Home>Furniture>Outdoor Furniture>How To Install A Slate Patio
Outdoor Furniture
How To Install A Slate Patio
Modified: August 23, 2024
Learn how to install a beautiful slate patio and transform your outdoor space with our step-by-step guide. Create the perfect setting for your outdoor furniture and enjoy the great outdoors.
(Many of the links in this article redirect to a specific reviewed product. Your purchase of these products through affiliate links helps to generate commission for Storables.com, at no extra cost. Learn more)
Introduction
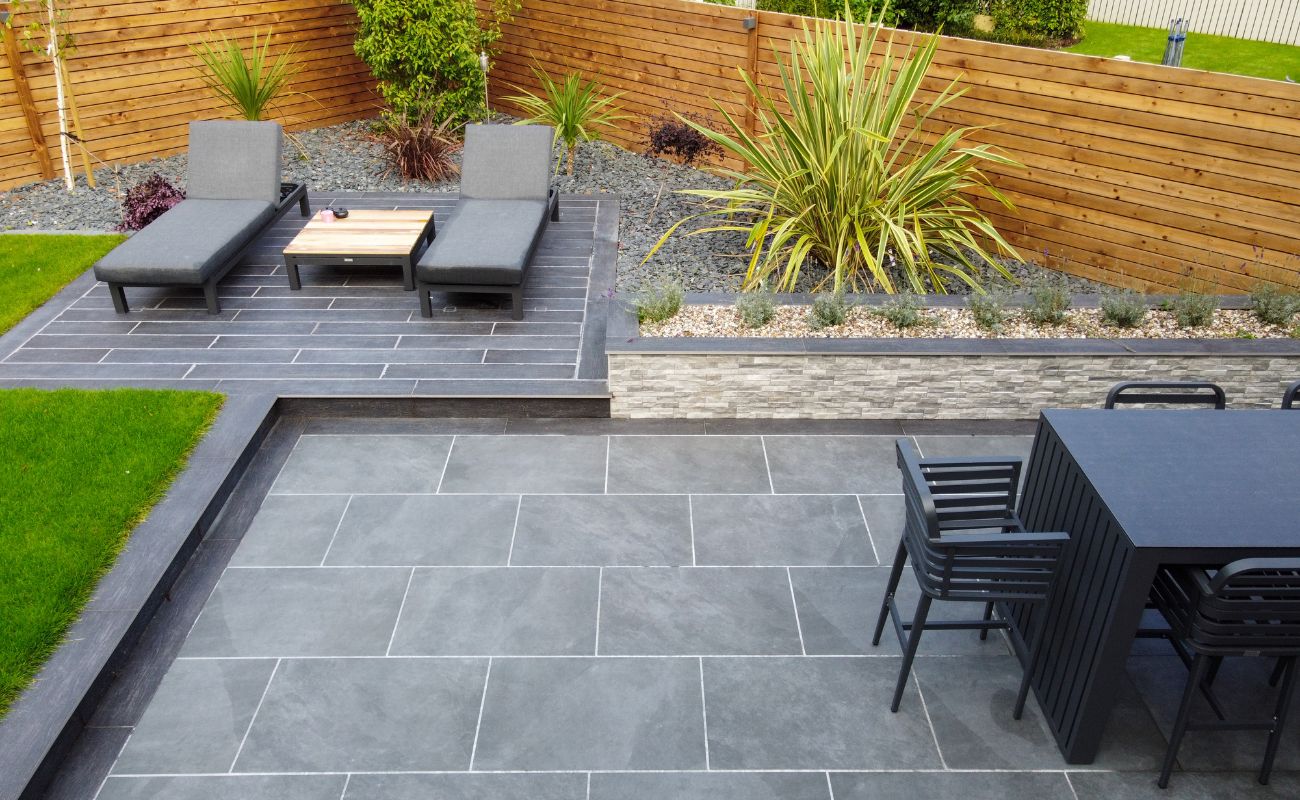
Creating a beautiful outdoor space is a dream for many homeowners. A well-designed patio can serve as an extension of your living space, providing a comfortable area for relaxation, entertaining, and enjoying the great outdoors. One popular choice for patio flooring is slate, a natural stone known for its durability and aesthetic appeal. In this article, we will guide you through the process of installing a slate patio, from site preparation to finishing touches.
Installing a slate patio requires careful planning and attention to detail. It is crucial to follow the correct steps to ensure the longevity and stability of your patio. Whether you are a seasoned DIY enthusiast or new to outdoor projects, our step-by-step guide will help you navigate the installation process with ease.
Before diving into the specifics, it is important to mention that safety should always be a top priority. Make sure to wear appropriate protective gear, such as safety glasses and gloves, when working with tools and materials. Additionally, be mindful of any local building codes or regulations that may apply to your project.
Now, let’s get started on transforming your outdoor space with a stunning slate patio!
Key Takeaways:
- Transform your outdoor space with a stunning slate patio by carefully preparing the site, planning the layout, and creating a solid foundation. Enjoy the process and embrace the joy of your new outdoor oasis!
- Installing a slate patio requires attention to detail and safety. From laying the tiles to adding finishing touches, create a visually stunning and inviting outdoor space that will stand the test of time.
Read more: How To Clean Outdoor Slate Patio
Step 1: Prepare the Site
Before you begin the installation process, it is essential to properly prepare the site where your slate patio will be placed. This step is crucial for ensuring that your patio is level, stable, and able to withstand the test of time.
The first task in preparing the site is to clear away any vegetation, rocks, or debris that may be present. Use a shovel or a rake to remove any grass, weeds, or other plant growth. This will provide a clean slate for your patio installation.
Next, it’s time to mark out the boundaries of your patio. Use stakes and string to define the desired shape and size of your patio area. This will help you visualize the final result and ensure that the dimensions are accurate.
Once the boundaries are marked, it is recommended to excavate the area to a depth of approximately 6-8 inches. This will allow for the proper installation of the base layer and prevent any unevenness in the final patio surface.
A helpful tip is to use a hand tamper or a plate compactor to compact the soil at the bottom of the excavated area. This will create a firm and stable base for the patio.
Another important consideration during site preparation is drainage. It is crucial to ensure that water can properly drain away from the patio to prevent any potential damage. If your site has poor natural drainage, you may need to consider installing a drainage system, such as a French drain, to redirect water away from the patio area.
Lastly, take the time to thoroughly inspect the site for any underground utilities or cables. It is important to avoid digging or excavating in areas where there may be electrical, gas, or water lines. If in doubt, consult with a professional to ensure safety.
By taking the time to properly prepare the site, you will lay the groundwork for a successful slate patio installation. This step sets the stage for the following steps and ensures that your patio will be durable and long-lasting.
Step 2: Layout and Design
Once you have prepared the site for your slate patio, the next step is to determine the layout and design of your outdoor space. This step is crucial as it will dictate the overall look and feel of your patio.
Start by considering the size and shape of your patio. Think about how you plan to use the space and how much seating and entertaining area you will need. This will help you determine the appropriate dimensions for your patio.
Next, it’s time to think about the layout of your slate tiles. You can choose from a variety of patterns, such as traditional square or rectangular tiles, or more intricate patterns like herringbone or basket weave. Consider the style and aesthetic you want to achieve, and select a pattern that complements your outdoor decor.
To help visualize the design, consider using a string or chalk lines to mark out the pattern directly on the prepared site. This will give you a sense of how the tiles will fit together and allow you to make any necessary adjustments before beginning the installation.
Another consideration in the design process is the placement of any additional features, such as seating areas, fire pits, or planters. Take into account the location of existing trees, shrubs, or other landscaping elements, and how they will integrate with your patio design.
It is also essential to keep in mind any future expansions or additions you may want to make to your patio. Leave some room for flexibility and consider how the layout will accommodate any future changes.
Once you have finalized the layout and design of your slate patio, take a step back and assess the overall look. Make any necessary adjustments or alterations to ensure that the design meets your expectations.
Remember, the layout and design of your patio will be the foundation for the rest of the installation process. Take the time to carefully plan and visualize the final result, as this will ultimately determine the success and beauty of your slate patio.
Step 3: Excavation and Foundation Preparation
Now that you have finished planning the layout and design of your slate patio, it’s time to move on to the next step: excavation and foundation preparation. This step is crucial for creating a stable base and ensuring the longevity of your patio.
Begin by excavating the area to the desired depth for your patio. Use a shovel, excavator, or other suitable tools to remove the soil. Ensure that the excavation is uniform and level, with a depth of approximately 6-8 inches.
Next, it’s important to evaluate the soil composition and quality. If the soil is sandy or loose, you may need to make additional preparations to improve its stability. Consider adding a layer of compactable material, such as crushed stone or gravel, to create a solid base.
After excavating the area and addressing any soil issues, it’s time to prepare the foundation for your slate patio. Start by adding a layer of geotextile fabric over the excavated area. This fabric will help prevent weeds from growing and provide an additional barrier against potential soil erosion.
Next, add a layer of compactable base material, such as crushed stone or gravel, to a depth of 4-6 inches. Use a tamper or compactor to firmly compact the base material. This step is essential for creating a stable and level foundation for your patio.
Ensure that the base material is evenly spread and compacted throughout the entire patio area. Use a level to check for any high or low spots and make necessary adjustments to achieve a perfectly level surface.
It’s worth noting that the thickness and type of base material may vary depending on the specific requirements of your project and local building codes. Consulting with a professional or referring to local guidelines can provide valuable insight in this regard.
Once the foundation is prepared, take a moment to step back and inspect the leveled surface. Check for any irregularities or inconsistencies and make any necessary adjustments before proceeding to the next step.
By properly excavating the area and preparing a solid foundation, you set the stage for a successful installation of your slate patio. Taking the time to ensure a stable base will result in a durable and long-lasting outdoor space for years to come.
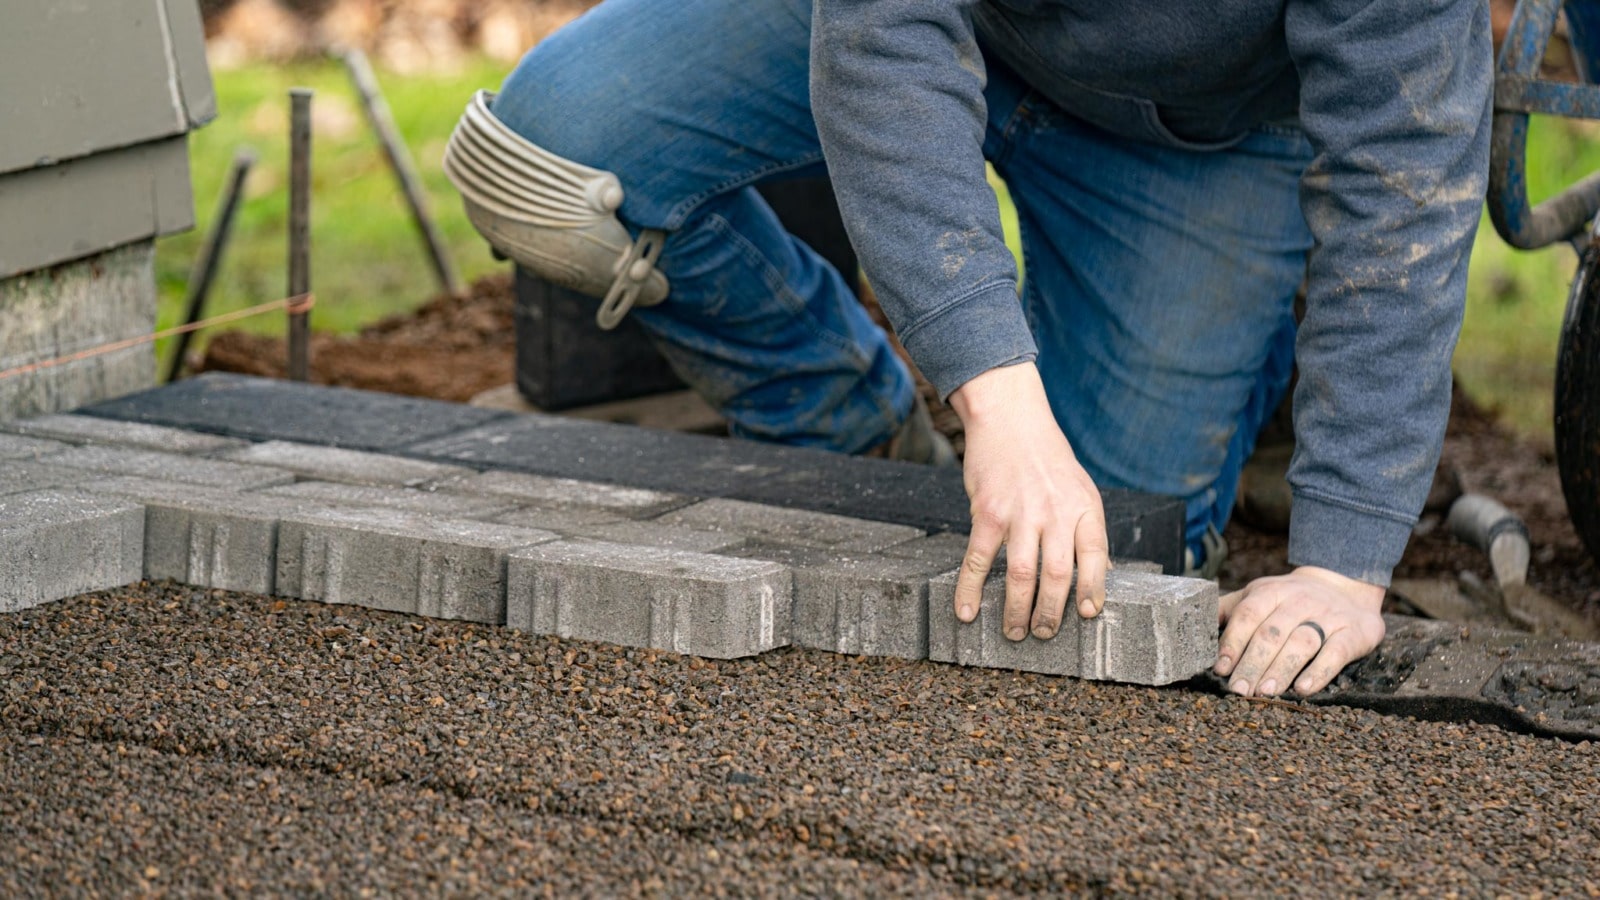
Step 4: Base Layer Installation
With the excavation and foundation preparation complete, it’s time to move on to the next step: installing the base layer for your slate patio. This layer serves as a crucial component in providing stability and support for your patio tiles.
Start by spreading a layer of coarse sand or paver base evenly over the compacted base material. Aim for a thickness of approximately 1 inch, ensuring that the sand is spread uniformly across the entire patio area.
Once the sand is spread, use a rake or a screed board to level and smooth it out. Pay close attention to achieving an even and consistent layer, as this will influence the final aesthetic and stability of your patio.
After leveling the sand, it’s time to compact it further. Use a plate compactor or a hand tamper to firmly compact the sand layer. This step is crucial for creating a solid and stable base that will prevent settling and shifting of the slate tiles over time.
Periodically check the levelness of the sand layer using a straight edge or a level. Make any necessary adjustments to achieve a smooth and level surface. It’s important to take your time at this stage, as a properly installed base layer will ensure the longevity and integrity of your slate patio.
Once the sand layer is compacted and level, it’s time to consider edge restraints. Edge restraints are essential for preventing the tiles from shifting or spreading apart. They can be made of materials such as plastic, metal, or concrete. Install the edge restraints along the perimeter of your patio, making sure they are securely anchored and leveled.
Ensure that the edge restraints are positioned slightly higher than the sand layer to provide a guide for installing the slate tiles later on. This will help maintain the integrity of the patio and prevent potential tripping hazards.
With the base layer and edge restraints in place, take a moment to inspect the entire area. Check for any irregularities or inconsistencies and make any necessary adjustments before proceeding to the next step. This attention to detail will ensure a smooth and professional-looking slate patio installation.
By properly installing the base layer, you are creating a sturdy and solid foundation for your slate patio. This will not only contribute to the overall durability of your patio, but also provide a level surface for the subsequent tile installation.
Before installing a slate patio, make sure to properly prepare the base by leveling the ground, adding a layer of gravel, and compacting it to create a stable foundation for the slate tiles.
Read more: How Much Is A Slate Roof
Step 5: Edging Installation
After completing the base layer installation, it’s time to move on to the next step: installing the edging for your slate patio. Edging serves both aesthetic and practical purposes, providing a clean and finished look while also helping to contain and secure the patio tiles.
Start by selecting the type of edging that best suits your patio design and personal preferences. Common options include plastic, metal, or concrete edging. Consider factors such as durability, ease of installation, and compatibility with your chosen slate tiles.
Before installing the edging, it’s important to mark out the placement to ensure a precise and consistent look. Use stakes and string or a chalk line to define the outer perimeter of your patio. This will guide the installation of the edging and help maintain a straight line.
Next, prepare the edging material according to the manufacturer’s instructions. This may involve cutting the pieces to the desired length or assembling them as needed.
Starting at one corner or end of your patio, position the first piece of edging along the marked line. Use a rubber mallet or a hammer and block to secure the edging into the ground, ensuring that it is level and firmly in place.
Continue installing the edging material along the designated perimeter, connecting the pieces tightly together. If necessary, you may need to cut or trim the edging to fit around curves or corners. Ensure that each piece is securely anchored and level.
As you install the edging, periodically check for levelness and adjust as needed. This will ensure a uniform and professional-looking installation.
Once the edging is installed around the entire perimeter of your patio, take a moment to step back and assess the overall look and alignment. Make any necessary adjustments to ensure that the edging is straight, level, and visually pleasing. This attention to detail will contribute to the overall appearance and functionality of your slate patio.
With the edging installed, your slate patio begins to take shape, creating a clearly defined and visually appealing outdoor space. The edging not only adds a finishing touch but also helps to secure and contain the slate tiles, ensuring a stable and long-lasting patio.
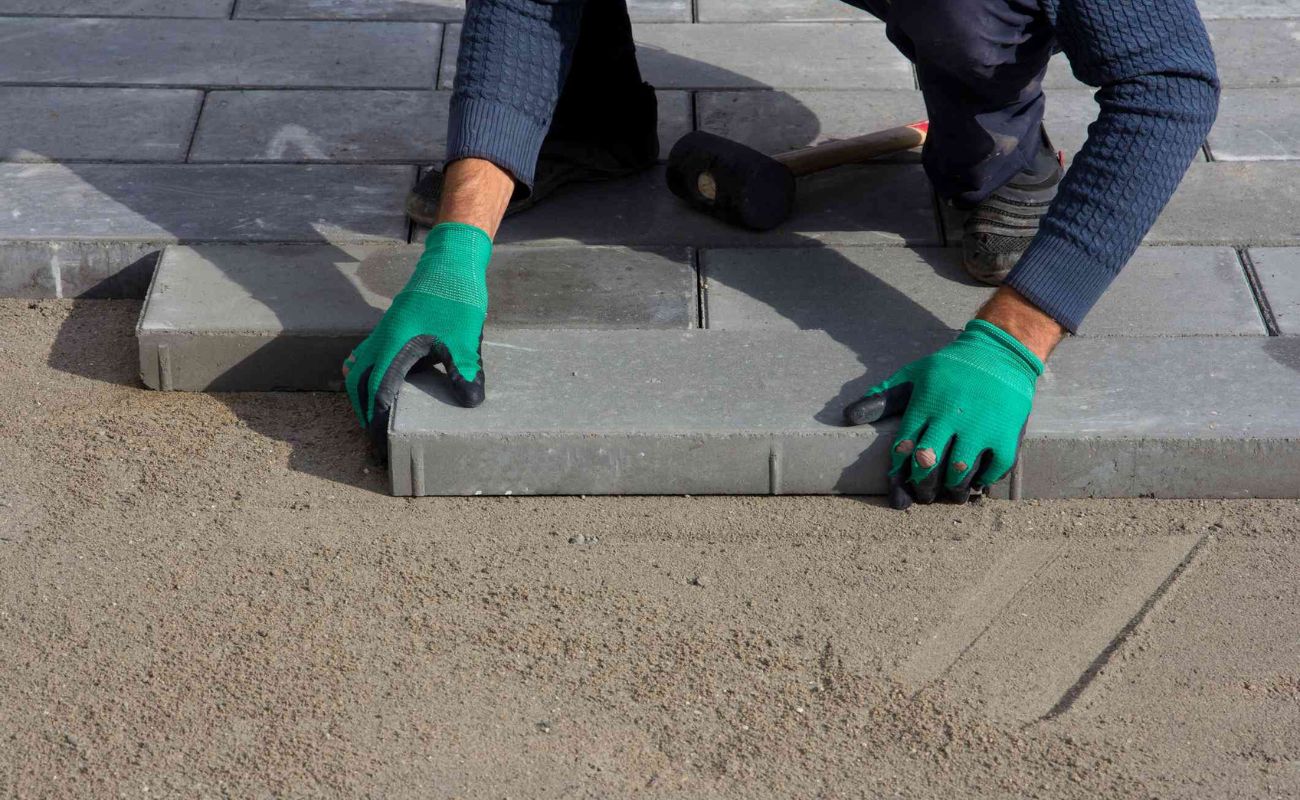
Step 6: Installing the Slate Tiles
Now comes the exciting part: installing the slate tiles for your patio. This step brings your outdoor space to life, adding beauty and functionality to your backyard. Proper installation is crucial to ensure a visually appealing and durable slate patio.
Before you begin laying the tiles, take a moment to plan the pattern and layout. Consider the size and shape of your slate tiles, as well as any design elements or borders you want to incorporate. This pre-planning will help streamline the installation process and ensure a cohesive look.
Start by applying a thin layer of mortar or tile adhesive to a small section of the prepared base layer. Use a trowel to spread the mortar evenly, creating a smooth and even layer.
Place the first slate tile firmly onto the mortar, aligning it with the marked layout or pattern. Gently press it into place, ensuring that it is level and properly seated into the mortar. Use a rubber mallet or a wooden block to tap the tile into position, if necessary.
Continue adding tiles, working in small sections at a time. Apply mortar or adhesive to the base layer and place each tile, ensuring they are evenly spaced and aligned with the desired pattern.
As you work, periodically use a level to check for any unevenness or sloping. Make any necessary adjustments by adding or removing mortar until the tiles are level with each other and the edging.
If needed, cut or trim tiles to fit around edges, corners, or any obstacles in the patio area. Use a wet saw or tile cutter to make precise cuts, ensuring a seamless and professional finish.
Ensure that each tile is firmly pressed into the mortar and has proper adhesion. Clean any excess mortar or adhesive from the surface of the tiles using a damp cloth or sponge.
Work systematically across the patio area, placing and adjusting each tile as you go. Take breaks as needed to allow the mortar to set, following the manufacturer’s instructions for drying time.
Once all the tiles are installed, allow the mortar to cure fully before proceeding to the next step. This curing process ensures the stability and strength of the slate patio.
With the slate tiles in place, your patio begins to take shape and showcase its natural beauty. The careful and precise installation of the slate tiles ensures a durable and visually stunning outdoor space.
Step 7: Finishing Touches
Congratulations! You’re nearing the completion of your slate patio installation. The final step involves adding those finishing touches that will enhance the overall aesthetics and functionality of your outdoor space.
Start by thoroughly cleaning the slate tiles. Remove any dust, debris, or residue from the installation process using a broom, leaf blower, or pressure washer. Ensure that the surface is clean and free from any obstructions that may affect the final appearance of your patio.
Next, consider applying a sealant to protect and enhance the natural beauty of the slate tiles. A quality stone sealant specifically formulated for outdoor use will help prevent staining, water damage, and the growth of moss or mold. Follow the manufacturer’s instructions for proper application and allow the sealant to dry completely.
At this stage, it’s also a good idea to inspect the entire patio for any loose or uneven tiles. Gently tap any loose tiles into place using a rubber mallet or wooden block. If any tiles are severely uneven or damaged, consider replacing them to maintain the integrity and visual appeal of the patio.
Consider adding additional features and elements to personalize your patio. This could include outdoor furniture, planters, lighting, or a fire pit. Select pieces that complement the style and ambiance you want to achieve in your outdoor space.
Complete the look of your patio by adding landscaping elements around the perimeter. Plant flowers, shrubs, or other greenery to soften the edges and enhance the overall aesthetic appeal of your outdoor space.
Lastly, take a moment to step back and admire your completed slate patio. Spend some time enjoying the fruits of your hard work and let the beauty of your outdoor space bring you joy and relaxation.
Remember to regularly maintain your slate patio by sweeping away debris, cleaning with a mild detergent as needed, and resealing the tiles periodically to ensure their longevity and beauty.
By paying attention to these final finishing touches, you can create a slate patio that is not only visually stunning but also functional and inviting. Enjoy your new outdoor oasis!
Conclusion
Creating a slate patio is a rewarding and worthwhile project that can transform your outdoor space into a beautiful and functional oasis. By following the step-by-step guide outlined in this article, you can successfully install a slate patio that will stand the test of time.
From site preparation to the finishing touches, each step plays a crucial role in ensuring the durability and aesthetics of your patio. Properly preparing the site, planning the layout, and establishing a solid foundation are vital for a successful installation. The careful placement of the slate tiles, along with the proper edging and finishing touches, completes the look of your patio.
Throughout the process, be mindful of safety and adhere to local building codes and regulations. Wear appropriate protective gear and consult with professionals when needed.
Remember that the beauty of a slate patio lies not only in its visual appeal but also in its ability to provide a comfortable and inviting outdoor living space. Customize your patio with furniture, lighting, and landscaping elements to create a welcoming atmosphere for yourself and your guests.
Maintaining your slate patio is key to its longevity. Regular cleaning and sealing will help protect the tiles and preserve their natural beauty. Be proactive in addressing any repairs or adjustments to ensure a stable and well-maintained patio area.
Now, armed with the knowledge and guidance provided in this article, it’s time to go out and bring your dream slate patio to life. Enjoy the process, and embrace the joy and relaxation that your new outdoor space will provide.
Frequently Asked Questions about How To Install A Slate Patio
Was this page helpful?
At Storables.com, we guarantee accurate and reliable information. Our content, validated by Expert Board Contributors, is crafted following stringent Editorial Policies. We're committed to providing you with well-researched, expert-backed insights for all your informational needs.


0 thoughts on “How To Install A Slate Patio”