Home>Furniture>Outdoor Furniture>How To Resurface A Concrete Patio

Outdoor Furniture
How To Resurface A Concrete Patio
Modified: August 24, 2024
Learn how to easily resurface your concrete patio and transform it into the perfect outdoor furniture setting. Enhance your outdoor space with this DIY project.
(Many of the links in this article redirect to a specific reviewed product. Your purchase of these products through affiliate links helps to generate commission for Storables.com, at no extra cost. Learn more)
Introduction
Welcome to our comprehensive guide on how to resurface a concrete patio. Whether you want to revive the worn-out look of your existing patio or give it a fresh update, resurfacing is an excellent option. Resurfacing not only enhances the appearance of your patio but also extends its lifespan.
A concrete patio is a valuable addition to any outdoor space, providing an ideal area for relaxation, entertaining, and enjoying the outdoors. However, over time, exposure to different weather conditions, heavy foot traffic, and general wear and tear can take a toll on the patio surface, causing it to crack, chip, and fade. Resurfacing is an effective solution to breathe new life into your patio without the need for a costly replacement.
In this guide, we will walk you through the step-by-step process of resurfacing a concrete patio, from assessing the condition of the patio to applying the concrete overlay and finishing the surface. We will also provide you with maintenance tips to ensure the longevity of your newly resurfaced patio.
Before we dive into the nitty-gritty of the resurfacing process, let’s first take a look at how to assess the condition of your concrete patio to determine if it’s a good candidate for resurfacing.
Remember, while resurfacing a concrete patio is a relatively straightforward DIY project, it does require careful preparation and attention to detail. So, let’s grab our tools and get ready to transform your tired patio into a stunning outdoor oasis!
Key Takeaways:
- Revive your worn-out concrete patio with resurfacing to enhance its appearance and extend its lifespan. Follow the step-by-step guide for a DIY project that transforms your outdoor space into a stunning oasis.
- Proper maintenance, including regular cleaning, protecting furniture, and reapplying sealer, is essential for preserving the beauty and durability of your newly resurfaced patio. Enjoy your revitalized outdoor space for years to come!
Read more: How To Resurface A Concrete Driveway
Assessing the Condition of the Concrete Patio
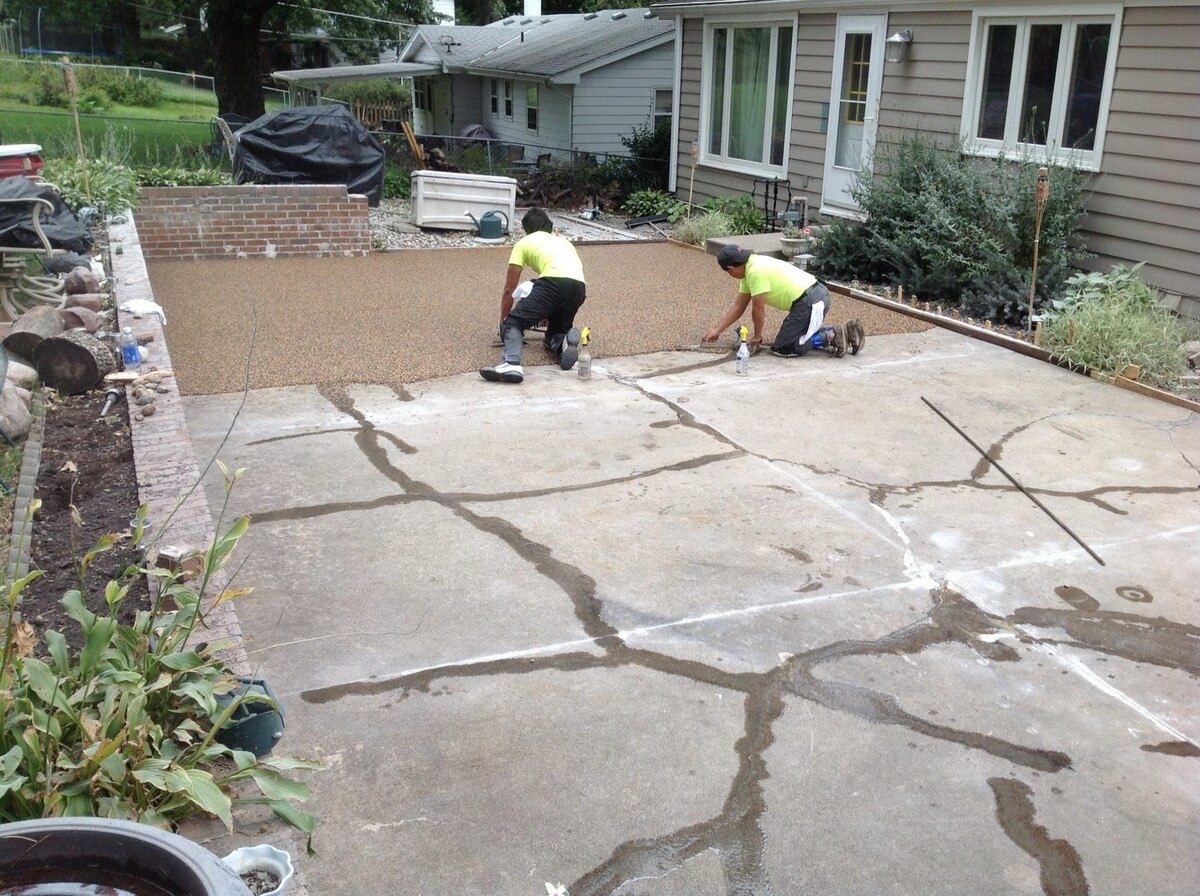
Before you begin the process of resurfacing your concrete patio, it’s crucial to thoroughly assess its condition. This will help you identify any underlying issues that may affect the success of the resurfacing project.
Here are some key factors to consider when assessing the condition of your concrete patio:
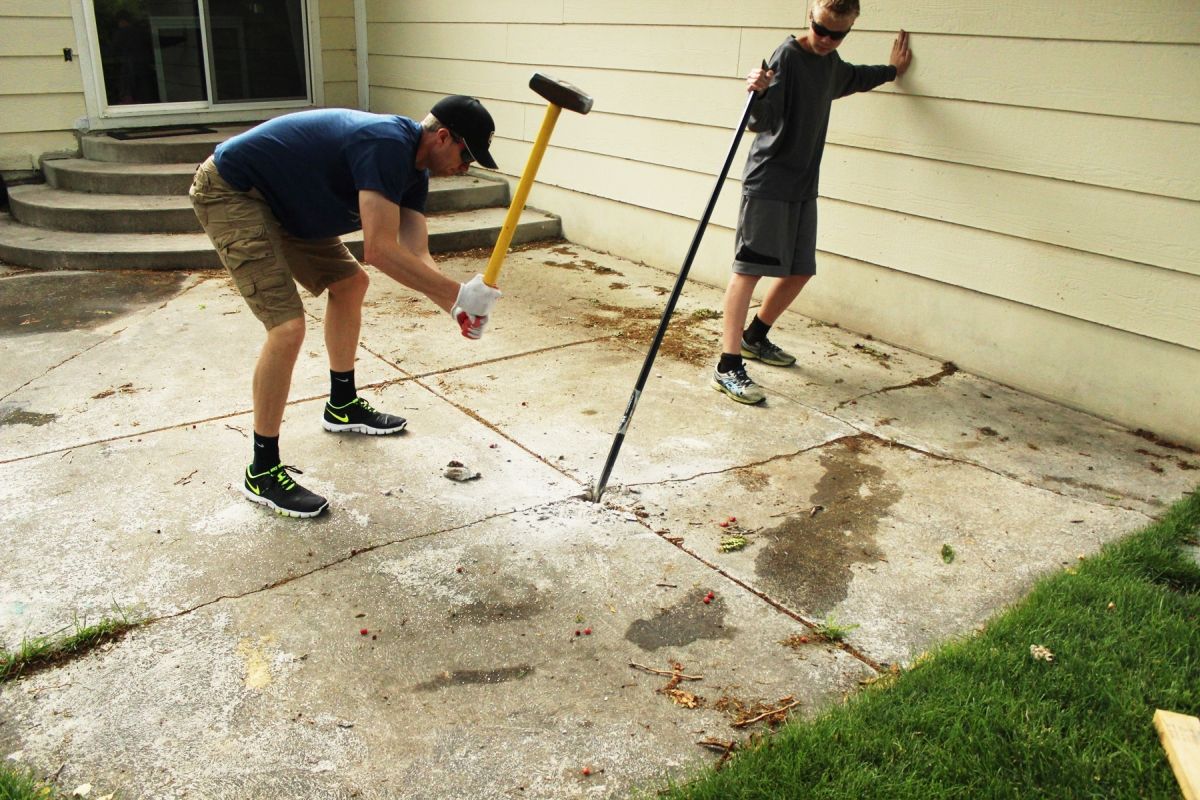
- Cracks: Inspect the surface for any cracks, both small and large. Hairline cracks are common and can be addressed during the resurfacing process. However, larger cracks (more than 1/4 inch wide) or extensive cracking could indicate deeper structural issues that may require professional attention.
- Spalling: Spalling refers to the flaking or chipping of the concrete surface. Look for areas where the top layer of the concrete is coming off. If the spalling is minor, it can be repaired during resurfacing. However, severe spalling could indicate problems with the sub-base and may require additional repairs.
- Unevenness: Check if the patio surface is level and even. High and low spots can affect the application of the concrete overlay and the overall appearance of the patio. Addressing minor unevenness is possible during resurfacing, but significant variations may need professional leveling.
- Stains and Discoloration: Take note of any stains or discoloration on the concrete surface. Some stains can be removed during the cleaning process, while others may require specialized treatment. Resurfacing can help improve the overall appearance by covering up minor discoloration.
- Drainage: Consider the patio’s drainage system. Adequate drainage is essential to prevent water pooling and potential damage. Ensure that the patio has proper slope and that water flows away from the house.
By carefully assessing these factors, you can determine the feasibility of resurfacing your concrete patio. Keep in mind that major structural issues may require professional intervention. Resurfacing is best suited for patio surfaces with minor cosmetic issues and no significant underlying problems.
Once you’ve determined that your patio is a good candidate for resurfacing, you can move on to the next step: gathering the necessary materials and tools.
Gathering Materials and Tools
Now that you have assessed the condition of your concrete patio and confirmed its suitability for resurfacing, it’s time to gather the materials and tools you’ll need to complete the project. Having everything ready before you start will ensure a smoother and more efficient workflow.
Here’s a list of the materials and tools you’ll need:
Materials:
- Concrete Overlay: Choose a high-quality concrete overlay material specifically designed for patio resurfacing. Look for products that offer good adhesion, durability, and resistance to weather conditions.
- Concrete Bonding Agent: This is used to enhance the bond between the existing concrete and the overlay. It helps prevent delamination and ensures a strong, long-lasting surface.
- Concrete Stain or Pigment (optional): If you want to add color to your patio, consider purchasing concrete stain or pigment. This will give your resurfaced patio a customized and unique look.
- Sealer: After the resurfacing process, you will need to seal the patio to protect it from moisture, stains, and UV damage. Choose a high-quality concrete sealer suitable for outdoor use.
- Cleaning Solution: Depending on the condition of your patio, you may need a concrete cleaner to remove stains, dirt, and debris. Look for a cleaner that is safe for use on concrete surfaces.
- Crack Repair Compound: If you have any significant cracks in your patio, purchase a crack repair compound to fill them in before starting the resurfacing process.
- Basic Cleaning Tools: These include a stiff-bristle brush, a garden hose or pressure washer for cleaning the patio surface, and a bucket for mixing the cleaning solution.
- Trowel or Magic Trowel: A trowel is essential for applying the concrete overlay and achieving a smooth finish. Alternatively, you can use a magic trowel, which can help create a textured finish.
- Concrete Mixing Tools: If your concrete overlay requires mixing, you’ll need a mixing paddle and a drill to ensure a uniform consistency.
- Protective Gear: It’s important to prioritize safety during the resurfacing process. Wear gloves, safety glasses, a dust mask, and appropriate clothing to protect yourself from chemicals and dust.
Make a checklist of these materials and ensure you have everything on hand before you start resurfacing your patio. This will save you time and minimize interruptions during the process.
With all the necessary materials and tools at your disposal, you’re ready to move on to the next step: preparing the patio for resurfacing.
Preparing the Patio for Resurfacing
Before you can begin applying the concrete overlay, it’s essential to properly prepare the patio surface. This step is crucial to ensure a successful and long-lasting resurfacing job.
Follow these steps to prepare your patio for resurfacing:
- Clean the Surface: Start by thoroughly cleaning the patio surface to remove any dirt, debris, oil stains, or other contaminants. Use a stiff-bristle brush or a pressure washer to scrub the surface and ensure it is free from any loose material.
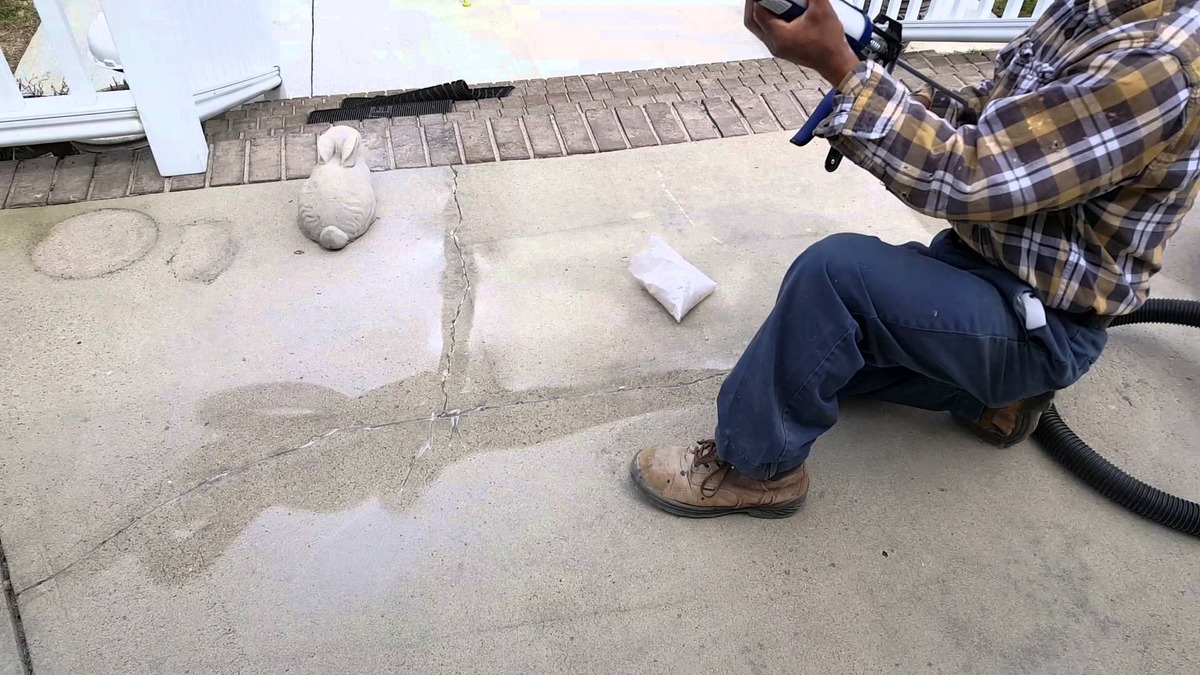
- Repair Cracks: If you have any significant cracks on the patio, use a crack repair compound to fill them in. Follow the manufacturer’s instructions to properly apply the compound and smooth it out. Allow it to dry completely before proceeding.
- Etch the Surface: Etching helps create a rough texture on the existing concrete to improve the adhesion of the overlay. Use a concrete etching product and follow the manufacturer’s instructions. Make sure to wear protective gear and work in a well-ventilated area when using chemicals.
- Apply Bonding Agent: Once the patio is etched and clean, it’s time to apply a bonding agent. This agent will enhance the bond between the existing concrete and the overlay. Follow the manufacturer’s instructions and let the bonding agent dry for the recommended time.
- Mask Off Boundaries: If you have any areas adjacent to the patio that you want to protect from the overlay, such as walls or plants, use plastic sheeting or painter’s tape to mask them off. This will ensure clean edges and prevent accidental application of the overlay where it’s not desired.
Properly preparing the patio surface is essential for the success of the resurfacing project. It ensures good adhesion between the existing concrete and the overlay, minimizing the chances of delamination or peeling in the future.
Once you’ve completed these preparation steps, you’re ready to move on to the next phase – mixing the concrete overlay. This is where you’ll transform your worn-out patio into a fresh, new surface. Stay tuned!
Mixing the Concrete Overlay
With the patio surface properly prepared, it’s time to mix the concrete overlay. This step is crucial to ensure the correct consistency and quality of the overlay, which will ultimately determine the final result of your resurfaced patio.
Follow these steps to mix the concrete overlay:
- Read the Instructions: Before you begin, carefully read the instructions provided by the manufacturer of the concrete overlay. Different products may have specific mixing ratios and instructions, so make sure to follow them accordingly.
- Measure the Overlay Material: Measure the appropriate amount of concrete overlay material, based on the square footage of your patio, as specified by the manufacturer. It’s essential to use the correct amount to ensure proper coverage.
- Add Water Gradually: Begin adding water to the overlay material gradually, following the manufacturer’s instructions. It’s crucial to add water in small increments and mix thoroughly between additions to achieve the desired consistency.
- Mix Thoroughly: Use a mixing paddle attachment on a drill to mix the overlay material and water together. Make sure to mix at a slow speed to avoid introducing air bubbles into the mixture. Scrape the sides of the container as you mix to ensure a uniform consistency.
- Check for Proper Consistency: The concrete overlay should have a creamy and workable consistency, similar to pancake batter. It should not be too runny or too thick. If needed, you can add more water or overlay material to adjust the consistency.
Remember to mix the concrete overlay in small batches that you can work with within the recommended pot life provided by the manufacturer. This will ensure that the overlay remains workable throughout the application process.
Always refer to the specific instructions provided by the manufacturer of the concrete overlay product you are using. They may have additional guidelines or specific requirements that will help you achieve the best results.
Once the concrete overlay is properly mixed, it’s time to move on to the exciting part – applying the overlay to your patio. Stay tuned for the next section!
Before resurfacing a concrete patio, make sure to thoroughly clean the surface to remove any dirt, debris, or stains. This will ensure better adhesion for the new resurfacing material.
Read more: How To Resurface A Concrete Swimming Pool
Applying the Concrete Overlay
Now that you have your concrete overlay mixed to the proper consistency, it’s time to apply it to your patio surface. This step will transform your worn-out patio into a fresh and rejuvenated space.
Follow these steps to apply the concrete overlay:
- Start in a Corner: Begin at a corner of your patio and work your way outward. This will prevent you from stepping on the freshly applied overlay as you move around.
- Use a Trowel: Use a trowel or magic trowel to scoop up a small amount of the overlay mixture. Start by spreading a thin, even layer of overlay onto the patio surface.
- Work in Small Sections: It’s best to work in small sections to ensure that the overlay remains workable and doesn’t dry out too quickly. Spread the overlay mixture evenly and consistently across the section.
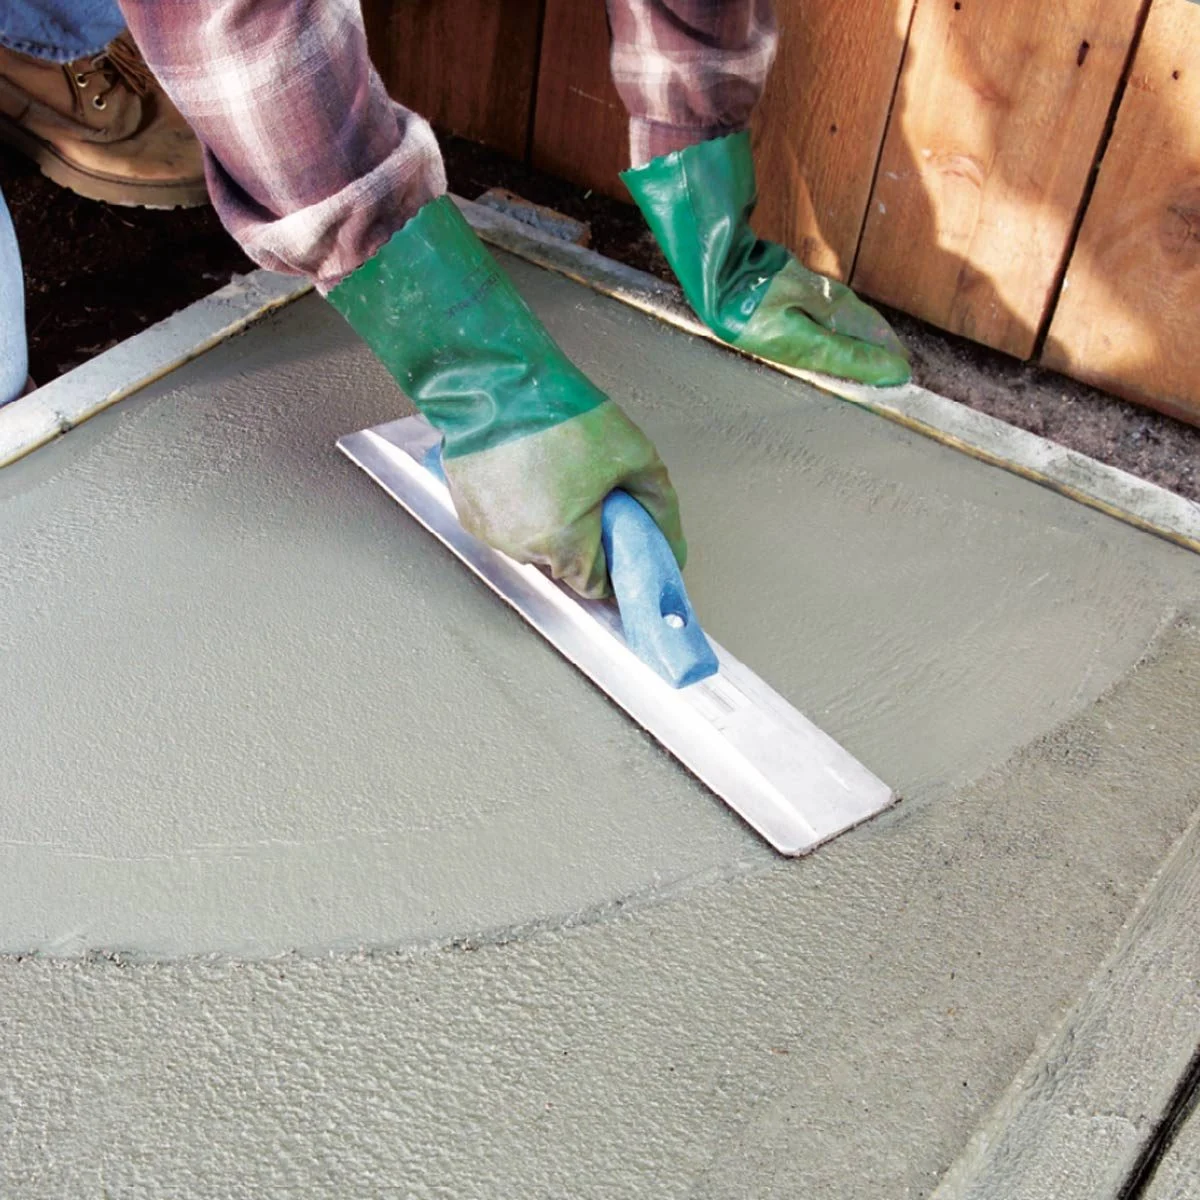
- Smooth the Surface: After applying the overlay, use the trowel to smooth the surface, making it level and removing any excess overlay material. Work in a motion that is perpendicular to the application direction to achieve a smooth finish.
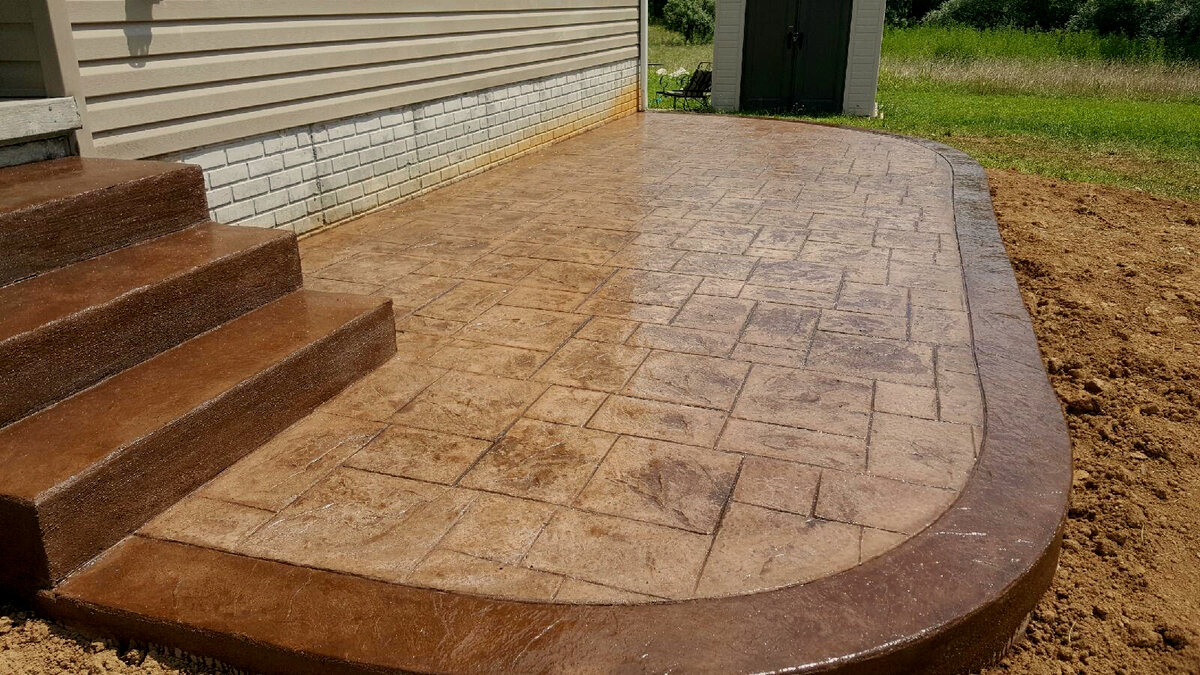
- Add Texture (Optional): If you prefer a textured finish, use a broom or a texture roller to create patterns or texture on the surface of the overlay while it’s still wet. This will add visual interest and provide better traction.
- Continue Working in Sections: Repeat the process of applying, spreading, and smoothing the overlay in small sections until the entire patio surface is covered.
- Pay Attention to Edges: Take special care when approaching edges and corners to ensure a seamless transition between the resurfaced area and the existing patio. Use a trowel or an edging tool to create clean, defined edges.
Work efficiently while applying the overlay, as it can dry relatively quickly, especially in warm weather. If needed, have someone help you with the application process to ensure a consistent and timely finish.
Once you have applied the overlay to the entire patio surface, let it dry according to the manufacturer’s instructions before moving on to the next step. It’s important to allow sufficient time for the overlay to cure and bond to the existing concrete.
Now that you’ve successfully applied the concrete overlay, it’s time to move on to the final steps of finishing and smoothing the surface. Stay tuned for the next section!
Finishing and Smoothing the Surface
After applying the concrete overlay to your patio, the next step is to finish and smooth the surface. This will ensure a polished and visually appealing result.
Follow these steps to finish and smooth the surface of your resurfaced patio:
- Wait for the Overlay to Partially Cure: Allow the concrete overlay to partially cure according to the manufacturer’s instructions. This typically takes a few hours, but it can vary depending on the product and weather conditions.
- Use a Trowel or Float: Once the overlay has partially cured, use a trowel or a float to smooth out any imperfections, ridges, or uneven areas on the surface of the patio. Work in circular or sweeping motions to achieve a consistent texture.
- Address Air Bubbles: If you notice any air bubbles on the surface, pop them using a pin or a needle. Smooth out the area around the bubble to blend it seamlessly into the rest of the patio surface.
- Blend in Texture: If you opted for a textured finish, use a broom, texture roller, or other tools to enhance the desired texture. Work in the same direction as the initial application to maintain consistency.
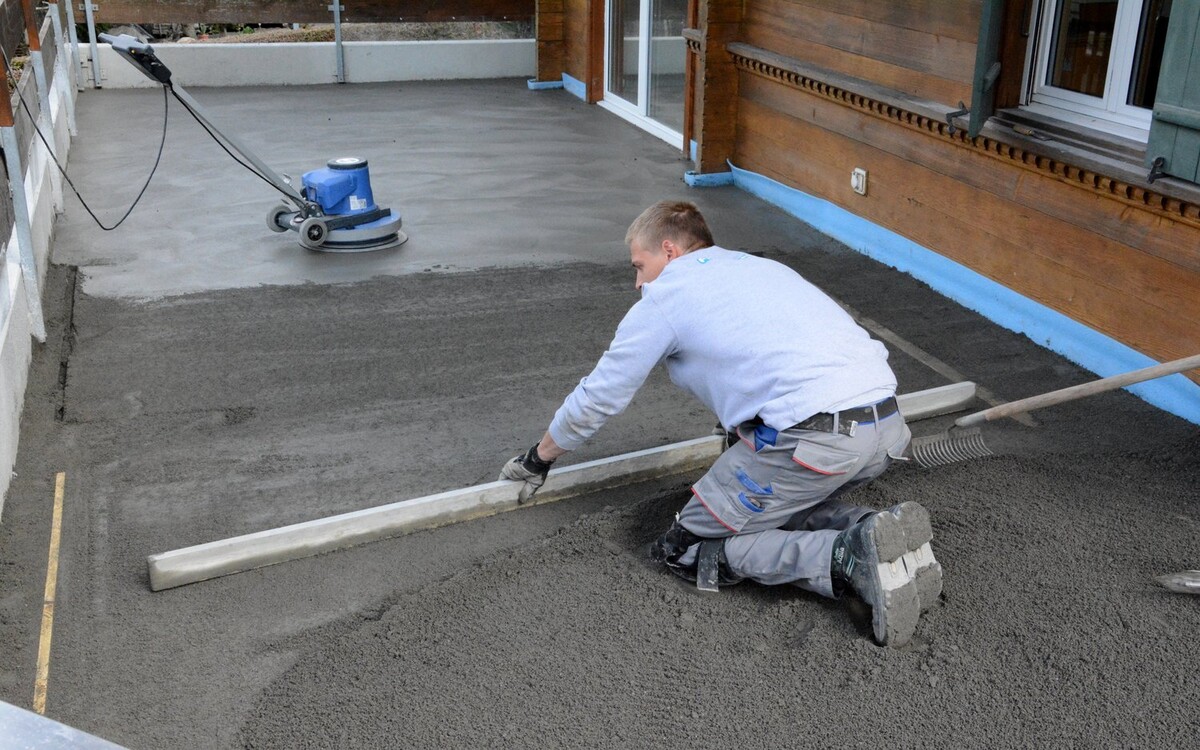
- Check for Evenness: Ensure that the surface of your resurfaced patio is flat and even. Use a level or straight edge to check for any areas that need further attention. Adjust and level out as necessary.
- Keep the Surface Moist: To prevent the overlay from drying too quickly and to facilitate a smoother finish, lightly mist the surface with water as you work. This will help to eliminate trowel marks and achieve a more seamless appearance.
- Allow the Surface to Fully Cure: After completing the finishing and smoothing process, allow the concrete overlay to fully cure before proceeding. The curing time can vary depending on the product, so follow the manufacturer’s instructions for the recommended curing period.
Pay close attention to detail during the finishing process, as this will greatly contribute to the overall look and durability of your resurfaced patio. Take your time and ensure that the surface is smooth, level, and visually pleasing.
Once the concrete overlay has fully cured, it’s time to move on to the final, essential step – curing and sealing the resurfaced concrete patio. Stay tuned!
Curing and Sealing the Resurfaced Concrete Patio
After completing the resurfacing and finishing process, it’s important to properly cure and seal the newly resurfaced concrete patio. Curing and sealing will enhance the strength, durability, and longevity of the surface, as well as protect it from moisture, stains, and UV damage.
Follow these steps to effectively cure and seal your resurfaced concrete patio:
- Allow Sufficient Curing Time: Before applying any sealer, ensure that the concrete overlay has fully cured as per the manufacturer’s instructions. This typically takes about 7 to 14 days, but curing times may vary depending on the product and weather conditions.
- Clean the Surface: Thoroughly clean the patio surface by sweeping away any debris or loose particles. Use a mild detergent and water solution to remove any stains or dirt, and allow the surface to dry completely.
- Choose the Right Sealer: Select a high-quality concrete sealer that is specifically designed for outdoor use. There are various types of sealers available, including acrylic, epoxy, and urethane sealers. Consider factors such as durability, UV resistance, and the desired finish before making your choice.
- Apply the Sealer: Follow the manufacturer’s instructions for applying the sealer. Typically, you will use a paint roller or a sprayer to evenly distribute the sealer over the entire patio surface. Work in small sections to ensure thorough coverage.
- Allow Drying and Curing: Once you have applied the sealer, allow it to dry and cure as instructed on the product packaging. This may take anywhere from a few hours to a couple of days, depending on the sealer type and weather conditions.
- Apply Additional Coats (Optional): Depending on the type of sealer you choose, you may need to apply multiple coats for maximum protection and longevity. Follow the manufacturer’s guidelines for the recommended number of coats and the drying time between each application.
- Maintain the Sealed Patio: Once the sealer has fully cured, it’s important to maintain the sealed patio. Regularly clean the surface with gentle cleaners, and avoid using harsh chemicals or abrasive cleaners that could damage the sealer. Periodically reapply the sealer according to the manufacturer’s instructions to maintain its protective properties.
Curing and sealing your resurfaced concrete patio is a crucial step that will help preserve its appearance and protect it from common sources of wear and tear. By following these steps and properly maintaining the sealed surface, you can enjoy a beautiful and long-lasting patio for years to come.
Now that you have successfully completed the resurfacing, finishing, and sealing process, it’s time to relax and enjoy your transformed outdoor space. Remember to follow any additional maintenance tips provided by the manufacturer to extend the life of your resurfaced patio.
Congratulations on your DIY resurfacing project! We hope this guide has been helpful in achieving a rejuvenated and inviting concrete patio.
Maintenance Tips for a Long-lasting Patio
Now that you have successfully resurfaced and sealed your patio, it’s important to follow some maintenance tips to ensure its long-lasting beauty and durability. By implementing these practices, you can extend the lifespan of your patio and keep it looking fresh for years to come.
Here are some maintenance tips for your resurfaced patio:
- Regular Cleaning: Clean your patio regularly to remove dirt, debris, and stains that can accumulate over time. Sweep the surface regularly and use a mild detergent mixed with water to scrub away any stubborn stains or marks. Rinse thoroughly with water and allow it to dry.
- Avoid Harsh Chemicals: Use gentle cleaning solutions when cleaning your patio surface. Harsh chemicals can damage the sealer and the overlay, compromising its integrity and appearance. Opt for pH-neutral and non-abrasive cleaners to maintain the longevity of your patio.
- Prevent Stains: Promptly clean up spills to prevent stains from setting into the surface. Wipe away any spills, such as oils, grease, or acidic substances, using a mild detergent and a soft cloth. Avoid dragging sharp or heavy objects across the patio surface, as they can cause scratches or damage.
- Protect Furniture and Plants: Use protective pads or coasters under furniture to prevent scratches or indentations on the patio surface. Lift heavy furniture rather than dragging it to avoid damaging the overlay. Place saucers under potted plants to prevent water and soil from staining or seeping into the patio surface.
- Inspect for Damage: Regularly inspect your patio for any signs of damage, such as cracks, chips, or delamination. Address any issues promptly to prevent further damage. Minor cracks or chips can be repaired using a suitable concrete repair compound, following the manufacturer’s instructions.
- Reapply Sealer: Over time, the sealer on your patio may wear off due to exposure to the elements and foot traffic. Follow the manufacturer’s recommendations for reapplying the sealer. This will help maintain the protective barrier and keep your patio looking fresh and vibrant.
- Protect from Extreme Weather: Extreme weather conditions, such as freezing temperatures or intense heat, can affect the durability of your patio. Take precautions to protect your patio during such conditions. Use furniture covers or move items indoors during harsh weather, and avoid using de-icing chemicals on the surface during winter.
- Regular Maintenance: Periodically inspect the patio for any signs of wear and tear, and address them promptly. Keep the surface clean, remove any debris, and take care of minor repairs as needed. Regular maintenance prevents the accumulation of damage and ensures a long-lasting patio.
Following these maintenance tips will help preserve the beauty and integrity of your resurfaced patio. By incorporating these practices into your routine, you can enjoy your outdoor space for years to come, and your patio will continue to be a welcoming and enjoyable area for relaxation and entertainment.
Remember, proper maintenance is key to the longevity of any outdoor surface, so invest some time in caring for your patio to ensure it remains in pristine condition.
With these maintenance tips in mind, you can confidently enjoy your newly resurfaced patio for many seasons ahead!
Thank you for following our comprehensive guide on how to resurface a concrete patio. We hope it has been informative and helpful throughout your DIY project. Enjoy your revitalized outdoor space!
Read more: How To Resurface A Concrete Porch Floor
Conclusion
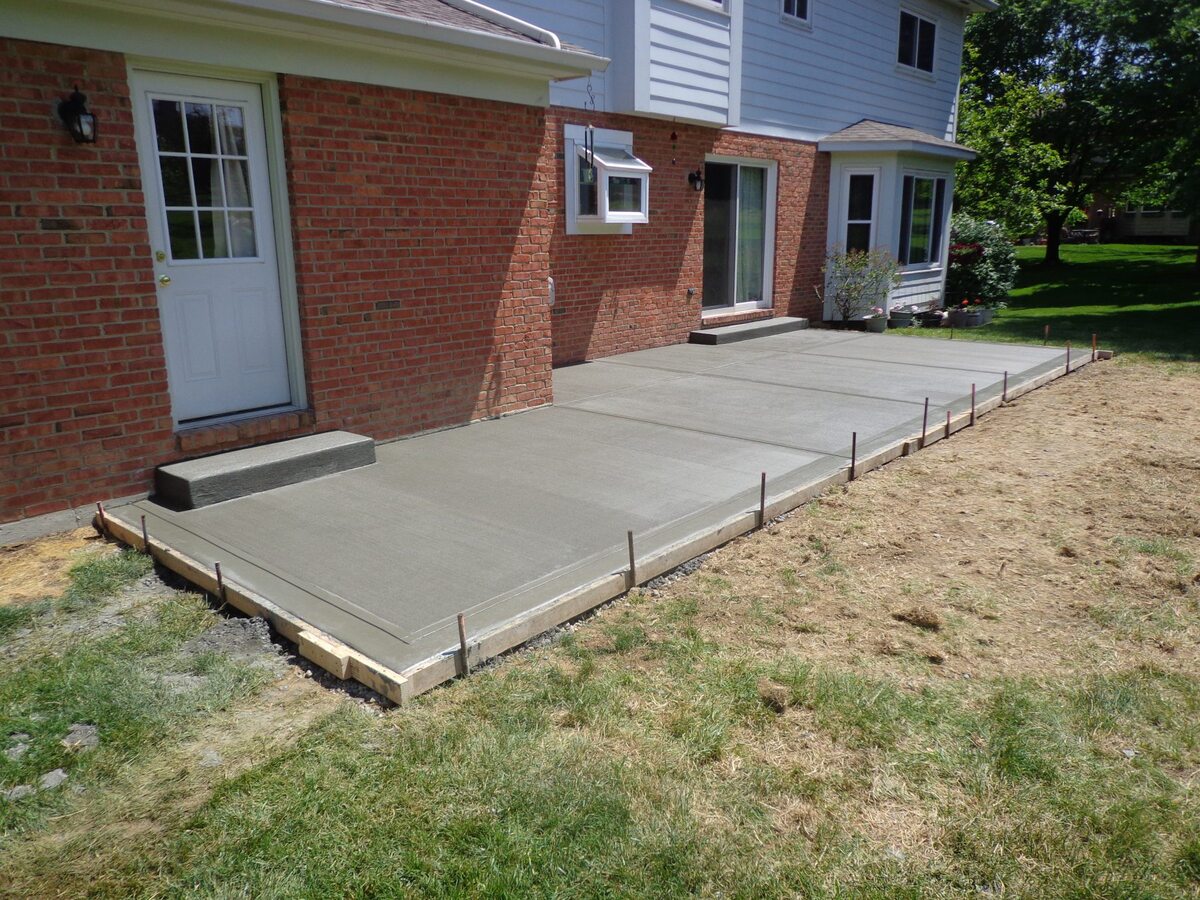
Congratulations on successfully completing the resurfacing of your concrete patio! By following this comprehensive guide, you have transformed your worn-out patio into a fresh, rejuvenated outdoor space that you can enjoy for years to come.
We began by assessing the condition of your concrete patio, taking note of cracks, spalling, unevenness, stains, and drainage issues. Once we determined that your patio was suitable for resurfacing, we gathered the necessary materials and tools to embark on the project.
Through the process of preparing the patio, mixing the concrete overlay, applying it evenly, and smoothing the surface, we ensured a professional finish that enhances the aesthetic appeal and durability of your patio.
After completing the resurfacing process, we discussed the importance of curing and sealing the patio to protect it from moisture, stains, and UV damage. By following the manufacturer’s guidelines, you have applied the appropriate sealer to prolong the life of your resurfaced patio.
Furthermore, we provided valuable maintenance tips to ensure the longevity of your resurfaced patio. Regular cleaning, avoiding harsh chemicals, protecting furniture and plants, and inspecting for damage are just a few of the practices that will help keep your patio looking its best.
Remember, by following these tips and incorporating them into your routine, you can enjoy your revitalized outdoor space for many years. Regular maintenance and touch-ups will preserve the beauty and functionality of your patio, allowing you to create lasting memories with family and friends.
Thank you for joining us on this journey to resurface your concrete patio. We hope this guide has been informative, helpful, and inspiring throughout your DIY project. Now it’s time to relax and enjoy your transformed outdoor oasis.
Wishing you many enjoyable moments in your newly resurfaced and well-maintained patio!
Now that you've mastered resurfacing your concrete patio, why not give that revamped space a burst of color and charm? Our next guide on sprucing up decks for outdoor living will show you simple yet impactful decorating tricks and add-ons. These tips not only make your deck more inviting but also create a fantastic atmosphere for relaxation and entertainment. Ready to transform your outdoor area into a cozy, vibrant retreat? Dive into our comprehensive article and let your creativity flow!
Frequently Asked Questions about How To Resurface A Concrete Patio
Was this page helpful?
At Storables.com, we guarantee accurate and reliable information. Our content, validated by Expert Board Contributors, is crafted following stringent Editorial Policies. We're committed to providing you with well-researched, expert-backed insights for all your informational needs.




0 thoughts on “How To Resurface A Concrete Patio”