Home>Garden Essentials>How To Plant A Seed For Kids
Garden Essentials
How To Plant A Seed For Kids
Modified: March 15, 2024
Learn how to plant a seed in a fun and interactive way for kids with this step-by-step guide. Get your little ones involved in creating their own garden!
(Many of the links in this article redirect to a specific reviewed product. Your purchase of these products through affiliate links helps to generate commission for Storables.com, at no extra cost. Learn more)
Introduction
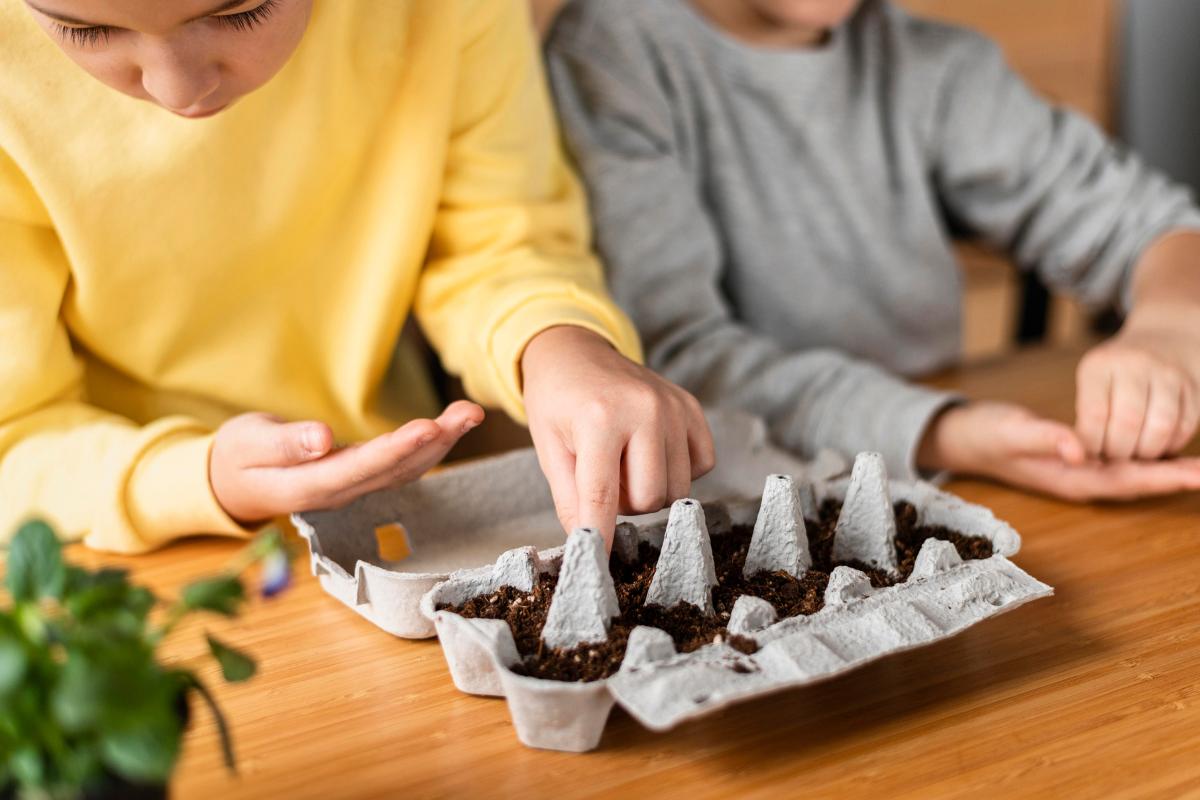
Welcome to the wonderful world of gardening! Planting a seed and watching it grow into a beautiful plant is a magical experience, especially for kids. It not only teaches them about nature and the importance of taking care of living things, but also instills a sense of responsibility and patience. In this article, we will guide you through the step-by-step process of planting a seed with your kids, from choosing the perfect seed to caring for the seedling.
Gardening with kids is a fantastic way to spend quality time together and create lasting memories. It provides them with hands-on learning opportunities, encourages their curiosity, and allows them to witness the miracles of nature firsthand. By involving children in the planting process, they will develop a deeper appreciation for the environment and develop lifelong skills.
Now, let’s dive into the exciting world of planting seeds and watch as the magic unfolds!
Key Takeaways:
- Planting seeds with kids is a magical experience that teaches patience, responsibility, and appreciation for nature. It’s a fun way to create lasting memories and nurture a love for gardening.
- By choosing the right seeds, providing care, and observing growth, kids can witness the miracles of nature firsthand and develop valuable life skills. Gardening is an ongoing journey of exploration and discovery.
Read more: How To Germinate A Plant
Step 1: Choosing the Seed
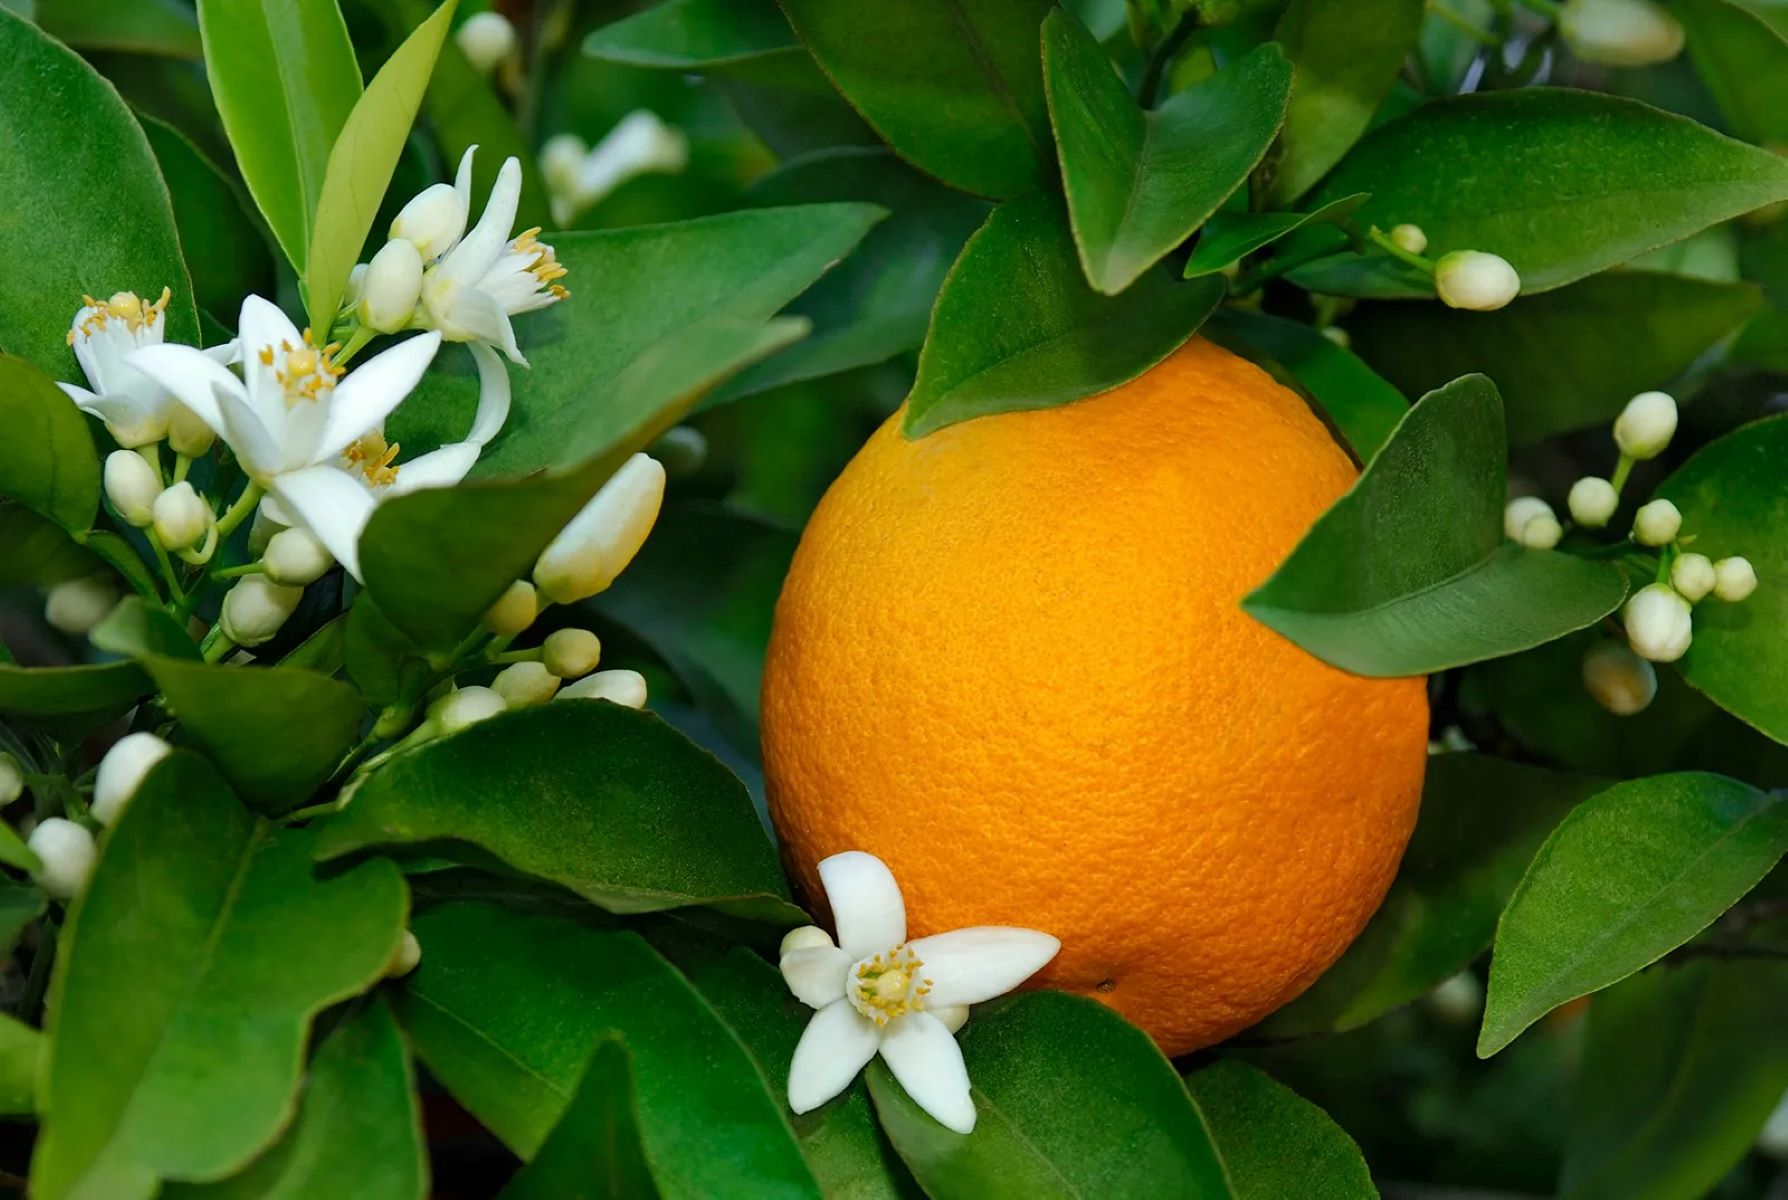
The first step in planting a seed with your kids is choosing the right seed to grow. There are a plethora of options to choose from, ranging from flowers to vegetables, herbs, and even fruits. To make the selection process more engaging, involve your kids by discussing their preferences and interests.
Consider the climate and weather conditions in your area when selecting the seed. It’s important to choose a seed that is suitable for the growing conditions in your region. Some plants thrive in full sun, while others prefer partial shade. Research the ideal growing conditions for the seed you are interested in and ensure you can provide the necessary environment for it to flourish.
It’s also worth considering the time it takes for the seed to germinate and grow. Some seeds sprout quickly, while others require more patience. If you’re looking for a faster-growing plant, opt for seeds that germinate within a week or two. On the other hand, if you want to teach your kids about patience and the gradual growth process, choose seeds that take longer to sprout.
Furthermore, take into account the space available for planting. If you have a spacious backyard, you can opt for larger plants that require more room to grow. If you’re limited on space, consider growing smaller plants or utilizing containers and vertical gardening techniques.
Lastly, involve your kids in the decision-making process. Encourage them to research and learn about different plants, their characteristics, and benefits. Letting them play an active role in choosing the seed will make them more invested in the entire gardening process.
Once you’ve gathered all the information and discussed with your kids, make a decision on which seed to grow. Remember, the goal is to choose a seed that aligns with your kids’ interests, the climate in your area, and the space you have available.
Step 2: Gathering Supplies
Now that you have chosen the perfect seed to plant with your kids, it’s time to gather the necessary supplies. Having all the materials ready will make the planting process smoother and more enjoyable for everyone involved.
Here are the essential supplies you will need:
- Seedling Trays or Pots: You will need containers to plant the seeds. Seedling trays or small pots are perfect for this. Make sure they have drainage holes at the bottom to prevent water from pooling.
- Potting Soil: Use high-quality potting soil that is well-draining and nutrient-rich. Avoid using garden soil, as it may contain pests or diseases that can harm the seedlings.
- Seeds: Of course, you will need the seeds you have chosen in the previous step. Ensure they are fresh and haven’t expired.
- Watering Can or Spray Bottle: You will need a watering can or a spray bottle to water the seeds gently without disturbing them.
- Labels and Marker: It’s important to label the containers with the name of the plant and the date of planting. This will help you keep track of the different seeds.
- Plastic Wrap or Seedling Tray Cover: To create a warm and moist environment, cover the containers with plastic wrap or use a seedling tray cover if available.
- Grow Lights or Sunny Windowsill: Seeds need adequate light to germinate and grow. If you don’t have a sunny windowsill, consider investing in grow lights to provide the necessary light for the seedlings.
- Gardening Gloves and Aprons: Protect your kids’ hands and clothes by providing them with gardening gloves and aprons. Not only will this keep them clean, but it will also make them feel like real gardeners.
- A Spirit of Adventure: Don’t forget to bring along a sense of adventure and curiosity. Gardening with kids is all about exploring, learning, and having fun!
Once you have gathered all the supplies, arrange them in a designated gardening area. This will create an organized and inviting space for you and your kids to plant the seeds together.
With everything set, you’re now ready to move on to the next step of preparing the soil for planting!
Step 3: Preparing the Soil
Preparing the soil is a crucial step in ensuring the healthy growth of your seedlings. Good soil provides essential nutrients, proper drainage, and a conducive environment for the roots to develop. Here’s how you can prepare the soil:
- Choose the Right Soil: Use high-quality potting soil that is specifically formulated for seed starting. This type of soil will provide the necessary nutrients and aeration for the seeds to germinate.
- Moisten the Soil: Before filling the containers with soil, moisten it slightly. This will help the soil hold moisture and create a favorable environment for the seeds to grow.
- Fill the Containers: Fill the seedling trays or pots with the moistened soil, leaving a small gap at the top for watering. Gently press down on the soil to ensure it’s evenly compacted.
- Create Planting Holes: Make small indentations or holes in the soil using your finger or a small tool. The depth of the hole should be twice the size of the seed. Refer to the seed packet for specific instructions.
- Plant the Seeds: Carefully place one or two seeds in each hole, following the recommended spacing mentioned on the seed packet. If the seeds are tiny, you can sprinkle them lightly on the soil surface.
- Cover and Label: Gently cover the seeds with a thin layer of soil, ensuring they are adequately covered for optimal germination. Use the labels and marker to identify each seed variety, and place the labels in the containers.
- Water Carefully: Use a watering can or spray bottle to moisten the soil gently without disturbing the seeds. Avoid over-watering, as excessive moisture can lead to rotting.
- Provide Proper Drainage: Ensure that the containers have drainage holes to prevent water from accumulating at the bottom. Excess water can cause root rot and other issues.
- Cover and Create a Warm Environment: Cover the containers with plastic wrap or use a seedling tray cover to create a warm and humid environment. Place the containers in a warm location, such as near a window or under grow lights.
Now that the soil is prepared and the seeds are planted, it’s time to move on to the next step: caring for the seedlings and ensuring their healthy growth. Exciting times are ahead as you watch the seeds sprout and transform into beautiful plants!
Step 4: Planting the Seed
Now comes the exciting part – planting the seeds! This step involves delicately placing the seeds into the prepared soil and providing the optimal conditions for germination and growth. Follow these steps to plant your seeds:
- Refer to the Seed Packet: Read the instructions on the seed packet carefully. It will provide specific details about the recommended planting depth and spacing for the particular seed variety you have chosen.
- Prepare the Soil: Ensure that the soil in your containers is moist, but not waterlogged. This will create a favorable environment for the seeds to sprout.
- Make Planting Holes: Use your finger or a small tool to create small holes in the soil. The depth of the hole should correspond to the planting instructions on the seed packet.
- Plant the Seeds: Place one or two seeds into each hole. If the seeds are small, sprinkle them lightly over the soil surface. Be careful not to overcrowd the seeds, as they need space to grow and develop.
- Cover and Firm the Soil: Gently cover the seeds with a thin layer of soil, ensuring they are well-covered. Lightly press down on the soil to ensure good soil-to-seed contact.
- Water the Seeds: Give the newly planted seeds a gentle watering. Use a watering can or spray bottle to moisten the soil without causing disturbance. Avoid over-watering, as excessive moisture can lead to rotting.
- Label the Containers: Use labels or popsicle sticks to mark the name of the plant and the date of planting. This will help you keep track of the different seeds as they grow.
- Provide Optimal Growing Conditions: Place the containers in a warm and sunny location, or use grow lights if natural light is scarce. Different seeds have specific temperature and light requirements, so refer to the seed packet for guidance.
- Be Patient and Observant: Now it’s time to wait and watch! Keep a close eye on the containers and monitor the soil moisture regularly. Observe any changes or signs of growth, and be patient as the seeds take their time to sprout.
Remember, each seed is unique, and germination times can vary. Some seeds may sprout within days, while others may take weeks. Stay consistent with watering, provide adequate light, and be patient. Before you know it, you will witness the miracle of life as your seeds transform into seedlings.
Stay tuned for the next step – watering and caring for the seedling to ensure healthy growth!
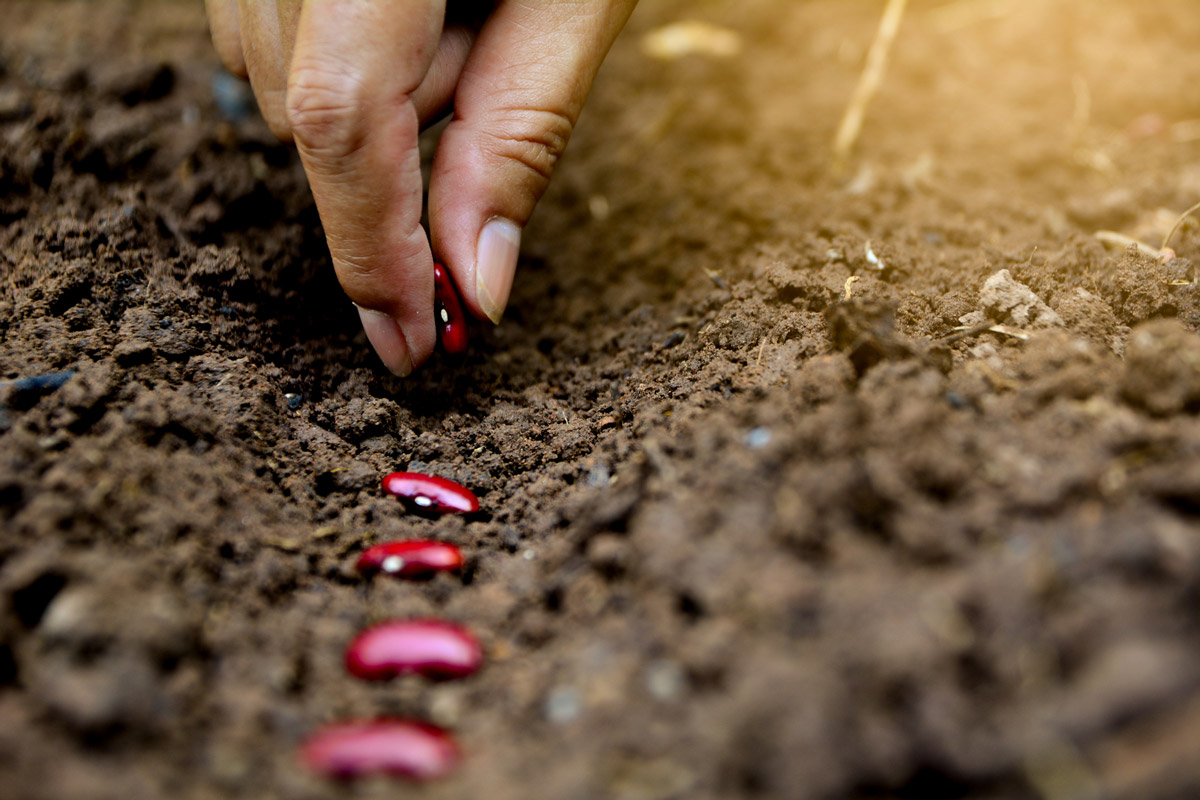
When planting a seed with kids, choose large, easy-to-handle seeds like sunflowers or beans. Show them how to dig a small hole, place the seed inside, cover it with soil, and water it gently.
Read more: How To Plant Seed
Step 5: Watering and Caring for the Seedling
Congratulations on successfully planting your seeds! Now, it’s time to provide the necessary care for the emerging seedlings. Proper watering and maintenance are crucial for their healthy growth and development. Follow these steps to ensure the well-being of your seedlings:
- Monitor Soil Moisture: Check the soil moisture regularly by gently inserting a finger into the soil. Water the seedlings when the top inch of soil feels dry. Avoid over-watering, as it can lead to root rot and other issues.
- Water Gently: Use a watering can or a spray bottle to water the seedlings. Pour water slowly and evenly around the base of the plants to avoid disturbing the delicate roots. Ensure that the water reaches the root zone without causing waterlogging.
- Provide Adequate Drainage: Ensure that the containers have proper drainage holes to prevent water from pooling and causing root rot. If excessive water accumulates at the bottom, carefully remove it to maintain proper drainage.
- Adjust Watering Frequency: As the seedlings grow and their root systems develop, you may need to adjust your watering frequency. Larger plants require more water, while smaller seedlings may need less frequent watering.
- Stay Consistent: Establish a regular watering routine to maintain consistent moisture levels. Avoid drastic fluctuations in soil moisture, as it can stress the seedlings.
- Provide Proper Lighting: Ensure that the seedlings receive adequate light for healthy growth. Place them in a sunny windowsill or use artificial grow lights to supplement natural light. Aim for 12-16 hours of light per day.
- Watch for Pests and Diseases: Monitor the seedlings for any signs of pests or diseases, such as wilting, discoloration, or holes in the leaves. If you notice any issues, take appropriate action promptly to prevent further damage.
- Support Growing Plants: As the seedlings grow taller, provide support if necessary. Use stakes or small trellises to prevent them from bending or falling over.
- Thin Out Seedlings: If you initially planted multiple seeds in one container, thin out the weaker seedlings to give the remaining ones enough space to grow. This will prevent overcrowding and competition for resources.
- Fertilize as Needed: Depending on the type of seedlings and the nutrient content of the soil, you may need to fertilize occasionally. Use a gentle, balanced fertilizer according to the manufacturer’s instructions.
By diligently caring for your seedlings, you will witness their growth and development over time. Enjoy this nurturing process with your kids, as it provides valuable lessons in responsibility and the wonders of nature.
In the next step, we will explore the excitement of observing the growth and progress of your seedlings as they transform into thriving plants!
Step 6: Observing Growth
As you continue to provide care and nurture your seedlings, it’s time to step back and observe their growth. This step is filled with excitement and wonder, as you witness the progress and transformation of your plants. Here’s how you can observe the growth of your seedlings:
- Keep a Journal: Start a gardening journal or use a notebook to record the growth and changes of your seedlings. Note down the date of planting, germination, and any significant milestones along the way. This will help you track their progress and identify patterns.
- Observe Daily: Take a few moments each day to observe your seedlings closely. Look for signs of growth, such as emerging leaves, stems getting taller, and the development of true leaves. Notice any changes in color, texture, or overall appearance.
- Compare Seedlings: If you planted multiple seeds of the same variety, compare their growth patterns. Observe if some seedlings are growing faster or stronger than others. This can provide insights into environmental factors or variations in seed quality.
- Measure Height: Use a ruler or measuring tape to measure the height of your seedlings regularly. This will give you a tangible way to track their growth and compare it over time.
- Photograph the Progress: Take photos of your seedlings at different stages of growth. Capture their journey from tiny sprouts to full-grown plants. These snapshots will serve as lasting memories and allow you to visually document their transformation.
- Notice Leaf Development: Pay attention to the formation of true leaves. True leaves are the second set of leaves that appear after the initial sprout leaves. They resemble the mature leaves of the plant and indicate that your seedlings are on their way to becoming fully developed plants.
- Document Changes and Challenges: Note any challenges or issues you encounter during the growth process. If you notice any pests, diseases, or nutrient deficiencies, document them and take necessary action to address them.
- Celebrate Milestones: Celebrate each milestone and achievement in your seedlings’ growth journey. Whether it’s the first true leaf, the start of flowering, or the emergence of fruits, acknowledge and appreciate the progress your plants are making.
- Involve Your Kids: Engage your kids in the observation process. Encourage them to notice the changes and ask questions about the plants. Foster their curiosity and help them develop a deeper understanding of the growth cycle.
Observing the growth of your seedlings is an exciting and rewarding experience. It allows you to witness the miracles of nature firsthand and connect with the beauty and resilience of plants. Enjoy this stage of your gardening journey, and savor the progress your seedlings make as they inch closer to becoming mature plants.
In the next step, we will explore the optional but rewarding process of transplanting your seedlings to their permanent outdoor home.
Step 7: Transplanting the Seedling (optional)
Transplanting seedlings is an optional but rewarding step in the gardening process. It involves moving your well-established seedlings from their containers to their permanent outdoor home, such as a garden bed or larger pots. Here’s how you can successfully transplant your seedlings:
- Choose the Right Time: Select the appropriate time to transplant your seedlings. This is typically when they have developed a strong root system and have at least two to three sets of true leaves. Check the seed packet or consult gardening resources for specific recommendations regarding the timing for the particular plant.
- Prepare the Soil: Make sure the soil in the garden bed or larger pots is well-prepared. Remove any weeds, rocks, or debris, and amend the soil with compost or other organic matter to improve its fertility and drainage.
- Safely Remove the Seedlings: Gently loosen the soil around the seedlings in their containers. Hold the seedling by the leaves or use a small spoon or trowel to carefully lift it out of the container, being mindful not to disturb the roots.
- Make Proper Planting Holes: Dig holes in the garden bed or larger pots that are slightly larger than the root ball of the seedlings. Space the holes according to the recommended spacing for the particular plant.
- Plant the Seedlings: Place the seedlings in the prepared holes, making sure they are at the same depth as they were in their containers. Gently backfill the soil around the root ball, pressing it down to ensure good soil contact with the roots.
- Water Thoroughly: After transplanting, water the seedlings generously to help them settle into their new environment. This will also provide hydration to the roots and minimize transplant shock.
- Provide Support if Needed: If your seedlings are tall or fragile, they may require support to prevent them from bending or breaking. Use stakes or plant supports to keep them upright.
- Maintain Proper Care: After transplanting, continue caring for your seedlings by providing adequate water, sunlight, and protection from pests. Keep an eye on their progress and address any issues that may arise.
- Monitor and Nurture: Regularly monitor the transplanted seedlings and provide ongoing care as they adapt to their new environment. Check for any signs of stress or wilting, and adjust your watering and care routine accordingly.
- Enjoy the Fruits of Your Labor: As your transplanted seedlings grow and thrive in their new home, you will soon begin to enjoy the beauty of their blossoms, the flavors of their fruits, or the satisfaction of their foliage. Observe their progress, celebrate their growth, and relish in the rewards of your gardening efforts.
Transplanting seedlings can be an exciting step that marks the transition from indoor gardening to outdoor cultivation. It allows your plants to flourish and spread their roots, contributing to the overall beauty and productivity of your garden.
Congratulations! You have successfully completed the entire process of planting seeds and nurturing them into seedlings. Gardening with kids not only provides valuable educational experiences but also nurtures a love and appreciation for nature. Enjoy the bountiful results and the memories created along the way!
And remember, gardening is a continuous journey. Don’t be afraid to experiment, learn, and explore new plants and techniques. Happy gardening!
Conclusion
Planting a seed with your kids is a remarkable experience that combines education, creativity, and a deeper connection with nature. By following the step-by-step process outlined in this guide, you have learned how to choose the perfect seed, gather the necessary supplies, prepare the soil, plant the seeds, care for the seedlings, observe their growth, and optionally transplant them to their permanent outdoor home.
Throughout this journey, you and your kids have witnessed the magic of germination, nurtured the growth of seedlings, and celebrated the transformation of tiny seeds into thriving plants. You have explored the wonders of nature together, learning patience, responsibility, and the importance of caring for living things.
As you observed the growth of your seedlings, you marveled at their development, measured their height, documented their milestones, and celebrated their achievements. You navigated the challenges of watering and providing proper care, ensuring that your plants received the optimal conditions for healthy growth. And if you opted to transplant your seedlings, you experienced the joy of watching them settle into their new homes, ready to flourish and bring beauty to your garden.
Through this process, you’ve not only cultivated a love for gardening but have also created lasting memories and valuable learning experiences for your kids. They have witnessed the miracles of nature firsthand, developed a deeper appreciation for the environment, and learned life skills such as responsibility, patience, and the rewards of hard work.
Gardening is an ongoing journey, and the learning never stops. Continue to explore new plants, experiment with different techniques, and adapt your gardening practices as you develop your green thumb. The joy of gardening lies in the continuous growth and discovery it offers.
So, grab your gardening tools, choose your seeds, and embark on new gardening adventures with your kids. Enjoy the beauty and bounty that nature has to offer, and cherish the time spent nurturing and cultivating a love for plants and the environment.
Happy gardening!
Frequently Asked Questions about How To Plant A Seed For Kids
Was this page helpful?
At Storables.com, we guarantee accurate and reliable information. Our content, validated by Expert Board Contributors, is crafted following stringent Editorial Policies. We're committed to providing you with well-researched, expert-backed insights for all your informational needs.


0 thoughts on “How To Plant A Seed For Kids”