Home>Gardening & Outdoor>Outdoor Entertaining>How To Seal A Picnic Table
Outdoor Entertaining
How To Seal A Picnic Table
Published: January 16, 2024
Learn how to seal a picnic table for durable outdoor entertaining. Follow these easy steps to protect your picnic table from the elements.
(Many of the links in this article redirect to a specific reviewed product. Your purchase of these products through affiliate links helps to generate commission for Storables.com, at no extra cost. Learn more)
Introduction
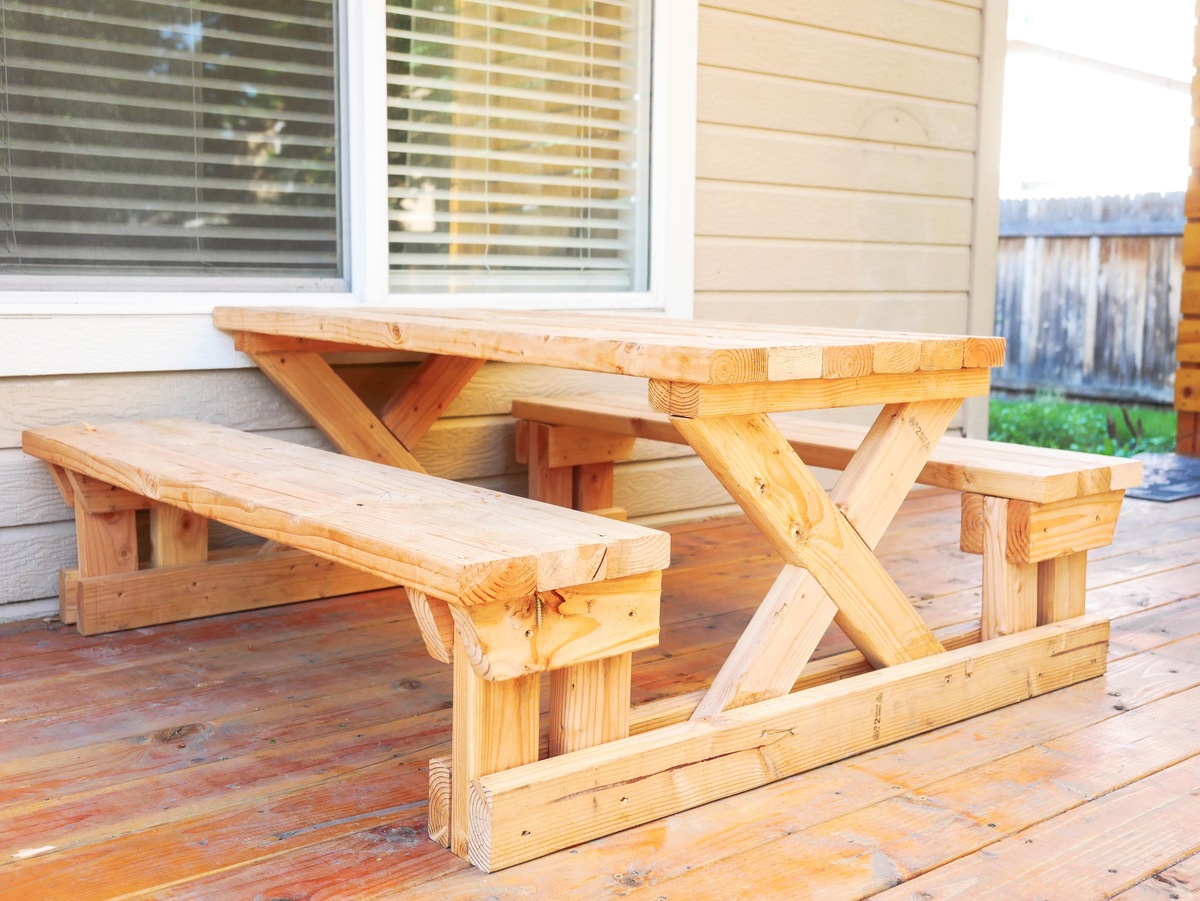
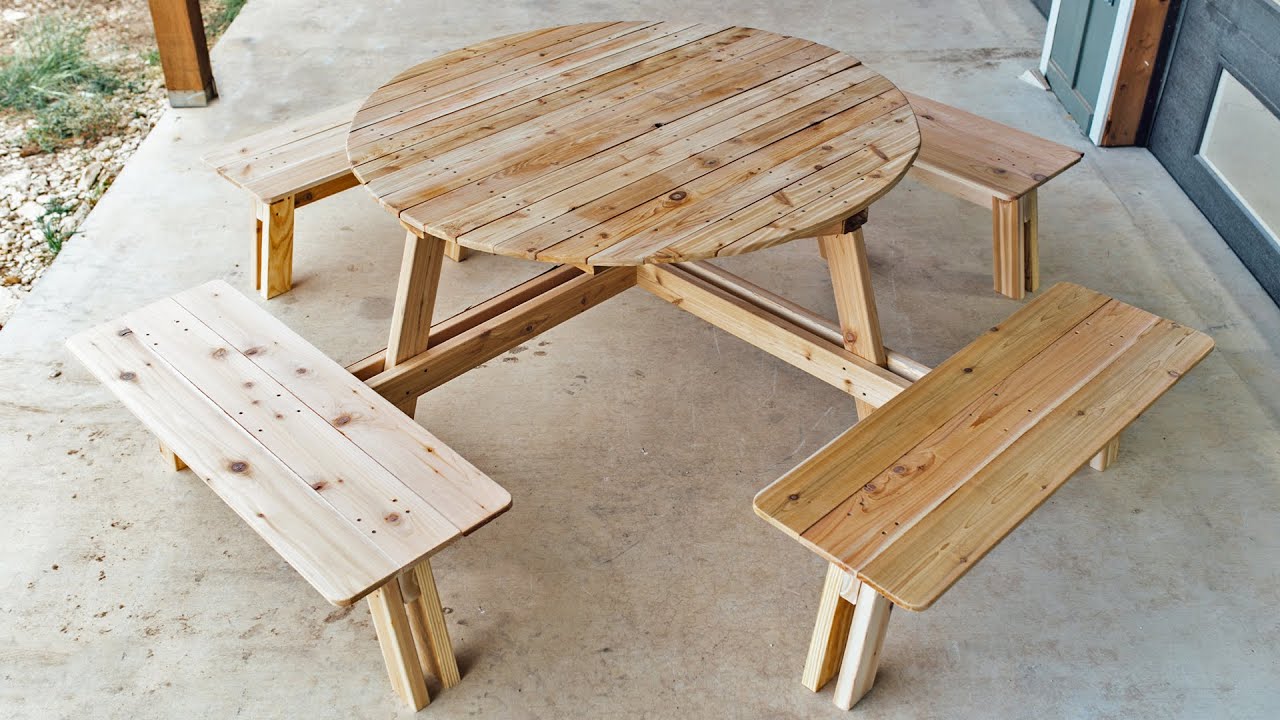
When it comes to outdoor entertaining, a picnic table serves as the centerpiece for gatherings, whether it's a family barbecue, a casual weekend brunch, or a cozy evening with friends. However, exposure to the elements can take a toll on the table, causing it to deteriorate over time. To ensure that your picnic table remains in top condition for years to come, it's essential to seal it properly. Sealing not only protects the wood from moisture, UV rays, and other environmental factors but also enhances its natural beauty.
In this comprehensive guide, we'll walk you through the step-by-step process of sealing a picnic table. Whether you're a seasoned DIY enthusiast or a novice looking to tackle your first outdoor project, you'll find valuable insights and practical tips to help you achieve professional-quality results. So, roll up your sleeves, gather your supplies, and let's dive into the rewarding endeavor of preserving and beautifying your beloved picnic table.
Key Takeaways:
- Sealing a picnic table involves cleaning, sanding, applying sealant, and allowing it to dry. This protects the wood, enhances its beauty, and ensures the table lasts for many outdoor gatherings.
- By following the steps to seal a picnic table, you can preserve its charm and durability, making it a welcoming centerpiece for barbecues, brunches, and relaxing moments with friends and family.
Read more: How To Seal A Dining Table
Step 1: Clean the Picnic Table
Before embarking on the sealing process, it’s crucial to start with a clean surface. Over time, dirt, grime, and other contaminants can accumulate on the table, compromising the effectiveness of the sealant. Begin by removing any debris, such as leaves, twigs, or food crumbs, from the surface of the picnic table. Using a stiff-bristled brush or a putty knife, scrape off any stubborn residue or peeling finish.
Next, prepare a cleaning solution by mixing mild dish soap or wood cleaner with water. Dip a sponge or soft-bristled brush into the solution and gently scrub the entire surface of the table, paying special attention to any areas with noticeable stains or discoloration. Rinse the table thoroughly with a garden hose and allow it to dry completely before proceeding to the next step.
For stubborn stains or mold growth, consider using a wood cleaner specifically formulated to tackle these issues. Apply the cleaner according to the manufacturer’s instructions, and use a scrub brush to agitate the affected areas. Rinse the table thoroughly and let it dry before moving on to the next phase of the sealing process.
By starting with a clean slate, you’ll ensure that the sealant adheres effectively to the wood, providing long-lasting protection and a flawless finish. Additionally, the cleaning process allows you to inspect the table for any signs of damage or wear that may require attention before sealing.
Step 2: Sand the Surface
Once the picnic table is clean and dry, the next step is to sand the surface to prepare it for the sealant. Sanding serves several important purposes, including smoothing out any rough spots, removing old finish or paint, and opening up the wood’s pores to enhance the adhesion of the sealant.
Begin by selecting the appropriate sandpaper grit based on the condition of the table. For general surface smoothing and paint or finish removal, start with medium-grit sandpaper (around 80-100 grit) before progressing to fine-grit sandpaper (around 150-180 grit) for a smoother finish. If the table has a particularly rough or weathered surface, you may need to start with a coarser grit and gradually work your way to a finer grit to achieve the desired smoothness.
Using a sanding block or a random orbital sander, sand the entire surface of the picnic table in the direction of the wood grain. Pay extra attention to any rough patches, splinters, or areas with old finish that need to be smoothed out. Be thorough but gentle to avoid over-sanding and causing unevenness in the wood surface.
After sanding, use a clean, damp cloth to wipe away the dust and debris from the table. Inspect the surface to ensure that it’s uniformly smooth and free of any remaining blemishes or rough areas. If necessary, make any final adjustments by spot-sanding specific areas to achieve a consistent and smooth texture across the entire table.
By meticulously sanding the picnic table, you’ll create an ideal foundation for the sealant, allowing it to penetrate the wood effectively and produce a professional-looking, long-lasting finish. This crucial step sets the stage for the final phase of the sealing process, bringing you one step closer to rejuvenating your picnic table and enhancing its durability.
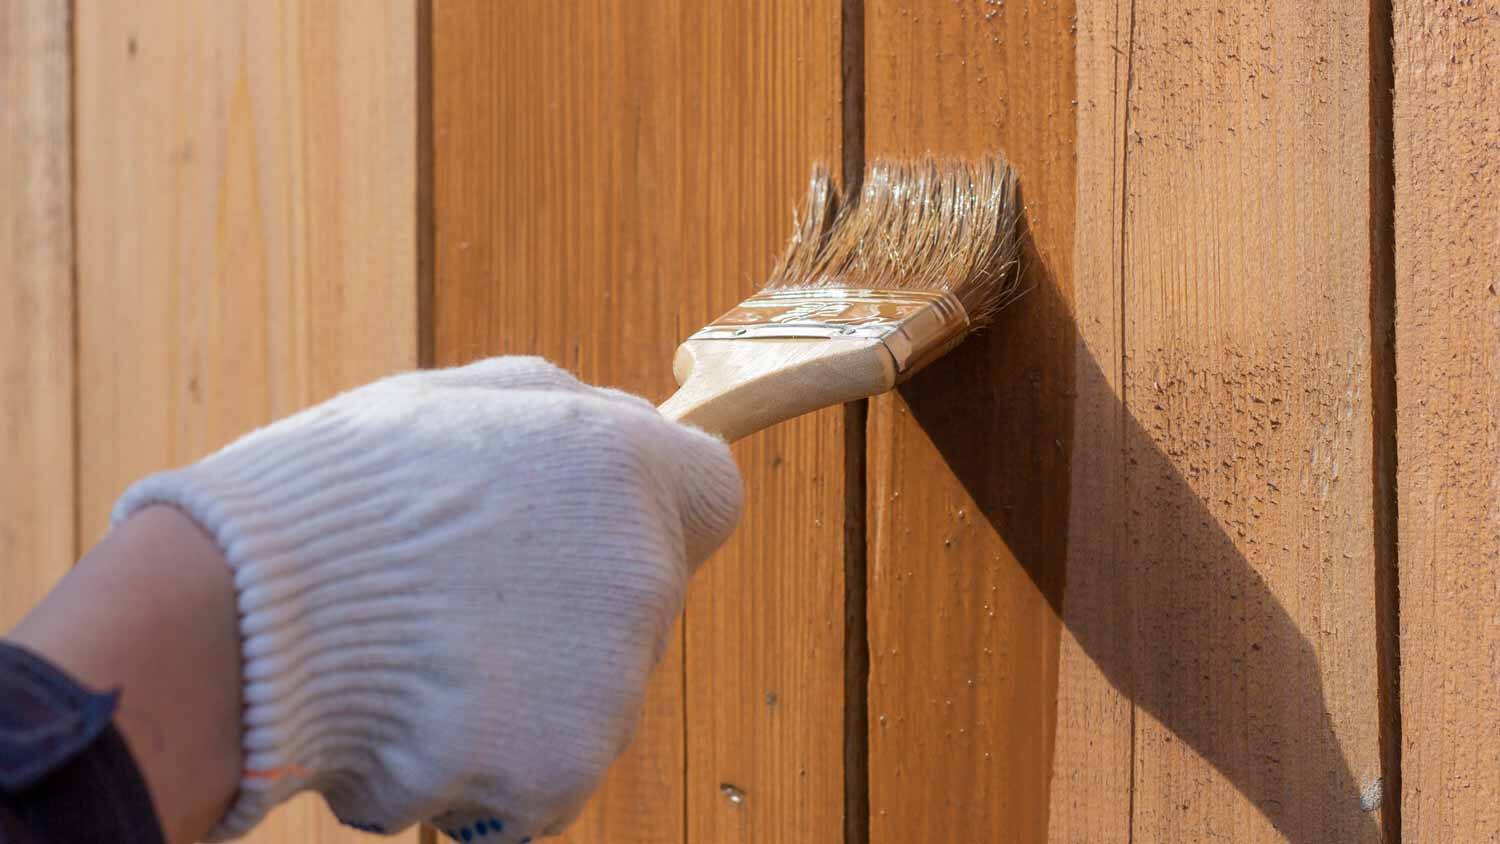
Step 3: Apply the Sealant
With the picnic table cleaned and sanded, it’s time to apply the sealant to protect the wood from the elements and enhance its natural beauty. When choosing a sealant, opt for a high-quality outdoor wood sealant or wood stain with built-in sealant properties. Consider the type of wood used for the picnic table and select a sealant that complements its natural characteristics while providing the desired level of protection.
Before applying the sealant, carefully read and follow the manufacturer’s instructions, including any specific recommendations for application tools and environmental conditions. Choose a well-ventilated area for the application process, and consider the weather forecast to ensure optimal drying conditions for the sealant.
Using a high-quality paintbrush, foam brush, or paint sprayer, apply an even coat of sealant to the entire surface of the picnic table, working with the wood grain to ensure thorough coverage. Pay attention to any intricate details, such as engraved patterns or decorative elements, to ensure that the sealant reaches all exposed areas of the wood.
If you’re using a wood stain with built-in sealant, take care to mix the product thoroughly before and during application to maintain a consistent finish. For transparent or semi-transparent sealants, apply additional coats as needed to achieve the desired level of color richness and protection, allowing each coat to dry completely before applying the next.
After applying the sealant, inspect the table for any drips, runs, or uneven areas, and smooth them out with a brush or foam applicator to ensure a uniform finish. Once the initial coat is applied and any touch-ups are completed, allow the sealant to dry according to the manufacturer’s recommendations before proceeding to the next step.
By applying the sealant meticulously and following the recommended techniques, you’ll safeguard the picnic table against moisture, sunlight, and wear, while accentuating its natural appeal. The sealant serves as a protective barrier, shielding the wood from the elements and preserving its allure for countless outdoor gatherings to come.
To seal a picnic table, use a waterproof sealant designed for outdoor use. Apply the sealant evenly with a brush or roller, following the manufacturer’s instructions. Allow the table to dry completely before using it.
Step 4: Let the Sealant Dry
After applying the sealant to the picnic table, allowing ample time for it to dry thoroughly is crucial to ensure a durable and flawless finish. The drying process not only sets the sealant but also allows it to bond with the wood, forming a resilient protective layer that safeguards the table against environmental elements.
Check the manufacturer’s instructions for the recommended drying time and environmental conditions, as these factors can significantly impact the effectiveness of the sealant. Ideally, choose a period when the weather forecast predicts dry and moderate temperatures to facilitate optimal drying conditions.
During the drying period, it’s essential to protect the picnic table from dust, debris, and direct sunlight, which can interfere with the drying process and compromise the quality of the finish. If possible, place the table in a sheltered area, such as a garage or covered patio, to shield it from external elements while allowing adequate airflow for drying.
As the sealant dries, periodically inspect the table for any signs of uneven drying, drips, or imperfections, and address them promptly to maintain a smooth and uniform finish. Depending on the type of sealant used and the environmental conditions, the drying process may take several hours to a few days to reach the optimal cured state.
Once the sealant is completely dry and cured, gently run your hand over the surface to ensure that it feels smooth and consistent. At this stage, the picnic table is primed to withstand outdoor conditions and serve as a resilient and visually appealing centerpiece for your outdoor gatherings.
By allowing the sealant to dry thoroughly and taking precautions to protect the table during this critical phase, you’ll ensure that the sealant forms a robust barrier, fortifying the wood and preserving its natural charm for years to come.
Read more: How To Seal A Beer Pong Table
Step 5: Reapply if Necessary
After the initial application and drying of the sealant, it’s important to assess the condition of the picnic table to determine if additional coats of sealant are necessary. Factors such as the type of wood, the level of exposure to outdoor elements, and the desired durability of the finish can influence the decision to reapply the sealant.
Inspect the picnic table’s surface to evaluate the coverage and the level of protection provided by the initial coat of sealant. Look for any areas where the wood appears less saturated or where the sealant may have worn off due to weathering or frequent use. Additionally, consider the level of sheen and color richness achieved with the initial coat, as additional coats can enhance these aspects.
If reapplication is deemed necessary, ensure that the surface is clean and dry before proceeding. Lightly sand the existing sealant with fine-grit sandpaper to create a smooth texture and promote adhesion for the subsequent coat. Wipe away any sanding residue with a clean, damp cloth and allow the surface to dry completely before applying the next coat of sealant.
Follow the same application techniques and considerations as the initial coat, ensuring even coverage and working with the wood grain to maintain a consistent finish. Depending on the type of sealant used, you may need to apply one or more additional coats to achieve the desired level of protection and aesthetic appeal.
Allow each additional coat of sealant to dry thoroughly according to the manufacturer’s recommendations before assessing the need for further reapplication. As with the initial coat, protect the picnic table from dust, debris, and direct sunlight during the drying process to maintain the integrity of the finish.
By reapplying the sealant as needed, you’ll fortify the picnic table against the rigors of outdoor exposure, ensuring long-lasting protection and a lustrous finish that enhances the table’s visual appeal. This proactive approach to maintenance and preservation will prolong the life of the picnic table, allowing you to enjoy countless memorable gatherings around this cherished outdoor essential.
Conclusion
Sealing a picnic table is a rewarding endeavor that not only preserves the wood but also elevates its aesthetic allure, making it a focal point for outdoor gatherings and leisurely moments. By following the comprehensive steps outlined in this guide, you’ve embarked on a journey to rejuvenate and protect your picnic table, ensuring its resilience and timeless charm.
From the initial cleaning and sanding to the meticulous application of sealant, each step plays a pivotal role in fortifying the picnic table against the elements and enhancing its natural beauty. The attention to detail and care invested in this process will yield a durable and visually captivating finish that withstands the test of time.
As you admire the newly sealed picnic table, envision the countless memories and shared moments it will host in the years to come. From lively barbecues and family gatherings to tranquil moments of relaxation, your picnic table stands as a steadfast companion, exuding warmth and hospitality in your outdoor space.
Embrace the joy of outdoor entertaining and the simple pleasures of al fresco dining, knowing that your picnic table is not only a functional piece of furniture but also a symbol of cherished connections and enduring traditions. With proper maintenance and periodic resealing, your picnic table will continue to enrich your outdoor experiences, embodying the timeless allure of nature and conviviality.
So, as you bask in the satisfaction of completing this transformative project, take a moment to appreciate the craftsmanship and care that have revitalized your picnic table, ensuring that it remains a beloved feature of your outdoor sanctuary for years to come.
Frequently Asked Questions about How To Seal A Picnic Table
Was this page helpful?
At Storables.com, we guarantee accurate and reliable information. Our content, validated by Expert Board Contributors, is crafted following stringent Editorial Policies. We're committed to providing you with well-researched, expert-backed insights for all your informational needs.


0 thoughts on “How To Seal A Picnic Table”