Home>Home Appliances>Lighting Appliances>How Do You Remove A Ceiling Light Cover
Lighting Appliances
How Do You Remove A Ceiling Light Cover
Modified: February 17, 2024
Learn how to safely remove a ceiling light cover with our step-by-step guide. Get expert tips for maintaining your lighting appliances.
(Many of the links in this article redirect to a specific reviewed product. Your purchase of these products through affiliate links helps to generate commission for Storables.com, at no extra cost. Learn more)
Introduction
Removing a ceiling light cover may seem like a daunting task, but with the right guidance, it can be a straightforward process. Whether you're looking to clean the cover, replace a light bulb, or make adjustments to the fixture, understanding the steps involved is essential for a safe and successful outcome.
Ceiling light covers come in various designs, including glass, plastic, or metal, and are often secured in place by screws or clips. Before embarking on the removal process, it's crucial to ensure that the power to the light fixture is turned off to prevent any electrical mishaps.
In this comprehensive guide, we will walk you through the step-by-step process of removing a ceiling light cover. From turning off the power to safely lowering the cover and reattaching it, each stage is vital for a smooth and hassle-free experience. Additionally, we'll provide insights on cleaning the cover and addressing common concerns that may arise during the removal process.
By following these instructions, you can confidently tackle the task of removing a ceiling light cover, whether it's for maintenance, cleaning, or making adjustments to the fixture. With a clear understanding of the process, you'll be equipped to handle this task with ease and ensure that your ceiling light continues to illuminate your space effectively.
Now, let's delve into the specific steps required to remove a ceiling light cover, empowering you to maintain and enhance the functionality and aesthetics of your lighting fixture.
Key Takeaways:
- Safety First!
Before removing a ceiling light cover, always turn off the power to the fixture to prevent electrical mishaps. This ensures a safe and risk-free experience throughout the removal process. - Clean for Clarity
After removing the cover, cleaning it with suitable solutions and gentle materials enhances its visual appeal and the overall illumination quality of the ceiling light.
Read more: How To Remove Ceiling Light Cover
Step 1: Turn off the power
Before beginning the process of removing a ceiling light cover, it is crucial to prioritize safety by turning off the power to the light fixture. This step is fundamental to prevent the risk of electrical shock or injury during the removal process.
To start, locate the circuit breaker or fuse box in your home. It is essential to identify the specific switch or fuse that controls the power supply to the ceiling light. If your home has a modern circuit breaker panel, you will typically find a list or diagram indicating which breaker corresponds to the light fixture. In the case of a fuse box, the fuses are usually labeled to indicate their respective circuits.
Once you have identified the correct circuit breaker or fuse, switch it off to cut off the power supply to the ceiling light. To ensure that the power is effectively turned off, it is advisable to test the light switch associated with the fixture. By flipping the switch on and off, you can verify that the light remains unresponsive, confirming that the power has been successfully disconnected.
It is important to exercise caution and double-check that the power is indeed off before proceeding with the removal of the ceiling light cover. This precautionary measure minimizes the risk of accidental electrical contact and ensures a safe environment for working on the fixture.
By diligently following this initial step to turn off the power, you establish a secure foundation for the subsequent stages of removing the ceiling light cover. Prioritizing safety at the outset of the process sets the stage for a smooth and risk-free experience, allowing you to proceed with confidence and peace of mind.
With the power safely turned off, you are now ready to advance to the next step in the process of removing the ceiling light cover, bringing you closer to achieving your maintenance, cleaning, or adjustment goals for the fixture.
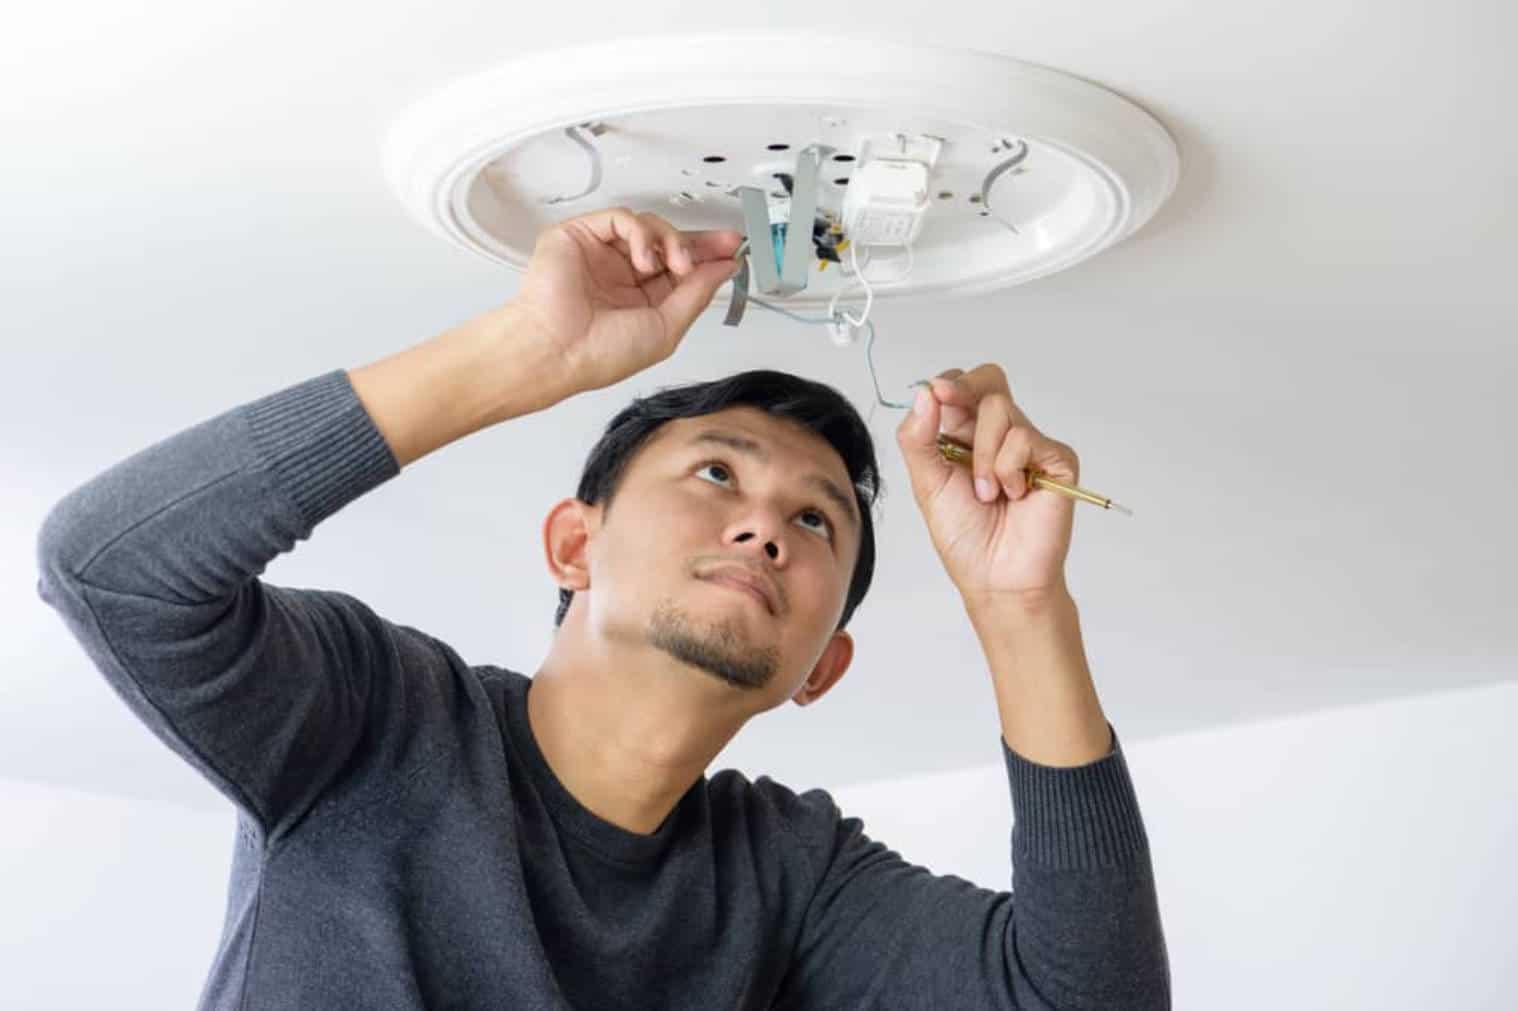
Step 2: Remove the screws or clips
Once the power to the ceiling light fixture has been safely turned off, the next crucial step in removing the cover involves addressing the fasteners that secure it in place. Depending on the specific design of the fixture, the cover may be held in position by screws or clips, and understanding how to navigate these fasteners is essential for a successful removal process.
Screws:
If the ceiling light cover is secured by screws, you will typically find them positioned around the perimeter of the cover. Using a suitable screwdriver that matches the screw head type, carefully loosen and remove each screw. It is important to exercise caution and maintain a firm grip on the cover as the final screws are being removed to prevent it from falling unexpectedly.
Clips:
In the case of ceiling light covers secured by clips, a slightly different approach is required. These clips are often located at specific points around the cover and are designed to hold it firmly in place. To release the cover, gently press or slide the clips to disengage them from their locked position. This may require applying a moderate amount of pressure while ensuring that the cover is adequately supported to prevent it from dropping.
Additional Considerations:
It is important to note that some ceiling light covers may feature a twist-and-lock mechanism instead of screws or clips. In such instances, carefully rotate the cover in the designated direction to unlock it from the fixture. This method typically involves a quarter-turn or similar motion to release the cover, allowing for safe and straightforward removal.
By understanding the specific fastening mechanism employed by your ceiling light cover, you can confidently proceed with the removal process, knowing how to effectively disengage the securing elements. This knowledge empowers you to navigate the removal with precision and care, ensuring that the cover is detached smoothly and without any mishaps.
As you successfully address the screws, clips, or twist-and-lock mechanism securing the cover, you are one step closer to accessing the interior of the fixture for cleaning, maintenance, or bulb replacement. With the cover now ready to be lowered, the subsequent steps will guide you through the remaining stages of the removal process, bringing you closer to achieving your desired objectives for the ceiling light fixture.
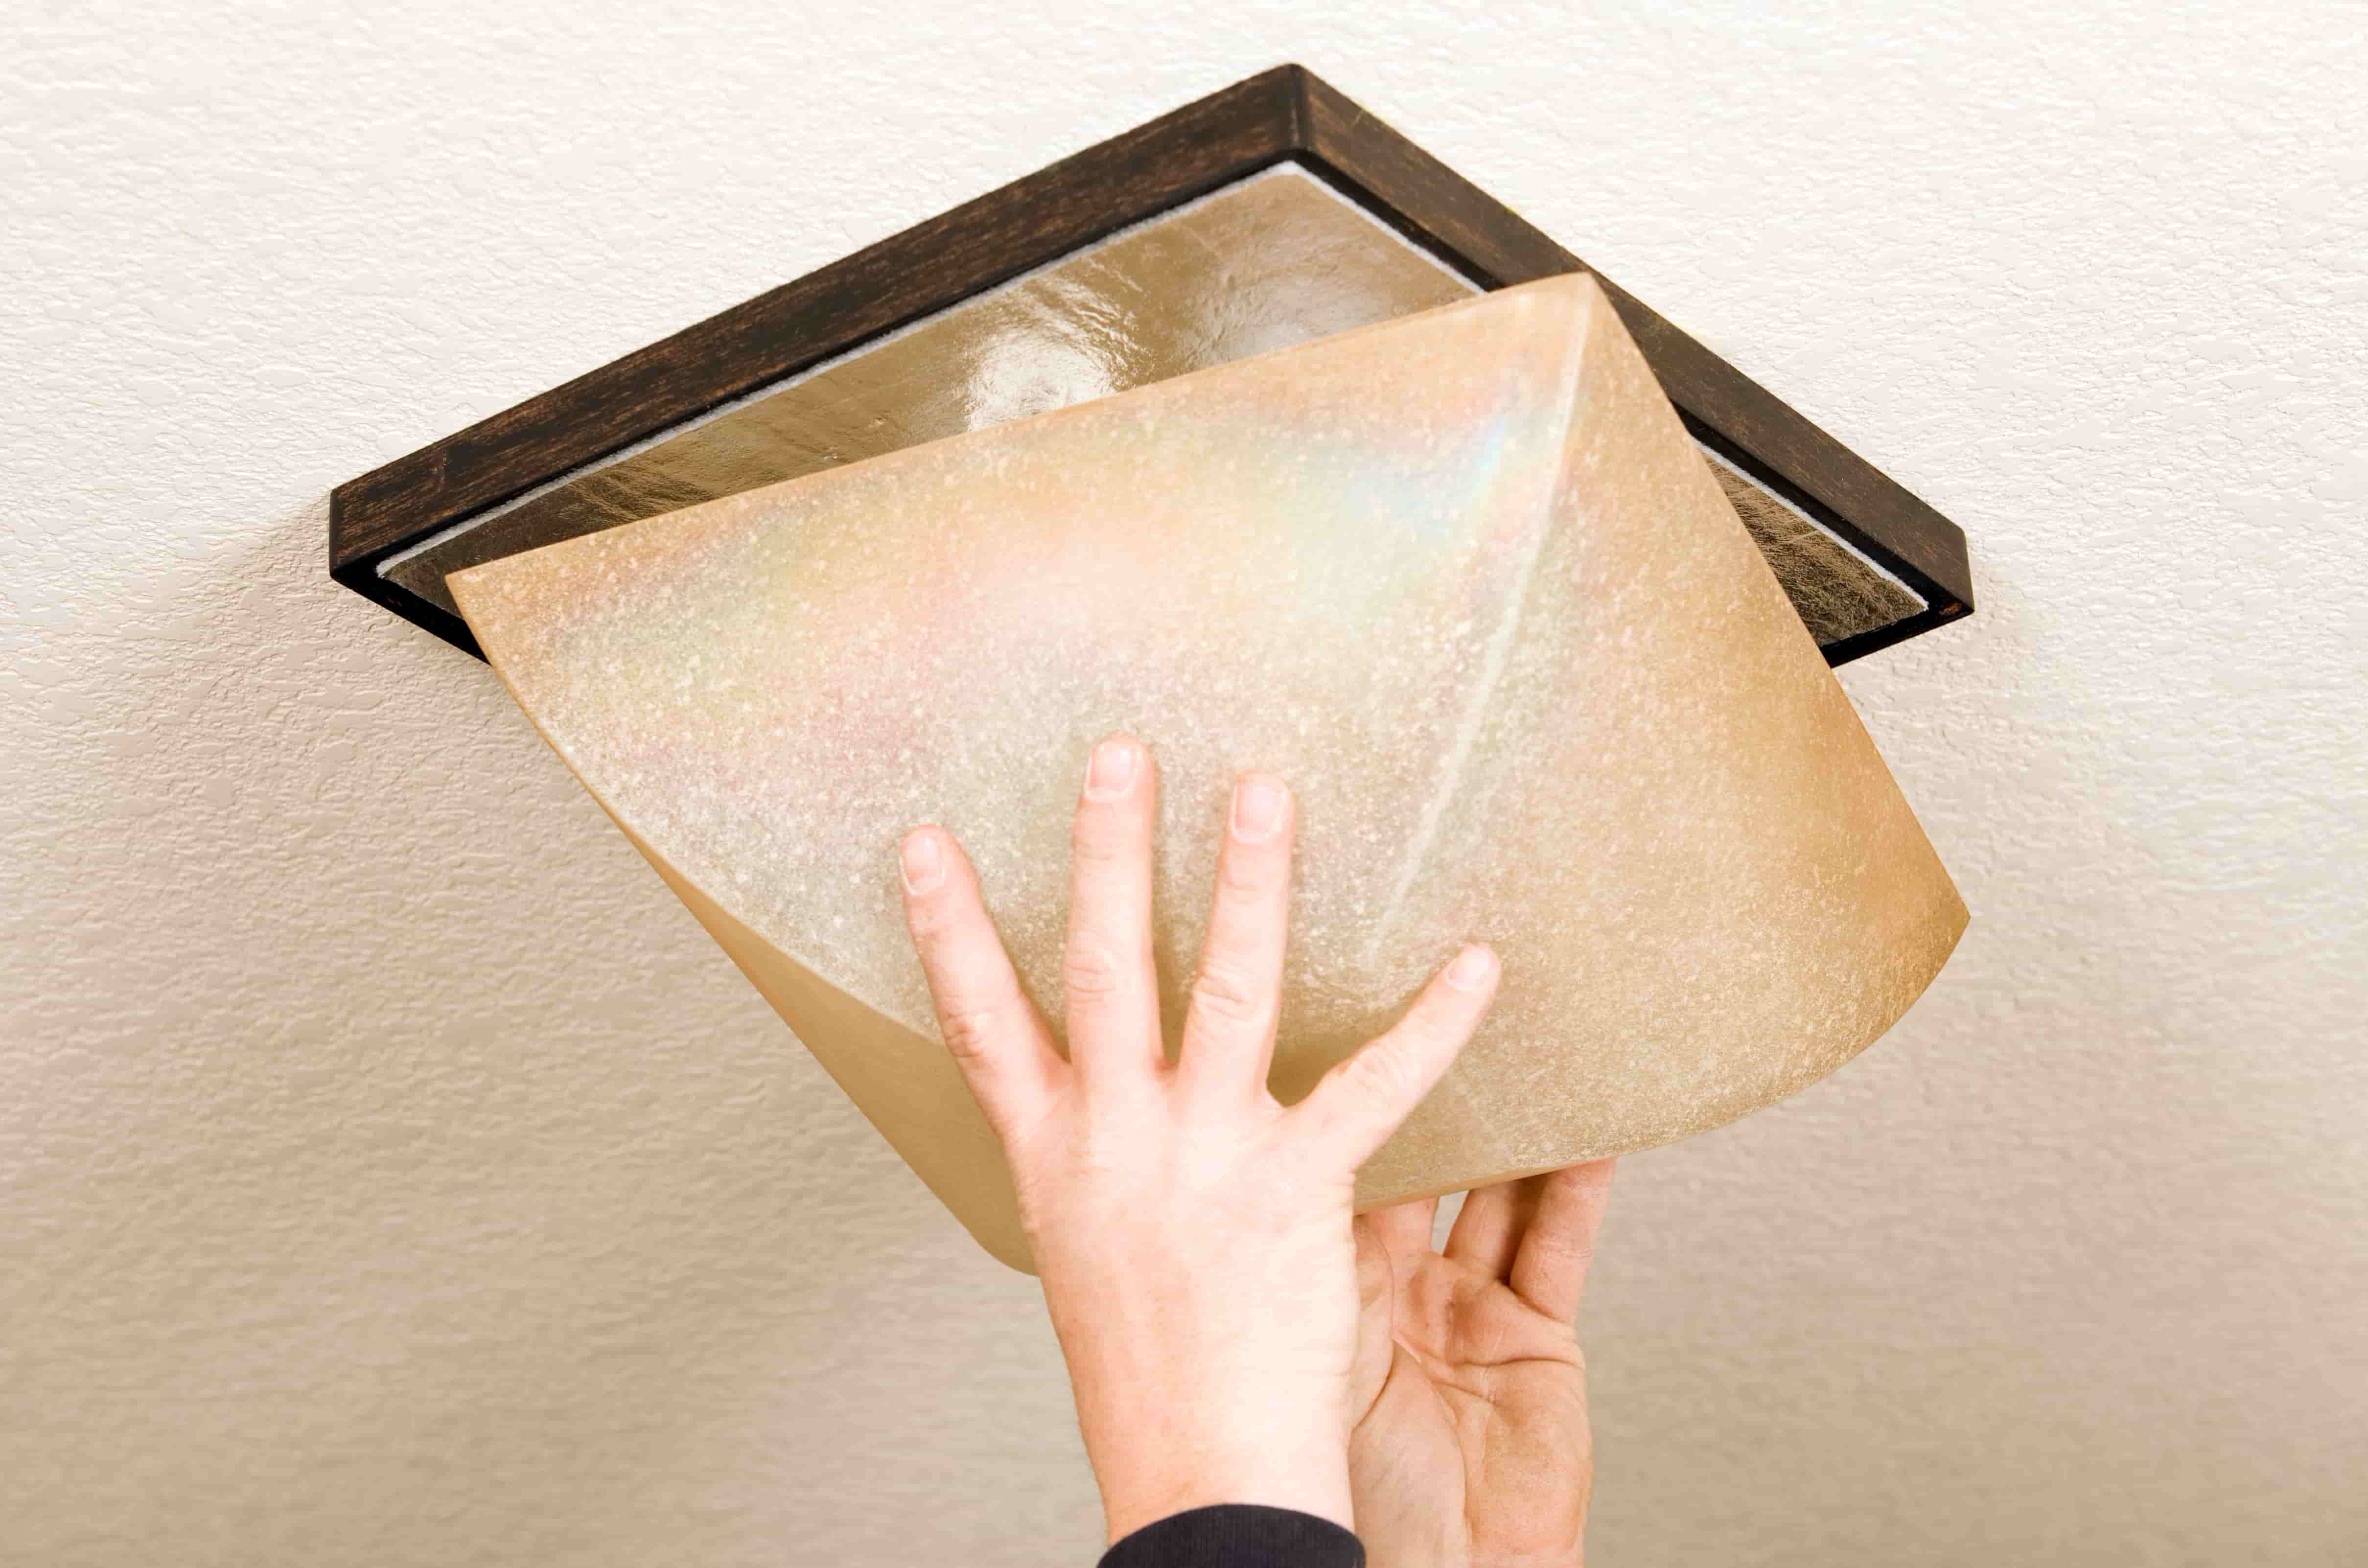
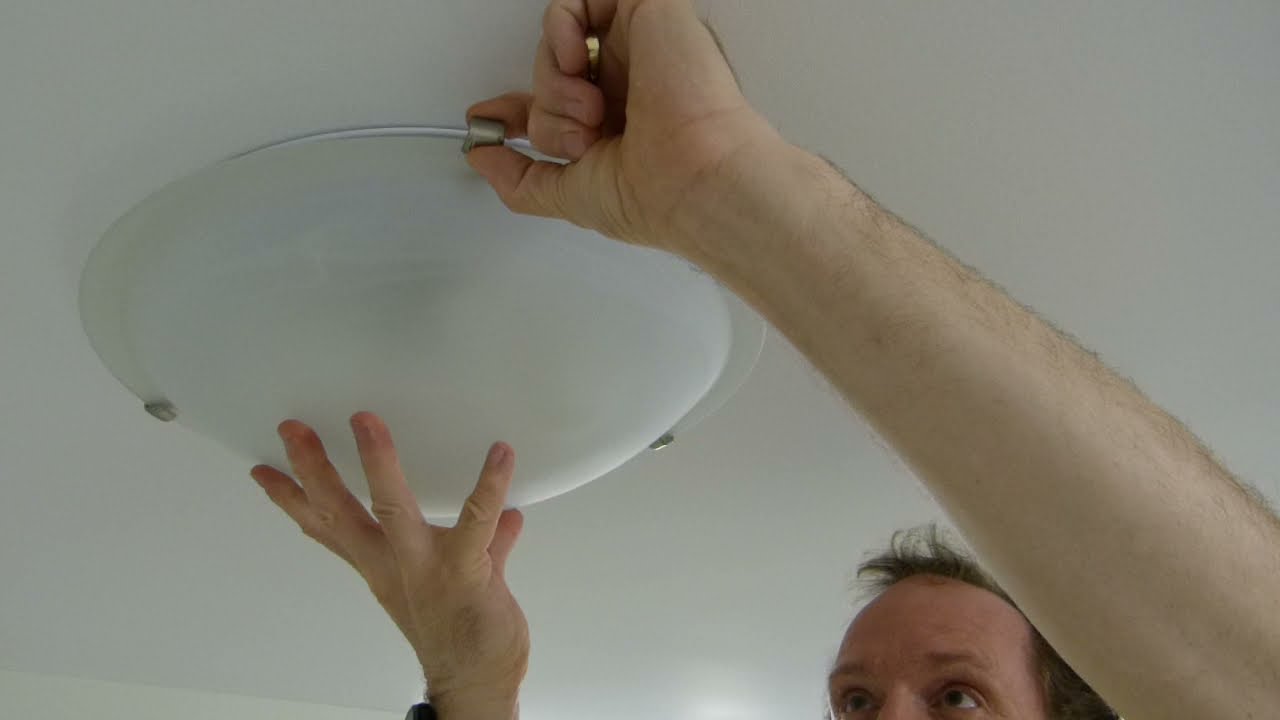
Step 3: Lower the cover
With the screws, clips, or twist-and-lock mechanism successfully addressed, the next pivotal stage in removing the ceiling light cover involves carefully lowering it from its position. This step requires a steady and controlled approach to ensure that the cover is safely detached without causing any damage to the fixture or the surrounding area.
When preparing to lower the cover, it is essential to maintain a firm grip and provide adequate support to prevent any sudden movements or accidental drops. Depending on the size and weight of the cover, it may be necessary to enlist the assistance of another person to ensure a smooth and coordinated removal process.
If the cover is made of glass or another fragile material, it is crucial to exercise extra caution and handle it with care to avoid breakage. Slowly and steadily lower the cover, keeping it level to prevent any tilting or uneven distribution of weight. By maintaining a controlled descent, you can minimize the risk of accidental damage and ensure that the cover is safely removed from the fixture.
In the case of larger or heavier covers, it may be necessary to support it from multiple points to distribute the weight evenly. This approach helps to prevent strain on any specific area of the cover and reduces the likelihood of it slipping or becoming unbalanced during the lowering process.
As the cover is carefully lowered, it is important to be mindful of any protruding elements or components within the fixture that may come into contact with the cover. By maintaining a clear line of sight and observing the positioning of the cover, you can navigate any potential obstructions and ensure a smooth and unhindered removal process.
Once the cover has been fully lowered and detached from the fixture, it should be placed in a secure and stable location, away from the immediate work area. This prevents any accidental tripping hazards or interference with subsequent steps in the maintenance, cleaning, or adjustment process.
By successfully completing the process of lowering the cover, you have achieved a significant milestone in the removal process, bringing you closer to accessing the interior of the fixture for your intended maintenance or cleaning tasks. With the cover safely removed, you are now ready to proceed to the next stages, confident in your ability to navigate the removal process with precision and care.
Step 4: Clean the cover
Once the ceiling light cover has been successfully removed, it presents an opportune moment to address any accumulated dust, debris, or smudges that may have diminished its clarity and luminosity. Cleaning the cover is a crucial aspect of maintaining the overall aesthetics and functionality of the fixture, ensuring that it continues to illuminate your space effectively.
To commence the cleaning process, it is advisable to inspect the cover for any visible dirt, grime, or stains. Depending on the material of the cover, such as glass, plastic, or metal, different cleaning methods may be employed to achieve optimal results without causing damage.
For glass covers, a gentle glass cleaner or a solution of mild dish soap and water can be utilized to remove smudges and fingerprints. Using a soft, lint-free cloth, apply the cleaning solution in a circular motion, ensuring thorough coverage of the entire surface. Care should be taken to avoid excessive pressure or abrasive materials that could scratch or mar the glass.
In the case of plastic covers, a similar approach can be employed, utilizing a mild solution of dish soap and water to gently cleanse the surface. It is important to use a non-abrasive cloth to prevent scratching and to avoid harsh chemical cleaners that may cause discoloration or damage to the plastic.
For metal covers, a damp cloth with a mild cleaning solution can be used to wipe away any accumulated dust or grime. It is essential to dry the metal surface thoroughly to prevent water spots or tarnishing, maintaining its luster and visual appeal.
In situations where the cover exhibits stubborn stains or residue, a specialized cleaner formulated for the specific material may be employed. It is crucial to follow the manufacturer's recommendations and test the cleaner on a small, inconspicuous area of the cover to ensure compatibility and prevent any adverse effects.
Once the cleaning process is complete, it is important to dry the cover thoroughly to prevent water spots or streaks from affecting its clarity. A clean, dry cloth can be used to gently pat the surface and remove any residual moisture, ensuring that the cover is pristine and ready for reattachment to the fixture.
By dedicating attention to cleaning the cover, you not only enhance its visual appeal but also contribute to the overall illumination quality of the ceiling light. With the cover now refreshed and free from any accumulated debris, you are poised to reattach it to the fixture, completing the maintenance process and restoring the full radiance of your lighting installation.
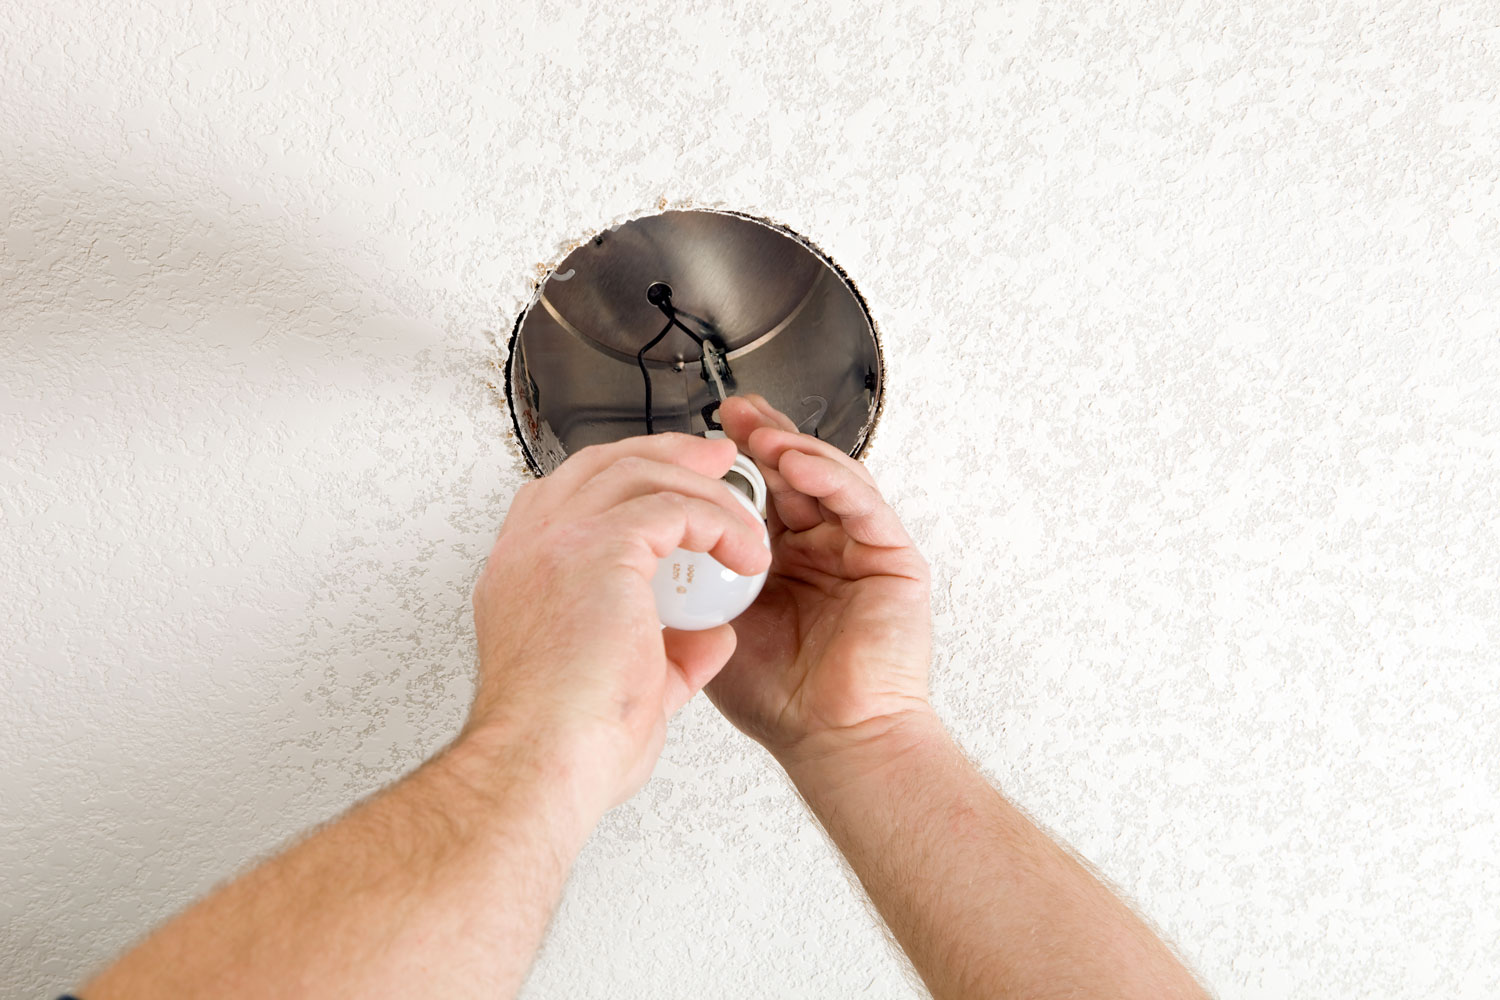
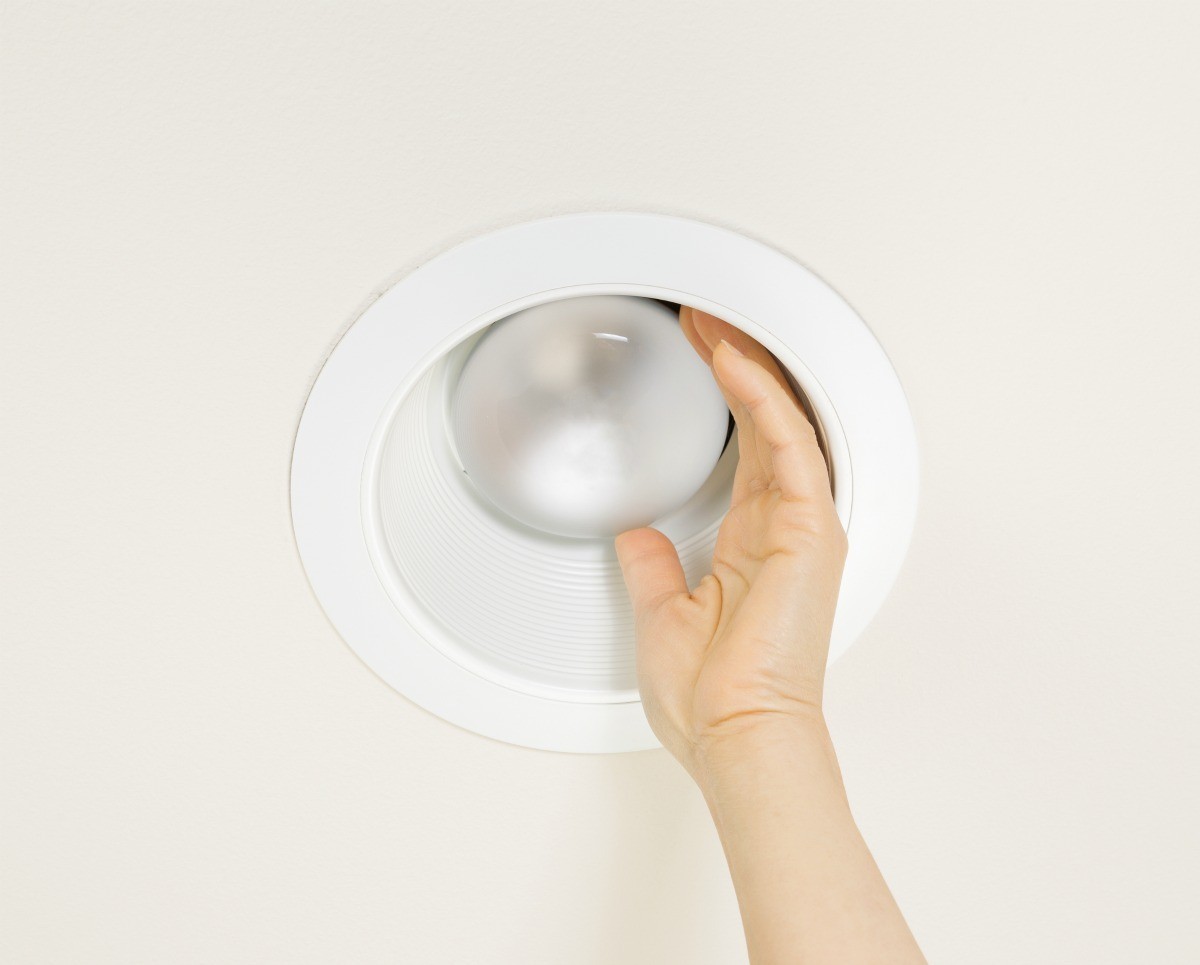
Before removing a ceiling light cover, make sure to turn off the power to the light at the circuit breaker. Then, carefully unscrew or unclip the cover to access the light bulb or fixture inside. Be gentle to avoid damaging the cover or the light.
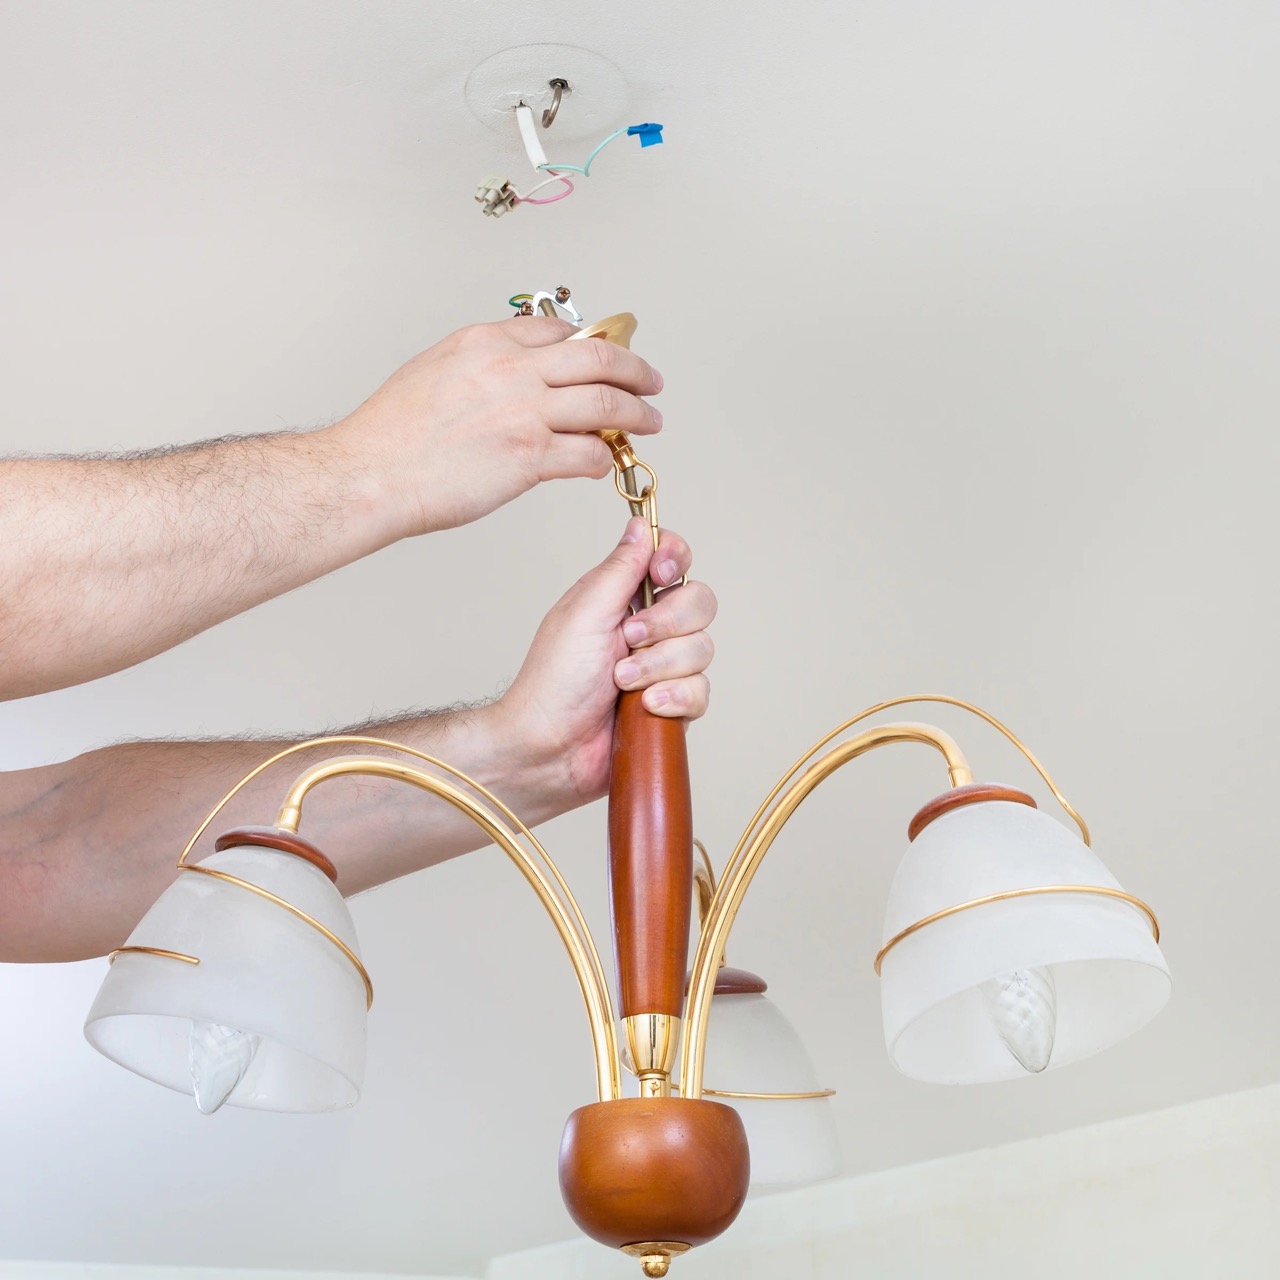
Step 5: Reattach the cover
Reattaching the ceiling light cover is the final step in the process of removing and maintaining the fixture. This stage is crucial for restoring the functionality and visual appeal of the lighting installation, ensuring that the cover is securely positioned and ready to illuminate your space effectively.
To begin the reattachment process, carefully lift the cleaned cover and position it in alignment with the fixture. It is important to ensure that the cover is oriented correctly, matching any specific grooves or alignment markers that facilitate a secure fit. By maintaining a steady grip and a clear line of sight, you can position the cover accurately, preparing it for the final securing steps.
If the cover is secured by screws, gently align it with the designated screw holes on the fixture. Using a suitable screwdriver, carefully insert and tighten each screw, ensuring that the cover is held firmly in place. It is important to exercise caution and avoid over-tightening the screws, as this may lead to damage or misalignment of the cover.
In the case of covers secured by clips, carefully position the cover and engage the clips by pressing or sliding them into their locked position. It is essential to verify that each clip is securely fastened, providing a stable and reliable hold for the cover. By confirming the proper engagement of the clips, you can ensure that the cover is firmly attached and ready for use.
For covers featuring a twist-and-lock mechanism, carefully align the cover with the fixture and rotate it in the designated direction to lock it in place. This method typically involves a quarter-turn or similar motion to secure the cover, ensuring that it remains steadfast and stable.
Once the cover has been successfully reattached, it is important to conduct a visual inspection to confirm its secure positioning and alignment with the fixture. By verifying that the cover is firmly in place and free from any wobbling or misalignment, you can ensure that it is ready to fulfill its role in illuminating your space.
With the cover securely reattached, the final step involves restoring the power to the ceiling light fixture. Return to the circuit breaker or fuse box and switch the power back on, allowing the light to illuminate once again. By confirming that the fixture is operational, you can validate the successful reattachment of the cover and celebrate the completion of the maintenance process.
By following these steps to reattach the cover, you can confidently conclude the process of removing and maintaining the ceiling light fixture, ensuring that it continues to enhance your space with its radiant illumination.
Frequently Asked Questions about How Do You Remove A Ceiling Light Cover
Was this page helpful?
At Storables.com, we guarantee accurate and reliable information. Our content, validated by Expert Board Contributors, is crafted following stringent Editorial Policies. We're committed to providing you with well-researched, expert-backed insights for all your informational needs.


0 thoughts on “How Do You Remove A Ceiling Light Cover”