Articles
How To Wire Dimmable LED Ceiling Lights
Modified: October 19, 2024
Discover the best articles on how to wire dimmable LED ceiling lights and make the most of your lighting setup. Find expert tips and step-by-step instructions to ensure a successful installation.
(Many of the links in this article redirect to a specific reviewed product. Your purchase of these products through affiliate links helps to generate commission for Storables.com, at no extra cost. Learn more)
Introduction
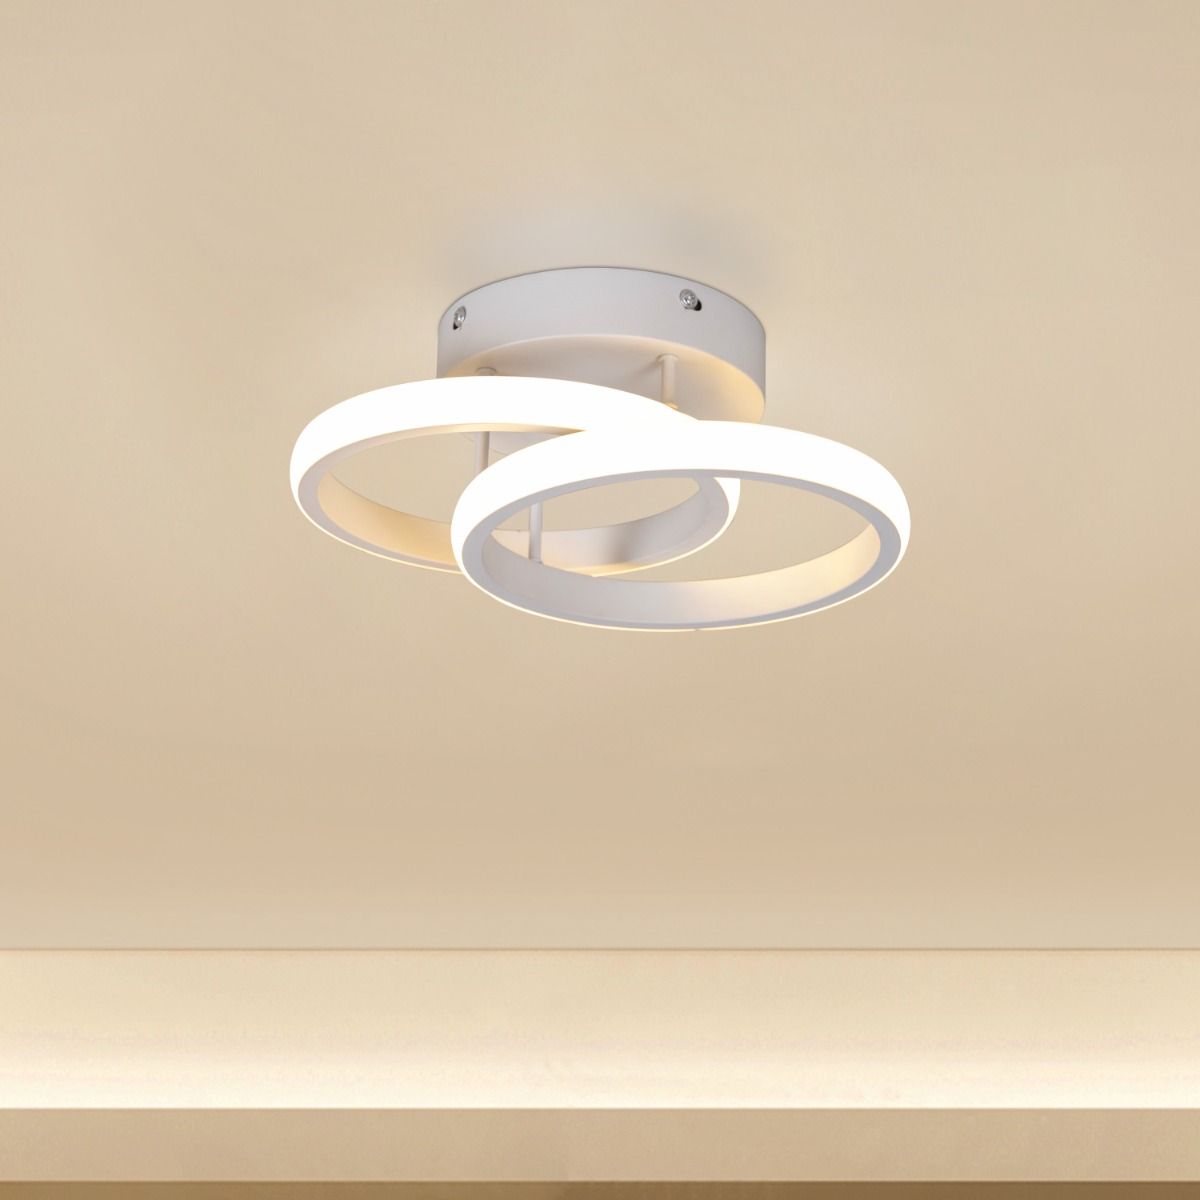
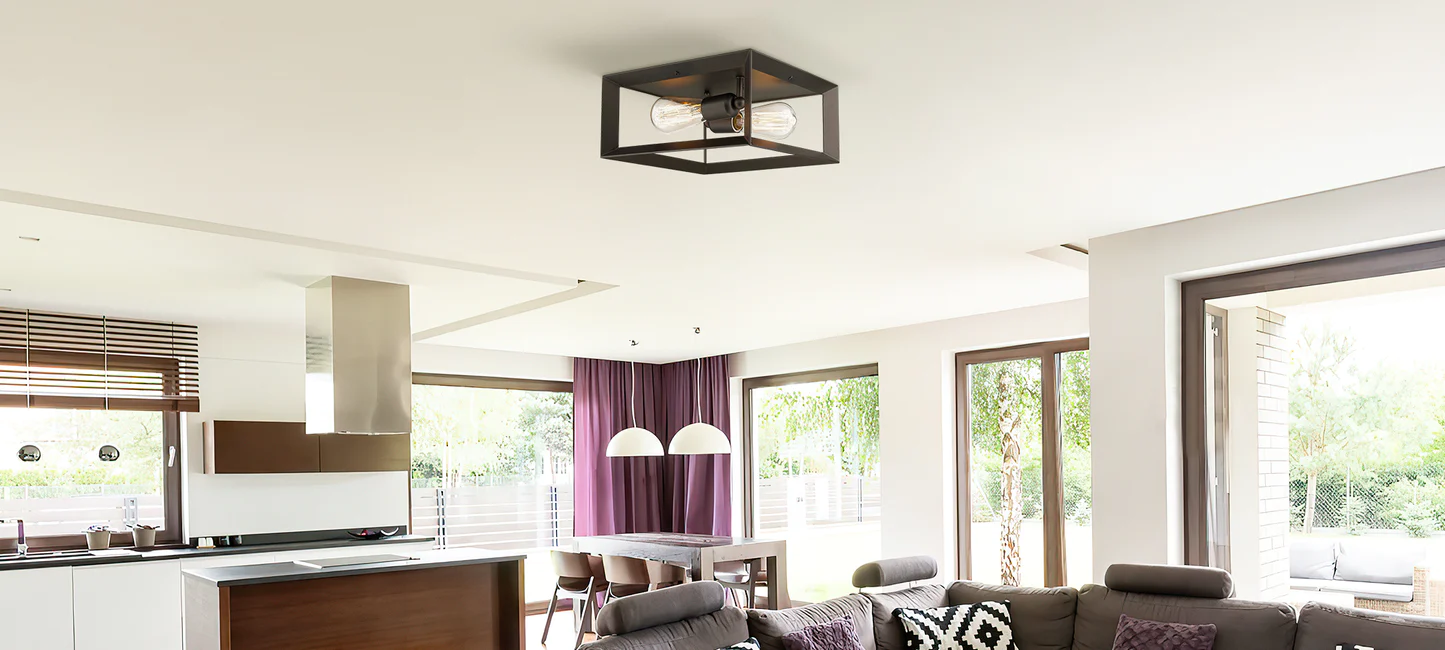
Welcome to the world of dimmable LED ceiling lights! These innovative lighting fixtures offer not only bright and efficient illumination but also the flexibility to adjust the light intensity to suit your mood and needs. Whether you want to create a cozy ambiance or bright working environment, dimmable LED ceiling lights provide the perfect solution.
In this article, we will guide you through the process of wiring dimmable LED ceiling lights. With a few simple steps and the right tools, you can enjoy the benefits of customizable lighting in your home or workspace.
Before we dive into the installation process, let’s take a moment to understand what exactly dimmable LED ceiling lights are and how they work.
Key Takeaways:
- Dimmable LED ceiling lights offer customizable illumination, energy efficiency, and a modern aesthetic. Prioritize safety, follow installation steps, and enjoy the benefits of versatile lighting in your space.
- Ensure compatibility, test functionality, and seek professional assistance if needed. With proper installation and testing, dimmable LED ceiling lights provide the perfect ambiance for any occasion.
Read more: How To Wire A Ceiling Light
Understanding Dimmable LED Ceiling Lights
Dimmable LED ceiling lights are a type of lighting fixture that combines the energy efficiency of LED technology with the ability to adjust the brightness. Unlike traditional incandescent or fluorescent lights, which can only be turned on or off, dimmable LED ceiling lights offer a range of brightness levels that can be controlled to create the desired lighting ambiance.
The main advantage of dimmable LED ceiling lights is their versatility. They can be dimmed or brightened to suit different activities or moods. For example, you can dim the lights to create a relaxing atmosphere for movie nights or increase the brightness for tasks that require focused attention, such as reading or cooking.
These lights work by using a dimmer switch, which regulates the electrical current flowing to the LEDs. The switch controls the amount of electricity supplied to the lights, thus controlling the brightness. Most dimmable LED ceiling lights are compatible with both standard on-off switches and specialized dimmer switches.
It is important to note that not all LED lights are dimmable. Before purchasing LED ceiling lights, make sure they are specifically designed for dimming. Dimmable LED lights usually come with a dimmable driver or dimming capability built into the fixture to ensure smooth dimming functionality.
Dimmable LED ceiling lights offer a plethora of benefits. Firstly, they are highly energy-efficient, consuming significantly less power compared to traditional lighting options. This not only helps reduce electricity bills but also contributes to a greener and more sustainable environment.
Furthermore, dimmable LED lights have a longer lifespan compared to incandescent or fluorescent lights. With an average lifespan of 25,000 to 50,000 hours, they require less frequent replacement, resulting in cost savings in the long run.
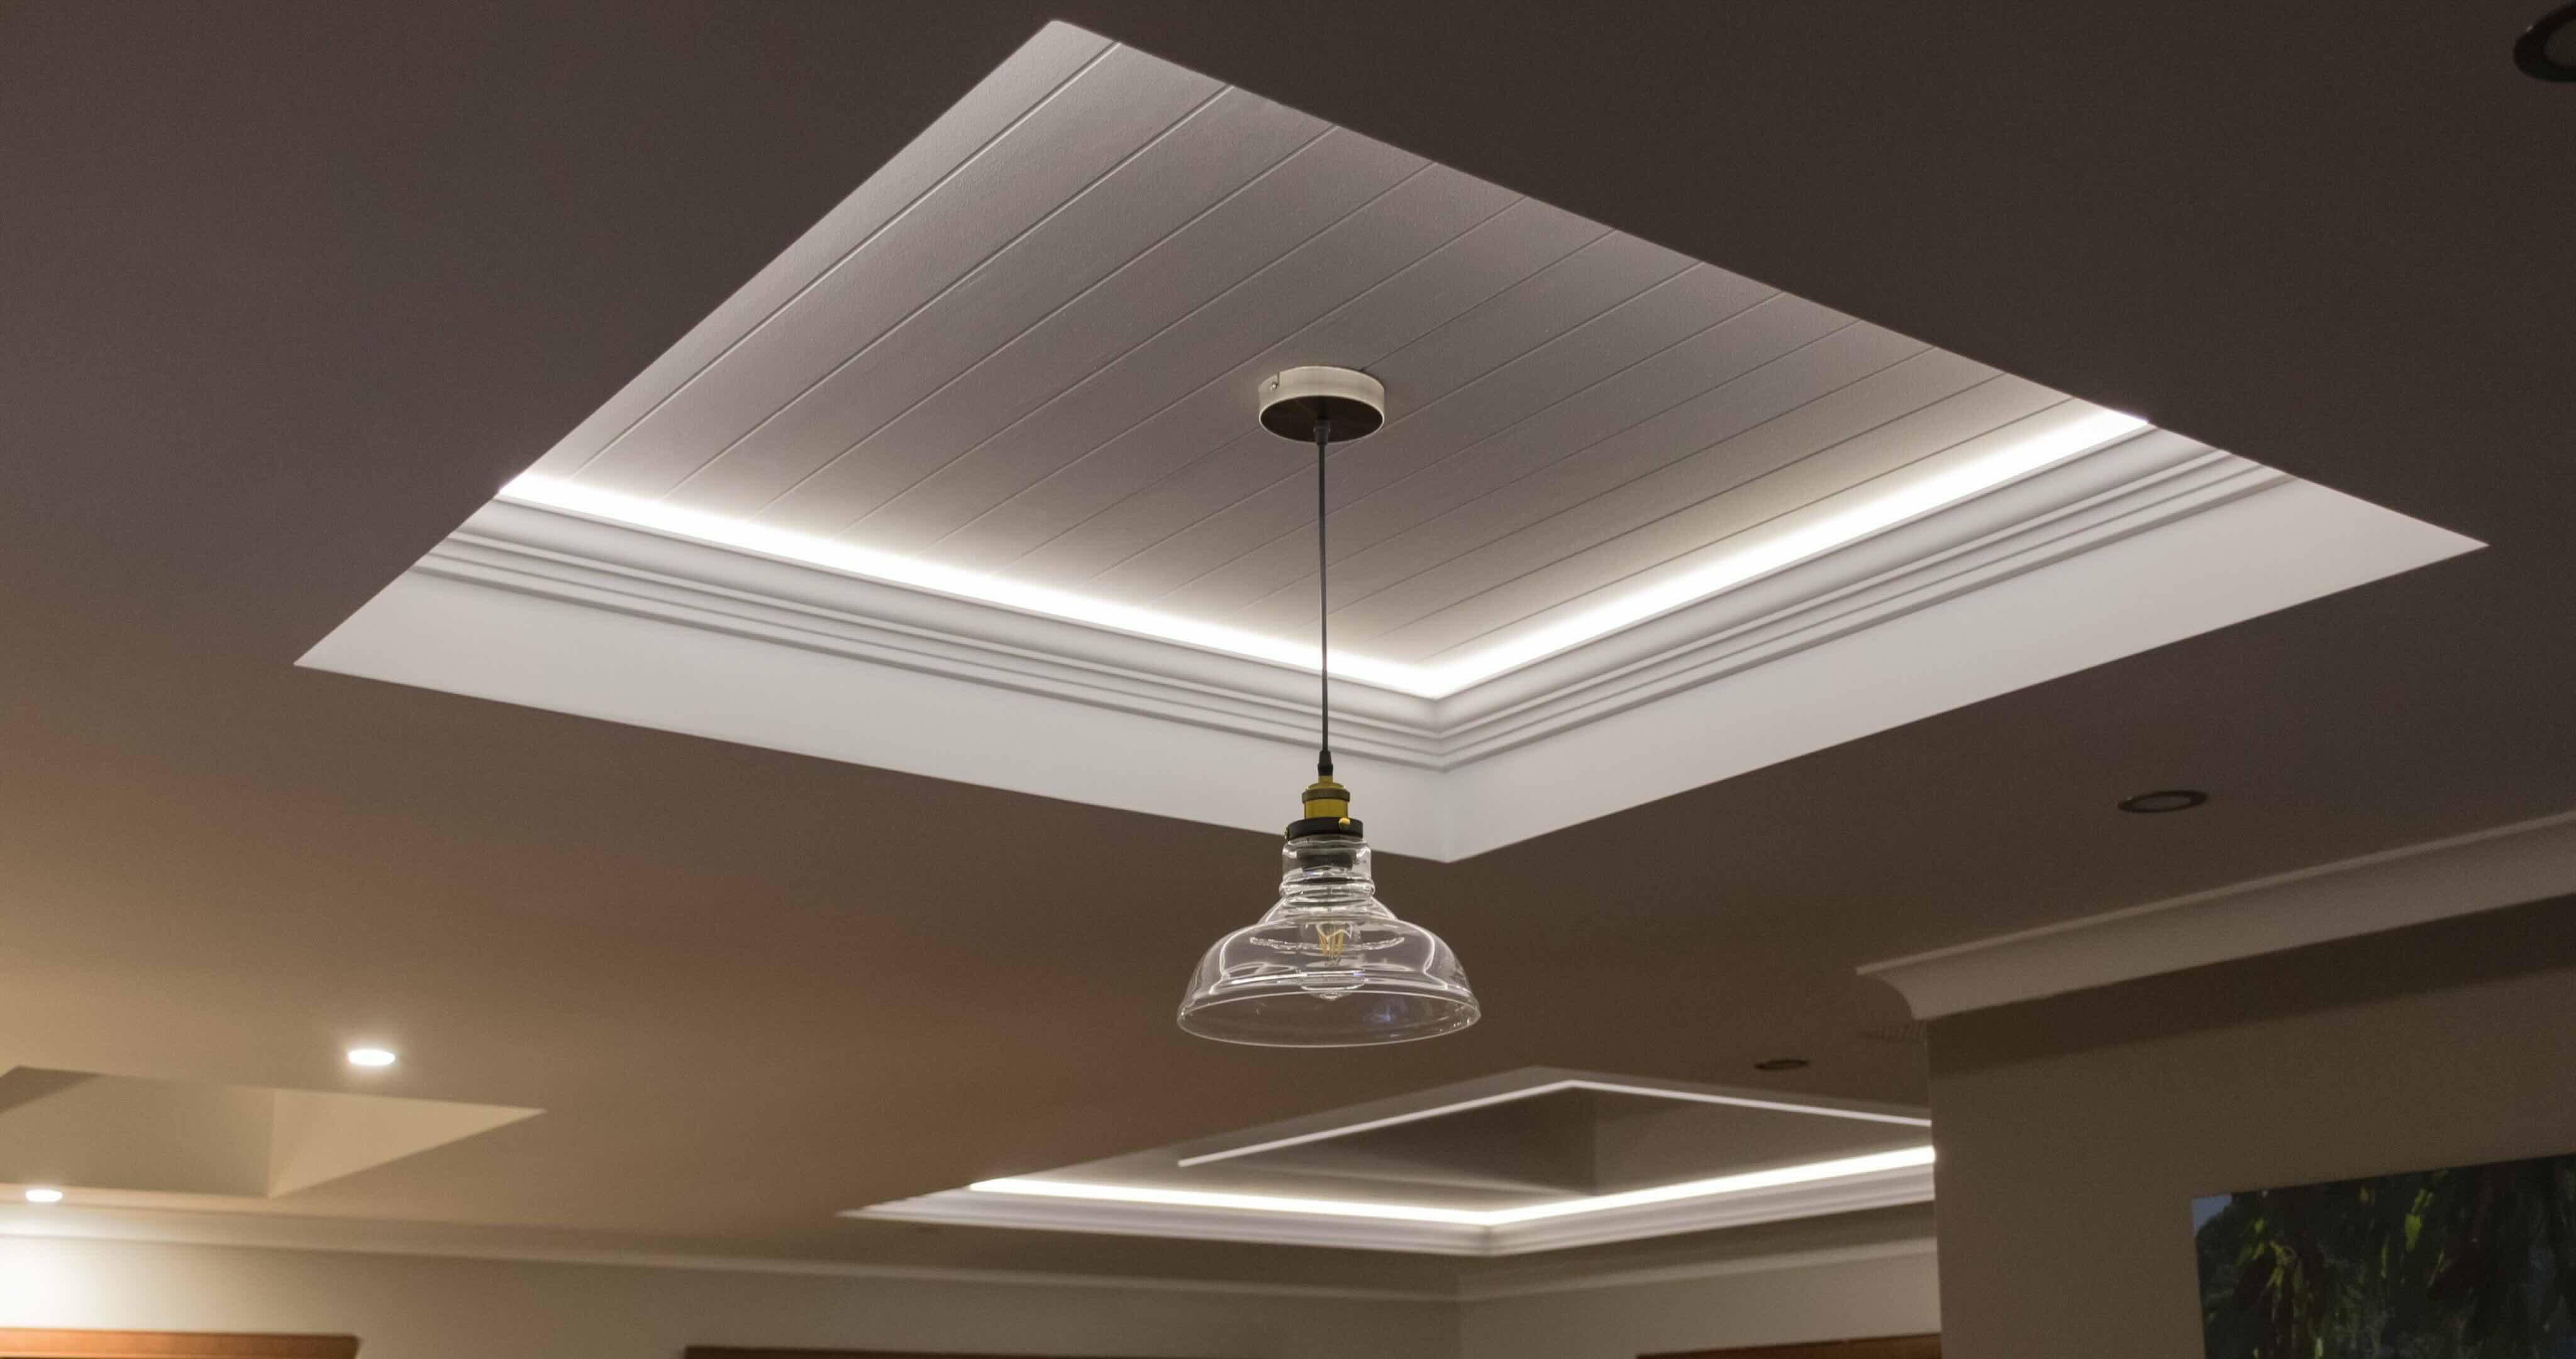
In terms of aesthetics, dimmable LED ceiling lights provide a sleek and modern look to any space. They are available in various designs, sizes, and color temperatures, allowing you to select the perfect lighting style to complement your interior décor.
Now that you have a better understanding of dimmable LED ceiling lights, it’s time to gather the necessary tools and equipment to begin the installation process. Let’s move on to the next section.
Tools and Equipment Needed
Before you start wiring dimmable LED ceiling lights, make sure you have the following tools and equipment on hand:
- Wire strippers: These are used to strip the insulation from the electrical wires.
- Voltage tester: This tool is essential for ensuring that the power is turned off before working on the wiring.
- Screwdriver: You will need a screwdriver to remove the existing light fixture and install the dimmer switch.
- Wire connectors: These are used to connect the wires together securely.
- Dimmer switch: Make sure to choose a dimmer switch that is compatible with dimmable LED lights. Check the packaging or consult with a lighting professional to ensure compatibility.
- Dimmable LED ceiling lights: Purchase the desired number of LED ceiling lights that are specifically designed for dimming.
- Electrical tape: This is used to secure and insulate the exposed wires after making the connections.
- Ladder or step stool: Depending on the height of your ceiling, you may need a ladder or step stool to reach the ceiling light fixture.
It’s important to have all the necessary tools and equipment ready before you begin the installation process. This will ensure a smooth and efficient installation and reduce any potential delays or interruptions.
Once you have gathered all the required tools and equipment, it’s time to move on to the next step: safety precautions. Ensuring your safety and the safety of your property is of utmost importance when working with electricity. Let’s proceed to the next section to learn about the safety measures you should take.
Step 1: Safety Precautions
Before you begin the process of wiring dimmable LED ceiling lights, it is crucial to prioritize safety. Dealing with electrical wiring carries risks, so it’s important to take the necessary precautions to protect yourself and your property. Follow these safety guidelines:
- Turn off the power: Before you start working on any electrical installation, turn off the power supply to the area where you will be working. Locate the circuit breaker or fuse box and switch off the appropriate circuit. To ensure the power is off, use a voltage tester to check for any live wires.
- Use personal protective equipment (PPE): Wear appropriate PPE, such as safety goggles and gloves, to protect yourself from potential hazards. It’s better to be safe than sorry, so make sure you are comfortably dressed and taking necessary precautions.
- Work in a well-ventilated area: Ensure that the area where you are working is well-ventilated to prevent the accumulation of fumes or gases.
- Follow local electrical codes: Familiarize yourself with the electrical codes and regulations in your area. Adhere to these guidelines to ensure that the installation is safe and meets the required standards.
- Avoid water and moisture: Keep in mind that electricity and water do not mix. Work in dry conditions and avoid installing lighting fixtures in areas prone to moisture, such as bathrooms or outdoors.
- Work with a partner: If possible, have someone assist you during the installation process. They can provide an extra set of eyes and hands, making the process safer and more efficient.
- Seek professional help if unsure: If you are uncertain or uncomfortable working with electrical wiring, it’s best to consult with a licensed electrician. They have the expertise and knowledge to ensure a safe and proper installation.
By following these safety precautions, you can minimize the risks associated with working with electricity and create a safe environment for installing dimmable LED ceiling lights. Now that you have taken the necessary safety measures, let’s move on to the next step: turning off the power supply.
Step 2: Turn off the Power
Now that you have taken the necessary safety precautions, it’s time to turn off the power before working on the wiring. This step is crucial to ensure your safety and prevent any electrical accidents. Follow these steps to turn off the power:
- Locate the circuit breaker or fuse box: The circuit breaker or fuse box is usually located in the basement, utility room, or garage. Identify the circuit that supplies power to the area where you will be working.
- Switch off the appropriate circuit: Once you have located the circuit, switch it off. For circuit breakers, flip the switch to the “off” position. For fuse boxes, remove the fuse corresponding to the circuit you are working on. If you are unsure which circuit serves the area, switch off the main circuit to ensure complete power shutdown.
- Verify the power is off: Before proceeding, it is essential to verify that the power is indeed turned off. You can do this by using a voltage tester. Place the tester against the wires or terminals to ensure that there is no electrical current flowing. If the tester indicates no voltage, it is safe to proceed. If the tester indicates voltage, double-check your breaker/fuse box and try again.
- Communicate with others: If there are other people in the vicinity, inform them that you will be working on the electrical system and that the power is turned off. This helps prevent accidental re-energizing of the circuit while you are working on it.
By following these steps, you can ensure that the power is completely turned off before beginning the installation process. Remember, working with live electrical connections can be extremely dangerous, so it’s crucial to take these precautions to protect yourself and others. Once you have confirmed that the power is off, you can proceed to the next step: removing the existing ceiling light.
Read more: What Does A Dimmable Light Bulb Mean?
Step 3: Remove the Existing Ceiling Light
Now that the power is turned off, it’s time to remove the existing ceiling light fixture. Follow these steps to safely remove the fixture:
- Remove the light bulb(s): Start by unscrewing and removing any light bulbs from the fixture. This will prevent any accidental breakage or damage to the bulbs during the removal process.
- Remove the screws or mounting hardware: Most ceiling light fixtures are secured with screws or mounting hardware. Use a screwdriver or appropriate tool to remove these screws or hardware from the fixture.
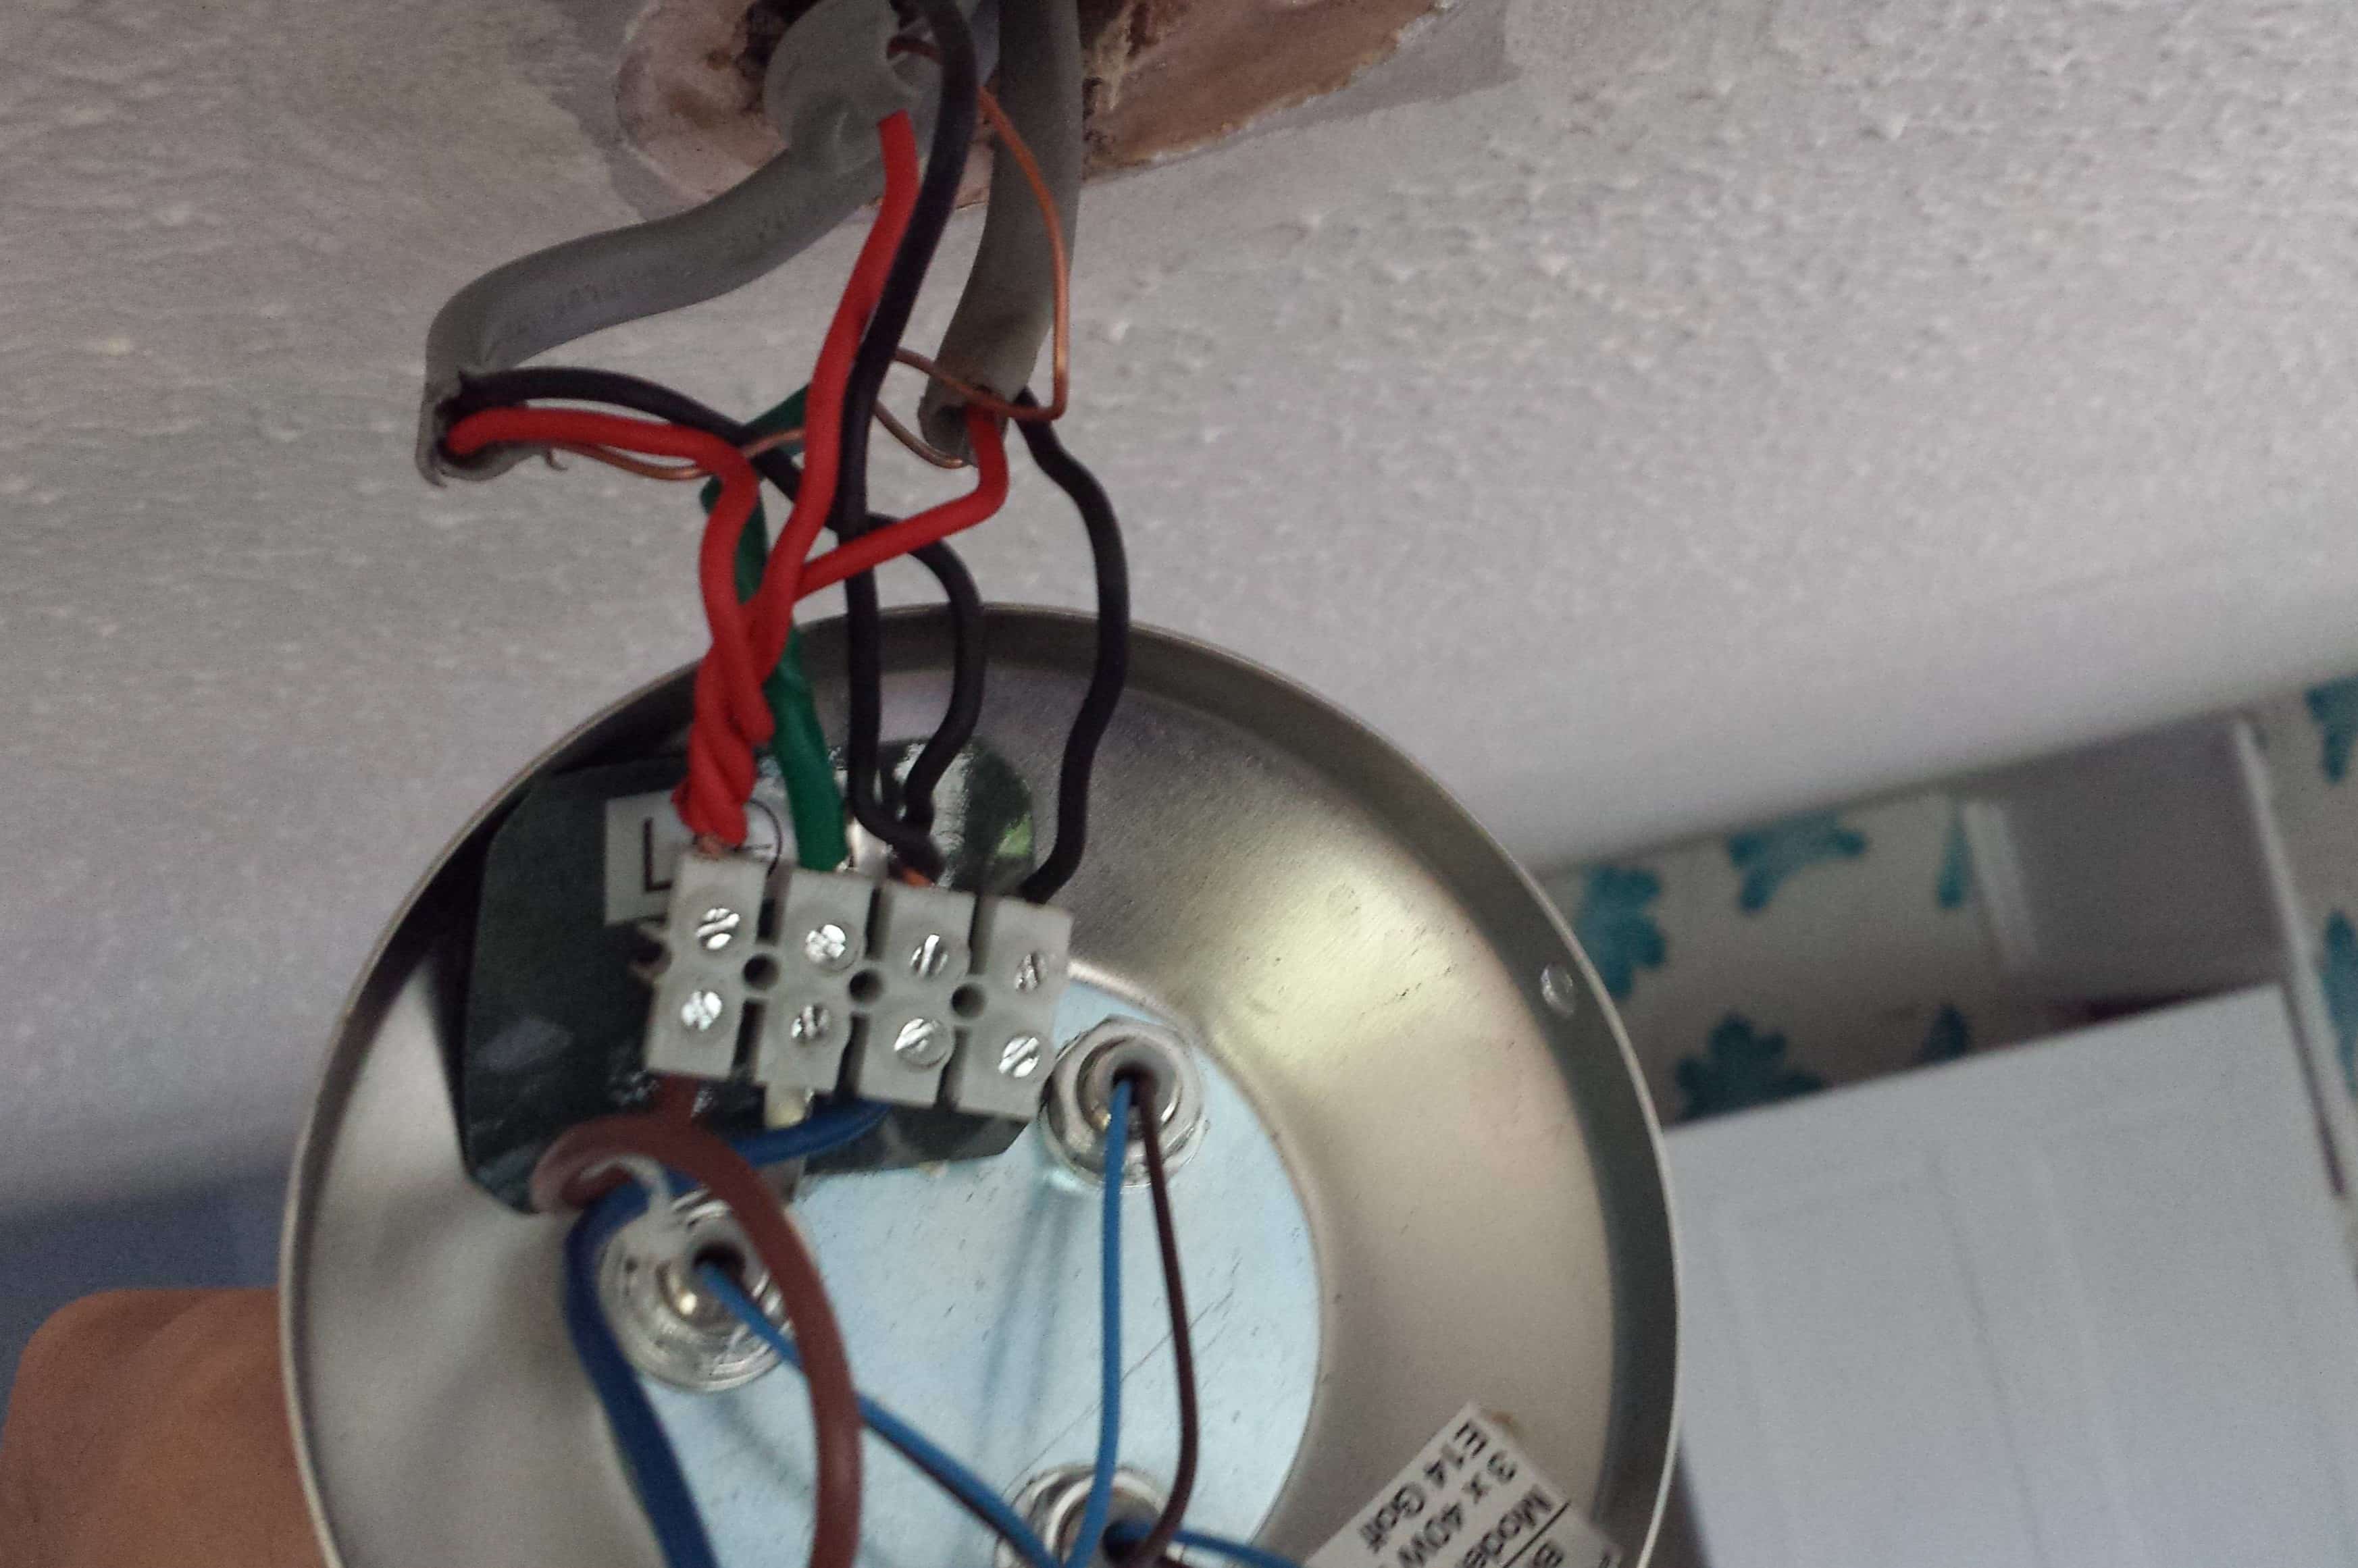
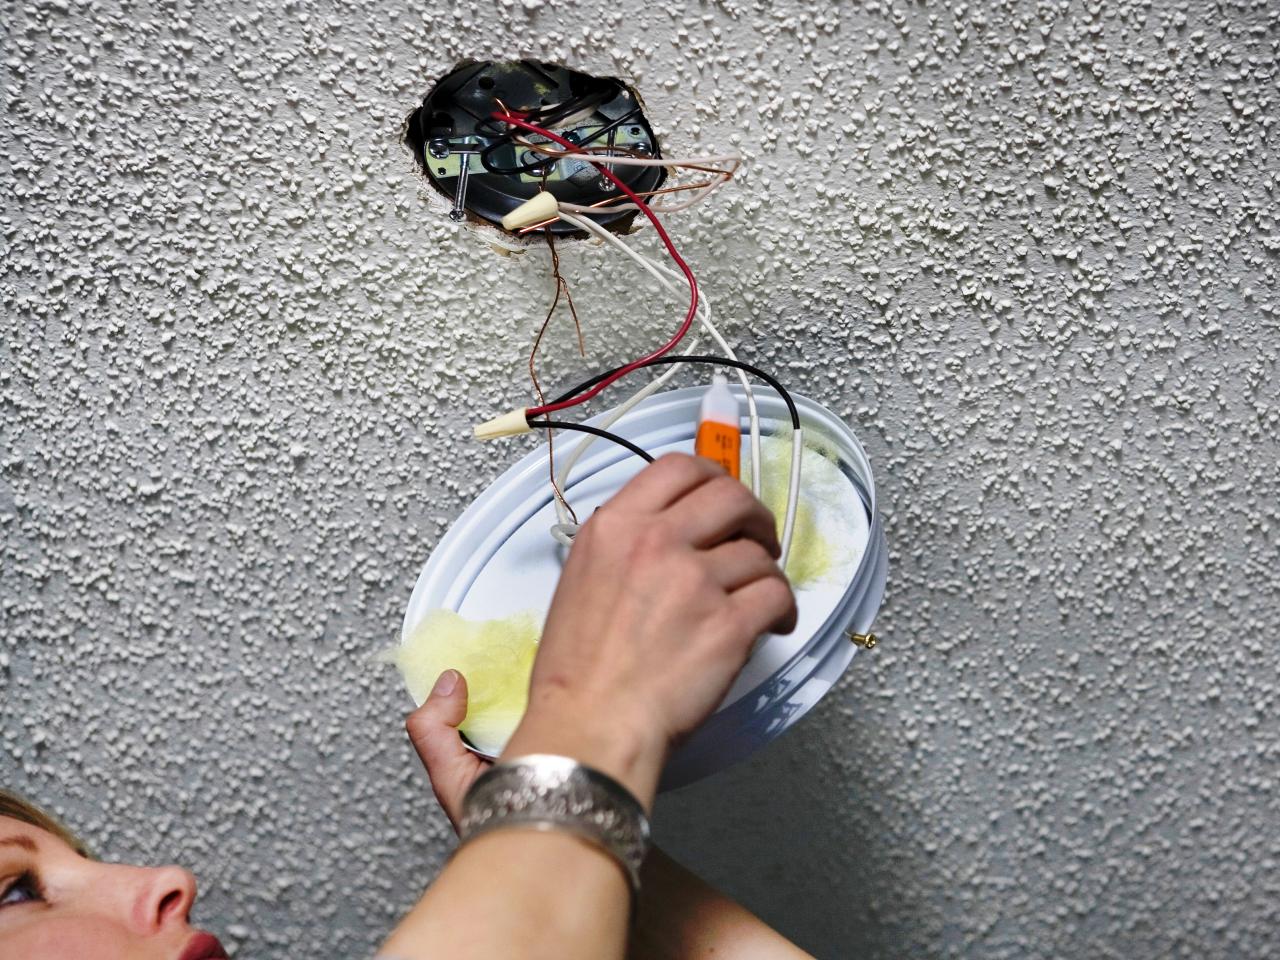
- Disconnect the wiring connections: Carefully disconnect the wiring connections that are attached to the existing fixture. Depending on the type of fixture, there may be multiple wires to disconnect. Use your wire strippers to remove any wire nuts or electrical tape covering the wire connections.
- Support the fixture: Once the wiring connections are disconnected, securely hold the fixture to prevent it from falling when fully removed. Some fixtures may be lightweight, while others may require additional support.
- Remove the fixture: With the wiring connections detached and the fixture supported, gently twist or unscrew the fixture from its mounting bracket or base. Take caution and ensure that the fixture is securely detached before fully removing it from the ceiling.
- Inspect and clean the area: After removing the fixture, inspect the ceiling area for any damage or loose wiring. Clean the area by removing any dust or debris that may have accumulated over time.
It’s important to handle the existing ceiling light fixture with care and attention to detail. If you encounter any difficulties or are unsure of how to safely remove the fixture, consult the manufacturer’s instructions or seek assistance from a licensed electrician.
With the existing ceiling light fixture successfully removed, you are ready to proceed to the next step: installing the dimmer switch. We will guide you through the process in the next section.
When wiring dimmable LED ceiling lights, make sure to use a compatible dimmer switch that is specifically designed for LED lighting. This will ensure smooth dimming and prevent any flickering or buzzing.
Step 4: Install the Dimmer Switch
With the existing ceiling light fixture removed, it’s time to install the dimmer switch. The dimmer switch allows you to control the brightness of the dimmable LED ceiling lights. Follow these steps to install the dimmer switch:
- Read the instructions: Before starting the installation, carefully read the manufacturer’s instructions that come with the dimmer switch. Familiarize yourself with any specific installation requirements or precautions.
- Ensure compatibility: Confirm that the dimmer switch you have purchased is compatible with dimmable LED lights. Check the packaging or consult the manufacturer to ensure the switch is suitable for your specific lighting requirements.
- Turn off the power: Double-check that the power to the circuit is switched off. Use a voltage tester to confirm that there is no electrical current flowing to the wires.
- Remove the existing switch cover: Use a screwdriver to remove the screws holding the switch cover in place. Carefully remove the cover to expose the switch and wiring.
- Disconnect the old switch: Using a screwdriver, loosen the screws that secure the electrical wires to the existing switch. Gently disconnect the wires from the switch, taking note of their positions.
- Prepare the dimmer switch: If necessary, remove the faceplate from the dimmer switch. Attach the wires from the switch to the corresponding wires in the electrical box, following the manufacturer’s instructions. Make sure to connect the ground wire as well.
- Secure the dimmer switch: Once the wires are connected, carefully tuck them back into the electrical box. Secure the dimmer switch to the box by using the screws provided with the switch.
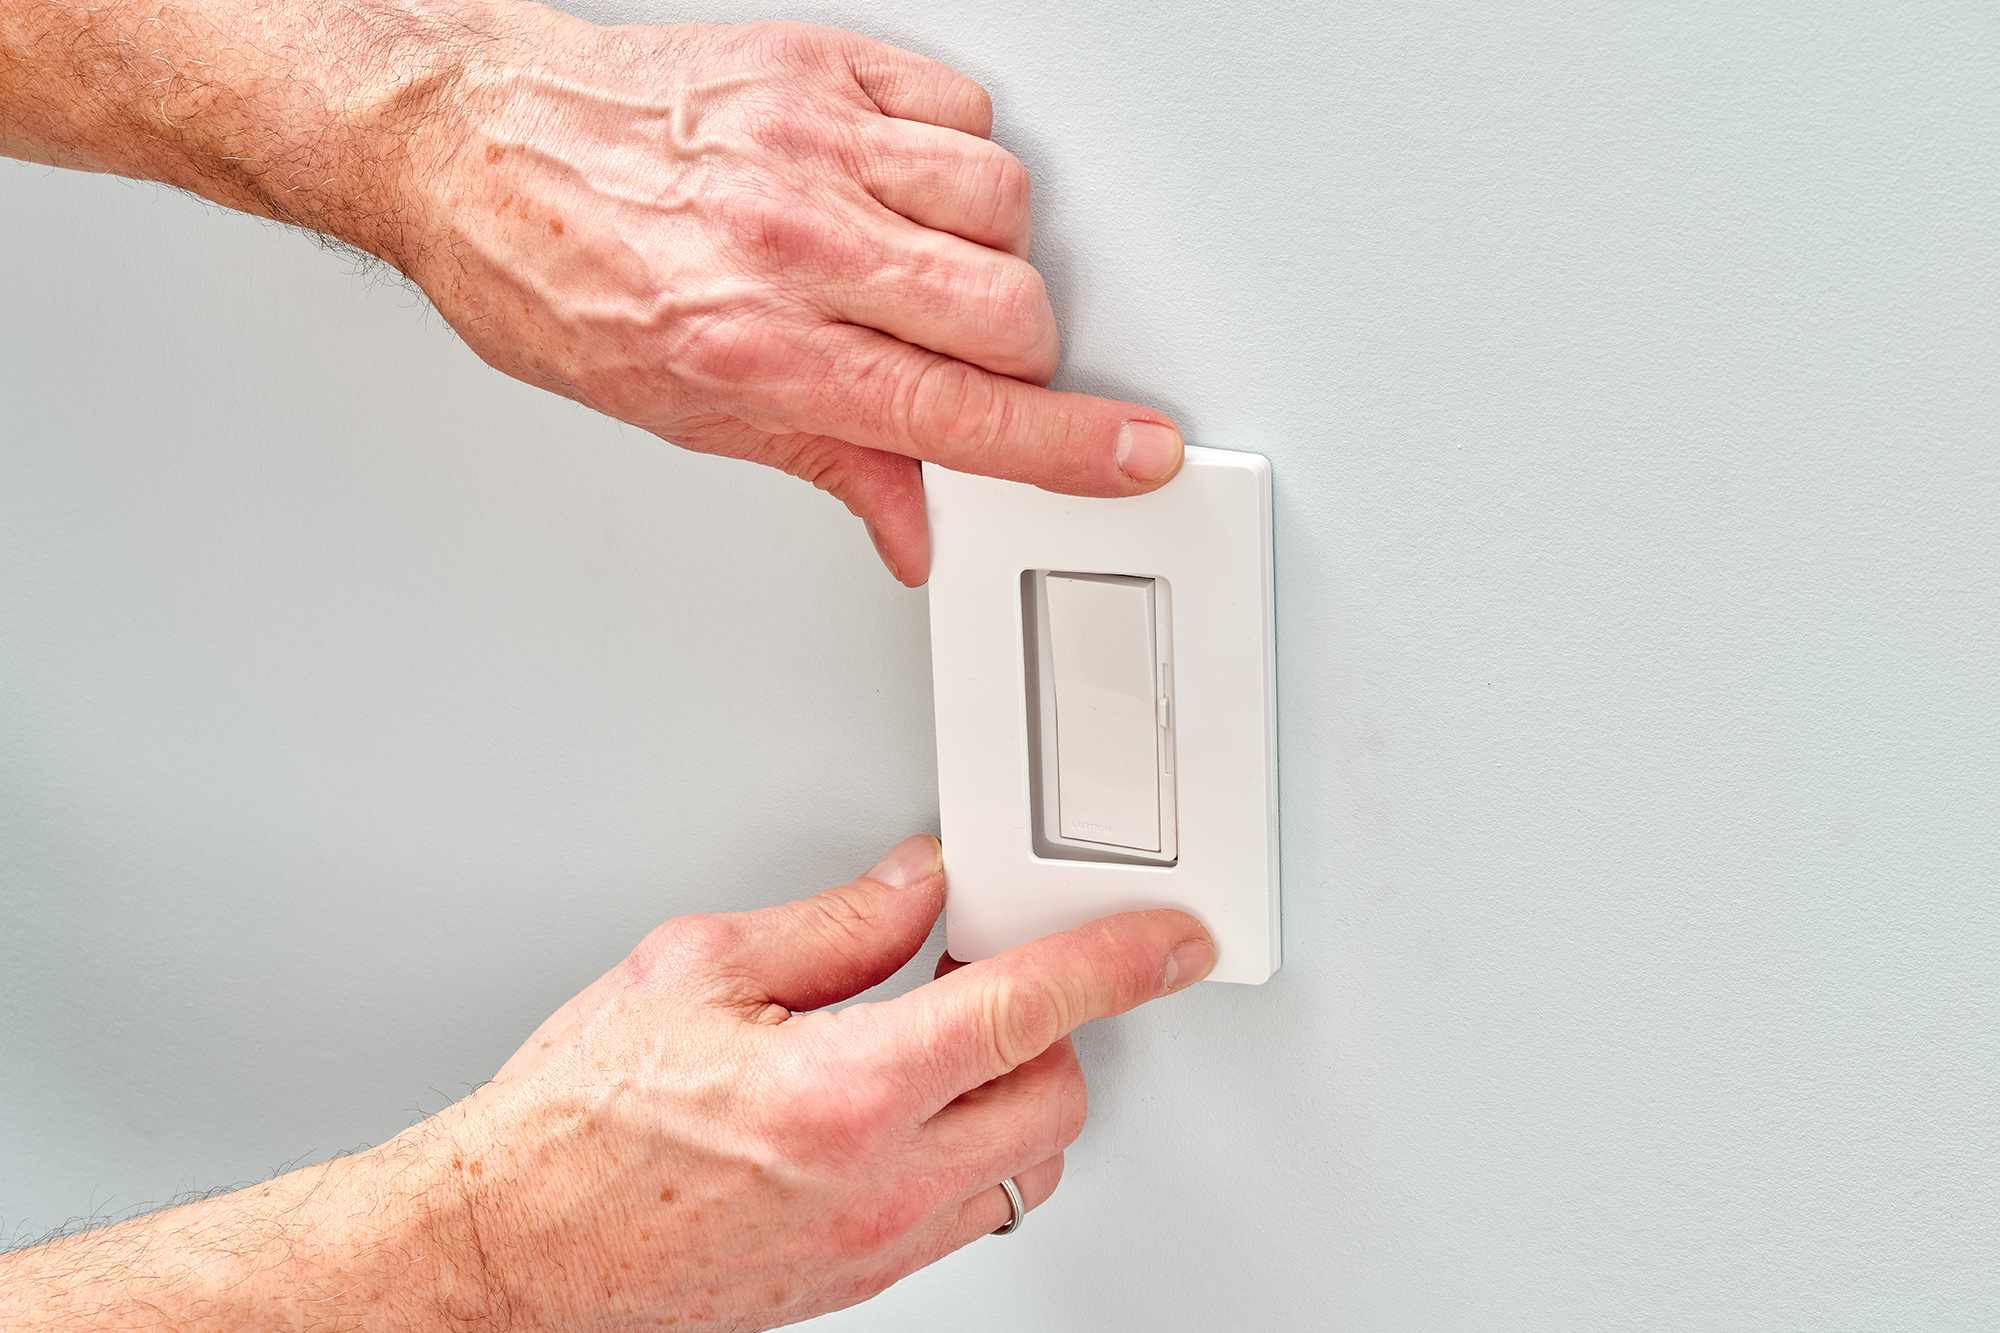
- Attach the faceplate: Align the faceplate with the dimmer switch and carefully screw it into place. Ensure that it is securely attached and aligns properly with the switch.
- Turn on the power: After the dimmer switch is securely installed, turn on the power to the circuit by switching on the corresponding breaker. Use the dimmer switch to test if it is properly functioning. Adjust the brightness levels to confirm that the dimmable LED ceiling lights respond accordingly.
It is important to follow the manufacturer’s instructions and guidelines during the installation process. If you are unsure about any aspect of the installation, consult a licensed electrician for assistance.
With the dimmer switch successfully installed, you are now ready to move on to the next step: connecting the wires to the dimmable LED ceiling lights. We will guide you through this process in the next section.
Step 5: Connect the Wires
With the dimmer switch in place, it’s time to connect the wires to the dimmable LED ceiling lights. Properly connecting the wires will ensure that the lights function correctly and are controlled by the dimmer switch. Follow these steps to connect the wires:
- Identify the wires: Start by identifying the wires coming from the dimmer switch and the wires from the dimmable LED ceiling lights. Typically, there will be a black wire, a white wire, and a ground wire.
- Strip the wire ends: Using wire strippers, carefully strip the insulation from the ends of the wires. It’s important to strip only the necessary amount of insulation to expose enough wire for proper connection.
- Connect the ground wires: Twist the bare ends of the ground wires together in a clockwise direction. Secure the connection with a wire connector. Make sure the connection is tight and secure.
- Connect the black wires: Twist the bare ends of the black wires together in a clockwise direction. Secure the connection with a wire connector. Again, ensure the connection is tight and secure.
- Connect the white wires: Twist the bare ends of the white wires together in a clockwise direction. Secure the connection with a wire connector. Confirm that the connection is tight and secure.
- Tuck the connected wires: Carefully tuck the connected wires into the electrical box. Make sure there is enough space for the dimmable LED ceiling lights to be installed without interference from the wires.
- Double-check the connections: Once all the wires are properly connected, double-check that all connections are secure and tightly twisted. This will ensure a reliable and safe electrical connection.
It’s essential to follow proper wiring practices and ensure that all wire connections are secure. Loose or incorrect connections can lead to malfunctioning lights or potential electrical hazards. If you are unsure about the wiring process, consult a licensed electrician for guidance and assistance.
With the wires securely connected, you are now ready to move on to the next step: attaching the dimmable LED ceiling lights to the electrical box. We will guide you through this process in the next section.
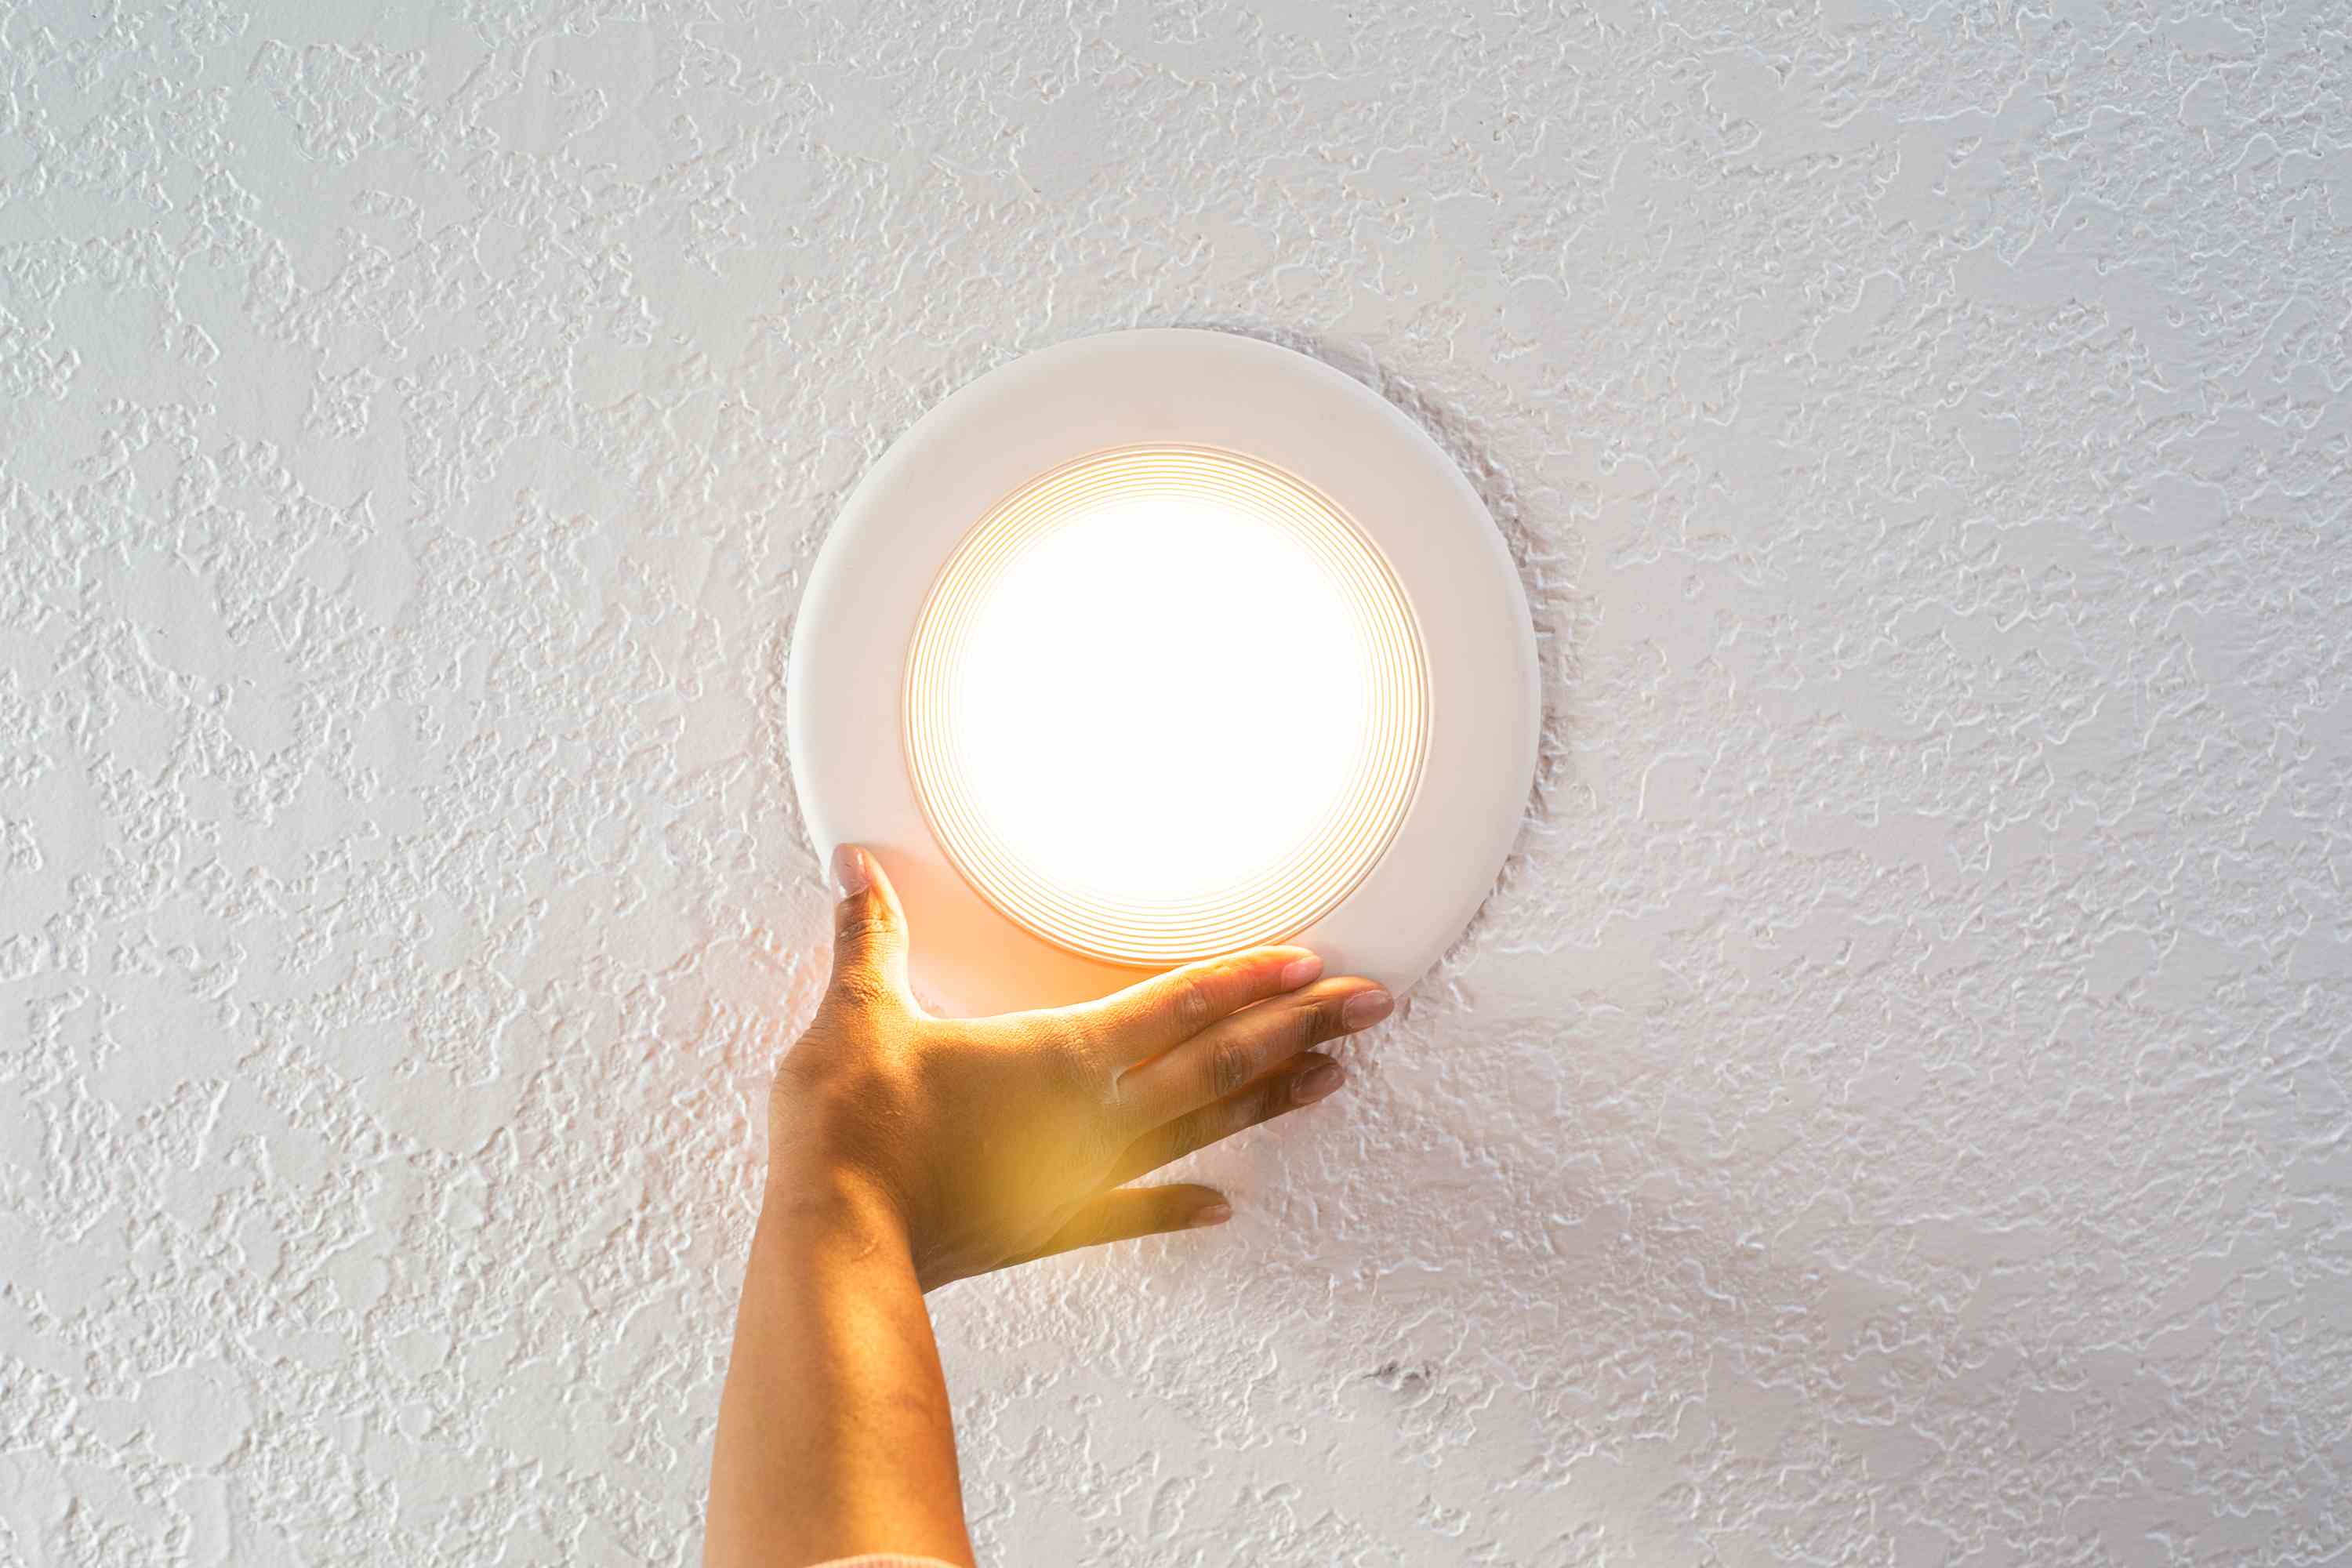
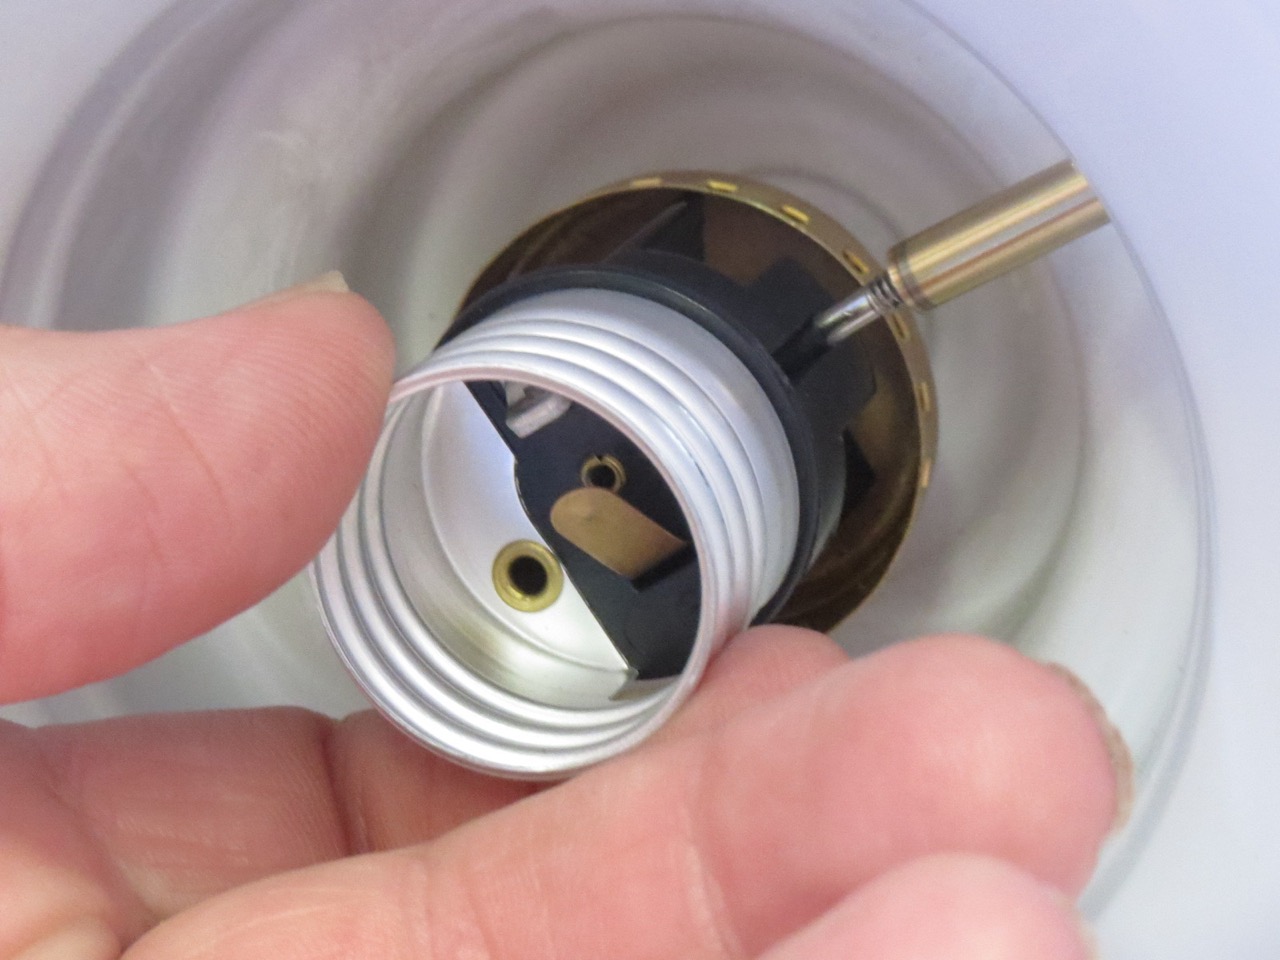
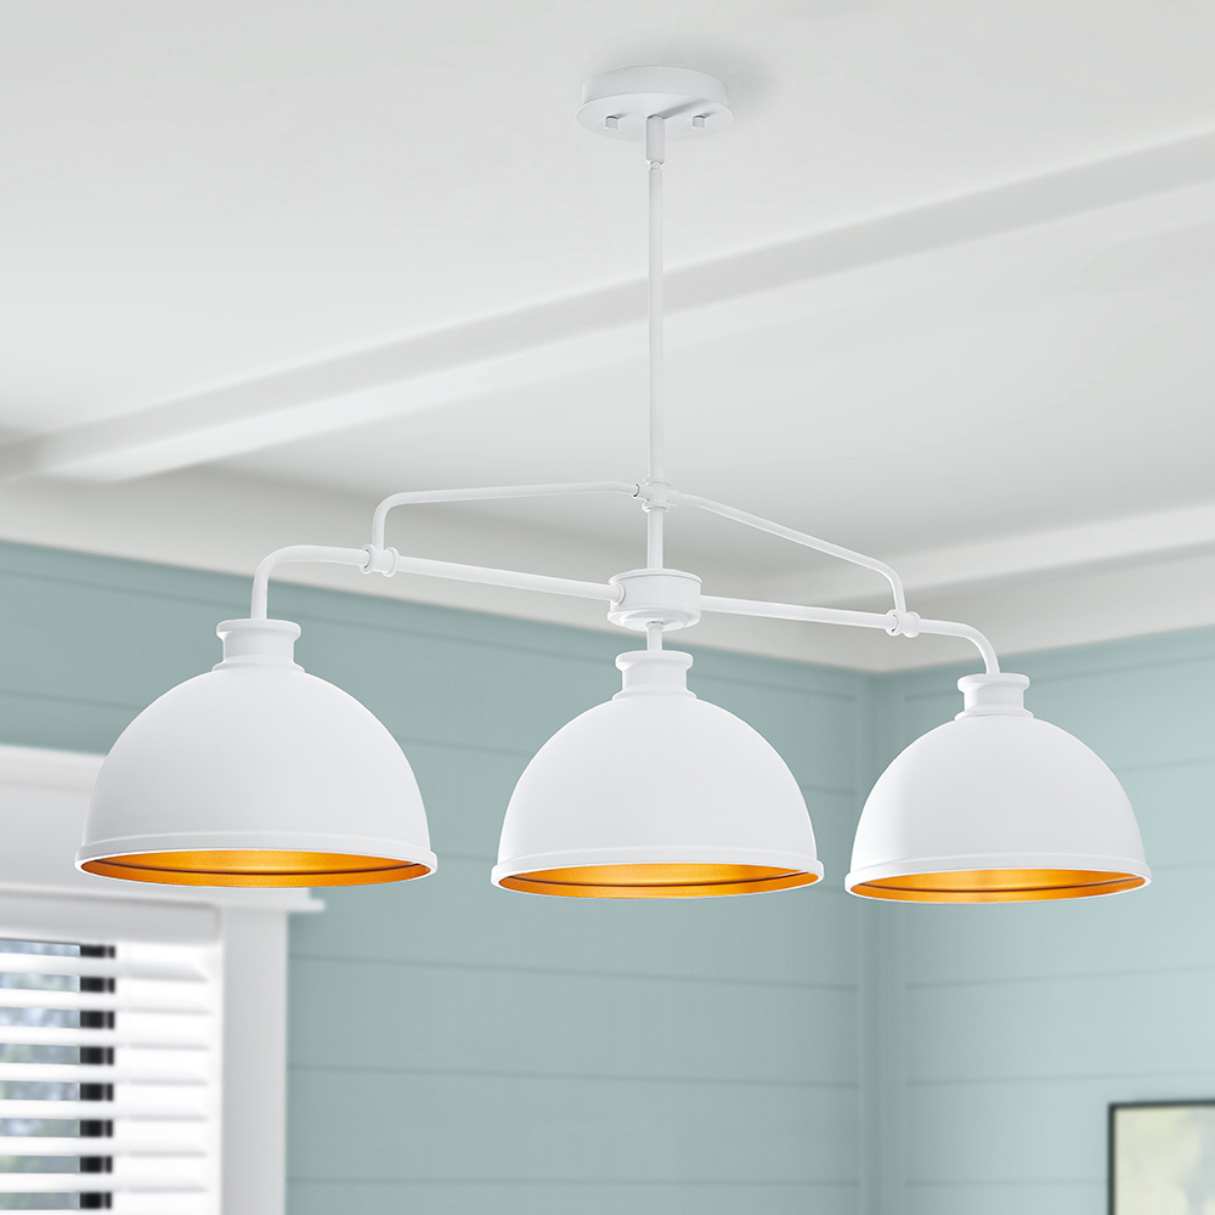
Step 6: Attach the Dimmable LED Ceiling Lights
With the wires properly connected, it’s time to attach the dimmable LED ceiling lights to the electrical box. This step involves securing the lights in place and ensuring a stable installation. Follow these steps to attach the dimmable LED ceiling lights:
- Position the ceiling lights: Determine the desired location for each dimmable LED ceiling light. Hold the light fixture against the ceiling and align it with the mounting bracket or base.
- Secure the mounting bracket: If the dimmable LED ceiling light comes with a mounting bracket, follow the manufacturer’s instructions to secure it to the electrical box. Use screws or other designated hardware to ensure the bracket is firmly attached.
- Connect the wiring: Carefully align the wiring from the dimmable LED ceiling light with the corresponding wires in the electrical box. Connect the black wire to the black wire, the white wire to the white wire, and the ground wire to the ground wire. Use wire connectors to securely fasten the connections.
- Secure the ceiling light: Once the wiring is connected, gently push the dimmable LED ceiling light against the ceiling. Ensure that it is flush against the surface and aligned with the mounting bracket or base.
- Attach the screws: If the dimmable LED ceiling light has screws or other fastening mechanisms, use them to secure the fixture to the mounting bracket or base. Follow the manufacturer’s instructions to ensure proper attachment.
- Double-check the connections: After securing the dimmable LED ceiling light, double-check that all wiring connections are secure and tightly fastened. This will help prevent any issues with the functionality of the lights.
- Repeat for remaining lights: If you have multiple dimmable LED ceiling lights to install, repeat the above steps for each light. Take measurements and ensure proper spacing between the lights for an even and balanced lighting arrangement.
It’s important to handle the dimmable LED ceiling lights with care and attention during the installation process. Ensure that the lights are securely attached and aligned properly to achieve an aesthetically pleasing and functional lighting setup.
With the dimmable LED ceiling lights securely installed, you are now ready for the final step: testing the lights. Move on to the next section to learn how to test the functionality of the lights and ensure everything is working correctly.
Read more: How To Wire A Ceiling Light To A Switch
Step 7: Test the Dimmable LED Ceiling Lights
After successfully installing the dimmable LED ceiling lights, it’s crucial to test their functionality to ensure they are working properly and responding to the dimmer switch. Follow these steps to test the dimmable LED ceiling lights:
- Turn on the power: Make sure the power to the circuit is turned on by switching on the corresponding breaker. This step is essential for the lights to receive the necessary electrical supply.
- Adjust the dimmer switch: Using the dimmer switch, adjust the brightness levels of the dimmable LED ceiling lights. Start with the lowest setting and gradually increase the brightness to the desired level.
- Observe the lights: As you adjust the dimmer switch, closely observe the dimmable LED ceiling lights. Ensure that they respond accordingly to the changes in brightness levels. The light intensity should increase or decrease smoothly without flickering or dim spots.
- Check for compatibility: If you encounter any issues or inconsistencies during testing, double-check the compatibility between the dimmer switch and the dimmable LED lights. Ensure that both are designed to work together for optimal performance.
- Make adjustments if necessary: If the dimmable LED ceiling lights are not functioning correctly or exhibiting any issues, troubleshooting may be required. Refer to the product’s manual or consult with a lighting professional for guidance on resolving any compatibility or performance issues.
- Ensure safety: Throughout the testing process, prioritize safety. Watch for any signs of overheating, strange smells, or unusual behavior from the dimmable LED ceiling lights. If any safety concerns arise, immediately switch off the power and seek professional assistance.
- Enjoy your dimmable LED ceiling lights: Once you have successfully tested the dimmable LED ceiling lights and ensured their proper functionality, you can now enjoy the benefits of customizable lighting in your space. Adjust the brightness levels as desired to create the perfect ambiance for any occasion.
Testing the dimmable LED ceiling lights is an essential step to ensure they are functioning correctly and providing the desired lighting experience. If you encounter any persistent issues or concerns, it is advisable to consult with a licensed electrician or contact the manufacturer for assistance.
Congratulations! You have successfully wired and installed dimmable LED ceiling lights. Enjoy the versatility and energy-efficient illumination that these lights provide in your home or workspace.
Note: Always refer to the manufacturer’s instructions and guidelines for specific installation requirements and safety precautions.
Disclaimer: This article provides general guidelines and suggestions for wiring dimmable LED ceiling lights. It is always recommended to consult with a licensed electrician for professional advice and assistance to ensure a safe and proper installation.
Conclusion
Congratulations on successfully completing the installation of your dimmable LED ceiling lights! By following the steps outlined in this guide, you have gained the knowledge and skills necessary to wire and install these versatile and energy-efficient lighting fixtures.
Dimmable LED ceiling lights offer numerous benefits, including adjustable brightness levels, energy efficiency, and a modern aesthetic. With the ability to create the perfect lighting ambiance for any occasion, these lights enhance the functionality and visual appeal of your space.
Throughout the installation process, it is essential to prioritize safety. Remember to turn off the power, wear appropriate personal protective equipment, and follow local electrical codes and regulations. If at any point you feel uncertain or uncomfortable, it is recommended to seek professional assistance from a licensed electrician.
Always double-check the compatibility between the dimmer switch and the dimmable LED lights to ensure smooth and reliable operation. If you encounter any issues or concerns, refer to the manufacturer’s instructions or consult with a lighting professional for guidance.
Now that your dimmable LED ceiling lights are installed and tested, it’s time to enjoy the flexibility and energy-efficient lighting they provide. Adjust the brightness levels to create the perfect ambiance for any activity or mood in your home or workspace.
Thank you for taking the time to learn about wiring dimmable LED ceiling lights. We hope this guide has been informative and helpful in your installation journey. Enjoy the enhanced lighting experience and the numerous benefits that these innovative lights bring to your space.
Disclaimer: This article provides general guidelines and suggestions for wiring dimmable LED ceiling lights. It is always recommended to consult with a licensed electrician for professional advice and assistance to ensure a safe and proper installation.
Frequently Asked Questions about How To Wire Dimmable LED Ceiling Lights
Was this page helpful?
At Storables.com, we guarantee accurate and reliable information. Our content, validated by Expert Board Contributors, is crafted following stringent Editorial Policies. We're committed to providing you with well-researched, expert-backed insights for all your informational needs.


0 thoughts on “How To Wire Dimmable LED Ceiling Lights”