Home>Home Security and Surveillance>How To Install Night Owl Analog Wired Outdoor Camera
Home Security and Surveillance
How To Install Night Owl Analog Wired Outdoor Camera
Modified: March 6, 2024
Learn how to easily install Night Owl Analog Wired Outdoor Camera for your home security and surveillance needs. Step-by-step guide and tips.
(Many of the links in this article redirect to a specific reviewed product. Your purchase of these products through affiliate links helps to generate commission for Storables.com, at no extra cost. Learn more)
Introduction
Welcome to this comprehensive guide on how to install a Night Owl analog wired outdoor camera. A reliable and high-quality security camera is essential for protecting your home and ensuring your peace of mind. With Night Owl’s analog wired outdoor camera, you can monitor your property, deter potential intruders, and capture crystal-clear video footage.
Installing a surveillance camera may seem like a daunting task, but fear not! This step-by-step guide will provide you with the knowledge and instructions you need to successfully install your Night Owl analog wired outdoor camera. From gathering the necessary tools to configuring camera settings, we’ve got you covered.
Before we get started, it’s important to note that Night Owl offers a wide range of outdoor cameras, and the specific installation process may vary slightly depending on the model you have chosen. However, the fundamental steps we will outline in this article can be applied to most analog wired outdoor cameras.
So, let’s dive in and get you on your way to achieving a secure and well-protected home!
Key Takeaways:
- Installing a Night Owl analog wired outdoor camera is made easy with this step-by-step guide. From gathering tools to testing the camera, you’ll have a secure home in no time.
- After setting up your Night Owl camera, remember to regularly maintain and test it for optimal performance. Consider additional lighting and expanding your surveillance system for comprehensive coverage.
Step 1: Gather the necessary tools and materials
Before you begin the installation process, it’s important to gather all the necessary tools and materials. Having the right equipment on hand will ensure a smoother and more efficient installation. Here’s a list of what you’ll need:
- Night Owl analog wired outdoor camera
- Digital Video Recorder (DVR)
- Power adapter for the camera
- Coaxial cable
- BNC connectors
- Power supply for the DVR
- HDMI or VGA cable (depending on your DVR)
- Monitor or TV
- Drill and appropriate drill bits
- Screwdriver
- Masonry anchors (if mounting on brick or concrete)
- Cable clips or staples
It’s important to ensure you have all the necessary tools and materials before starting the installation process. This will save you time and minimize any potential delays or inconveniences.
Additionally, it’s always a good idea to read the instruction manual that comes with your specific Night Owl camera. The manual will provide you with important details regarding the installation process and any specific requirements or recommendations for your camera model.
Now that you have all the necessary tools and materials ready, you’re all set to move on to the next step: choosing the appropriate location for your camera.
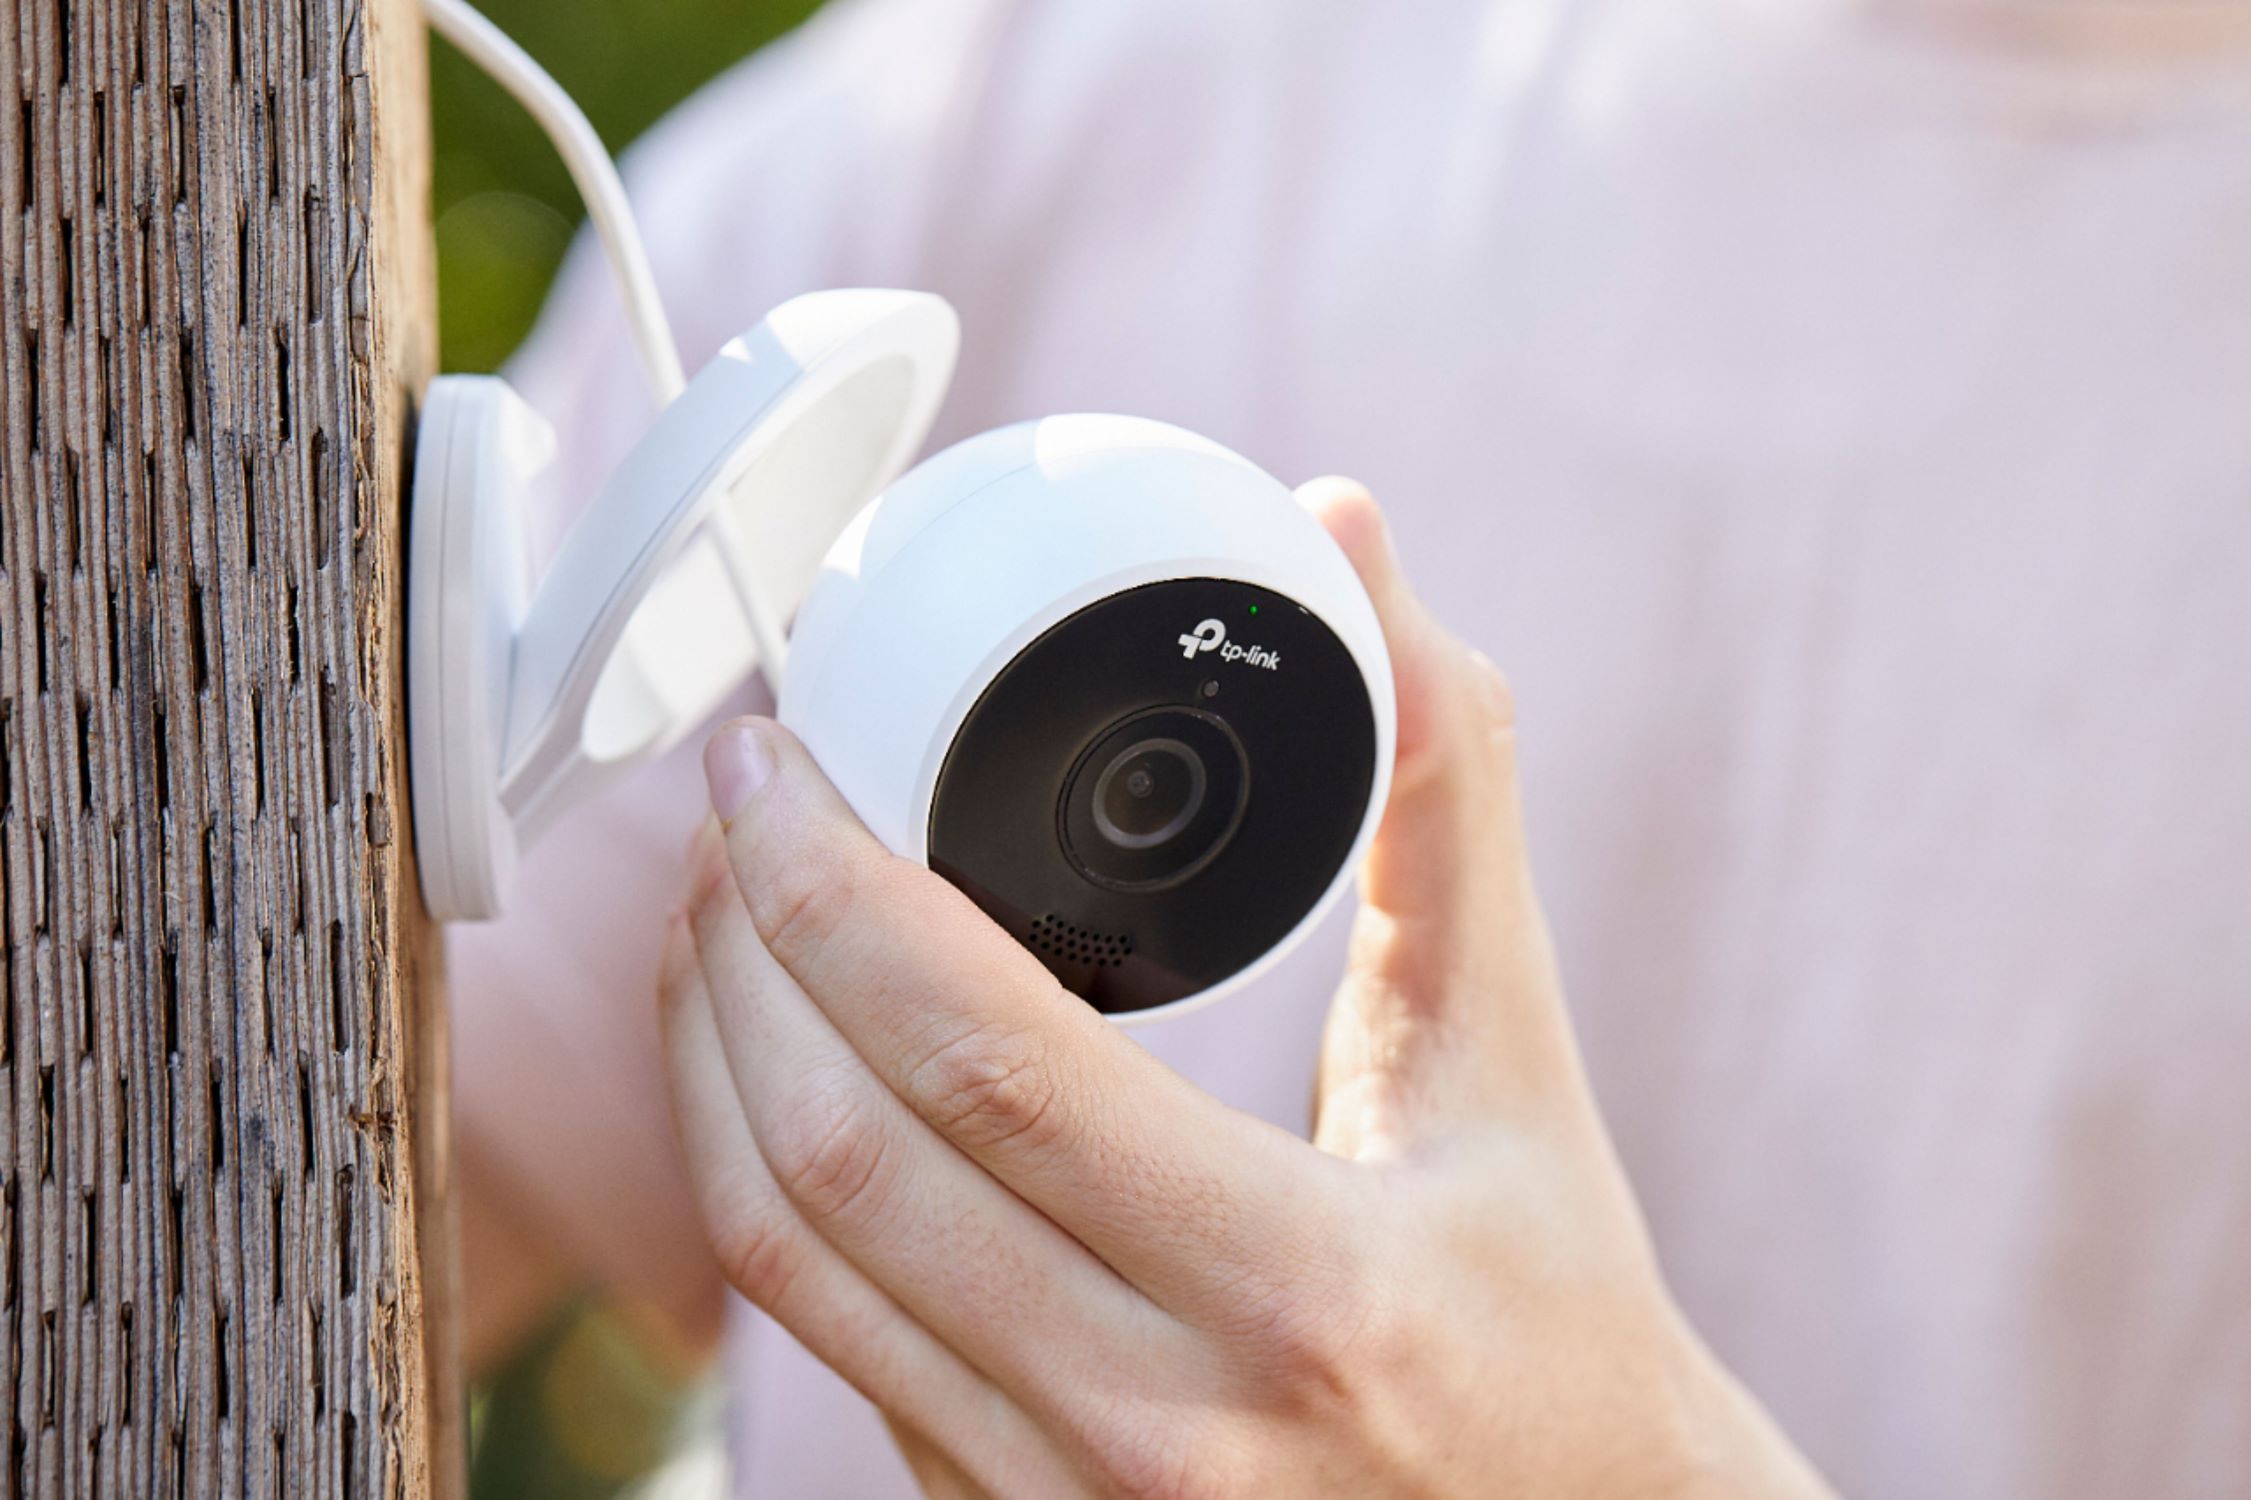
Step 2: Choose the appropriate location for the camera
Selecting the right location for your Night Owl analog wired outdoor camera is crucial for maximizing its effectiveness and capturing the desired surveillance footage. Here are some factors to consider when choosing the installation spot:
1. Coverage Area: Determine the areas you want to monitor and ensure that the camera’s field of view covers those areas. Take into account blind spots, obstructions, and potential entry points.
2. Accessibility: Consider how easily accessible the camera will be for maintenance and adjustments. Ensure that it can be easily accessed for cleaning, adjusting angles, and checking connections.
3. Weather Resistance: Look for a spot that offers some protection from inclement weather elements, such as rain, snow, or direct sunlight. Opt for a location that minimizes exposure to harsh weather conditions to prolong the lifespan of your camera.
4. Height and Angle: Position the camera at an optimal height and angle to capture a clear view of the target area. Aim for a height that is difficult for potential intruders to reach and angle the camera downward for better coverage.
5. Lighting Conditions: Take into account the lighting conditions of the area at various times of day. Ensure that the camera’s placement allows for adequate lighting, whether it’s natural light or artificial lighting, for clear video capture.
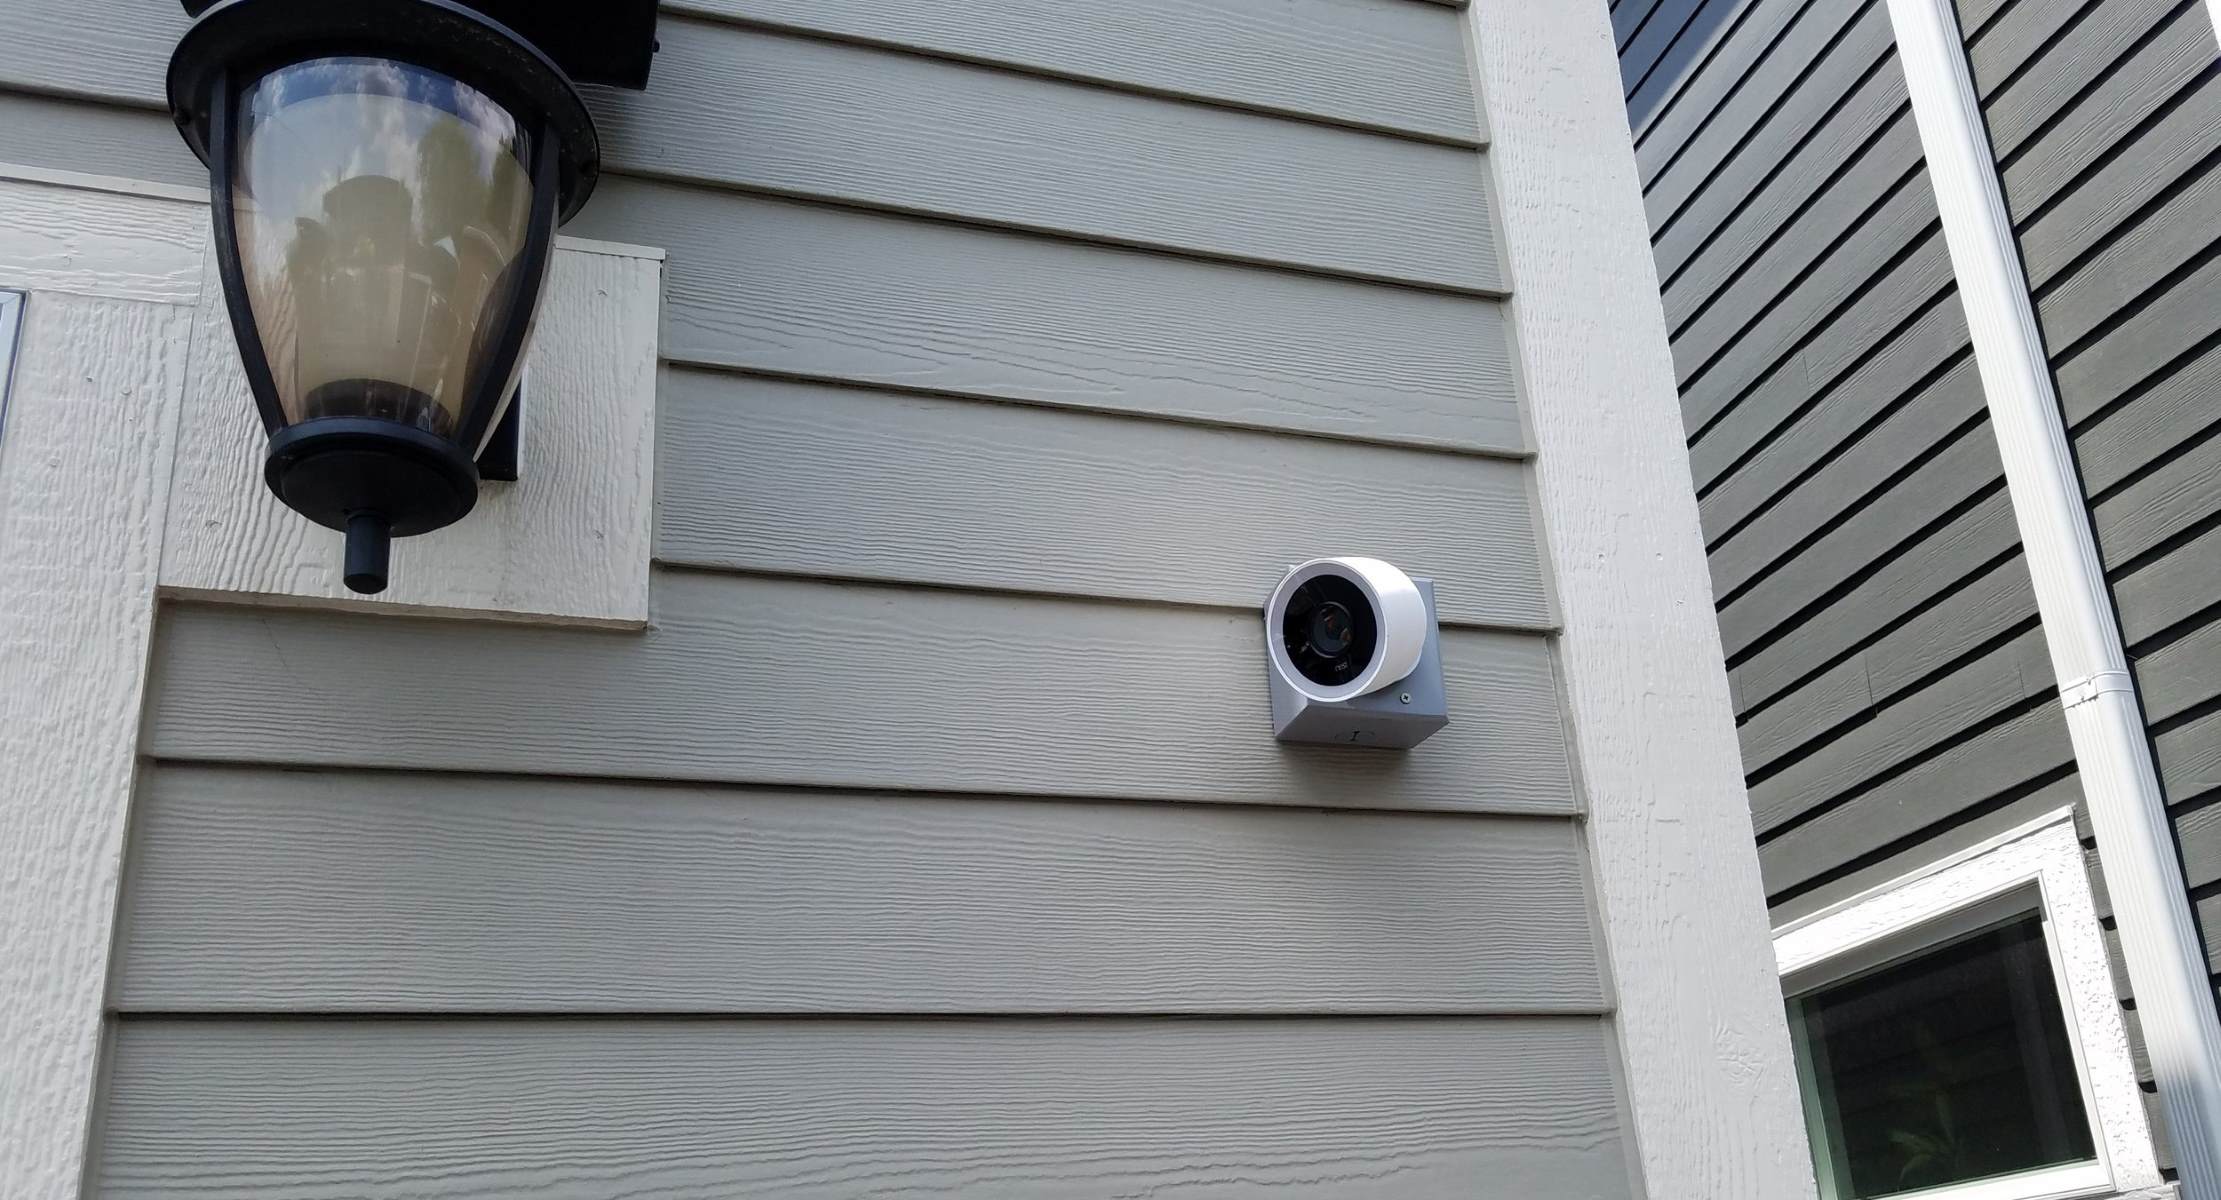
Once you have identified the suitable location, it’s time to determine the mounting option for your Night Owl analog wired outdoor camera. There are a few common mounting options:
1. Wall Mount: Attach the camera directly to the exterior wall using screws and the included mounting bracket. This option is ideal for elevated spots and wide coverage areas.
2. Ceiling Mount: Mount the camera on the ceiling, facing downwards. This option is useful in areas where wall mounting is not feasible or when a wider coverage area is desired.
3. Pole Mount: Use a pole to mount the camera, which is an excellent option for open spaces such as gardens or parking lots. Ensure the pole is sturdy and secure for optimal stability.
4. Corner Mount: Attach the camera to a corner using a specially designed bracket. This option provides an increased angle of view and can be useful in tight spaces.
Consider the specific requirements of your property and choose the mounting option that best suits your needs.
Now that you have the perfect location and mounting option in mind, it’s time to move on to the next step: installing the mounting bracket.
Step 3: Install the mounting bracket
Now that you have chosen the appropriate location and mounting option for your Night Owl analog wired outdoor camera, it’s time to install the mounting bracket. The mounting bracket provides a secure and stable base for your camera. Follow these steps to ensure a proper installation:
1. Prepare the mounting bracket: Start by unpacking the mounting bracket and ensuring that all the necessary components are included. Familiarize yourself with the parts, which typically include the bracket itself, a mounting plate, screws, and any additional hardware.
2. Choose the appropriate surface: Depending on your chosen mounting option, identify the surface where you will be mounting the bracket. Ensure that the surface is sturdy and capable of supporting the weight of the camera and bracket.
3. Mark the spots: Use a pencil or marker to mark the spots where the screws will go. Make sure to position the bracket in a way that provides the desired angle and coverage.
4. Drill pilot holes: Using an appropriate drill bit, carefully drill pilot holes at the marked spots. The size of the drill bit should match the size of the screws provided with the mounting bracket.
5. Attach the mounting bracket: Place the mounting plate over the pilot holes and align it properly. Insert the screws through the holes in the plate and into the pilot holes. Use a screwdriver to tighten the screws, ensuring the bracket is securely attached to the surface.
6. Adjust the angle: Once the bracket is installed, adjust the angle of the camera to ensure optimal coverage. Most mounting brackets allow for angle adjustment, so take the time to position the camera at the desired angle.
7. Test stability: Give the mounting bracket a gentle shake to ensure it is stable and securely attached. If it feels loose, tighten the screws further or consider using additional anchors or fasteners for added stability.
With the mounting bracket securely installed, you’re one step closer to getting your Night Owl analog wired outdoor camera up and running. The next step is to connect the camera to the DVR, so let’s move on to Step 4.
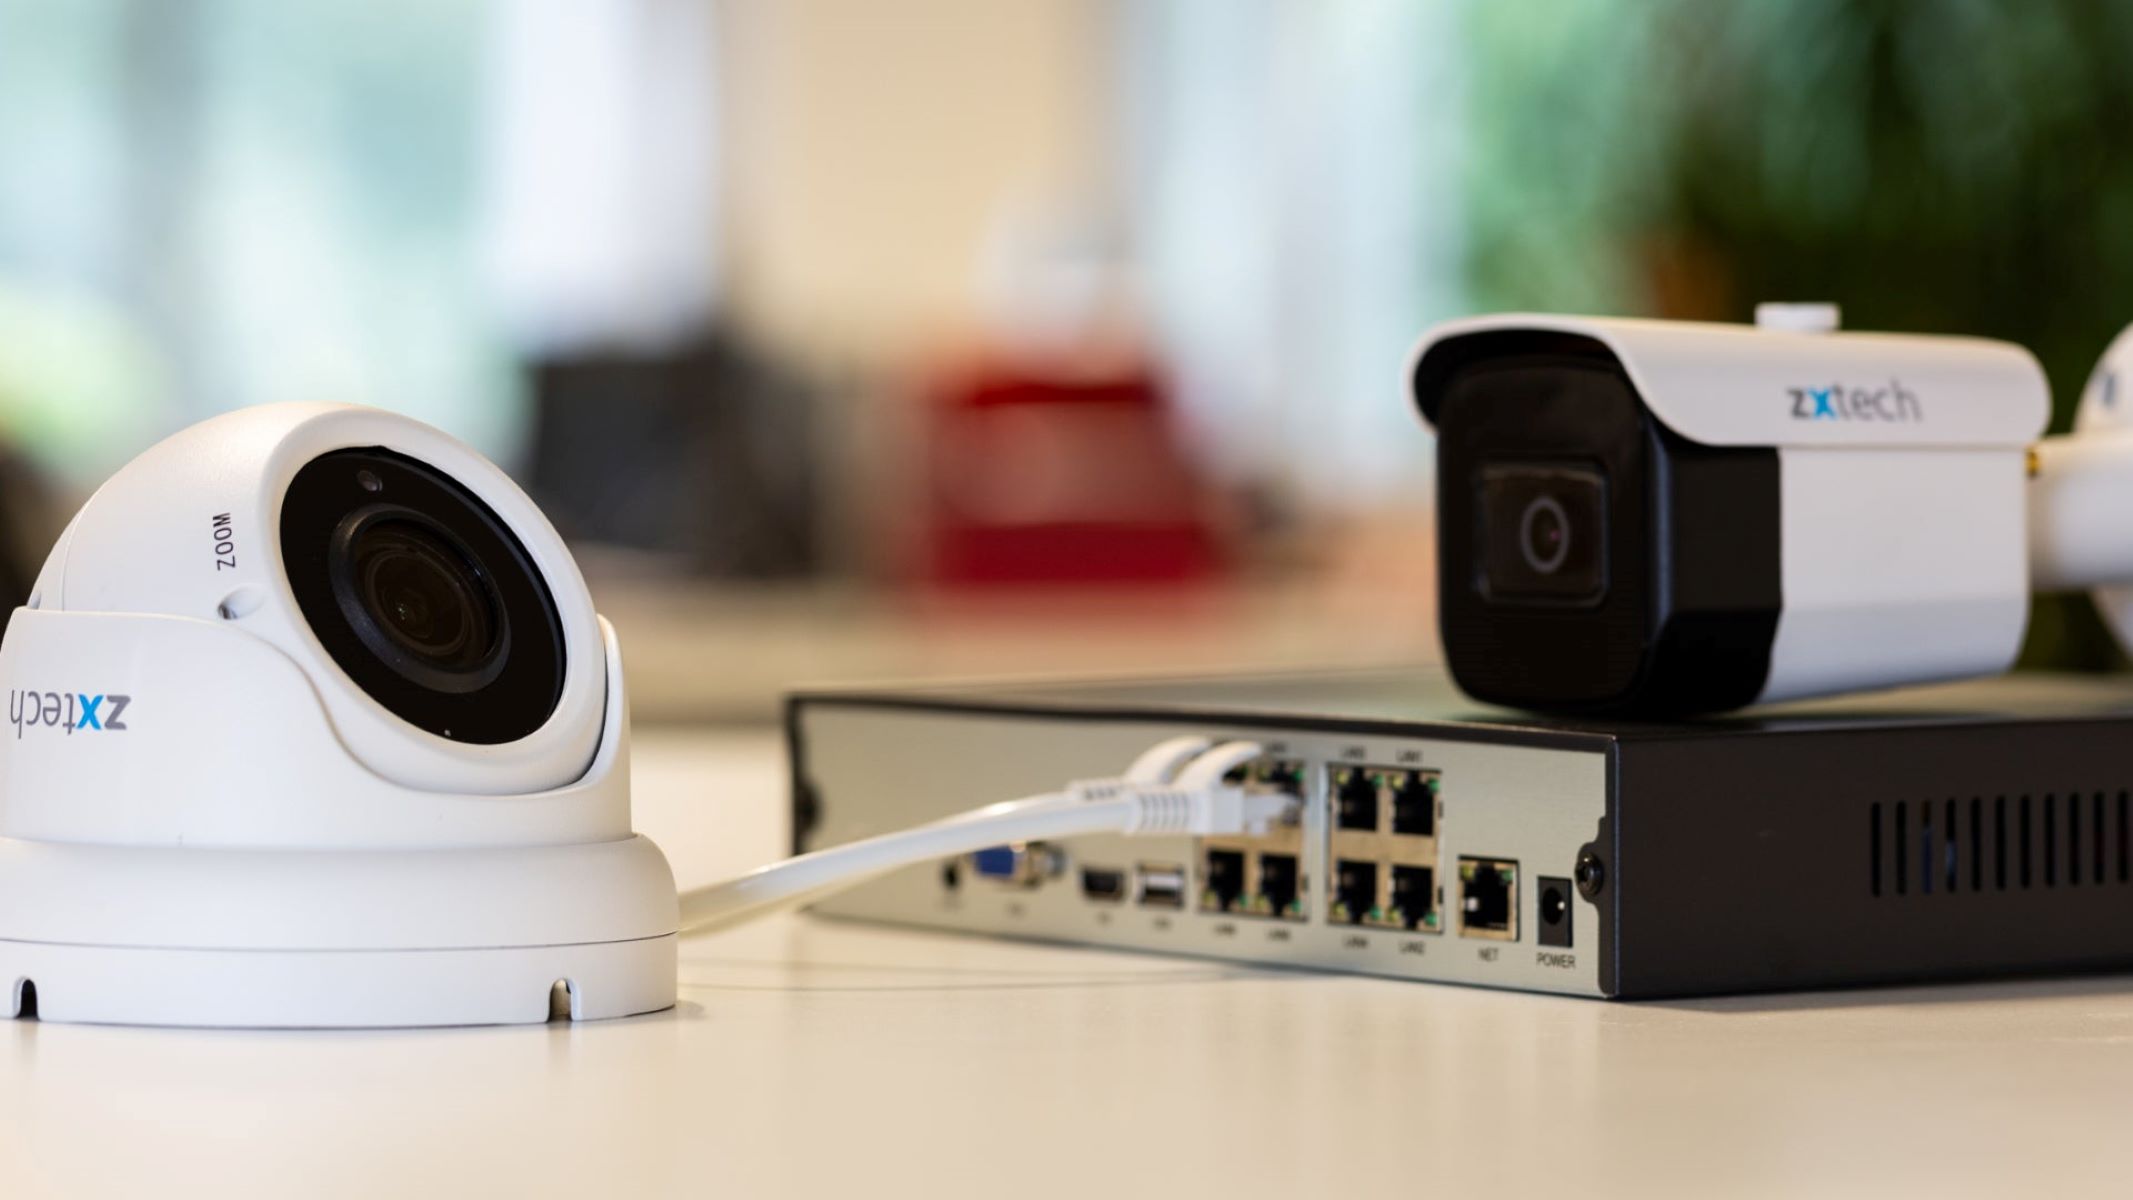
Step 4: Connect the camera to the DVR
Now that you have installed the mounting bracket for your Night Owl analog wired outdoor camera, it’s time to connect the camera to the Digital Video Recorder (DVR). This step is crucial for capturing and storing the surveillance footage. Follow these steps to establish the connection:
1. Assess the cable requirements: Identify the type and length of the cable required to connect the camera to the DVR. Typically, Night Owl cameras use coaxial cables for video transmission. Ensure that you have a cable that is long enough to reach from the camera to the DVR.
2. Prepare the cables: If necessary, cut the coaxial cable to the desired length, leaving some extra length for flexibility. Strip the ends of the cable to expose the inner conductor and shielding layers.
3. Connect the BNC connectors: Attach BNC connectors to both ends of the coaxial cable. Ensure a secure connection by twisting the connectors onto the stripped ends of the cable. Tighten them using a wrench, if necessary.
4. Locate the camera and DVR ports: Identify the camera input port on the back of the DVR and the camera output port on the camera. These ports are typically labeled as “CAM” or “VIDEO IN” for the DVR and “VIDEO OUT” or “BNC OUT” for the camera.
5. Connect the camera to the DVR: Take one end of the coaxial cable, which is connected to the camera, and insert the BNC connector into the camera output port. Twist it gently to ensure a secure connection.
6. Connect the other end to the DVR: Take the other end of the coaxial cable, which is connected to the BNC connector, and insert it into the camera input port on the back of the DVR. Again, twist it gently to secure the connection.
7. Repeat for additional cameras: If you have multiple cameras to connect to the DVR, repeat the previous steps for each camera. Make sure to connect each camera to the appropriate input port on the DVR.
Congratulations! You have successfully established the connection between your Night Owl analog wired outdoor camera and the DVR. Now, it’s time to power up the camera and DVR, which we’ll cover in Step 5.
Before installing your Night Owl Analog Wired Outdoor Camera, make sure to carefully read the instruction manual to understand the installation process. It’s important to choose a suitable location with a clear view and easy access to power and cables.
Step 5: Power up the camera and DVR
After connecting the Night Owl analog wired outdoor camera to the DVR, it’s time to power up both devices. Follow these instructions to ensure a smooth power-up process:
1. Check power sources: Ensure that both the camera and DVR have access to a reliable power source. Connect the power adapter to the camera and plug it into a nearby electrical outlet. Likewise, connect the power supply to the DVR and plug it into a power outlet.
2. Power on the camera: Locate the power switch on the camera or check the camera’s instruction manual for specific power-on instructions. Turn the camera on and wait for it to initialize. Depending on the camera model, there may be indicator lights that confirm power connectivity.
3. Power on the DVR: Switch on the DVR using either the power button on the device or the remote control. Depending on the model, the DVR may take a few moments to boot up and display the video feeds from the connected cameras.
4. Monitor the video feed: Connect the DVR to a monitor or TV using an HDMI or VGA cable. Switch on the monitor and select the appropriate input source to view the camera’s video feed. Monitor the feed to ensure that the camera is functioning correctly and capturing the desired surveillance footage.
Troubleshooting common power-related issues:
– Power supply failure: Check all power connections and make sure they are secure. If the camera or DVR is not receiving power, double-check the power source and cables. Consider using a different power outlet or replacing the power supply if necessary.
– Camera not powering on: If the camera does not power on, ensure that the power adapter is connected correctly and that power is reaching the outlet. Check for any reset buttons on the camera and press them if needed. If the issue persists, consult the camera’s manual or contact Night Owl support for further assistance.
– DVR not powering on: If the DVR does not power on, verify that the power supply is securely connected and that the outlet is functioning properly. Check for any power switches or buttons on the DVR and ensure they are in the correct position. If the DVR still does not power on, consult the DVR’s manual or contact Night Owl support for troubleshooting guidance.
By following these instructions and troubleshooting tips, you can power up your Night Owl analog wired outdoor camera and DVR successfully. Now, it’s time to move on to Step 6, where we’ll guide you through configuring the camera settings for optimal performance and customization.
Step 6: Configure camera settings
Once your Night Owl analog wired outdoor camera and DVR are powered up, it’s time to configure the camera settings. By accessing the camera’s settings through the DVR, you can adjust various parameters to optimize the camera’s performance and meet your specific surveillance needs. Follow these steps to configure the camera settings:
1. Access the DVR interface: Ensure that the DVR is connected to a monitor or TV. Navigate to the DVR’s interface by using the remote control or the buttons on the DVR itself. Refer to the DVR’s manual for specific instructions on accessing the settings menu.
2. Locate the camera settings: Once you are on the DVR’s interface, navigate to the camera settings section. This section may be labeled as “Camera Setup,” “Configuration,” or something similar. Select the specific camera that you want to configure.
3. Adjust resolution and video quality: In the camera settings menu, you will find options to adjust the resolution and video quality of the camera feed. Higher resolutions offer more detail but may require more storage space. Choose the resolution and video quality that meet your specific requirements.
4. Customize video settings: Explore the camera settings menu to find additional options for customizing video settings. This may include adjusting brightness, contrast, saturation, and other parameters to enhance video clarity and visibility.
5. Configure motion detection: Most Night Owl cameras have built-in motion detection capabilities. Access the camera settings menu and enable motion detection. Customize the sensitivity level and specify the areas in the camera’s field of view where you want motion detection to be active.
6. Set up alerts and notifications: If your Night Owl camera supports it, you can configure alerts and notifications for specific events. This may include receiving email notifications or push notifications to your smartphone when motion is detected or when certain triggers occur. Refer to the camera’s manual for instructions on setting up alerts.
7. Save and apply the settings: Once you have made your desired changes, save the settings and apply them. The DVR will update the camera’s configuration, and you should see the changes reflected in the camera feed.
Remember, the specific options and settings available may vary depending on your Night Owl camera model and DVR. Refer to the camera and DVR manuals for detailed instructions and additional customization options.
With the camera settings configured, you’re now ready to test the camera’s functionality in Step 7. We’ll guide you through testing and troubleshooting common issues.
Step 7: Test the camera
After configuring the settings of your Night Owl analog wired outdoor camera, it’s important to test its functionality to ensure it is capturing clear images and recording video as expected. Follow these methods to test the camera and troubleshoot any image or recording issues:
1. Live view test: Access the live view of the camera feed on the DVR interface or your connected monitor. Ensure that the camera is displaying a clear and properly-colored image. Adjust the camera’s angle or settings if necessary to optimize the view.
2. Motion detection test: Walk or move within the camera’s view to trigger the motion detection feature. Verify that the camera detects the motion and starts recording or sends alerts, depending on your settings. Adjust the motion detection sensitivity if needed to avoid false alarms or ensure all movements are captured.
3. Night vision test: Test the camera’s night vision capability by turning off the lights or navigating to a dark area. The camera should switch to night vision mode and provide clear black and white images. Adjust the camera’s night vision settings if the images appear blurry or distorted.
4. Recording and playback test: Initiate a recording on the DVR and verify that the camera’s feed is being recorded properly. After recording, play back the footage to ensure that it is clear and that all desired events are captured. If there are any issues with recording or playback, check the storage capacity and settings on the DVR.
5. Network and remote access test: If your DVR supports network connectivity, test its remote access capabilities. Access the camera feed remotely using a computer or smartphone to ensure you can view the live feed and playback recorded footage. Troubleshoot any connection issues by checking network settings and ensuring proper port forwarding if needed.
Troubleshooting image or recording issues:
– Blurry or distorted images: Check the camera lens for any smudges, dirt, or obstructions. Clean the lens carefully using a soft cloth. Additionally, ensure that the camera is securely mounted and not vibrating, as this can cause blurriness. Adjust the focus or fine-tune the camera settings for better image quality.
– No video feed: If you are not seeing any video feed on the DVR or connected monitor, ensure that all cable connections are secure. Check that the camera is powered on and that the correct input channel is selected on the DVR. If the issue persists, try connecting the camera to a different input port on the DVR to rule out a faulty port.
– Inadequate night vision: If the night vision footage is not clear or doesn’t provide sufficient visibility, double-check that the camera’s infrared LEDs are functioning correctly. Ensure there are no obstructions or reflections interfering with night vision. Adjust the camera’s night vision settings or consider adding additional lighting if needed.
By thoroughly testing the camera’s functionality and troubleshooting any issues, you can ensure that your Night Owl analog wired outdoor camera is performing optimally and providing the security and surveillance you need. With the finishing touches complete, you can now rest assured that your property is well-protected.
Congratulations on successfully installing and setting up your Night Owl analog wired outdoor camera! Armed with this comprehensive guide, you can confidently enhance the security and surveillance capabilities of your home.
Remember to refer to the camera and DVR manuals for specific instructions and additional troubleshooting guidance. If you encounter any technical difficulties or require further support, don’t hesitate to reach out to Night Owl’s customer service for assistance.
Stay vigilant and enjoy the peace of mind that comes with a reliable and effective home security system!
Conclusion
Congratulations on successfully completing the installation and setup of your Night Owl analog wired outdoor camera! By following this comprehensive guide, you have taken a significant step towards enhancing the security and surveillance of your home or property. With your Night Owl camera in place, you can now monitor your surroundings, deter potential intruders, and have peace of mind knowing that you have eyes on your property at all times.
Throughout this guide, you learned how to gather the necessary tools and materials for installation, choose the appropriate location for the camera, install the mounting bracket securely, connect the camera to the DVR using the proper cables, power up both devices, configure the camera settings for optimal performance, and test the camera’s functionality.
While this guide covered the fundamental steps, it’s important to remember that each Night Owl analog wired outdoor camera model may have its own unique features and installation requirements. Therefore, we recommend consulting the specific instruction manual for your camera model and DVR for any additional instructions or specifications.
With your Night Owl camera up and running, it’s vital to regularly maintain and monitor its performance. Keep an eye out for any unusual activity or behavior in the camera’s feed, perform routine checks on the connections and power supply, and ensure that any firmware updates or software enhancements recommended by Night Owl are installed promptly.
Remember to familiarize yourself with the camera’s features, such as motion detection, night vision, and remote access capabilities. Utilizing these features effectively will help you get the most out of your surveillance system and provide an extra layer of security and peace of mind.
Lastly, we would like to emphasize the importance of professional monitoring and collaboration with local law enforcement agencies to further enhance your home security. Alarm systems, reliable monitoring services, and reliable communication with authorities can provide an added layer of protection and assistance in the event of a security breach or emergency situation.
Thank you for choosing Night Owl and for taking the initiative to secure your home and loved ones. We hope this guide has empowered you with the knowledge and confidence to install and set up your Night Owl analog wired outdoor camera successfully. If you have any questions or require further assistance, remember that Night Owl’s customer support team is just a call or email away.
Stay vigilant, stay secure, and enjoy the peace of mind that comes with having a reliable home security and surveillance system!
Additional Tips and Recommendations
Now that you’ve successfully installed and set up your Night Owl analog wired outdoor camera, here are some additional tips and recommendations to further enhance your home security and ensure the optimal performance of your surveillance system:
- Regularly inspect and clean the camera: Periodically check the camera for dirt, dust, or cobwebs that may obstruct the lens or affect image quality. Safely clean the camera using a soft, lint-free cloth and non-abrasive cleaning solution, if necessary. Regular maintenance will help ensure clear and uninterrupted video footage.
- Consider additional lighting: While Night Owl cameras are equipped with night vision capabilities, adding supplemental lighting to the surrounding area can further enhance visibility and deter potential intruders. Motion-activated lights or strategically placed floodlights can greatly improve the overall effectiveness of your surveillance system.
- Secure and protect cable connections: Ensure that all cable connections, including the coaxial cables and power cables, are properly secured and protected from the elements. Use cable clips or staples to neatly secure cables along walls or other surfaces and prevent potential damage or tampering.
- Regularly test and review footage: Periodically test your camera’s functionality by reviewing recorded footage and checking the quality and clarity of the images. This will help identify any issues and ensure that your camera is capturing the desired surveillance coverage. Regular testing and evaluation will give you peace of mind knowing that your camera is operating optimally.
- Consider expanding your surveillance system: If you have a larger property or additional areas that require surveillance, consider expanding your Night Owl surveillance system by adding more analog wired outdoor cameras. Night Owl offers a range of camera models to suit various needs and budgets. Adding additional cameras will provide comprehensive coverage and enhance the security of your entire property.
- Keeping your DVR secure: Protect your DVR by placing it in a secure and discreet location, such as a locked cabinet or hidden space. Additionally, change the default login credentials and enable any available security features on the DVR to prevent unauthorized access.
- Stay informed: Stay up to date with the latest firmware updates and software enhancements provided by Night Owl. These updates often include new features, bug fixes, and security improvements that can enhance the overall performance and functionality of your surveillance system.
By following these additional tips and recommendations, you can further optimize the effectiveness of your Night Owl analog wired outdoor camera and ensure the long-term reliability of your home security and surveillance system.
Remember, the safety and security of your home and loved ones are of the utmost importance. If you have any questions or encounter any issues with your Night Owl camera, refer to the instruction manual or reach out to Night Owl’s customer support for further assistance. They are dedicated to providing excellent support and helping you make the most of your surveillance system.
Thank you again for choosing Night Owl. We hope these additional tips empower you to maximize the security of your home and enjoy the peace of mind that comes with a reliable and effective home surveillance system.
Stay safe, stay secure!
Frequently Asked Questions about How To Install Night Owl Analog Wired Outdoor Camera
Was this page helpful?
At Storables.com, we guarantee accurate and reliable information. Our content, validated by Expert Board Contributors, is crafted following stringent Editorial Policies. We're committed to providing you with well-researched, expert-backed insights for all your informational needs.