Home>Renovation & DIY>Tools & Equipment>How To Make A Spackle Art
Tools & Equipment
How To Make A Spackle Art
Published: December 19, 2023
Discover the essential tools and equipment needed to create stunning spackle art with our comprehensive guide. Master the art of spackle with the right tools!
(Many of the links in this article redirect to a specific reviewed product. Your purchase of these products through affiliate links helps to generate commission for Storables.com, at no extra cost. Learn more)
Introduction
Creating spackle art is a wonderful way to unleash your creativity and add a unique touch to your living space. Whether you're a seasoned artist or a beginner looking to explore a new medium, spackle art offers a versatile and captivating outlet for self-expression. In this article, we'll explore the step-by-step process of creating stunning spackle art, from gathering the necessary materials to adding the finishing touches.
Spackle, typically used for patching holes and cracks in walls, might seem like an unexpected choice for artistic endeavors, but its texture and malleability make it an intriguing medium for creating visually striking artwork. By following this guide, you'll discover how to harness the potential of spackle to produce captivating pieces that showcase your artistic vision.
Throughout this creative journey, you'll learn how to prepare the canvas, mix and apply the spackle, and bring your artistic ideas to life. Whether you're drawn to abstract designs, textured landscapes, or intricate patterns, spackle art offers endless possibilities for self-expression and experimentation.
So, gather your creativity, roll up your sleeves, and let's dive into the world of spackle art. With a few simple materials and a touch of imagination, you'll be amazed at the captivating artwork you can create. Let's embark on this artistic adventure together and unlock the potential of spackle as a medium for self-expression and creativity.
Key Takeaways:
- Unleash Your Creativity with Spackle Art
Discover the joy of creating textured masterpieces with spackle art. Embrace experimentation and let your imagination run wild as you explore the endless possibilities of this unique medium. - Transform Your Vision into Captivating Art
From preparing the canvas to adding finishing touches, spackle art offers a tactile and expressive journey. Embrace the transformative power of artistic expression and bring your unique vision to life.
Read more: How To Make Plaster Wall Art
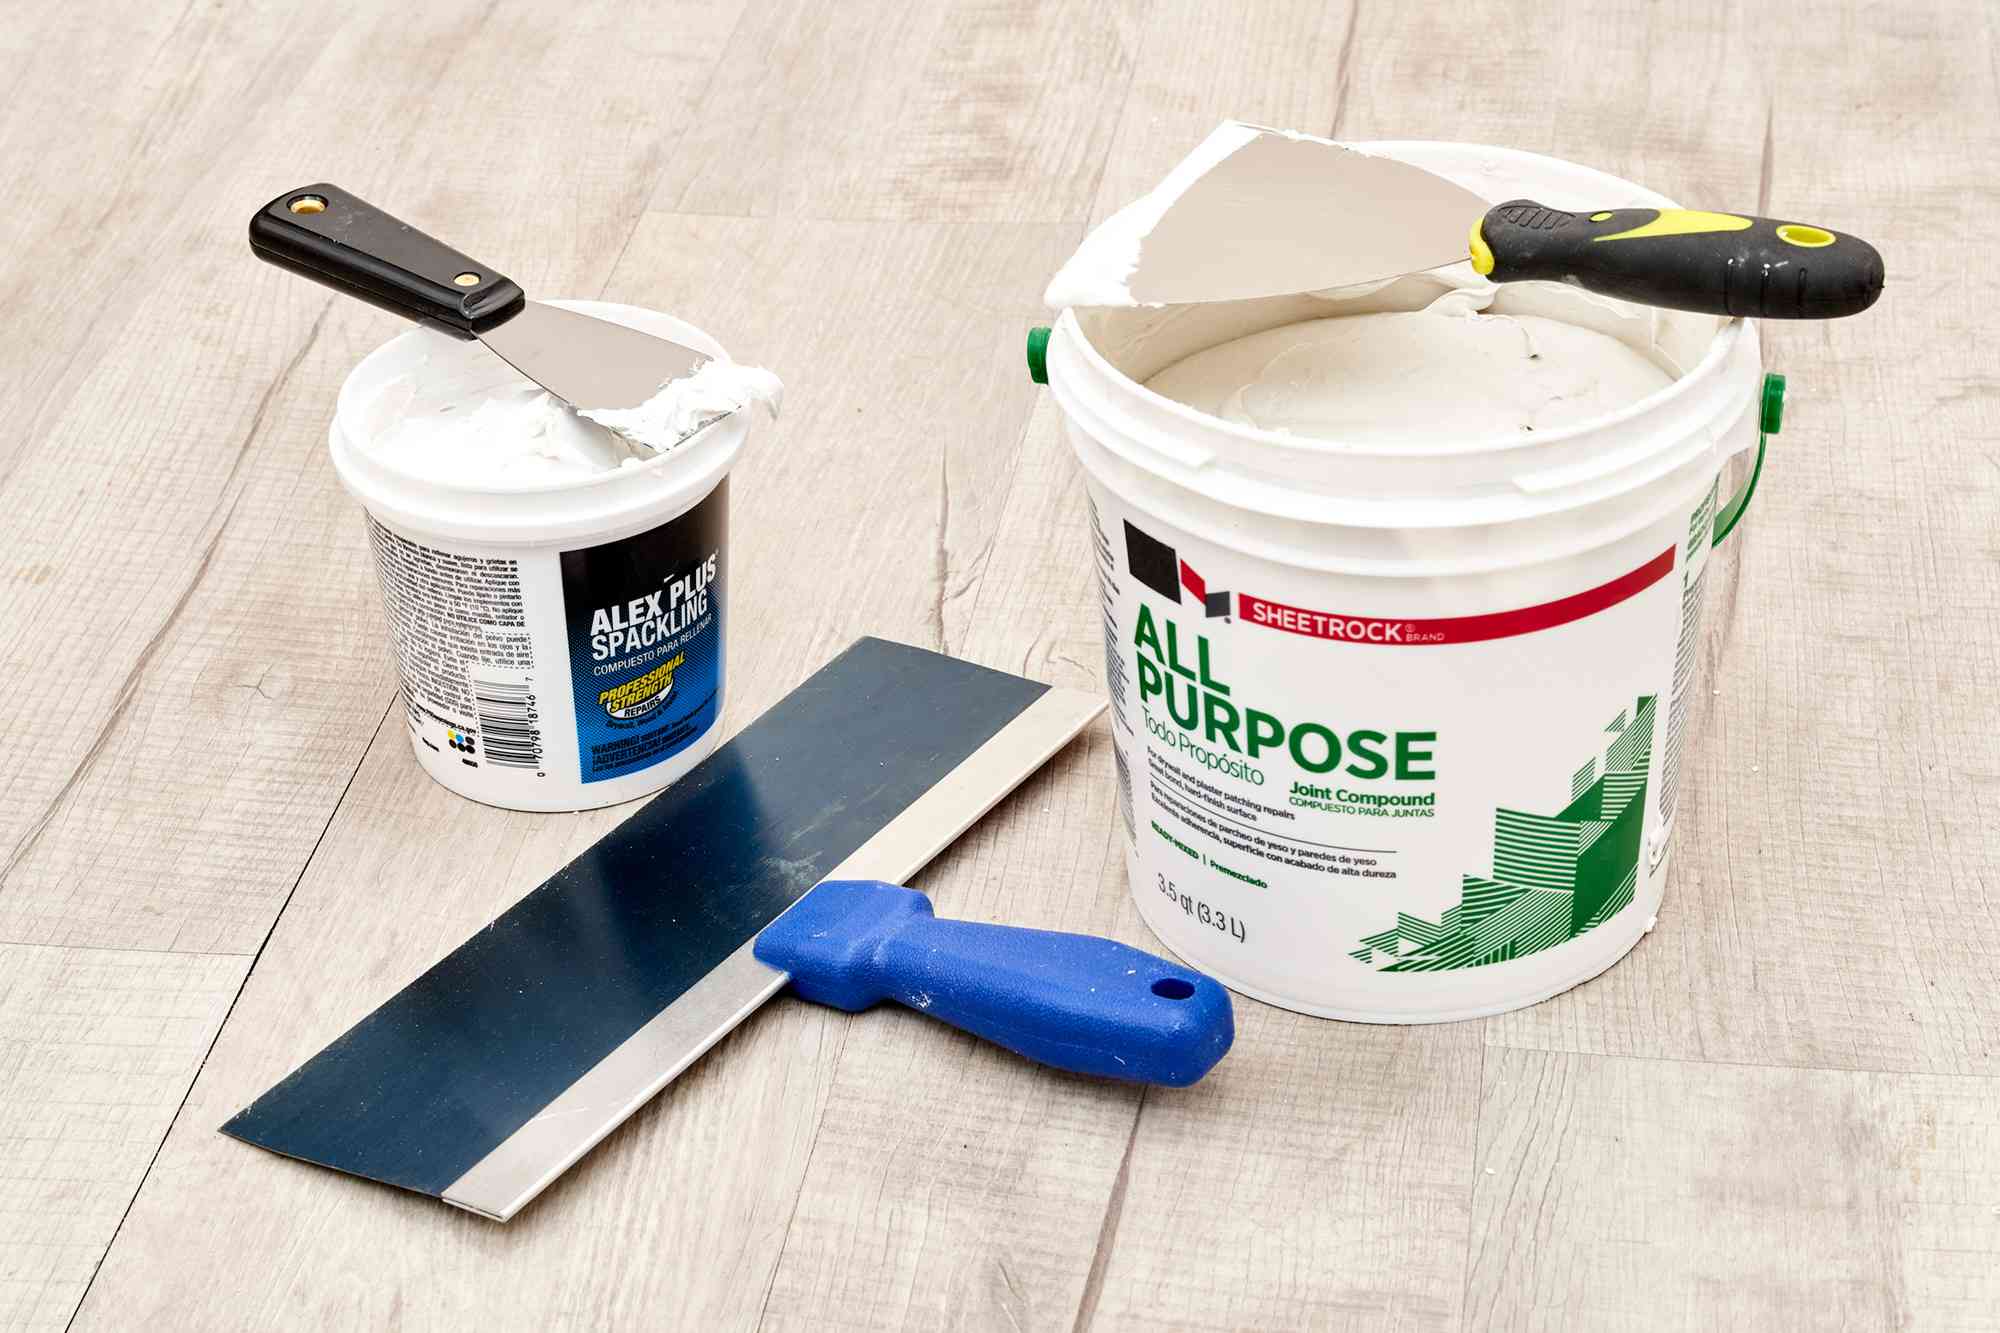
Materials Needed
Before diving into the world of spackle art, it’s essential to gather the necessary materials to ensure a smooth and enjoyable creative process. Here’s a comprehensive list of the materials you’ll need to get started:
- Spackle: The star of the show, spackle will serve as the primary medium for your artwork. Opt for a high-quality spackle that offers a smooth consistency and is suitable for artistic applications.
- Canvas: Select a canvas or a sturdy art board as the foundation for your spackle art. The size and shape of the canvas are entirely up to your artistic preferences.
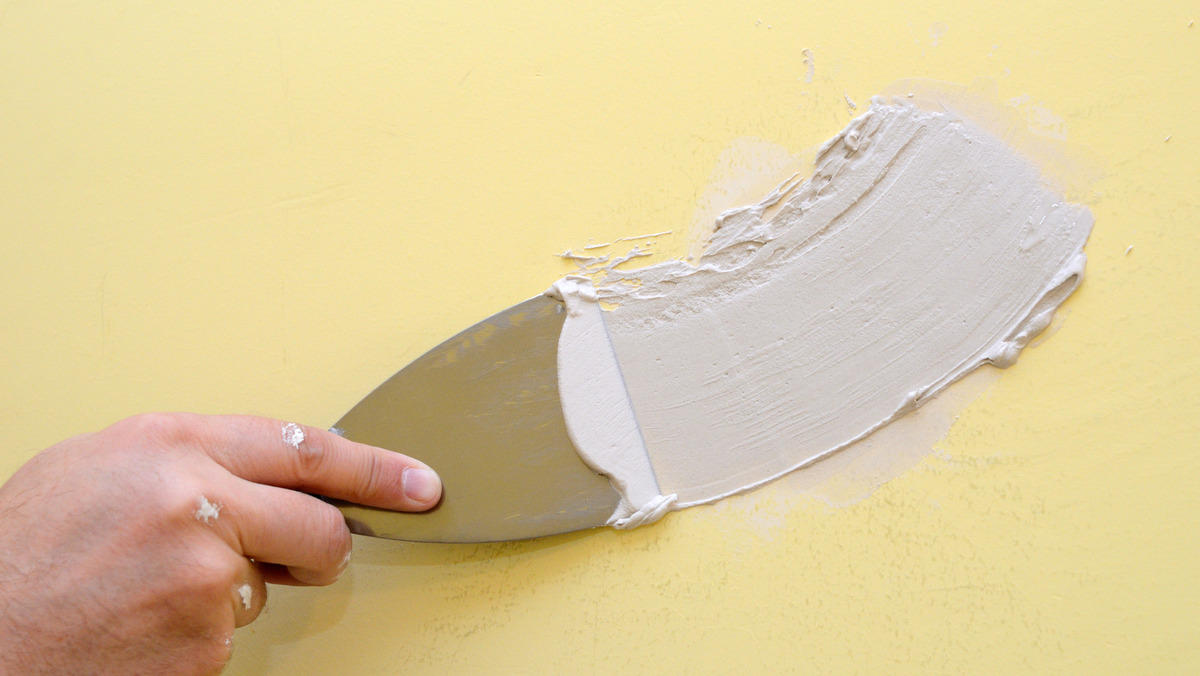
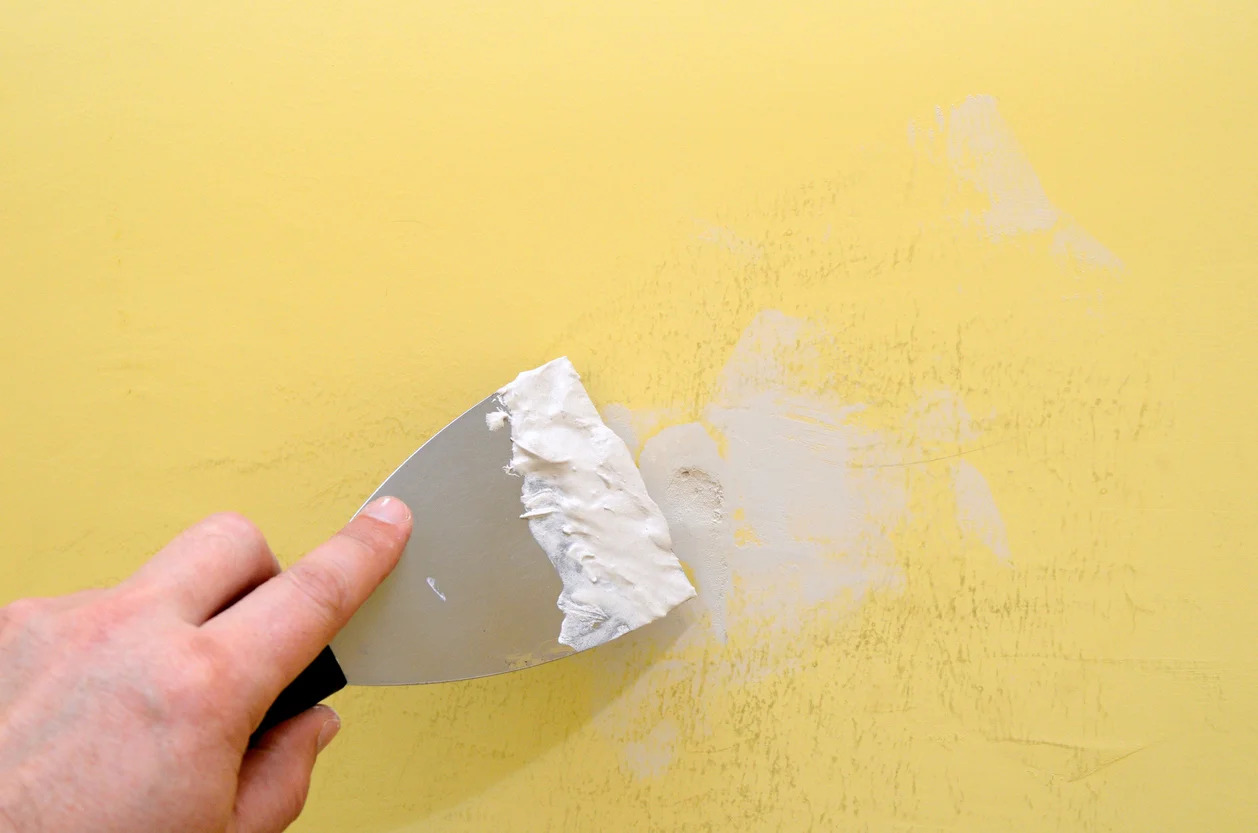
- Palette Knife or Spatula: A palette knife or spatula will be your go-to tool for applying and manipulating the spackle on the canvas. Look for a versatile and easy-to-handle tool that allows for precise application.
- Acrylic Paints: While optional, acrylic paints can add vibrant colors and depth to your spackle art. Consider including a variety of colors to bring your artistic vision to life.
- Paintbrushes: If you choose to incorporate acrylic paints, a set of paintbrushes in different sizes will be essential for applying and blending colors on the canvas.
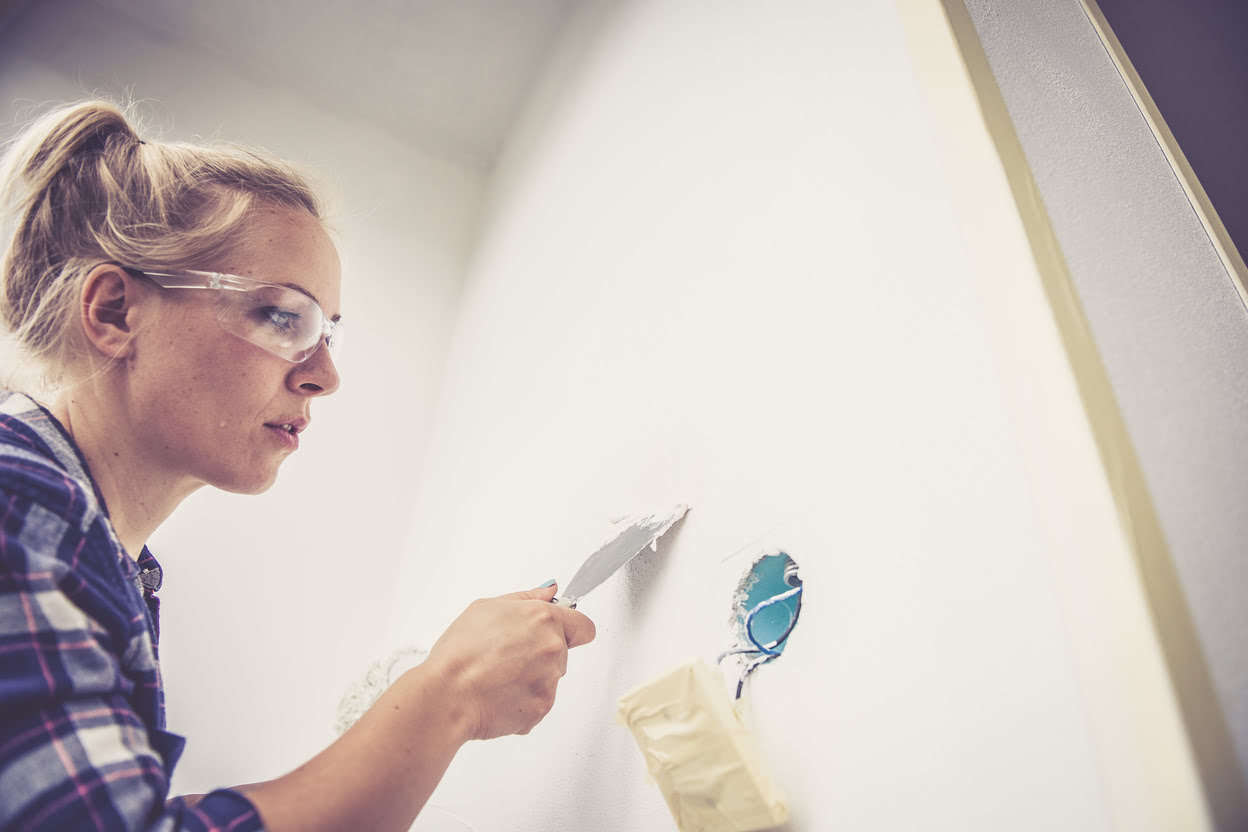
- Protective Gloves: Since spackle can be messy to work with, wearing protective gloves will help keep your hands clean and protect your skin during the creative process.
- Drop Cloth or Newspaper: To protect your workspace from spills and splatters, lay down a drop cloth or spread out newspaper to create a designated and easily cleanable area for creating your spackle art.
- Water and Cloth: Keep a container of water and a cloth handy for cleaning your tools and making quick adjustments to the spackle as you work.
- Inspiration and Creativity: Last but certainly not least, bring your boundless creativity and a spark of inspiration to fuel your artistic journey. Let your imagination run wild as you explore the possibilities of spackle art.
With these materials at your disposal, you’ll be well-equipped to embark on your spackle art adventure. Now that you’ve gathered the essentials, let’s move on to preparing the canvas for your artistic masterpiece.
Preparing the Canvas
Before delving into the creative process of applying spackle, it’s crucial to prepare the canvas to ensure an optimal surface for your artwork. Follow these steps to get your canvas ready for the spackle application:
- Prime the Canvas: If you’re working with a raw canvas, consider applying a layer of gesso to prime the surface. This will create a smooth and stable base for the spackle and any additional materials you choose to incorporate.
- Sketch or Outline: If you have a specific design or concept in mind for your spackle art, lightly sketch or outline the basic elements on the canvas. This step will serve as a guide as you apply the spackle, ensuring that you stay true to your artistic vision.
- Set Up Your Workspace: Find a well-lit and well-ventilated area to work on your spackle art. Lay down a drop cloth or newspaper to protect your workspace from any potential spills or splatters.
- Position the Canvas: Place the canvas on a flat and stable surface, ensuring that it’s easily accessible for the spackling process. Consider securing the canvas with clips or weights to prevent it from shifting as you work.
By taking the time to prepare the canvas, you’re setting the stage for a seamless and enjoyable spackle art experience. With the canvas primed and ready, you’re now prepared to dive into the next step: mixing the spackle.
Mixing the Spackle
As you embark on your spackle art journey, mastering the art of mixing spackle is a crucial step in achieving the desired texture and consistency for your artwork. Follow these guidelines to ensure that your spackle is prepared for application:
- Selecting the Spackle: Begin by choosing a high-quality spackle that offers a smooth and malleable texture. Opt for a product specifically designed for artistic applications, as it will provide the best results for your artwork.
- Preparing the Spackle: Scoop out the desired amount of spackle onto a clean and smooth surface, such as a palette or disposable plate. Ensure that the spackle is free of any lumps or dry patches before proceeding.
- Adding Color (Optional): If you wish to incorporate color into your spackle art, consider mixing acrylic paints into the spackle to achieve your desired hues. Blend the paint thoroughly into the spackle until the color is evenly distributed.
- Adjusting the Consistency: Depending on your artistic vision, you may need to adjust the spackle’s consistency. Add small amounts of water to the spackle and mix it thoroughly until you achieve the desired smoothness and spreadability. Be cautious not to add too much water, as it can compromise the spackle’s texture.
By following these steps, you’ll be well-equipped to create a spackle mixture that aligns with your artistic vision. Whether you opt for a neutral white spackle or infuse it with vibrant colors, the mixing process sets the stage for the next exhilarating phase: applying the spackle to the canvas.
When creating spackle art, make sure to use a variety of textures and tools to add depth and interest to your piece. Experiment with different application techniques to achieve unique and dynamic effects.
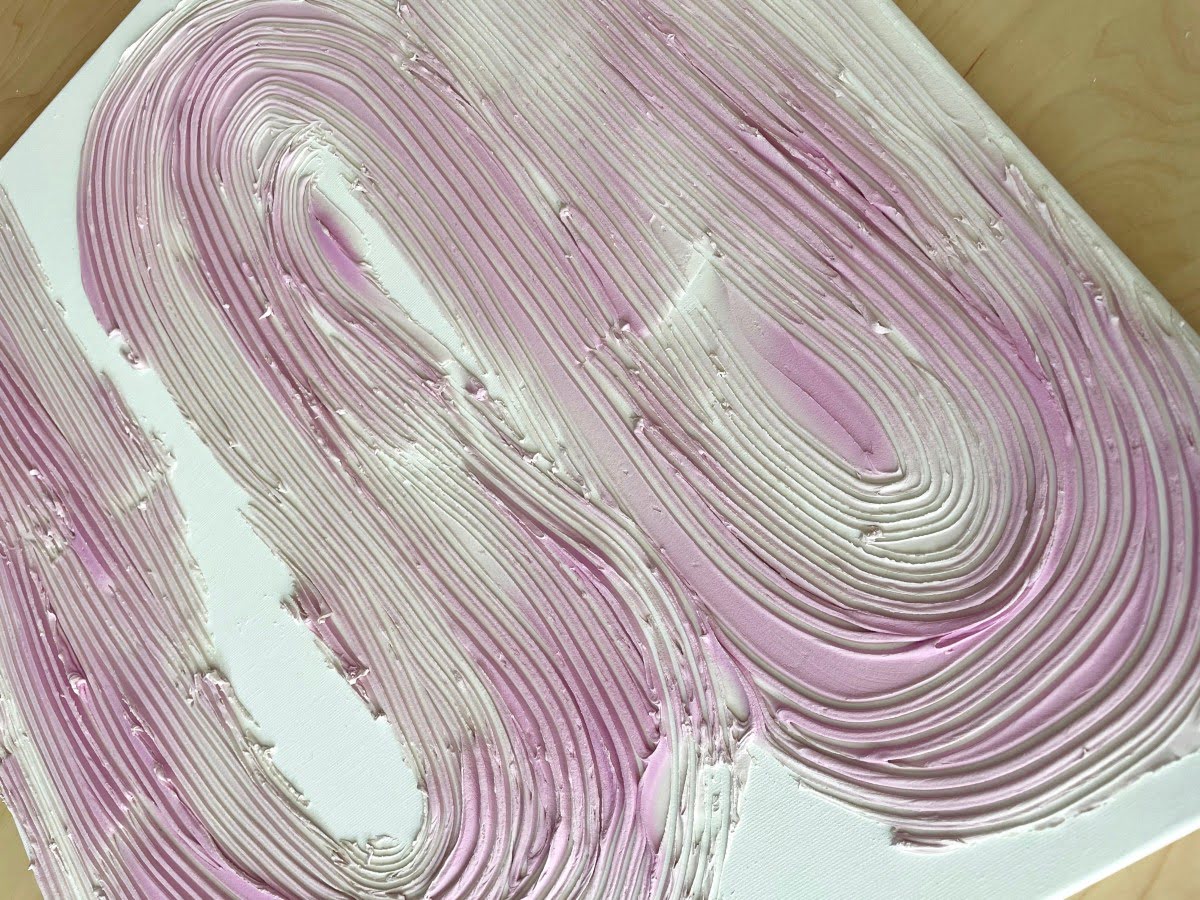
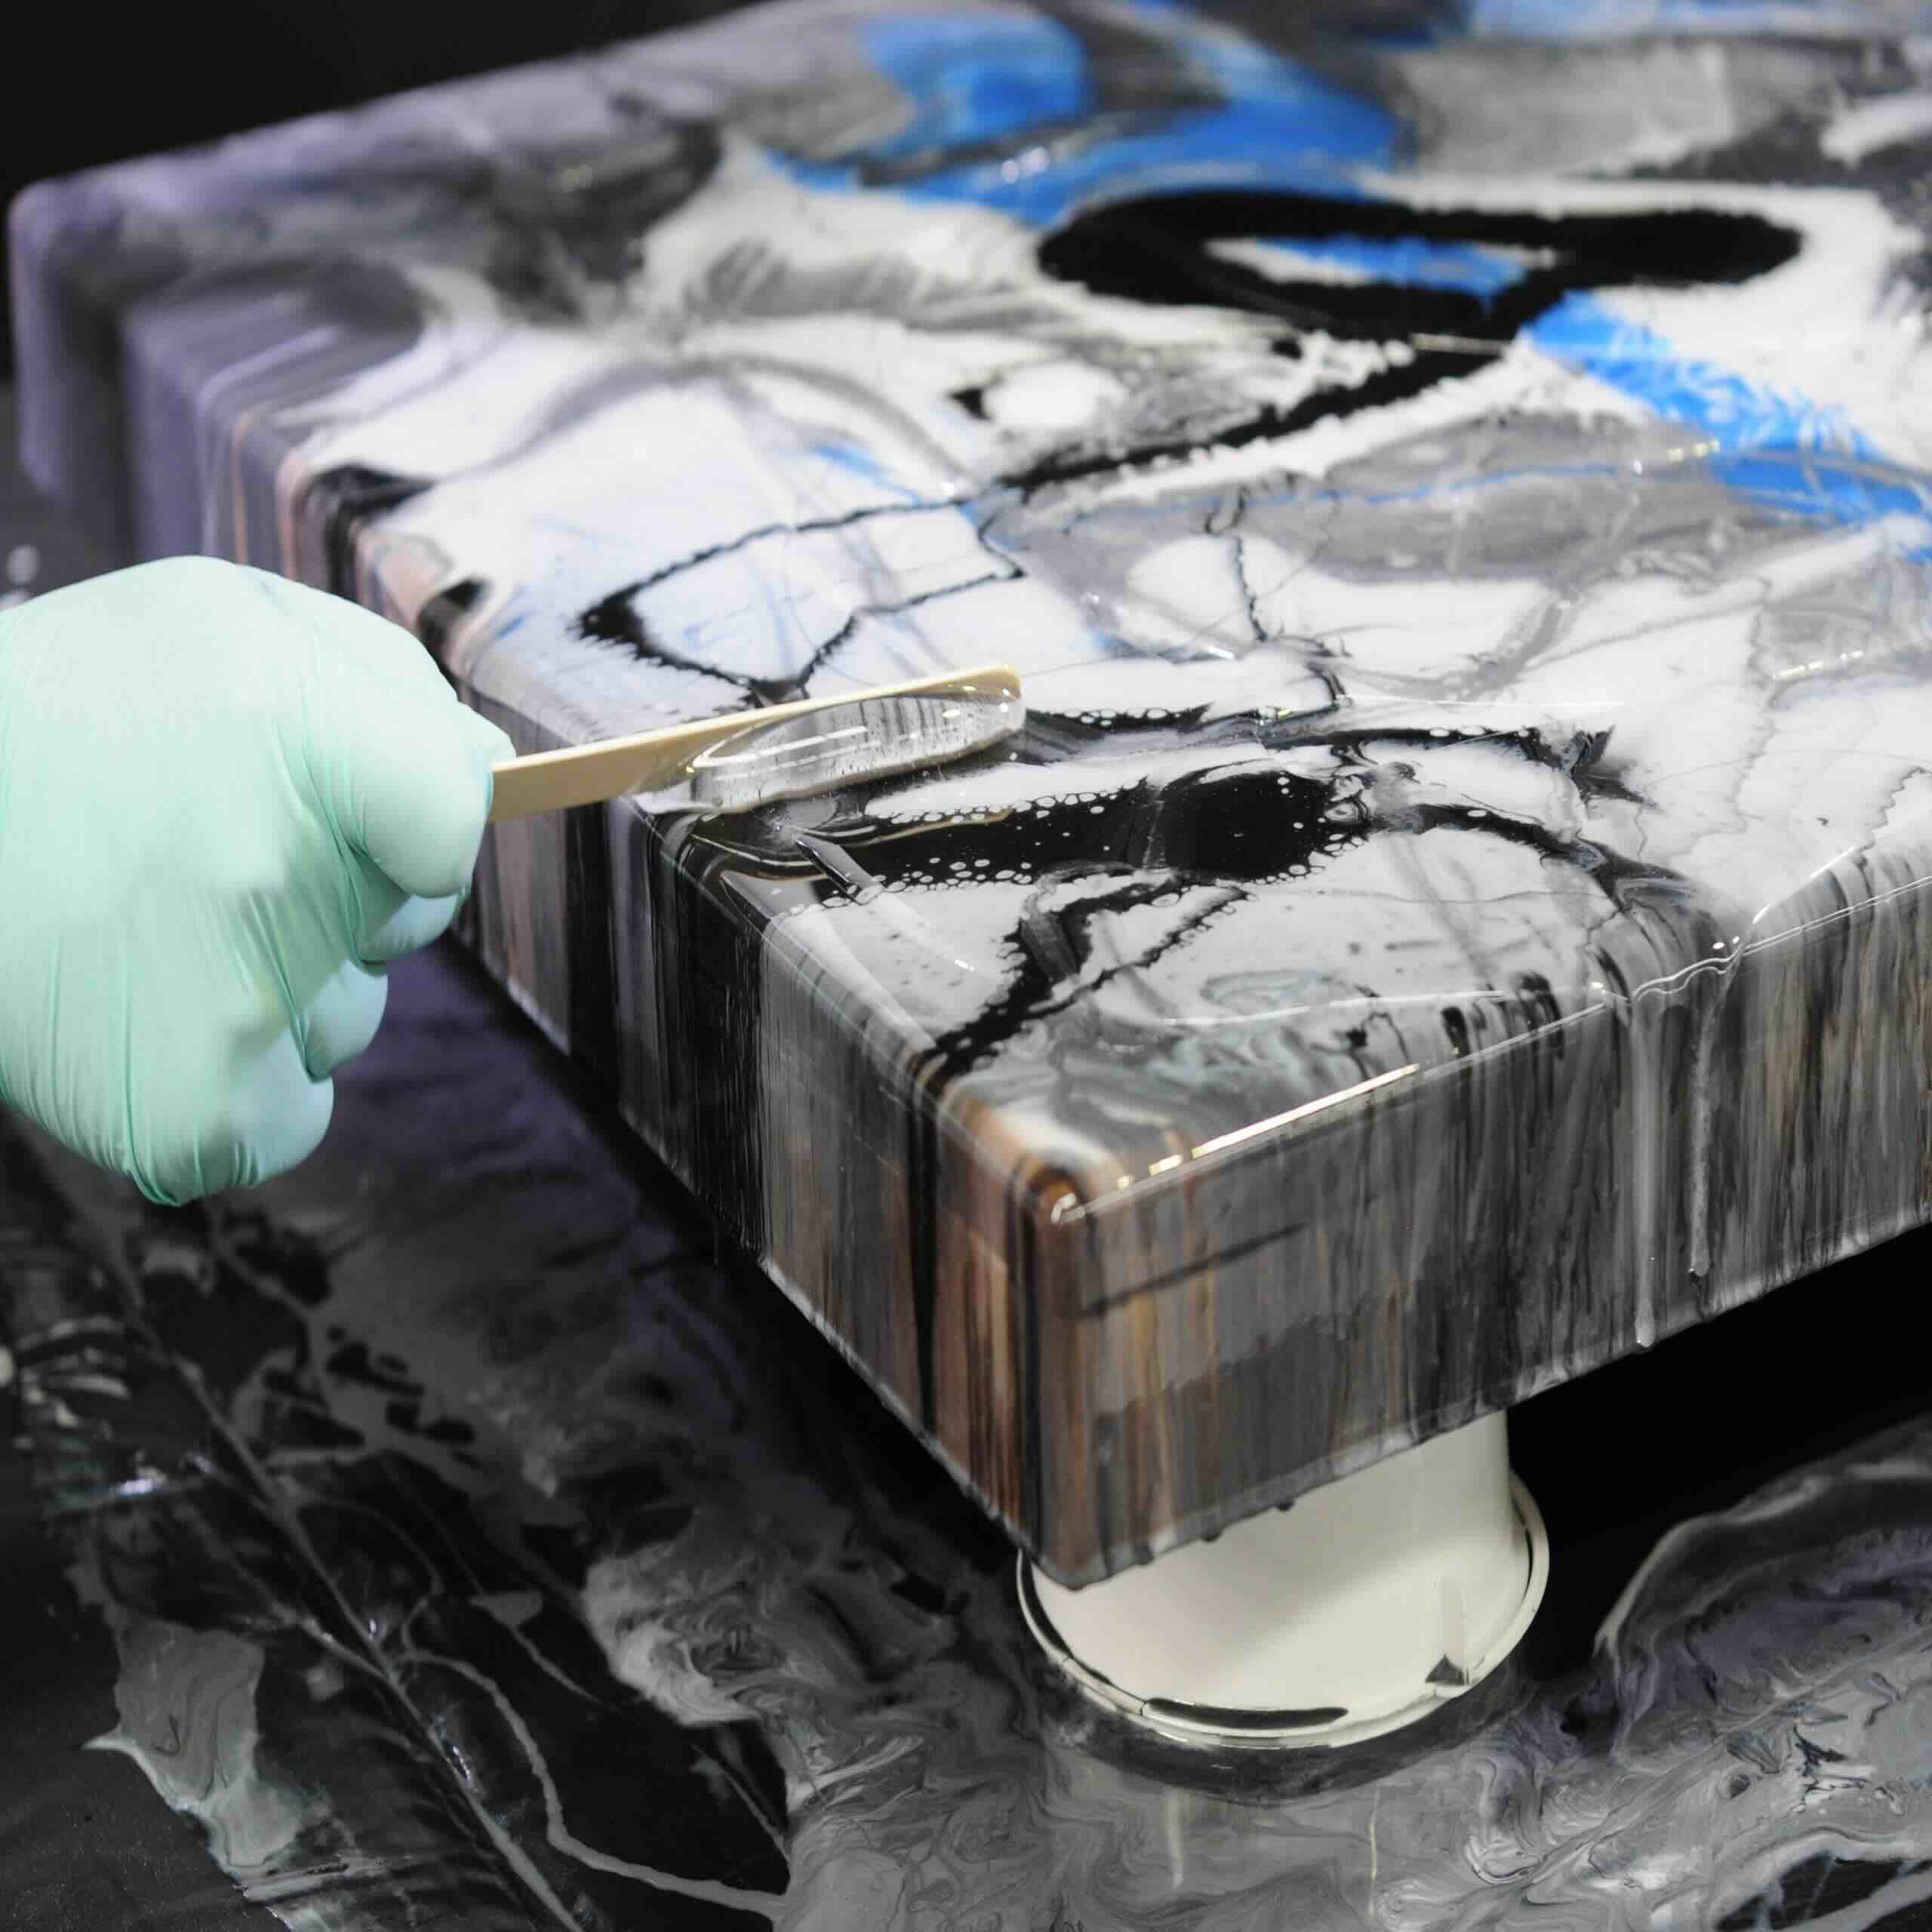
Applying the Spackle
With the canvas primed and the spackle mixture prepared, it’s time to bring your artistic vision to life by applying the spackle to the canvas. This step is where your creativity takes center stage, allowing you to experiment with textures, shapes, and patterns. Here’s a guide to effectively applying the spackle to create captivating artwork:
- Using the Palette Knife: Dip the palette knife or spatula into the spackle mixture, ensuring that it’s evenly coated on the tool’s surface. The amount of spackle you apply to the palette knife will depend on the coverage and texture you intend to achieve.
- Applying with Precision: Carefully transfer the spackle from the palette knife to the canvas, applying gentle pressure to control the thickness and distribution of the spackle. Experiment with different techniques, such as swirling, stippling, or layering, to create varied textures and visual interest.
- Building Dimension: As you apply the spackle, consider building dimension and depth within your artwork. Layer the spackle strategically to create raised elements and dynamic surfaces that invite visual exploration.
- Exploring Abstract Forms: Embrace the freedom of expression as you work with the spackle, allowing abstract forms and patterns to emerge organically. Trust your intuition and let the spackle guide your creative process, leading to unique and captivating results.
Throughout the spackling process, embrace experimentation and spontaneity, allowing your artistic instincts to guide the application of the spackle. By infusing your creativity into each stroke and texture, you’ll witness your artwork taking shape in captivating and unexpected ways.
As you complete the application of the spackle, you’re one step closer to realizing your spackle art vision. The next phase will involve bringing your artistic creation to fruition through the process of creating the art itself.
Read more: How To Make Metal Wall Art
Creating the Art
With the spackle applied to the canvas, you now have a textured foundation that serves as the starting point for bringing your artistic creation to life. This phase of the spackle art process is where your imagination and artistic vision converge, allowing you to transform the textured surface into a captivating piece of art. Here’s how you can further develop your spackle art:
- Exploring Composition: Consider the composition of your artwork and how the textured surface interacts with the space on the canvas. Whether you’re drawn to abstract forms, landscapes, or intricate designs, use the spackle’s texture as a springboard for shaping the composition of your art.
- Adding Detail and Definition: Utilize the unique properties of spackle to add detail and definition to your artwork. Experiment with carving or etching into the spackle to create intricate patterns, lines, or focal points that enhance the visual impact of your piece.
- Embracing Texture and Contrast: Emphasize the tactile nature of spackle art by embracing texture and contrast. Use the raised surfaces and varied textures created by the spackle to evoke depth and dimension within your artwork, adding visual intrigue and tactile appeal.
- Incorporating Color (Optional): If you’ve chosen to incorporate acrylic paints into your spackle art, this is the stage where you can introduce vibrant colors to enhance the visual impact of your creation. Experiment with blending and layering colors to evoke mood and emotion within your artwork.
As you immerse yourself in the process of creating the art, allow your intuition and creativity to guide your decisions. Embrace the organic evolution of your artwork, allowing it to unfold naturally as you respond to the textures and forms created by the spackle.
With each artistic choice and brushstroke, you’ll witness your spackle art taking on a life of its own, evolving into a captivating expression of your creative vision. As you near the completion of your artwork, the final touches will add a polished and refined quality to your spackle art masterpiece.
Adding Finishing Touches
As you approach the culmination of your spackle art journey, the addition of finishing touches will elevate your artwork, adding polish and refinement to your creation. This phase allows you to refine and enhance the visual impact of your spackle art, bringing it to a state of completion that reflects your artistic intentions. Here’s how you can add the finishing touches to your spackle art:
- Refining Details: Take a moment to assess the overall composition and details of your artwork. Consider refining any intricate patterns, lines, or textures created with the spackle, ensuring that they align with your artistic vision.
- Balancing Visual Elements: Evaluate the balance of visual elements within your artwork, such as color, texture, and form. Make adjustments as needed to create a harmonious and visually compelling composition that resonates with the viewer.
- Enhancing Depth and Contrast: Use subtle shading or highlighting techniques to enhance the depth and contrast within your spackle art. By strategically accentuating certain areas, you can draw the viewer’s eye and create a sense of visual dynamism within your artwork.
- Sealing and Protecting: Once you’re satisfied with the artistic integrity of your spackle art, consider applying a sealant or varnish to protect the artwork and preserve its visual appeal. This step will safeguard your creation and ensure its longevity.
- Reflecting on the Artwork: Take a moment to step back and reflect on your completed spackle art. Consider the emotions and messages conveyed by your creation, and appreciate the unique journey that led to the realization of your artistic vision.
As you add the finishing touches to your spackle art, trust your artistic instincts and embrace the transformative power of subtle refinements. Each decision and adjustment contributes to the cohesiveness and impact of your artwork, bringing it to a state of completion that reflects your artistic prowess.
With the finishing touches in place, you’ve successfully navigated the creative process of spackle art, culminating in a captivating and unique masterpiece that reflects your creative spirit. As you admire your completed artwork, take a moment to savor the fulfillment of bringing your artistic vision to life through the versatile and captivating medium of spackle art.
Final Thoughts
Congratulations on embarking on a creative journey that has led you to explore the captivating world of spackle art. Throughout this artistic endeavor, you’ve harnessed the malleable nature of spackle to create a textured masterpiece that reflects your unique vision and creativity. As you reflect on the process and the completed artwork, consider the following final thoughts:
Unleashing Creativity: The process of creating spackle art has allowed you to unleash your creativity in a tactile and expressive manner. The versatility of spackle as a medium has empowered you to explore textures, forms, and colors, resulting in a one-of-a-kind artwork that embodies your artistic expression.
Embracing Experimentation: Throughout the spackle art journey, you’ve embraced experimentation and spontaneity, allowing the organic evolution of your artwork to guide your creative decisions. This spirit of exploration has led to the emergence of captivating textures, patterns, and compositions within your spackle art.
Artistic Evolution: Your experience with spackle art has showcased the transformative power of artistic expression. From the initial application of spackle to the addition of finishing touches, each phase has contributed to the evolution of your artwork, culminating in a visually compelling and emotionally resonant creation.
Personal Fulfillment: As you admire your completed spackle art, take pride in the personal fulfillment that comes from bringing your artistic vision to life. Your dedication, creativity, and artistic sensibility have converged to produce a unique and captivating artwork that reflects your passion for self-expression through art.
As you conclude this spackle art journey, consider the artistic growth and inspiration that have emerged from the creative process. Whether this experience serves as a stepping stone for further artistic explorations or stands as a testament to your creative spirit, the journey of creating spackle art has undoubtedly left an indelible mark on your artistic endeavors.
May your spackle art journey continue to inspire and ignite your passion for creativity, serving as a reminder of the boundless potential that resides within the realm of artistic expression. Embrace the tactile allure of spackle art, and let your creativity flourish in the endless possibilities it offers.
Frequently Asked Questions about How To Make A Spackle Art
Was this page helpful?
At Storables.com, we guarantee accurate and reliable information. Our content, validated by Expert Board Contributors, is crafted following stringent Editorial Policies. We're committed to providing you with well-researched, expert-backed insights for all your informational needs.


0 thoughts on “How To Make A Spackle Art”