
Articles
How To Spackle A Ceiling
Modified: September 2, 2024
Learn how to spackle a ceiling with these helpful articles. Get step-by-step instructions and tips for a flawless finish.
(Many of the links in this article redirect to a specific reviewed product. Your purchase of these products through affiliate links helps to generate commission for Storables.com, at no extra cost. Learn more)
Introduction
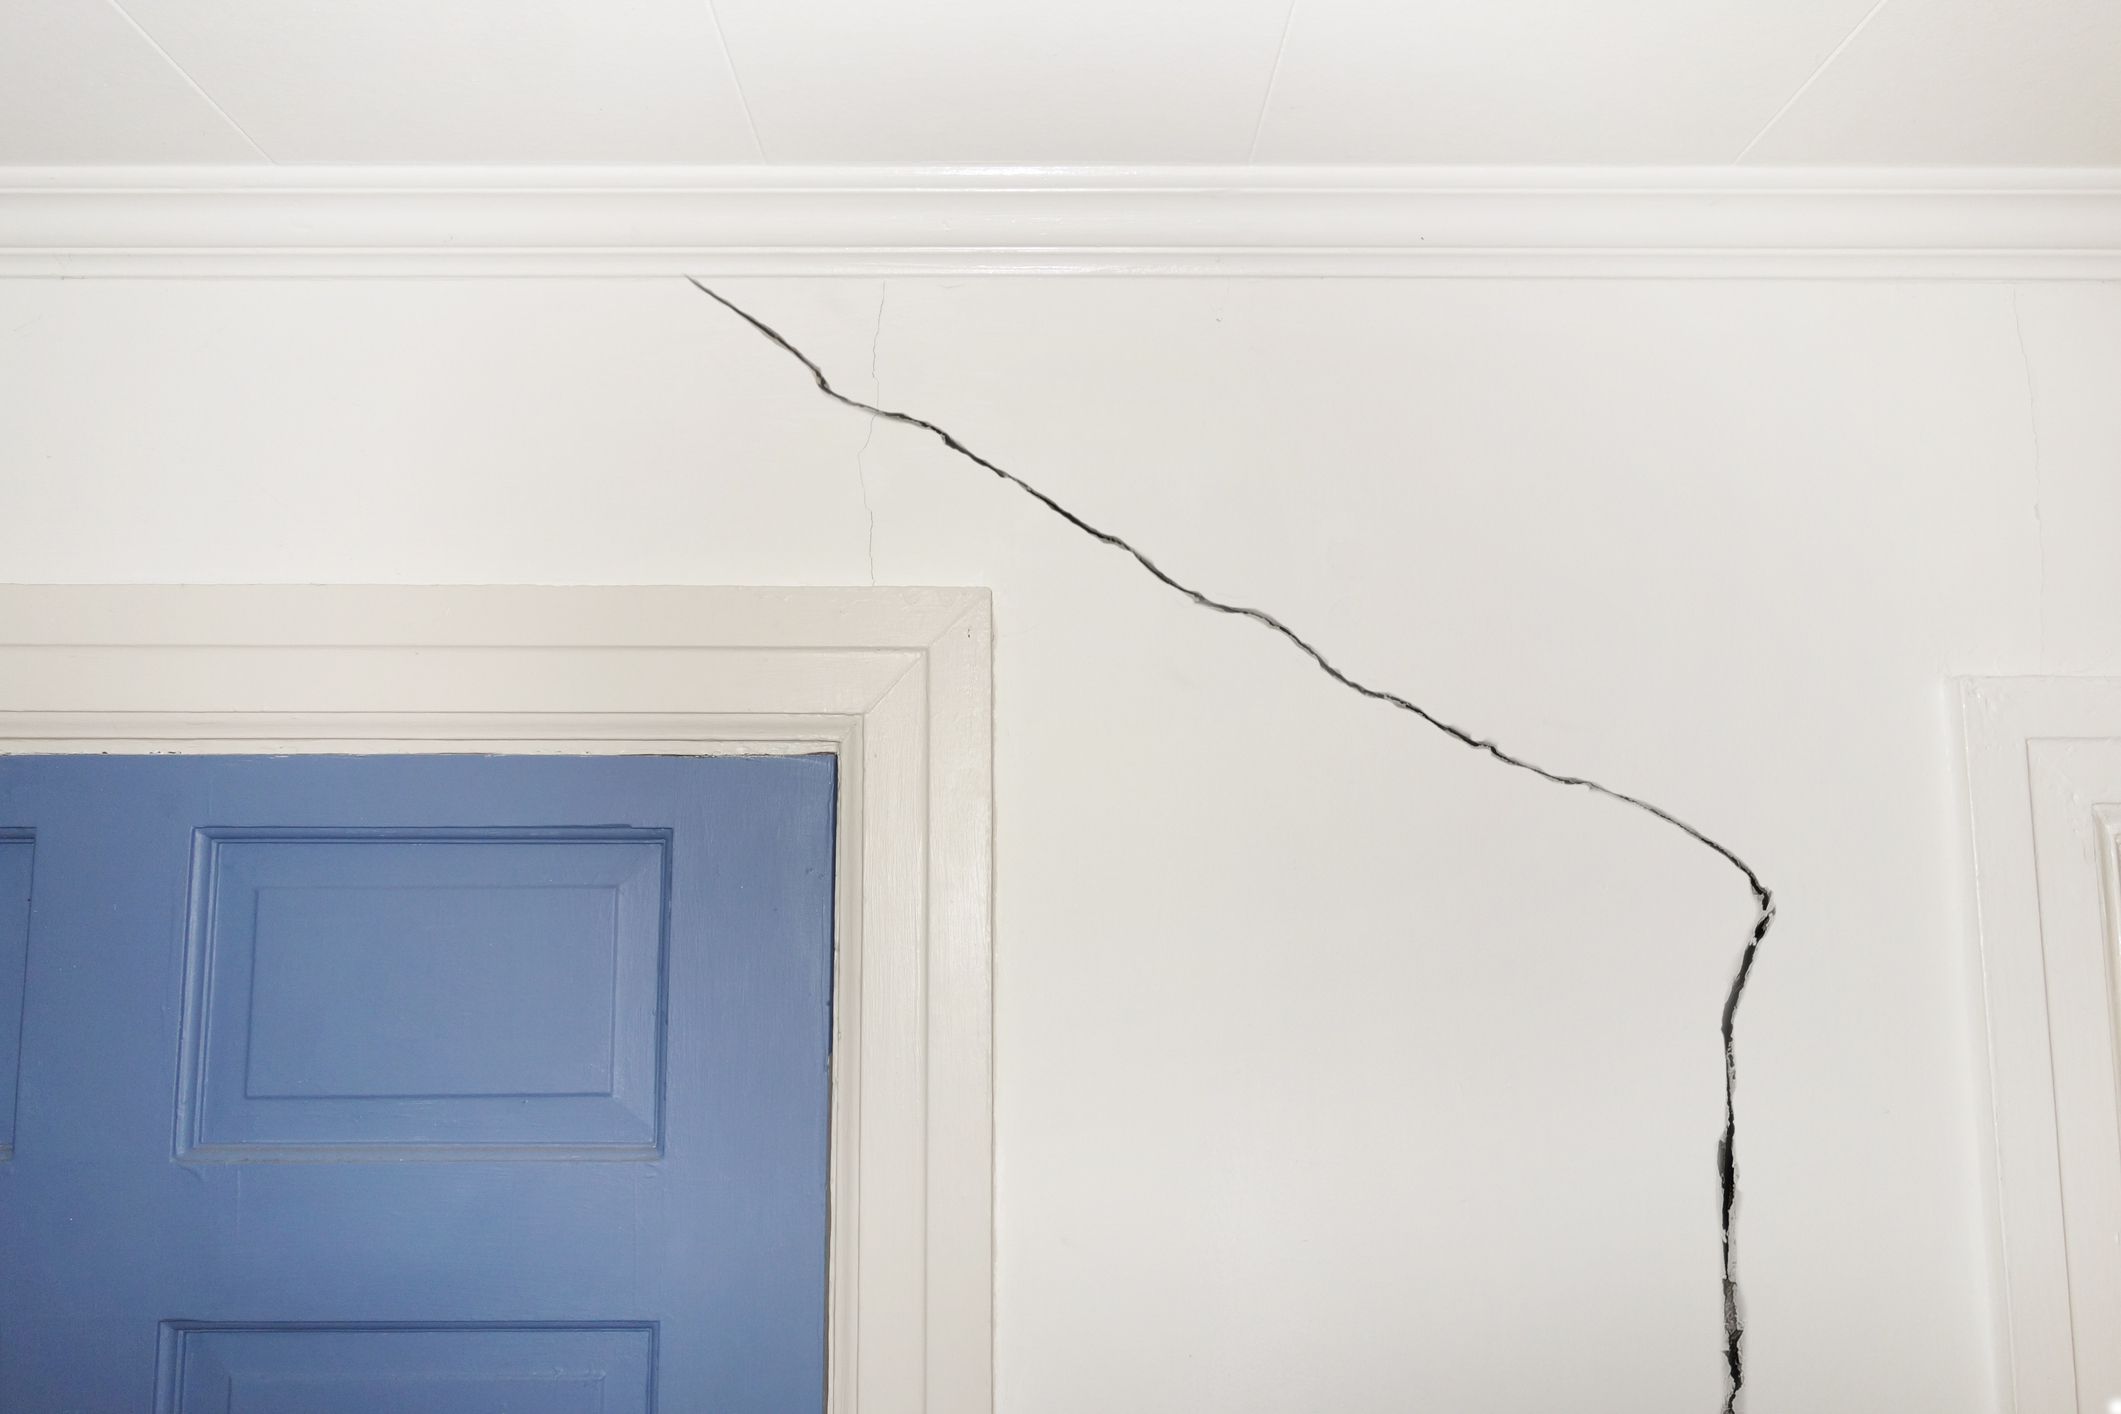
When it comes to home improvement projects, one task that often gets overlooked is spackling a ceiling. Whether you’re dealing with small cracks, holes, or an uneven surface, knowing how to properly spackle a ceiling is essential to achieve a smooth and professional-looking finish.
In this article, we’ll guide you through the step-by-step process of spackling a ceiling. From gathering the necessary materials and tools to applying the spackle and finishing touches, you’ll learn everything you need to know to successfully tackle this project.
But first, let’s understand what spackle is. Spackle, also known as joint compound or filler, is a creamy paste-like substance that dries hard. It is primarily used to fill in cracks, holes, and imperfections on walls and ceilings before painting or wallpapering. Spackling a ceiling requires some time and patience, but with the right techniques, you can achieve a flawless finish that will make your ceiling look as good as new.
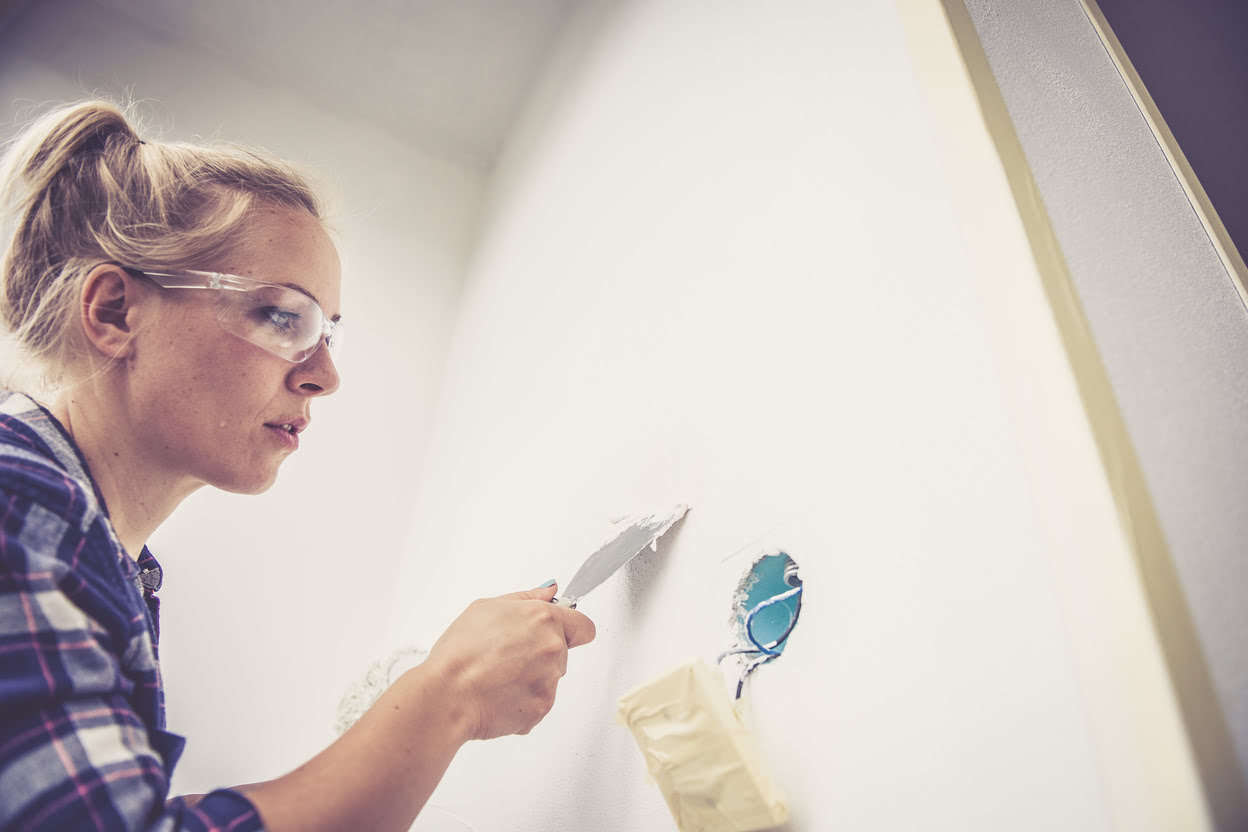
Before you begin, it’s important to note that spackling may not be suitable for all types of ceilings. You should assess the condition of your ceiling and consult a professional if needed. Additionally, ensure that you have proper safety precautions in place, such as wearing protective eyewear and covering furniture and floors to prevent any damage or mess during the process.
Now that we have covered the basics, let’s dive into the materials needed to get started.
Key Takeaways:
- Proper spackling of a ceiling involves thorough cleaning, meticulous application of spackle, and patient sanding to achieve a flawless finish. Following the step-by-step process ensures a professional-looking result.
- From gathering materials to painting, spackling a ceiling requires attention to detail and patience. The rewarding process transforms a flawed ceiling into a polished and visually appealing surface.
Read more: What Is A Spackle
Materials Needed
Before you start spackling your ceiling, make sure you have the following materials on hand:
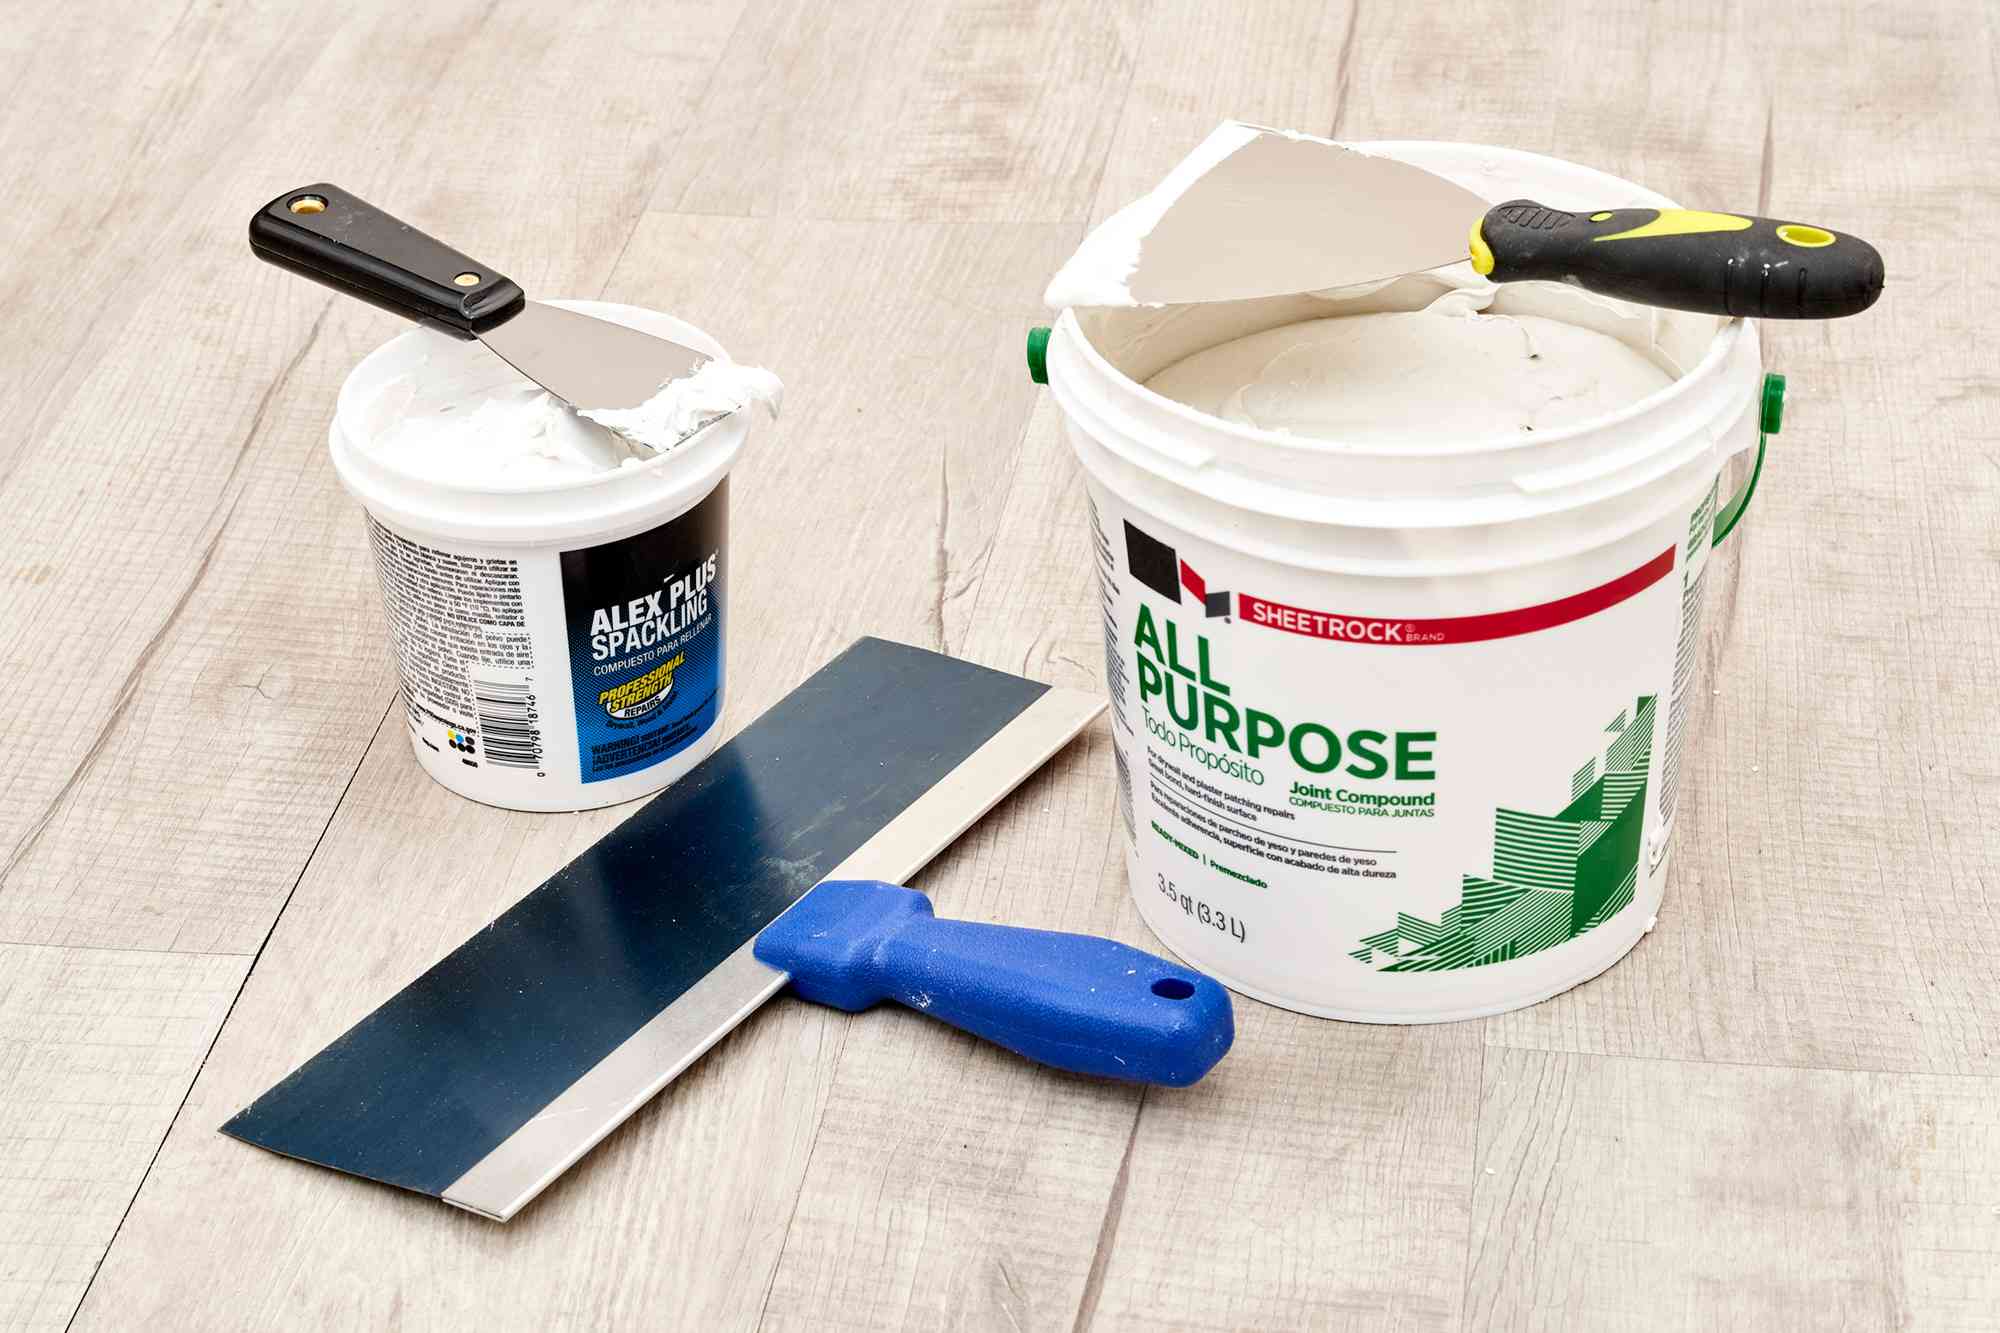
- Spackle or joint compound: This is the primary material you’ll be using to fill in the cracks and holes on your ceiling. Choose a high-quality spackle that is suitable for ceilings.
- Putty knife: You’ll need a putty knife with a flexible blade to apply the spackle smoothly and evenly on the ceiling.
- Sandpaper: To achieve a smooth finish, you’ll need sandpaper with a fine grit. This will be used to sand down the spackle once it has dried.
- Clean cloth or sponge: Use a clean cloth or sponge to wipe away any dust or debris from the ceiling before you begin spackling.
- Primer: A primer is essential to create a smooth and even surface for painting. Choose a primer that is suitable for your ceiling type and the type of paint you’ll be using.
- Paint: Once the spackle and primer have dried, you’ll need paint to give your ceiling a fresh and uniform look. Select a paint color that complements the overall aesthetic of your room.
- Paintbrush or roller: Depending on your preference and the size of the ceiling, you’ll need a paintbrush or roller to apply the paint evenly on the surface.
- Dust mask and protective eyewear: It’s important to protect yourself during the spackling and sanding process. Wear a dust mask to avoid inhaling any dust particles and protective eyewear to protect your eyes.
- Dust sheet or plastic drop cloth: To protect your furniture and floors from any potential spackle or paint splatters, cover them with a dust sheet or plastic drop cloth.
Having these materials readily available will ensure that you can complete the spackling process efficiently and effectively. Now that you’ve gathered the necessary materials, let’s move on to preparing your ceiling for spackling.
Preparation
Before you start spackling your ceiling, it’s important to prepare the area properly. Follow these steps to ensure a smooth and successful spackling process:
- Clean the ceiling: Begin by cleaning the ceiling to remove any dirt, dust, or debris. Use a clean cloth or sponge and gently wipe the surface to ensure that it’s free from any loose particles. This step will help the spackle adhere better to the ceiling.
- Protect the surrounding area: Cover your furniture, floors, and any other items in the room with a dust sheet or plastic drop cloth. This will protect them from any spackle or paint splatters during the process.
- Remove loose paint or popcorn texture: If your ceiling has any peeling paint or a popcorn texture, gently remove it using a putty knife or scraper. Smooth out the surface as much as possible before proceeding with spackling.
- Fill in larger holes or cracks: If you have any larger holes or cracks on the ceiling, you may need to use a patching compound or fiberglass mesh tape to reinforce the area. Follow the manufacturer’s instructions for the specific product you’re using.
- Sand the area: Once the patching compound or fiberglass tape has dried, lightly sand the area to create a smooth surface. Use a fine-grit sandpaper and be gentle to avoid damaging the surrounding area.
By thoroughly preparing the ceiling, you’ll create an ideal surface for the spackle to adhere to and ensure a seamless finish. Now that the preparation is complete, it’s time to move on to the step-by-step process of spackling your ceiling.
Step 1: Clean the Ceiling
The first step in spackling a ceiling is to thoroughly clean the surface. This is important to ensure that the spackle adheres properly and that there are no loose particles or debris that could interfere with the spackling process.
Here’s how to clean your ceiling:
- Prepare the area: Cover your furniture and floors with a dust sheet or plastic drop cloth to protect them from any dust or debris that may fall during the cleaning process.
- Use a duster or vacuum: Start by removing any loose dust or cobwebs using a duster or a vacuum cleaner with a brush attachment. Gently sweep the ceiling to remove any visible particles.
- Wipe the ceiling: Next, take a clean cloth or sponge and moisten it with warm water. Wring out any excess water to avoid dripping. Gently wipe the ceiling surface in circular motions, starting from one corner and working your way across the entire area. Be sure to pay attention to any visible stains or marks on the ceiling.
- Dry the ceiling: Once you’ve wiped the entire ceiling, allow it to air-dry completely. Make sure there is no moisture left before moving on to the next step.
Cleaning the ceiling ensures that the spackle can adhere properly and that you have a clean surface to work with. Once the ceiling is dry, you can proceed to the next step of gathering the necessary tools and materials for the spackling process.
Step 2: Gather Tools and Materials
Before you begin spackling your ceiling, it’s important to gather all the necessary tools and materials. Having everything prepared and within reach will help you work more efficiently and ensure a smoother spackling process.
Here are the tools and materials you’ll need:
- Spackle or joint compound: Get a high-quality spackle or joint compound that is specifically designed for ceilings. Choose the right amount of spackle depending on the size of the repairs or imperfections you need to address.
- Putty knife: Select a putty knife with a flexible blade, ideally around 6 to 8 inches long. This will help you apply the spackle smoothly and evenly.
- Sandpaper: Have fine-grit sandpaper (around 120 to 150 grit) on hand to sand down the spackle once it has dried. This will ensure a smooth finish on your ceiling.
- Clean cloth or sponge: Keep a clean cloth or sponge nearby to wipe any excess spackle and clean up any messes during the spackling process.
- Primer: Depending on the condition and type of your ceiling, you may need a primer. Choose a primer that is suitable for your ceiling material and the type of paint you’ll be using.
- Paint: If you plan on painting the ceiling after spackling, have the desired paint color ready. Choose a paint that is specifically formulated for ceilings to achieve the best results.
- Paintbrush or roller: Have a paintbrush or roller on hand depending on your preference and the size of the ceiling. A paintbrush is ideal for smaller areas, while a roller is more efficient for larger surfaces.
- Dust mask and protective eyewear: Protect yourself during the spackling and sanding process by wearing a dust mask and protective eyewear. This will prevent inhalation of dust particles and protect your eyes.
- Dust sheet or plastic drop cloth: Lay down a dust sheet or plastic drop cloth to protect your furniture and floors from any potential spackle or paint splatters.
Having these tools and materials readily available will make the spackling process smoother and more efficient. Once you have everything gathered, you can proceed to the next step of actually mixing and applying the spackle.
Read more: How To Spackle Corners
Step 3: Mix the Spackle
Now that you have all the necessary tools and materials, it’s time to mix the spackle. Mixing the spackle properly will ensure a smooth consistency that is easy to apply and work with.
Follow these steps to mix the spackle:
- Read the manufacturer’s instructions: Different spackle brands may have specific instructions on how to mix their product. It’s important to read and follow the instructions provided to ensure the best results.
- Prepare a clean container: Use a clean, empty bucket or container to mix the spackle. Make sure it’s large enough to accommodate the amount of spackle you’ll need.
- Start with a small amount: Begin by scooping a small portion of spackle into the container. You can always add more as needed, but it’s best to start with a smaller quantity to avoid wasting excess spackle.
- Add water gradually: Slowly add water to the spackle while stirring continuously. Use a putty knife or a mixing tool to blend the water and spackle together. Add the water gradually to achieve the desired consistency, which should be thick yet spreadable.
- Avoid adding too much water: Be mindful not to add too much water, as this can make the spackle too runny and difficult to work with. If you accidentally add too much water, you can add more spackle to balance it out.
- Continue mixing until smooth: Keep stirring the spackle until you achieve a smooth and lump-free mixture. The consistency should be similar to that of thick cake batter.
Once you have mixed the spackle to the desired consistency, you are ready to start applying it to the ceiling. Keep in mind that the spackle has a limited working time before it begins to dry, so work efficiently and avoid preparing more than you can use within a reasonable timeframe.
In the next step, we will cover how to apply the first coat of spackle to your ceiling to start filling in the imperfections.
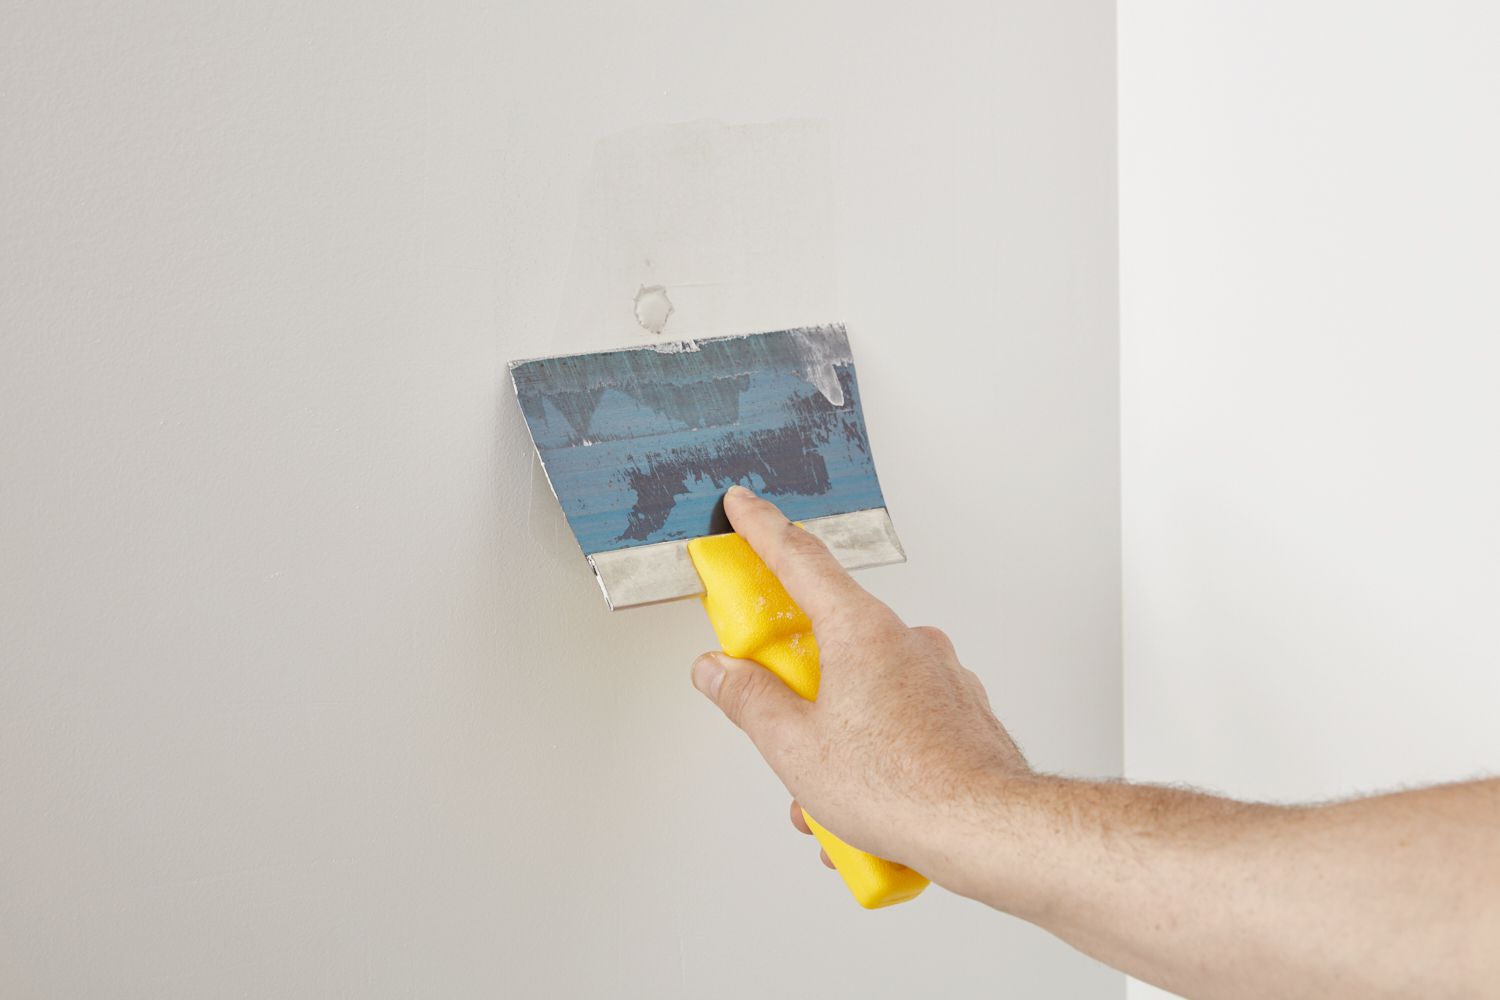
Step 4: Apply the First Coat
With the spackle mixed and ready to go, it’s time to apply the first coat onto the ceiling. This coat will begin the process of filling in the cracks, holes, and imperfections, creating a smooth and even surface.
Follow these steps to apply the first coat of spackle:
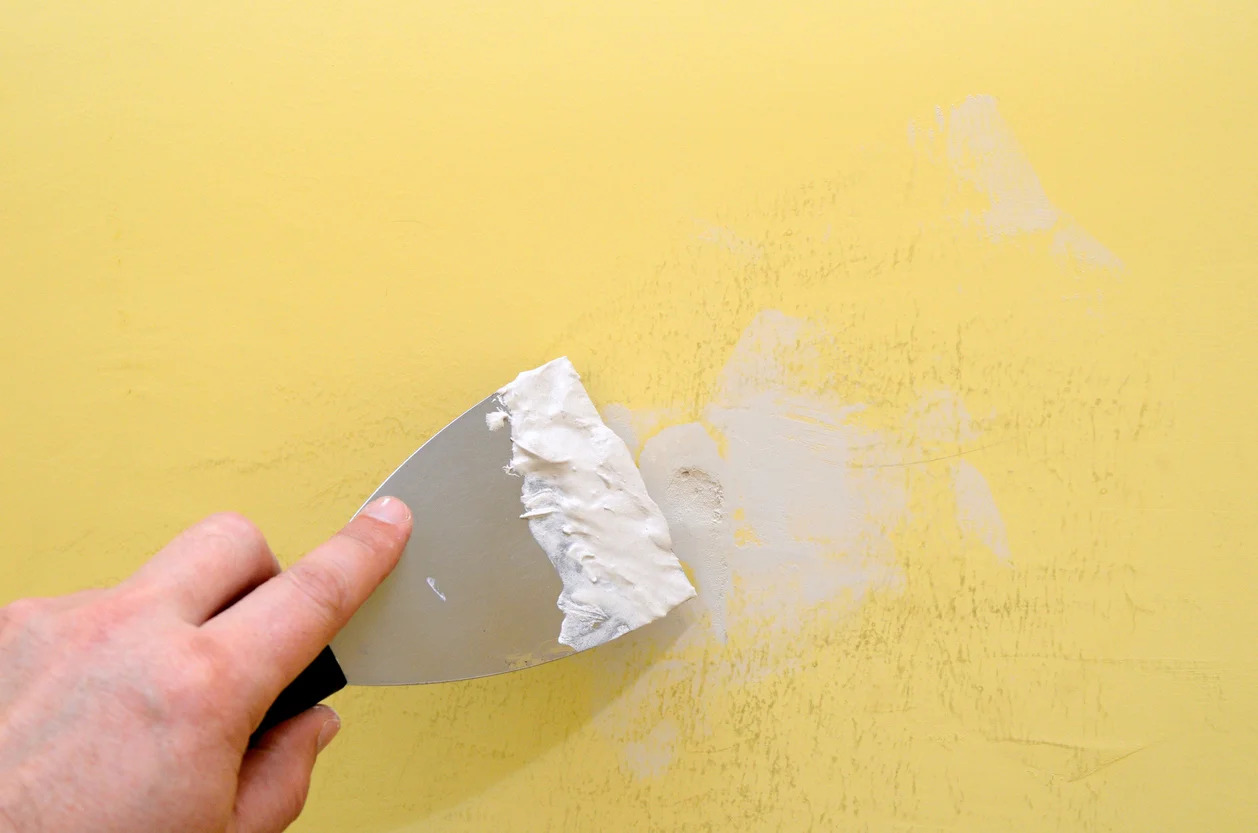
- Load the putty knife: Using the putty knife, scoop a small amount of spackle onto the edge of the blade. Aim for an amount that fits comfortably on the blade without excess spackle hanging off.
- Hold the putty knife at an angle: Position the putty knife at a slight angle, around 45 degrees, against the ceiling surface. This will allow you to spread the spackle more smoothly and evenly.
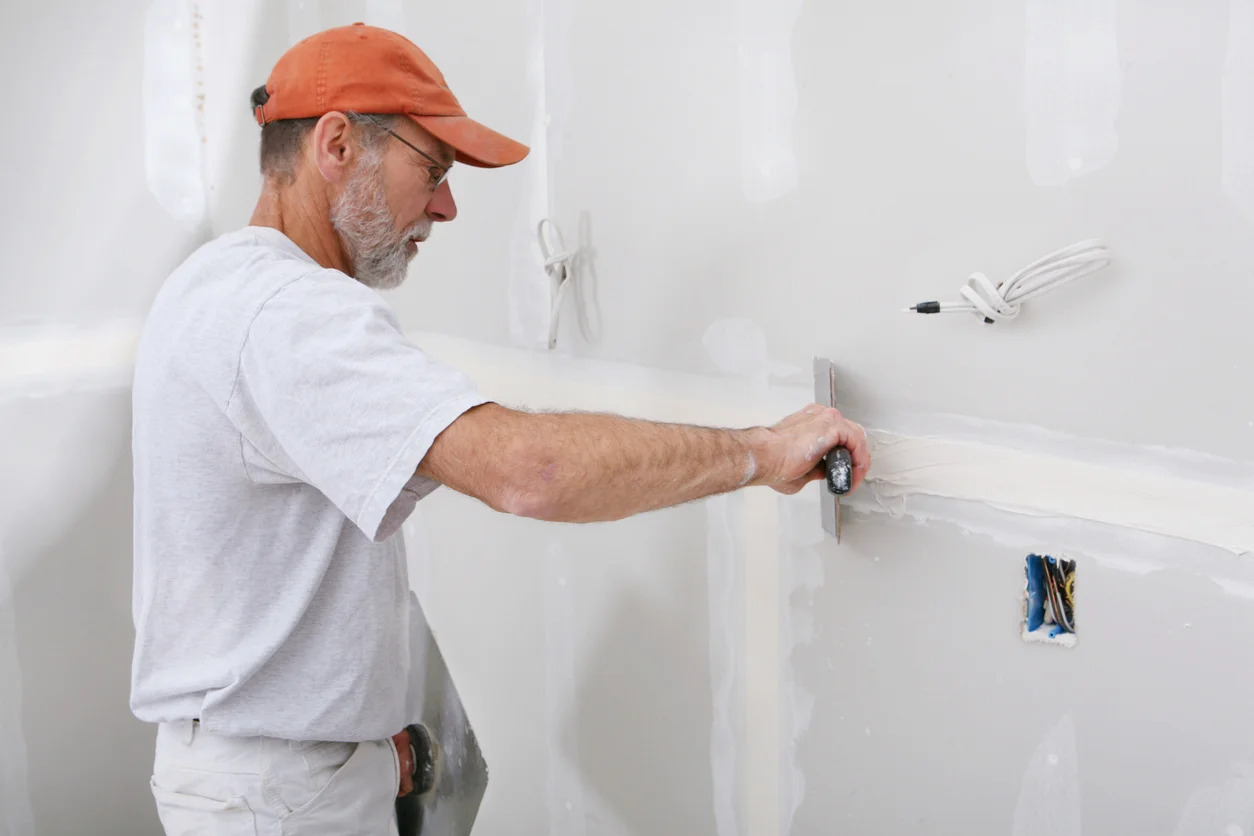
- Apply the spackle: Starting in one corner of the ceiling, press the loaded edge of the putty knife against the surface and begin to spread the spackle in a smooth motion. Use firm, even pressure to ensure the spackle goes into the cracks and holes, filling them completely.
- Keep a consistent pressure: Maintain a consistent pressure as you move the putty knife along the ceiling surface. This will help distribute the spackle evenly and avoid creating uneven patches or ridges.
- Overlap slightly: When applying the spackle, overlap each stroke slightly with the previous one to ensure full coverage and a seamless finish. This will help blend the spackle with the surrounding area for a more natural look.
- Continue working systematically: Work in small sections, covering one area at a time, and gradually move across the entire ceiling. This will help you maintain control and ensure that you apply the spackle evenly and consistently.
- Check for smoothness: Periodically step back and inspect the applied spackle for any areas that may need additional attention. Smooth out any rough spots or excess spackle using the putty knife.
Once you have completed the first coat of spackle, allow it to dry according to the manufacturer’s instructions. The drying time can vary depending on the brand and climate conditions, so be sure to check the recommended timeframe before proceeding to the next step.
In the following step, we will cover how to let the first coat dry properly before moving on to additional coats.
When spackling a ceiling, use a lightweight spackling compound to minimize sagging. Apply in thin layers, feathering the edges for a smooth finish. Sand between coats for best results.
Step 5: Let the First Coat Dry
After applying the first coat of spackle, it’s important to allow it to dry completely before proceeding with additional coats or any further work on the ceiling. Drying time can vary depending on the type of spackle and environmental conditions, so it’s essential to follow the manufacturer’s instructions for the specific product you’re using.
Here are some general guidelines to help you let the first coat of spackle dry:
- Ensure good ventilation: Proper air circulation is important for the drying process. Open windows or doors, turn on fans, or use a dehumidifier to promote quicker drying if necessary. However, avoid excessive air movement, as it can cause the spackle to dry too quickly and lead to cracking.
- Allow sufficient time: The drying time for spackle can range from a few hours to overnight, depending on the product and thickness of the applied coat. It’s crucial to be patient and let the spackle dry fully before proceeding to the next step.
- Avoid touching the spackled area: To prevent any smudging or damage, avoid touching or leaning against the spackled area during the drying process. If necessary, cover the spackled portion with a protective barrier, such as a plastic sheet, to prevent accidental contact.
- Check for dryness: To determine if the spackle is fully dry, lightly touch a small, inconspicuous area with your fingertips. If it feels firm and does not leave a mark or impression, it is likely dry. Alternatively, you can gently tap the spackled area with your knuckles. If it sounds solid and does not produce a hollow or dull sound, it is generally a sign of dryness.
Keep in mind that drying times may be influenced by factors like humidity, temperature, and the thickness of the spackled coat. It’s better to allow the spackle to dry for a longer period than to rush the process and risk compromising the quality of the finish.
Once the first coat is fully dry, you can proceed with additional coats to achieve a smoother and more seamless appearance. The next step will cover how to apply the additional coats of spackle to further refine the surface of your ceiling.
Step 6: Apply Additional Coats
After the first coat has dried completely, it’s time to apply additional coats of spackle to further refine the surface of your ceiling. Additional coats are necessary to fill in any remaining imperfections, create a smoother finish, and ensure a seamless appearance once the ceiling is painted.
Follow these steps to apply additional coats of spackle:
- Inspect the first coat: Before applying additional coats, carefully inspect the first coat of spackle for any areas that may require further attention. Look for any visible cracks, indentations, or unevenness that need to be addressed.
- Prepare the spackle mixture: Mix and prepare a fresh batch of spackle following the same process as outlined in Step 3. Make sure to mix enough spackle to cover the areas that require additional coats.
- Load the putty knife: Using a putty knife, scoop a small amount of spackle onto the blade, similar to what you did for the first coat. Start with a manageable amount to avoid waste.
- Apply the spackle: Starting from one corner of the ceiling, apply the spackle to the areas that need additional coats. Use the same technique as before, spreading the spackle evenly and overlapping slightly with each stroke. Smooth out any excess or uneven spots with the putty knife.
- Blend with the surrounding area: As you apply the additional coats, be mindful of blending the new spackle with the surrounding area to create a seamless transition. Feather the edges of the spackle to ensure a gradual and natural appearance.
- Allow each coat to dry: Just like the first coat, allow each additional coat to dry completely before proceeding. Follow the same drying guidelines mentioned in Step 5 and refer to the manufacturer’s instructions for the approximate drying time of the spackle you’re using.
- Assess for smoothness: After each coat has dried, assess the ceiling surface for smoothness. Lightly run your hand over the spackled area to check for any rough or raised spots. If necessary, lightly sand these areas with fine-grit sandpaper to create a smoother finish.
- Repeat the process as needed: Depending on the condition of your ceiling and the desired level of smoothness, you may need to apply multiple additional coats of spackle. Repeat the process of applying, drying, and assessing until you achieve the desired result.
Remember to take your time and be patient during this process. Building up the additional coats gradually will help you achieve a more professional and flawless finish on your ceiling.
With the additional coats applied and dried, you’re now ready to move on to the next step, which involves sanding the ceiling to create an even and smooth surface.
Read more: How To Remove Spackle
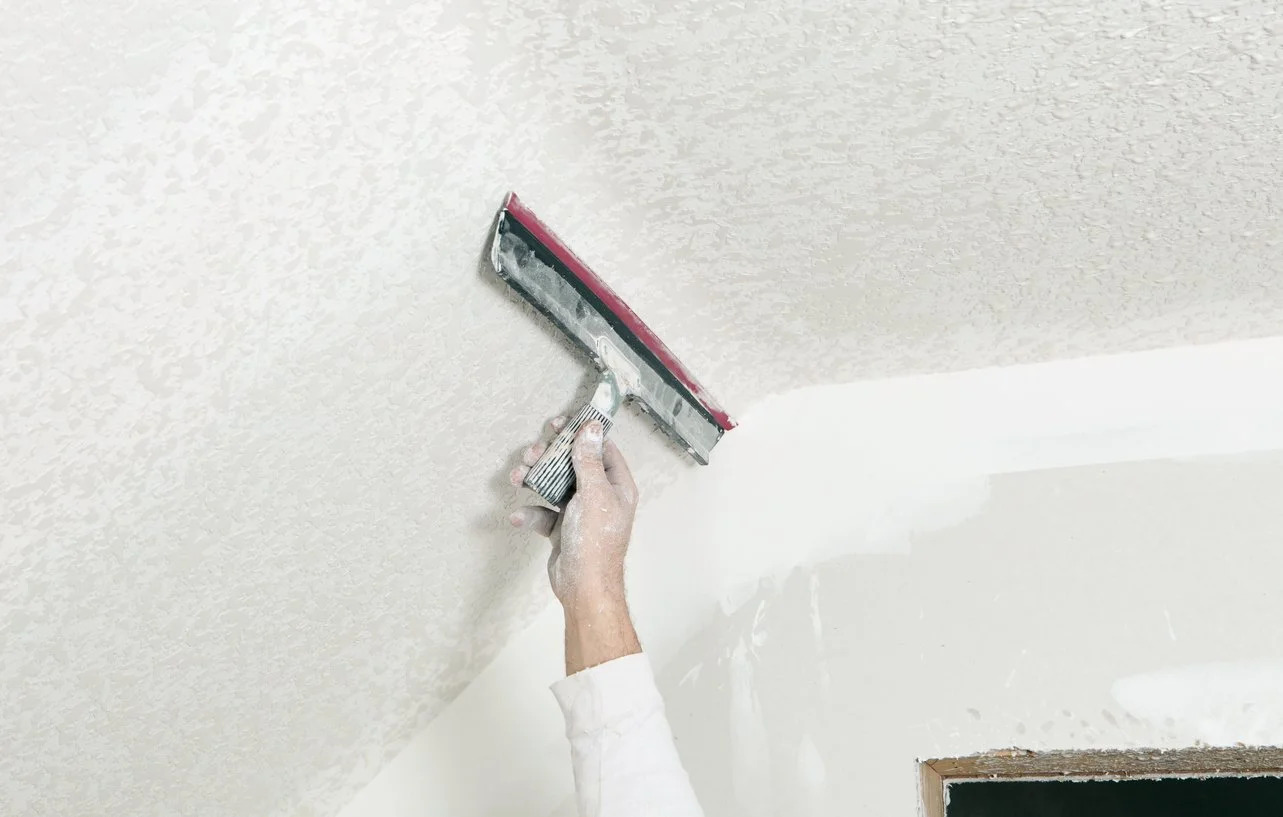
Step 7: Sand the Ceiling
After applying the necessary coats of spackle and allowing them to dry, it’s time to sand the ceiling. Sanding helps smooth out any rough patches, uneven spots, or excess spackle, creating a polished and even surface for further finishing.
Follow these steps to sand the ceiling:
- Prepare the area: Before you begin sanding, protect yourself by wearing a dust mask and safety goggles to avoid inhaling dust particles or getting debris in your eyes. Additionally, cover the floor and any furniture with a dust sheet or plastic drop cloth to catch any sanding debris.
- Choose the right sandpaper: Select a fine-grit sandpaper, such as 120 to 150 grit, depending on your preference and the level of smoothness you desire. A lower grit number indicates a coarser texture, while a higher number indicates a finer texture.
- Sand in a circular motion: Hold the sandpaper securely and gently sand the spackled areas in a circular motion. Avoid applying excessive pressure, as it may damage the surface or create uneven patches. Sand lightly and gradually to achieve an even and smooth finish.
- Inspect your work: Periodically stop and inspect your work to determine if the desired smoothness has been achieved. Run your hand over the sanded areas to detect any remaining rough spots or imperfections that need further attention.
- Remove the sanding dust: It’s important to remove the sanding dust after each sanding session to maintain a clean work surface. Use a clean cloth or a vacuum with a brush attachment to carefully remove any loose particles or dust.
- Reapply spackle if necessary: If you notice any areas that still require additional filling, apply a thin layer of spackle using a putty knife. Allow it to dry and repeat the sanding process as needed.
- Wipe down the ceiling: Once you are satisfied with the smoothness of the sanded ceiling, use a clean, slightly damp cloth to wipe away any remaining dust or debris. This will ensure a clean surface for priming and painting.
Remember to work patiently and thoroughly when sanding the ceiling. Take breaks as needed and inspect your progress regularly to ensure the desired smoothness has been achieved.
With the ceiling sanded and cleaned, you’re now ready to move on to the next step of priming the surface before applying the final coat of paint.
Step 8: Prime the Ceiling
After sanding the ceiling to achieve a smooth and even surface, the next step is to prime the ceiling. Priming is an important step that prepares the surface for painting, ensuring better adhesion and a more professional-looking finish.
Follow these steps to prime the ceiling:
- Choose the right primer: Select a primer that is specifically formulated for ceilings. Look for a high-quality primer that is suitable for the type of paint you’ll be using.
- Prepare the area: Protect your eyes and lungs by wearing safety goggles and a dust mask. Cover the floor and any furniture with a dust sheet or plastic drop cloth to prevent any potential spills or drips.
- Stir the primer: Open the primer can and stir it thoroughly to ensure an even consistency. Use a stir stick or a paint mixing tool to mix the primer well.
- Start in a corner: Begin by priming the corners and edges of the ceiling using a paintbrush. Apply the primer in smooth, even strokes, cutting in about a few inches from the edges to ensure full coverage.
- Roll the primer: Use a paint roller with a medium or high-nap cover to apply the primer to the rest of the ceiling. Dip the roller into the primer tray and evenly distribute the primer by rolling it in a “W” or “M” pattern across the ceiling surface.
- Work in sections: Work in small, manageable sections to ensure that the primer doesn’t dry before you can roll over it. Overlap each section slightly to ensure full coverage and a consistent finish.
- Allow the primer to dry: Follow the manufacturer’s instructions for the drying time of the primer. Typically, it takes around 2-4 hours for the primer to dry, but it may vary depending on the brand and environmental conditions.
- Inspect for coverage: Once the primer has dried, inspect the ceiling for any areas that may require additional primer. Look for any missed spots or areas that may need better coverage.
- Touch up if needed: If you notice any areas that need additional primer, use a paintbrush or a small roller to touch up those spots. Allow the touch-up areas to dry before proceeding.
Priming the ceiling is crucial as it creates a smooth and uniform base for your paint. It also helps to seal the spackled surface and enhances the durability and longevity of the paint job.
Once the primer has dried completely, you’re ready to move on to the final step of painting the ceiling.
Step 9: Paint the Ceiling
After priming the ceiling and allowing it to dry, the final step is to paint the ceiling. Painting not only enhances the overall appearance of the room but also protects the surface and completes the spackling process.
Follow these steps to paint the ceiling:
- Choose the right paint: Select a high-quality ceiling paint that is specifically designed for the type of ceiling surface you have. Consider the color, finish, and coverage needed for your desired aesthetic.
- Prepare the area: Protect yourself by wearing safety goggles and a dust mask. Cover the floor and furniture with a dust sheet or plastic drop cloth to prevent any paint splatters or drips.
- Stir the paint: Open the paint can and thoroughly stir the paint using a stir stick or a paint mixing tool. Properly mixing the paint ensures an even color and consistency.
- Cut in the edges: Start by cutting in the edges of the ceiling using a high-quality angled paintbrush. Carefully paint along the perimeter of the ceiling, including corners and around light fixtures or vents.
- Use a roller for the main area: Dip a roller into the paint tray and roll off any excess paint. Starting from one corner, roll the paint onto the main area of the ceiling using long, even strokes. Work in small sections to maintain a wet edge.
- Roll in alternating directions: To achieve a more uniform finish, roll the paint in alternating directions, such as in a “W” or “M” pattern. This helps to distribute the paint evenly and avoid visible roller lines.
- Maintain a wet edge: To avoid overlapping paint lines or dried edges, make sure to maintain a wet edge while painting. This means working in continuous sections and blending the paint as you move across the ceiling.
- Apply multiple coats if needed: Depending on the desired coverage and color intensity, you may need to apply multiple coats of paint. Follow the recommended drying time between coats and ensure each coat is dry before applying the next.
- Check for touch-ups: After the final coat has dried, inspect the ceiling for any areas that may require touch-ups. Look for any missed spots, uneven coverage, or imperfections that need additional attention.
Remember to follow the paint manufacturer’s instructions regarding drying times, ventilation requirements, and other recommendations specific to the paint you are using.
Once you are satisfied with the painted ceiling and have addressed any touch-up areas, allow the paint to fully dry before removing any protective coverings. Then, you can enjoy your newly spackled and freshly painted ceiling that adds beauty and a polished finish to your space.
Congratulations on successfully spackling and painting your ceiling!
Conclusion
Spackling a ceiling is a rewarding home improvement project that can transform the look and feel of a room. By following the step-by-step process outlined in this guide, you can successfully spackle your ceiling and achieve a smooth and professional finish.
From cleaning and preparing the ceiling to applying multiple coats of spackle, sanding, priming, and finally painting, each step is essential in creating a flawless and visually appealing ceiling surface.
Remember to be patient and take your time during each stage of the process. Proper preparation, including cleaning the ceiling and gathering the necessary tools and materials, ensures that the spackling process goes smoothly. Mixing the spackle to the right consistency and applying multiple coats at the right intervals will result in a seamless and well-repaired ceiling surface.
Once the spackle has dried, proper sanding is vital to achieve an even and smooth finish. Priming the ceiling sets the stage for a successful paint job and helps protect the spackled surface, while choosing the right paint and applying it carefully ensures a beautiful final result.
By following these steps and paying attention to detail, you can transform your ceiling from one with imperfections to a flawless and polished surface. Not only will this improve the overall appearance of your room, but it will also provide a sense of satisfaction and pride in a job well done.
So, gather your tools, roll up your sleeves, and let’s get started on spackling that ceiling. Enjoy the process, and soon enough, you’ll be rewarded with a beautifully spackled and painted ceiling that adds charm and elegance to your space.
Frequently Asked Questions about How To Spackle A Ceiling
Was this page helpful?
At Storables.com, we guarantee accurate and reliable information. Our content, validated by Expert Board Contributors, is crafted following stringent Editorial Policies. We're committed to providing you with well-researched, expert-backed insights for all your informational needs.


0 thoughts on “How To Spackle A Ceiling”