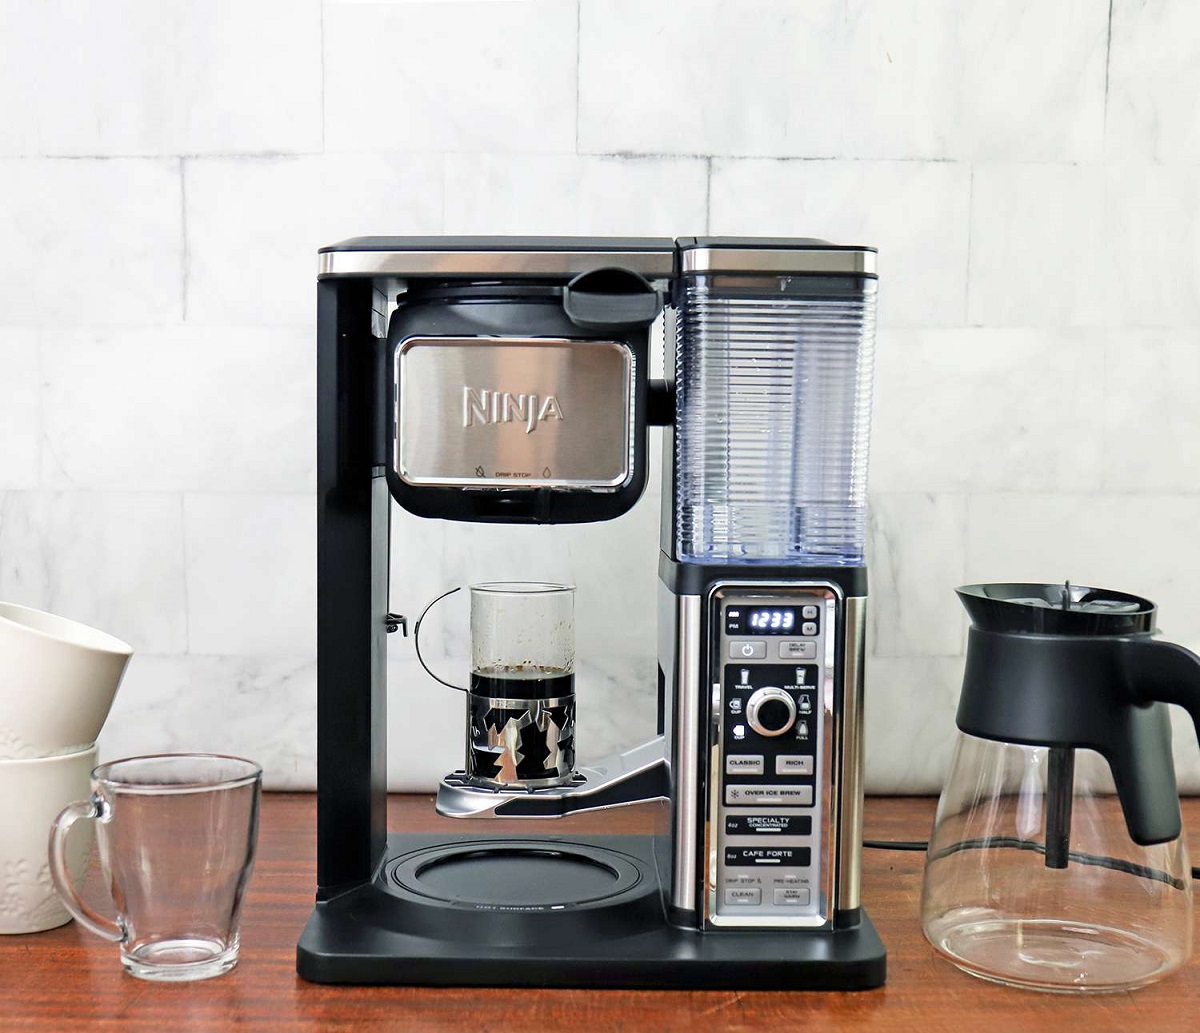
Home>Storage Ideas>Kitchen Storage>How To Clean A Ninja Coffee Maker: Expert Steps To Follow
Kitchen Storage
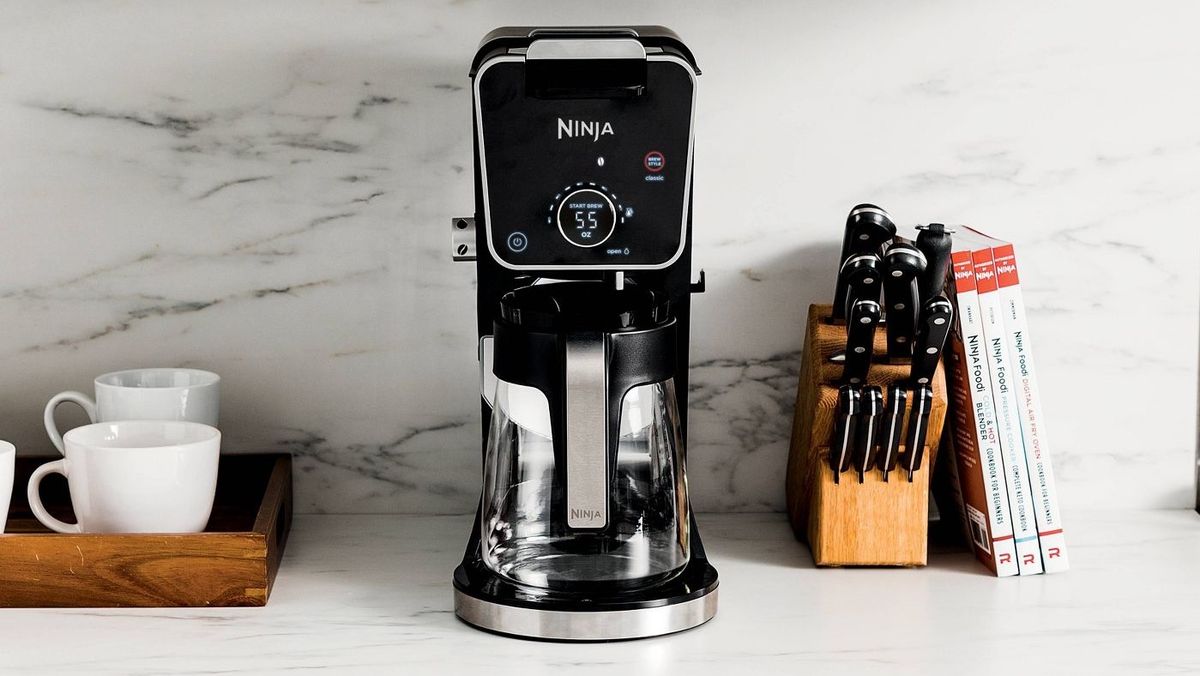
How To Clean A Ninja Coffee Maker: Expert Steps To Follow
Modified: August 25, 2024
Learn the expert steps to effectively clean your Ninja coffee maker and keep it running smoothly. Discover the best kitchen storage ideas for organizing your coffee-making essentials.
(Many of the links in this article redirect to a specific reviewed product. Your purchase of these products through affiliate links helps to generate commission for Storables.com, at no extra cost. Learn more)
Introduction
Welcome to our comprehensive guide on how to clean a Ninja coffee maker! A clean coffee maker not only ensures that your coffee tastes delicious but also helps to prolong the life of your machine. Over time, coffee oils and mineral deposits can build up, affecting the quality of your brew and causing potential performance issues.
Fortunately, cleaning your Ninja coffee maker is a straightforward process that can be done with just a few common household supplies. In this article, we will walk you through expert steps to follow to keep your coffee maker sparkling clean and working at its best.
Cleaning your Ninja coffee maker regularly has several benefits. It helps to remove any residual coffee oils that can accumulate and become rancid, affecting the flavor of your coffee. Additionally, it prevents mineral deposits from building up in the internal components of your machine, which can hinder its performance and even lead to clogs.
To get started, gather the necessary supplies. You will need water, white vinegar, dish soap, a soft cloth or sponge, and a brush with soft bristles. These items are readily available in most households, ensuring that cleaning your coffee maker is a convenient and cost-effective process.
In the next section, we will show you how to prepare your coffee maker for cleaning. This involves emptying the water reservoir, removing any leftover coffee grounds, and rinsing the coffee filter. These steps ensure that you have a clean canvas to work with before diving into the deep cleaning process.
Descaling is a crucial step in keeping your Ninja coffee maker in top shape. We will guide you through the process of descaling, which involves using a mixture of equal parts water and white vinegar to remove mineral deposits that can accumulate in the internal parts of your machine. A descaling cycle will effectively dissolve and eliminate these deposits, resulting in better-tasting coffee and improved performance.
Once you have descaled your coffee maker, it’s time to clean the coffee pot and filter basket. We will show you how to wash these components with warm soapy water and use a brush to scrub away any stubborn stains or residue. Cleaning these parts not only ensures that your coffee is brewed in a clean environment but also helps to prevent any potential contamination.
The water reservoir of your Ninja coffee maker also needs attention. We will guide you through the process of washing the reservoir with soapy water and rinsing it thoroughly before refilling it with fresh water. Keeping the water reservoir clean is vital for a clean and fresh-tasting brew.
In addition to the internal components, we will also discuss how to clean the exterior of your Ninja coffee maker. Wiping down the exterior surfaces with a damp cloth and drying them with a soft cloth ensures that your machine looks as good as it brews.
To wrap up the cleaning process, we will guide you through running a water cycle to remove any remaining residue or vinegar taste. This final step guarantees that your Ninja coffee maker is ready to brew your next delicious cup of coffee.
Cleaning your Ninja coffee maker doesn’t have to be a daunting task. By following our expert steps and regular cleaning routine, you can ensure that your machine is always in tip-top shape. So let’s get started and discover how to clean and maintain your Ninja coffee maker for years of enjoyable brewing!
Key Takeaways:
- Keep your Ninja coffee maker sparkling clean and working at its best by descaling regularly, cleaning the coffee pot and filter basket, and maintaining a spotless exterior. Enjoy delicious brews and extend the lifespan of your machine with these expert cleaning steps!
- Gather essential supplies, prepare your coffee maker, and run a water cycle to ensure your Ninja coffee maker stays in top shape. Regular cleaning and maintenance guarantee fresh, flavorful brews and optimal performance for years to come.
Read more: How To Clean A Ninja Coffee Machine
Step 1: Gather necessary supplies
To effectively clean your Ninja coffee maker, it is important to gather the necessary supplies beforehand. Here is what you will need:
- Water: You will need clean water for various cleaning steps throughout the process.
- White vinegar: White vinegar is a versatile cleaning agent that helps to remove mineral deposits and coffee oils. It is an essential ingredient for descaling your coffee maker.
- Dish soap: Mild dish soap will be used to clean the coffee pot, filter basket, and water reservoir. Opt for a gentle soap that won’t leave any residue or strong scent behind.
- Soft cloth or sponge: A soft cloth or sponge is necessary for wiping down the exterior surfaces of your coffee maker. Choose a non-abrasive cloth that won’t scratch or damage the finish.
- Brush with soft bristles: A brush with soft bristles will come in handy for scrubbing away any stubborn stains or residue from the coffee pot, filter basket, and other hard-to-reach areas of your machine.
Having these supplies ready before you begin the cleaning process will save you time and ensure a smooth experience. You may already have most, if not all, of these items in your home, making this step simple and convenient.
It is important to note that using these supplies in the correct manner is crucial to the cleaning process. Water is used for rinsing and diluting cleaning agents, while white vinegar is used for descaling and removing mineral deposits. Dish soap is gentle enough to clean various parts of the coffee maker without causing any damage. The soft cloth or sponge is perfect for wiping down surfaces without scratching them, and the brush with soft bristles is designed for thorough scrubbing while being gentle enough to avoid any harm.
Having all these supplies on hand will set you up for success when it comes to cleaning your Ninja coffee maker. With your arsenal of cleaning tools ready, you are now prepared to move on to the next step: preparing the coffee maker for cleaning.
Step 2: Prepare the coffee maker for cleaning
Before diving into the actual cleaning process, it is essential to prepare your Ninja coffee maker. This step ensures that you have a clean canvas to work with and allows for a more effective cleaning experience. Here are the steps to follow:
1. Empty the water reservoir: Start by emptying the water reservoir of any remaining water. This helps to prevent any spills or leaks during the cleaning process. Check for any debris or sediment in the reservoir and remove it if present.
2. Remove any leftover coffee grounds: Carefully remove the coffee grounds from the filter basket. Dispose of them properly and rinse the basket to remove any loose grounds. Removing the coffee grounds prevents them from clogging the machine or affecting the taste of your future brews.
3. Remove the coffee filter and rinse: If your Ninja coffee maker has a removable coffee filter, take it out and rinse it under running water. This helps to remove any coffee residue that might have accumulated on the filter. If your machine uses a permanent filter, give it a thorough rinse to remove any trapped particles.
By following these preparation steps, you ensure that your Ninja coffee maker is ready for a deep cleaning. Emptying the water reservoir prevents any potential spills, while removing leftover coffee grounds and rinsing the filter helps to eliminate any residual coffee residue. With your machine prepped and ready, you are now set to move on to the next step: descaling the coffee maker.
Remember, proper preparation is key to maximizing the effectiveness of the cleaning process. Taking a few moments to empty the reservoir and clean out the coffee grounds sets the stage for a more thorough and efficient cleaning of your Ninja coffee maker.
Step 3: Descale the coffee maker
Descaling your Ninja coffee maker is an essential step in maintaining its performance and ensuring that you consistently brew delicious coffee. Over time, mineral deposits can accumulate in the internal components of the machine, affecting the taste of your brew and potentially causing clogs. Descaling helps to remove these deposits and keep your coffee maker running smoothly. Here’s how to do it:
1. Mix equal parts water and white vinegar in the water reservoir: Start by measuring out equal parts of water and white vinegar. For example, if your water reservoir holds 10 ounces of liquid, mix 5 ounces of water with 5 ounces of white vinegar. This vinegar-water solution will effectively break down the mineral deposits in your coffee maker.
2. Run a descaling cycle on the coffee maker: Once you have the vinegar-water mixture, it’s time to run a descaling cycle. Follow the manufacturer’s instructions on your Ninja coffee maker for initiating the descaling process. This usually involves pressing specific buttons or selecting a descaling mode.
During the descaling cycle, the vinegar-water mixture will flow through the internal components of the machine, breaking down and removing mineral build-up. This process may take some time, so be patient and allow the cycle to run its course.
While the descaling cycle is running, you may notice that the vinegar-water mixture has a strong smell. This is normal and is a result of the acid in the vinegar breaking down the mineral deposits. However, if the smell becomes overwhelming or unbearable, ensure that your space is well-ventilated or consider wearing a mask.
Once the descaling cycle is complete, empty the vinegar-water mixture from the coffee maker. It is crucial to rinse the water reservoir thoroughly to ensure that no vinegar residue remains. Refill the water reservoir with clean water and run a plain water cycle to flush out any remaining traces of vinegar.
Descaling your Ninja coffee maker should be done regularly, depending on the frequency of use and the hardness of your water. It is recommended to descale every three to six months, or as indicated by the manufacturer. However, if you notice a significant decrease in performance or taste, it might be necessary to descale more frequently.
By following these steps and descaling your coffee maker regularly, you can prevent build-up of mineral deposits, ensure better-tasting coffee, and prolong the lifespan of your Ninja coffee maker. Moving forward, it’s time to focus on cleaning the coffee pot and filter basket in the next step.
Step 4: Clean the coffee pot and filter basket
Cleaning the coffee pot and filter basket of your Ninja coffee maker is essential for maintaining a clean brewing environment and ensuring a delicious cup of coffee every time. Over time, coffee oils and residue can accumulate, leading to stubborn stains and affecting the taste of your brew. Here’s how to clean them effectively:
1. Wash the coffee pot and filter basket with warm soapy water: Start by removing the coffee pot and filter basket from the coffee maker. Fill your sink or a basin with warm water and add a few drops of mild dish soap. Submerge the coffee pot and filter basket in the soapy water.
Using a soft cloth or sponge, gently scrub the surfaces of the coffee pot and filter basket to remove any coffee residue. Pay special attention to the interior and any stained areas. Ensure that you clean all sides and crevices to achieve a thorough clean.
2. Use a brush to scrub any stubborn stains or residue: If you encounter stubborn stains or residue that cannot be removed with the cloth or sponge alone, it’s time to bring out your brush with soft bristles. Dip the brush in warm soapy water and gently scrub the affected areas of the coffee pot and filter basket.
The brush’s soft bristles will help to loosen and remove the stains or residue without causing any damage to the surfaces. Be patient and persistent with the scrubbing, focusing on the areas that require extra attention.
Once you have thoroughly cleaned the coffee pot and filter basket, rinse them under running water to remove any remaining soap residue. Ensure that you remove all traces of soap to prevent any unwanted flavors in your future brews.
After rinsing, dry the coffee pot and filter basket with a clean towel or let them air dry before placing them back into your Ninja coffee maker. It’s important to ensure that they are completely dry to prevent any moisture-related issues or potential bacterial growth.
Regularly cleaning the coffee pot and filter basket helps to maintain the cleanliness of your brewing equipment and keeps your coffee tasting as fresh as possible. With these components clean and ready, it’s time to move on to the next step: cleaning the water reservoir.
Remember, a clean coffee pot and filter basket contribute to the overall quality of your brew and prolong the life of your Ninja coffee maker. So take the time to clean them thoroughly, and enjoy the benefits of optimal coffee flavor and performance.
To clean a Ninja coffee maker, regularly descale it with a mixture of water and white vinegar to remove mineral buildup and ensure optimal performance.
Step 5: Clean the water reservoir
The water reservoir of your Ninja coffee maker plays a vital role in brewing a fresh and tasty cup of coffee. Over time, mineral deposits and residual coffee oils can build up in the reservoir, affecting the quality of your brew and potentially causing performance issues. Here’s how to clean the water reservoir effectively:
1. Empty any remaining vinegar-water mixture from the reservoir: If you have just completed the descaling process with a vinegar-water mixture, start by emptying any remaining liquid from the water reservoir. Carefully pour out the vinegar-water mixture, ensuring that it doesn’t spill onto any other components of the coffee maker.
2. Wash the reservoir with soapy water: Fill your sink or a basin with warm water and add a few drops of mild dish soap. Submerge the water reservoir in the soapy water and use a soft cloth or sponge to clean its interior and exterior surfaces. Gently scrub any areas where mineral deposits or coffee residue may be present.
Pay special attention to the corners, edges, and any narrow openings of the reservoir. These areas can collect debris and require thorough cleaning. Use a gentle wiping motion to remove any buildup, ensuring that you don’t damage the reservoir.
3. Rinse thoroughly before refilling with fresh water: Once you have cleaned the water reservoir with soapy water, rinse it thoroughly under running water. Ensure that all the soap residue is removed to avoid any unwanted flavors in your future brews.
After rinsing, pat the reservoir dry with a clean towel or allow it to air dry before refilling it with fresh water. It’s important to make sure that the reservoir is completely dry to prevent any moisture-related issues or potential bacterial growth.
Regularly cleaning the water reservoir helps to maintain a clean brewing environment and ensures that your Ninja coffee maker operates at its best. By removing mineral deposits and coffee residue, you can enjoy better-tasting coffee and prolong the life of your machine.
With the water reservoir cleaned and ready, it’s time to move on to the next step: cleaning the exterior of your coffee maker. Keep reading to learn how to give your Ninja coffee maker a spotless look!
Step 6: Clean the exterior of the coffee maker
Keeping the exterior of your Ninja coffee maker clean not only enhances its appearance but also contributes to the overall cleanliness of your kitchen. Dust, fingerprints, and spills can accumulate on the surfaces over time, making the machine look dull and unkempt. Here’s how to effectively clean the exterior of your coffee maker:
1. Wipe down the exterior surfaces with a damp cloth: Start by dampening a soft cloth with water. Make sure the cloth is not dripping wet, as excessive moisture can damage the coffee maker. Gently wipe down the exterior surfaces, including the sides, front, top, and any buttons or control panels.
Pay special attention to any areas that appear dirty or have noticeable stains. Use a gentle wiping motion to remove any dust, dirt, or residue. If necessary, you can use a mild dish soap solution on the cloth to target stubborn stains, but make sure to rinse the cloth thoroughly before wiping the coffee maker.
2. Dry with a soft cloth: After wiping down the exterior surfaces, use a dry and clean soft cloth to thoroughly dry the coffee maker. This step is important to prevent water spots or streaks from forming and to ensure that the machine is completely dry.
Take care to dry all the nooks and crannies, including any seams, corners, or areas where water may have accumulated during the cleaning process. The goal is to leave your Ninja coffee maker looking clean, shiny, and free of any water residue.
By regularly cleaning the exterior of your coffee maker, you not only maintain its visual appeal but also contribute to a clean and hygienic brewing environment. A clean coffee maker is more inviting and can enhance your overall coffee-drinking experience.
With the exterior of your Ninja coffee maker looking pristine, it’s time to move on to the final step: running a water cycle to flush out any remaining residue or vinegar taste. Let’s explore this step to ensure your machine is ready to brew the perfect cup of coffee!
Step 7: Run a water cycle
After completing the cleaning process for various components of your Ninja coffee maker, it’s important to run a water cycle to ensure that any remaining residue or vinegar taste is completely eliminated. Here’s how to do it:
1. Fill the water reservoir with clean water: Start by filling the water reservoir with fresh, clean water. Ensure that you do not exceed the maximum fill line indicated on the reservoir. Using filtered or bottled water is recommended to avoid any potential mineral buildup that might affect the taste of your coffee.
2. Run a cycle without coffee grounds: With the water reservoir filled, place an empty carafe on the warming plate and position it properly to catch the water that will be dispensed during the water cycle. Select the brew size or water cycle option on your Ninja coffee maker’s control panel, usually the largest cup size or “Full” option.
Allow the coffee maker to run a complete water cycle without adding any coffee grounds. This will flush out any remaining residue or vinegar taste that may be present in the system.
By running a water cycle, you ensure that your Ninja coffee maker is ready to brew your next delicious cup of coffee. This step not only eliminates any lingering traces of cleaning agents but also helps to ensure that your brews taste fresh and free from any unwanted flavors.
Once the water cycle is complete, empty the carafe and rinse it thoroughly. You can now enjoy your freshly cleaned Ninja coffee maker and indulge in the rich aroma and flavors of your favorite coffee without any residue or vinegar aftertaste.
Remember to run a water cycle periodically to remove any buildup that may occur over time, even if you haven’t used any cleaning agents during the process. It’s a good practice to run a water cycle after every few brewing cycles or as recommended by the manufacturer to maintain the cleanliness of your coffee maker.
With the final step completed, your Ninja coffee maker is now clean, refreshed, and ready to provide you with delicious cups of coffee. Regular cleaning and maintenance will ensure that your machine continues to deliver optimal performance and satisfaction for years to come. Enjoy your freshly brewed coffee!
Conclusion
Congratulations! You have successfully learned how to clean your Ninja coffee maker like an expert. By following the steps outlined in this guide, you can keep your coffee maker in top shape, ensure delicious brews, and extend its lifespan.
Regular cleaning and maintenance of your Ninja coffee maker are crucial for maintaining optimal performance and flavor. Here’s a quick recap of the steps:
1. Gather the necessary supplies, including water, white vinegar, dish soap, a soft cloth or sponge, and a brush with soft bristles.
2. Prepare the coffee maker by emptying the water reservoir, removing any leftover coffee grounds, and rinsing the coffee filter.
3. Descaling the coffee maker by mixing equal parts water and white vinegar in the reservoir and running a descaling cycle.
4. Clean the coffee pot and filter basket by washing them with warm soapy water and using a brush to remove stubborn stains or residue.
5. Clean the water reservoir by emptying any remaining vinegar-water mixture, washing it with soapy water, and thoroughly rinsing it before refilling with clean water.
6. Clean the exterior surfaces of the coffee maker by wiping them down with a damp cloth and then drying with a soft cloth.
7. Run a water cycle by filling the water reservoir with clean water and running a brew cycle without any coffee grounds to remove any remaining residue or vinegar taste.
Remember to perform these cleaning steps regularly, depending on the frequency of use and the hardness of your water. It is recommended to descale your coffee maker every three to six months or as specified by the manufacturer.
By maintaining a clean coffee maker, you ensure that your brews taste fresh and flavorful, free from any unwanted residue or flavors. Regular cleaning also helps to prevent mineral buildup and clogs that can affect the performance of your coffee maker.
With your Ninja coffee maker now sparkling clean, it’s time to sit back, relax, and enjoy a delicious cup of coffee. So, brew away, confident in the knowledge that your coffee maker is in optimal condition, ready to serve you the perfect cup every time.
Cheers to clean and delightful coffee moments!
Frequently Asked Questions about How To Clean A Ninja Coffee Maker: Expert Steps To Follow
Was this page helpful?
At Storables.com, we guarantee accurate and reliable information. Our content, validated by Expert Board Contributors, is crafted following stringent Editorial Policies. We're committed to providing you with well-researched, expert-backed insights for all your informational needs.
0 thoughts on “How To Clean A Ninja Coffee Maker: Expert Steps To Follow”