Home>Storage Ideas>Kitchen Storage>How To Clean A Drip Coffee Maker: 6 Steps For Perfect Coffee

Kitchen Storage
How To Clean A Drip Coffee Maker: 6 Steps For Perfect Coffee
Modified: December 7, 2023
Discover how to clean your drip coffee maker and achieve perfect coffee with these 6 simple steps. Transform your kitchen storage with these amazing ideas.
(Many of the links in this article redirect to a specific reviewed product. Your purchase of these products through affiliate links helps to generate commission for Storables.com, at no extra cost. Learn more)
How to Clean a Drip Coffee Maker: 6 Steps for Perfect Coffee
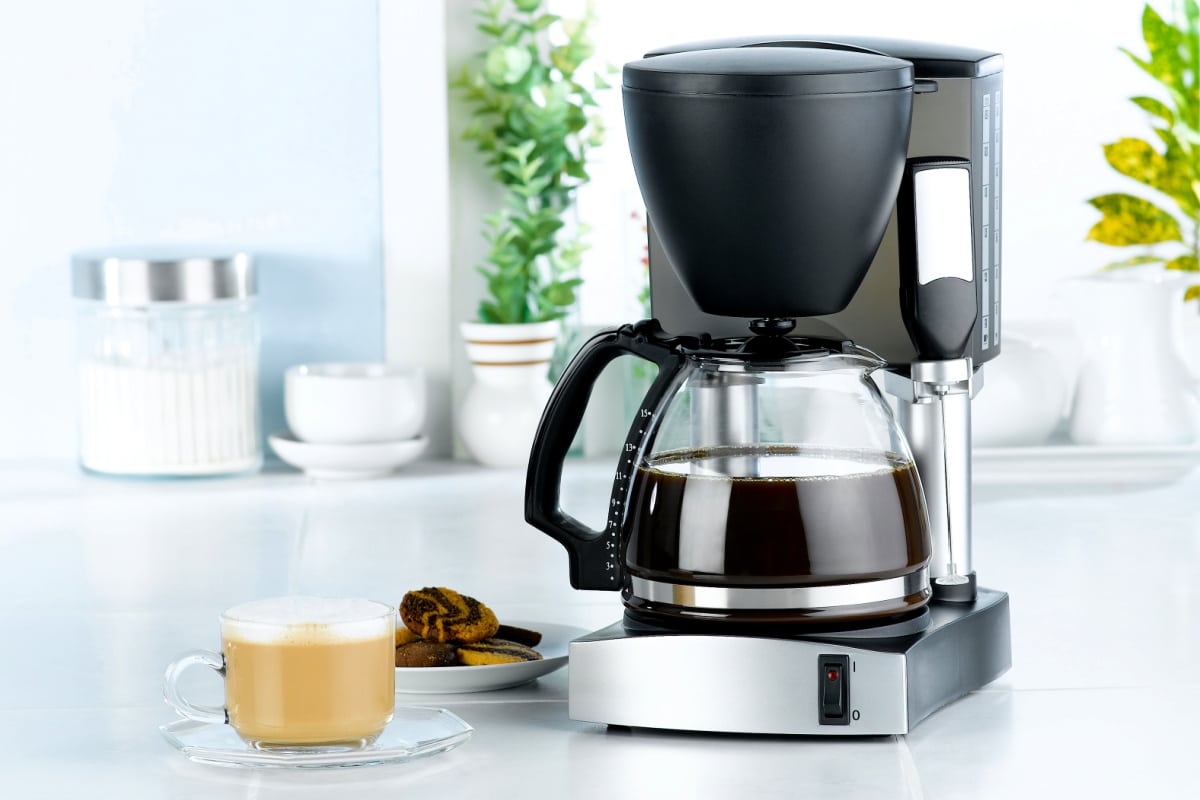
Having a clean drip coffee maker is essential for ensuring the best-tasting coffee. Over time, mineral deposits, oils, and coffee residue can build up, affecting the flavor of your favorite brew. Luckily, with just a few simple steps, you can keep your coffee maker clean and maintain its optimal performance. Follow these six steps to enjoy a fresh and delicious cup of coffee every time:
Key Takeaways:
- Keep your drip coffee maker clean by following 6 simple steps using white vinegar, water, and basic supplies for a fresh and flavorful cup of coffee every time.
- Regularly cleaning your coffee maker prevents build-up, maintains optimal performance, and ensures a consistently delicious coffee experience. Cheers to the perfect cup of coffee!
Step 1: Gather the Necessary Supplies
Before you begin the cleaning process, make sure you have the necessary supplies at hand. You’ll need white vinegar, water, a brush or sponge, dish soap, and a clean cloth.
Step 2: Prepare the Cleaning Solution
Mix a solution of equal parts white vinegar and water. The acidity of the vinegar helps to break down any mineral deposits and eliminate bacteria that may be present inside the coffee maker.
Step 3: Clean the Removable Parts
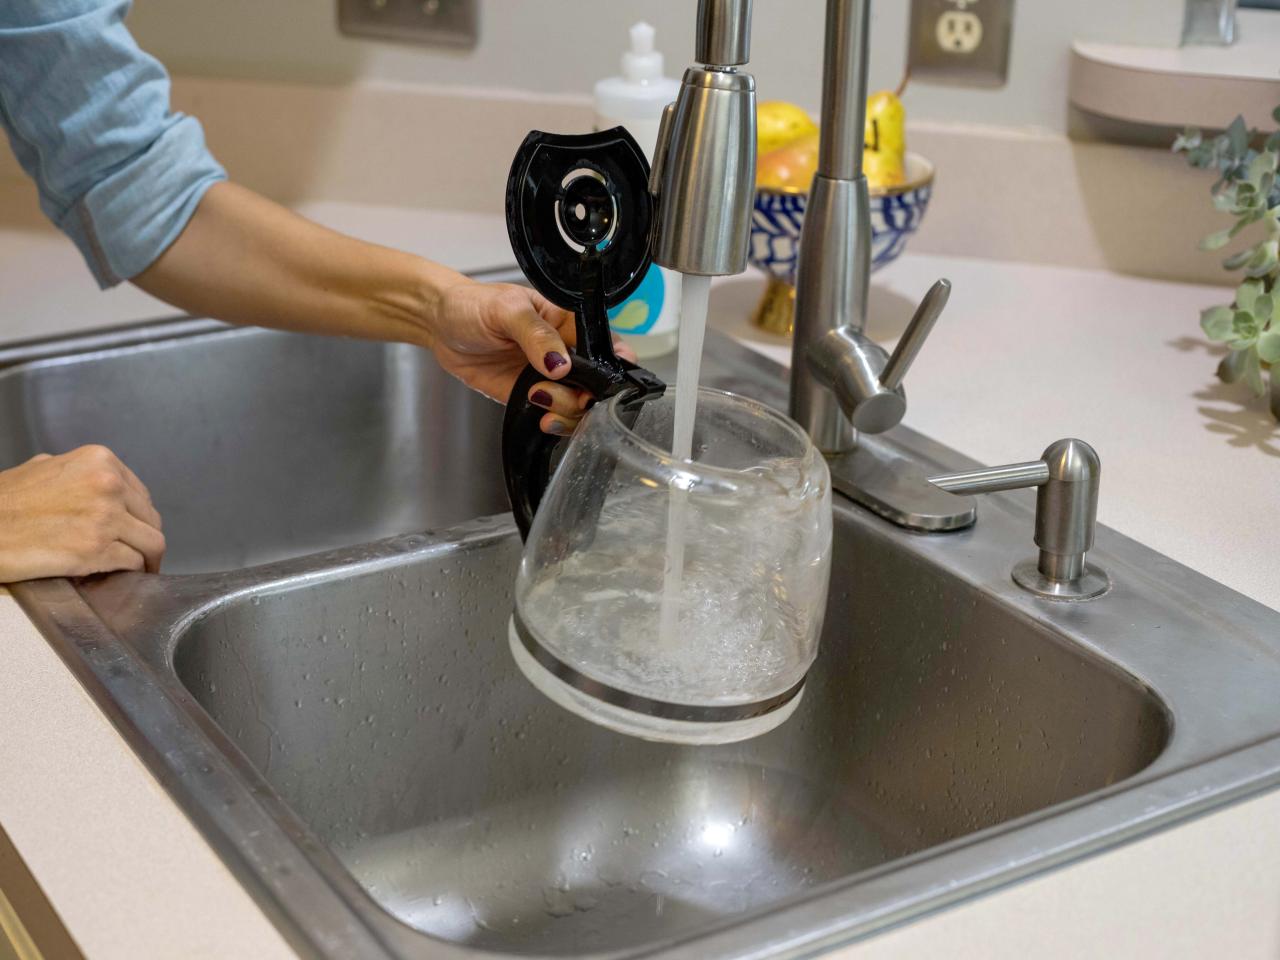
Start by removing the filter basket, coffee pot, and any other removable parts. Wash these items with warm, soapy water, ensuring that all coffee residue is removed. Rinse thoroughly and allow them to air dry.
Step 4: Clean the Coffee Pot
Pour the vinegar and water mixture into the coffee pot until it is about halfway full. Place the empty coffee pot back onto the heating plate, and then turn on the brew cycle. Let the mixture run through the coffee maker as if you were making a pot of coffee.
Once the cycle is complete, discard the vinegar and water mixture. Rinse the coffee pot thoroughly with water to remove any lingering vinegar taste or odor.
Read more: How To Use Drip Coffee Machine
Step 5: Clean the Exterior of the Machine
Dip a clean cloth into the vinegar solution and use it to wipe down the exterior of the coffee maker. Pay close attention to any areas where spills or stains may have occurred. Follow up by wiping the surface with a damp cloth to remove any residue.
Step 6: Run a Cleaning Cycle
Fill the water reservoir with fresh water and run a brew cycle without adding any coffee grounds. This helps to flush out any remaining vinegar and residue from the cleaning process. Repeat this step once or twice, using clean water each time, until there are no traces of vinegar smell or taste.
Congratulations! Your drip coffee maker is now clean and ready to brew the perfect cup of coffee. Remember to clean your coffee maker at least once a month to prevent build-up and ensure the best flavor in each cup.
By following these six steps, you can keep your drip coffee maker in excellent condition, prolonging its lifespan, and enjoying delicious coffee for years to come. Cheers to the perfect cup of coffee!
Introduction
A drip coffee maker is a staple in many households, providing a convenient way to brew a delicious cup of coffee. However, over time, the accumulation of mineral deposits, oils, and coffee residue can impact the taste and performance of your machine. To ensure that you continue to enjoy the perfect cup of coffee every time, it’s important to keep your drip coffee maker clean.
In this article, we will guide you through six simple steps to clean your drip coffee maker and maintain its optimal performance. With just a few minutes of your time and some basic supplies, you can easily remove stubborn stains, eliminate bacteria, and get rid of any lingering odors. By following these steps regularly, you’ll not only enjoy better-tasting coffee but also prolong the lifespan of your machine.
We’ll start by gathering the necessary supplies, which include white vinegar, water, a brush or sponge, dish soap, and a clean cloth. These items are readily available in most households, making the cleaning process quick and convenient.
Next, we’ll show you how to prepare a cleaning solution using white vinegar and water. Vinegar is an excellent natural cleaner that helps break down mineral deposits and eliminate any bacteria that may have accumulated inside your coffee maker. This step is crucial for maintaining the cleanliness and functionality of your machine.
Once the cleaning solution is prepared, we’ll move on to cleaning the removable parts of the coffee maker. This includes the filter basket and coffee pot, which can harbor stubborn coffee residue. By thoroughly washing and rinsing these components, you’ll prevent any residue from affecting the taste of your coffee.
After cleaning the removable parts, we’ll guide you through the process of cleaning the coffee pot itself. This involves running a brew cycle using the vinegar and water mixture, which helps remove mineral deposits and disinfect the internal components of the coffee maker. We’ll also show you how to rinse the coffee pot to ensure there are no lingering vinegar tastes or odors.
Next, we’ll address the exterior of the coffee maker. Sometimes spills and stains occur during the brewing process, leaving the machine looking less than pristine. Using the vinegar solution, we’ll show you how to wipe down the exterior and remove any residue or stains that may be present.
Finally, we’ll run a cleaning cycle using fresh water to flush out any remaining vinegar and residue. This step ensures that your coffee maker is thoroughly cleaned, leaving no traces of vinegar taste or odor.
Regularly following these six steps will keep your drip coffee maker in excellent condition and ensure that every cup of coffee is fresh and flavorful. Say goodbye to off-tasting coffee and hello to the perfect brew!
Key Takeaways:
- Keep your drip coffee maker clean by following 6 simple steps using white vinegar, water, and basic supplies for a fresh and flavorful cup of coffee every time.
- Regularly cleaning your coffee maker prevents build-up, maintains optimal performance, and ensures a consistently delicious coffee experience. Cheers to the perfect cup of coffee!
Step 1: Gather the Necessary Supplies
Before you start the cleaning process, it’s important to gather all the necessary supplies. This ensures that you have everything on hand to effectively clean your drip coffee maker. Here is a list of the supplies you’ll need:
- White vinegar
- Water
- Brush or sponge
- Dish soap
- Clean cloth
White vinegar is a key ingredient in the cleaning process. Its acidity helps to break down mineral deposits and remove any bacteria that may have accumulated inside the coffee maker. Water is needed to dilute the vinegar and create the cleaning solution. Make sure to use fresh, clean water for the best results.
A brush or sponge will be used to clean the removable parts of the coffee maker, such as the filter basket and the coffee pot. Look for a brush with soft bristles or a sponge that can easily reach into tight corners and remove any stubborn residue.
Dish soap will be used to thoroughly clean the removable parts. Look for a gentle dish soap that can effectively remove coffee residue without leaving behind any soapy residue. Make sure to rinse all the parts thoroughly with clean water after cleaning them with dish soap.
A clean cloth is essential for wiping down the exterior of the coffee maker. Look for a lint-free cloth that won’t leave behind any fibers or streaks. The cloth can be used with the vinegar solution to remove any stains or spills from the exterior surface of the machine.
Once you have gathered all the necessary supplies, you are ready to move on to the next step of the cleaning process. Having everything on hand ensures that you can efficiently clean your drip coffee maker and maintain its optimal performance.
Now that you have everything you need, let’s proceed to step two: preparing the cleaning solution.
Step 2: Prepare the Cleaning Solution
Preparing the cleaning solution is a crucial step in effectively cleaning your drip coffee maker. The solution, made with white vinegar and water, helps to break down mineral deposits and remove bacteria from the internal components of the machine. Follow these simple steps to prepare the cleaning solution:
- Start by measuring equal parts white vinegar and water. Depending on the size of your coffee maker, you may need about 4 cups (1 liter) of each.
- Pour the white vinegar and water into a measuring cup or any container that is easy to pour from.
- Give the mixture a gentle stir to ensure that the vinegar is well mixed with the water. This will distribute the acidity of the vinegar evenly throughout the solution.
It’s important to note that using white vinegar is recommended for cleaning your coffee maker. White vinegar is non-toxic and safe to use around food preparation areas. Its acidity helps to dissolve mineral build-up and eliminate bacteria that may have accumulated over time.
Once you have prepared the cleaning solution, you are now ready to move on to the next step: cleaning the removable parts of your drip coffee maker. The cleaning solution will effectively remove any stubborn residues and ensure that your coffee maker is fresh and clean for the best-tasting coffee.
Remember to refer back to the cleaning solution whenever needed during the cleaning process. If the solution runs low, simply mix equal parts white vinegar and water again to ensure that you have enough to clean all the necessary components of your coffee maker.
Now that the cleaning solution is ready, let’s proceed to step three: cleaning the removable parts of your drip coffee maker.
Step 3: Clean the Removable Parts
Now that you have prepared the cleaning solution, it’s time to clean the removable parts of your drip coffee maker. These include the filter basket, coffee pot, and any other detachable components that come into contact with coffee grounds or water. Follow these steps to effectively clean the removable parts:
- Start by removing the filter basket from the coffee maker. Rinse it under warm water to remove any loose coffee grounds. Use a brush or sponge to scrub away any stubborn grime or residue.
- In a sink or basin, fill it with warm, soapy water. Add a small amount of dish soap and agitate the water to create suds.
- Place the filter basket and other removable parts into the soapy water and let them soak for a few minutes. This will help to loosen any remaining debris and coffee oils.
- After soaking, use a brush or sponge to scrub the filter basket and other parts, paying attention to any hard-to-reach areas. Ensure that all residue is thoroughly removed.
- Rinse the parts under clean running water to remove any soap residue. Inspect them to make sure they are completely clean before proceeding.
- Leave the parts to air-dry completely before reassembling them back into the coffee maker.
This thorough cleaning of the removable parts helps to ensure that there are no leftover coffee grounds or oils that could affect the taste of your brew. It also prevents any potential build-up that could clog the coffee maker over time.
Remember to clean the removable parts regularly, ideally after every use or at least once a week, to maintain the cleanliness and performance of your drip coffee maker.
With the removable parts clean and dry, we are ready to move on to the next step: cleaning the coffee pot.
Step 4: Clean the Coffee Pot
Now that you have cleaned the removable parts, it’s time to focus on cleaning the coffee pot itself. The coffee pot is where your brewed coffee collects, and it’s important to keep it clean to ensure the best flavor in every cup. Follow these steps to effectively clean your coffee pot:
- Pour the prepared white vinegar and water mixture into the coffee pot until it is about halfway full. The vinegar acts as a natural cleaner, breaking down mineral deposits and removing any bacteria that may have built up.
- Place the empty coffee pot back onto the heating plate of the coffee maker.
- Turn on the brew cycle, allowing the vinegar and water mixture to run through the machine as if you were making a regular pot of coffee.
- Once the brew cycle is complete, carefully pour out the vinegar and water mixture. Take caution, as it may still be hot.
- Rinse the coffee pot thoroughly with clean water to remove any lingering vinegar taste or odor.
By running the vinegar and water mixture through the coffee maker, you are effectively cleaning the internal components, such as the heating element and water tubes. This process helps to remove any mineral deposits, oils, or coffee residue that may have built up over time.
Once you have completed these steps, you’ll notice that your coffee pot looks clean and free from coffee stains. It’s important to rinse the pot thoroughly with clean water to ensure that there are no traces of vinegar remaining, as this can affect the taste of your coffee.
Now that your coffee pot is clean and ready for use, we can move on to step five: cleaning the exterior of the coffee maker.
Read more: How To Use Drip Coffee Machine
Step 5: Clean the Exterior of the Machine
While it’s essential to clean the internal components of your coffee maker, it’s also important to pay attention to the exterior. Over time, spills, splatters, and fingerprints can leave the machine looking dirty and unattractive. Follow these steps to effectively clean the exterior of your coffee maker:
- Dip a clean cloth into the vinegar and water solution that you prepared earlier. Make sure the cloth is damp but not dripping wet.
- Gently wipe down the exterior surface of the coffee maker, paying attention to any areas with stains or spills. The acidity of the vinegar helps to break down any residue and remove stubborn marks.
- If there are any stubborn stains or dried-on spills, you can use a gentle scrub brush or sponge. Dip it in the vinegar solution and gently scrub the affected areas.
- After cleaning, wipe the exterior of the coffee maker with a clean, damp cloth to remove any residue or vinegar smell.
- Dry the coffee maker thoroughly with a clean, dry cloth.
When cleaning the exterior of the coffee maker, avoid submerging the machine in water or using abrasive cleaners. The vinegar solution is gentle yet effective at removing grime and stains.
Paying attention to the cleanliness of the exterior not only keeps your coffee maker looking pristine but also reduces the risk of any residue or dirt transferring to your hands or countertop when handling the machine.
Now that the exterior is clean, we can move on to the final step: running a cleaning cycle to ensure that there are no traces of vinegar or residue left in your coffee maker.
Step 6: Run a Cleaning Cycle
In the final step of cleaning your drip coffee maker, we will run a cleaning cycle to ensure that there are no traces of vinegar or residue left behind. This step helps to flush out any remaining cleaning solution and leaves your machine fresh and ready for brewing coffee. Follow these steps to run a cleaning cycle:
- Fill the water reservoir of your coffee maker with fresh, clean water.
- Place an empty coffee pot onto the heating plate.
- Start a brew cycle, allowing the machine to run as if you were making a regular pot of coffee.
- Dispose of the water in the coffee pot once the cycle is complete.
- Repeat this process once or twice, using clean water each time, until there are no traces of vinegar smell or taste.
Running a cleaning cycle with clean water effectively rinses out any remaining vinegar or residue from the previous steps. This ensures that there are no flavors or odors that can transfer to your brewed coffee.
During the cleaning cycle, you may notice some debris or residue being flushed out into the coffee pot. This is normal and indicates that the cleaning process is effectively removing any build-up inside the machine.
Once you have completed the cleaning cycle and there are no traces of vinegar smell or taste, your drip coffee maker is now thoroughly cleaned and ready for brewing the perfect cup of coffee.
Remember to run a cleaning cycle like this at least once a month to maintain the cleanliness and performance of your coffee maker. Regular cleaning will ensure that you continue to enjoy the best-tasting coffee every time you brew.
Congratulations! You have successfully completed all six steps of cleaning your drip coffee maker. By following these steps regularly, you can keep your machine in excellent condition and enjoy fresh and delicious coffee with every cup.
Now sit back, relax, and savor that perfect cup of coffee!
Conclusion
Cleaning your drip coffee maker is an essential part of maintaining its performance and ensuring the best-tasting coffee. With just a few simple steps, you can effectively remove mineral deposits, oils, and coffee residue that can accumulate over time.
We began by gathering the necessary supplies, including white vinegar, water, a brush or sponge, dish soap, and a clean cloth. These supplies are readily available and make the cleaning process convenient.
Next, we prepared a cleaning solution using equal parts white vinegar and water. This solution acts as a natural cleanser and helps remove build-up and bacteria from the coffee maker’s internal components.
Then, we cleaned the removable parts such as the filter basket and coffee pot, ensuring all coffee residue was thoroughly removed. Regular cleaning of these parts prevents any build-up that can impact the flavor of your coffee.
We moved on to cleaning the coffee pot itself by running a brew cycle with the vinegar and water mixture. This process effectively removes mineral deposits and disinfects the internal components. Rinsing the coffee pot with clean water eliminates any remaining vinegar taste.
After cleaning the interior, we focused on the exterior of the coffee maker. Wiping it down with the vinegar solution helps remove stains, spills, and residue. A final wipe with a clean, damp cloth leaves the exterior looking pristine.
Finally, we ran a cleaning cycle with clean water to ensure there were no traces of vinegar or residue left behind. This step completes the cleaning process, leaving your coffee maker fresh and ready to brew the perfect cup of coffee.
Regularly following these six steps will keep your drip coffee maker in excellent condition, prolong its lifespan, and ensure a consistently delicious coffee experience.
Remember, the cleanliness of your coffee maker plays a significant role in the taste of your brewed coffee. By investing a little time and effort into cleaning your coffee maker, you’ll be rewarded with a flavorful and satisfying cup of coffee every time.
So, go ahead and give your drip coffee maker the attention it deserves. Enjoy the process of cleaning, knowing that it’s a small step towards elevating your coffee brewing experience. Cheers to a fresh and delicious cup of coffee!
Frequently Asked Questions about How To Clean A Drip Coffee Maker: 6 Steps For Perfect Coffee
Was this page helpful?
At Storables.com, we guarantee accurate and reliable information. Our content, validated by Expert Board Contributors, is crafted following stringent Editorial Policies. We're committed to providing you with well-researched, expert-backed insights for all your informational needs.



0 thoughts on “How To Clean A Drip Coffee Maker: 6 Steps For Perfect Coffee”