Articles
How Much To Install Tongue And Groove Ceiling
Modified: August 26, 2024
Looking for articles on how much it costs to install a tongue and groove ceiling? Get expert insights and accurate estimates to help plan your project.
(Many of the links in this article redirect to a specific reviewed product. Your purchase of these products through affiliate links helps to generate commission for Storables.com, at no extra cost. Learn more)
Introduction
Welcome to our comprehensive guide on installing a tongue and groove ceiling. If you’re looking to add a touch of elegance and rustic charm to your home, a tongue and groove ceiling can be the perfect choice. This type of ceiling adds a beautiful and timeless aesthetic to any room, whether it’s a living space, a bedroom, or even a porch.
But before diving into the installation process, it’s important to understand what a tongue and groove ceiling is. Simply put, it consists of interlocking wood planks that fit together seamlessly. The “tongue” refers to the edge of the board that is inserted into the “groove” of the adjacent board. This creates a tight and secure fit, ensuring a smooth and visually appealing ceiling.
Installing a tongue and groove ceiling requires some careful planning and consideration. There are several factors that can affect the overall cost of the project, such as the size of the area to be covered, the type of wood used, and whether you choose to hire a professional or do it yourself. In this guide, we will walk you through the installation process step by step, provide tips and tricks for a successful installation, and discuss the cost breakdown of the project.
Before we get started, it’s important to note that tongue and groove ceilings can be installed both indoors and outdoors. While the installation process may vary slightly depending on the location, the basic principles remain the same. So whether you’re looking to enhance your living room or create a cozy outdoor patio, this guide will provide you with all the information you need to tackle the project with confidence.
So, if you’re ready to transform your ceiling and add a touch of elegance to your space, let’s dive into our comprehensive guide on installing a tongue and groove ceiling.
Key Takeaways:
- Installing a tongue and groove ceiling can add elegance and charm to any space, but it requires careful planning, quality materials, and attention to detail. Consider factors like wood type, labor costs, and preparation for a successful installation.
- Whether you choose to hire a professional or take on a DIY approach, prioritize safety, follow manufacturer instructions, and maintain consistent gaps and leveling during installation. With patience and meticulous execution, you can achieve a stunning and long-lasting tongue and groove ceiling.
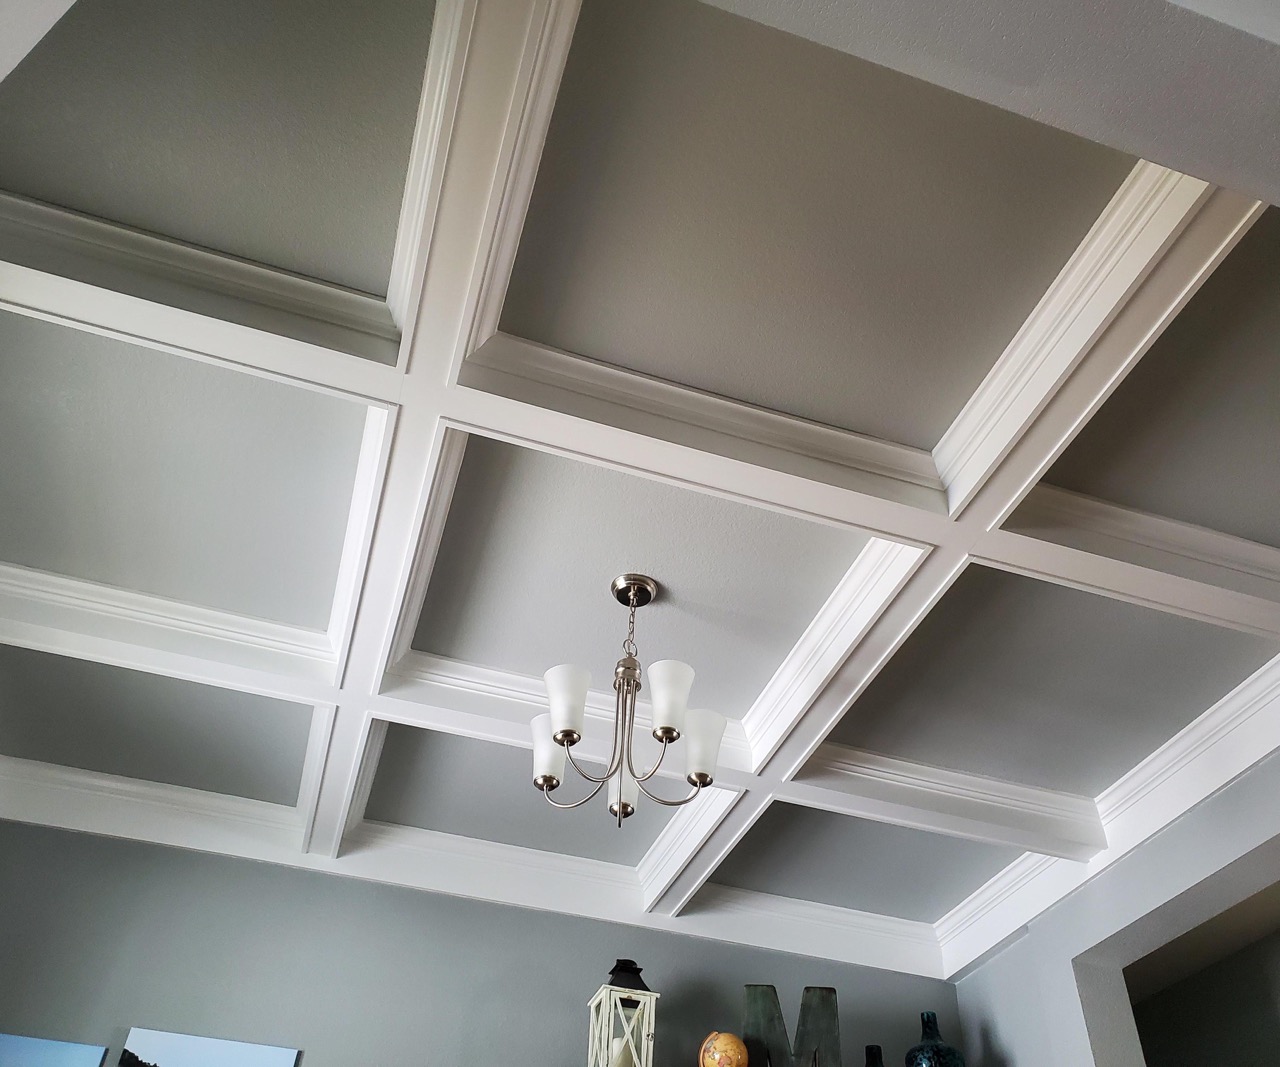
Understanding Tongue and Groove Ceilings
Tongue and groove ceilings have been around for centuries and are known for their durability, charm, and visual appeal. They are commonly used in traditional, cottage-style, and coastal homes to add a touch of elegance and warmth to the interior or exterior spaces. Understanding the key features and benefits of a tongue and groove ceiling is essential before embarking on the installation process.
One of the primary advantages of a tongue and groove ceiling is its seamless and tight fit. The interlocking nature of the planks ensures that there are no visible gaps or joints, creating a smooth and polished finish. This not only adds to the aesthetics but also helps to reduce heat loss and noise transmission, making it an excellent choice for energy efficiency and soundproofing.
Another benefit of a tongue and groove ceiling is its versatility in design and style. The wide range of wood species available, such as pine, cedar, and oak, allows you to customize the look to suit your desired aesthetic. You can choose between natural wood finishes for a rustic and traditional feel or paint the planks to match the color scheme of your space.
Moreover, tongue and groove ceilings are relatively low maintenance. Once installed, they require minimal upkeep, making them a practical and long-lasting solution. Regular cleaning with a soft cloth or vacuuming with a brush attachment is usually sufficient to keep the ceiling looking its best.
It is important to note that tongue and groove ceilings can be installed both horizontally and vertically, depending on the desired effect. Horizontal installation is typically used to visually expand the space, while vertical installation can create a more dramatic and striking look.
Before proceeding with the installation, it’s crucial to inspect the area for any existing structural issues or moisture problems that may compromise the integrity of the ceiling. It’s always recommended to consult with a professional if you have any concerns about the structural stability of your space.
Overall, understanding the features and benefits of a tongue and groove ceiling will help you make an informed decision and ensure a successful installation. With their seamless design, versatility, and low maintenance, these ceilings are an excellent choice for adding charm and character to your home or outdoor space.
Factors Affecting Installation Costs
When considering the installation of a tongue and groove ceiling, it’s important to understand the various factors that can affect the overall cost of the project. By taking these factors into account, you can better prepare and budget for the installation process. Here are some key factors that can influence the installation costs:
- Size of the Area: The size of the area to be covered with a tongue and groove ceiling will have a significant impact on the overall cost. Larger areas will require more materials, labor, and time to complete, which can increase the installation expenses. Conversely, smaller spaces will generally be more cost-effective.
- Type of Wood: The type of wood you choose for your tongue and groove ceiling will greatly affect the cost. Different wood species vary in price, with more exotic or high-end options being more expensive. Softwoods like pine are typically more budget-friendly, while hardwoods like oak or cedar can be pricier.
- Quality of Wood: The quality of the wood also plays a role in the installation costs. Higher-grade, premium-quality wood will generally cost more than lower-grade options. Additionally, if you opt for pre-finished wood, which comes with a factory-applied finish, it may add to the overall cost.
- Labor Costs: Hiring a professional contractor to install your tongue and groove ceiling will add to the overall expenses. Labor costs can vary depending on various factors, including the complexity of the installation, the location, and the contractor’s experience and expertise. Keep in mind that hiring an experienced professional can ensure a high-quality installation.
- Additional Materials and Supplies: Apart from the wood planks, there are additional materials and supplies required for installation. This may include adhesive, nails, screws, and finishing products. The cost of these materials should be factored into the overall budget.
- Preparation and Repairs: Before installing a tongue and groove ceiling, there may be some preparation work required, such as removing existing ceilings or repairing any structural issues. These additional tasks can impact the overall cost of the project.
It’s important to note that the costs mentioned here are general considerations and can vary depending on your specific project and location. To get an accurate estimate of the installation costs, it’s advised to consult with professionals and obtain multiple quotes.
By considering these factors, you can better plan and budget for the installation of your tongue and groove ceiling. Remember to prioritize quality materials and professional workmanship to ensure a long-lasting and visually stunning result.
Materials Needed for Installation
Installing a tongue and groove ceiling requires a few essential materials that will help you achieve a successful and professional-looking result. Here is a list of the materials you will need:
- Tongue and Groove Planks: The most crucial material for the installation is the tongue and groove planks themselves. These planks are typically made of solid wood and come in various lengths, widths, and wood species. Measure your ceiling area carefully to determine the quantity of planks needed to cover the space.
- Adhesive: An adhesive that is specifically designed for tongue and groove applications is necessary for a secure and long-lasting installation. Look for a high-quality adhesive that is compatible with your chosen wood species and consult the manufacturer’s instructions for proper usage.
- Nails or Screws: Depending on your preference and the instructions from the manufacturer, you will need either nails or screws to secure the planks to the ceiling. These fasteners should be corrosion-resistant and the appropriate length for attaching the planks securely.
- Finishing Nails: Finishing nails are smaller nails that will be used to fill any nail holes and provide a seamless finish. Choose nails that are the appropriate size and color to blend in with the wood or finish you plan to apply.
- Sandpaper: Sandpaper or sanding blocks are necessary for smoothing the surface and removing any rough edges or imperfections. Choose sandpaper of varying grits, starting with a coarse grit for initial sanding and gradually moving to finer grits for a smooth finish.
- Finishing Products: Depending on your desired finish, you may need additional materials such as wood stain, paint, or clear sealant. These finishing products will enhance the appearance and protect the wood, so choose products that are suitable for your chosen wood species.
- Tools: You will need a set of tools to facilitate the installation process, including a tape measure, a level, a miter saw or table saw for cutting the planks to size, a hammer or drill for inserting nails or screws, a pneumatic nailer (if using nails), a caulk gun (if using adhesive), and a sanding block or orbital sander.
- Protective Gear: When working with wood and finishing products, it’s essential to protect yourself. Wear safety glasses to protect your eyes, gloves to protect your hands, and a dust mask to prevent inhaling dust particles.
Before starting the installation process, ensure that you have all the necessary materials and tools readily available. This will help streamline the installation process and ensure a smooth workflow.
Always read the manufacturer’s instructions for all materials and tools to ensure proper usage and safety precautions. Additionally, if you’re unsure about any aspect of the installation, it’s recommended to consult with professionals or seek guidance from experienced individuals.
By gathering all the required materials beforehand and having the necessary tools on hand, you’ll be well-prepared to tackle the installation of your tongue and groove ceiling.
Preparation and Planning
Before diving into the installation of a tongue and groove ceiling, proper preparation and planning are essential for a smooth and successful project. Taking the time to prepare the space and adequately plan out the installation process will help you avoid costly mistakes and ensure a professional-looking result. Here are some important steps to consider:
- Measure the Ceiling: Start by accurately measuring the dimensions of your ceiling. This will help you determine the quantity of tongue and groove planks needed for the installation. Measure both the length and width of the ceiling area, and consider any obstructions or irregularities that may affect the layout.
- Remove Existing Ceiling: If you have an existing ceiling in place, such as drywall or plaster, you will need to remove it before installing the tongue and groove ceiling. This can be a labor-intensive process, so take the necessary precautions and consult with professionals if needed.
- Inspect the Substrate: Once the existing ceiling is removed, inspect the substrate (the surface beneath) for any structural issues or moisture problems. Ensure that the substrate is dry, stable, and free from any damage. If there are any concerns, consult with professionals before proceeding.
- Acclimate the Wood: Wood is a natural material that can expand or contract with changes in humidity and temperature. To minimize the risk of warping or shrinking after installation, it is important to acclimate the tongue and groove planks to the environment in which they will be installed. Follow the manufacturer’s recommendations for acclimation, which typically involves storing the wood in the space for a specific period of time.
- Plan the Layout: Before installing the planks, carefully plan the layout of the ceiling. Consider the direction in which the planks will run, the orientation of any joints or seams, and any patterns or designs you wish to incorporate. This planning stage will help ensure a visually pleasing result.
- Calculate the Starting Point: Determine the starting point of the installation, as this will significantly impact the overall look of the ceiling. It is generally recommended to start in a corner of the room or at a focal point, such as the center of a ceiling. Mark this starting point to guide your installation process.
- Prepare Tools and Materials: Gather all the necessary tools and materials required for the installation, as mentioned in the previous section. Ensure that you have everything readily available to streamline the installation process.
- Take Safety Precautions: It’s essential to prioritize safety during the installation process. Wear appropriate safety gear, such as safety glasses and gloves, and use caution when handling tools and materials.
By thoroughly preparing and planning your tongue and groove ceiling installation, you can minimize potential issues and ensure a successful outcome. Taking the time to measure, inspect, acclimate the wood, and plan the layout will contribute to a smoother installation process and a beautifully finished ceiling.
If you’re unsure about any aspect of the preparation or planning stage, it’s always a good idea to consult with professionals or seek guidance from experienced individuals. Their expertise and knowledge can help you navigate any challenges and ensure a successful installation.
Step-by-Step Installation Process
Installing a tongue and groove ceiling involves a series of steps that, when followed carefully, will result in a beautiful and professional-looking finish. Here is a step-by-step guide to help you navigate the installation process:
- Prepare the Planks: Before installation, inspect the tongue and groove planks for any defects or damage. If necessary, sand down any rough edges or imperfections. Additionally, ensure that the planks are acclimated to the room’s environment as per the manufacturer’s instructions.
- Mark the Starting Point: Measure and mark the starting point for the installation, usually in a corner of the room or at a focal point. This will serve as your reference throughout the installation process.
- Apply Adhesive: Apply a high-quality adhesive to the back of the first plank using a caulk gun, following the manufacturer’s instructions. Make sure to apply an even coat of adhesive to ensure a secure bond.
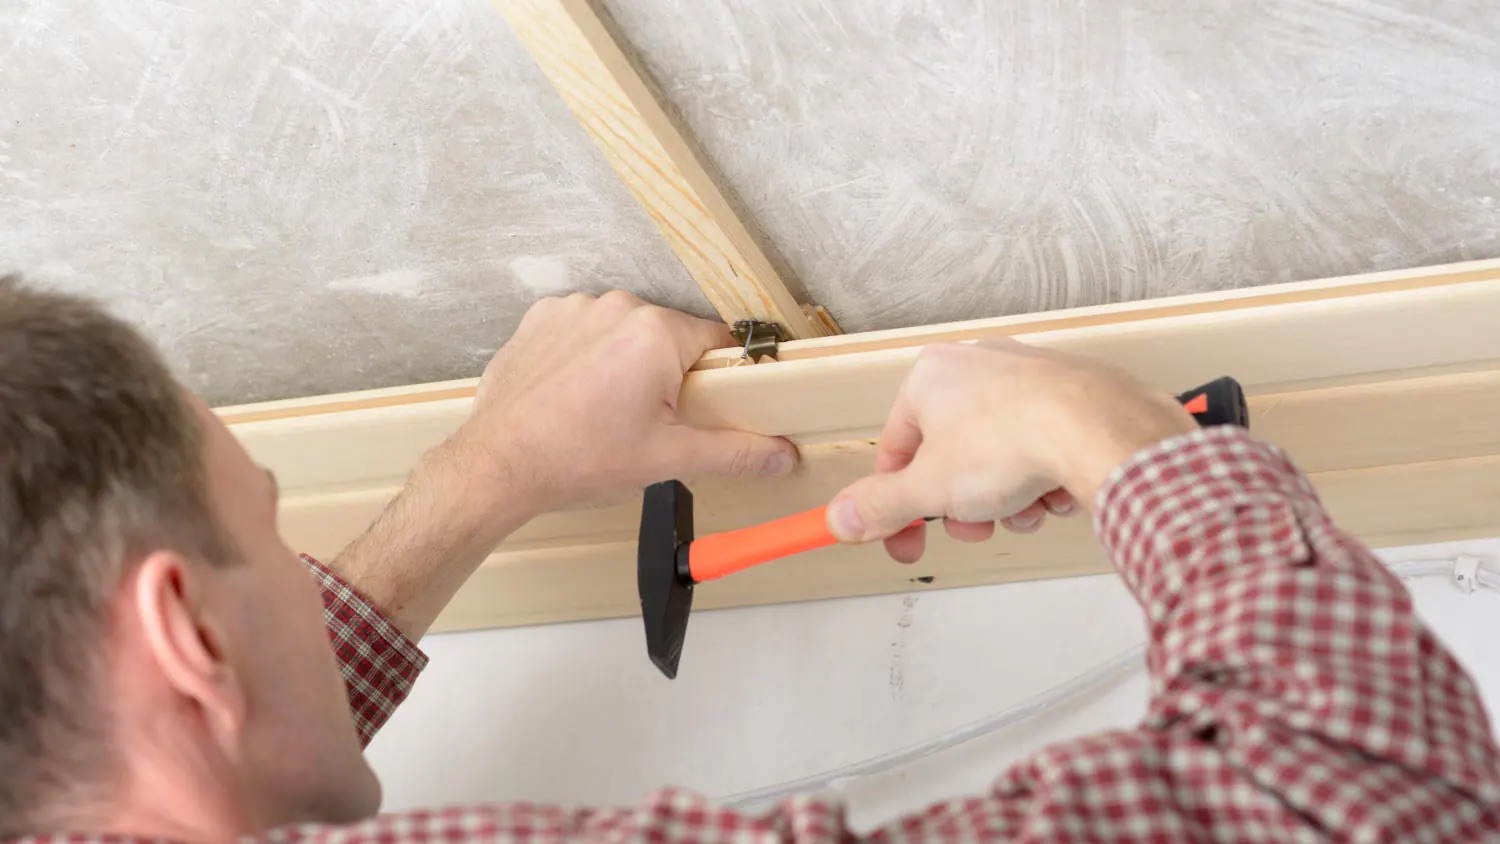
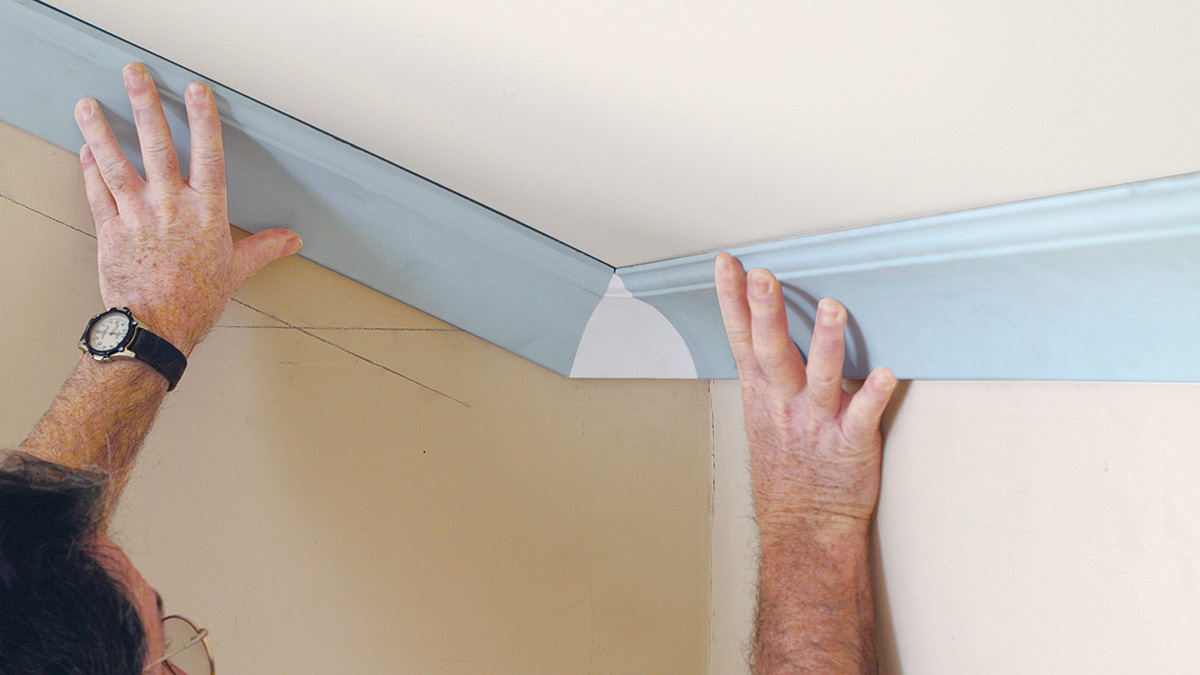
- Insert the First Plank: Align the first plank with the starting point and gently press it into place, ensuring the tongue and groove interlock snugly. Use a level to ensure that the plank is straight and level. Secure the plank using either nails or screws as per the manufacturer’s recommendations.
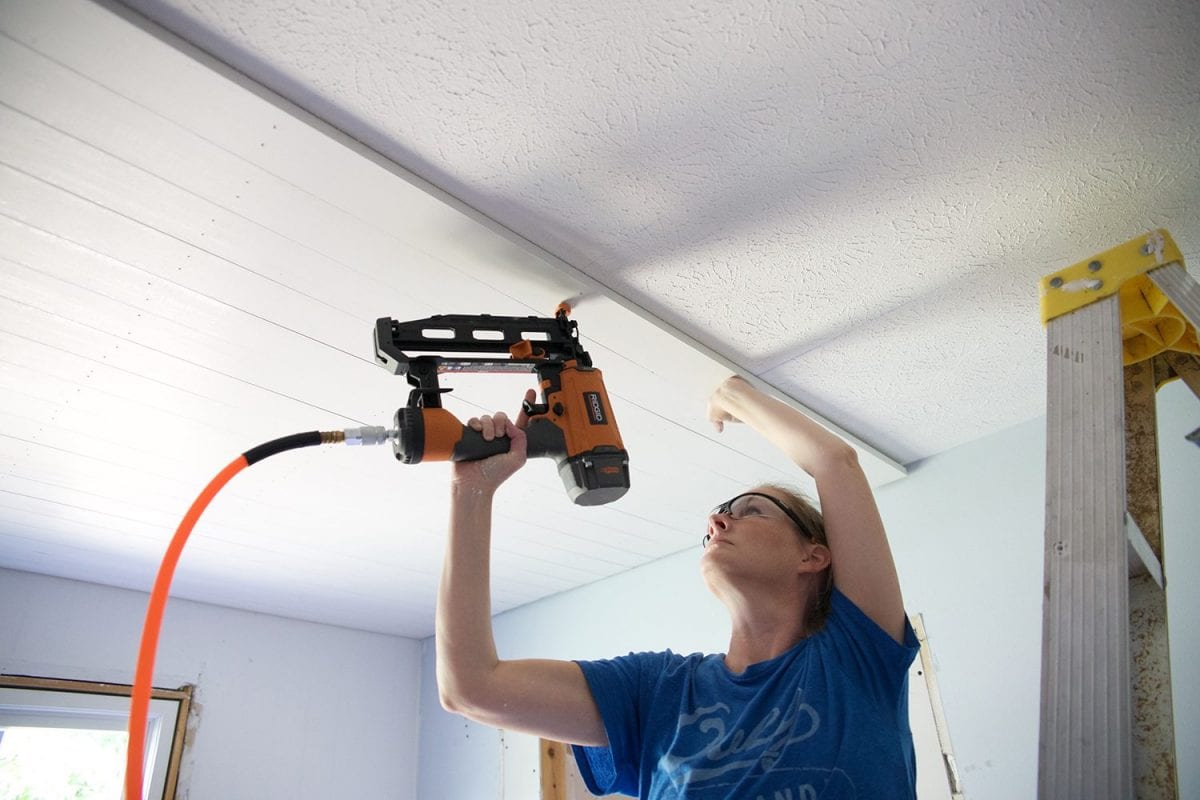
- Continue Installing: Fit the subsequent planks together by inserting the tongue of one plank into the groove of the previous plank. Use a rubber mallet or a scrap piece of wood and a hammer to gently tap the planks into place, ensuring a tight fit. Secure each plank to the ceiling using the appropriate fasteners and continue adding planks until the entire ceiling is covered.
- Trim the Planks: When reaching the end of a row or at the edges of the ceiling, you may need to trim the planks to fit. Measure and cut the planks using a miter saw or table saw, ensuring accuracy and precision.
- Fill Nail Holes: After the planks are installed, fill any nail holes and gaps with wood filler. Use a putty knife to apply the filler, and smooth it out for a seamless finish. Allow the filler to dry completely and sand it down to create a smooth surface.
- Finish the Ceiling: Depending on your desired look, you can apply a wood stain, paint, or clear sealant to the ceiling. Follow the manufacturer’s instructions for the chosen finishing product to achieve the desired effect. Allow sufficient drying time before moving on to the next step.
- Final Touches: Once the finish has dried, inspect the ceiling for any remaining imperfections or touch-ups. Make any necessary repairs or adjustments before completing the project.
It’s important to note that the specific installation techniques may vary depending on the manufacturer’s recommendations and the type of wood being used. Always refer to the manufacturer’s instructions for best results and seek professional guidance if needed.
By following these step-by-step instructions, you’ll be able to effectively install a tongue and groove ceiling and create a stunning and visually appealing space.
When installing a tongue and groove ceiling, make sure to acclimate the wood to the room’s humidity levels before installation to prevent warping or shrinking. This can help ensure a smooth and long-lasting finish.
Finishing and Sanding the Ceiling
After the installation of the tongue and groove ceiling is complete, the next step is to finish and sand the surface. This process helps to enhance the appearance of the wood, provide protection, and create a smooth and polished finish. Here’s a guide on how to finish and sand your ceiling:
- Clean the Ceiling: Before applying any finish, ensure that the ceiling is clean and free from dust or debris. Use a soft cloth or a vacuum with a brush attachment to remove any particles that may affect the finish.
- Choose the Finishing Product: Depending on your desired look and the type of wood used for the ceiling, you can choose from various finishing options. These can include wood stains, paints, or clear sealants. Consider the natural color and grain of the wood, as well as the overall aesthetic of the space, when selecting the finishing product.
- Apply the Finish: Follow the manufacturer’s instructions for applying the chosen finishing product. Use a brush or roller to evenly coat the surface of the wood planks. Work in small sections, starting from one end of the ceiling and progressing systematically to the other end. Take care to avoid drips or uneven application.
- Allow the Finish to Dry: Once the finish is applied, allow it to dry completely. The drying time can vary depending on the type of product used, humidity levels, and ventilation in the room. Follow the manufacturer’s instructions for the recommended drying duration.
- Sand the Ceiling: After the finish has dried, sand the ceiling to create a smooth and polished surface. Start with a coarse-grit sandpaper and gradually progress to finer grits for a refined finish. Use a sanding block or an orbital sander to ensure even and consistent sanding. Be mindful not to apply too much pressure, as it may damage the wood.
- Remove Dust: After sanding, thoroughly remove any dust or debris from the ceiling. Use a soft cloth or a vacuum with a brush attachment to eliminate any particles that could affect the final appearance of the ceiling.
- Apply Additional Coats (Optional): Depending on the desired level of sheen or protection, you may choose to apply multiple coats of finish. Follow the manufacturer’s instructions for applying additional coats, ensuring proper drying time between each coat.
- Final Touches: Once the sanding and finishing process is complete, inspect the ceiling for any imperfections. Touch up any areas that require attention, such as small scratches or missed spots. This final step ensures a flawless and professional-looking finish.
Keep in mind that the specific instructions and recommendations for finishing and sanding may vary based on the type of wood and finish you are working with. Always refer to the manufacturer’s instructions for best results. Additionally, consider wearing appropriate safety gear, such as safety glasses and a dust mask, to protect yourself during the sanding process.
By following these steps, you’ll be able to finish and sand your tongue and groove ceiling, achieving a beautiful, smooth, and visually appealing surface.
Cost Breakdown of Installation
When planning the installation of a tongue and groove ceiling, it’s important to have a clear understanding of the potential costs involved. The overall cost will depend on various factors, including the size of the area, the type and quality of wood chosen, labor expenses, and any additional materials required. Here is a breakdown of the typical costs associated with installing a tongue and groove ceiling:
- Materials: The cost of materials is a significant portion of the overall expense. It includes the tongue and groove planks, adhesive, nails or screws, finishing nails, sandpaper, and any necessary finishing products. The cost of materials will vary depending on the type of wood chosen, the quantity needed, and the quality of the products selected.
- Labor: If you decide to hire a professional contractor for the installation, labor costs will be an additional expense. The cost of labor can vary depending on factors such as the complexity of the project, the contractor’s experience and expertise, and the location of the project. It is recommended to obtain multiple quotes from reputable contractors to ensure a fair price.
- Tools and Equipment: While not a significant portion of the overall cost, you may need to purchase or rent certain tools and equipment for the installation. These can include a miter saw or table saw for cutting the planks, a caulk gun for applying adhesive, a nail gun or drill for attaching the planks, and sanding equipment.
- Preparation and Repairs: In some cases, there may be additional costs associated with preparing the space for installation or addressing any structural issues or repairs. This can include removing an existing ceiling, fixing damaged areas, or leveling the substrate.
- Finishing Touches: Depending on your desired aesthetic, there may be additional costs associated with finishing the tongue and groove ceiling. This can include purchasing wood stain, paint, or clear sealant for the final coat, as well as any additional tools or supplies required for the finishing process.
It’s important to note that the costs provided here are general estimates, and actual expenses may vary depending on several factors. The size and complexity of the project, the type of wood chosen, and labor rates in your area can all impact the final cost. To get a more accurate estimate, it is recommended to consult with professionals and obtain detailed quotes based on your specific project requirements.
By understanding the cost breakdown and considering all the factors involved, you can plan your budget accordingly and ensure a smooth and successful installation of your tongue and groove ceiling.
Hiring a Professional vs. DIY Installation
When it comes to installing a tongue and groove ceiling, you have the option to either hire a professional contractor or tackle the project as a do-it-yourself (DIY) endeavor. Each approach has its own advantages and considerations, so let’s explore the factors to consider when deciding between hiring a professional or opting for a DIY installation:
Hiring a Professional:
1. Expertise and Experience: Professional contractors have the knowledge, experience, and skills necessary to ensure a high-quality installation. They are familiar with the intricacies of working with tongue and groove planks and can handle any challenges that may arise during the process.
2. Time and Efficiency: Hiring a professional can save you a significant amount of time and effort. They will take care of the entire installation process, from preparing the space to finishing the ceiling, allowing you to focus on other tasks or responsibilities.
3. Tools and Equipment: Professionals have access to the necessary tools and equipment required for the installation. This eliminates the need for you to purchase or rent specialized tools, which can be an additional cost if you decide to tackle the project yourself.
4. Quality and Warranty: By hiring a reputable professional, you can expect a higher standard of craftsmanship and installation quality. Professional contractors may also provide warranties or guarantees for their work, giving you peace of mind in case any issues arise after the installation.
DIY Installation:
1. Cost Savings: One of the main advantages of a DIY installation is the potential for cost savings. By handling the project yourself, you can avoid labor fees, potentially reducing the overall expenses associated with hiring a professional.
2. Personal Satisfaction: Taking on a DIY project can be rewarding and provide a sense of accomplishment. Successfully installing a tongue and groove ceiling on your own can give you a great sense of pride in your handiwork and enhance the personal connection to your living space.
3. Flexibility and Control: DIY installations allow you to have full control over every aspect of the project, including the choice of materials, design, and timeline. You can customize the project according to your preferences and work at your own pace.
4. Learning Opportunity: Tackling a tongue and groove ceiling installation as a DIY project can provide a valuable learning experience. It allows you to gain insights into the installation process and acquire new skills that can be applied to future projects.
When deciding between hiring a professional or opting for a DIY installation, consider your skill level, available time and resources, and the complexity of the project. It’s important to be realistic about your abilities and assess whether you have the necessary expertise to achieve a satisfactory result on your own. If you’re unsure or lack experience, hiring a professional may be the best option to ensure a successful and hassle-free installation.
Regardless of your choice, make sure to prioritize safety, carefully follow manufacturer instructions, and consult professional guidance when needed. A well-executed tongue and groove ceiling can enhance the aesthetics and value of your space, creating a beautiful and inviting atmosphere.
Tips for a Successful Tongue and Groove Ceiling Installation
Installing a tongue and groove ceiling can be a rewarding and visually appealing project. To ensure a successful installation and achieve the desired results, consider the following tips:
- Plan and Prepare: Take the time to thoroughly plan and prepare for the installation. Measure the space accurately, inspect the substrate, and acclimate the wood planks to the room’s environment before starting the installation process.
- Choose the Right Wood: Select the appropriate wood species for your tongue and groove ceiling, considering factors such as durability, appearance, and budget. Be sure to choose high-quality wood that will withstand the test of time.
- Inspect and Sort the Planks: Before installation, inspect the planks for defects, such as warping or splitting. Sort the planks based on their quality and appearance, ensuring a visually consistent result.
- Follow Manufacturer Instructions: Always refer to the manufacturer’s instructions for the specific tongue and groove system and recommended installation techniques. Following these guidelines will ensure proper interlocking and a secure fit.
- Use Adhesive and Fasteners: For added reliability and stability, use both adhesive and fasteners, such as nails or screws, during the installation process. This will provide extra strength and prevent the planks from shifting over time.
- Maintain Consistent Gaps: When installing the planks, ensure consistent gaps between each board. These gaps allow for natural expansion and contraction of the wood and promote proper airflow in the ceiling.
- Double Check Alignment and Leveling: Regularly check the alignment and leveling of the planks as you progress. Use a level to ensure a straight and even installation.
- Take Safety Precautions: Prioritize safety throughout the installation process. Wear appropriate safety gear, such as safety glasses and gloves, and follow precautions when using tools or working at heights.
- Sand and Finish Properly: Pay attention to the sanding and finishing process to achieve a smooth and polished surface. Sand the planks in between coats of finish and apply multiple coats for added protection and durability.
- Regular Maintenance: Once the tongue and groove ceiling is installed, practice regular maintenance to keep it looking its best. Dust the surface regularly and address any issues promptly, such as repairing small damages or reapplying protective finishes.
Remember, patience and attention to detail are key to a successful tongue and groove ceiling installation. Take your time, work deliberately, and seek professional guidance or consult with experts if needed. By following these tips, you’ll be well on your way to a stunning and long-lasting tongue and groove ceiling that adds charm and character to your living space.
Conclusion
Installing a tongue and groove ceiling can transform the look and feel of any space, adding a touch of elegance and rustic charm. With the right materials, proper planning, and careful execution, you can achieve a stunning and visually appealing result. Throughout this comprehensive guide, we have explored the various aspects of installing a tongue and groove ceiling, including understanding the concept, factors affecting installation costs, materials required, preparation and planning, step-by-step installation instructions, finishing and sanding, cost breakdown, and the decision of hiring a professional versus a DIY approach.
To ensure a successful installation, it is essential to plan ahead, choose quality materials, and follow manufacturer instructions diligently. Taking the time to properly prepare the space, acclimate the wood, and carefully install each plank will contribute to the overall aesthetic and longevity of the ceiling. Additionally, paying attention to finishing touches, such as sanding and applying the appropriate finish, will result in a polished and visually appealing surface.
When considering the costs involved, factors such as material selection, labor expenses, and additional tools or preparations should be taken into account. Obtaining multiple quotes from professionals and carefully evaluating the feasibility of a DIY approach will help you make the most informed decision for your specific project.
By following the tips and guidelines provided throughout this guide, you’ll be well-equipped to tackle the installation of a tongue and groove ceiling. Whether you’re looking to enhance your living space, add character to a bedroom, or create an inviting outdoor area, a tongue and groove ceiling can be a beautiful and timeless addition to your home.
Remember, installation can be a significant undertaking, so take your time, prioritize safety, and seek professional advice or assistance if needed. With dedication and careful attention, you’ll create a breathtaking tongue and groove ceiling that becomes the centerpiece of your space and leaves a lasting impression for years to come.
Ready to tackle more exciting projects around your home? Whether you're keen on getting hands-on or just want to understand the crafts that shape your living spaces, we've got content that will keep your creativity flowing. Learn why rolling up your sleeves for DIY projects can be incredibly rewarding and fulfilling. Or, if you're looking to hone your skills in craftsmanship, discover the top woodworking techniques that are shaping up to be must-knows for the coming year. Dive into these reads to spark your next great project!
Frequently Asked Questions about How Much To Install Tongue And Groove Ceiling
Was this page helpful?
At Storables.com, we guarantee accurate and reliable information. Our content, validated by Expert Board Contributors, is crafted following stringent Editorial Policies. We're committed to providing you with well-researched, expert-backed insights for all your informational needs.


0 thoughts on “How Much To Install Tongue And Groove Ceiling”