
Articles
How To Build A Hip Roof
Modified: February 23, 2024
Learn how to build a hip roof with our informative articles. Discover step-by-step instructions and expert tips for a successful construction project.
(Many of the links in this article redirect to a specific reviewed product. Your purchase of these products through affiliate links helps to generate commission for Storables.com, at no extra cost. Learn more)
Introduction
Welcome to the world of hip roofs! If you are considering building a new house or renovating an existing one, the style of the roof plays a crucial role in the overall design. One of the most popular and aesthetically appealing choices is the hip roof. With its unique shape and practical benefits, a hip roof can add charm and functionality to any structure.
But what exactly is a hip roof? In simple terms, it is a type of roof that has slopes on all four sides, forming a pyramid-like shape. Unlike gable roofs that have two sides sloping downwards to form a triangular shape, a hip roof has all sides sloping towards the walls of the building. This design not only adds visual interest but also provides excellent structural stability.
Now, you might be wondering why you should choose a hip roof for your project. Well, let’s explore the benefits. First and foremost, a hip roof offers enhanced durability and resistance to harsh weather conditions. The sloping sides minimize the chances of water pooling, reducing the risk of leakage or damage. Additionally, the design of a hip roof allows for better ventilation and improved energy efficiency. The overhangs provide shade and help to prevent excessive heat gain during the summer months.
Furthermore, hip roofs are known for their aesthetic appeal. The symmetrical shape and clean lines create a visually pleasing silhouette that can complement various architectural styles. Whether you have a modern, traditional, or even a farmhouse-style house, a hip roof can add a touch of elegance and sophistication.
In this article, we will guide you through the process of building a hip roof from start to finish. We’ll cover the tools and materials you’ll need, the planning and preparation required, framing the roof, installing hip roof trusses, sheathing the roof, choosing the right roofing materials, and finishing touches like flashing and ventilation. By the end of this article, you’ll have a comprehensive understanding of how to create a beautiful and functional hip roof for your home.
So, whether you’re an experienced DIYer or a homeowner looking to embark on your first construction project, let’s dive into the world of hip roofs and learn how to build one that will stand the test of time.
Key Takeaways:
- Building a hip roof involves careful planning, precise execution, and attention to detail. From framing to finishing touches, it’s essential to consider stability, durability, water drainage, and aesthetic appeal for a successful project.
- Proper installation of roof sheathing, selection of the right roofing material, and incorporation of flashing and ventilation are crucial for protecting the hip roof from water damage and ensuring a healthy roofing system.
Read more: How To Build A Hip Roof Porch
What is a Hip Roof?
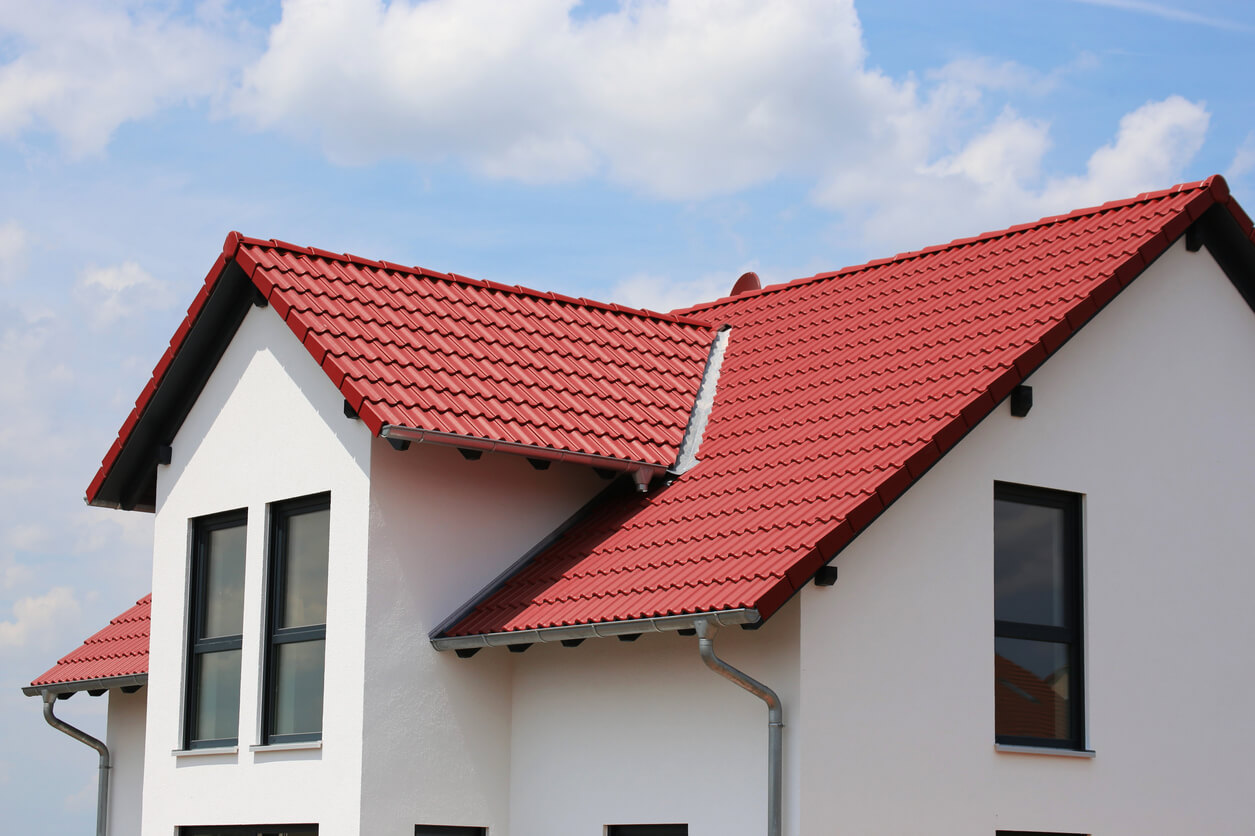
A hip roof is a type of roof design that features slopes on all four sides, forming a pyramid-like shape. Unlike a gable roof, which has two sides that slope downwards to form a triangle, a hip roof has all sides sloping towards the walls of the building. This design creates a more uniform and symmetrical appearance, making it a popular choice for many homeowners.
The main characteristic of a hip roof is its overhanging eaves. These overhangs provide additional protection to the exterior walls and windows, shielding them from harsh weather conditions and reducing potential damage caused by wind, rain, or snow. The eaves also create shade, which helps to prevent the excessive heat and sun exposure that can occur on the sides of the building.
One of the key benefits of a hip roof is its exceptional stability and durability. The sloping sides of the roof help to distribute the weight more evenly, making it less susceptible to wind uplift. This can be particularly advantageous in areas prone to strong winds or severe weather conditions. Additionally, the four-sided design offers superior structural integrity compared to other roof styles, making it a reliable choice in regions with heavy snow loads or seismic activity.
Another advantage of a hip roof is its excellent water drainage capabilities. With all sides sloping downwards, water is efficiently directed away from the roof surface, minimizing the risk of water pooling or leakage. This feature can be especially beneficial in areas with high rainfall or climates that experience frequent storms.
Besides its practical advantages, a hip roof also brings aesthetic appeal to a building. The symmetrical shape and clean lines create a timeless and elegant look that can enhance the overall architectural design. Whether your home has a modern, traditional, or even a Mediterranean style, a hip roof can seamlessly integrate and add a touch of sophistication.
Last but not least, hip roofs offer improved energy efficiency. The overhanging eaves provide shade, reducing the amount of direct sunlight that enters the building during hot summer months. This, in turn, helps to lower cooling costs by reducing the demand for air conditioning.
In summary, a hip roof is a type of roof design characterized by slopes on all four sides, forming a pyramid-like shape. It offers numerous benefits, including superior stability, durability, water drainage capabilities, aesthetic appeal, and improved energy efficiency. Whether you are building a new home or considering a roof renovation, a hip roof can be a practical and visually appealing choice.
Tools and Materials Needed
Tools
- Measuring Tape: To accurately measure the dimensions of the roof
- Hammer: For driving nails into the framing
- Nail Gun: A faster and more efficient alternative to a hammer
- Circular Saw: Used for cutting lumber and roof sheathing
- Level: To ensure proper alignment and evenness of the roof structure
- Chalk Line: For marking guidelines and reference points on the roof
- Roofing Nailer: Specifically designed for attaching roofing materials
- Roofing Shovel: Used to remove old roofing materials, if necessary
- Safety Equipment: Including gloves, safety glasses, and a hard hat
Materials
- Lumber: Various sizes and lengths for the roof framing
- Roof Trusses: Depending on the size and complexity of the roof
- Roof Sheathing: OSB (oriented strand board) or plywood panels
- Roofing Underlayment: Provides an additional layer of protection
- Roofing Materials: Shingles, tiles, or metal sheets
- Flashing Material: Metal strips or sheets to prevent water penetration
- Nails and Screws: For securing the roof components
- Roofing Adhesive: Helps to create a watertight seal
- Fascia Boards: Trim boards installed along the edges of the roof
- Gutters and Downspouts: For proper drainage of rainwater
These are the basic tools and materials you will need for building a hip roof. Depending on the specific requirements of your project, you may need additional tools or specialized equipment. It is essential to gather all the necessary tools and materials before starting the construction process to ensure a smooth and efficient installation of your hip roof.
Read more: What Is A Hip Roof
Planning and Preparation
Measuring and Calculating Roof Dimensions
Before you begin building a hip roof, it is crucial to accurately measure and calculate the dimensions of the roof. This will ensure that you have the correct amount of materials and that the roof fits properly onto the structure.
Start by measuring the length and width of the building’s exterior walls. These measurements will serve as the base dimensions for your roof. Next, determine the desired overhang length, which is the distance the roof will extend beyond the walls. Consider factors such as aesthetics and weather protection when determining the overhang.
Once you have the base dimensions and overhang length, you can calculate the length of the hip rafters and common rafters. Hip rafters connect the apex of the roof to the corners, while common rafters run from the corners to the ridge board. You can use various online calculators or consult with a structural engineer to ensure accurate calculations.
Remember to account for any additional features such as dormers or skylights when measuring and calculating roof dimensions. These elements will affect the shape and size of the hip roof.
Obtaining Necessary Permits
Before starting any construction project, it is essential to obtain the necessary permits and approvals from your local building authority. Building codes and regulations vary depending on your location, so it is crucial to familiarize yourself with the specific requirements in your area.
Contact your local building department and inquire about the permits needed for constructing or renovating a hip roof. They will provide you with the necessary information and guide you through the application process.
Typically, you will need to submit plans and specifications, including the proposed design, dimensions, and materials for the hip roof. The building department will review your application and ensure that it complies with local regulations, building codes, and zoning ordinances.
Once you have obtained the necessary permits, keep them readily accessible at the construction site. Building inspections may be required at various stages of the roof installation process, so be prepared for inspections and coordinate with the building department accordingly.
Remember, obtaining the required permits is essential to ensure that your hip roof is built to code and is safe. It also protects you from potential legal and financial issues in the future.
By taking the time to measure and calculate roof dimensions accurately and obtaining the necessary permits, you can start your hip roof construction on the right track and ensure a smooth and compliant building process.
Framing the Roof
Once you have completed the planning and obtained the necessary permits, it’s time to start framing the hip roof. This process involves installing the ridge board, attaching the hip rafters, and installing the common rafters.
Installing the Ridge Board
The ridge board is a horizontal beam that runs along the top of the hip roof, connecting the upper ends of the hip rafters. It provides structural support and helps to distribute the weight of the roof evenly. Start by positioning the ridge board at the highest point of the roof and secure it in place using nails or screws. Ensure that the ridge board is level and aligned with the top edges of the hip rafters.
Attaching the Hip Rafters
The hip rafters are diagonal beams that extend from the corners of the building to the ridge board. They form the sloping sides of the hip roof and provide stability and support. Start by measuring and cutting the hip rafters to the appropriate length, ensuring that the bottom ends are plumb with the corners of the building. Attach the hip rafters to the ridge board using metal brackets or framing connectors. Secure them in place using nails or screws, ensuring that they are securely fastened and aligned correctly.
Installing the Common Rafters
The common rafters are horizontal beams that run from the corners of the building to the ridge board, intersecting with the hip rafters. They provide additional support and form the horizontal sections of the roof. Measure and cut the common rafters to the appropriate length, taking into account the desired roof overhang. Attach the common rafters to the hip rafters using metal connectors or framing brackets. Secure them in place using nails or screws, making sure they are properly aligned and fastened.
Continue installing the remaining hip and common rafters, alternating between the two sides of the roof. Double-check the alignment and ensure that all rafters are securely attached and in the correct position. Use a level to verify that the ridge board and rafters are level and plumb.
Once all the rafters are installed, step back and inspect the framing to ensure it is structurally sound and aligned. Any necessary adjustments should be made before proceeding to the next step of the hip roof construction.
By following these steps, you can successfully frame the hip roof, installing the ridge board, attaching the hip rafters, and installing the common rafters. This crucial phase of the construction sets the foundation for the rest of the hip roof installation.
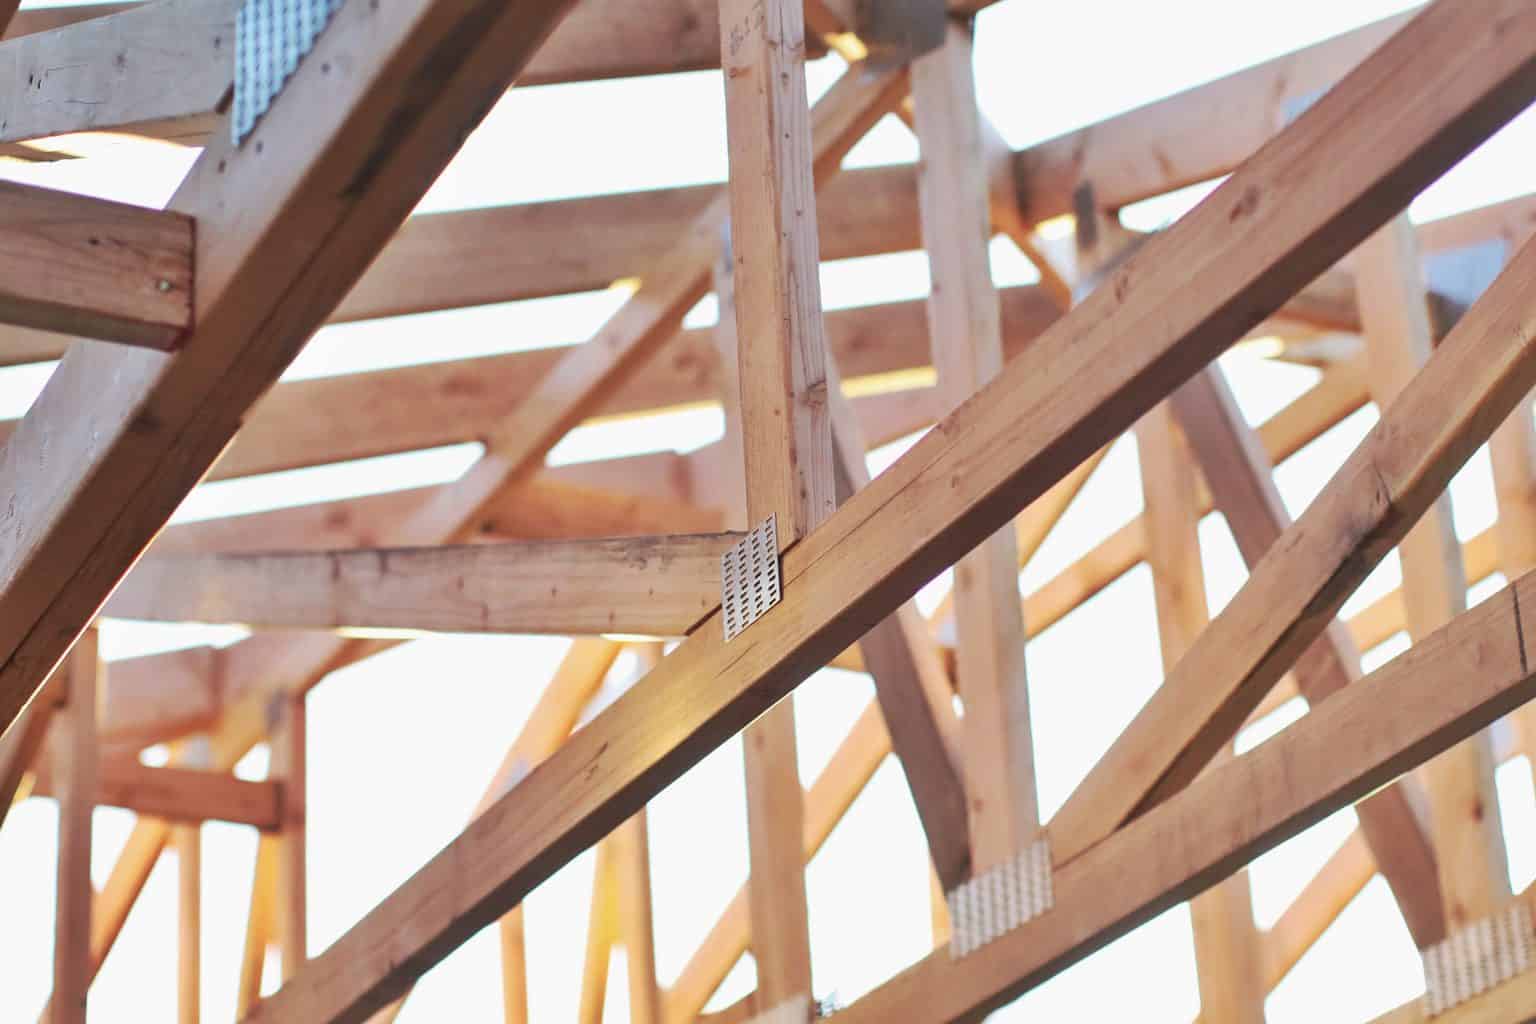
Hip Roof Trusses
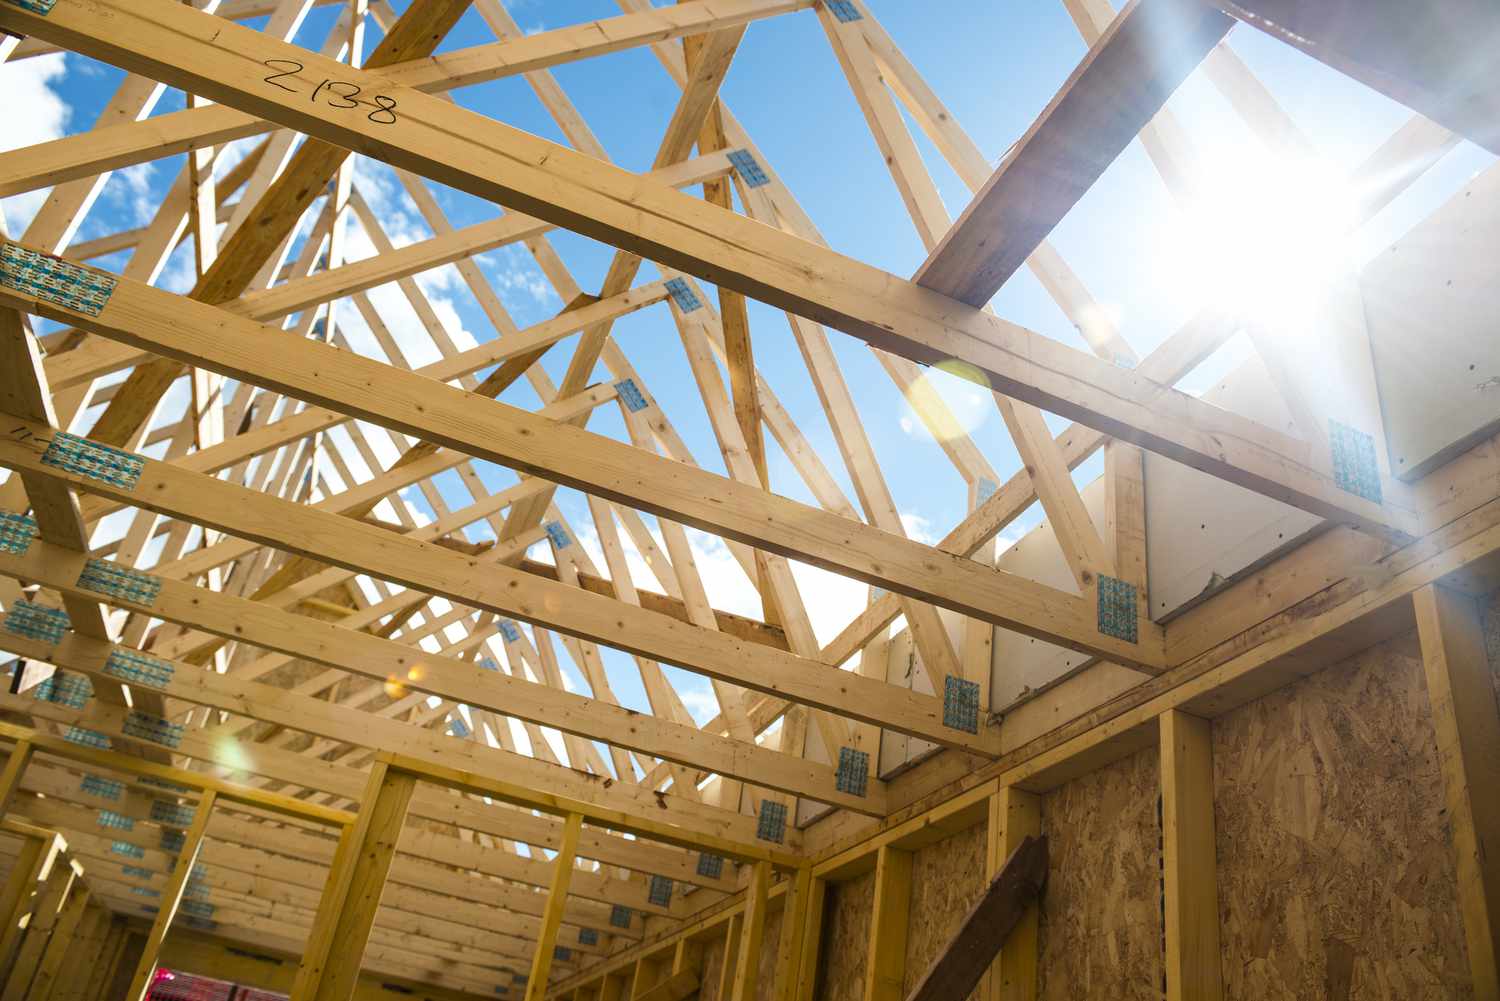
When it comes to constructing a hip roof, trusses play a vital role in providing structural support and stability. Trusses are pre-fabricated frameworks made of wood or metal that consist of interconnected joists, beams, and supports. They are designed to distribute the weight of the roof evenly and efficiently, ensuring the integrity of the hip roof structure. There are different types of hip roof trusses available, and you can choose between installing pre-fabricated trusses or building custom trusses to suit your specific project requirements.
Types of Hip Roof Trusses
There are several types of hip roof trusses that you can consider for your construction project:
1. Standard Hip Truss: This is the most common type of hip roof truss, featuring joists and supports connected in a triangular shape. It provides excellent stability and support to the roof structure.
2. Cantilever Hip Truss: This type of truss extends beyond the external walls of the building, creating larger overhangs. Cantilever trusses are often used to add extra space or create a covered porch or patio under the overhang.
3. Parallel Chord Hip Truss: In parallel chord trusses, the top and bottom chords run parallel to each other, creating a flat top surface. This design allows for additional storage or living space in the attic.
Installing Prefabricated Trusses
Installing pre-fabricated hip roof trusses is a popular option due to its efficiency and time-saving advantages. Here are the steps to install pre-fabricated trusses:
1. Prepare the work area: Clear the roof surface of any debris or obstacles to provide a clean and safe working environment.
2. Position the first truss: Lift the first truss into position, aligning it with the marks or layout lines on the walls. Secure it temporarily with braces or nails.
3. Install subsequent trusses: Continue lifting and installing the remaining pre-fabricated trusses, ensuring they are properly aligned with the layout lines and each other.
4. Secure the trusses: Once all the trusses are in place, secure them to the top plate using metal connectors and nails or screws. Ensure they are plumb and level before fastening.
5. Install bracing: Install temporary bracing or cross-bracing between the trusses to provide additional stability during the construction process.
Building Custom Hip Roof Trusses
If you prefer a more customized approach or have specific design requirements, you can opt to build custom hip roof trusses. Building custom trusses allows for more flexibility in terms of design, size, and spacing. However, it requires advanced carpentry skills and knowledge of roof engineering. It is recommended to consult with a structural engineer or roof truss manufacturer to ensure the trusses are designed correctly and comply with local building codes.
Custom trusses are typically built on-site, using lumber and metal connectors. The process involves precise measurement, cutting, and assembly to achieve the desired truss design. Each truss should be built according to the approved engineering plans and drawings, ensuring the correct dimensions and angles are achieved.
Whether you choose pre-fabricated trusses or custom-built ones, hip roof trusses are a crucial element in the construction of a hip roof. They provide the necessary structural support and stability, ensuring a strong and reliable roof structure.
Roof Sheathing
Roof sheathing is an essential component of a hip roof, providing a solid and stable base for the roofing materials. It is the layer of material that covers the rafters or trusses and forms the roof deck. Proper installation of roof sheathing is crucial for the longevity and durability of the roof. Let’s explore the steps involved in roof sheathing, including selecting the right sheathing material, measuring and cutting sheathing panels, and installing the sheathing.
Read more: How To Build A Roof For A Shed
Selecting the Right Sheathing Material
When it comes to selecting the appropriate sheathing material for a hip roof, there are several options to choose from. The most commonly used materials are oriented strand board (OSB) and plywood. Both options have their benefits and considerations.
OSB is a cost-effective choice and provides good structural strength and moisture resistance. It is made of wood strands combined with adhesive and compressed to form panels. OSB is available in different thicknesses, and it is important to select the appropriate thickness that complies with local building codes.
Plywood is another popular choice for roof sheathing. It is made of thin layers of wood veneer glued together with adjacent layers having their wood grain rotated up to 90 degrees to each other. Plywood offers excellent strength and durability and is known for its dimensional stability. It is also available in various thicknesses, and the appropriate thickness should be chosen based on the specific project requirements.
Consider factors such as the climate, cost, and local building codes when selecting the sheathing material for your hip roof. Consult with a professional contractor if you need guidance or specific recommendations for your project.
Measuring and Cutting Sheathing Panels
Before installing the sheathing, precise measurements and cutting of the panels are required. Measure the dimensions of the roof surface to determine the size of the sheathing panels needed. It is recommended to leave a small gap, usually around 1/8 inch, between the panels to allow for expansion due to temperature changes.
Using a circular saw or a handsaw, cut the sheathing panels to the appropriate size, ensuring they fit snugly on the roof surface. It may be necessary to cut smaller panels to fit around protrusions such as chimneys or skylights. Take care to make accurate and clean cuts to ensure proper alignment during installation.
Installing Sheathing
With the correctly sized panels ready, it’s time to install the sheathing onto the roof. Start at one corner of the roof and position the first panel, aligning it with the edge of the roof. Secure the panel to the rafters or trusses using screws or nails, following the manufacturer’s guidelines and local building codes.
Continue installing subsequent sheathing panels, leaving the recommended gap between each panel. Stagger the panels to provide additional strength and stability to the roof deck. Use a level to check for proper alignment and make any necessary adjustments during the installation process.
Once all the sheathing panels are installed, inspect the roof surface to ensure a flat and even deck. Fix any loose or raised panels, and reinforce any joints or edges as necessary. Ensure that the sheathing is securely fastened and provides a solid base for the roofing materials.
Roof sheathing plays a crucial role in the overall structural integrity of a hip roof. By selecting the right sheathing material, measuring and cutting the panels accurately, and installing the sheathing correctly, you can ensure a stable and sturdy roof deck for your hip roof.
Roofing Materials
Choosing the right roofing material is an important decision when it comes to completing your hip roof. The roofing material you select will not only affect the aesthetic appearance of your roof but also its durability and functionality. In this section, we will discuss the different types of roofing materials available, considerations for choosing the right material for a hip roof, and the installation process for roofing shingles or tiles.
Read more: How To Build A Pergola Roof
Types of Roofing Materials
There are various roofing materials to choose from, each with its own unique characteristics and benefits:
1. Asphalt Shingles: Asphalt shingles are the most commonly used roofing material due to their affordability, durability, and ease of installation. They are available in a wide range of colors and styles, making them suitable for various architectural designs.
2. Metal Roofing: Metal roofs are known for their longevity and ability to withstand harsh weather conditions. They come in different materials, including steel, aluminum, and copper, and can be shaped to mimic the appearance of other materials, such as shingles or tiles.
3. Concrete Tiles: Concrete tiles are durable, fire-resistant, and provide excellent insulation. They come in various shapes and colors, allowing for versatility in design. Concrete tiles may require additional support due to their weight.
4. Clay or Ceramic Tiles: Clay or ceramic tiles are renowned for their aesthetic appeal, durability, and longevity. They provide excellent insulation and are resistant to fire and insects. Clay or ceramic tiles are more expensive and may require additional structural support due to their weight.
5. Wood Shingles or Shakes: Wood shingles or shakes offer natural beauty and character to a roof. They are typically made from cedar, redwood, or pine, providing excellent insulation properties. However, they require regular maintenance and are susceptible to rot and insect damage.
Choosing the Right Roofing Material for a Hip Roof
When selecting the roofing material for your hip roof, consider the following factors:
– Aesthetic Appeal: Choose a material that complements the architectural style of your home and enhances its overall appearance.
– Durability: Consider the lifespan of the roofing material and its ability to withstand the local climate conditions, including wind, rain, snow, and extreme temperatures.
– Weight: Ensure that the roofing material is suitable for a hip roof by considering its weight and whether it requires additional structural support.
– Maintenance: Assess the level of maintenance required for each material and consider your willingness and ability to perform regular upkeep.
– Budget: Determine your budget and choose a roofing material that aligns with your financial constraints.
Installing Roofing Shingles/Tiles
The installation process for roofing shingles or tiles involves several steps:
1. Prepare the Roof: Ensure that the roof surface is clean and free of debris. Install an underlayment for added protection against moisture.
2. Start at the Bottom: Begin by installing the first row of shingles or tiles along the eaves of the roof, following the manufacturer’s instructions and using appropriate roofing nails.
3. Continue Installation: Lay subsequent rows of shingles or tiles, overlapping them properly to create a watertight barrier. Use a chalk line or other alignment techniques to ensure straight and uniform rows.
4. Secure the Roofing Material: Fasten the shingles or tiles securely to the roof using nails or screws in the designated areas, as specified by the manufacturer.
5. Trim and Finish: Trim any excess or overhanging shingles or tiles as necessary. Install ridge caps or flashing to ensure proper sealing along ridges, hips, and valleys.
6. Inspect and Maintain: Conduct a thorough inspection of the installed roofing material, checking for any loose or damaged pieces. Regularly maintain the roof by removing debris and performing any necessary repairs.
It is important to consult the manufacturer’s instructions and follow industry best practices during the installation of roofing shingles or tiles. If needed, seek professional assistance to ensure a proper and long-lasting installation.
By considering the various roofing materials available, taking into account factors such as aesthetics, durability, weight, maintenance, and budget, and following the correct installation methods, you can choose and install the right roofing material for your hip roof.
Flashing and Ventilation
When it comes to building a hip roof, proper flashing and ventilation are key factors in ensuring the longevity and performance of the roof. Flashing prevents water penetration at vulnerable areas, while ventilation promotes airflow to prevent moisture buildup. In this section, we will discuss the importance of flashing and ventilation for a hip roof, along with the installation of roof flashing and ensuring proper ventilation.
Read more: How To Build A Green Roof
Installing Roof Flashing
Roof flashing is a crucial component that helps prevent water leakage at vulnerable areas, such as intersections, joints, and penetrations. Here’s how to install roof flashing:
1. Identify Flashing Areas: Determine the specific areas where flashing is required, such as valleys, chimneys, skylights, and vents. These areas are prone to water infiltration and require added protection.
2. Clean and Prepare Surfaces: Ensure that the surfaces where the flashing will be installed are clean and free from debris. This provides a smooth and solid base for the flashing material.
3. Choose Flashing Material: Select the appropriate flashing material based on the specific needs and requirements of the hip roof. Common options include metal (such as aluminum or galvanized steel) or synthetic materials.
4. Measure and Cut: Measure and cut the flashing material to the appropriate size for each specific area. Allow for proper overlap and adequate coverage to ensure effective water sealing.
5. Install Flashing: Begin by installing flashing at the bottom of the roof, such as in valleys or along eaves. Secure the flashing in place using appropriate roofing nails or screws. Work your way up, overlapping the previous layers of flashing as you go.
6. Seal and Waterproof: Apply a quality roofing sealant or waterproofing membrane along the edges and seams of the flashing to provide an additional layer of protection against water infiltration.
7. Inspect and Maintain: Regularly inspect the roof flashing for any signs of damage or wear. Perform maintenance and repairs as needed to ensure the continued effectiveness of the flashing.
Ensuring Proper Ventilation
A well-ventilated hip roof is essential for maintaining a healthy and functional roofing system. Proper ventilation allows for the removal of excess heat, moisture, and condensation, which can lead to various roof problems. Here are some key considerations for ensuring proper ventilation:
– Soffit Vents: Install soffit vents along the underside of the roof overhangs. Soffit vents allow fresh air to enter the attic space and facilitate proper airflow.
– Ridge Vents: Install ridge vents at the peak of the roof. Ridge vents are designed to allow warm, moist air to escape from the attic, creating a continuous flow of air.
– Attic Ventilation: Ensure that your hip roof has adequate ventilation in the attic space. This may include a combination of soffit vents, ridge vents, gable vents, or other ventilation systems as recommended by building codes and roofing professionals.
– Insulation: Properly insulate the attic space to prevent heat buildup and condensation. Insulation helps maintain a comfortable temperature and reduces the risk of moisture-related issues.
– Regular Maintenance: Regularly inspect the vents and other ventilation components to ensure they are clear of debris and functioning properly. Clear away any obstructions that may inhibit proper airflow.
By installing roof flashing in vulnerable areas and ensuring proper ventilation, you can protect your hip roof from water damage, improve energy efficiency, and maintain a healthy roof system for years to come. Remember to follow manufacturer recommendations and local building codes when installing flashing and ventilation components.
Finishing Touches
As you near completion of your hip roof construction, it’s time to focus on the finishing touches that add both functionality and aesthetic appeal. Two important components to consider at this stage are fascia boards and gutters with downspouts. Let’s explore the importance of these finishing touches and the process of adding fascia boards and installing gutters and downspouts.
Adding Fascia Boards
Fascia boards are installed along the edges of the roof to provide a clean and finished appearance. They also serve as a support for the lower edge of the roof’s overhang and help protect the rafter ends from moisture. Here’s how to add fascia boards:
1. Measure and Cut: Measure the length of the fascia board needed for each edge of the roof. Use a saw to make precise cuts, ensuring the fascia board fits securely in place.
2. Attach Fascia Boards: Install the fascia boards along the eaves, securing them to the lower ends of the rafters or the ends of the roof trusses. Use galvanized nails or screws to fasten the boards securely.
3. Seal and Paint: Apply a suitable sealant or primer to the fascia boards to protect them from moisture and UV damage. Then, paint the boards with a weather-resistant paint color that complements the overall design of your home.
4. Inspect and Maintain: Regularly inspect the fascia boards for any signs of damage, such as rot or warping. Maintain the boards by replacing or repairing any damaged sections promptly.
Read more: How To Build A Roof For A Porch
Installing Gutters and Downspouts
Gutters and downspouts play a crucial role in directing rainwater away from the roof and foundation, protecting your home from potential water damage. Here’s the process for installing gutters and downspouts:
1. Measure and Plan: Measure the length of the eaves where the gutters will be installed. Plan the layout of the gutters, considering the direction of water flow and the placement of downspouts.
2. Install Gutter Hangers: Install gutter hangers along the eaves, following the manufacturer’s instructions. Space the hangers according to the recommended distance to ensure proper support for the gutters.
3. Attach the Gutters: Secure the gutters onto the hangers, aligning them with the slope of the roof. Connect the gutters using gutter connectors or sealant. Ensure that the gutters have a slight slope to allow for proper water drainage.
4. Install Downspouts: Position the downspouts at suitable locations along the gutters, ensuring they are properly aligned with the downspout outlets. Attach the downspouts securely to the gutters and the ground using brackets or straps.
5. Direct the Water Away: Install downspout extensions or splash blocks to direct the water away from the foundation of your home. Ensure that the water flows freely and does not pool around the base.
6. Maintain and Clean: Regularly clean the gutters and downspouts, removing any debris or blockages that may hinder proper water flow. Inspect the system for leaks or damage, and promptly repair or replace any compromised sections.
By adding fascia boards and installing gutters with downspouts, you not only enhance the visual appeal of your hip roof but also protect your home from potential water damage. Regular maintenance and timely repairs will help maintain the functionality and longevity of these finishing touches.
Congratulations! With the addition of fascia boards and gutters with downspouts, your hip roof construction is complete. Take pride in your hard work and enjoy the beauty and functionality of your newly finished hip roof.
Conclusion
Building a hip roof requires careful planning, precise execution, and attention to detail. Throughout this article, we have covered the various aspects of constructing a hip roof, from understanding its definition and benefits to the step-by-step process of framing, sheathing, roofing, and adding finishing touches.
A hip roof offers numerous advantages, including excellent stability, durability, water drainage capabilities, and enhanced energy efficiency. Its symmetrical shape and clean lines add a touch of elegance to any architectural style. By following the guidelines and recommendations provided, you can create a beautiful and functional hip roof for your home.
Proper planning and preparation, accurate measurement and calculation of dimensions, and obtaining the necessary permits are essential for a successful hip roof construction project. Framing the roof using ridge boards, hip rafters, and common rafters ensures a sturdy and stable structure.
The installation of roof sheathing provides a solid base for the roofing materials, while the selection of the right roofing material and the proper installation of shingles or tiles contribute to the roof’s aesthetic appeal and durability.
Furthermore, incorporating flashing at vulnerable areas and ensuring proper ventilation are critical for protecting the hip roof from water damage and maintaining a healthy roofing system.
Finally, adding fascia boards along the roof edges and installing gutters with downspouts complete the finishing touches, enhancing both the functionality and visual appearance of the hip roof.
Remember to consult with professionals and adhere to local building codes throughout the construction process. Regular maintenance and timely repairs will help prolong the lifespan of your hip roof and ensure its optimal performance for years to come.
With the completion of your hip roof, you can enjoy the benefits of a structurally sound and visually appealing roof that not only protects your home but also adds value and aesthetic charm. So, embark on your hip roof construction project, and let your creativity and technical skills shine as you create a roof that stands the test of time.
Frequently Asked Questions about How To Build A Hip Roof
Was this page helpful?
At Storables.com, we guarantee accurate and reliable information. Our content, validated by Expert Board Contributors, is crafted following stringent Editorial Policies. We're committed to providing you with well-researched, expert-backed insights for all your informational needs.

0 thoughts on “How To Build A Hip Roof”