Articles
How To Build A Gambrel Roof
Modified: January 18, 2024
Learn how to build a gambrel roof with our comprehensive articles. Gain expert insight and step-by-step instructions to create a sturdy and visually appealing structure.
(Many of the links in this article redirect to a specific reviewed product. Your purchase of these products through affiliate links helps to generate commission for Storables.com, at no extra cost. Learn more)
Introduction
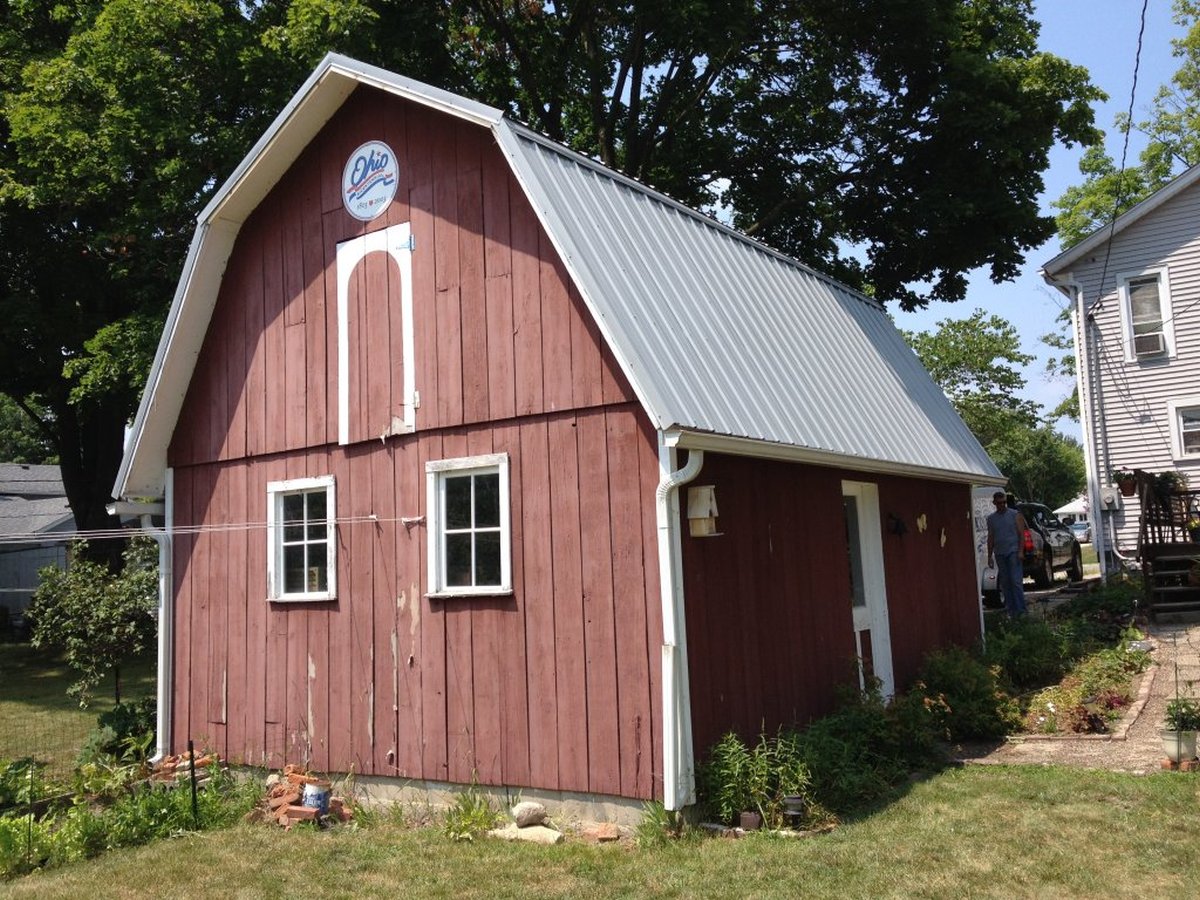
The gambrel roof is a distinctive and visually appealing roof design that has been used for centuries. Also known as a “barn roof” or “Dutch roof,” it features two sloping roof sections on each side, with the lower slope being steeper than the upper slope. This unique design not only adds a touch of elegance to any structure but also offers practical benefits in terms of increased headroom and storage space.
The gambrel roof has a rich history that traces back to the 17th century, where it was commonly used for barns and agricultural buildings. Its popularity grew rapidly due to its structural advantages and efficiency in providing more usable space beneath the roof. Over time, the gambrel roof design became synonymous with barns and farmhouses, evoking a sense of nostalgia and rustic charm.
Today, the gambrel roof is not limited to agriculture-related buildings but can be found in various residential and commercial structures. Its versatile design allows it to complement different architectural styles, from traditional to contemporary. Whether you’re building a new home, remodeling an existing one, or constructing a shed or garage, understanding how to build a gambrel roof can be a valuable skill.
In this guide, we will delve into the intricacies of designing and constructing a gambrel roof. From the initial planning stages to the finishing touches, we will cover all the essential steps to help you successfully build a gambrel roof. We’ll explore the advantages and disadvantages of this roof design, provide tips on selecting the right materials and tools, and guide you through the construction process to ensure a sturdy and visually appealing outcome.
So, if you’re ready to embark on this journey of creating a beautiful and functional gambrel roof, let’s dive into the fascinating world of roof design and construction!
Key Takeaways:
- Embrace the timeless charm and practical benefits of a gambrel roof by understanding its history, advantages, and construction intricacies. Proper planning, framing, and material selection are key to a sturdy and visually appealing outcome.
- Building a gambrel roof requires meticulous attention to detail, from framing and sheathing to roofing materials and drainage systems. Careful execution and maintenance ensure a durable, functional, and aesthetically pleasing roof structure.
Read more: How To Build Gambrel Shed Roof Truss
Understanding the Gambrel Roof
The gambrel roof is a distinctive architectural feature characterized by its double sloping roof design. It consists of two roof sections on each side, with the lower slope being steeper than the upper slope. This unique shape creates a charming and eye-catching profile that sets the gambrel roof apart from other roof designs.
The history of the gambrel roof can be traced back to the Netherlands, hence its alternative name “Dutch roof.” It was a popular choice for barns and agricultural buildings in the 17th century. The design allowed for increased storage space in the upper portion of the structure while providing ample headroom in the lower section. This versatility made it ideal for housing livestock and storing hay and other agricultural necessities.
Over time, the gambrel roof design transcended its agricultural origins and found its way into residential architecture. Its aesthetic appeal and practical advantages led to its incorporation in various types of buildings, including homes, garages, and sheds. Today, the gambrel roof is often associated with a classic, country-style charm, evoking a sense of warmth and tradition wherever it is used.
One of the main advantages of the gambrel roof is its efficient use of space. The steep lower slope provides ample headroom, allowing for easy movement within the structure. This makes it an excellent choice for attics, lofts, and storage areas. The upper slope, with its shallower angle, allows for increased natural light, creating a bright and airy atmosphere.
Another advantage of the gambrel roof is its durability and ability to withstand heavy snow loads. The steeper lower slope allows snow to slide off more easily, reducing the risk of structural damage. Additionally, the design provides excellent ventilation, helping to regulate temperature and prevent moisture buildup, which can lead to mold and rot.
However, it’s important to consider the potential disadvantages of the gambrel roof. One of the key drawbacks is its vulnerability to high winds. The design’s unique shape can create uplift forces during severe storms, which may require additional reinforcement and bracing to ensure structural integrity.
Another consideration is the complexity of constructing a gambrel roof compared to other roof designs. The varying angles and joints require careful planning and precise execution to ensure a watertight and sturdy roof. This may require the expertise of experienced professionals or extensive research and preparation for DIY enthusiasts.
In summary, the gambrel roof is a timeless and versatile architectural feature that offers both aesthetic appeal and practical advantages. Its efficient use of space, durability, and distinctive profile make it a popular choice for a wide range of structures. Understanding the history, advantages, and disadvantages of the gambrel roof will help you make an informed decision when incorporating this unique design into your next building project.
Planning and Designing a Gambrel Roof
Before embarking on the construction of a gambrel roof, careful planning and design considerations are essential to ensure a successful and structurally sound outcome. This involves assessing the site and climate conditions, determining the roof pitch and dimensions, and selecting the appropriate materials and tools for the project.
Assessing the site and climate conditions is crucial to understand the environmental factors that may impact the construction and longevity of the gambrel roof. Factors such as wind speeds, snow loads, and exposure to extreme weather conditions should be taken into account. Consult local building codes and regulations to ensure compliance and choose materials and construction methods that can withstand the specific climate challenges.
Determining the roof pitch and dimensions is a critical step in the design process. The pitch refers to the angle of the roof slopes and will depend on personal preference, local building codes, and the desired aesthetic. A steeper pitch can create a more pronounced gambrel roof profile, while a shallower pitch may provide a more subtle look. Consider the overall height and width of the structure to determine the appropriate dimensions for the roof.
Choosing the right materials and tools is essential for a successful gambrel roof construction. Consider the durability, aesthetics, and maintenance requirements of the materials. Common options for roof framing include wood and steel, while roof sheathing materials can range from plywood to OSB (oriented strand board). Additionally, select appropriate insulation, weatherproofing, and ventilation materials to ensure energy efficiency and long-term performance.
Equally important is having the right tools for the job. This can include tools for measuring and marking, such as tape measures, chalk lines, and squares, as well as tools for cutting and fastening, such as saws, drills, and nails. Ensure that all tools are in good working condition and suitable for the specific tasks involved in a gambrel roof construction.
By carefully assessing the site and climate conditions, determining the roof pitch and dimensions, and selecting the appropriate materials and tools, you can ensure that your gambrel roof is designed to withstand the elements and meet your aesthetic preferences. Proper planning and design will lay the foundation for a smooth and successful construction process, resulting in a sturdy and visually appealing gambrel roof.
Preparing the Construction Area
Before beginning the construction of a gambrel roof, it is important to properly prepare the construction area. This involves clearing the site, marking the boundaries, and ensuring proper drainage to create a solid foundation for the roof structure.
Clearing the site is the first step in preparing the construction area. Remove any vegetation, debris, or obstacles that may hinder the construction process. This includes clearing away any trees, shrubs, rocks, or other objects that may obstruct the roof’s installation or pose a safety hazard. It is important to have a clean and level surface for laying the foundation and constructing the roof.
Once the site is cleared, marking the boundaries is essential to ensure accurate installation of the gambrel roof. Use stakes, string lines, or other markers to establish the outline of the roof. This will help give a clear visual representation of the roof’s shape and dimensions, ensuring that the construction stays within the intended boundaries. Take precise measurements and double-check the dimensions to avoid any errors or miscalculations during the construction process.
Proper drainage is a vital aspect of preparing the construction area for a gambrel roof. Poor drainage can lead to water accumulation, which can damage the roof structure and cause leaks and mold issues. Evaluate the slope of the land to ensure that water can flow away from the roof and structure. If necessary, consider grading the land or implementing drainage solutions such as French drains or gutter systems to redirect water away from the roof and foundation.
By taking the time to clear the site, mark the boundaries accurately, and ensure proper drainage, you can create an optimal construction area for the gambrel roof. This preparation will help to minimize any potential issues during the construction process and lay the groundwork for a solid and long-lasting roof structure.
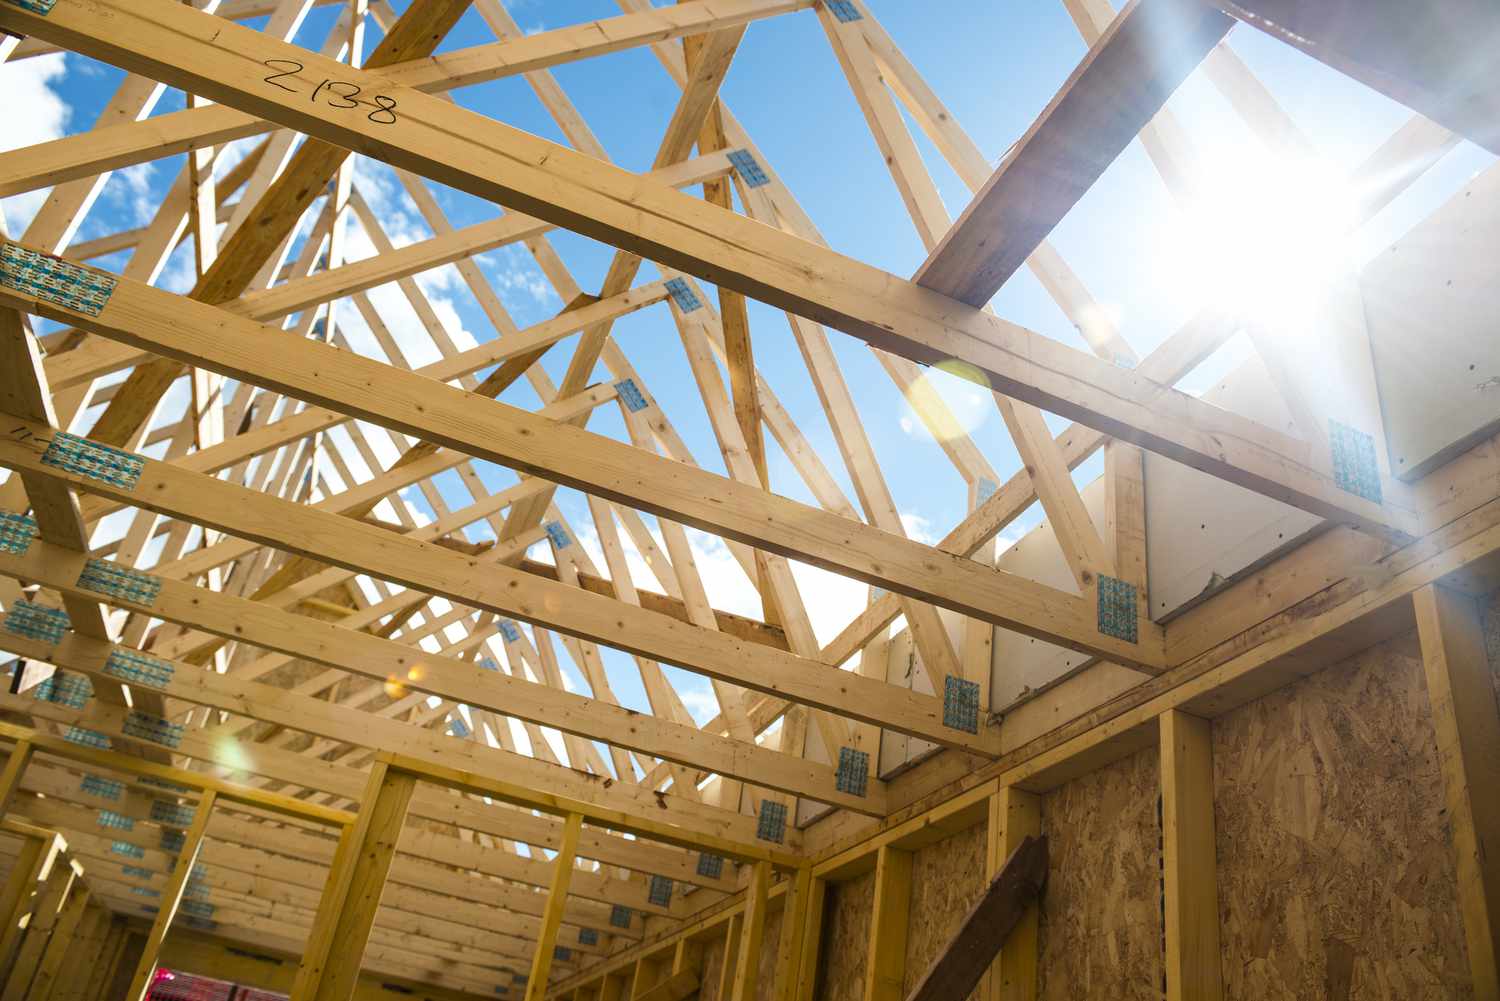
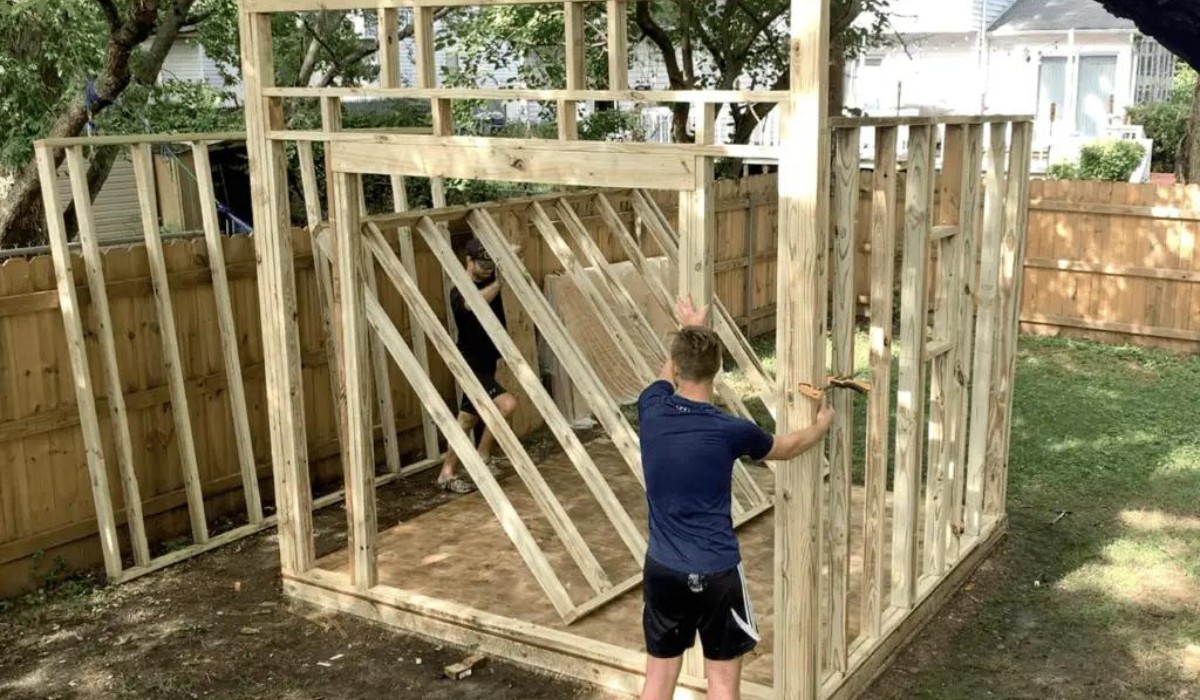
Framing the Gambrel Roof
Once the construction area is prepared, the next step in building a gambrel roof is framing. This involves installing the ridge board, constructing the roof trusses, and installing the collar ties and jack rafters to create a sturdy and well-supported roof structure.
The first step in framing the gambrel roof is installing the ridge board. The ridge board is a horizontal beam that runs along the top of the roof, connecting the two sloping roof sections. It provides stability and support for the roof structure. To install the ridge board, measure and mark its position according to the roof pitch and dimensions. Secure it in place using nails or structural screws, ensuring that it is level and properly aligned.
After installing the ridge board, the next step is to construct the roof trusses. Roof trusses are pre-fabricated triangular frames that support the roof load and distribute it evenly to the walls. The number and spacing of the trusses will depend on the size and design of the gambrel roof. Use the necessary lumber and follow the design plans to create each truss. Secure them in place, making sure they are properly aligned and level. It is crucial to ensure that the trusses are securely fastened to the ridge board and adequately supported by the structure’s walls.
Once the roof trusses are in place, the next step is to install collar ties and jack rafters. Collar ties are horizontal beams that connect the opposing roof rafters at a specific height, usually in the upper third of the roof structure. They strengthen the roof’s framework, prevent excessive spreading or movement, and provide added stability. Install collar ties at predetermined intervals, ensuring they are securely attached to each roof rafter.
Jack rafters are shorter rafters that connect the ridge board to the top plate of the walls. They provide additional support and help distribute the weight of the roof across the structure. Measure and cut each jack rafter to the appropriate length and angle, then secure them in place, attaching them to both the ridge board and the top plate of each wall.
By carefully installing the ridge board, constructing the roof trusses, and installing the collar ties and jack rafters, you can create a solid and well-framed gambrel roof structure. Proper framing is critical for ensuring the roof’s stability, load-bearing capacity, and longevity. Take the time to accurately measure, align, and secure each component to ensure a reliable and durable gambrel roof.
When building a gambrel roof, make sure to properly brace the roof trusses to prevent any shifting or movement during construction. This will ensure the stability and integrity of the roof structure.
Installing Roof Sheathing
Installing roof sheathing is a crucial step in building a gambrel roof as it provides a solid base for the roof covering and helps to distribute the load evenly across the roof structure. This process involves choosing the appropriate sheathing material, measuring and cutting the sheathing panels, and fastening them securely to the roof frame.
The first step in installing roof sheathing is selecting the appropriate material. Common options include plywood and oriented strand board (OSB). Consider factors such as durability, cost, and local building code requirements when choosing the sheathing material. Ensure that the chosen material meets the necessary specifications for strength, load-bearing capacity, and resistance to moisture and other elements.
Once the sheathing material is selected, the next step is to measure and cut the sheathing panels to fit the roof slope and dimensions. Measure the length and width of each section of the roof, accounting for any roof openings such as vents or skylights. Use a circular saw or a table saw to make clean and accurate cuts. Ensure that the panels fit snugly but leave a small gap between them to allow for expansion due to temperature changes.
After preparing the sheathing panels, the next step is to fasten them to the roof frame. Start at one corner of the roof and work your way across in a staggered pattern. Use appropriate nails or screws to secure the sheathing to the roof frame, following the manufacturer’s recommendations. Place fasteners at regular intervals along the edges and through the field of the panel to ensure proper attachment and structural integrity.
While installing the sheathing, make sure to leave gaps for any necessary ventilation, such as ridge vents or soffit vents, to promote the circulation of air beneath the roof. This helps prevent moisture buildup and improves the overall performance of the roof system.
Throughout the installation process, check the sheathing for any warping or defects and replace any damaged panels. It’s essential to maintain a level surface and ensure that the sheathing is properly aligned and securely fastened to the roof frame.
By choosing the appropriate sheathing material, measuring and cutting the panels accurately, and fastening them securely to the roof frame, you can ensure a solid and reliable foundation for your gambrel roof. Proper installation of the roof sheathing is essential for the overall strength, stability, and longevity of the roof structure.
Adding Roofing Materials
Once the roof sheathing is installed, the next step in building a gambrel roof is adding the roofing materials. This involves selecting the appropriate roofing material, installing the underlayment, and applying the chosen roofing material to protect the roof structure from weather elements.
The first step is selecting the roofing material that suits your aesthetic preferences, durability requirements, and budget. Common options for gambrel roofs include shingles, metal sheets, tiles, or composite materials. Consider factors such as the climate in your area, the desired lifespan of the roof, and the architectural style of the structure when choosing the roofing material. Consult with professionals or do thorough research to understand the pros and cons of each material before making a decision.
After selecting the roofing material, the next step is installing the underlayment. The underlayment acts as a protective layer between the sheathing and the roofing material, providing an additional barrier against water infiltration. Roll out the underlayment over the entire roof surface, ensuring that it overlaps at the edges and any joints by the manufacturer’s recommended amount. Secure the underlayment in place according to the manufacturer’s instructions, typically using roofing nails or staples.
Once the underlayment is properly installed, it’s time to apply the chosen roofing material. Follow the manufacturer’s guidelines for the specific material you’ve chosen. For shingles, start at the bottom edge of the roof and work your way up, overlapping each row to provide proper water shedding. Secure the shingles in place using roofing nails, following the recommended pattern and placement. If using metal sheets, tiles, or composite materials, carefully follow the manufacturer’s instructions for their proper installation.
During the installation process, pay attention to any necessary flashings around roof edges, valleys, and other openings to ensure a watertight seal. Flashings are metal pieces that help direct water away from critical areas of the roof, such as chimneys or skylights. Install them according to manufacturer instructions, ensuring that they are properly sealed and integrated into the roofing material.
Throughout the installation of the roofing materials, it’s important to maintain a consistent and uniform appearance. Check for any misaligned or loose materials, making adjustments as necessary. Take care to properly trim and shape the roofing material to fit around any roof protrusions, such as vents or chimneys, to ensure a seamless and professional finish.
By carefully selecting the appropriate roofing material, installing the underlayment correctly, and applying the chosen roofing material with precision, you can provide the gambrel roof with reliable protection against the elements. The choice of roofing material and proper installation are vital for the aesthetic appeal, longevity, and performance of the roof structure.
Installing Roof Flashing
When building a gambrel roof, installing roof flashing is a crucial step in ensuring a watertight and durable roof. Roof flashing serves as a protective barrier, preventing water penetration at vulnerable areas, such as roof edges, valleys, chimneys, and skylights. Understanding the purpose of roof flashing, selecting the right type of flashing, and employing proper installation techniques are essential for a successful roof installation.
The primary purpose of roof flashing is to direct water away from critical areas to prevent leaks and water damage. It is typically made of metal, such as aluminum or galvanized steel, due to its durability and resistance to weather elements. Flashing acts as a waterproof seal, guiding water away from roof joints, intersections, and any areas where water can seep through vulnerable gaps in the roofing materials.
There are various types of flashing to choose from, depending on the specific areas of the roof that require protection. For example:
- Step flashing is used along roof edges and intersections, providing a watertight barrier where the roof meets the vertical walls.
- Valley flashing is used to direct water away from the valleys formed by the intersection of two sloping roof planes.
- Chimney flashing is used to seal the joint between the chimney and the roof, preventing water from entering and causing damage.
- Skylight flashing is specially designed to create a weatherproof seal around skylights, ensuring water does not penetrate the roof.
Proper installation techniques are crucial to ensure the effectiveness of roof flashing. Here are some key considerations:
- Clean and prepare the areas where the flashing will be installed, removing any debris or old flashing materials.
- Ensure that the flashing material is properly sized and shaped to fit the specific area where it will be installed.
- Use appropriate sealants and adhesives to create a watertight bond between the flashing and the roof surface.
- Secure the flashing in place using roofing nails, screws, or other recommended fasteners, following the manufacturer’s instructions.
- Overlap the flashing pieces to ensure proper water shedding and create a continuous barrier against moisture.
- Inspect the flashing regularly for any signs of damage or deterioration and make repairs or replacements as needed.
By understanding the purpose of roof flashing, carefully selecting the appropriate type of flashing for each specific area, and employing proper installation techniques, you can ensure a watertight roof that is protected against potential water damage. Properly installed roof flashing plays a vital role in the long-term performance and durability of your gambrel roof.
Installing Gutters and Downspouts
When constructing a gambrel roof, installing gutters and downspouts is a crucial step in managing rainwater and maintaining the integrity of your roof and foundation. Gutters and downspouts serve a vital purpose in directing water away from the roof, preventing water damage, erosion, and foundation issues. Understanding the importance of gutters and downspouts, choosing the appropriate materials, and properly installing and maintaining them are key to a well-functioning and efficient drainage system.
Gutters and downspouts play a crucial role in managing rainwater by collecting it from the roof and directing it away from the foundation of the building. Without gutters, water can pool around the base of the structure, leading to a range of problems such as basement flooding, soil erosion, and compromised foundation stability. By properly channeling rainwater away, gutters and downspouts help protect your property from potential water damage.
When choosing gutters and downspouts for your gambrel roof, consider factors such as materials, durability, maintenance requirements, and aesthetics. Common materials for gutters include aluminum, steel, vinyl, and copper. Each material has its advantages and disadvantages, so it’s important to select the one that best suits your specific needs and budget. Similarly, downspouts can be made of the same materials as the gutters, with different shapes and sizes available.
Installing gutters and downspouts involves proper measurements and positioning. Start by measuring the length of the eaves where the gutters will be installed. Ensure that the gutters slope downward slightly toward the downspouts to promote efficient water flow and drainage. Secure the gutters to the fascia board using appropriate mounting brackets, ensuring they are level and properly aligned. Install downspouts at suitable intervals, ensuring they are securely attached to the gutters and extend down to direct water away from the building’s foundation.
Proper maintenance of gutters and downspouts is essential for their functionality. Regularly clean gutters and remove any debris, such as leaves or twigs, to prevent clogging and ensure the smooth flow of rainwater. Inspect and repair any leaks, loose parts, or damaged sections to maintain the effectiveness of the drainage system. Consider installing gutter guards or screens to reduce debris buildup and minimize the need for frequent cleaning.
By recognizing the importance of gutters and downspouts, choosing the appropriate materials, installing them correctly, and maintaining them regularly, you can effectively manage rainwater runoff and protect your gambrel roof and building foundation from potential water damage. A well-designed and properly maintained gutter and downspout system will contribute to the longevity and durability of your roof structure.
Read more: How To Build A Green Roof
Conclusion
Building a gambrel roof requires proper planning, design considerations, and careful execution to create a durable, functional, and visually appealing structure. By understanding the unique characteristics of the gambrel roof, assessing site and climate conditions, and selecting the right materials and tools, you can set a solid foundation for the construction process. Clearing the construction area, marking boundaries accurately, and ensuring proper drainage are essential for creating a stable structure.
Framing the gambrel roof involves installing the ridge board, constructing the roof trusses, and installing collar ties and jack rafters. These components provide stability, support, and proper weight distribution for the roof structure. Careful measurement, alignment, and secure fastening are vital in ensuring the strength and integrity of the roof framing.
Installing roof sheathing adds a solid base and strength to the gambrel roof. Choosing the appropriate sheathing material, accurately measuring, cutting panels, and securing them to the roof frame create a strong and reliable foundation. Adding the right roofing materials, such as shingles or metal sheets, along with proper underlayment installation, ensures protection against the elements.
Proper installation of roof flashing is important to prevent water penetration and protect vulnerable areas like roof edges, valleys, chimneys, and skylights. Choosing the suitable flashing material, understanding its purpose, and employing correct installation techniques are crucial for a watertight and durable roof structure.
Finally, installing gutters and downspouts plays a vital role in managing rainwater and protecting the roof and foundation. Choosing appropriate materials, correct positioning, and regular maintenance of the gutter system ensure efficient water flow and drainage away from the building.
In conclusion, building a gambrel roof is a rewarding endeavor that requires careful planning, skillful execution, and attention to detail. By understanding the unique features of the gambrel roof, following proper construction techniques, and using high-quality materials, you can create a structurally sound and visually appealing roof that enhances the overall design and functionality of the building. Whether you’re constructing a barn, a home, or any other structure, a well-constructed gambrel roof adds charm, character, and practicality to any architectural project.
Frequently Asked Questions about How To Build A Gambrel Roof
Was this page helpful?
At Storables.com, we guarantee accurate and reliable information. Our content, validated by Expert Board Contributors, is crafted following stringent Editorial Policies. We're committed to providing you with well-researched, expert-backed insights for all your informational needs.


0 thoughts on “How To Build A Gambrel Roof”