
Articles
How To Build An Arcade Cabinet
Modified: August 28, 2024
Looking for storage ideas? Learn how to build an arcade cabinet with clever storage solutions for your gaming collection. Transform your space into a gamer's paradise today!
(Many of the links in this article redirect to a specific reviewed product. Your purchase of these products through affiliate links helps to generate commission for Storables.com, at no extra cost. Learn more)
Introduction
Welcome to the exciting world of building your very own arcade cabinet! If you’re a fan of classic arcade games and want to bring that nostalgic experience into your home, this guide will walk you through the step-by-step process of creating your own custom arcade cabinet.
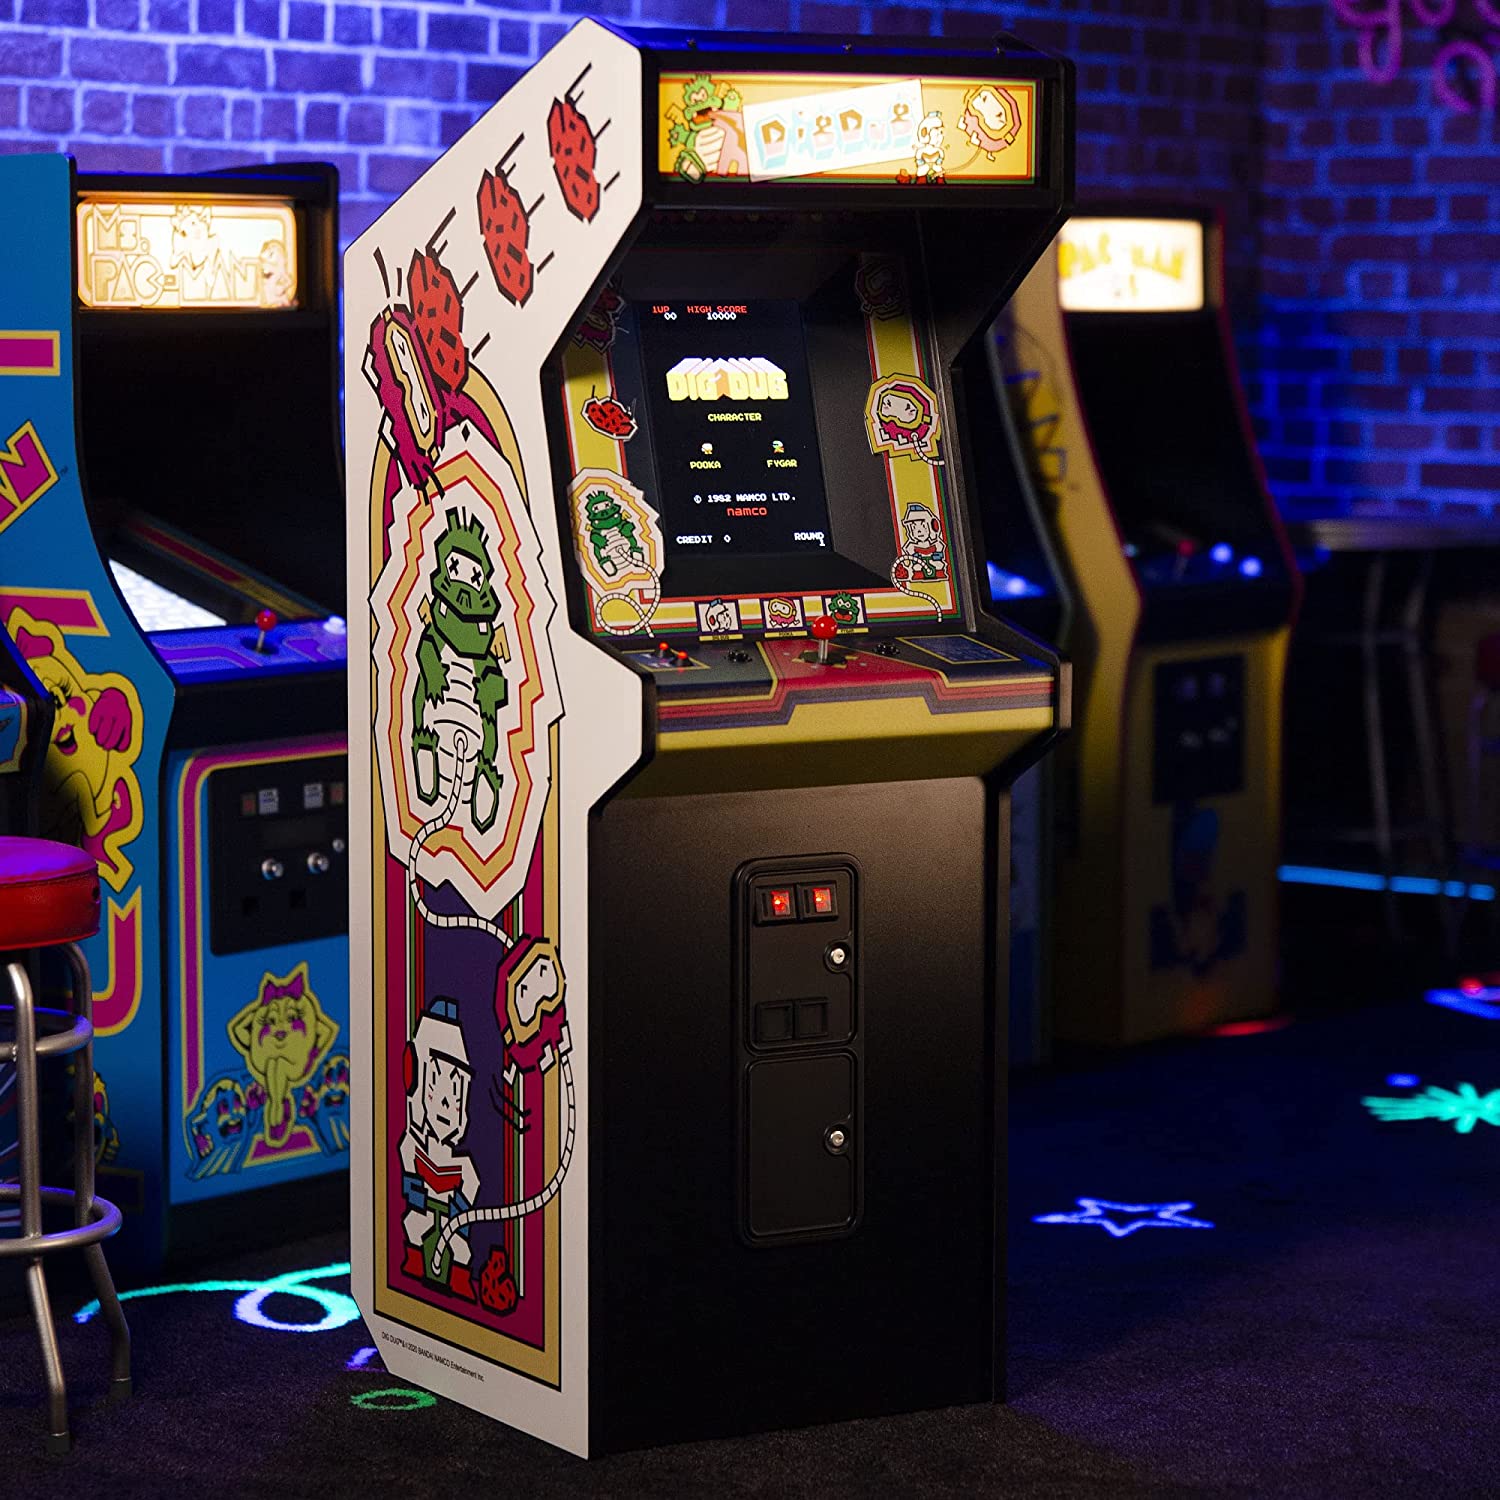
An arcade cabinet is a dedicated gaming console that houses a variety of arcade games. It typically includes a display screen, control panel, buttons, joystick, and other essential components needed to play the games. Building your own arcade cabinet allows you to customize the design, choose the games you want to play, and have a unique gaming experience.
Before we dive into the details, it’s important to note that building an arcade cabinet requires some technical skills, woodworking knowledge, and a bit of patience. However, with careful planning and the right tools, this DIY project can be a rewarding and fulfilling experience.
In this guide, we will cover each step of the process, from planning and designing your arcade cabinet to setting up the arcade system and adding the finishing touches. Along the way, we will provide tips, tricks, and recommendations to help you create a high-quality arcade cabinet that will bring hours of gaming fun to your home.
So, if you’re ready to embark on this exciting journey, let’s get started with step one: planning and designing your arcade cabinet.
Key Takeaways:
- Building an arcade cabinet is a rewarding DIY project that brings classic arcade gaming into your home. Careful planning, quality materials, and attention to detail are essential for a successful build.
- From designing and building to installing components and setting up the arcade system, each step contributes to a personalized and immersive gaming experience. Embrace the journey and enjoy the thrill of retro gaming in the comfort of your own home.
Read more: How To Build A Cabinet
Step 1: Planning and Designing Your Arcade Cabinet
Before you begin construction, it’s important to spend some time planning and designing your arcade cabinet. This step is crucial as it sets the foundation for the entire project. Here are three key aspects to consider:
1. Choosing the Right Cabinet Design
The cabinet design will determine the overall look and feel of your arcade cabinet. There are various options to choose from, including classic designs like the upright cabinet or more modern variations like bartop or cocktail cabinets. Consider your space limitations, personal preferences, and the style that will best complement your gaming setup.
2. Selecting Arcade Components
The components you choose will greatly impact the gaming experience. Critical components include a monitor or display screen, control panel, buttons, joystick, and audio system. Research different options, read reviews, and consider the quality and compatibility of the components. Opt for high-quality components that will provide a smooth and responsive gaming experience.
3. Sketching and Measuring the Cabinet Dimensions
Once you have a cabinet design and components in mind, it’s time to sketch and measure the dimensions of your arcade cabinet. Prepare a rough sketch of the cabinet, including the control panel layout, monitor placement, and overall dimensions. Take precise measurements to ensure the parts fit together correctly. This step is crucial to avoid any issues during the construction phase.
By carefully considering these aspects and taking the time to plan and design your arcade cabinet, you’ll be setting yourself up for success. With a clear vision in mind, you can move forward to gather the materials and tools needed to bring your arcade cabinet to life. In the next step, we will explore the essential materials and tools required for building your custom arcade cabinet.
Read more: How To Build A Shelf In A Cabinet
Step 2: Gathering Materials and Tools
Now that you have a solid plan for your arcade cabinet, it’s time to gather the necessary materials and tools to bring your vision to reality. Here are two key aspects to consider:
1. Required Materials for Construction
Building an arcade cabinet will require a variety of materials. Here are some essential ones to get started:
- Wood: Choose a sturdy and durable wood material for constructing the cabinet body. Medium-density fiberboard (MDF) or plywood are popular choices.
- Screws, Nails, and Glue: These will be used to assemble the cabinet and secure the components in place.
- Monitor or Display: Select a high-quality monitor or display screen that fits your desired size and resolution.
- Control Panel: This will include buttons and a joystick. Choose reliable and responsive components that align with your gaming preferences.
- Speaker System: Invest in speakers that provide clear and immersive sound for a complete gaming experience.
- Wiring and Cables: Ensure you have the necessary wiring and cables to connect all the components together.
- Paint and Finish: Select paint, primer, and finish materials to give your arcade cabinet a polished and professional look.
2. Essential Tools for Building
To successfully construct your arcade cabinet, you’ll need a set of essential tools. Here are some tools you’ll likely find useful:
- Power Drill: Used for drilling holes and attaching screws.
- Saw: Necessary for cutting wood panels to the correct dimensions.
- Screwdriver: Used to tighten screws and assemble the cabinet.
- Sander: Essential for smoothing out rough edges and surfaces.
- Measuring Tape: Used to accurately measure and mark the dimensions of the cabinet.
- Wire Cutters and Strippers: Required for cutting and stripping wires during the wiring process.
Gather all the necessary materials and tools before moving on to the next step. Having everything prepared will help streamline the construction process and ensure a smoother building experience. In the next step, we will delve into the construction of the arcade cabinet body.
Step 3: Building the Cabinet Body
With the materials and tools in hand, it’s time to begin constructing the body of your arcade cabinet. This step involves preparing and cutting the wood panels, assembling the cabinet structure, and ensuring a smooth finish. Let’s explore each aspect in more detail:
Read more: How To Build A Medicine Cabinet
1. Preparing and Cutting the Wood Panels
Start by preparing the wood panels that will form the foundation of your cabinet. Measure and mark the dimensions based on your earlier sketches. Use a saw to carefully cut the panels according to the measurements. By taking precise measurements and using a sharp saw, you’ll ensure accurate panel sizes for a snug fit during assembly.
2. Assembling the Cabinet Structure
Next, it’s time to assemble the cabinet structure. Start by attaching the base panel to the sides and back panel using screws or nails. Make sure the panels are aligned properly to create a sturdy structure. Then, attach the top panel to complete the basic cabinet shape. Depending on your design, you may also need to attach additional panels, such as a marquee panel or control panel frame.
3. Sanding and Smoothing the Surfaces
Once the cabinet structure is assembled, it’s essential to sand and smooth the surfaces. Use a sander or sandpaper to remove any rough edges, imperfections, or splinters on the wood panels. Sanding will not only improve the aesthetic appeal but also ensure a safer and more comfortable gaming experience. Finish by wiping down the surfaces to remove any dust or debris before moving on to the next step.
By carefully following these steps, you’ll have a well-constructed and visually appealing arcade cabinet body. The next step will focus on installing the arcade components such as the control panel, buttons, and joystick. Stay tuned for step 4!
Step 4: Installing Arcade Components
With the cabinet body built, it’s time to move on to installing the arcade components. This step involves mounting the control panel, wiring the buttons and joystick, and integrating the monitor and speakers. Let’s explore each aspect in more detail:
Read more: How To Build Cabinet Base
1. Mounting the Control Panel
Start by positioning and attaching the control panel onto the cabinet. Measure and mark the desired placement, ensuring it’s comfortable and accessible for gameplay. Use screws or brackets to secure the control panel in place. Make sure it’s sturdy and doesn’t wobble when pressure is applied. Consider mounting options that allow for adjustments and easy access for maintenance or upgrades.
2. Wiring the Buttons and Joystick
Once the control panel is mounted, it’s time to wire the buttons and joystick. Carefully plan the layout of the buttons and connect them to the appropriate terminals on a control board or encoder. Use wire cutters and strippers to prepare the wires and ensure a clean and secure connection. Follow the wiring diagram provided with your components to ensure proper functionality. Test each button and the joystick to ensure they register inputs correctly.
3. Integrating the Monitor and Speakers
The monitor and speakers are key components for the audio and visual experience of your arcade cabinet. Mount the monitor into the designated area in the cabinet, ensuring it is securely attached. Connect the necessary cables, such as HDMI or VGA, from the monitor to the appropriate ports on the arcade system or computer. Similarly, position the speakers and connect them to the audio system. Test the audio and video to ensure they are working as expected.
By following these steps, you’ll successfully install the arcade components into your cabinet. In the next step, we’ll focus on painting and adding the finishing touches to give your arcade cabinet its final look.
Step 5: Painting and Finishing Touches
Once the arcade components are installed, it’s time to add the finishing touches to your arcade cabinet. This step involves painting the cabinet, applying graphics and decals, and adding illumination effects. Let’s delve into each aspect in more detail:
Read more: How To Build Gun Cabinet
1. Preparing the Cabinet for Painting
Start by preparing the cabinet for painting. Remove any dust or debris from the surfaces by wiping them down thoroughly. Fill in any imperfections or gaps with wood filler and sand the surfaces once again to create a smooth canvas for painting. This step ensures that the paint adheres well and provides a professional finish.
2. Applying Primer and Paint
Apply a layer of primer to the cabinet to help the paint adhere better and create an even finish. Once the primer is dry, begin painting the cabinet in your desired color. Use even brush strokes or a paint sprayer for a consistent and smooth finish. Consider using multiple coats of paint for a more vibrant and durable result. Allow each coat to dry completely before applying the next one.
3. Adding Graphics and Decals
To give your arcade cabinet a personalized touch, consider adding graphics and decals. You can create your own designs or choose pre-made artwork that reflects your gaming style. Apply the graphics and decals carefully, following the instructions provided. This step adds visual appeal and can make your arcade cabinet stand out.
4. Adding Illumination Effects
If you want to take your arcade cabinet to the next level, consider adding illumination effects. LED strips or lighting can be installed inside the cabinet, around the marquee, or underneath the control panel to create a captivating visual experience. Experiment with different lighting colors and effects to enhance the overall ambiance of your gaming setup.
By following these steps, you’ll be able to transform your arcade cabinet into a visually appealing masterpiece. In the next step, we’ll focus on setting up the arcade system and getting ready to play your favorite games!
Read more: How To Build A China Cabinet
Step 6: Setting Up the Arcade System
With the cabinet construction and aesthetics complete, it’s time to set up the arcade system. This step involves choosing and installing an emulation software, configuring the controls and system settings, and adding games to the arcade cabinet. Let’s explore each aspect in more detail:
1. Choosing and Installing an Emulation Software
An emulation software allows you to play classic arcade games on your arcade cabinet. Research and choose a reliable and user-friendly software that supports a wide range of game platforms. Popular options include RetroPie, MAME, or LaunchBox. Once you’ve selected the software, follow the installation instructions provided by the software developer. Make sure to select the appropriate version for your operating system.
2. Configuring the Controls and System Settings
After installing the emulation software, it’s time to configure the controls and system settings. Depending on the software, you may need to connect and map the buttons and joystick to emulate the original arcade controls. Follow the software’s documentation or online tutorials to properly configure the controls. Additionally, adjust the system settings to personalize your gaming experience, including display resolution, sound output, and other preferences.
3. Adding Games to the Arcade Cabinet
Now comes the fun part – adding games to your arcade cabinet! Locate and download ROM files for the games you want to play on your arcade system. Ensure you have the legal right to use these files. Transfer the downloaded files to the appropriate game folder within the emulation software. The process may vary depending on the software you’ve chosen, so make sure to follow the specific instructions provided. Once the games are added, they should appear in your arcade cabinet’s menu for easy access.
By following these steps, you’ll have a fully functional arcade system ready to play your favorite games. In the final step, we’ll focus on conducting final testing and troubleshooting to ensure everything is working perfectly.
Read more: How To Build Cabinet Box
Step 7: Final Testing and Troubleshooting
Before you start enjoying your newly built arcade cabinet, it’s essential to conduct a final testing and troubleshooting phase. This step ensures that everything is functioning correctly and allows you to address any common issues that may arise. Let’s explore each aspect in more detail:
1. Conducting a Functionality Check
Start by conducting a functionality check to ensure all components and systems are working as expected. Test each button, joystick, and control input to ensure they respond accurately. Verify the display is functioning correctly and that the audio is clear and immersive. Play sample games to confirm that the emulation software is running smoothly. Take note of any issues or abnormalities that you may encounter during the testing process.
2. Addressing Common Issues
Inevitably, you may encounter some common issues during the testing phase. These can include controller mapping problems, sound glitches, or display issues. To troubleshoot these problems, refer to the documentation or support resources for your specific emulation software. Online forums and communities may also provide valuable insights and solutions. In most cases, these issues can be resolved by making adjustments to the software settings or ensuring proper connections. Don’t hesitate to seek help if you’re facing challenges – the arcade community is often eager to assist.
By conducting thorough testing and addressing any common issues, you’ll ensure a smooth and enjoyable gaming experience on your arcade cabinet. Take the time to fine-tune and refine any settings or configurations to personalize the system to your preferences. Finally, gather your friends and family to experience the thrill of classic arcade games in the comfort of your own home!
Conclusion
Congratulations on successfully building your own arcade cabinet! By following the steps outlined in this guide, you’ve transformed your love for classic arcade games into a tangible and personalized gaming experience. Here are some key takeaways:
1. Planning and Designing: Careful planning and consideration of the cabinet design, arcade components, and cabinet dimensions are crucial for a successful build.
2. Gathering Materials and Tools: Having all the necessary materials and tools ready before starting construction helps streamline the process and ensures a smoother building experience.
3. Building the Cabinet Body: Taking the time to prepare and cut the wood panels, assembling the cabinet structure, and sanding the surfaces enhances the overall quality and aesthetics of the cabinet.
4. Installing Arcade Components: Mounting the control panel, wiring the buttons and joystick, and integrating the monitor and speakers bring life to your arcade cabinet.
5. Painting and Finishing Touches: Applying primer and paint, adding graphics and decals, and incorporating illumination effects give your arcade cabinet a personalized and polished look.
6. Setting Up the Arcade System: Choosing and installing the emulation software, configuring the controls and system settings, and adding your favorite games create the ultimate arcade gaming experience.
7. Final Testing and Troubleshooting: Conducting a thorough functionality check and addressing any common issues ensure that your arcade cabinet operates smoothly.
Building an arcade cabinet is a rewarding DIY project that allows you to bring the nostalgia and excitement of classic arcade gaming into your own home. With your newly built arcade cabinet, you can relive the classics, challenge your friends, and create lasting memories.
Remember, the journey doesn’t end here. Feel free to explore additional customizations and upgrades to further enhance your arcade cabinet. Keep up with the vibrant arcade community online, where you can find support, inspiration, and new ideas for your gaming setup.
Now, it’s time to unleash the gamer within and enjoy countless hours of arcade gaming fun. Get ready to immerse yourself in the world of retro gaming and create new memories in an experience that is truly one-of-a-kind!
Frequently Asked Questions about How To Build An Arcade Cabinet
Was this page helpful?
At Storables.com, we guarantee accurate and reliable information. Our content, validated by Expert Board Contributors, is crafted following stringent Editorial Policies. We're committed to providing you with well-researched, expert-backed insights for all your informational needs.

0 thoughts on “How To Build An Arcade Cabinet”