Articles
How To Fix A Sink Disposal
Modified: August 26, 2024
Learn how to fix a sink disposal with these informative articles. Find step-by-step guides and helpful tips to troubleshoot and repair your garbage disposal.
(Many of the links in this article redirect to a specific reviewed product. Your purchase of these products through affiliate links helps to generate commission for Storables.com, at no extra cost. Learn more)
Introduction
Having a sink disposal is a convenient and efficient way to manage food waste in your kitchen. However, it can be frustrating when your sink disposal stops working properly. Whether it’s jammed, making strange noises, or not turning on at all, dealing with a malfunctioning sink disposal is not something anyone wants to encounter.
The good news is that many common sink disposal issues can be fixed without the need for professional help. With a few simple tools and some basic knowledge, you can troubleshoot and repair your sink disposal to get it back up and running in no time. Not only will this save you the hassle of hiring a plumber, but it will also save you money.
In this article, we will guide you through the steps to fix a sink disposal. We’ll cover the necessary tools and materials, safety precautions to take, and a step-by-step process to troubleshoot, remove, and install a new disposal unit if needed. We’ll also provide some troubleshooting tips to help you address common issues that may arise during the repair process.
Remember, safety should always be a top priority when working with any electrical appliance. If you have any doubts or concerns about your abilities to complete the repair, it’s best to consult a professional. Now, let’s gather the tools and materials needed to get started on fixing your sink disposal.
Key Takeaways:
- Fixing a sink disposal is manageable with the right tools and knowledge. Prioritize safety, follow step-by-step instructions, and use troubleshooting tips to address common issues and keep your kitchen running smoothly.
- Regular maintenance and responsible usage can help prolong the lifespan of your sink disposal. If you encounter persistent issues, seek professional assistance to ensure long-term functionality and convenience in your kitchen.
Read more: How To Install A Sink Disposal
Tools and Materials Needed
Before you begin the process of fixing your sink disposal, it’s important to gather the necessary tools and materials. Having everything you need on hand will help streamline the repair process and make it more efficient. Here are the tools and materials you will need:
- Adjustable wrench
- Screwdriver (either Phillips or flat-head, depending on the screws)
- Pliers
- Plumber’s putty
- New sink disposal unit (if necessary)
- Electrical tape
- Bucket or container
- Clean cloth
- Safety gloves
- Safety goggles
The adjustable wrench will be used to loosen and tighten connections, while the screwdriver will be needed to remove screws and fasteners. Pliers can come in handy for gripping and turning difficult-to-reach parts.
Plumber’s putty is used to create a watertight seal between the sink flange and the sink itself during the installation process. If you’re replacing the entire sink disposal unit, make sure to have a new unit ready along with any accompanying hardware.
Electrical tape is important for insulating and securing electrical connections, ensuring safety while working with the electrical components of the sink disposal. A bucket or container will be needed to catch any water or debris that may spill during the repair process.
Additionally, having a clean cloth on hand will allow you to wipe away any dirt or grime, ensuring a clean and smooth repair process. Lastly, don’t forget to wear safety gloves and goggles to protect your hands and eyes from any potential hazards.
With all the necessary tools and materials at your disposal, you’re now ready to dive into the process of fixing your sink disposal. Remember to follow all safety precautions and proceed with caution throughout the repair process.
Step 1: Safety Precautions
Before you start working on your sink disposal, it’s essential to take the necessary safety precautions to protect yourself from any potential hazards. Here are some important safety guidelines to follow:
- Turn off the power: The first and most crucial step is to turn off the power supply to the sink disposal. Locate the circuit breaker in your electrical panel that controls the disposal and switch it off. This will prevent accidental electrocution while you’re working on the unit.
- Disconnect the sink disposal: Make sure the sink disposal is completely disconnected from the power source before proceeding. This may involve unplugging the unit from an electrical outlet under the sink or disconnecting it from the wiring directly.
- Protective gear: Wear safety gloves and goggles to shield your hands and eyes from any potential debris or accidental splashing of water during the repair process. Additionally, consider wearing long sleeves and closed-toe shoes to further protect your body from potential injuries.
- Beware of sharp edges: Sink disposals have sharp blades, so exercise caution when working near them. Avoid sticking your hands or fingers into the disposal chamber to prevent any accidental cuts or injuries. If necessary, use pliers or a long-handled tool to remove any debris or obstructions.
- Work in a well-lit area: Ensure that the area around your sink is well-lit so that you can clearly see what you’re doing. This will help you avoid any mistakes or accidents during the repair process.
- Don’t rush: Take your time and work methodically. Rushing can lead to mistakes and potentially cause more damage. If needed, consult the manufacturer’s manual or seek professional guidance before proceeding with any repairs.
By following these safety precautions, you can ensure a safer work environment and minimize the risk of accidents or injuries. Remember, if at any point you feel uncomfortable or unsure about handling the repair yourself, it’s always best to seek professional assistance.
Step 2: Shut Off the Power
Before you begin working on your sink disposal, it’s crucial to ensure that the power supply is completely turned off. This will protect you from the risk of electrical shock or injury. Follow these steps to shut off the power:
- Locate the circuit breaker: Open your electrical panel and locate the circuit breaker that controls the power supply to the sink disposal. It’s usually labeled accordingly, but if not, check the user manual or consult an electrician for assistance.
- Switch off the circuit breaker: Once you’ve identified the correct circuit breaker, switch it off by flipping the respective switch to the “off” position. This will cut off the power supply to the sink disposal, ensuring your safety while working on it.
- Test the power: To double-check that the power is indeed off, try turning on the sink disposal using the wall switch or pressing the activation button. If the unit doesn’t turn on, you can be confident that the power has been successfully shut off.
- Secure the circuit breaker: To prevent accidental power restoration while you’re working on the sink disposal, consider placing a piece of tape or a lock on the circuit breaker to remind others not to turn it back on.
It’s important to note that some sink disposals may have a dedicated electrical outlet under the sink. In such cases, you can unplug the unit to disconnect it from the power supply. However, if your sink disposal is hardwired directly into the electrical system, be sure to shut off the dedicated circuit breaker as mentioned above.
Remember, working on live electrical components can be extremely dangerous, so always take the necessary precautions to ensure your safety. Once you’ve confirmed that the power supply to the sink disposal is off, you can proceed with the repair process with peace of mind.
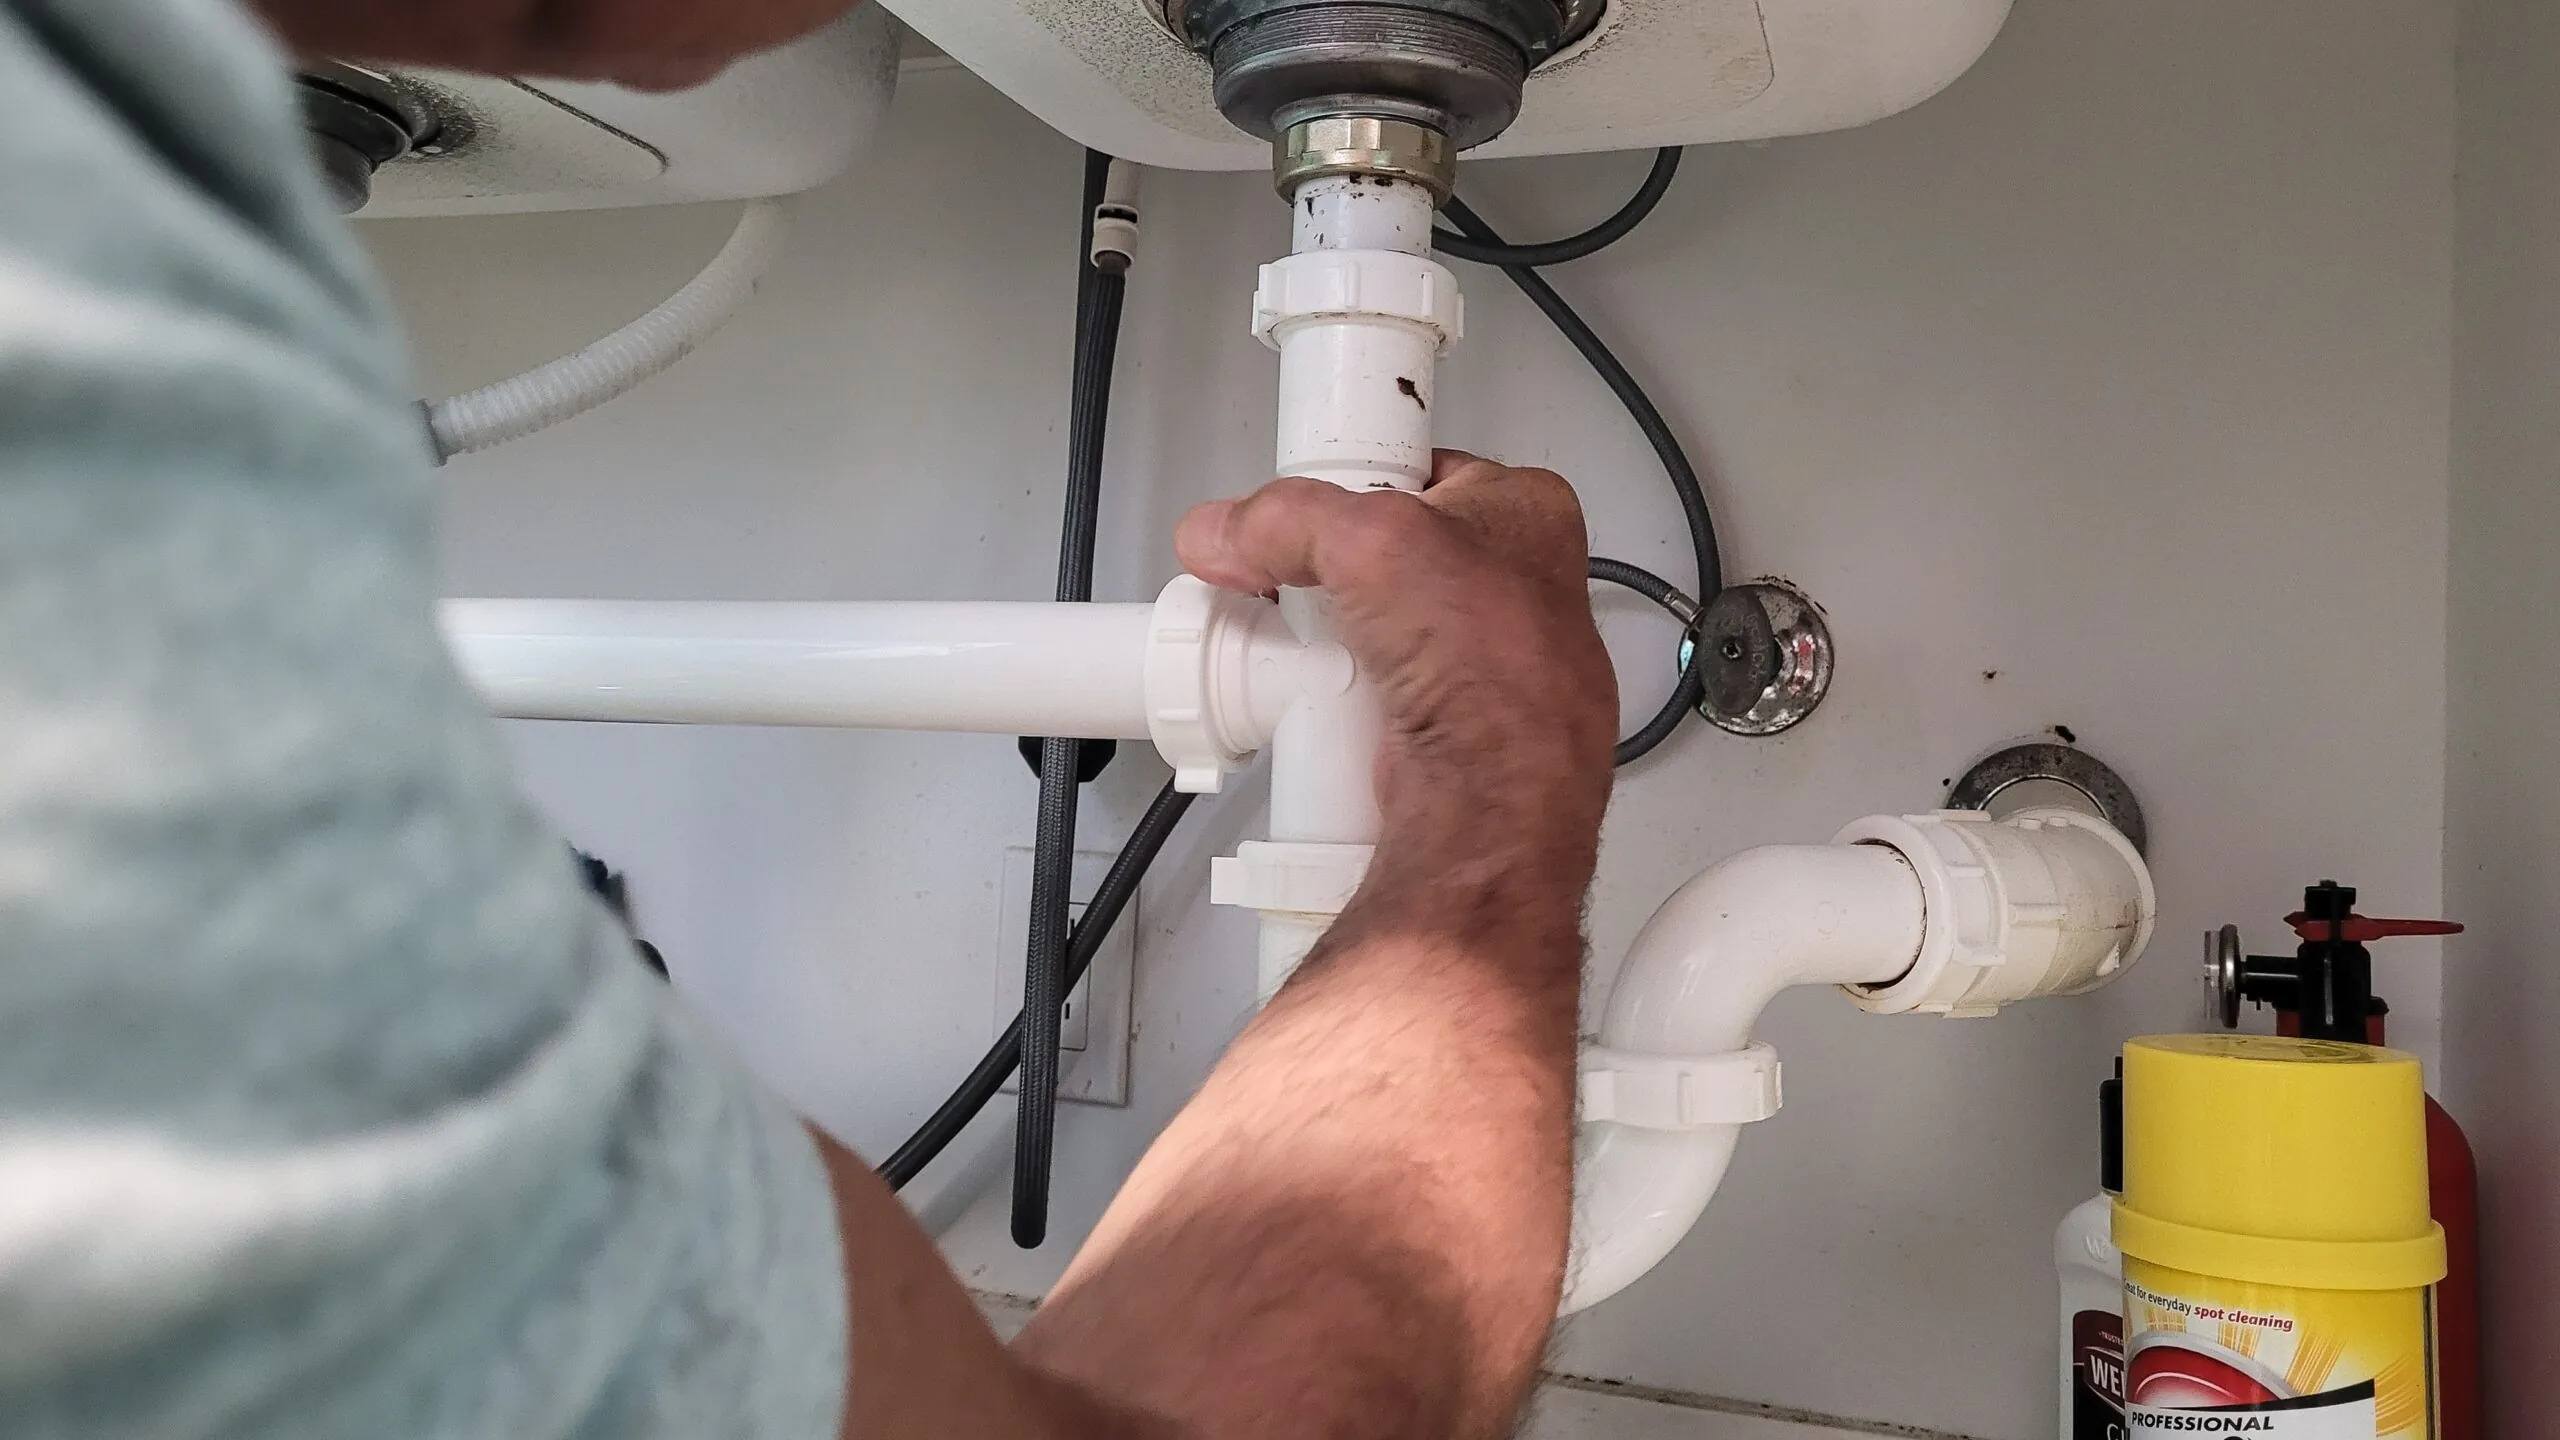
Step 3: Disconnect the Disposal from the Sink
Now that you’ve safely shut off the power, it’s time to disconnect the sink disposal from the sink itself. This will allow you to access the unit and remove it for further inspection or replacement. Follow these steps to disconnect the disposal:
- Clear the area: Before you begin, remove any objects or items from under the sink to give yourself ample room to work. This will make maneuvering easier and help prevent any accidental damage.
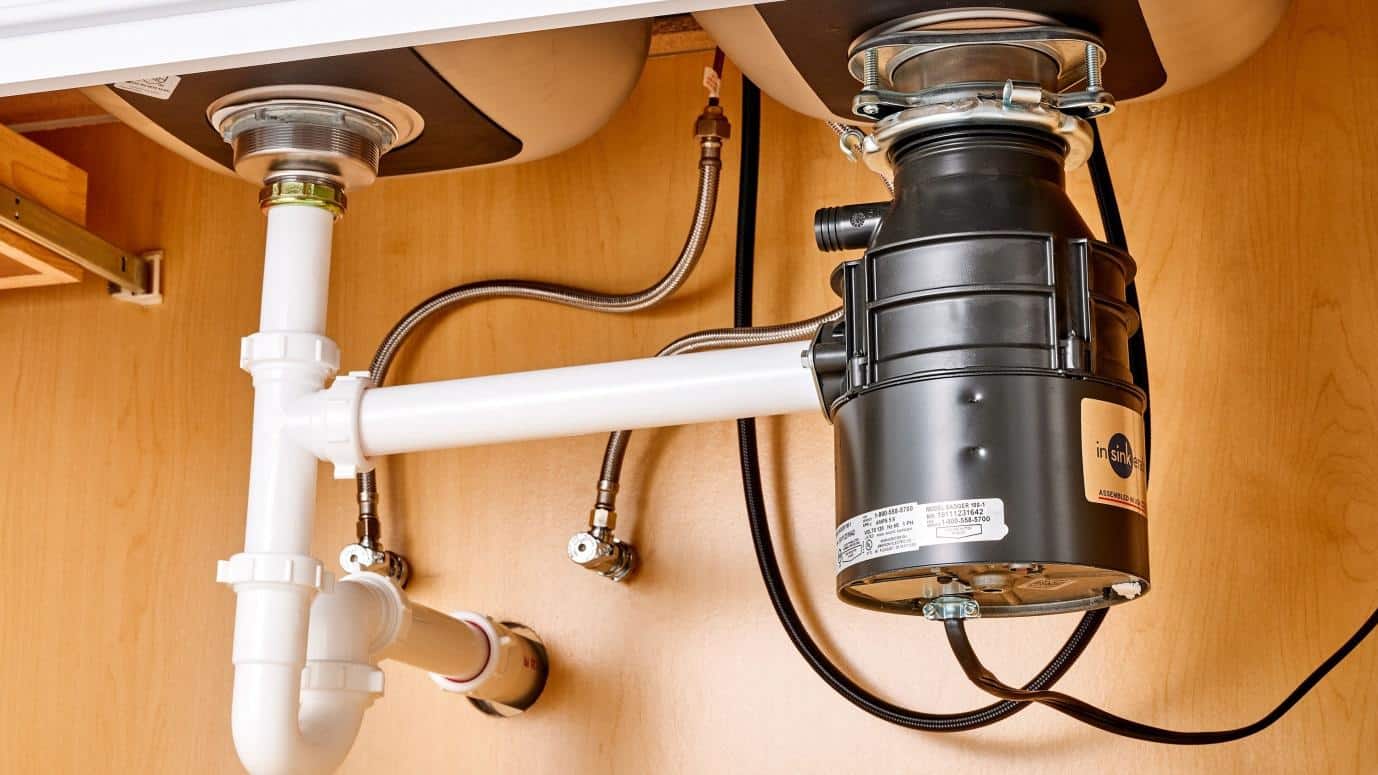
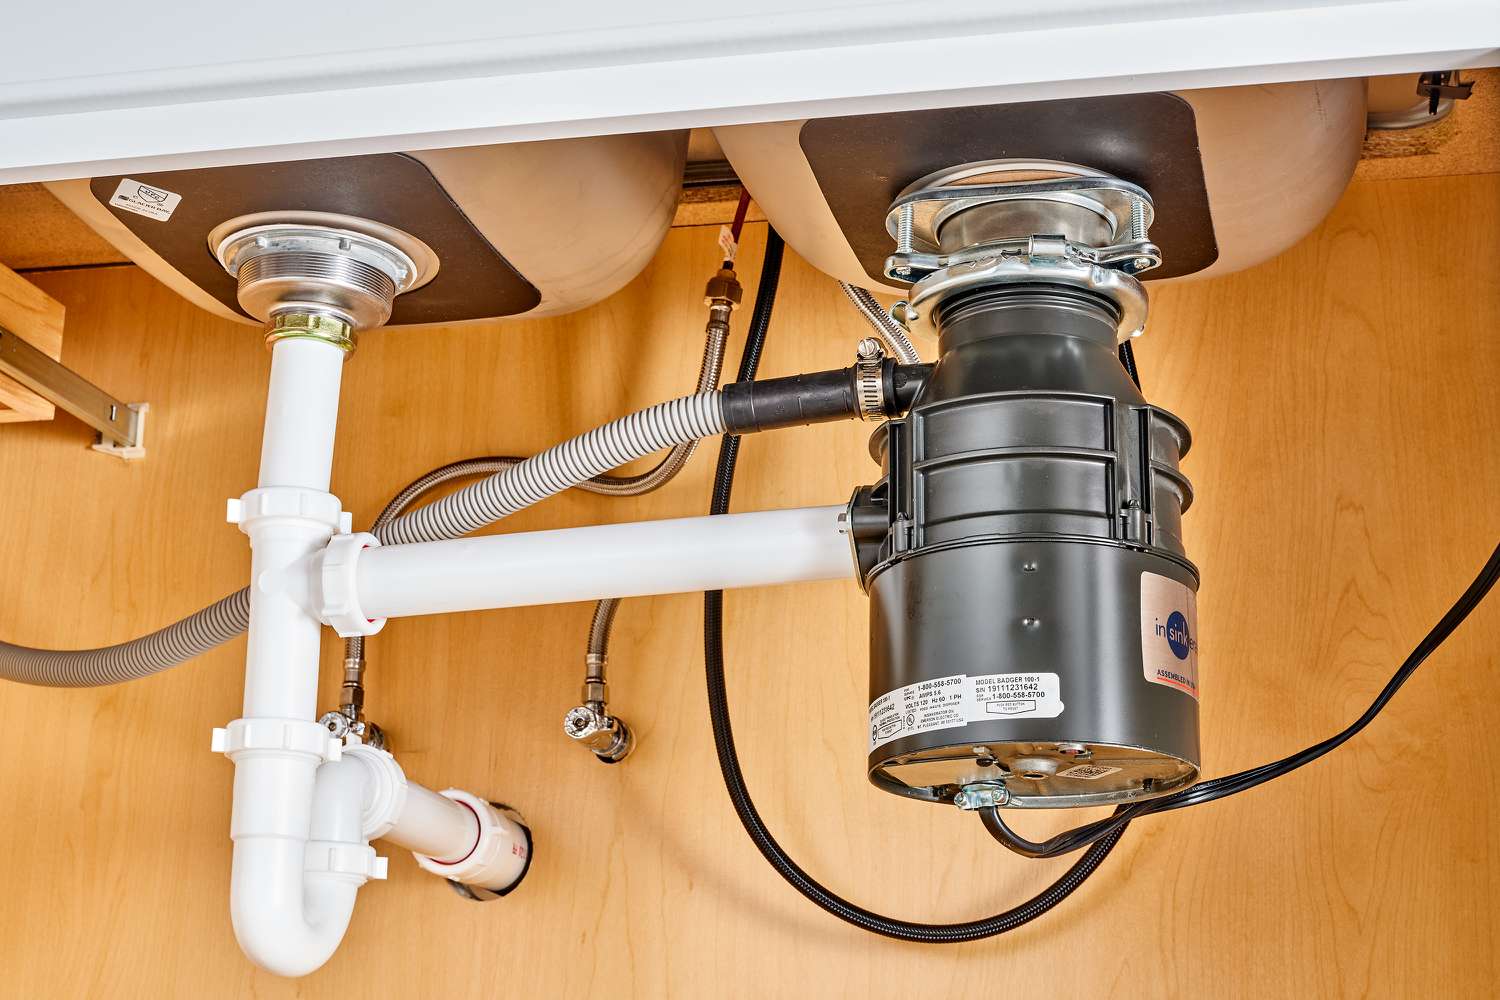
- Inspect the plumbing connections: Take a close look at the connection points between the sink disposal and the plumbing pipes. There will generally be a sink flange connecting the disposal unit to the sink, and there may also be additional connections such as a dishwasher drain hose or a discharge pipe.
- Detach the dishwasher drain hose (if applicable): If your sink disposal is connected to a dishwasher, locate the hose that runs from the dishwasher to the disposal unit. Use pliers to loosen the hose clamp and carefully disconnect the hose from the disposal. Be prepared for water or debris to spill out, so have a bucket or container ready to catch any potential mess.
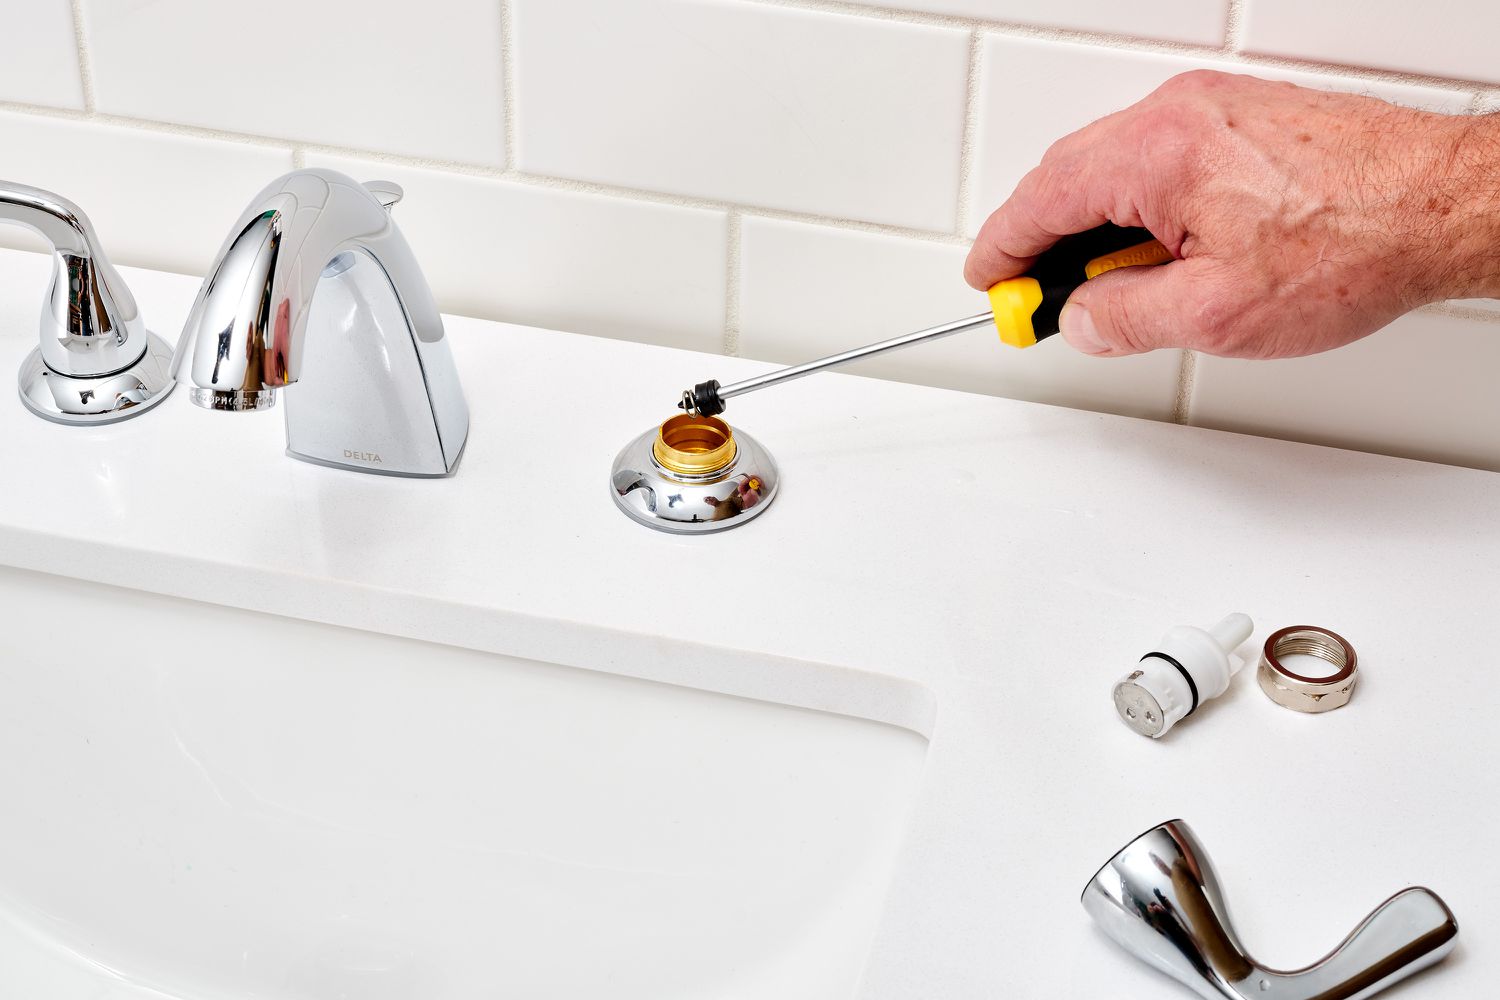
- Loosen the sink flange: The sink flange connects the disposal unit to the sink itself. It is typically held in place by a mounting assembly or a series of screws. Depending on the type of flange, use pliers or a screwdriver to loosen and remove the screws or other fasteners securing the flange.
- Support the disposal unit: The disposal unit can be heavy, so it’s important to provide support as you detach it from the sink. Use one hand to hold the disposal while removing the last screws or fasteners with the other hand.
- Lower the disposal unit: Once all the screws or fasteners are removed, carefully lower the disposal unit to detach it from the sink. Be mindful of any remaining plumbing connections or wires that may still be attached.
With the sink disposal successfully disconnected from the sink, you can now proceed to the next step, which involves removing the old disposal unit or preparing for the installation of a new one, depending on the condition of your current unit. Take your time and be gentle during this process to prevent any damage to the sink or surrounding plumbing.
Step 4: Remove the Old Disposal
Once you have successfully disconnected the sink disposal from the sink, the next step is to remove the old unit. This will allow you to examine it for any damage or malfunctions, and it will also create space for the installation of a new disposal, if necessary. Follow these steps to remove the old disposal:
- Inspect the disposal unit: Take a close look at the old disposal unit to assess its condition. Check for any visible signs of damage, leaks, or wear and tear. This will help you determine if it can be repaired or if you need to install a new unit.
- Disconnect the electrical connections: If the disposal unit is hardwired, locate the wire connections and use screwdrivers or pliers to disconnect the electrical wires. If the unit is plugged into an electrical outlet, unplug it from the outlet.
- Remove the mounting assembly: The mounting assembly is the mechanism that holds the disposal unit in place. It may consist of a mounting bracket, screws, and a snap ring. Use the necessary tools to detach and remove the mounting assembly from the sink.
- Lower the old disposal unit: With the mounting assembly removed, lower the old disposal unit and set it aside. Be careful not to damage any of the surrounding plumbing or make sudden movements that could result in injury.
- Inspect the sink flange: Take a moment to inspect the sink flange, which is the part that connects the disposal unit to the sink. Look for any signs of damage, corrosion, or debris that may have accumulated over time.
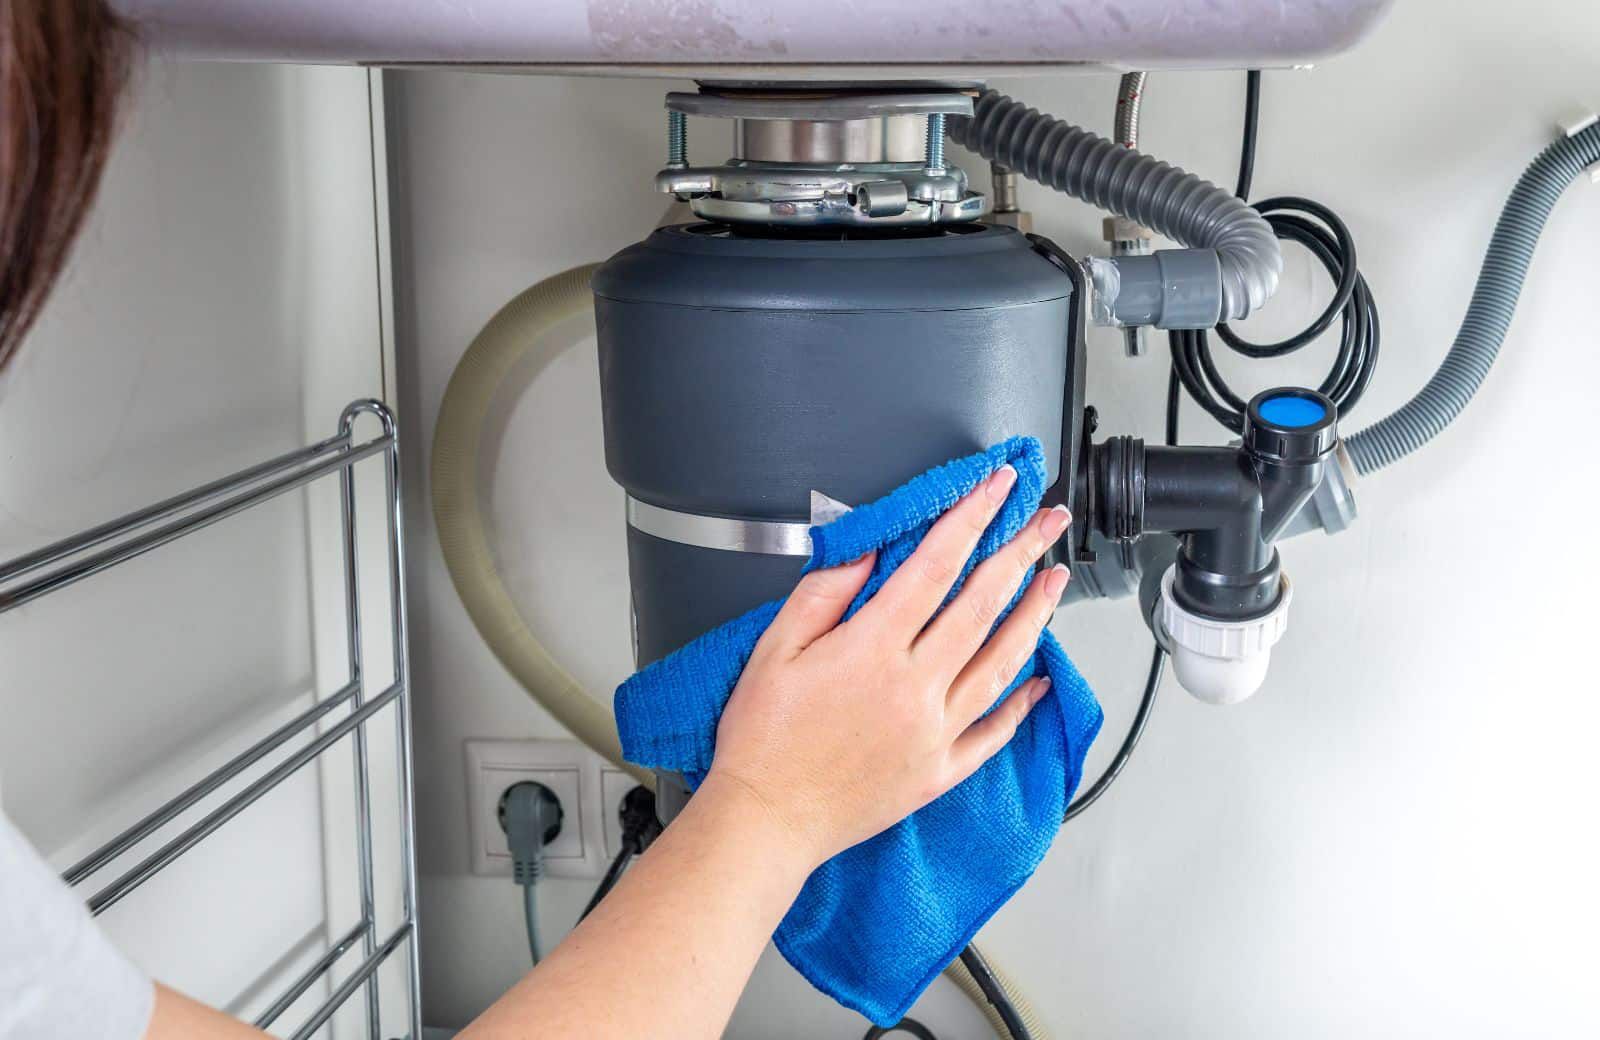
- Clean the area: Before installing a new disposal or making any repairs, use a clean cloth or sponge to wipe away any dirt or grime from the sink and surrounding area. This will provide a clean surface for the next steps.
It’s important to note that removing the old disposal unit can be a bit challenging, especially if it has been in place for a long time. Take your time and be patient throughout the process. If you encounter any difficulties, consult the manufacturer’s instructions or seek professional assistance.
With the old disposal unit removed, you can now move on to the next step – installing a new disposal unit or addressing any repairs to the existing unit. Depending on your situation, this step can vary in complexity, so be prepared to follow specific instructions based on your needs.
Run cold water while running the disposal to help flush out any food particles and prevent clogs. Avoid putting fibrous or starchy foods, like potato peels or celery, into the disposal to prevent jams.
Step 5: Install the New Disposal
If you’ve determined that installing a new disposal unit is necessary, it’s time to move on to the installation process. Follow these steps to install the new disposal:
- Prepare the sink flange: If the old sink flange is still in good condition, you can reuse it. Otherwise, remove the old sink flange and clean the area thoroughly. Apply a thin layer of plumber’s putty around the underside of the new sink flange to create a watertight seal.
- Attach the mounting assembly: Install the mounting assembly by following the manufacturer’s instructions. This typically involves aligning the mounting ring with the sink flange and securing it with screws. Make sure the assembly is tightly connected to the sink.
- Connect the disposal unit: Lift the new disposal unit and align it with the mounting assembly. Rotate the unit clockwise to lock it into place. Follow the manufacturer’s instructions for specific installation details, as different models may have slight variations in the connection process.
- Secure the disposal unit: Once the disposal unit is properly connected, use the mounting ring or snap ring provided by the manufacturer to secure it in place. The disposal unit should be stable and firmly attached to the sink.
- Reconnect the electrical connections: If the new disposal unit is hardwired, reconnect the electrical wires according to the manufacturer’s instructions. Ensure that the connections are secure and properly insulated with electrical tape.
- Install the drain pipes: Reconnect the drain pipes, including the dishwasher drain hose if applicable. Use plumber’s putty or appropriate sealing material to create a tight and leak-proof connection. Tighten the pipe connections using pliers or an adjustable wrench.
- Test the new disposal unit: Once all the connections are in place, it’s time to test the new disposal unit. Turn on the power supply, switch on the disposal unit, and run water through it. Listen for any unusual noises or vibrations and check for any leaks or blockages.
It’s important to follow the manufacturer’s instructions during the installation process, as different models may have specific requirements or additional steps. If you’re unsure about any aspect of the installation, consult the user manual or consider seeking professional assistance.
With the new disposal unit securely installed, you can move on to the next step – reconnecting the disposal to the sink. This will complete the installation process and get you one step closer to having a fully functional sink disposal again.
Step 6: Reconnect the Disposal to the Sink
Now that you have successfully installed the new disposal unit, it’s time to reconnect it to the sink. Follow these steps to ensure a proper connection:
- Raise the disposal unit: Gently lift the disposal unit, aligning it with the mounting assembly under the sink. Ensure that the disposal unit is positioned correctly and securely in place.
- Attach the sink flange: Place the sink flange back on top of the disposal unit, aligning it with the mounting assembly. Ensure that it sits flush with the sink surface.
- Secure the sink flange: Depending on the type of mounting assembly used, secure the sink flange by tightening the screws or fasteners provided. Use a screwdriver or pliers as needed to achieve a snug fit.
- Check for leaks: Once the sink flange is secured, run water through the sink and disposal to check for any leaks. Pay close attention to the connection points and ensure that there are no visible signs of water leakage.
- Reattach the dishwasher drain hose (if applicable): If your disposal unit is connected to a dishwasher, reattach the dishwasher drain hose to the disposal as per the manufacturer’s instructions. Use a hose clamp to secure the connection and ensure there are no leaks.
- Tighten the drain pipes: If you had to disconnect any drain pipes during the installation process, make sure they are properly reattached and tightened. Use pliers or an adjustable wrench to secure the connections, ensuring they are snug and leak-free.
- Test the disposal: Turn on the power supply and test the disposal by running water and activating the unit. Listen for any unusual noises and check for proper drainage. If everything is functioning as expected, your disposal unit is now successfully reconnected to the sink.
It’s important to thoroughly check for any leaks or improper connections before considering the installation complete. Even a small leak can cause significant damage over time, so be diligent in ensuring a secure and watertight connection.
Once you’ve confirmed that everything is functioning properly, you can move on to the next step – testing the disposal unit to ensure it is fully operational and ready to handle your kitchen waste.
Step 7: Test the Disposal
After reconnecting the disposal unit to the sink, it’s crucial to perform a test to ensure it is functioning correctly. Here are the steps to test the disposal:
- Clear the sink: Remove any objects or debris from the sink bowl before testing the disposal. This will help prevent any potential clogging or damage.
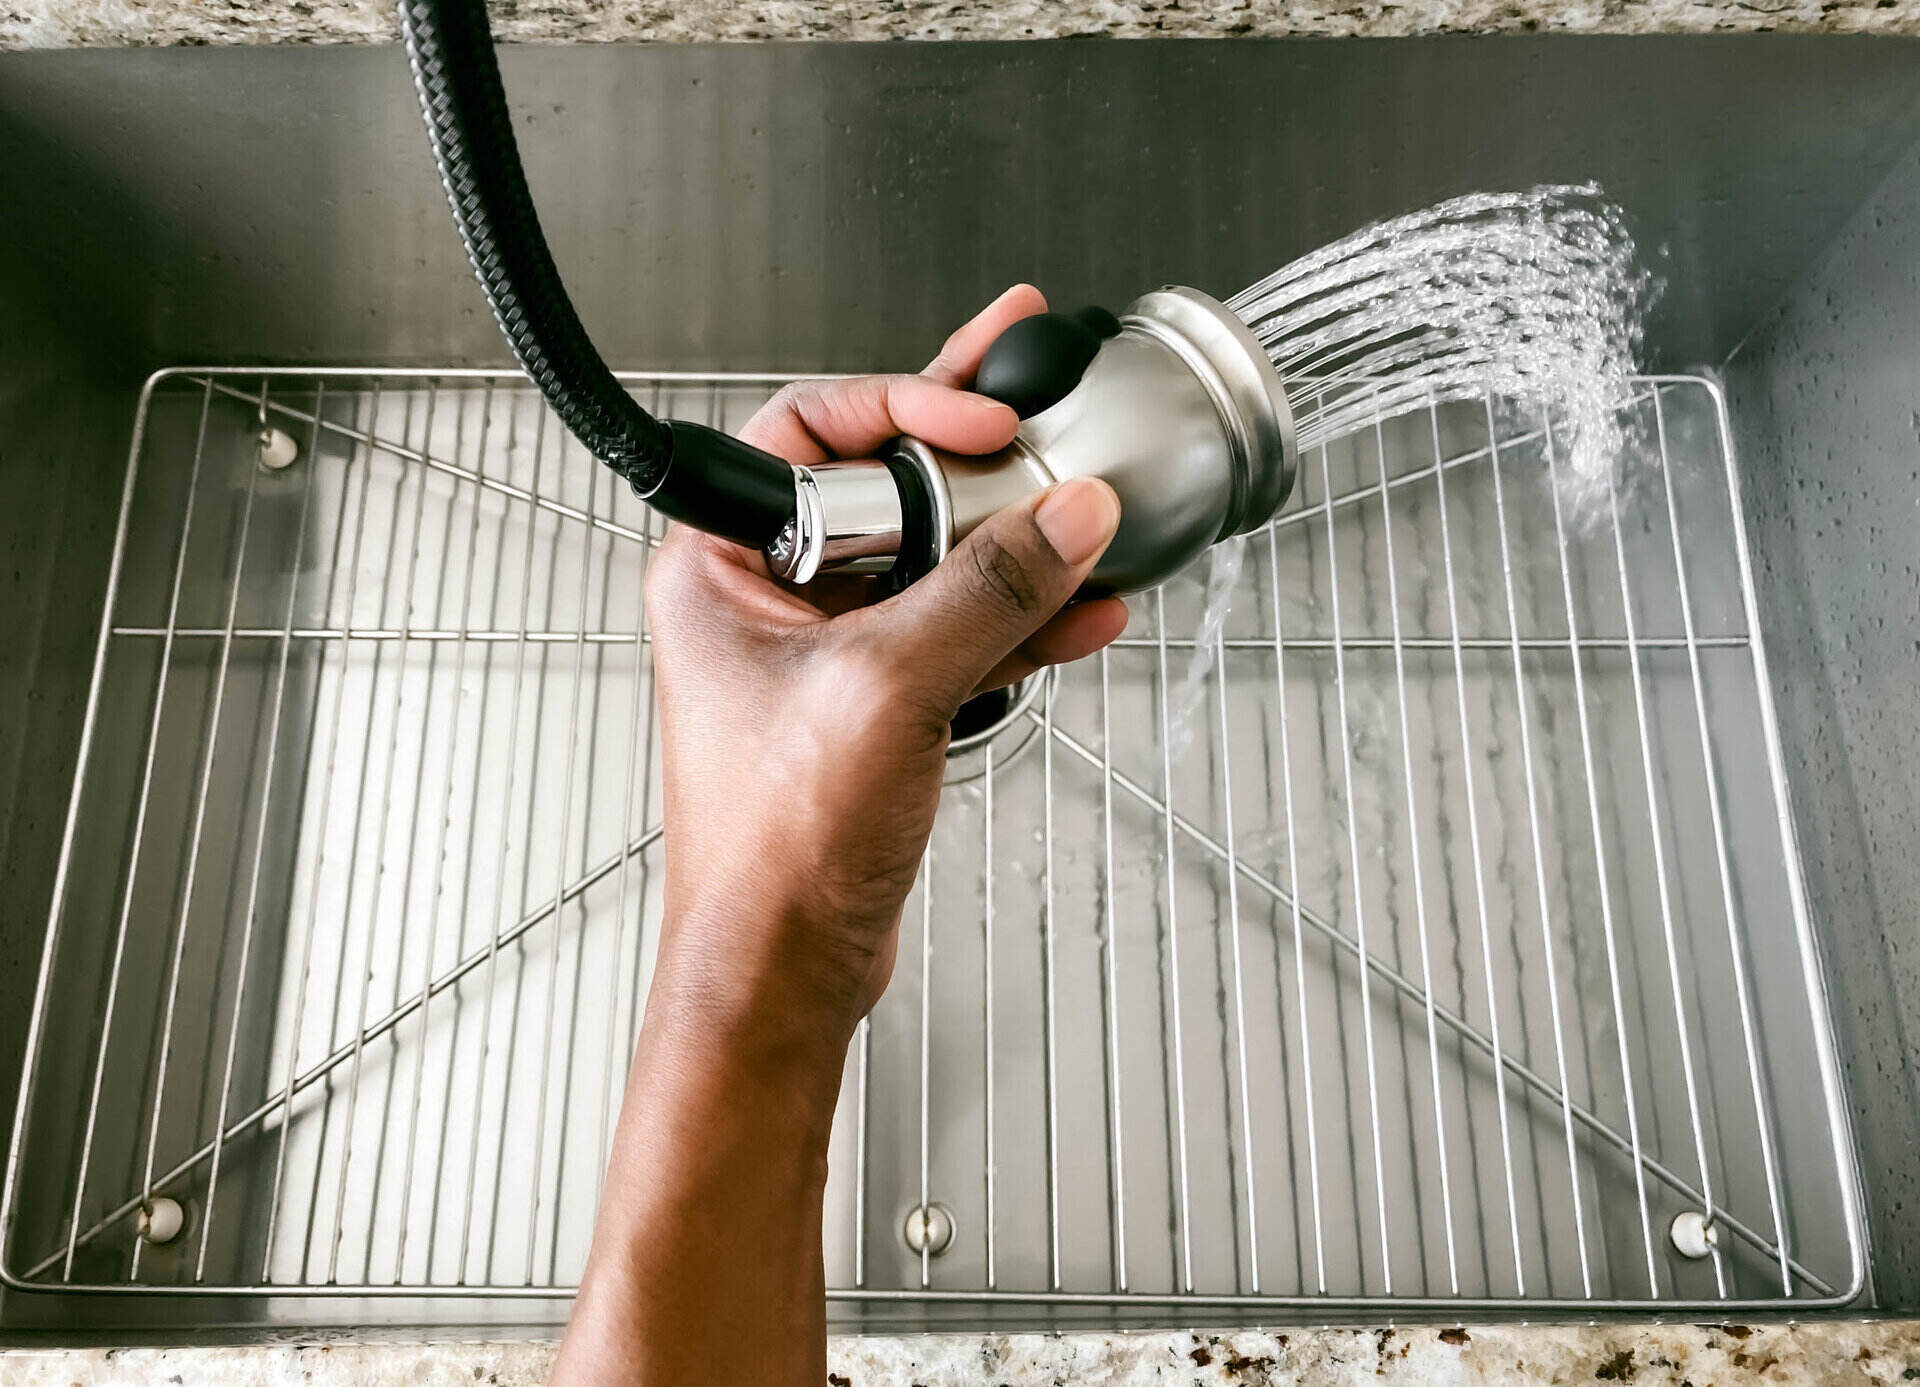
- Turn on the water: Run water from the faucet into the sink at a moderate flow rate. Keep the water running during the entire testing process.
- Activate the disposal: Turn on the power switch or press the activation button for the disposal unit. You should be able to hear the motor running smoothly.
- Feed small food scraps: Carefully introduce small amounts of food waste into the disposal while it is running. Start with soft and easily grindable items, such as vegetable peelings or small bits of cooked food.
- Observe the grinding process: Pay attention to how effectively the disposal grinds the waste. It should make a grinding or shredding noise and disperse the waste particles into the drain smoothly.
- Monitor for drainage: As you’re feeding food scraps into the disposal, check if the water drains properly. It should flow freely without any signs of backing up or slow drainage.
- Listen for unusual noises: While the disposal is running, listen for any strange or abnormal noises, such as grinding or scraping sounds. These could indicate a problem with the disposal’s mechanism or components.
If the disposal successfully grinds the food waste and drains the water without any issues, it indicates that the installation and connection were done correctly. However, if you notice any problems during the testing process, such as clogs, leaks, or unusual noises, take note of them and proceed to the next step.
It’s worth mentioning that some disposals may come with additional features like anti-jamming mechanisms or noise reduction technology. Consult the manufacturer’s instructions or user manual to familiarize yourself with any specific testing procedures or troubleshooting suggestions.
Once the disposal has passed the testing phase successfully, you can move on to the final step – troubleshooting tips. These tips will help you address common issues that may arise with your sink disposal in the future.
Read more: How To Fix A Sink
Step 8: Troubleshooting Tips
Even with proper installation and maintenance, sink disposals can occasionally encounter issues. Knowing how to troubleshoot common problems can save you time and potentially prevent the need for a professional repair. Here are some troubleshooting tips to keep in mind:
- Jammed disposal: If your disposal becomes jammed and stops working, turn off the power and use a hex key or an Allen wrench to manually rotate the disposal blades. This can help dislodge any trapped debris or obstructions.
- Reset the disposal: If your disposal stops working altogether, locate the reset button on the bottom or side of the unit. Press the reset button to reset the internal circuitry, then try turning it on again.
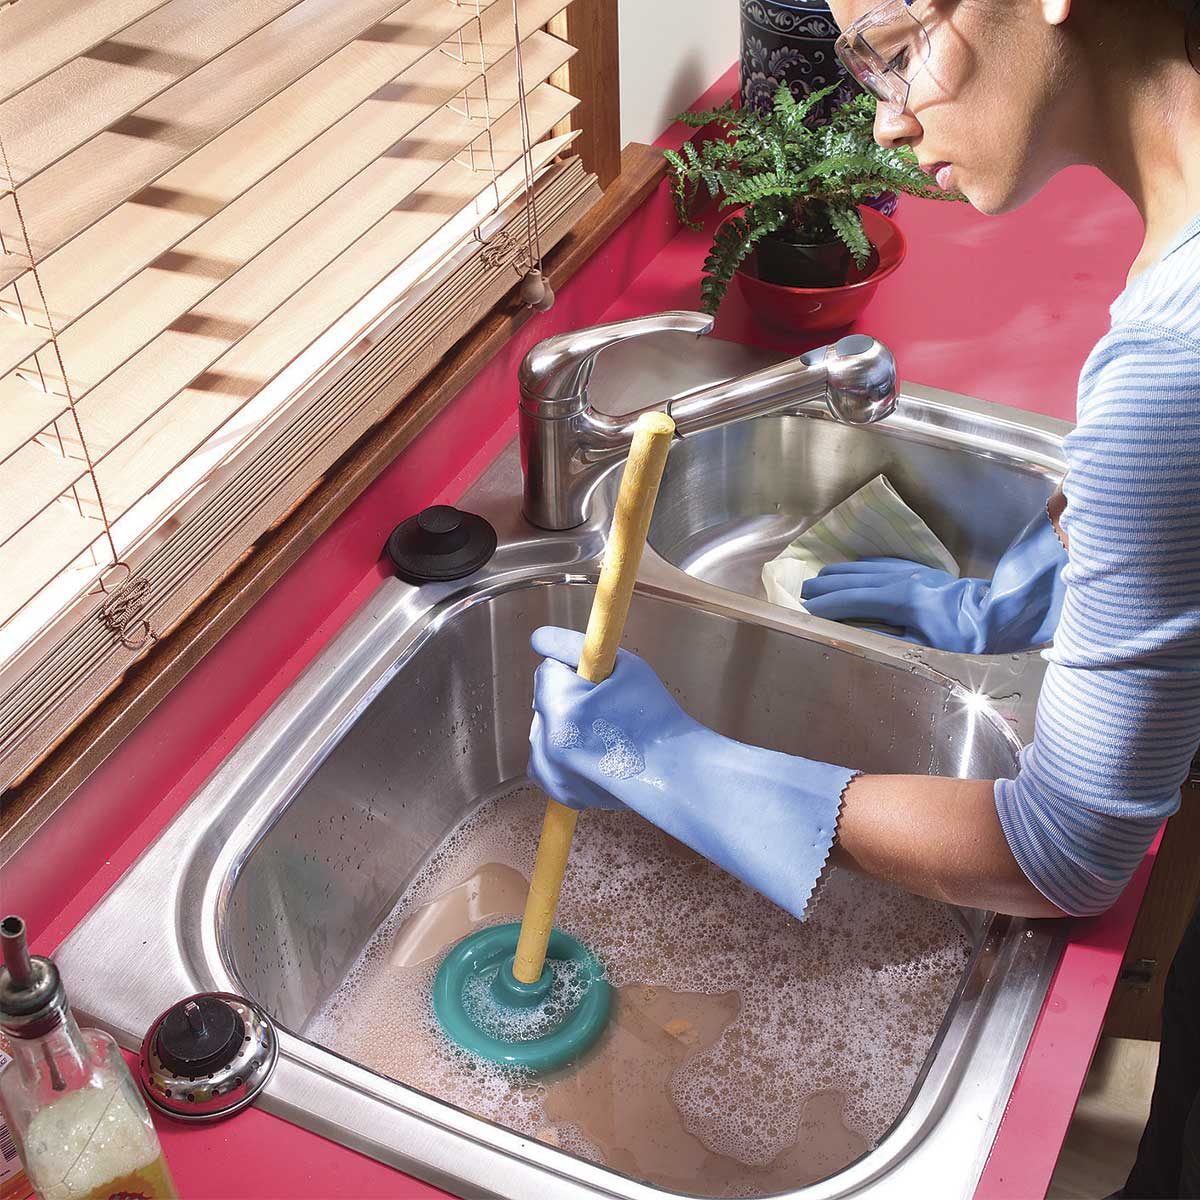
- Clear clogs: If the disposal is not draining properly, it may be due to a clog. Turn off the power and use long-handled tongs or pliers to remove any visible obstructions. Avoid using your hands directly in the disposal chamber.
- Address foul odors: If your disposal emits unpleasant odors, it may be due to food residue or bacteria buildup. Run a combination of ice cubes and citrus peels through the disposal to freshen it up. You can also use a mixture of baking soda and vinegar to clean and deodorize the unit.
- Prevent leaks: Check the connections regularly to ensure they are secure and leak-free. If you notice any leaks, tighten the connections or replace any damaged seals or gaskets. Avoid over-tightening to prevent damage.
- Avoid overloading: To prevent strain on the disposal, feed small amounts of food waste gradually rather than trying to grind a large quantity at once. This will help prolong the lifespan of the disposal.
If you encounter persistent issues with your sink disposal that you cannot resolve on your own, it’s recommended to seek professional assistance. Plumbers or appliance repair specialists have the necessary expertise to diagnose and fix more complex problems.
Regular maintenance, such as grinding ice cubes, flushing with cold water, and avoiding hard or fibrous materials, can help keep your disposal in good working condition. Following these troubleshooting tips and practicing proper usage and care will help extend the life of your sink disposal.
Lastly, remember that safety is paramount when performing any repairs or troubleshooting. Always follow the manufacturer’s guidelines and ensure the power is turned off before attempting any work on the disposal unit.
With these troubleshooting tips in mind, you are well-equipped to handle common issues that may arise with your sink disposal and keep your kitchen running smoothly.
Conclusion
Fixing a sink disposal can be a manageable task with the right tools, knowledge, and patience. By following the steps outlined in this guide, you can troubleshoot, repair, or replace your sink disposal and restore its functionality without the need for professional help.
Throughout the process, it’s important to prioritize safety by shutting off the power, wearing protective gear, and taking precautions to prevent accidents or injuries. Additionally, gather the necessary tools and materials before starting the repair to ensure a smooth and efficient process.
From disconnecting the disposal from the sink to removing the old unit and installing a new one, each step should be approached with care and attention to detail. Properly reconnecting the disposal to the sink and conducting a thorough test will ensure that the system is working optimally.
In the event of any issues or breakdowns, troubleshooting tips can come in handy to address common problems such as jams, clogs, or foul odors. Regular maintenance practices and responsible usage can also help prolong the lifespan of your sink disposal.
If you encounter complex or persistent problems during the repair process, it’s advisable to consult a professional plumber or appliance repair specialist. Their expertise can help you resolve more intricate issues and ensure the long-term functionality of your sink disposal.
By taking these steps and following the guidance provided in this article, you can successfully fix your sink disposal and regain the convenience of a functional kitchen appliance. Remember to always prioritize safety, follow instructions, and seek professional assistance when needed.
With your sink disposal working efficiently once again, you can enjoy a clean and convenient kitchen, free from the hassles of food waste management.
Frequently Asked Questions about How To Fix A Sink Disposal
Was this page helpful?
At Storables.com, we guarantee accurate and reliable information. Our content, validated by Expert Board Contributors, is crafted following stringent Editorial Policies. We're committed to providing you with well-researched, expert-backed insights for all your informational needs.


0 thoughts on “How To Fix A Sink Disposal”