Home>Furniture & Design>Bathroom Accessories>How To Fix A Plunger In A Bathroom Sink
Bathroom Accessories
How To Fix A Plunger In A Bathroom Sink
Modified: September 2, 2024
Learn how to fix a plunger in a bathroom sink with our step-by-step guide. Find the best bathroom accessories and solutions for your plumbing needs.
(Many of the links in this article redirect to a specific reviewed product. Your purchase of these products through affiliate links helps to generate commission for Storables.com, at no extra cost. Learn more)
Introduction
Dealing with a clogged bathroom sink can be a frustrating experience. Whether it's due to a buildup of hair, soap scum, or other debris, a clogged sink can disrupt your daily routine and lead to inconvenience. Fortunately, many common plumbing issues can be resolved without the need to call a professional. One such problem is a malfunctioning or stuck plunger in the bathroom sink.
A plunger is an essential component of a bathroom sink, as it helps control the flow of water and facilitates the drainage process. When a plunger becomes stuck or fails to function properly, it can impede the normal operation of the sink, leading to standing water and potential drainage issues. However, with the right tools and a basic understanding of plumbing, you can often resolve this issue on your own.
In this comprehensive guide, we will walk you through the step-by-step process of fixing a plunger in a bathroom sink. By following these instructions, you can regain control of your sink's drainage system and restore functionality to your bathroom. From gathering the necessary tools to testing the plunger after reassembly, each step is designed to help you address the problem with confidence and efficiency.
Whether you're a seasoned DIY enthusiast or someone who is new to plumbing repairs, this guide will provide you with the knowledge and guidance needed to tackle a common sink-related issue. By taking the time to understand the inner workings of your bathroom sink and learning how to troubleshoot common problems, you can save time and money while maintaining a smoothly functioning household.
Now, let's dive into the step-by-step process of fixing a plunger in a bathroom sink, empowering you to take control of your plumbing and restore your sink to its optimal condition.
Key Takeaways:
- Don’t let a stuck plunger ruin your day! With the right tools and know-how, you can fix it yourself. Just follow the steps to remove, clean, and reassemble the plunger for a smoothly running sink.
- By checking for clogs and testing the plunger, you can ensure your sink drains properly. Embrace your DIY skills and save time and money while keeping your home running smoothly!
Read more: How To Use A Sink Plunger
Step 1: Gather Necessary Tools
Before embarking on the task of fixing a plunger in a bathroom sink, it's essential to gather the necessary tools to ensure a smooth and efficient repair process. Having the right tools at your disposal will enable you to address the issue effectively and minimize the risk of complications. Here's a comprehensive list of the tools you'll need:
-
Adjustable Wrench: This versatile tool will come in handy for loosening and tightening various components of the sink, providing the necessary leverage to access and manipulate the plunger assembly.
-
Plunger: While this may seem obvious, having an additional plunger on hand can be beneficial, especially if the existing plunger is damaged beyond repair. A plunger with a secure and functional suction cup is essential for proper drainage.
-
Bucket: It's advisable to have a bucket nearby to catch any excess water that may spill during the repair process. This will help prevent water damage and keep the work area clean and organized.
-
Plumber's Tape: Also known as Teflon tape, this thin, white tape is used to seal pipe threads, preventing leaks and ensuring a secure connection when reassembling the plumbing components.
-
Cleaning Supplies: To effectively clean the plunger and the surrounding area, gather mild soap, a cleaning brush, and a cloth. Removing any accumulated debris and grime will help restore the plunger's functionality.
-
Flashlight: A flashlight will aid in illuminating the undersink area, allowing for better visibility as you work on the plunger and inspect the drain for potential clogs.
-
Rubber Gloves: Protect your hands from dirt, grime, and cleaning agents by wearing rubber gloves. This will also help maintain hygiene during the repair process.
By ensuring that you have these essential tools at your disposal, you'll be well-prepared to tackle the task of fixing a plunger in a bathroom sink. With the necessary tools in hand, you can proceed to the next steps with confidence, knowing that you have everything you need to address the issue effectively.
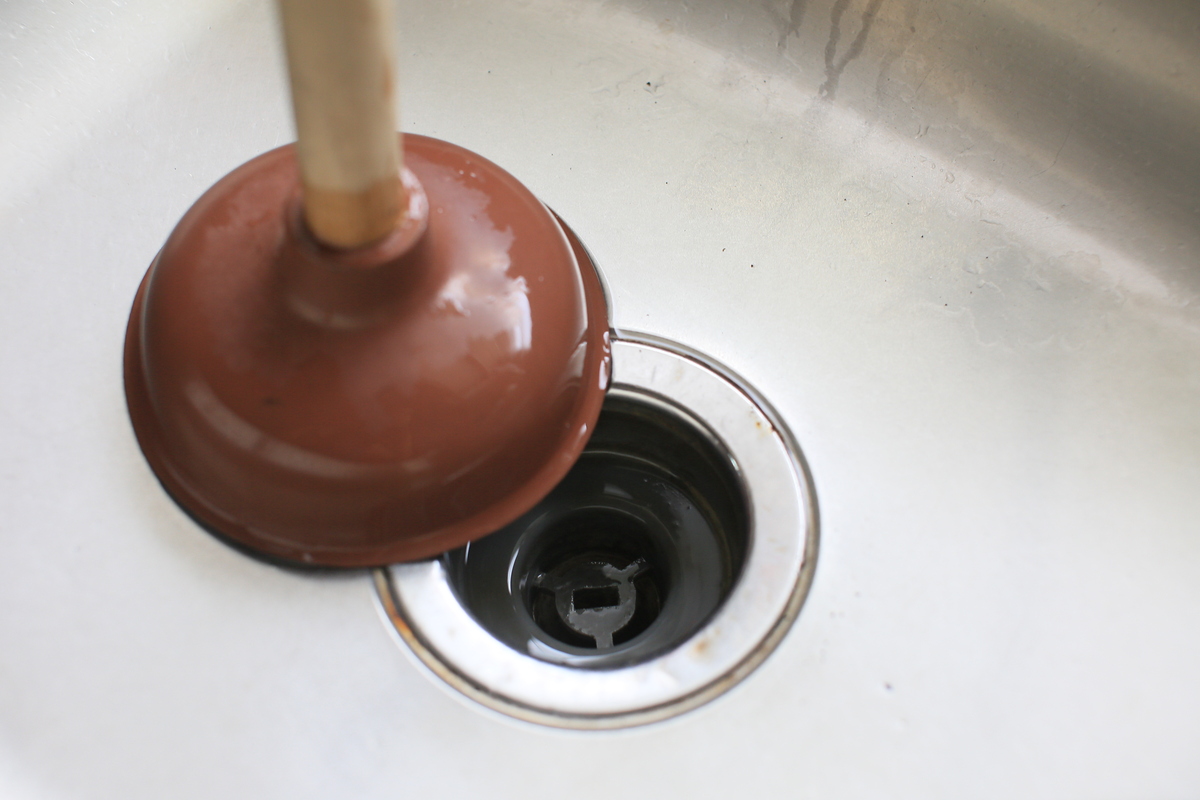
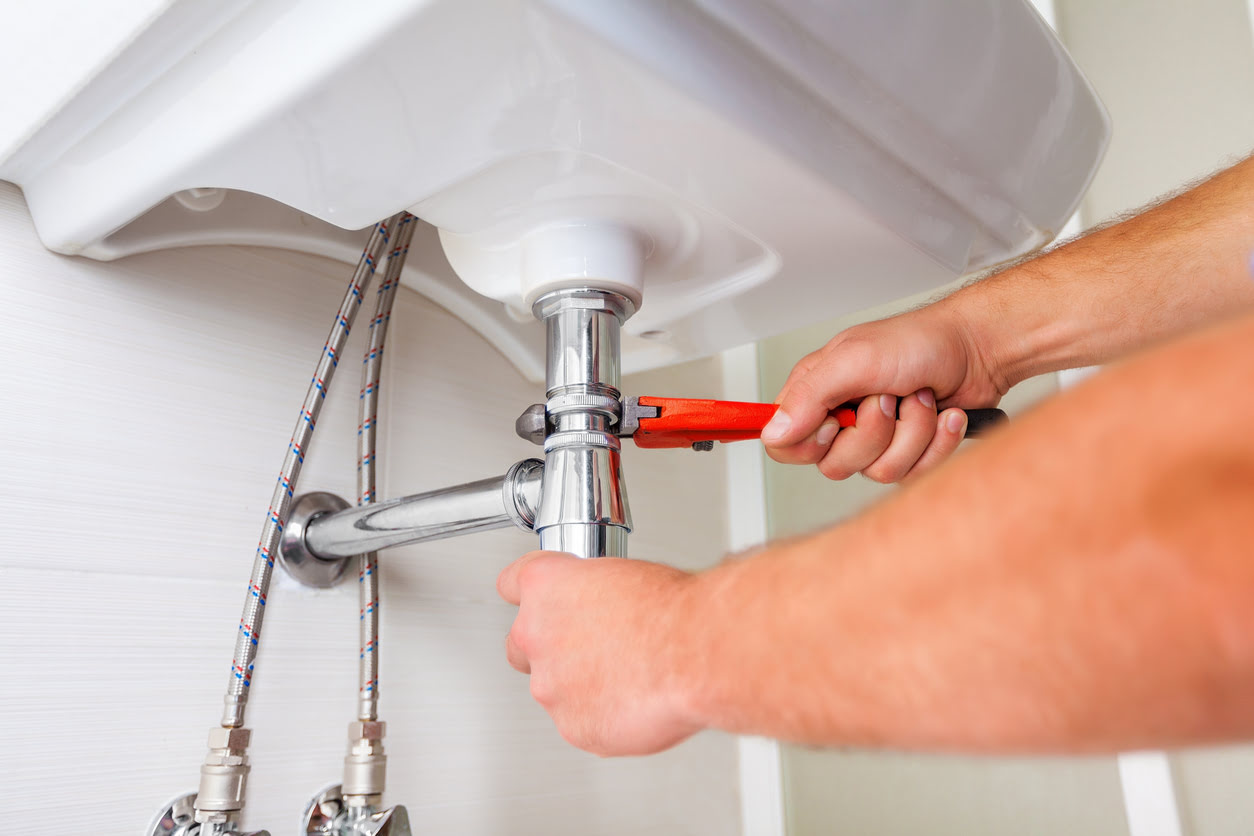
Step 2: Remove the Plunger from the Sink
Removing the plunger from the sink is a crucial step in the process of fixing a malfunctioning or stuck plunger. Before beginning this task, it's important to ensure that the water supply to the sink is turned off to prevent any potential leaks or spills. Once you've confirmed that the water supply is shut off, you can proceed with the following steps to safely remove the plunger from the sink:
-
Locate the Plunger Assembly: Begin by identifying the plunger assembly underneath the sink. This may require using a flashlight to illuminate the undersink area for better visibility. The plunger assembly is typically connected to the sink's drain mechanism and may be secured with nuts or fasteners.
-
Use an Adjustable Wrench: To remove the plunger assembly, use an adjustable wrench to loosen the nuts or fasteners that secure it in place. Carefully position the wrench around the nuts and turn it counterclockwise to loosen them. It's important to exercise caution and apply gentle pressure to avoid damaging the plumbing components.
-
Detach the Plunger Assembly: Once the nuts or fasteners are loosened, carefully detach the plunger assembly from the sink's drain mechanism. Depending on the specific design of the sink, you may need to maneuver the plunger assembly to release it from its position. Take care to support the assembly as you remove it to prevent any sudden movements that could cause damage.
-
Inspect the Plunger: With the plunger assembly removed, take a moment to inspect the plunger for any signs of damage, wear, or obstruction. Check the suction cup for cracks or deformities, as these issues can affect the plunger's ability to create a proper seal. Additionally, look for any accumulated debris or buildup that may be impeding the plunger's function.
-
Place the Plunger in a Safe Location: Once the plunger is removed and inspected, place it in a safe and clean location, such as a bucket or a designated work area. This will prevent the plunger from getting misplaced and allow you to proceed with the next steps of the repair process.
By carefully following these steps, you can safely remove the plunger from the sink and prepare it for cleaning and further inspection. With the plunger assembly detached, you'll be ready to proceed with the subsequent steps to address any issues and restore the functionality of the plunger in your bathroom sink.
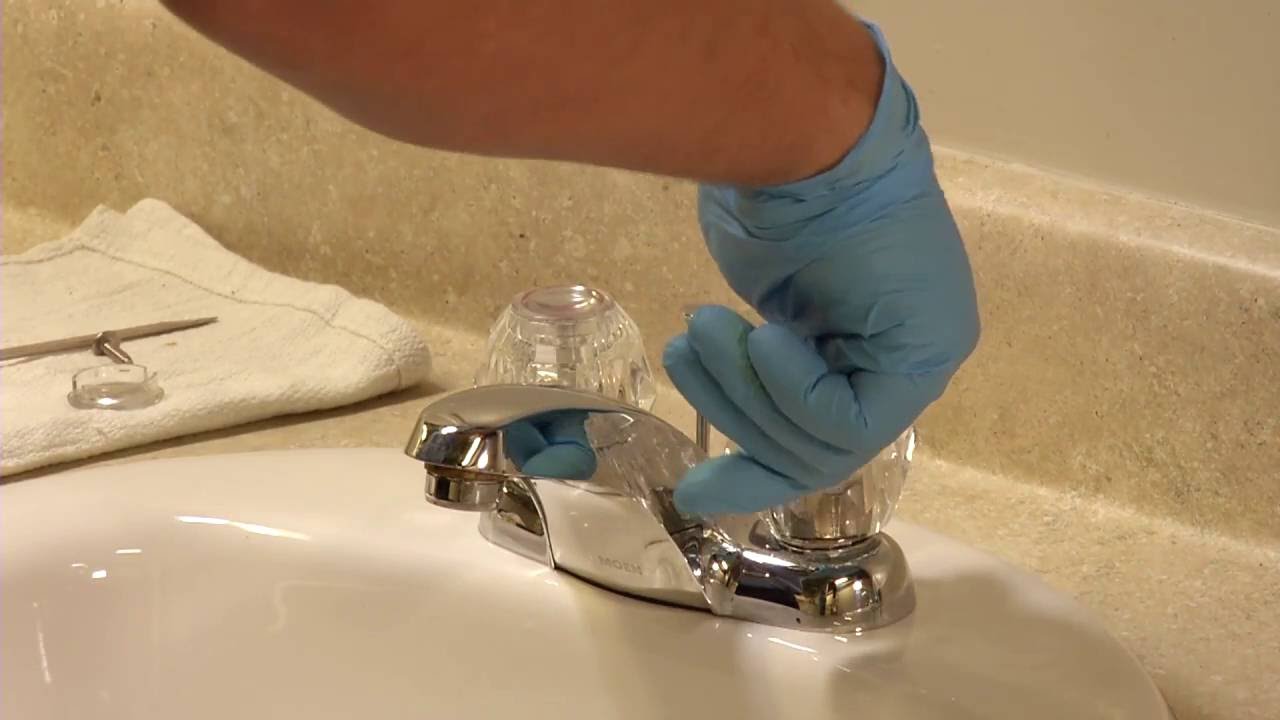
Step 3: Clean the Plunger
Cleaning the plunger is a critical step in the process of fixing a malfunctioning or stuck plunger in a bathroom sink. Over time, plunger assemblies can accumulate dirt, grime, and debris, which can hinder their effectiveness in creating a proper seal and facilitating drainage. By thoroughly cleaning the plunger, you can remove any obstructions and restore its functionality. Here's a detailed guide on how to clean the plunger effectively:
-
Prepare a Cleaning Solution: Begin by preparing a cleaning solution using mild soap and warm water. In a bucket or sink, mix a small amount of mild soap with warm water to create a soapy solution. This solution will serve as the primary cleaning agent for the plunger.
-
Submerge the Plunger: Submerge the plunger in the soapy solution, ensuring that it is fully immersed. Allow the plunger to soak for several minutes to loosen any accumulated debris and grime. This soaking process will help dislodge dirt and make the cleaning process more effective.
-
Use a Cleaning Brush: After soaking, use a cleaning brush to gently scrub the plunger, paying particular attention to the suction cup and the surrounding areas. The bristles of the cleaning brush will help dislodge stubborn debris and ensure that the plunger is thoroughly cleaned. Take care not to use abrasive materials that could damage the plunger.
-
Rinse the Plunger: Once the plunger has been thoroughly scrubbed, rinse it with clean water to remove any remaining soap and debris. Ensure that all traces of soap are removed to prevent residue from affecting the plunger's functionality.
-
Inspect for Debris: After cleaning and rinsing the plunger, inspect it for any remaining debris or buildup. Check the suction cup and the edges of the plunger for any lingering dirt or grime. If necessary, repeat the cleaning process to ensure that the plunger is completely free of obstructions.
-
Dry the Plunger: Once the plunger is clean and free of debris, use a clean cloth to dry it thoroughly. Ensure that the plunger is completely dry before proceeding to the next steps of the repair process.
By following these detailed steps, you can effectively clean the plunger and remove any accumulated dirt and debris. A clean plunger is essential for optimal functionality, and this thorough cleaning process will help ensure that the plunger operates as intended when reassembled in the sink.
If your plunger is not working in the bathroom sink, try cleaning the suction cup and the drain. Use a wire hanger to remove any debris and then try plunging again.
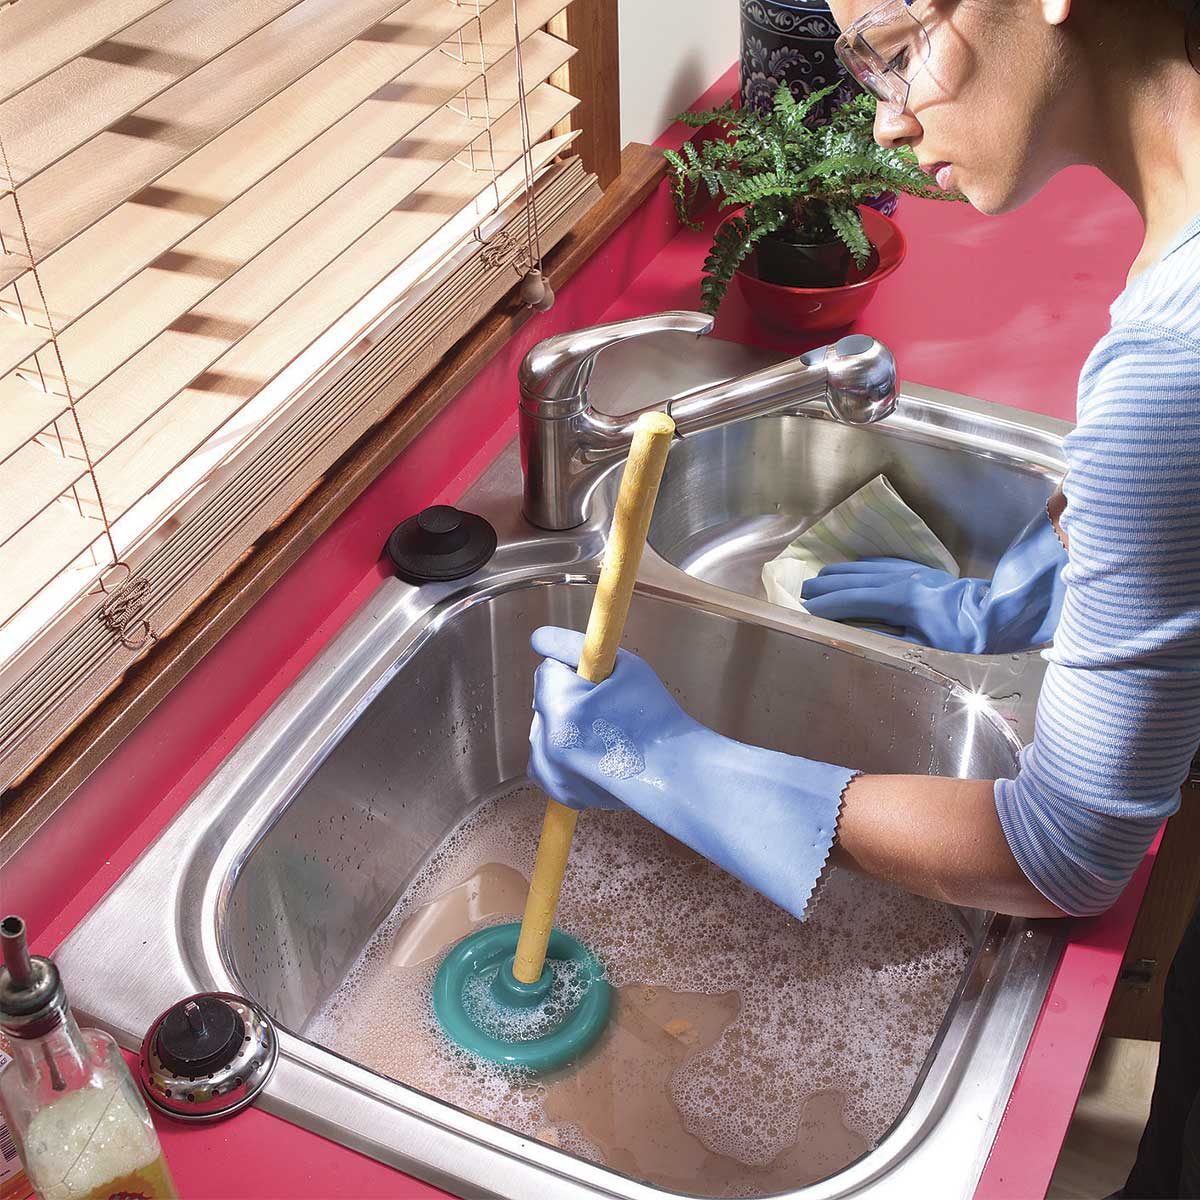
Step 4: Check for Clogs in the Sink
Once the plunger has been removed and cleaned, it's essential to inspect the sink for potential clogs that may be contributing to the drainage issue. Clogs in the sink can impede the flow of water and compromise the effectiveness of the plunger, leading to persistent drainage problems. By thoroughly checking for clogs and addressing any obstructions, you can ensure that the sink operates smoothly after the plunger is reassembled. Here's a detailed guide on how to check for clogs in the sink:
-
Inspect the Drain Opening: Begin by visually inspecting the drain opening in the sink. Look for any visible signs of debris, such as hair, soap scum, or other foreign objects that may be obstructing the flow of water. Use a flashlight to illuminate the drain opening for better visibility.
-
Use a Drain Snake or Wire Hanger: If the drain opening appears to be obstructed, consider using a drain snake or a straightened wire hanger to dislodge any clogs. Carefully insert the drain snake or wire hanger into the drain and maneuver it to break up and remove any accumulated debris. Exercise caution to avoid causing damage to the drain or plumbing components.
-
Run Hot Water: After attempting to dislodge any visible clogs, run hot water down the sink drain to help clear away loosened debris. The heat from the hot water can help dissolve soap scum and facilitate the removal of obstructions, improving the overall drainage of the sink.
-
Use a Plunger: With the plunger removed from the sink, you can also use a separate plunger to create a seal over the drain opening and attempt to dislodge any stubborn clogs. Apply firm and consistent pressure with the plunger to create suction and encourage the movement of debris within the drain.
-
Check the P-Trap: If the sink continues to exhibit drainage issues, consider inspecting the P-trap, which is the curved pipe located beneath the sink. Place a bucket underneath the P-trap to catch any water, then carefully remove the P-trap to check for clogs or blockages. Clean the P-trap thoroughly and reassemble it securely.
By diligently checking for clogs in the sink and addressing any obstructions, you can ensure that the sink's drainage system is free from impediments. This proactive approach will complement the repair of the plunger and contribute to the overall functionality of the bathroom sink.
Read more: How To Unclog A Sink Without A Plunger
Step 5: Reassemble the Plunger
After the plunger has been thoroughly cleaned and any potential sink clogs have been addressed, it's time to reassemble the plunger in the bathroom sink. Proper reassembly is crucial to ensure that the plunger functions effectively and facilitates smooth drainage. Follow these detailed steps to reassemble the plunger with precision and care:
-
Apply Plumber's Tape: Before reattaching the plunger assembly to the sink's drain mechanism, apply plumber's tape to the threaded connections. This thin, white tape helps create a tight seal and prevents leaks when the components are reassembled. Wrap the plumber's tape around the threads in a clockwise direction, ensuring a snug fit.
-
Position the Plunger Assembly: Carefully position the plunger assembly back into place, aligning it with the drain mechanism. Take care to maneuver the assembly into position without causing any strain on the plumbing components. Ensure that the nuts or fasteners are ready for reattachment.
-
Secure the Plunger Assembly: Once the plunger assembly is properly aligned, use an adjustable wrench to tighten the nuts or fasteners that secure it in place. Apply gentle pressure and turn the wrench clockwise to secure the connections. Avoid over-tightening, as this can lead to damage or leaks.
-
Check for Stability: After securing the plunger assembly, check for stability and proper alignment. Ensure that the plunger sits securely in its designated position and that there are no loose or wobbly connections. A stable and secure assembly is essential for the effective operation of the plunger.
-
Test the Plunger: With the plunger reassembled, it's time to conduct a preliminary test to ensure that it functions as intended. Run water in the sink and observe the drainage process. Press the plunger down to create a seal and verify that it effectively controls the flow of water. Pay attention to any signs of leaks or instability.
By meticulously following these steps, you can successfully reassemble the plunger in the bathroom sink, setting the stage for a fully functional and efficient drainage system. The careful application of plumber's tape, secure attachment of the plunger assembly, and thorough testing are essential components of this reassembly process. With the plunger securely in place, you can proceed to the final step of testing its functionality in the sink.
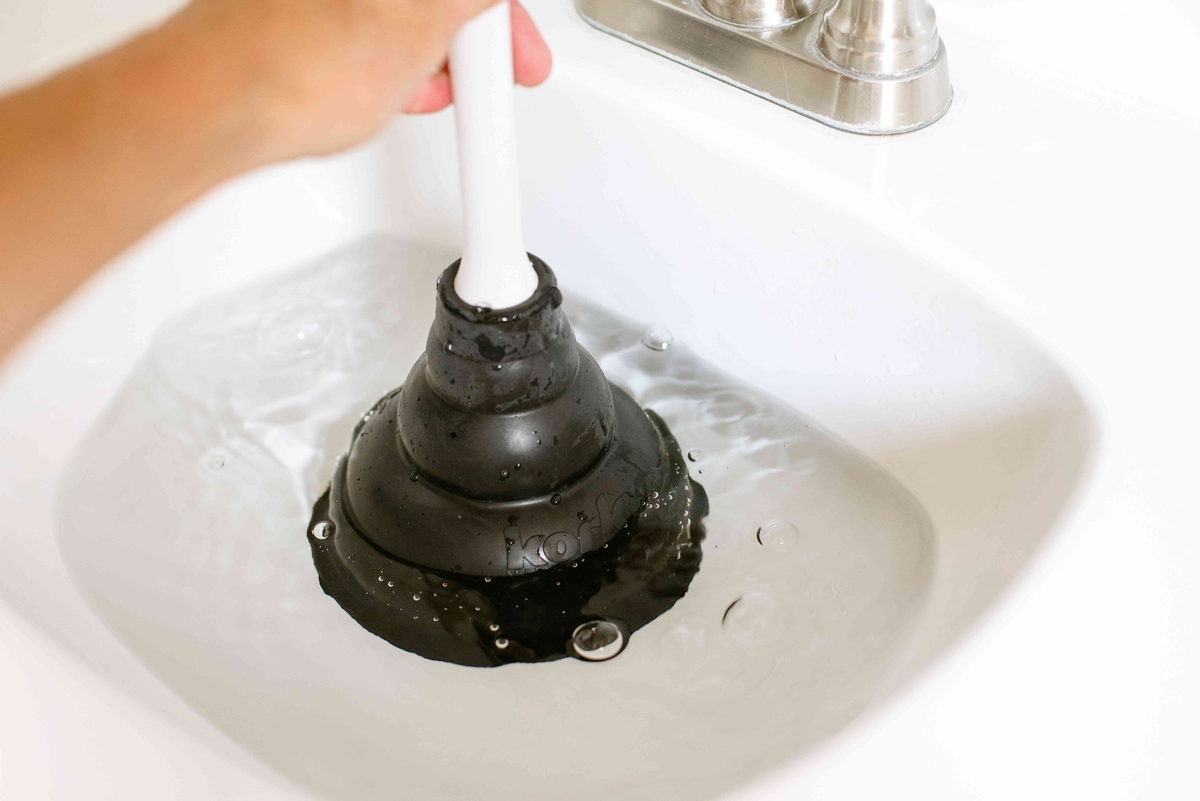
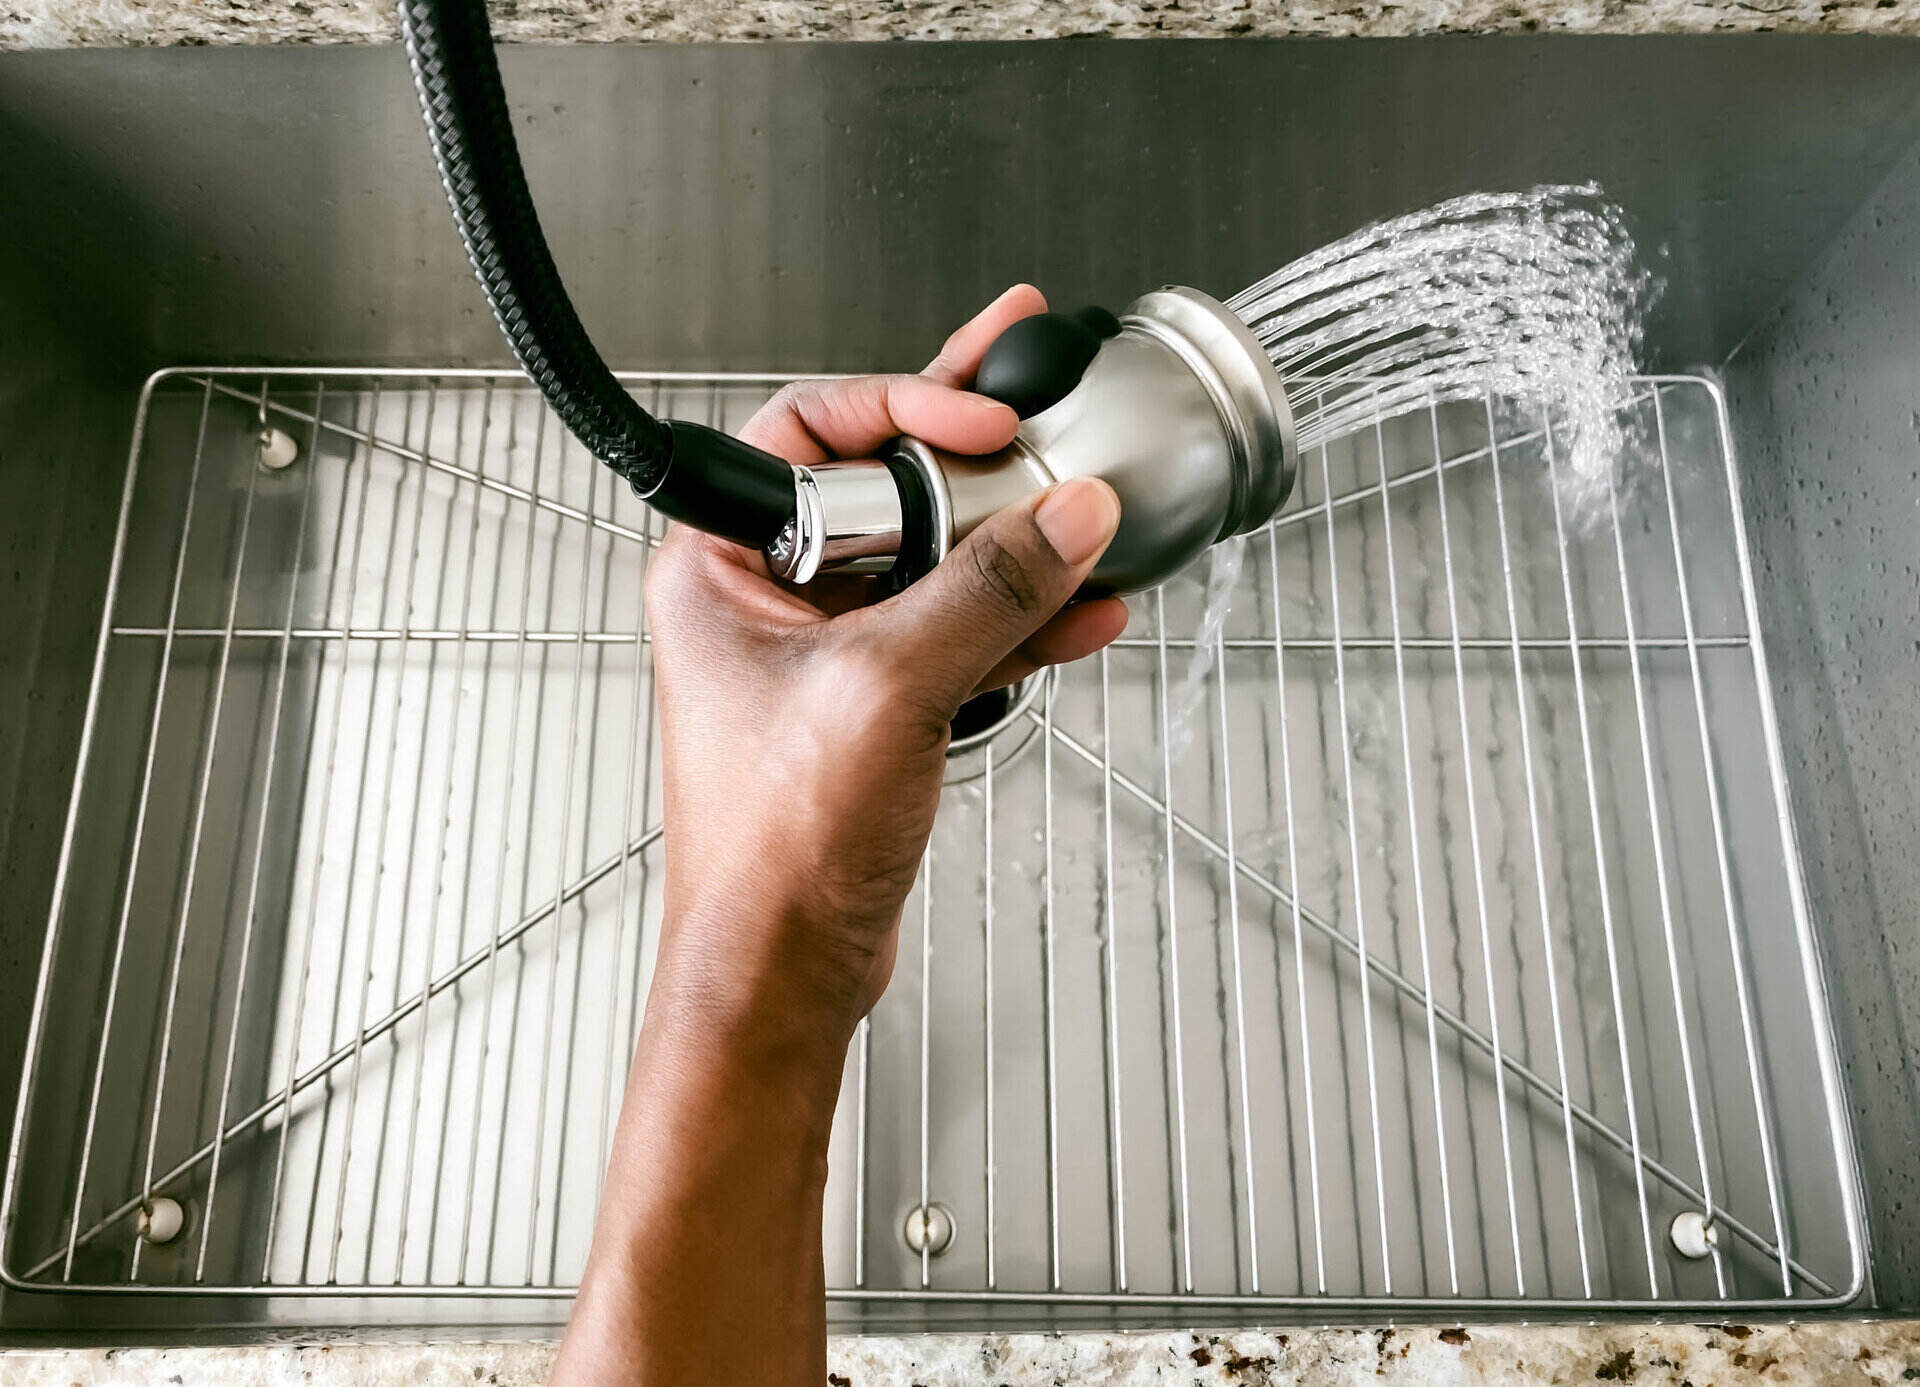
Step 6: Test the Plunger in the Sink
With the plunger reassembled in the bathroom sink, it's crucial to conduct a thorough test to ensure that it functions optimally and facilitates proper drainage. Testing the plunger will allow you to verify its effectiveness in controlling the flow of water and address any potential issues before concluding the repair process. Follow these detailed steps to test the plunger in the sink and confirm its functionality:
-
Run Water in the Sink: Begin by running water in the sink to simulate typical usage. Observe the flow of water and take note of any signs of standing water or slow drainage. This initial assessment will provide valuable insight into the current state of the sink's drainage system.
-
Press the Plunger: With the water running, press the plunger down firmly to create a seal over the drain opening. Observe how the sink responds to the plunger's action and assess whether it effectively controls the flow of water. Pay attention to any signs of leaks, instability, or resistance.
-
Check for Proper Suction: As you press the plunger, ensure that it forms a secure seal over the drain opening. The suction created by the plunger should effectively prevent water from draining, demonstrating its ability to control the flow and facilitate drainage when released.
-
Observe Drainage: Release the plunger and observe the drainage process. Verify that the water flows smoothly and efficiently down the drain without any signs of backup or standing water. A properly functioning plunger should contribute to a swift and unobstructed drainage process.
-
Repeat the Test: If necessary, repeat the testing process to confirm the consistent functionality of the plunger. Conducting multiple tests will allow you to identify any potential issues and make adjustments as needed to ensure optimal performance.
By diligently testing the plunger in the sink, you can verify its effectiveness in controlling the flow of water and facilitating efficient drainage. This comprehensive testing process will provide you with the confidence that the plunger operates as intended, allowing you to address any remaining concerns and finalize the repair with assurance.
With the plunger successfully tested and confirmed to be functioning optimally, you have effectively addressed the issue of a malfunctioning or stuck plunger in the bathroom sink. By following the step-by-step process outlined in this guide, you have taken proactive measures to restore the functionality of your sink's drainage system and ensure a smoothly operating plumbing fixture. With the repair process complete, you can enjoy the peace of mind that comes with successfully resolving a common plumbing issue on your own.
Conclusion
In conclusion, successfully fixing a plunger in a bathroom sink is a rewarding accomplishment that empowers homeowners to address common plumbing issues with confidence and efficiency. By following the comprehensive step-by-step process outlined in this guide, you have gained valuable insights into the inner workings of a bathroom sink's drainage system and learned how to troubleshoot and resolve a malfunctioning or stuck plunger.
Throughout the repair process, you have acquired essential skills and knowledge, from gathering the necessary tools to conducting a thorough inspection of the sink for potential clogs. By carefully removing, cleaning, and reassembling the plunger, you have taken proactive measures to restore its functionality and ensure optimal drainage in your bathroom sink.
The meticulous testing of the plunger in the sink has provided you with the assurance that the repair process has been successful, allowing you to enjoy the peace of mind that comes with a fully functional plumbing fixture. By embracing a DIY approach to addressing common plumbing issues, you have demonstrated resourcefulness and a proactive mindset, ultimately saving time and money while maintaining a smoothly operating household.
As you reflect on the journey of fixing a plunger in a bathroom sink, you have not only resolved a specific issue but also expanded your understanding of plumbing maintenance and repair. This newfound knowledge can serve as a valuable asset in maintaining the functionality of your home's plumbing systems and addressing similar issues in the future.
By taking the initiative to tackle a common plumbing challenge, you have demonstrated a proactive and capable approach to home maintenance. The skills and confidence you have gained through this experience can be applied to various aspects of household upkeep, empowering you to take control of your living environment and address issues as they arise.
In the end, successfully fixing a plunger in a bathroom sink is a testament to your resourcefulness, determination, and willingness to engage with DIY solutions. As you celebrate the completion of this repair process, you can take pride in your ability to overcome challenges and maintain a smoothly functioning home environment.
Frequently Asked Questions about How To Fix A Plunger In A Bathroom Sink
Was this page helpful?
At Storables.com, we guarantee accurate and reliable information. Our content, validated by Expert Board Contributors, is crafted following stringent Editorial Policies. We're committed to providing you with well-researched, expert-backed insights for all your informational needs.


0 thoughts on “How To Fix A Plunger In A Bathroom Sink”