
Articles
How To Install A Bathroom Sink
Modified: October 28, 2024
Learn how to install a bathroom sink with step-by-step instructions and tips from our articles. Transform your bathroom with this easy DIY project.
(Many of the links in this article redirect to a specific reviewed product. Your purchase of these products through affiliate links helps to generate commission for Storables.com, at no extra cost. Learn more)
Introduction
Installing a bathroom sink may seem like a daunting task, but with the right tools and a bit of know-how, it can be a rewarding DIY project. Whether you’re remodeling your bathroom or simply replacing an old sink, this guide will walk you through the step-by-step process of installing a bathroom sink.
Before you get started, it’s important to gather all the necessary tools and materials. Having everything on hand will make the installation process go much smoother. You’ll need a wrench, pliers, a screwdriver, a bucket, a putty knife, silicone caulk, a measuring tape, a level, and of course, the sink and faucet (if applicable).
Once you have everything you need, you’re ready to begin. The first step is to turn off the water supply. Locate the shut-off valves under the sink or near the main water line and turn them to the closed position. This will prevent any water from flowing while you work.
Next, you’ll need to disconnect the existing sink. Start by removing any accessories or hardware, such as the faucet, handles, and drain. Use a wrench or pliers to loosen and remove any connections. Be sure to place a bucket under the sink to catch any remaining water or debris.
With the sink disconnected, you can now prepare the area for the new installation. Clean the countertop surface thoroughly, removing any old caulk or adhesive. Use a putty knife to scrape away any residue, and then wipe the surface clean with a damp cloth.
Key Takeaways:
- Installing a bathroom sink is a manageable DIY project with the right tools and step-by-step guidance. Prioritize safety, attention to detail, and proper preparation for a successful and rewarding installation process.
- From disconnecting the existing sink to checking for leaks, each step in the installation process is crucial for a seamless and functional bathroom sink. Take pride in the transformation and enjoy the benefits of a properly installed sink.
Read more: DIY Guide To Installing A Vessel Sink
Tools and Materials Needed
Before you begin the installation process, it’s important to gather all the necessary tools and materials. Having everything on hand will make the process much smoother and ensure you have everything you need. Here are the tools and materials you’ll need:
Tools:
- Wrench
- Pliers
- Screwdriver
- Bucket
- Putty Knife
- Measuring Tape
- Level
Materials:
- Bathroom Sink
- Faucet (if applicable)
- Drain
- Silicone Caulk
The wrench and pliers are essential for loosening and tightening connections and fittings during the installation process. The screwdriver will come in handy for removing hardware and accessories from the previous sink and installing them on the new one.
A bucket is necessary for catching any water or debris that may come out during the disconnection process. It will help keep your work area clean and prevent any messes.
A putty knife is useful for scraping away any old adhesive or caulk from the countertop surface. It will ensure a clean and smooth area for the new sink installation.
The measuring tape and level are vital for ensuring accurate placement and alignment of the sink and faucet. Taking measurements will help you position everything correctly, and the level will ensure that the sink is balanced and not tilted.
Of course, the most important materials needed for the installation are the sink, faucet (if applicable), drain, and silicone caulk. Choose a sink that suits your bathroom’s style and size, and ensure that it comes with any necessary mounting hardware. The faucet should also be compatible with your sink and provide the desired water flow and temperature control.
Lastly, the silicone caulk is used to seal the gaps and edges around the sink, ensuring a watertight and secure installation. It’s important to choose a high-quality caulk suitable for bathroom use to prevent any leaks or water damage.
Having these tools and materials ready before you begin the installation will save you time and prevent any delays. It’s always better to be prepared and have everything you need on hand.
Step 1: Turn Off the Water Supply
Before you start disconnecting your existing sink or working with any plumbing connections, you must first turn off the water supply. This step is crucial to prevent any water damage or flooding during the installation process.
The water supply shut-off valves are typically located under the sink or near the main water line. Look for two small valves or knobs, one for hot water and one for cold water. Turn both of these valves to the closed position, which is usually clockwise. If you don’t have shut-off valves under the sink, you may need to locate the main water shut-off valve for your home and turn it off.
Once the water supply is turned off, it’s a good idea to turn on the faucet to release any remaining water pressure in the pipes. This will help prevent any unwanted water from spraying out when you disconnect the plumbing connections.
Remember, safety is key when working with plumbing, so make sure to take the necessary precautions to avoid any accidents or water damage. It’s also a good idea to have a bucket or towels handy to catch any residual water that may come out during the disconnection process.
After you have turned off the water supply, you can proceed with disconnecting your existing sink and preparing the area for the new installation. This includes removing any accessories or hardware, cleaning the countertop surface, and ensuring everything is ready for the next steps.
By taking the time to turn off the water supply before starting the installation, you’re setting yourself up for a smooth and hassle-free process. Plus, it ensures the safety of your plumbing system and prevents any potential water damage. So, don’t skip this important step before diving into the sink installation process.
Read more: DIY Guide To Installing A Pedestal Sink
Step 2: Disconnect the Existing Sink
Now that you’ve turned off the water supply, it’s time to disconnect your existing sink. This step involves removing any accessories, hardware, and plumbing connections that are currently in place.
Start by removing the faucet. Use a wrench or pliers to loosen and remove the nuts securing the faucet to the countertop. Once the nuts are loosened, lift the faucet assembly off the sink and set it aside.
Next, disconnect the water supply lines. Use a wrench to unscrew the nuts connecting the supply lines to the shut-off valves. Be prepared for some water to come out as you disconnect the lines, so have a bucket or towels nearby to catch any dripping water.
If your sink has an integral pop-up drain or a separate drain assembly, you’ll need to disconnect it as well. Use a pair of pliers or a wrench to loosen and remove the nuts securing the drain assembly to the sink. Once the nuts are removed, you should be able to pull the drain assembly out from the bottom of the sink.
With the accessories and plumbing connections disconnected, it’s time to remove the sink from the countertop. Carefully lift the sink, taking care not to damage the countertop or surrounding area. If the sink is secured with clips or brackets, use a screwdriver to remove them before lifting the sink completely.
Once the sink is removed, you may notice some adhesive or caulk residue on the countertop surface. Use a putty knife to scrape away any leftover residue, ensuring a clean and smooth surface for the new sink installation.
By disconnecting the existing sink, you’re making way for the new sink to be installed. Taking your time to remove all the accessories and plumbing connections properly will make the installation process much easier. Remember to use the appropriate tools and take caution to avoid damaging any components or surfaces as you work.
With the existing sink successfully disconnected, you can move on to the next step in the installation process: preparing the area for the new sink.
Step 3: Prepare the Area
Now that the existing sink has been disconnected and removed, it’s time to prepare the area for the installation of the new sink. This step involves cleaning the countertop surface, measuring and marking the placement of the new sink, and ensuring that everything is ready for the next steps.
Start by cleaning the countertop surface thoroughly. Use a damp cloth to wipe away any dust, dirt, or debris. If there is any leftover adhesive or caulk from the previous sink, use a putty knife to carefully scrape it off. This will ensure a clean and smooth surface for the new sink to be installed.
Once the countertop is clean, it’s time to measure and mark the placement of the new sink. Measure the dimensions of the sink, including its width, length, and depth. Use these measurements to determine the exact placement of the sink on the countertop. Consider the positioning in relation to other fixtures and the available space in the bathroom.
Using a pencil or marker, mark the outline of the sink on the countertop. This will serve as a guide during the installation process, ensuring that the sink is centered and aligned correctly.
Before moving on to the next steps, make sure that you have all the necessary components and hardware for the installation. This includes the sink, faucet (if applicable), drain, and any mounting brackets or clips that may be required. Check that all the pieces are in good condition and ready to be installed.
Lastly, take a moment to review the manufacturer’s instructions for the specific sink you are installing. Familiarize yourself with any specific requirements or recommendations provided by the manufacturer. This will ensure that you follow the proper installation process and avoid any potential issues down the line.
By taking the time to properly prepare the area, you’re setting yourself up for a successful and smooth installation of the new sink. Cleaning the countertop, measuring and marking the placement, and ensuring you have all the necessary components will help streamline the installation process. With the area prepared, you’re ready to move on to the next steps in installing your new bathroom sink.
Step 4: Install the New Faucet (if applicable)
If you’re replacing your old sink with a new one that includes a faucet, or if you’ve purchased a separate faucet to install, this step is where you’ll focus on installing the faucet onto the sink. The faucet installation may vary depending on the specific model and manufacturer, so it’s important to refer to the manufacturer’s instructions for the exact steps.
Start by aligning the faucet with the mounting holes on the sink. Depending on the faucet design, there may be one or multiple mounting holes. Carefully lower the faucet into place, ensuring that it fits securely within the holes and is aligned properly.
Underneath the sink, secure the faucet in place using the included hardware. This typically involves using a wrench or screwdriver to tighten the nuts or screws provided. Make sure to follow the manufacturer’s instructions for the specific tightening specifications.
Next, connect the water supply lines to the corresponding faucet inlets. Most faucets use flexible supply lines that can be hand-tightened. However, it’s important to avoid over-tightening, as it can damage the lines and create leaks. Once the supply lines are securely connected, use a wrench or pliers to give them an extra quarter turn for added security.
After installing the faucet, turn on the water supply briefly to check for any leaks. Observe the faucet and supply connections closely, looking for any signs of dripping or water seepage. If there are any leaks, tighten the connections further or consider using plumber’s tape to create a better seal.
Remember, if you’re installing a separate faucet, you’ll need to connect it to the existing plumbing lines. This may involve using adapters or additional fittings, depending on the differences between the old and new faucet connections. Again, it’s crucial to refer to the manufacturer’s instructions for the specific steps required for your faucet model.
By properly installing the new faucet, you’re not only enhancing the functionality of your new sink but also adding a stylish touch to your bathroom. Take your time to align the faucet correctly and ensure that all connections are secure to prevent any leaks. With the faucet successfully installed, you can move on to the next step in the sink installation process.
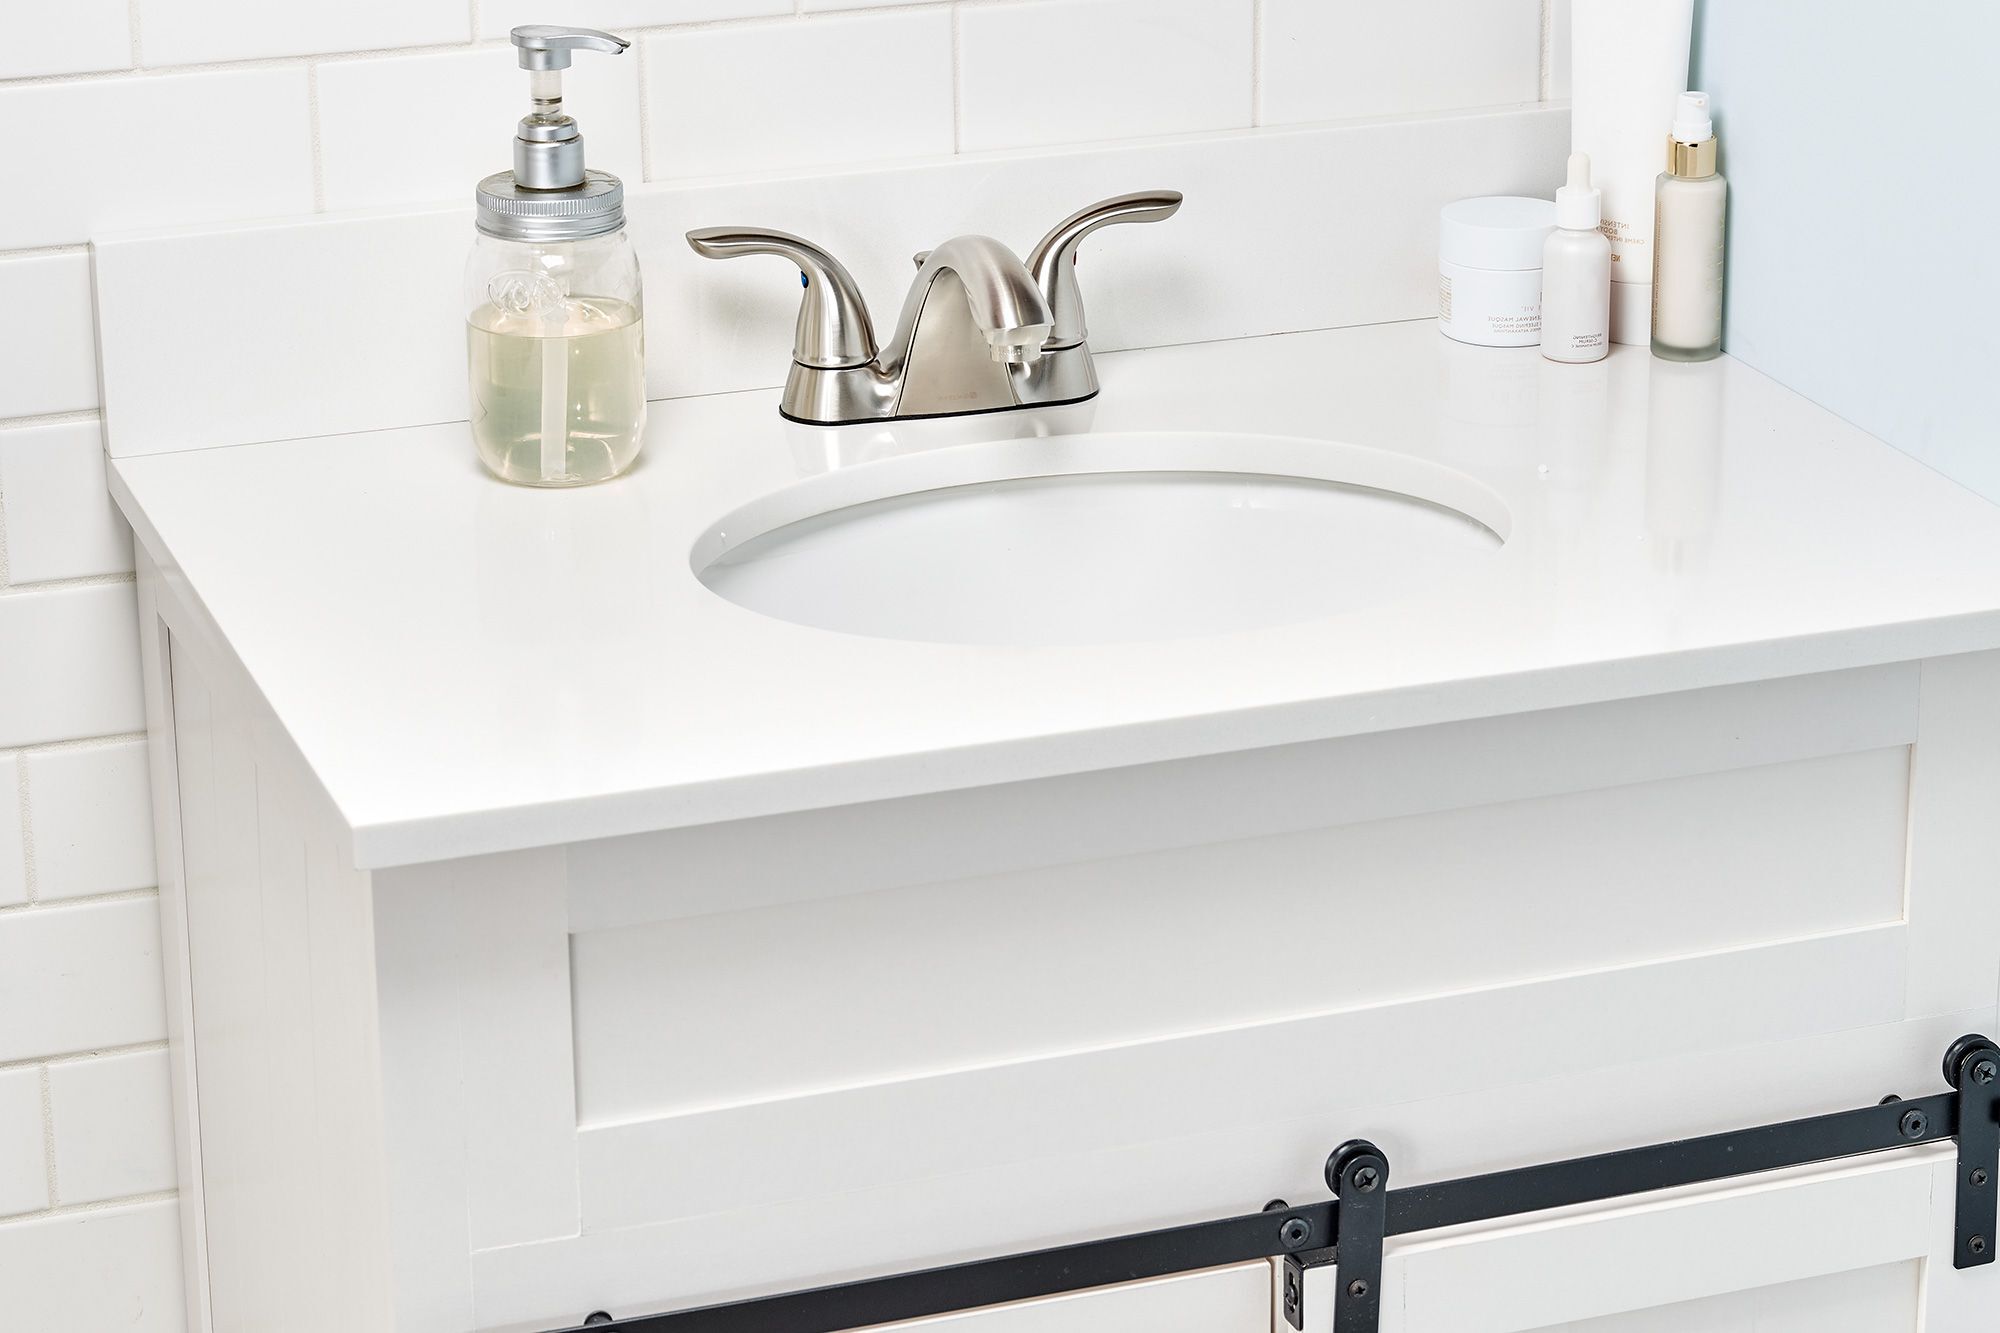
Step 5: Mount the Sink Basin
Now that the faucet is installed, it’s time to mount the sink basin onto the countertop. This step will secure the sink in place and ensure its stability for everyday use. The process of mounting the sink basin may vary depending on the specific sink model and manufacturer, so it’s important to refer to the manufacturer’s instructions for detailed guidance. However, here are some general steps to follow:
1. Apply a bead of silicone caulk along the edge of the sink cutout on the countertop. This will create a watertight seal and prevent any water from seeping underneath the sink.
2. Carefully place the sink basin onto the silicone caulk, aligning it with the markings you made during the preparation step. Ensure that the sink is centered and level on the countertop.
3. Press down firmly on the sink to secure it in place and help the caulk adhere. You may want to use a level to double-check that the sink is perfectly level from front to back and side to side.
4. If necessary, use mounting clips or brackets provided by the manufacturer to secure the sink to the countertop. Follow the manufacturer’s instructions for the specific installation process of these clips.
5. Once the sink is in position and secure, wipe away any excess caulk that may have oozed out from the edges. Use a damp cloth or sponge to remove any smudges or fingerprints, leaving the sink clean and shiny.
After mounting the sink basin, allow the caulk to dry according to the manufacturer’s recommendations. This will ensure that the sink is firmly attached to the countertop and the seal is intact.
Mounting the sink basin is a crucial step in the installation process as it provides stability and support to the sink. By following the manufacturer’s instructions and using silicone caulk, you can ensure a secure and leak-free installation. With the sink basin properly mounted, you’re one step closer to completing the installation of your new bathroom sink.
When installing a bathroom sink, make sure to shut off the water supply before disconnecting the old sink. This will prevent any leaks or water damage during the installation process.
Step 6: Connect the Drain
With the sink basin securely mounted, it’s time to connect the drain. This step involves connecting the drain assembly to the sink’s drain opening and making sure it is properly sealed to prevent any leaks. Here’s a general guide on how to connect the drain:
1. Start by applying a thin layer of plumber’s putty or silicone caulk around the underside of the drain flange. This will create a watertight seal between the drain and the sink basin.
2. Insert the drain flange into the sink’s drain opening, ensuring it is centered and aligned properly. Press down firmly to seal it in place.
3. Underneath the sink, attach the rubber gasket, washer, and nut to the drain flange. Tighten the nut by hand, and then use a pair of pliers or a pipe wrench to give it an extra quarter-turn for a secure fit. Be careful not to overtighten, as it may damage the drain assembly or the sink.
4. Connect the P-trap to the drain tailpiece. The P-trap is a curved pipe that prevents sewer gases from entering the bathroom. Use slip-joint pliers to tighten the connections and ensure a leak-free seal.
5. Once the drain connections are secure, check for any leaks by filling the sink with water and letting it drain completely. Observe the drain connections closely for any signs of dripping or water seepage. If there are any leaks, tighten the connections further or consider using plumber’s tape or pipe thread sealant for a better seal.
It’s worth noting that some sinks may require additional steps or different components for the drain connection, depending on the specific model and manufacturer. It’s important to consult the manufacturer’s instructions to ensure you’re following the correct procedure for your sink.
By properly connecting the drain, you’re ensuring that water flows smoothly and efficiently out of the sink without any leaks or backups. Take your time to align and seal the drain connections correctly to prevent any future plumbing issues. Once the drain is connected, you can move on to the next step: reconnecting the water supply.
Step 7: Reconnect the Water Supply
Now that the drain is connected, it’s time to reconnect the water supply lines to your newly installed bathroom sink. This step involves reestablishing the flow of water by reconnecting the supply lines to the shut-off valves. Here’s a general guide on how to reconnect the water supply:
1. Start by locating the shut-off valves under the sink. These valves control the flow of water to your sink. Turn the valves to the open position by turning them counterclockwise. This will allow water to flow into the supply lines.
2. Take one end of the supply line and connect it to the shut-off valve by hand. Make sure the connection is tight but avoid over-tightening, as it may damage the lines. If necessary, use a wrench or pliers to give it an extra quarter-turn for a secure fit.
3. Repeat the process for the other end of the supply line, connecting it to the corresponding inlet on the bottom of the faucet. Again, tighten the connection by hand and use a wrench or pliers if needed. Ensure a snug fit, but be careful not to overtighten and cause damage.
4. Once the supply lines are securely connected, turn on the shut-off valves by turning them clockwise. This will allow the water to flow through the supply lines and into the faucet.
5. Check for any leaks by running the water and observing the supply connections closely. Look for any signs of dripping or water seepage. If there are any leaks, tighten the connections further or consider using plumber’s tape for a better seal.
It’s important to note that the specific process for reconnecting the water supply lines may vary depending on the type of faucet and plumbing configuration you have. Always refer to the manufacturer’s instructions for the recommended procedure for your particular sink and faucet model.
By properly reconnecting the water supply lines, you’re ensuring the flow of clean water into your new bathroom sink. Take your time to tighten the connections securely and check for any leaks. With the water supply reconnected, you’re getting closer to completing the installation process.
Step 8: Check for Leaks
After reconnecting the water supply and completing the installation of your new bathroom sink, it’s important to thoroughly check for any leaks. This step ensures that all connections are secure and there are no potential issues that could lead to water damage or wasted resources. Here’s what you need to do:
1. Turn on the water supply fully and let the water flow into the sink. Observe each connection point carefully, including the faucet, supply lines, drain, and P-trap. Look for any signs of dripping, water seepage, or moisture around these areas.
2. Run both hot and cold water separately, and check if any leaks occur during this process. Pay close attention to the connections between the faucet and the supply lines, making sure there are no drips or water escaping.
3. Fill the sink with water and then let it drain completely. While the water is draining, inspect the area underneath the sink for any signs of leakage or water pooling. Ensure that the drain connections, including the P-trap, are secure and watertight.
4. If you notice any leaks, tighten the connections that are causing the issue. Use a wrench or pliers to make slight adjustments to create a better seal. If necessary, consider using plumber’s tape or pipe thread sealant to prevent leaks.
5. After addressing any leaks, repeat the process of running the water and checking for leaks until you are satisfied that all connections are secure and there are no signs of water leakage.
By thoroughly checking for leaks, you can address any potential issues before they escalate into bigger problems. Even a small drip can lead to significant water waste and damage over time, so it’s important to be diligent in this step of the installation process.
If you encounter persistent leaks or are unsure about how to address a specific issue, it’s always advisable to consult a professional plumber for assistance. They have the expertise and experience to diagnose and fix any plumbing problems efficiently.
Once you’ve completed this step and are confident that there are no leaks, you’re almost finished with the installation process. Just a few more steps to go before enjoying your new bathroom sink!
Step 9: Finish the Installation
Congratulations! You’ve made it to the final step of installing your new bathroom sink. This step involves completing the finishing touches and ensuring that everything is in place for a fully functional and visually appealing sink. Here’s what you need to do:
1. Trim and clean up any excess caulk or adhesive around the edges of the sink. Use a putty knife or a damp cloth to carefully remove any residue and create a neat and polished appearance.
2. Double-check all the connections and hardware to ensure they are secure. Give the faucet handles, drain stopper, and other components a test to make sure they are functioning properly.
3. Take a moment to wipe down the sink basin and faucet with a clean, damp cloth. This will remove any smudges or fingerprints and leave the sink looking clean and shiny.
4. If you have a vanity or cabinet beneath the sink, organize the space and make any necessary adjustments. Store any cleaning supplies or bathroom essentials in an organized manner, ensuring easy access and functionality.
5. Finally, step back and admire your newly installed bathroom sink! Take pride in the work you’ve done and enjoy the refreshed look and functionality it provides.
Remember to keep the manufacturer’s warranty information and any related documentation in a safe place. This will be useful in case any issues arise in the future or if you need to reference any specific instructions or product details.
With the installation complete, make sure to periodically check for any signs of leaks or other issues. Regular maintenance and upkeep will ensure that your bathroom sink continues to function properly and lasts for years to come.
Thank you for following this step-by-step guide on how to install a bathroom sink. By taking the time to properly disconnect the existing sink, prepare the area, connect the drain, reconnect the water supply, check for leaks, and finish the installation, you have successfully completed a DIY project that will enhance the functionality and aesthetics of your bathroom. Well done!
Conclusion
Installing or replacing a bathroom sink may seem like a daunting task, but with the right tools, materials, and guidance, it can be a rewarding DIY project. By following the step-by-step instructions provided in this guide, you can successfully install a bathroom sink and enjoy its benefits for years to come.
From turning off the water supply to disconnecting the existing sink, preparing the area, installing the new faucet (if applicable), mounting the sink basin, connecting the drain, reconnecting the water supply, checking for leaks, and finishing the installation, each step is essential in ensuring a seamless and functional sink installation.
Throughout the process, it’s important to prioritize safety and attention to detail. Take your time, follow the manufacturer’s instructions, and double-check all connections to prevent any potential leaks or issues. If you encounter any challenges or are unsure about a particular step, don’t hesitate to seek professional assistance.
Once the sink installation is complete, appreciate the transformation it brings to your bathroom. The new sink not only enhances the functionality but also adds a touch of elegance and style to the space. Enjoy the convenience of a properly functioning sink for daily tasks and revel in the satisfaction of a successful DIY project.
Remember to periodically inspect and maintain your bathroom sink to ensure its longevity. Regularly check for leaks, clean the surfaces, and address any issues promptly to prevent further damage or deterioration.
Thank you for using this comprehensive guide to install a bathroom sink. We hope it has provided you with the knowledge and confidence to tackle this project successfully. With proper care and maintenance, your new bathroom sink will continue to serve you well for years to come.
Frequently Asked Questions about How To Install A Bathroom Sink
Was this page helpful?
At Storables.com, we guarantee accurate and reliable information. Our content, validated by Expert Board Contributors, is crafted following stringent Editorial Policies. We're committed to providing you with well-researched, expert-backed insights for all your informational needs.


0 thoughts on “How To Install A Bathroom Sink”