Articles
How To Install A Pedestal Sink
Modified: March 1, 2024
Learn how to install a pedestal sink with this step-by-step guide. Find articles and tips on plumbing and bathroom renovations for your DIY project.
(Many of the links in this article redirect to a specific reviewed product. Your purchase of these products through affiliate links helps to generate commission for Storables.com, at no extra cost. Learn more)
Introduction
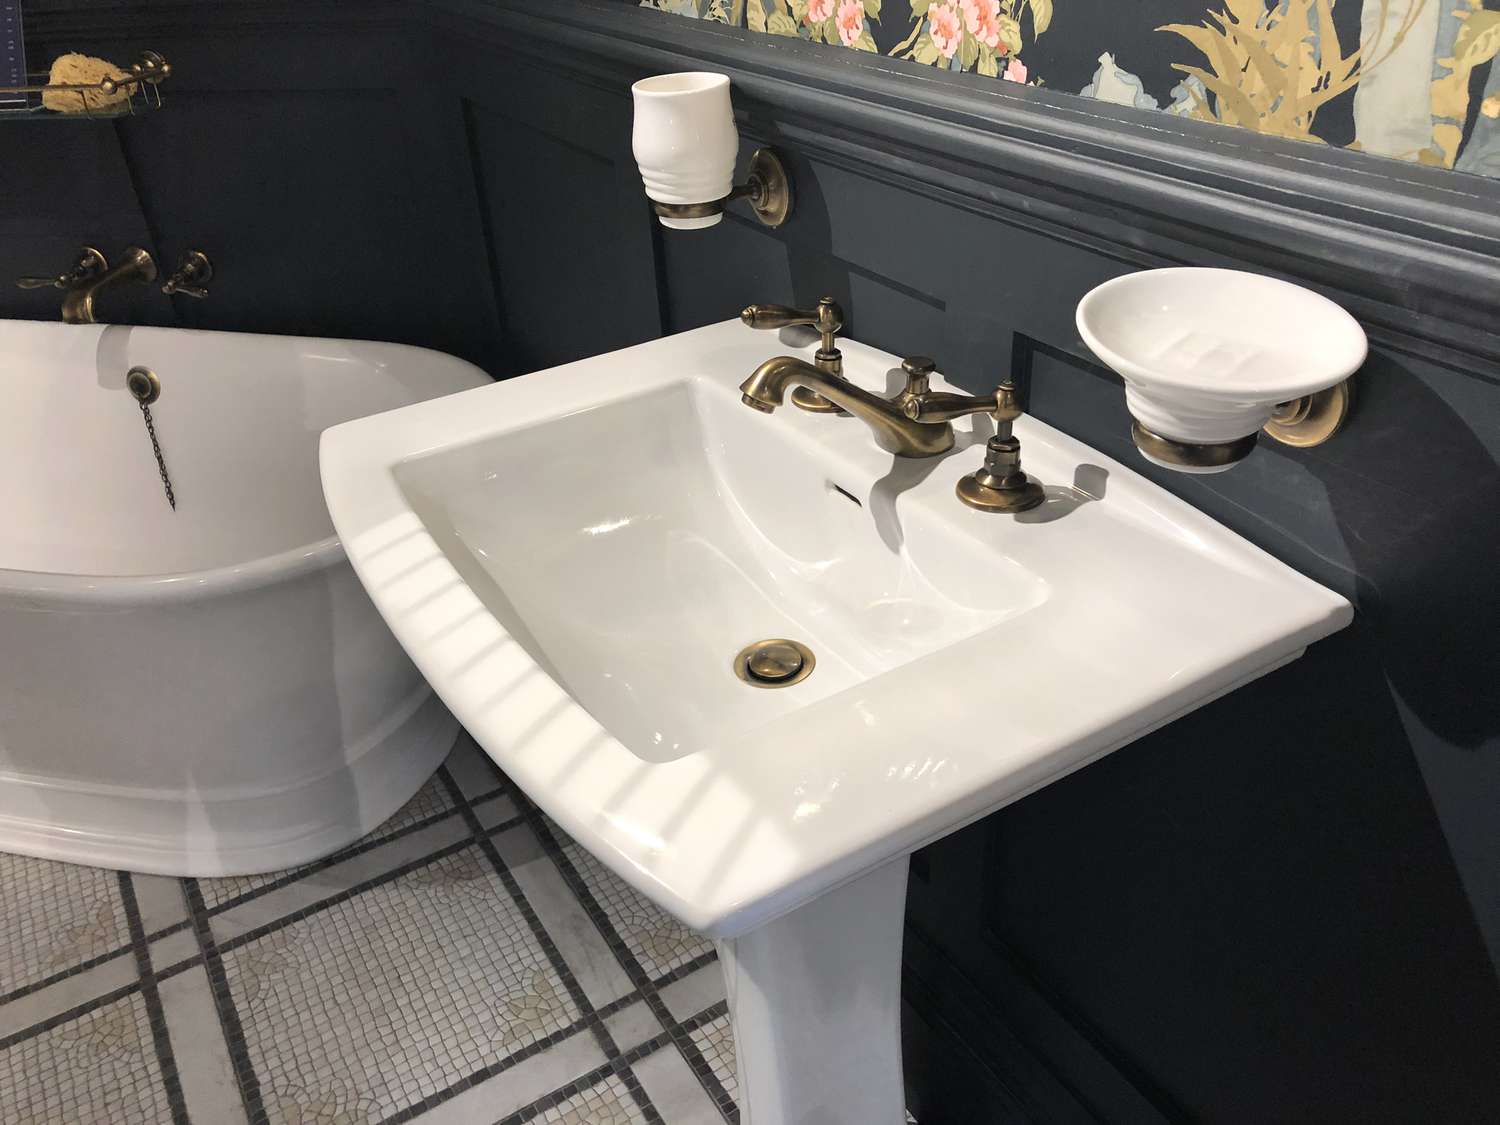
Installing a pedestal sink can be a great way to add charm and functionality to your bathroom. This classic fixture not only saves space but also creates an elegant and timeless look. Whether you’re renovating your bathroom or simply replacing an old sink, installing a pedestal sink can be a rewarding project that enhances the overall aesthetic of your space.
In this step-by-step guide, we will walk you through the process of installing a pedestal sink. Don’t worry if you’re not an experienced DIY enthusiast – with the right tools and a little patience, you can complete this project successfully.
Before we dive into the steps, it’s essential to gather all the necessary tools and materials to ensure a smooth installation process. Here’s a brief overview of what you’ll need:
- Pedestal Sink
- Faucet
- Drain Assembly
- Adjustable Wrench
- Plumber’s Tape
- Phillips Screwdriver
- Level
- Hammer
- Drill
- Hacksaw
- Bucket
- Safety Glasses
Now that you have your tools and materials ready, let’s move on to preparing the area for installation in the next step.
Key Takeaways:
- Installing a pedestal sink is a rewarding DIY project that enhances bathroom aesthetics and functionality. From gathering tools to checking for leaks, each step contributes to a successful and elegant installation.
- Attention to detail and patience are key to a smooth pedestal sink installation. Following the step-by-step guide ensures a secure and stylish addition to your bathroom, creating a space-saving and timeless look.
Step 1: Gather the Necessary Tools and Materials
Before you begin installing a pedestal sink, it’s important to ensure that you have all the tools and materials required for the job. This will help make the installation process smoother and more efficient. Here’s a list of what you’ll need:
- Pedestal Sink: This is the main component of the installation. Choose a sink that matches the style and dimensions you desire for your bathroom.
- Faucet: Select a faucet that complements the design of your sink. Make sure it comes with all the necessary hardware and connectors.
- Drain Assembly: This includes the drain pipe, tailpiece, and P-trap. Ensure that it is compatible with your sink and meets plumbing code requirements.
- Adjustable Wrench: You’ll need this tool to tighten and loosen nuts and bolts during the installation process.
- Plumber’s Tape: Also known as Teflon tape, this tape is used to create a watertight seal on threaded connections. Apply it to the threads of the faucet and drain connections.
- Phillips Screwdriver: A screwdriver with a Phillips head will be necessary for attaching the faucet and other components.
- Level: This tool will help you ensure that the sink and other components are installed straight and level.
- Hammer: You may need a hammer to secure anchors or to gently tap components into place.
- Drill: If necessary, you’ll need a drill to create holes in the wall or floor for mounting the sink or running plumbing pipes.
- Hacksaw: This tool may be needed to cut pipes or other materials to the appropriate length.
- Bucket: Keep a bucket nearby to catch any water or debris that may be released during the installation process.
- Safety Glasses: It’s always important to protect your eyes when working with tools or potentially hazardous materials.
By gathering all the necessary tools and materials beforehand, you’ll be prepared to tackle the installation process with confidence. Now that you have everything you need, let’s move on to preparing the area for installation.
Step 2: Prepare the Area for Installation
Before starting the installation of your pedestal sink, it’s important to prepare the area where the sink will be placed. This will ensure a smooth and efficient installation process. Follow these steps to prepare the area:
- Turn off the Water Supply: Locate the shut-off valves under the sink or near the bathroom. Turn the valves clockwise to shut off the water supply. If there are no shut-off valves, you may need to shut off the main water supply to your house.
- Clear the Space: Remove any items or furniture that might obstruct your work area. Clearing the space will allow you to maneuver freely and prevent any damage to objects during the installation process.
- Remove the Old Sink: If you’re replacing an existing sink, carefully disconnect the water supply lines and remove the old sink and vanity. You may need to use a utility knife or pry bar to remove any caulk or adhesive.
- Check the Wall for Studs: Use a stud finder to locate the studs in the wall where the sink will be mounted. Mark the stud locations with a pencil.
- Measure and Mark the Sink Height: Measure the height of the sink pedestal and mark the corresponding position on the wall. Use a level to ensure the mark is straight and level.
- Measure and Mark the Faucet and Drain Holes: Measure the distance between the center of the sink bowl and the center of the faucet and drain holes. Transfer these measurements to the wall and mark the locations for the holes.
- Drill Holes: Use a drill and appropriate drill bits to create holes for the faucet and drain. Be sure to follow the manufacturer’s instructions and use the correct size drill bits for your specific faucet and drain assembly.
- Wall Mounting: If the sink requires wall mounting, use a drill and appropriate screws or anchors to secure the sink’s mounting bracket or plates to the wall.
By properly preparing the area for installation, you’ll be ready to proceed with the next steps. This will result in a more efficient and successful installation of your pedestal sink. Let’s move on to assembling the pedestal sink in the next step.
Step 3: Assemble the Pedestal Sink
With the area properly prepared, it’s time to assemble the pedestal sink. This step involves attaching the sink bowl to the pedestal and ensuring a secure and stable installation. Follow these steps to assemble the pedestal sink:
- Place the Pedestal: Position the pedestal in the desired location against the wall. Align it with the previously marked height and stud locations.
- Attach the Sink Bowl: Carefully lift the sink bowl and place it onto the pedestal. Ensure that the sink bowl aligns with the pre-drilled faucet and drain holes.
- Secure the Sink Bowl: Use the provided hardware, typically mounting brackets or clamps, to secure the sink bowl to the pedestal. Tighten the hardware using an adjustable wrench or a screwdriver.
- Check for Stability: Gently nudge the sink bowl to check if it wobbles or feels loose. If necessary, adjust the mounting hardware to ensure a stable and secure connection between the sink bowl and the pedestal.
Assembling the pedestal sink is an important step in the installation process. Ensuring a sturdy and stable attachment will prevent any future issues or damage. With the sink bowl securely attached to the pedestal, it’s now time to move on to installing the faucet and drain assembly in the next step.
Step 4: Install the Faucet and Drain
Now that the pedestal sink is assembled, it’s time to install the faucet and drain assembly. These components allow for proper water flow and drainage in your sink. Follow these steps to install the faucet and drain:
- Apply Plumber’s Tape: Wrap plumber’s tape around the threads of the faucet and drain connections. This will create a watertight seal when the components are installed.
- Install the Faucet: Depending on the type of faucet you have, refer to the manufacturer’s instructions to guide you through the installation process. Generally, this involves inserting the faucet through the pre-drilled hole in the sink and securing it from underneath with nuts or mounting hardware.
- Connect the Water Supply Lines: Attach the water supply lines to the corresponding hot and cold water connections on the faucet. Use an adjustable wrench to tighten the connections, ensuring they are snug but not over-tightened.
- Install the Drain Assembly: Insert the drain assembly into the drain hole at the bottom of the sink. Depending on the type of drain assembly, this may involve connecting the tailpiece, attaching the rubber gasket, and tightening the drain nut with an adjustable wrench.
- Check for Leaks: Before proceeding to the next step, turn on the water supply valves and check for any leaks around the faucet and drain connections. If you notice any leaks, tighten the connections or replace any faulty components as needed.
Installing the faucet and drain is a crucial step in the pedestal sink installation process. Ensuring a proper installation will enable smooth water flow and efficient drainage. With the faucet and drain assembly in place, it’s time to move on to mounting the sink to the wall in the next step.
When installing a pedestal sink, make sure to measure and mark the location for the sink and anchor it securely to the wall before connecting the plumbing. This will ensure a stable and secure installation.
Read more: How To Remove A Pedestal Sink
Step 5: Mount the Sink to the Wall
With the faucet and drain installed, it’s now time to mount the pedestal sink to the wall. This step ensures the sink is securely attached and provides additional stability. Follow these steps to mount the sink to the wall:
- Locate the Studs: Use a stud finder to locate the studs in the wall behind the sink. Mark the stud locations with a pencil.
- Position the Sink: Carefully lift the sink bowl and pedestal, placing it against the wall in the desired position. Ensure that the sink aligns with the pre-drilled holes in the wall.
- Secure the Sink: Use screws or mounting hardware to attach the sink to the wall. Drill through the marked stud locations and into the sink’s mounting bracket or plates. Attach the sink securely to the wall using the appropriate hardware.
- Check for Level: Use a level to ensure that the sink is straight and level. Make any necessary adjustments by tightening or loosening the mounting hardware.
- Confirm Stability: Gently push and pull on the sink to ensure it is securely mounted to the wall. If you notice any wobbling or instability, double-check the tightness of the mounting hardware.
Mounting the sink to the wall is an important step in the installation process, as it ensures the sink remains securely in place. Take your time to position the sink accurately, use the marked stud locations, and tighten the mounting hardware properly. With the sink securely mounted, we can now move on to connecting the plumbing in the next step.
Step 6: Connect the Plumbing
With the sink securely mounted to the wall, it’s time to connect the plumbing components. This step involves connecting the water supply lines and the P-trap to ensure proper water flow and drainage. Follow these steps to connect the plumbing:
- Connect the Water Supply Lines: Use an adjustable wrench to connect the water supply lines to the corresponding hot and cold water outlets on the faucet. Ensure that the connections are tight and properly aligned.
- Attach the P-Trap: Position the P-trap underneath the sink’s drain assembly. Connect the tailpiece of the drain assembly to the P-trap using slip nuts and washers. Tighten the connections using an adjustable wrench.
- Check for Leaks: Before proceeding, turn on the water supply valves and check for any leaks at the faucet and P-trap connections. If you notice any leaks, tighten the connections or replace any faulty components if necessary.
Connecting the plumbing ensures that your pedestal sink is fully functional and ready to use. Take care to confirm that the connections are secure and there are no leaks before moving on to the final step.
Once you have completed the plumbing connections and checked for any leaks, it’s time to move on to the final step – checking for leaks and testing the sink.
Step 7: Check for Leaks and Test the Sink
The final step in installing a pedestal sink is to check for any leaks and test the functionality of the sink. This step ensures that everything is properly connected and operating as it should. Follow these steps to check for leaks and test the sink:
- Turn on the Water Supply: Open the shut-off valves or turn on the main water supply to allow water to flow to the sink.
- Inspect for Leaks: Thoroughly check all the connections, including the faucet, drain, and water supply lines, for any signs of leaks. Look for dripping water or pooling around the connections.
- Address any Leaks: If you notice any leaks, carefully tighten the corresponding connections using an adjustable wrench. If the leak persists, consider replacing any faulty components or seek professional assistance.
- Test the Sink: Turn on the faucet and let the water run for a few minutes. Check the water flow and ensure that both hot and cold water are functioning properly. Additionally, test the drain by filling the sink with water and observe how efficiently it drains.
- Ensure Proper Drainage: Once the sink is tested, check for proper drainage by allowing the water to fully drain from the sink. Ensure that there are no blockages or slow drainage issues.
By checking for leaks and testing the sink, you can identify and address any plumbing issues before they become larger problems. This final step ensures that your pedestal sink is fully functioning and ready for use.
Congratulations! You have successfully installed a pedestal sink. Enjoy the enhanced functionality and elegant look that this fixture brings to your bathroom.
Please note that if you encounter any difficulties during the installation process or if you lack the necessary experience, it is recommended to seek assistance from a professional plumber. Safety should always be a top priority.
Now that your pedestal sink is installed, you can sit back, relax, and enjoy your newly transformed bathroom space!
Conclusion
Installing a pedestal sink is a rewarding project that can transform the look and functionality of your bathroom. By following the step-by-step guide outlined in this article, you can successfully install a pedestal sink with confidence.
Starting with gathering the necessary tools and materials, to preparing the area for installation, assembling the sink, installing the faucet and drain, mounting the sink to the wall, connecting the plumbing, and finally checking for leaks and testing the sink, each step plays a crucial role in achieving a successful installation.
Remember to take your time and pay attention to detail during each step. Double-checking measurements, ensuring proper alignment, and tightening connections will prevent future issues and ensure a long-lasting installation.
It’s important to note that if you’re unsure about any aspect of the installation or if you encounter any difficulties, it’s always wise to seek the assistance of a professional plumber. Safety should be a top priority throughout the installation process.
Once your pedestal sink is installed, take a moment to appreciate the new aesthetic it brings to your bathroom. Enjoy the functional benefits of the space-saving design while adding a touch of sophistication to your home.
Now that you have the knowledge and guidance to install a pedestal sink, you can confidently take on this DIY project and make a stylish and functional upgrade to your bathroom.
Happy installation!
Frequently Asked Questions about How To Install A Pedestal Sink
Was this page helpful?
At Storables.com, we guarantee accurate and reliable information. Our content, validated by Expert Board Contributors, is crafted following stringent Editorial Policies. We're committed to providing you with well-researched, expert-backed insights for all your informational needs.


0 thoughts on “How To Install A Pedestal Sink”