Articles
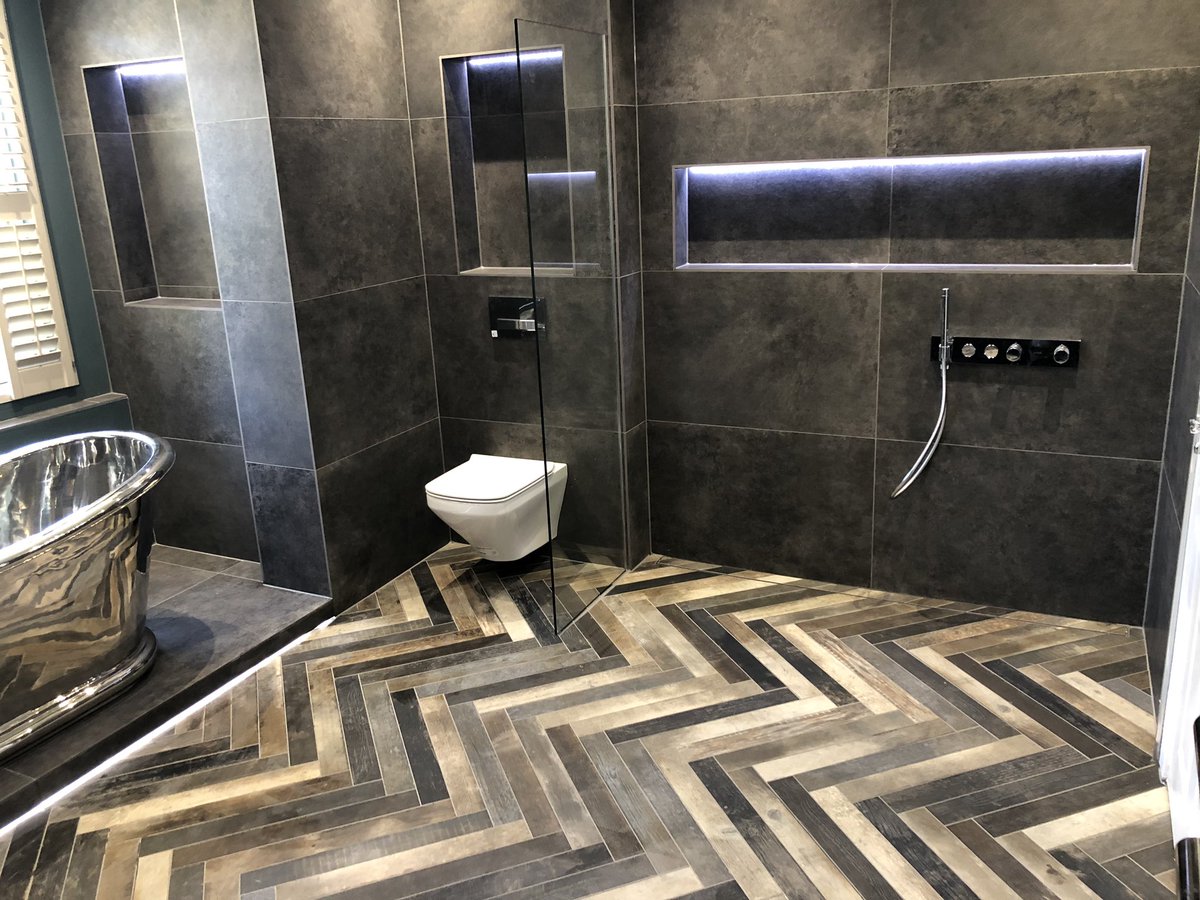
How To Level Bathroom Floor
Modified: March 2, 2024
Discover expert articles on how to level your bathroom floor and achieve a perfectly even foundation for your remodeling project.
(Many of the links in this article redirect to a specific reviewed product. Your purchase of these products through affiliate links helps to generate commission for Storables.com, at no extra cost. Learn more)
Introduction
Welcome to our comprehensive guide on how to level a bathroom floor. If you’re experiencing an uneven floor in your bathroom, it can be both an eyesore and a safety hazard. Whether you’re planning on installing new tiles, hardwood, or any other flooring material, it’s important to have a level surface for a professional-looking and long-lasting result.
Uneven floors can occur due to a variety of reasons, such as settling of the house, water damage, or an incorrect installation. Leveling the floor is a crucial step in the renovation process, as it ensures that your new flooring will be durable, functional, and visually appealing.
In this guide, we will walk you through the process of assessing your bathroom floor, gathering the necessary materials and tools, preparing the floor for leveling, and finally, applying the self-leveling compound. By following these steps, you’ll be able to achieve a perfectly level bathroom floor in no time.
Before we dive into the details, it’s important to note that leveling a bathroom floor can be a labor-intensive task. It requires attention to detail, patience, and precision. If you’re not confident in your DIY skills or if you’re dealing with a severely uneven floor, it’s advisable to hire a professional contractor to ensure the best results.
Now, let’s get started on assessing your bathroom floor to determine the extent of the leveling needed.
Key Takeaways:
- Achieving a perfectly level bathroom floor requires thorough assessment, meticulous preparation, and careful application of self-leveling compound. Following manufacturer’s instructions and allowing proper drying time are crucial for professional results.
- Prioritize thorough inspection of the leveled floor to ensure evenness, proper adhesion, and minimal imperfections. Consult with a professional if needed to guarantee a high-quality and durable flooring installation.
Read more: How To Level A Floor
Assessing the Floor
The first step in leveling your bathroom floor is to assess its current condition. This will help you determine the extent of the leveling required and plan your approach accordingly.
Start by clearing out any furniture, fixtures, and accessories from the bathroom. This will give you a clear view of the entire floor surface. Carefully inspect the floor for any visible signs of damage, such as cracks, holes, or water stains. These issues should be addressed and repaired before proceeding with leveling.
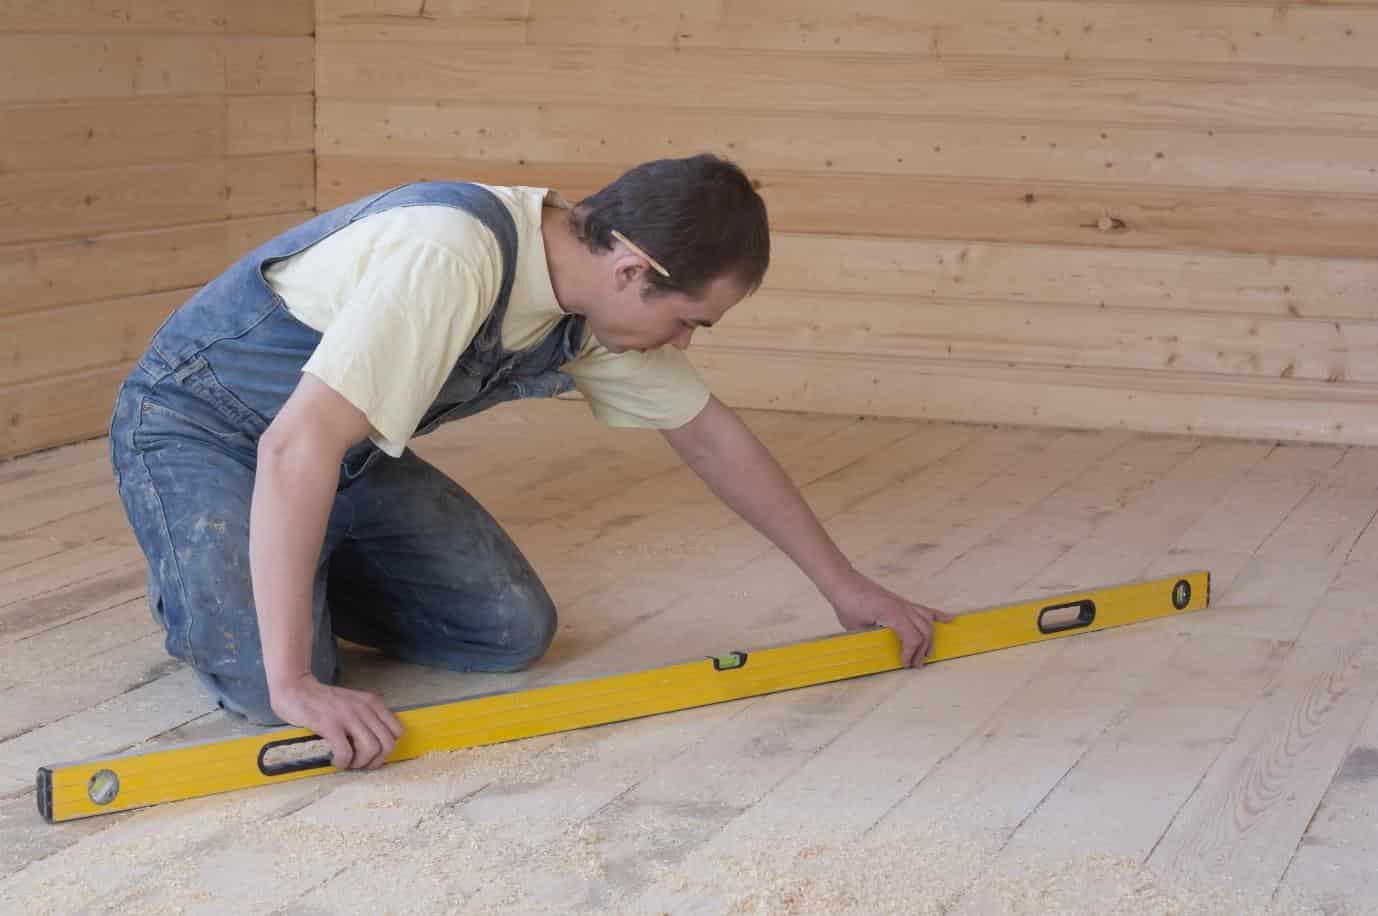
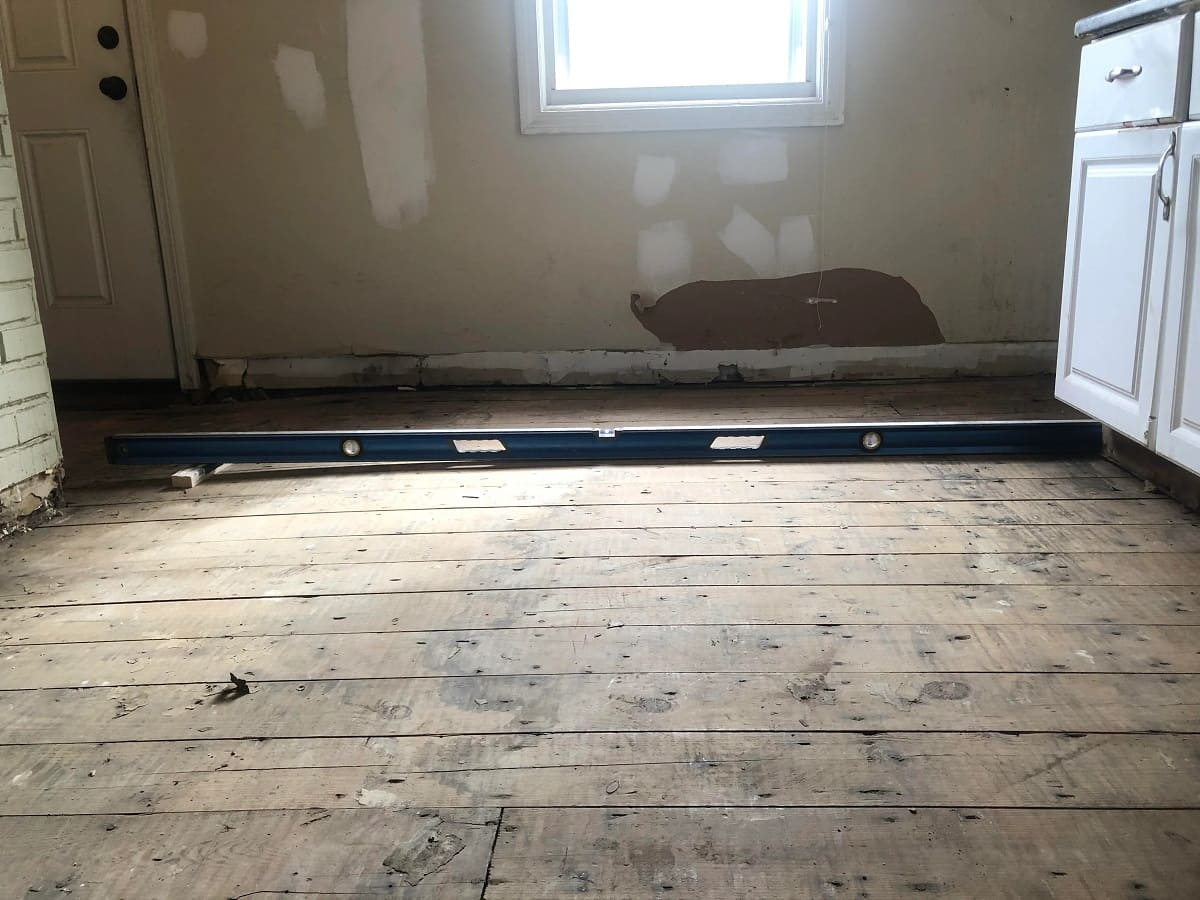
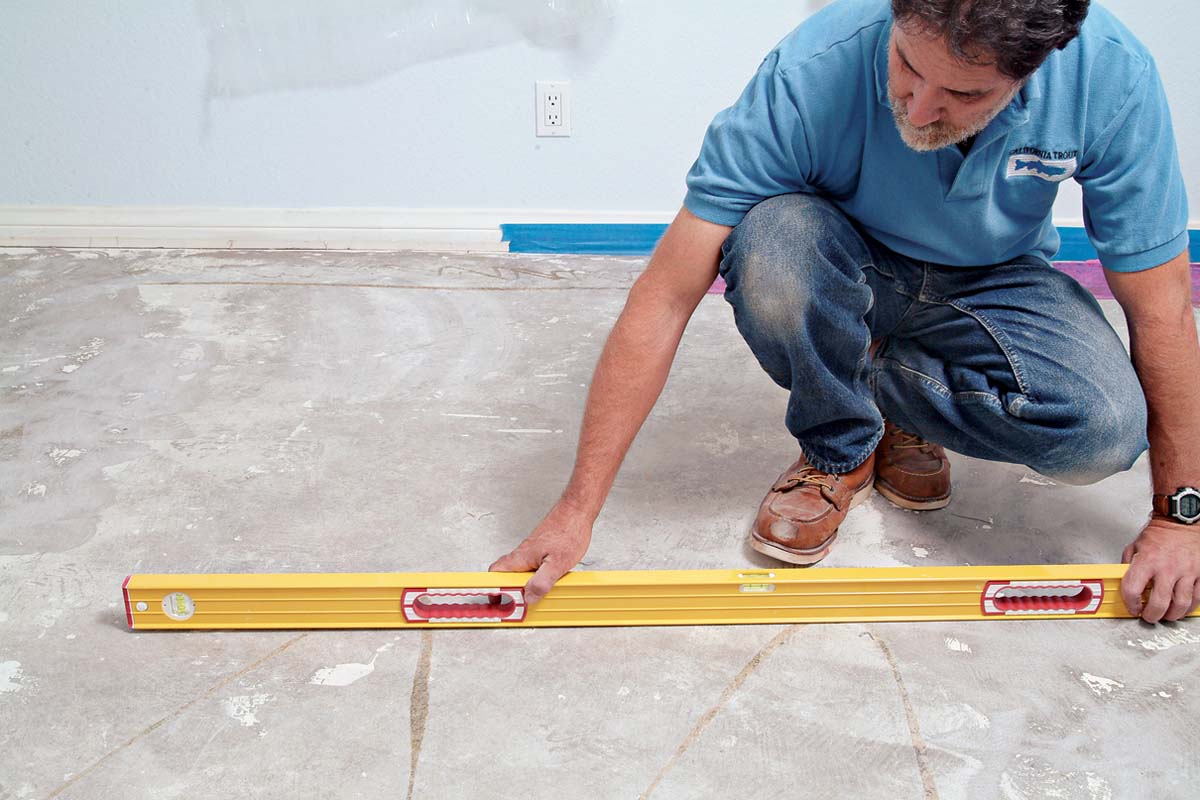
Next, use a level tool to check the overall flatness of the floor. Place the level on different areas of the floor, moving it around to ensure accuracy. If the level indicates that the floor has significant variations, it’s likely that you’ll need to level it before proceeding any further.
In addition to using a level, you can also use a straightedge, such as a long piece of wood or a metal ruler, to identify any high or low spots on the floor. Place the straightedge across different sections of the floor and look for any gaps between the straightedge and the floor surface. This will give you an idea of the areas that require leveling.
Lastly, pay attention to any signs of water damage, such as soft or warped sections of the floor. Water damage can result in structural issues and must be addressed before leveling. If you notice significant water damage, it’s essential to fix the underlying problem first, such as repairing leaky pipes or addressing inadequate ventilation.
By thoroughly assessing your bathroom floor, you’ll have a clear understanding of its condition and be better equipped to tackle the leveling process. Next, we’ll discuss the materials and tools you’ll need to successfully level your bathroom floor.
Gathering Materials and Tools
Once you have assessed your bathroom floor and confirmed that leveling is necessary, it’s time to gather the materials and tools you’ll need for the job. Having everything ready beforehand will help streamline the process and ensure a smooth workflow.
Here are the materials and tools you’ll typically need for leveling a bathroom floor:
- Self-leveling compound: This is the main material used to level the floor. It is a cement-based mixture that can flow and settle into uneven areas, creating a smooth and level surface. Choose a self-leveling compound suitable for your specific floor type, such as a compound designed for use with concrete or wood.
- Primer: In some cases, applying a primer to the floor before applying the self-leveling compound can improve adhesion and ensure a better bond.
- Measuring tools: You’ll need a measuring tape or a laser level to accurately measure the depth and extent of uneven areas on the floor.
- Mixing tools: Depending on the self-leveling compound you choose, you may need a mixing paddle and a power drill to properly mix the compound according to the manufacturer’s instructions.
- Trowel: A trowel will be used to spread and smooth the self-leveling compound over the floor surface.
- Safety equipment: It’s important to protect yourself during the leveling process. Wear safety goggles, gloves, and a dust mask to shield your eyes, hands, and respiratory system from any potential hazards.
- Cleaning tools: Before applying the self-leveling compound, make sure to thoroughly clean the floor to remove dust, debris, and any loose particles. You may need a broom, vacuum cleaner, mop, and bucket for this task.
It’s important to note that the specific materials and tools required may vary depending on the condition of your bathroom floor and the type of self-leveling compound you choose. It’s always a good idea to refer to the manufacturer’s instructions and recommendations to ensure you have everything you need for a successful leveling project.
With all the necessary materials and tools in hand, you’re now ready to prepare the floor for leveling. We’ll discuss this in detail in the next section.
Preparing the Floor
Before you start applying the self-leveling compound, it’s crucial to properly prepare the floor surface. Preparing the floor will ensure optimal adhesion and a successful leveling outcome. Follow these steps to prepare your bathroom floor:
- Clean the floor: Remove any loose debris, dust, or dirt from the floor surface. Sweep or vacuum the floor thoroughly to ensure a clean base for the self-leveling compound.
- Fill cracks and holes: If you noticed any cracks or holes during the assessment phase, it’s important to fill them before proceeding. Use a suitable patching compound or filler to fill and smooth out these areas. Allow the patching compound to dry completely according to the manufacturer’s instructions.
- Apply primer (if necessary): Depending on the type of self-leveling compound you’re using and the condition of your floor, applying a primer may be recommended. The primer enhances adhesion and helps the self-leveling compound bond better to the floor. Follow the manufacturer’s instructions for applying the primer and allow it to dry completely.
- Seal gaps and seams: Inspect the edges of the floor, especially around baseboards or where the floor meets other surfaces, such as walls or shower enclosures. Seal any gaps or seams with an appropriate sealant to prevent the self-leveling compound from leaking out during application.
- Protect adjacent areas: If you have any areas or fixtures in the bathroom that you want to protect from the self-leveling compound, such as cabinets or toilet, cover them with plastic sheeting or painter’s tape to avoid accidental spills or splatters.
Properly preparing the floor is vital for achieving a smooth and level surface. Take your time during this step and ensure that the floor is clean, repaired, and primed (if necessary). This will ensure the best possible results when applying the self-leveling compound.
Now that you’ve prepared the floor, it’s time to mix and apply the self-leveling compound. We’ll guide you through the process in the next section.
Mixing and Applying Self-Leveling Compound
Now that your bathroom floor is properly prepared, it’s time to mix and apply the self-leveling compound. This compound is specially formulated to flow and settle into uneven areas, creating a level surface. Follow these steps to mix and apply the self-leveling compound:
- Read the manufacturer’s instructions: Every self-leveling compound may have slight variations in mixing ratios and application procedures. Before you begin, carefully read and follow the manufacturer’s instructions for the specific compound you’re using.
- Mix the compound: In a clean container, pour the required amount of water as specified in the instructions. Gradually add the self-leveling compound while continuously mixing with a mixing paddle attached to a power drill. Mix until you achieve a smooth and lump-free consistency.
- Let the compound rest: After mixing, allow the compound to rest for a few minutes. This resting period, known as “slaking,” allows the compound to fully hydrate and ensures proper flow properties.
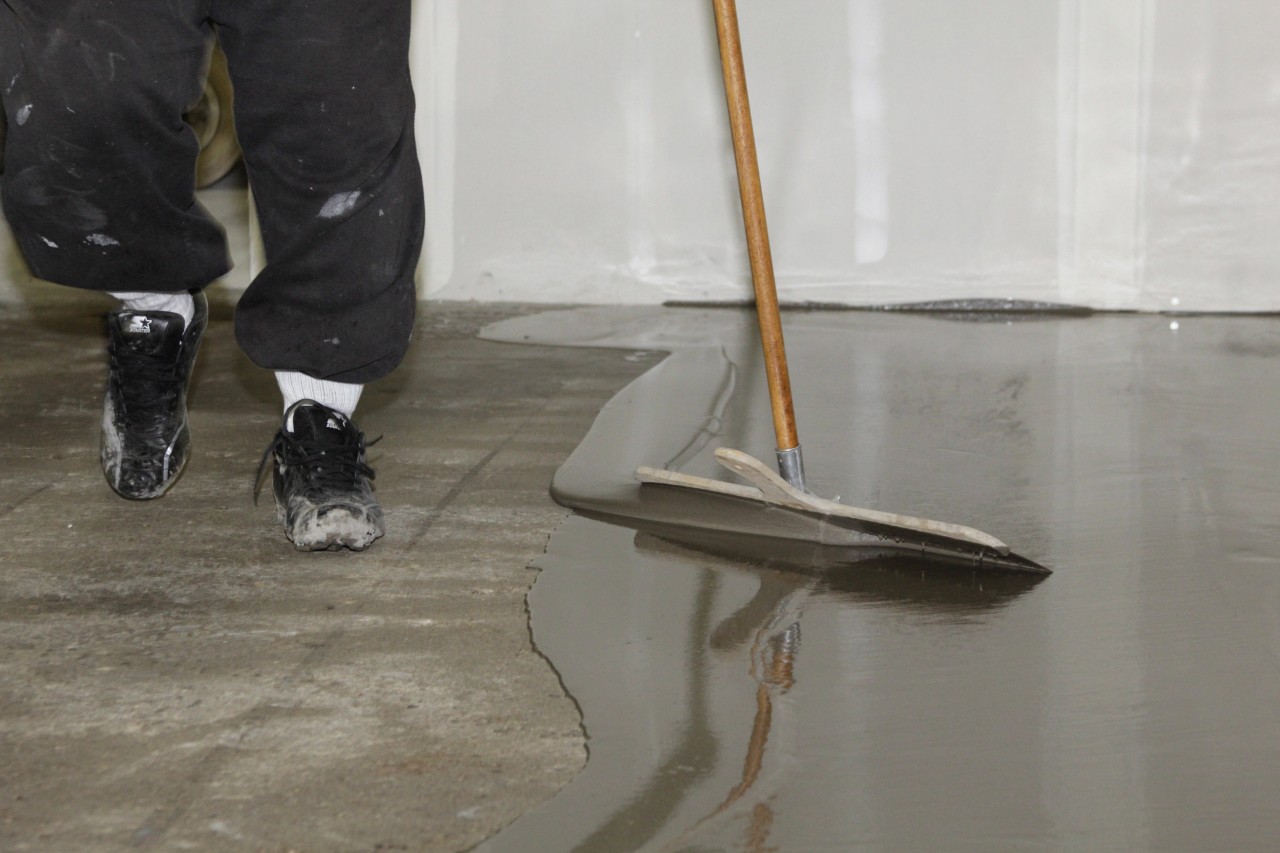
- Start pouring and spreading: Begin pouring the self-leveling compound onto the prepared floor surface in a small section. Use a trowel or a squeegee to spread the compound evenly, pushing it into the low areas and creating a level surface.
- Work in sections: Depending on the size of your bathroom, you may need to work in smaller sections to ensure proper application and control. Pour and spread the compound in one section before moving on to the next.
- Use a spiked roller: To remove any air bubbles and ensure an even application, roll a spiked roller over the freshly poured compound. This will help to distribute the compound evenly and eliminate any trapped air.
It’s important to work efficiently but carefully during the application process, as the self-leveling compound will begin to set within a limited time frame. Avoid excessive walking or traffic on the freshly poured compound to prevent any disturbances.
Continue mixing and applying the self-leveling compound until the entire floor surface is covered. Remember to periodically check the level with a straightedge or level tool to ensure that you are achieving a smooth and even surface.
Once the self-leveling compound has been applied, the next step is to smooth and level the compound. We’ll cover this in the next section.
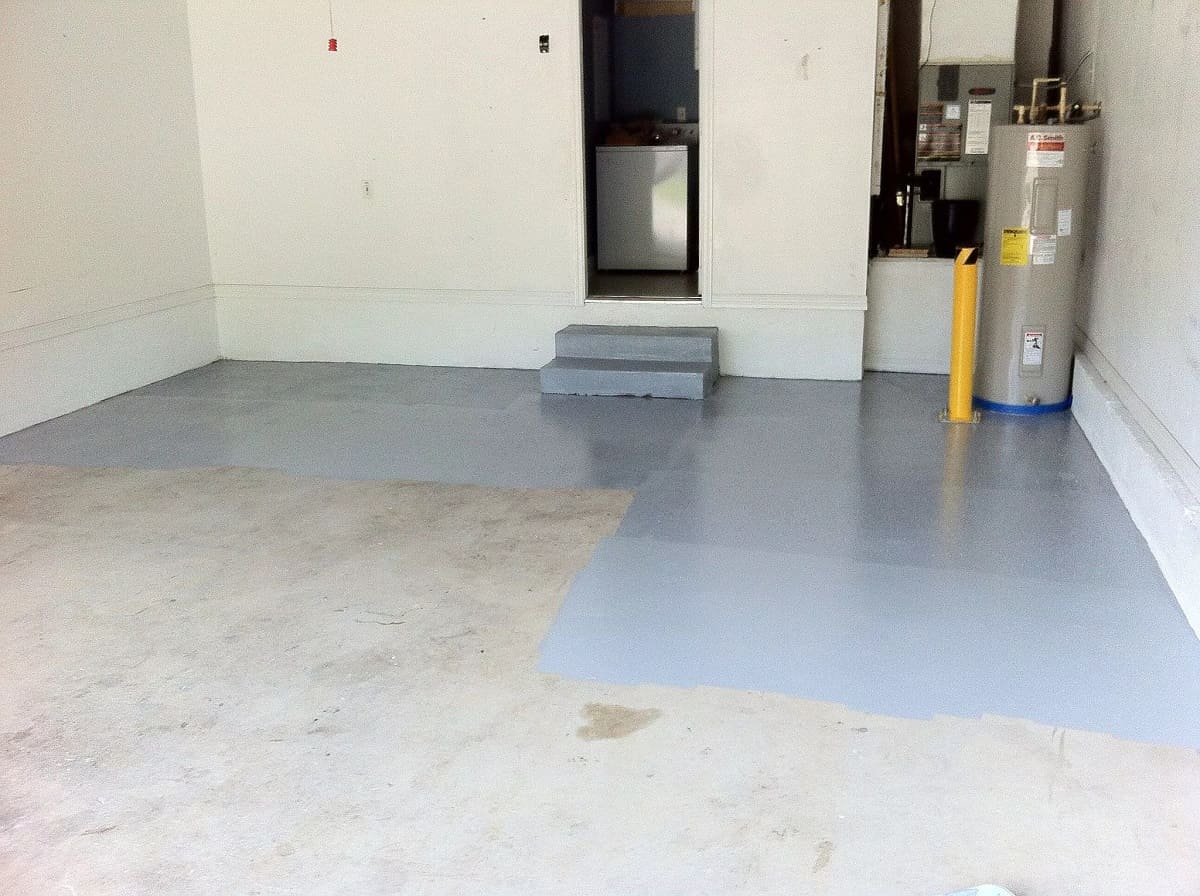
Before leveling a bathroom floor, ensure the subfloor is clean and free of debris. Use a self-leveling compound to fill in any low spots and create a smooth, even surface. Follow the manufacturer’s instructions for best results.
Read more: How To Level A Bathroom Vanity
Spreading the Compound
After pouring the self-leveling compound onto your prepared bathroom floor, it’s time to spread and distribute it evenly. This step is crucial for achieving a smooth and level surface. Follow these steps to effectively spread the compound:
- Work from the furthest point: Begin spreading the compound from the furthest corner of the room, working your way towards the exit. This ensures that you won’t have to step on the freshly applied compound as you work.
- Use a trowel or a squeegee: Use a trowel or a squeegee to spread the compound across the floor surface. Hold the tool at a slight angle and push the compound forward, making sure to distribute it evenly. The goal is to cover the entire surface with a thin and even layer of compound.
- Smooth out any high spots: As you spread the compound, pay attention to any areas that may have excess compound, creating high spots. Use the trowel or squeegee to carefully level out these areas by redistributing the compound or removing any excess.
- Work the compound into low spots: For areas that are lower than the desired height, use the trowel or squeegee to push the compound into these low spots, creating a level surface. Ensure that the compound fills these areas and blends seamlessly with the rest of the floor.
- Patch areas as needed: If you notice any small gaps or irregularities during the spreading process, use a small trowel or putty knife to patch and smooth out these areas. Take your time to achieve a smooth and consistent surface.
- Continuously check for level: Periodically check the level of the compound using a straightedge or level tool. This will help you identify any areas that require additional attention or adjustment.
As you spread the compound, keep in mind that it is self-leveling and will settle into low areas and fill gaps. However, it’s important to ensure that you are distributing it evenly and achieving a consistent thickness across the floor surface.
Once you have finished spreading the compound and are satisfied with the level and thickness, the next step is to smooth and level the compound. We’ll cover this in detail in the next section.
Smoothing and Leveling the Compound
After spreading the self-leveling compound across your bathroom floor, the next step is to smooth and level it to achieve a flawless and even surface. Properly smoothing and leveling the compound is crucial for creating a professional-looking result. Follow these steps to effectively smooth and level the compound:
- Use a smoothing tool: Start by using a long-handled smoothing tool, such as a trowel or a large squeegee, to gently glide over the surface of the compound. This helps to further distribute the compound and eliminate any visible lines or ridges.
- Feather the edges: Pay particular attention to the edges of the compound, where it meets the walls or other surfaces. Use a feathering or smoothing motion to blend the compound seamlessly into these edges, creating a smooth transition.
- Smooth out imperfections: During the smoothing process, you may notice small imperfections, such as air bubbles or uneven areas. Use the smoothing tool or a float to gently press down on these imperfections, smoothing them out and creating a consistent surface.
- Check for level and adjust: Continuously check the level of the compound using a straightedge or level tool. If you notice any areas that are not level, use the smoothing tool to adjust and level them. This may involve adding or removing compound as needed.
- Work in small sections: To ensure that you have enough time to smooth and level the compound before it sets, work in smaller sections of the floor at a time. This allows you to focus on achieving a smooth finish without rushing.
- Smooth transitions: If the bathroom floor transitions into another area, such as a hallway or an adjacent room, make sure to smooth the compound in a way that creates a seamless transition between the two surfaces. Feather the compound along the edges for a blended and professional appearance.
Remember to take your time during the smoothing and leveling process, as attention to detail is key. Regularly inspect the surface for any imperfections and work on them before the compound fully sets. This will ensure that you achieve the desired level and finish for your bathroom floor.
Once you are satisfied with the smoothing and leveling, the next step is to allow the compound to dry completely. We’ll discuss this in the next section.
Allowing the Compound to Dry
After smoothing and leveling the self-leveling compound on your bathroom floor, the next crucial step is to allow it to dry completely. Proper drying is essential to ensure the compound sets and hardens, providing a stable and even surface for your new flooring. Follow these steps to allow the compound to dry effectively:
- Read the manufacturer’s instructions: Refer to the manufacturer’s guidelines to determine the recommended drying time for the specific self-leveling compound you’re using. Drying times can vary depending on factors such as temperature and humidity.
- Minimize foot traffic: After applying the compound, it’s important to minimize foot traffic on the floor to avoid disturbing the drying process. Avoid walking on the compound unless necessary and remind others in your household to do the same.
- Allow sufficient drying time: It’s crucial to give the compound ample time to dry and harden before proceeding with any further installation or finishing tasks. This typically ranges from 24 to 48 hours, but can vary depending on the specific compound and environmental conditions.
- Monitor the drying process: Keep an eye on the compound during the drying period to ensure that it is setting properly. Look out for any signs of cracking or uneven drying, which may require additional attention or adjustment.
- Avoid moisture exposure: During the drying process, it’s important to keep the floor free from any moisture or water exposure. This can compromise the drying and hardening of the self-leveling compound. Take precautions to prevent any water spills or leaks that could affect the drying process.
- Perform a dryness test: Once the recommended drying time has elapsed, perform a dryness test to ensure the compound is fully dry. Touch the surface with the back of your hand or a moisture meter. If it feels cool or damp, allow more time for drying.
Remember that the drying time can vary, so it’s important to be patient and allow the compound enough time to fully dry. Rushing this step can lead to problems down the line, so prioritize the proper drying of the compound for the best results.
Once you are confident that the compound is fully dry, you can move on to the next step of inspecting the leveled floor before proceeding with your desired flooring installation.
Inspecting the Leveled Floor
After allowing the self-leveling compound to dry completely on your bathroom floor, it’s important to inspect the leveled surface before proceeding with any further installations or finishing touches. This inspection will ensure that the leveling process was successful and that the floor is ready for the next steps. Follow these guidelines to conduct a thorough inspection:
- Check for evenness: Use a straight edge, level tool, or even a marble to assess the evenness of the floor. Place the straight edge or level tool in various spots across the floor, making sure it is in contact with the entire surface. This will help you identify any areas that may still have slight unevenness.
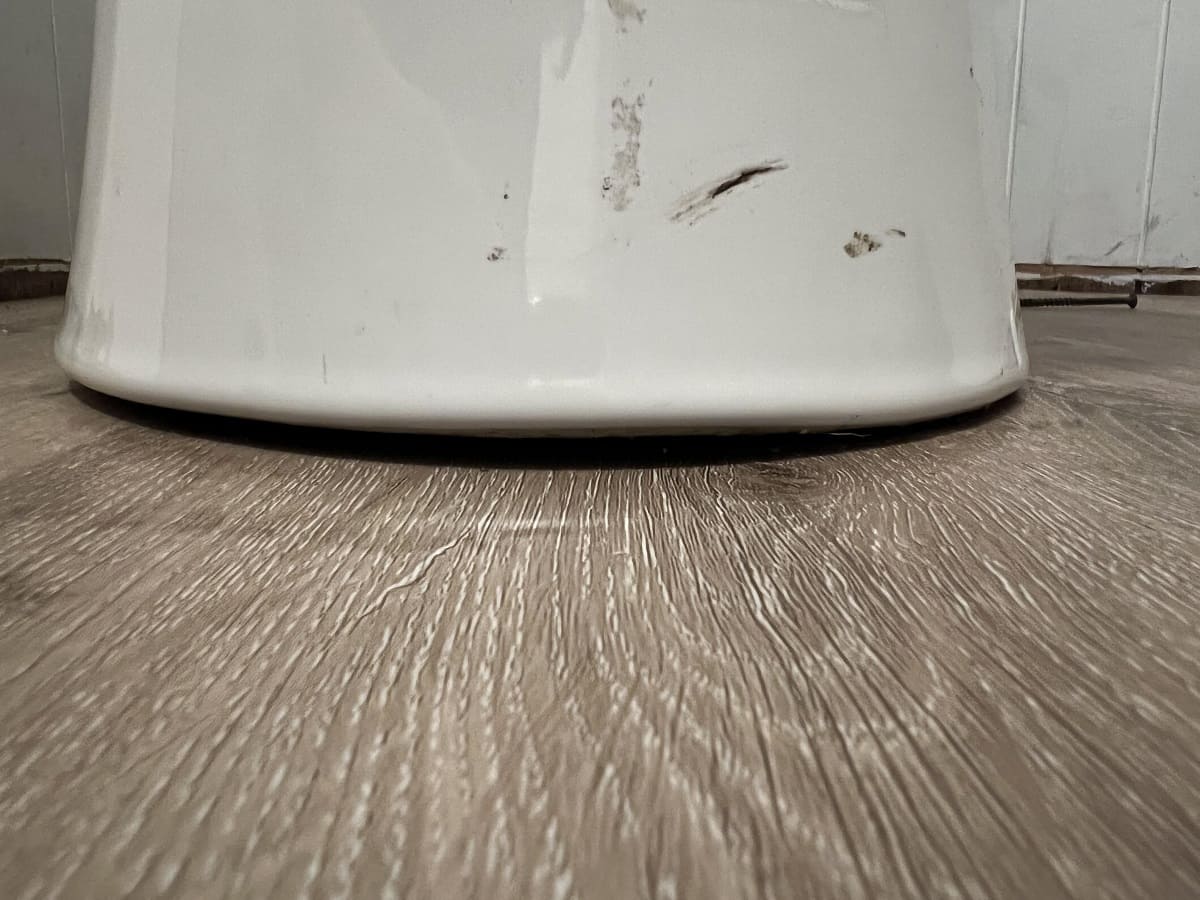
- Look for cracks or signs of damage: Inspect the leveled floor closely for any cracks, chips, or signs of damage. Pay attention to areas that were previously problematic, such as where the floor meets the walls or other surfaces. If you spot any issues, you may need to address them before proceeding with your flooring installation.
- Ensure proper adhesion: Check that the self-leveling compound has adhered well to the underlying surface. There should be no areas where the compound is peeling or separating from the floor. Any loose or poorly adhered sections will need to be addressed and repaired.
- Confirm the levelness: Carefully walk across the leveled floor, feeling for any areas that may feel spongy or uneven underfoot. This can indicate areas that may require additional attention or further leveling.
- Inspect for remaining imperfections: Check for any remaining imperfections, such as small bumps, ridges, or uneven edges. These can be addressed by gently sanding or using a leveling compound specifically designed for such purposes.
- Consider professional consultation: If you have any concerns or doubts about the results of your leveling job, it’s advisable to consult with a professional contractor or flooring specialist. They can provide expert advice and guidance to ensure that your floor is properly leveled and ready for the next steps.
By conducting a thorough inspection, you can ensure that the leveled floor meets your expectations and requirements. Taking the time to address any remaining issues or imperfections will result in a high-quality and durable flooring installation.
Once you’ve completed the inspection and are satisfied with the leveled floor, you can proceed with confidence to the next steps of installing your chosen flooring material in your bathroom.
Read more: How To Level A Concrete Floor
Conclusion
Congratulations! You have successfully learned how to level a bathroom floor. By following the steps outlined in this comprehensive guide, you have gained valuable knowledge and skills to achieve a smooth and even surface for your new flooring.
Remember, the key to a successful leveling job is thorough assessment, proper preparation, and meticulous application of the self-leveling compound. Take the time to evaluate your bathroom floor, gather the necessary materials and tools, and prepare the surface before pouring and spreading the compound. Smoothing and leveling the compound with care will result in a professional-looking finish.
Throughout the process, be sure to follow the manufacturer’s instructions for the self-leveling compound you’re using. Take adequate drying time and inspect the leveled floor for any imperfections or areas that require further attention. It’s essential to address any remaining issues to ensure the best results for your flooring installation.
If you have any concerns or doubts about your DIY skills or the condition of your bathroom floor, it’s always a good idea to consult with a professional contractor or flooring specialist. They can provide expert advice and guidance to ensure that your floor is properly leveled and ready for the next steps.
Now that your bathroom floor is leveled and ready, you can move forward with confidence to install your desired flooring material. Whether you choose tiles, hardwood, or any other flooring option, you can be confident that your bathroom will have a visually appealing and stable foundation.
We hope this guide has been informative and helpful on your journey to level a bathroom floor. Best of luck with your project!
Frequently Asked Questions about How To Level Bathroom Floor
Was this page helpful?
At Storables.com, we guarantee accurate and reliable information. Our content, validated by Expert Board Contributors, is crafted following stringent Editorial Policies. We're committed to providing you with well-researched, expert-backed insights for all your informational needs.


0 thoughts on “How To Level Bathroom Floor”