Articles
How To Self-Level Concrete Floor
Modified: January 6, 2024
Learn how to self level your concrete floor with this informative article. Find step-by-step instructions and expert tips to achieve a smooth and level surface.
(Many of the links in this article redirect to a specific reviewed product. Your purchase of these products through affiliate links helps to generate commission for Storables.com, at no extra cost. Learn more)
Introduction
Welcome to the world of self-leveling concrete floors! If you’re looking to create a smooth and level surface for your concrete floor, you’ve come to the right place. Self-leveling concrete is a popular choice for many homeowners and contractors due to its ease of use and ability to create a flawless finish.
In this article, we will delve into the basics of self-leveling concrete, including how it works, the preparation required, and the steps involved in achieving a perfectly leveled floor. Whether you’re planning a DIY project or considering hiring a professional, this guide will equip you with the knowledge needed to successfully self-level your concrete floor.
Self-leveling concrete is a polymer-modified cementitious material that is used to even out uneven or sloping floors. It is designed to flow and spread evenly, filling in low spots and creating a smooth and level surface. This makes it an ideal solution for addressing unevenness caused by factors such as settling, cracks, or inconsistent concrete pours.
Before you begin the process of self-leveling your concrete floor, it’s important to understand the key principles behind it. Self-leveling compounds are designed to have a low viscosity, allowing them to flow easily and self-level once poured onto a surface. They contain various additives that help with the flowability, setting time, and strength of the compound.
Now, let’s dig deeper into the process of self-leveling a concrete floor. We’ll discuss the necessary preparation, the tools and materials you’ll need, the steps involved in mixing and pouring the compound, and the finishing options and considerations to keep in mind.
If you’re ready to transform your uneven concrete floor into a smooth and level masterpiece, let’s get started!
Key Takeaways:
- Achieving a smooth and level self-leveled concrete floor requires thorough preparation, precise mixing and pouring, and careful smoothing and leveling to create a flawless finish.
- Selecting the right finishing option for your self-leveled floor, such as tiles, wood flooring, or stained concrete, can enhance the aesthetic and functionality of your space, but it’s crucial to consider compatibility and maintenance requirements.
Read more: How To Level A Concrete Floor
Understanding Self-Leveling Concrete
Before diving into the process of self-leveling your concrete floor, it’s important to have a solid understanding of what self-leveling concrete is and how it works. This will help you make informed decisions throughout the process and ensure a successful outcome for your project.
Self-leveling concrete is a specialized mixture that is designed to flow and settle evenly, creating a level surface. It is typically composed of a combination of Portland cement, fine aggregates, polymer modifiers, and other additives. These ingredients work together to achieve the desired flowability and self-leveling properties.
The key characteristic of self-leveling concrete is its low viscosity, which allows it to spread evenly over the surface and fill in low areas. This makes it an ideal solution for leveling uneven or sloping floors, as it can compensate for height differences and create a smooth and level base for various types of flooring materials.
When compared to traditional concrete mixes, self-leveling concrete has a higher amount of flow-enhancing additives. These additives help the mixture to have a thinner consistency, allowing it to easily flow and self-level once poured. This ensures that the compound can reach even the tightest spaces and create a consistent surface without the need for extensive manual leveling.
Self-leveling concrete also offers a faster drying and curing time compared to traditional concrete mixes. This means that you can often proceed with installing your desired flooring material within a shorter timeframe, reducing the overall project duration.
One important thing to note about self-leveling concrete is that it is not a structural material. It is primarily used for creating a level surface and should not be relied upon to provide structural support. If you have significant structural issues with your concrete floor, it is essential to address those problems separately before attempting to self-level the surface.
It’s worth mentioning that there are different types of self-leveling compounds available on the market, each with its own characteristics and intended applications. Some self-leveling compounds are designed for interior use only, while others are suitable for both interior and exterior projects. Additionally, there are specific compounds formulated for use with radiant heat systems or to provide additional soundproofing.
Understanding the properties and limitations of the self-leveling compound you choose is crucial to ensure the success of your project. Be sure to carefully read the manufacturer’s instructions and product specifications to choose the right compound for your specific needs.
Now that we have a solid understanding of self-leveling concrete, let’s move on to the preparation required before you can begin the self-leveling process.
Preparing the Concrete Floor
Before you can start self-leveling your concrete floor, it’s important to thoroughly prepare the surface to ensure proper adhesion and a smooth finish. Preparing the concrete floor involves several steps to clean, repair, and prime the surface. Let’s explore each of these steps in detail.
- Clean the surface: Begin by removing any existing flooring materials, such as carpet, tiles, or adhesive residue. Use a scraper or floor stripper to scrape away any loose debris or uneven spots on the surface. Next, sweep or vacuum the entire area to remove dust and dirt. It’s important to have a clean and debris-free surface for the self-leveling compound to properly adhere.
- Repair cracks and holes: Inspect the concrete floor for any cracks, holes, or damaged areas. These imperfections can interfere with the leveling process and may cause the compound to crack or settle unevenly. Fill any cracks or holes using a concrete patching compound and a trowel. Follow the manufacturer’s instructions for the specific patching compound you are using.
- Smooth out high spots: If you have any high spots or ridges on the concrete floor, use a grinder or a floor leveling compound to smooth them out. This will help create a more even and uniform surface for the self-leveling compound to be applied.
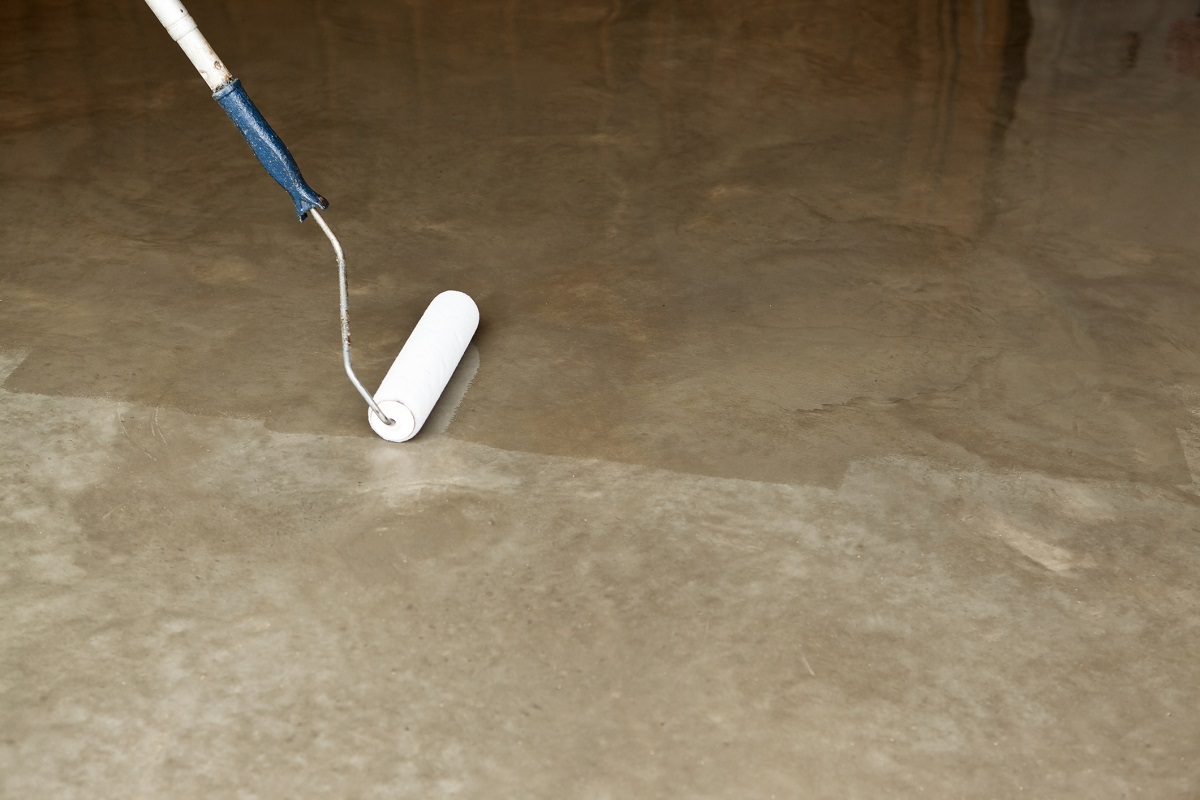
- Prime the surface: Applying a primer is an essential step to enhance the adhesion of the self-leveling compound to the concrete floor. Choose a primer that is compatible with the self-leveling compound you are using. Follow the manufacturer’s instructions to apply an even coat of primer using a brush or roller. Allow the primer to dry completely before proceeding to the next step.
By properly preparing the concrete floor, you are setting the foundation for a successful self-leveling process. This ensures that the self-leveling compound bonds effectively to the surface and prevents any potential issues that may arise from a poorly prepared substrate.
Once you have completed the preparation process, you are ready to move on to the next step: gathering the necessary tools and materials for self-leveling your concrete floor.
Gathering the Necessary Tools and Materials
Before you can begin self-leveling your concrete floor, it’s important to gather all the necessary tools and materials. Having everything ready and within reach will make the process smoother and more efficient. Let’s explore the essential tools and materials you’ll need for the job.
Tools:
- Trowel: A trowel is used for mixing the self-leveling compound and spreading it over the floor surface.
- Broom or brush: You’ll need a broom or brush for sweeping and cleaning the floor before applying the self-leveling compound.
- Mixing paddle or drill attachment: This tool is essential for mixing the self-leveling compound. It can be a mixing paddle that attaches to a power drill or a specifically designed mixing attachment.
- Bucket or mixing container: You’ll need a clean and sturdy container, such as a bucket or mixing container, to mix the self-leveling compound.
- Measuring tools: Depending on the instructions provided by the self-leveling compound manufacturer, you may need measuring tools such as a measuring cup or a scale to ensure the proper ratio of compound to water.
- Squeegee or floor squeegee: A squeegee is used to spread and move the self-leveling compound across the floor surface for an even distribution.
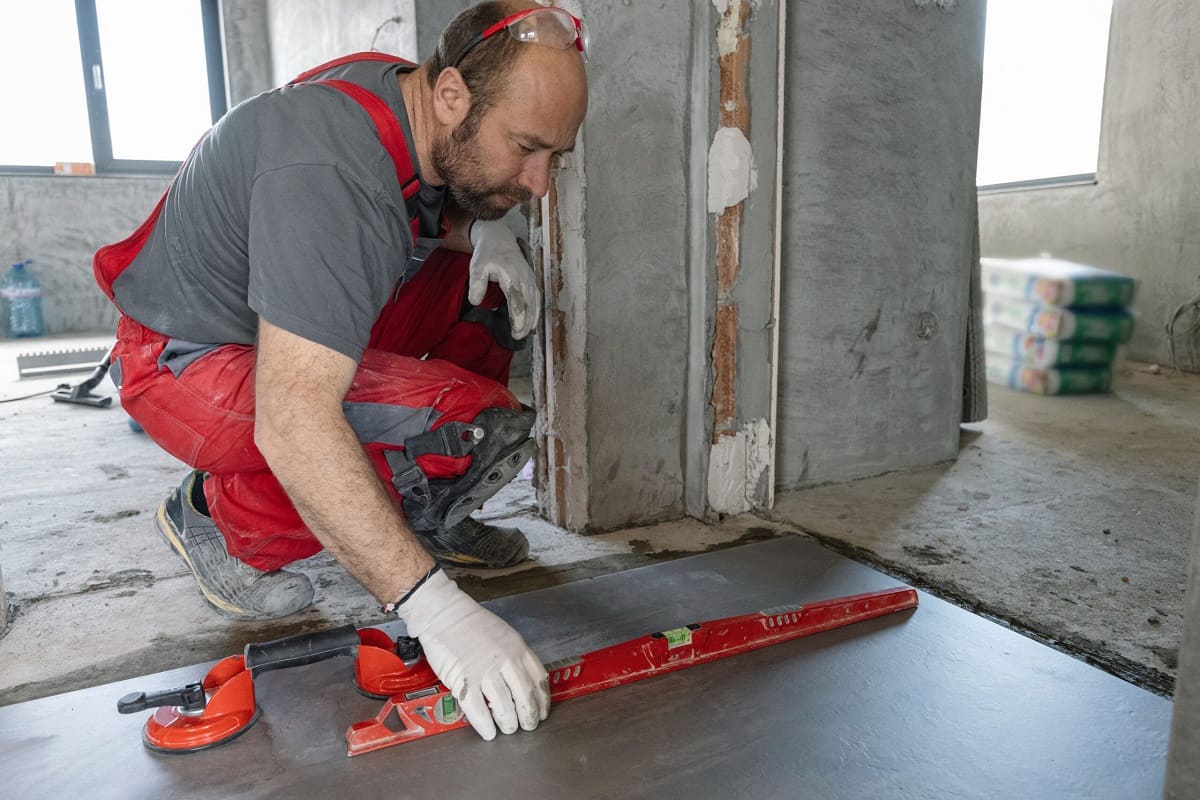
- Level: A level is crucial for determining if the surface is truly level and for making adjustments during the leveling process.
- Protective gear: Don’t forget to prioritize safety by wearing proper protective gear, including gloves, safety glasses, and a mask or respirator to protect yourself from any potential dust or fumes.
Read more: How To Level A Concrete Basement Floor
Materials:
- Self-leveling compound: Ensure you have enough self-leveling compound to cover the entire floor area. The amount needed will depend on the square footage and the thickness required for leveling.
- Water: Most self-leveling compounds require water to be mixed in. Consult the manufacturer’s instructions for the specific ratio of water to compound.
- Primer: If not already applied during the preparation stage, make sure you have the appropriate primer for your self-leveling compound. This will improve adhesion to the concrete floor.
- Concrete patching compound: If you have any cracks or holes in the floor, make sure you have a patching compound suitable for the repair.
By gathering all the necessary tools and materials in advance, you can ensure a smooth and efficient self-leveling process without any interruptions or delays. Once you have everything ready, it’s time to move on to the mixing and pouring stage.
Mixing the Self-Leveling Compound
Now that you have all your tools and materials ready, it’s time to mix the self-leveling compound. Properly mixing the compound is crucial for achieving the desired flow and consistency. Follow these steps to ensure a well-mixed and smooth self-leveling compound.
1. Read the instructions: Start by carefully reading and understanding the manufacturer’s instructions for the self-leveling compound you’re using. Pay attention to the recommended mixing ratios, as they may vary depending on the brand and type of compound. 2. Prepare the mixing container: Use a clean and sturdy bucket or mixing container that is big enough to accommodate the amount of compound needed. Make sure it is clean and free from any dirt or debris that could contaminate the mixture. 3. Add the compound: Slowly pour the self-leveling compound into the mixing container. Gradually add the compound to the water, following the manufacturer’s instructions for the correct mixing ratio. It’s essential to add the compound to water and not the other way around to ensure proper dispersion and avoid clumping. 4. Mixing the compound: Use a mixing paddle attached to a power drill or a specialized mixing attachment to mix the compound and water together. Start at a low speed and gradually increase the speed to achieve a consistent and lump-free mixture. Be sure to scrape the sides and bottom of the container to ensure all the dry compound is incorporated. 5. Check the consistency: As you mix, periodically check the consistency of the compound. It should have a flowable yet thick consistency similar to pancake batter. If it is too thick, add a small amount of water, or if it is too thin, add a small amount of the self-leveling compound to adjust the consistency. 6. Avoid over-mixing: Be careful not to over-mix the compound, as this can introduce air bubbles into the mixture, leading to an uneven finish. Mix the compound just until it reaches a smooth and uniform consistency. 7. Allow the mixture to rest: After mixing, allow the compound to rest for a few minutes as recommended by the manufacturer. This allows any air bubbles introduced during mixing to rise to the surface and dissipate. 8. Stir gently: Before pouring and spreading the self-leveling compound, give it a gentle stir to ensure an even distribution of the mixture. Remember, always follow the specific instructions provided by the manufacturer for the best results. Mixing the self-leveling compound correctly is vital to ensure a smooth and self-leveling application. Now that your compound is mixed, you’re ready to move on to the next step: pouring and spreading the compound onto the floor surface.
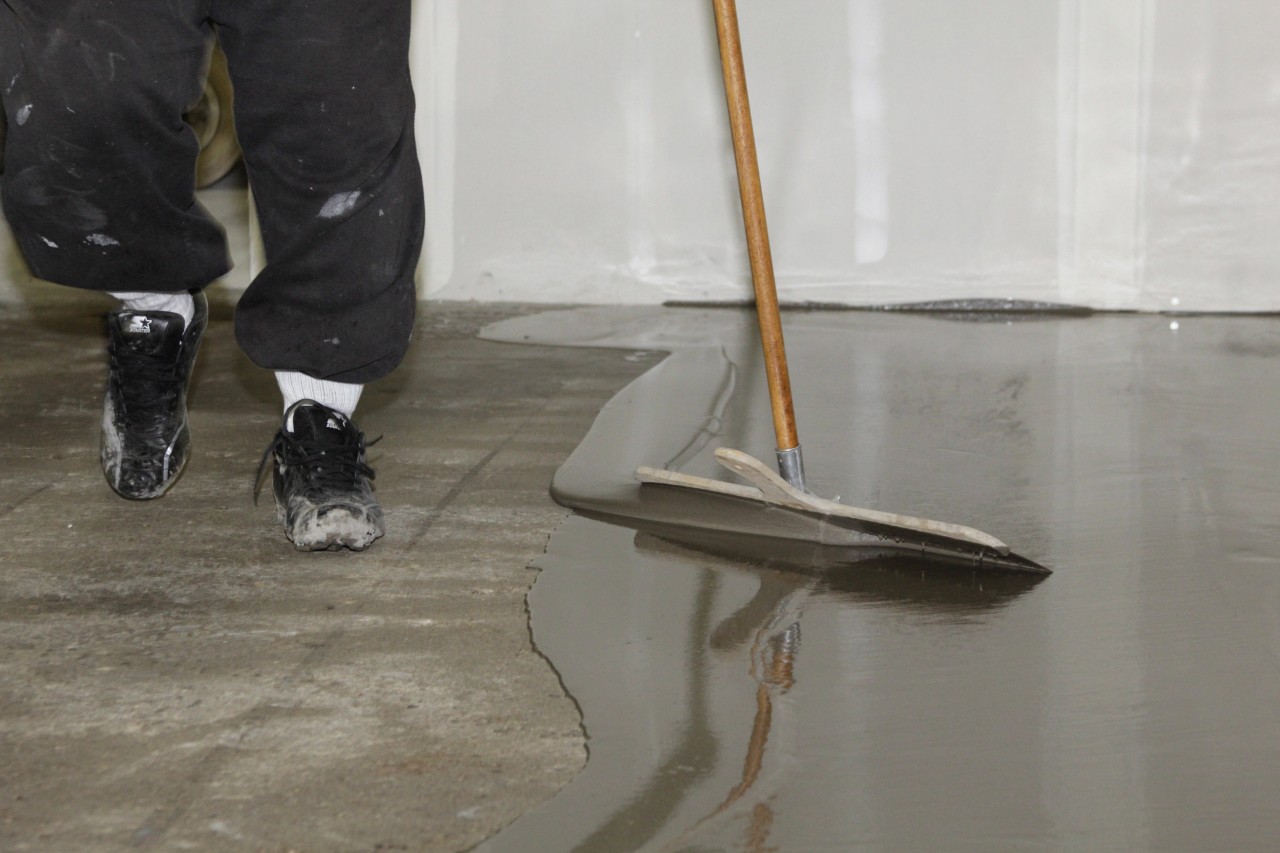
Pouring and Spreading the Compound
Once the self-leveling compound is mixed to the desired consistency, it’s time to pour and spread it onto the concrete floor. This step requires careful precision to achieve an even and level surface. Follow these steps to pour and spread the self-leveling compound effectively.
1. Divide the floor into sections: Depending on the size of the floor area, divide it into manageable sections to ensure you have enough time to pour and spread the compound before it starts to set. It’s best to work in small sections, allowing you to focus on one area at a time. 2. Pour the compound: Start by pouring the self-leveling compound onto the floor within one section. Begin at the farthest point from the exit to avoid walking on the freshly poured compound. Pour the compound in a thin, continuous stream along one edge of the section. 3. Spread the compound: Use a squeegee or floor squeegee to spread the compound evenly over the floor surface, working from the poured edge towards the opposite edge. Gradually push the compound across the floor, allowing it to self-level and fill any low spots or uneven areas. Continue spreading until the entire section is covered with a consistent layer. 4. Work quickly: Self-leveling compounds have a limited working time, so it’s important to work efficiently and quickly. Keep in mind that the compound will begin to set within a specific time frame, which varies depending on the product. Refer to the manufacturer’s instructions for the recommended working time. 5. Avoid overworking: Once you’ve spread the compound across the section, avoid excessive reworking or over manipulation of the surface. This can disrupt the self-leveling properties of the compound and lead to an uneven finish. Instead, focus on achieving an even and smooth application. 6. Use a leveling tool: For larger areas or if necessary, you can use a leveling tool, such as a long straight-edge or a screed, to ensure an even application. Place the leveling tool on the surface and move it in a back and forth motion to distribute the compound evenly across the section. 7. Continue with the next sections: Repeat the pouring and spreading process for each section, working your way across the entire floor. Make sure to overlap the edges of each section slightly to create a seamless transition. 8. Double-check for any missed spots: Once you’ve finished pouring and spreading the compound, inspect the floor surface for any missed areas or low spots. If necessary, add more compound to fill in any gaps or uneven areas. Remember to work efficiently and swiftly to ensure a smooth and level surface. It’s important to work within the recommended working time of the self-leveling compound to achieve the best results. Once the compound has been poured and spread, the next step is to smooth and level the surface for the final finish.
When self-leveling a concrete floor, make sure to properly prepare the surface by cleaning and priming it before applying the self-leveling compound. This will ensure a smooth and even finish.
Smoothing and Leveling the Surface
After pouring and spreading the self-leveling compound onto the concrete floor, the next step is to smooth and level the surface. This process involves using tools to ensure an even and flawless finish. Follow these steps to achieve a smooth and level surface for your self-leveled floor.
1. Check the surface: Before you begin smoothing and leveling, carefully inspect the surface for any irregularities or areas that may require additional attention. Look for any low spots or high spots that need to be addressed during the leveling process. 2. Use a smoothing tool: A smoothing tool, such as a smoothing trowel or a long-handled squeegee, is used to distribute and level the self-leveling compound across the floor surface. Begin by gently gliding the smoothing tool over the surface, making sure to apply even pressure to achieve an even distribution of the compound. 3. Fill low spots: If you come across any low spots or depressions on the floor surface, use the smoothing tool to push more compound into these areas. Work the compound into the low spots, ensuring they are filled to match the level of the rest of the floor. 4. Level high spots: If you encounter any high spots on the floor, use the smoothing tool or a trowel to gently scrape away the excess compound. Gradually level the high spots by scraping the compound until it matches the surrounding area. 5. Smooth out ridges and imperfections: As you work across the floor, pay attention to any ridges or imperfections that may arise. Use the smoothing tool to lightly glide over these areas, smoothing them out and creating a seamless surface. 6. Inspect for air bubbles: While smoothing and leveling, keep an eye out for any air bubbles that may have formed during the pouring and spreading process. If you spot any bubbles, gently pop them using a pin or a nail to prevent them from creating visible imperfections on the surface. 7. Check for proper leveling: Continuously check the levelness of the surface as you work. Utilize a level or a straight-edge to ensure that the floor is sufficiently leveled. Make any necessary adjustments to create a smooth and even surface. 8. Smooth transitions: Pay special attention to the edges and transitions between different sections. Blend these areas to create seamless transitions by feathering the compound to create a smooth and continuous surface. 9. Allow for curing: Once you have finished smoothing and leveling the surface, follow the manufacturer’s instructions regarding the curing time. Allow the self-leveling compound to cure and dry thoroughly before proceeding with any further steps or installing your desired flooring material. By carefully smoothing and leveling the surface of your self-leveled floor, you’ll achieve a seamless and flawless result that is ready for the next stage. The curing and drying process is just as important, as it allows the compound to fully set and prepare the floor for the final finishing touches.
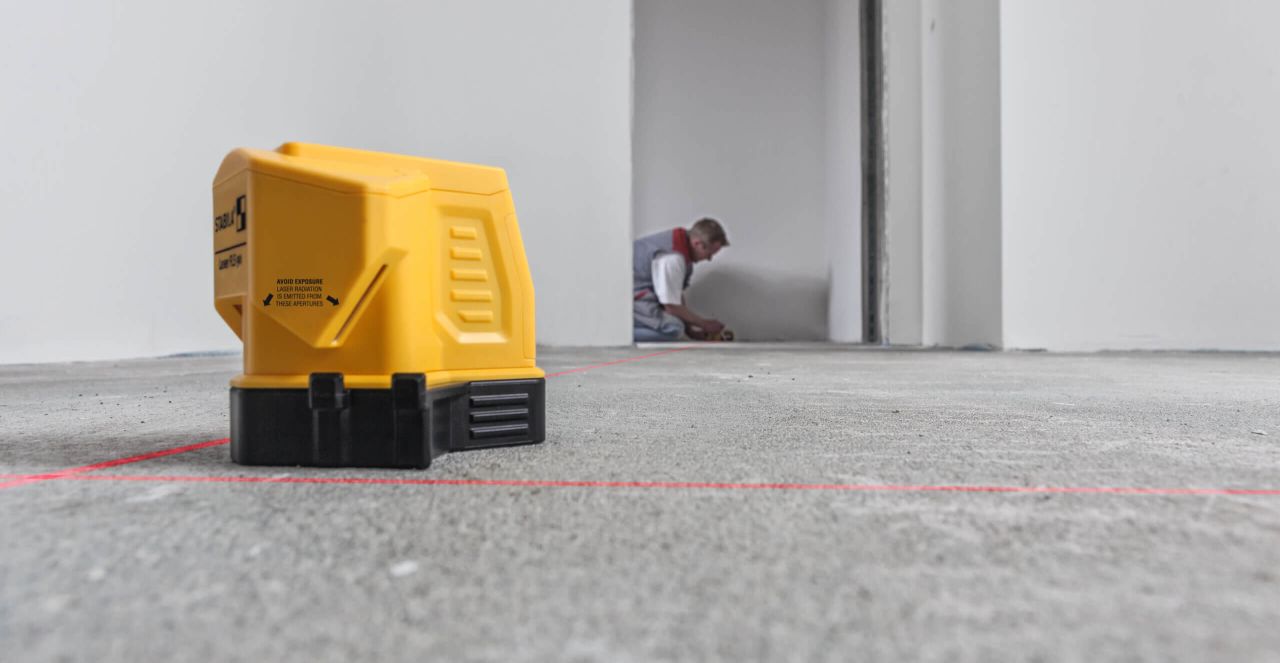
Read more: How To Use A Laser Level For Concrete
Curing and Drying the Floor
After smoothing and leveling the surface of your self-leveled floor, it’s crucial to allow the compound to properly cure and dry. Curing and drying ensure that the floor is ready for the final finishing touches, such as installing flooring materials. Follow these steps to achieve optimal curing and drying for your self-leveled floor.
1. Follow manufacturer’s instructions: First and foremost, consult the instructions provided by the manufacturer of the self-leveling compound. Each product may have specific recommendations for curing and drying times, so it’s important to follow these guidelines for the best results. 2. Allow for curing time: Curing is the process by which the self-leveling compound develops its strength and stability. It’s crucial to allow the compound sufficient time to cure before subjecting it to any additional stress or adding a flooring material on top. This generally takes anywhere from 24 hours to several days, depending on the product and environmental conditions. 3. Provide proper ventilation: During the curing process, it’s important to maintain proper ventilation in the area. Open windows or use fans to promote air circulation, which can help speed up the drying time and facilitate proper curing. 4. Avoid foot traffic: Stepping on the self-leveled floor too soon can disrupt the curing process and lead to unevenness or damage. To ensure a smooth and even surface, avoid walking on the floor until it has fully cured according to the manufacturer’s recommendations. 5. Monitor humidity and temperature: Keep an eye on the humidity and temperature levels in the area where the self-leveled floor is curing. Extreme temperature fluctuations or high humidity can affect the drying time and the overall quality of the cured surface. Aim for a controlled environment with moderate temperatures and humidity levels. 6. Perform a moisture test: Before proceeding with any further steps or installing flooring materials, it’s important to ensure that the self-leveled floor is fully dried. Perform a moisture test using a moisture meter, following the manufacturer’s instructions. This will confirm if the floor is ready for the next stage. 7. Seal or prime the surface: Depending on the type of flooring material you plan to install, you may need to seal or prime the self-leveled floor before proceeding. Follow the recommendations of the flooring manufacturer for specific primers or sealers that are compatible with the self-leveling compound. 8. Proceed with flooring installation: Once the self-leveled floor is fully cured, dried, and prepped, you can proceed with the installation of your desired flooring material. Follow the appropriate installation methods and techniques based on the specific type of flooring you have chosen. By allowing proper curing and drying time, you ensure the strength, stability, and longevity of your self-leveled floor. Patience during this stage will lead to a solid foundation for your chosen flooring, providing a durable and beautiful finish to your space.
Finishing Options and Considerations
Once your self-leveled floor is cured and dried, you have several finishing options to consider. The choice of finish will depend on your desired aesthetic, the intended use of the space, and the compatibility with the self-leveling compound. Here are some popular finishing options and key considerations to keep in mind:
1. Tile or Stone: Installing tiles or stone is a popular choice for self-leveled floors, offering durability and a wide range of design options. Ensure that the self-leveling compound is compatible with tile adhesives and grout, and follow the manufacturer’s guidelines for the installation process. 2. Wood Flooring: Wood flooring can add warmth and character to a space. Ensure the self-leveled floor is level and properly cured, and follow the manufacturer’s recommendations for installation methods suitable for self-leveled floors. 3. Carpet: Installing carpet over a self-leveled floor can create a comfortable and cozy atmosphere. Ensure that the self-leveling compound is fully dried and smooth before installing the carpet. Professional installation may be preferred to ensure a seamless and long-lasting result. 4. Stained Concrete: Staining the self-leveled concrete floor can enhance its appearance and create a unique, decorative finish. Check compatibility with the self-leveling compound and follow proper staining techniques and sealant application to achieve the desired look. 5. Epoxy Coating: Epoxy coatings provide a glossy and durable finish. It’s important to check the compatibility of the self-leveling compound with the selected epoxy product and follow the manufacturer’s instructions for proper application and curing. 6. Polished Concrete: Polishing the self-leveled floor can create a sleek, modern look. Ensure that the self-leveling compound is fully cured and consult with professionals for the appropriate polishing technique and equipment. 7. Consider floor heating: If you’re interested in adding radiant floor heating, self-leveled floors are an excellent option. Discuss with professionals to determine the compatibility of the self-leveling compound with the heating system and follow installation guidelines provided by the manufacturer. 8. Maintenance: Consider the maintenance requirements of the finishing option you choose. Some materials may require regular cleaning, sealing, or refinishing to maintain their appearance and durability. 9. Hire professionals: Depending on the complexity of the finishing option and your level of expertise, hiring professionals may be the best choice to ensure a high-quality and long-lasting result. They have the knowledge and experience to tackle the specific challenges associated with different finishing options. When selecting a finishing option for your self-leveled floor, take into account your personal preferences, the style of the space, and the functionality required. Consulting with professionals and following manufacturer’s instructions will help you make informed decisions and achieve the desired aesthetic and durability for your floor.
Conclusion
Self-leveling your concrete floor is a rewarding project that can transform uneven and damaged surfaces into smooth and level masterpieces. By understanding the principles of self-leveling concrete, preparing the floor properly, and following the correct techniques, you can achieve professional-looking results whether you’re a seasoned DIY enthusiast or considering hiring a professional.
Throughout this article, we’ve explored the process of self-leveling your concrete floor, including understanding self-leveling concrete, preparing the surface, gathering the necessary tools and materials, mixing the self-leveling compound, pouring and spreading the compound, smoothing and leveling the surface, and the importance of curing and drying the floor. We’ve also discussed finishing options and key considerations to keep in mind.
Remember to carefully read and follow the manufacturer’s instructions at each step of the process. This will ensure the best results and help avoid any pitfalls or issues that may arise. Take the time to properly prepare the floor, mix the self-leveling compound correctly, and pay attention to smoothing and leveling the surface for a flawless finish.
When choosing a finishing option for your self-leveled floor, consider factors such as durability, aesthetics, compatibility with the self-leveling compound, and maintenance requirements. Whether you decide on tiles, wood flooring, carpet, stained concrete, epoxy coating, or polished concrete, each option offers unique benefits and can contribute to the overall look and feel of your space.
Lastly, if you’re unsure about any part of the process or have concerns about tackling the project yourself, don’t hesitate to reach out to professionals. They can provide expert advice and ensure that your self-leveled floor meets your expectations.
By following the right steps, having the necessary tools and materials, and maintaining patience and precision, you can achieve a flawless self-leveled concrete floor that enhances the beauty and functionality of your space for years to come.
Frequently Asked Questions about How To Self-Level Concrete Floor
Was this page helpful?
At Storables.com, we guarantee accurate and reliable information. Our content, validated by Expert Board Contributors, is crafted following stringent Editorial Policies. We're committed to providing you with well-researched, expert-backed insights for all your informational needs.


0 thoughts on “How To Self-Level Concrete Floor”