Articles
How To Make A Concrete Walkway
Modified: October 27, 2024
Learn how to create a durable and attractive concrete walkway with our informative articles. Gain expert tips and step-by-step instructions for a successful DIY project.
(Many of the links in this article redirect to a specific reviewed product. Your purchase of these products through affiliate links helps to generate commission for Storables.com, at no extra cost. Learn more)
Introduction
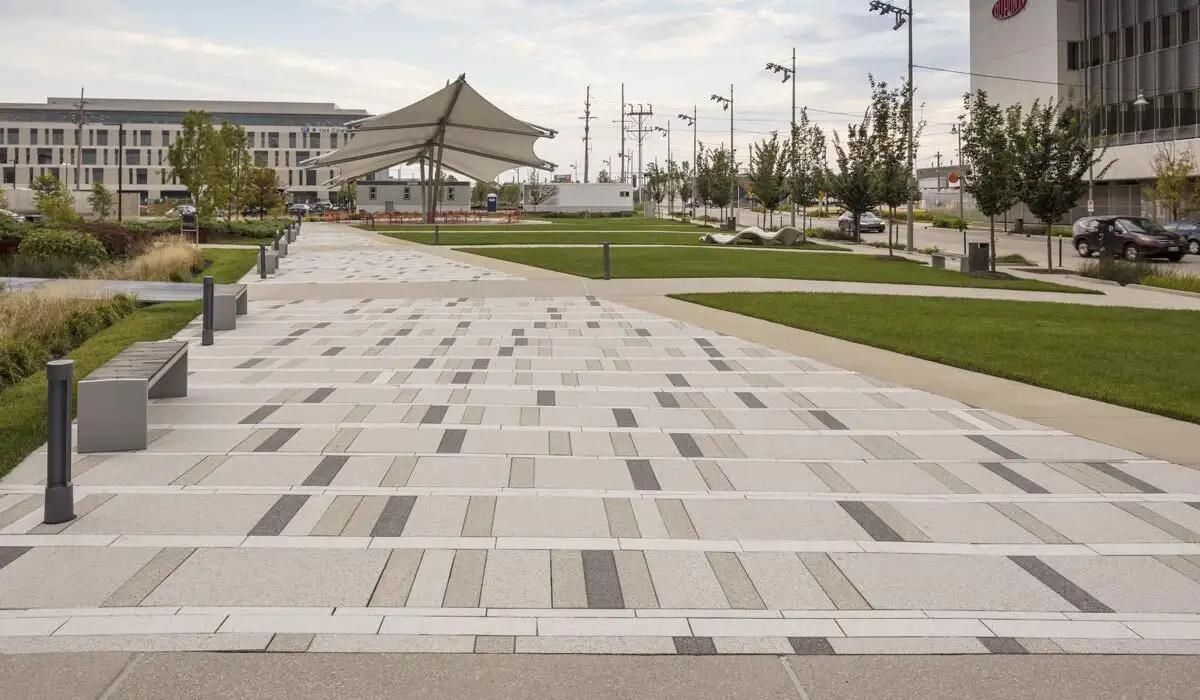
Concrete walkways are not only functional, but they can also add a touch of style and elegance to your outdoor space. Whether you want to create a welcoming path to your front door or a meandering walkway through your garden, building a concrete walkway is a great DIY project that can easily be done with some planning and the right tools.
In this article, we will guide you through the step-by-step process of creating a concrete walkway. From the initial planning stages to the finishing touches, we will cover everything you need to know to successfully complete this project. So, let’s get started!
Before you begin, it’s important to note that building a concrete walkway requires some physical labor and basic construction skills. However, with patience and careful execution, you can create a beautiful and durable walkway that will enhance the overall aesthetics of your outdoor space.
Throughout this article, we will provide detailed instructions and tips to help you achieve professional-looking results. From planning the layout to curing and sealing the concrete, we will cover each step in-depth to ensure that you have all the knowledge and guidance necessary for a successful project.
Additionally, we will discuss the materials and tools you will need, as well as provide helpful insights and recommendations to make your project as smooth as possible. We will also touch on important considerations such as drainage, design options, and potential challenges you may encounter along the way.
By the end of this article, you will have a comprehensive understanding of how to make a concrete walkway and be well-equipped to tackle this rewarding DIY project. So, let’s dive in and begin the journey to creating a beautiful and functional concrete walkway for your outdoor space!
Key Takeaways:
- Plan carefully, gather materials, and prepare the site before building a concrete walkway. Follow each step meticulously to create a durable, visually appealing addition to your outdoor space.
- Take pride in creating a beautiful and functional concrete walkway. From careful planning to meticulous finishing, each step contributes to a rewarding DIY project that enhances your outdoor environment.
Read more: How To Fix Uneven Concrete Walkway
Step 1: Planning
Planning is a crucial first step when it comes to building a concrete walkway. Taking the time to carefully plan your project will ensure that you achieve the desired outcome and avoid any costly mistakes along the way. Here are some key considerations for the planning phase:
- Layout and Design: Start by determining the layout and design of your walkway. Consider its purpose, such as connecting different areas of your outdoor space or creating a path to your front door. Take into account the size and shape of your available space, as well as any existing features or obstacles that may affect the path’s layout.
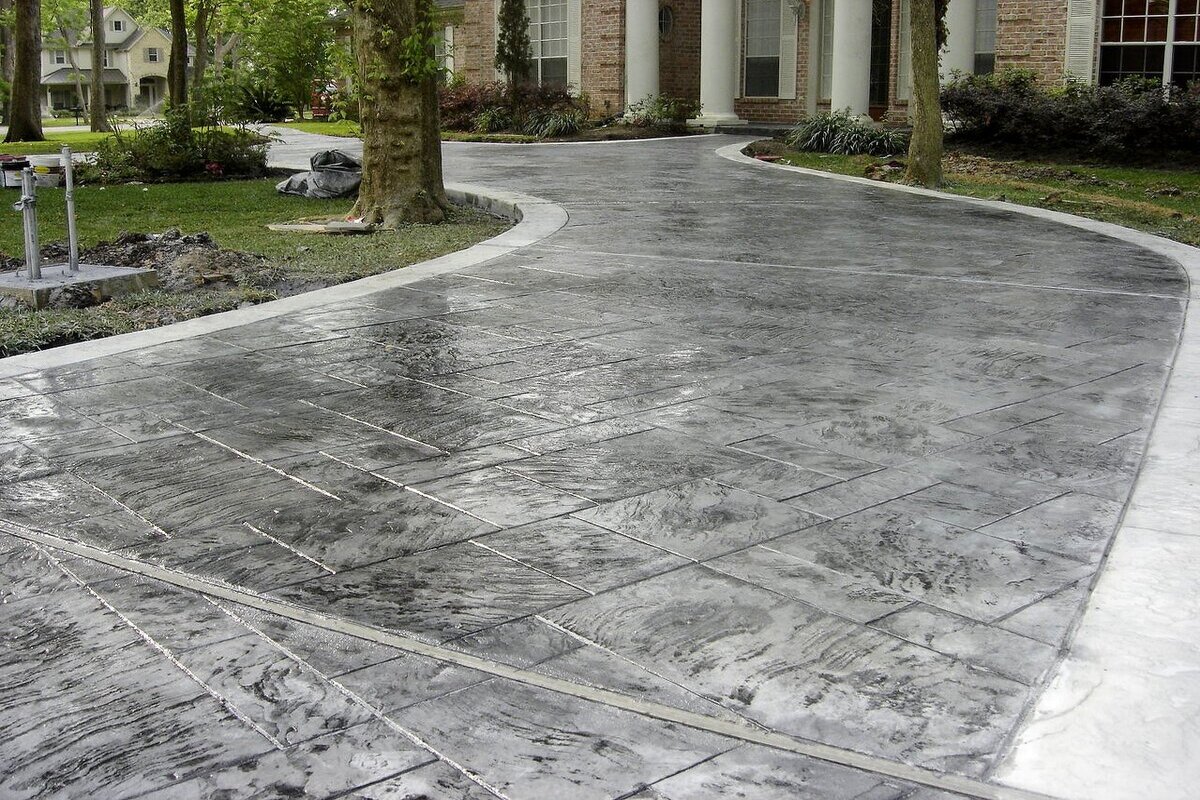
- Materials: Research the different materials available for your walkway, such as plain concrete or decorative options like stamped or stained concrete. Consider factors such as durability, maintenance, and aesthetic appeal when selecting the materials that best suit your needs and preferences.
- Drainage: Proper drainage is essential for preventing water accumulation and potential damage to your walkway. Evaluate the slope of your location and plan for adequate drainage by ensuring that the walkway slopes away from any structures or areas prone to water pooling.
- Budget: Determine your budget for the project, including the cost of materials, tools, and any professional assistance you may require. Take into account any additional features or enhancements you want to incorporate into your walkway, such as lighting or landscaping elements.
- Permits and Regulations: Check with your local authorities to ensure that you comply with any necessary permits or regulations for building a walkway on your property. This may include obtaining permits for excavation, adhering to setback requirements, or meeting specific design guidelines.
Once you have completed the planning phase and have a clear vision of your walkway project, you can move on to the next step: gathering the necessary materials and tools. It’s important to ensure that you have everything you need before starting construction to avoid unnecessary delays or interruptions.
Remember, careful planning is the foundation for a successful project. So take your time, consider all the variables, and create a well-thought-out plan for your concrete walkway.
Step 2: Gathering Materials and Tools
Before you can start building your concrete walkway, you’ll need to gather all the necessary materials and tools. Having everything prepared in advance will streamline the construction process and ensure that you’re well-equipped to complete the project. Here’s a list of the essential materials and tools you’ll need:
Materials:
- Concrete mix: Choose a high-quality concrete mix suitable for outdoor applications. Consider factors such as strength, durability, and weather resistance.
- Gravel or crushed stone: This is necessary for the base layer of your walkway to provide stability and proper drainage.
- Rebar or wire mesh: Reinforcement materials help to enhance the strength and structural integrity of your walkway.
- Formwork material: You’ll need either wood boards or reusable plastic forms to create the shape and structure of the walkway.
- Concrete sealant: Applying a sealant will protect your walkway from stains, moisture, and cracking over time.
- Optional: If you’re looking to add decorative touches to your walkway, you may need additional materials such as color pigments, stamp patterns, or stains.
Tools:
- Measuring tape and level: These tools will ensure that your walkway is accurately measured and level throughout the construction process.
- Shovel and rake: You’ll need these to excavate the area and spread the gravel or crushed stone base.
- Tamping tool: This tool is used to compact the base materials and ensure a solid foundation.
- Mixing equipment: Depending on the quantity of concrete needed, you can use a wheelbarrow and shovel or rent a concrete mixer for larger projects.
- Float and trowel: These tools will help you achieve a smooth and even finish on the surface of the concrete.
- Concrete edger: This tool is used to create clean edges and prevent chipping along the sides of the walkway.
- Broom or brush: A stiff-bristle broom or brush is necessary for creating a non-slip texture on the surface of the concrete.
- Protective gear: Don’t forget to wear safety goggles, gloves, and a dust mask to protect yourself during the construction process.
Once you have gathered all the materials and tools, it’s time to move on to the next step: site preparation. This involves clearing the area, marking the layout, and ensuring that the ground is ready for construction. Proper site preparation is crucial for the success of your concrete walkway project, so let’s proceed to the next step and get started!
Read more: How Thick Should Concrete Walkway Be
Step 3: Site Preparation
Site preparation is an important step in building a concrete walkway as it ensures a stable foundation and proper drainage. Taking the time to properly prepare the site will help to prevent future issues, such as cracking or sinking of the walkway. Here’s a breakdown of the site preparation process:
- Clear the area: Start by removing any obstacles or vegetation from the area where the walkway will be installed. This includes rocks, plants, and any other debris that may interfere with the construction process.
- Mark the layout: Use stakes and string to mark the outline of the walkway. This will help you visualize how the walkway will fit into your outdoor space and ensure that it aligns with your planned design.
- Excavate the area: Use a shovel or a small excavator to dig out the ground within the marked area. The depth of the excavation will depend on the thickness of the base and concrete layers specified in your design. Typically, a total excavation depth of 5-6 inches is recommended.
- Ensure proper slope: To ensure proper drainage, the walkway should have a slight slope away from any structures or areas vulnerable to water pooling. Aim for a slope of about 1/8 inch per foot of run. Use a level or a slope board to check the slope across the excavated area.
- Compact the soil: Compact the soil at the base of the excavation using a hand tamper or a mechanical compactor. This will help to create a stable foundation for your walkway. Repeat the compaction process in layers until the soil is well compacted.
- Add a base layer: Pour a layer of gravel or crushed stone onto the compacted soil. This layer will provide stability, proper drainage, and prevent the concrete from cracking. Level the base layer and compact it using a hand tamper or a mechanical compactor.
- Install edging: For a clean and professional-looking finish, consider installing edging along the sides of the walkway. This can be done using plastic or metal edging materials. Secure the edging into the ground to maintain the designated width and shape of the walkway.
Once the site is properly prepared, you’re ready to move on to the next step: building the formwork. The formwork will define the shape and structure of your walkway, so it’s important to pay attention to detail. Let’s dive into the next step and create the formwork for your concrete walkway!
Step 4: Building the Formwork
The formwork is an essential component of your concrete walkway as it creates the shape and structure of the final product. Building the formwork accurately will ensure that your walkway has clean lines, smooth edges, and the desired dimensions. Follow these steps to build the formwork for your concrete walkway:
- Measure and mark: Use measuring tape and stakes to mark the desired width and length of your walkway on the ground. Ensure that the formwork lines up with the layout you marked during the planning phase.
- Create the side forms: Cut the wood boards or use reusable plastic forms to create the side forms of the walkway. Make sure the boards are sturdy, straight, and properly aligned with the marked layout. Connect the boards at the corners using nails or screws to secure them in place.
- Check for level: Use a level to ensure that the side forms are level across the entire length of the walkway. Adjust the height of the forms by adding or removing soil underneath as necessary.
- Anchor the forms: To keep the side forms in place, use stakes driven into the ground at regular intervals along the outside edge. Make sure the stakes are firmly anchored and the forms remain secure.
- Add the expansion joints: Expansion joints allow for movement and prevent cracking in the concrete. Insert plastic or wooden expansion joint strips along the length of the walkway, placing them against the side forms. These strips should be positioned at regular intervals to accommodate the expected expansion and contraction of the concrete.
- Optional: Add reinforcement: Depending on the size and design of your walkway, you may want to include reinforcement. This can be in the form of rebar or wire mesh, which will help to strengthen the concrete and prevent cracking.
Once the formwork is properly built and in place, you’re ready to move on to the next step: mixing the concrete. Mixing the concrete correctly is crucial to ensure the durability and strength of your walkway. Let’s move on and learn how to mix the concrete for your project.
Step 5: Mixing the Concrete
Mixing the concrete correctly is essential to ensure the strength, durability, and workability of your walkway. Improperly mixed concrete may lead to weaker, crumbly surfaces or premature cracking. Follow these steps to mix the concrete for your walkway:
- Gather your materials and tools: Make sure you have all the necessary materials and tools at hand, including the concrete mix, water, a wheelbarrow, a shovel, and a mixing tool (such as a hoe or a concrete mixer).
- Read the instructions: Carefully read and follow the instructions provided by the manufacturer on the concrete mix bag. These instructions will specify the water-to-concrete ratio and any additional steps required.
- Wear protective gear: Put on safety goggles, gloves, and a dust mask to protect yourself from any potential hazards associated with handling concrete.
- Measure and add water: Use a bucket or a hose to measure the appropriate amount of water needed for the concrete mix. Slowly add the water into the wheelbarrow or concrete mixer, following the recommended water-to-concrete ratio.
- Add the concrete mix: Gradually add the concrete mix into the water, rather than pouring the water onto the concrete mix. This will help to ensure a more consistent and thorough distribution of the mix.
- Mix thoroughly: Use a shovel or a mixing tool to thoroughly blend the water and concrete mix together. Make sure to scrape the sides and bottom of the mixing container to incorporate all the dry mix and eliminate any pockets of unmixed material.
- Check the consistency: The concrete should have a workable consistency that allows for easy pouring and spreading, but is not too watery. It should hold its shape without being too stiff or too runny.
Properly mixed concrete will ensure that your walkway has the necessary strength and integrity to withstand foot traffic and the elements. Once the concrete is mixed to the appropriate consistency, it’s time to move on to the next step: pouring and leveling the concrete. Let’s dive in and continue the construction process!
Step 6: Pouring and Leveling the Concrete
Pouring and leveling the concrete is a critical step in creating a smooth and even surface for your walkway. This step requires careful precision and attention to detail to ensure a professional-quality result. Follow these steps to pour and level the concrete for your walkway:
- Prep the area: Before pouring the concrete, dampen the base layer with water. This will prevent the base from absorbing moisture from the concrete, which can affect its curing process.
- Pour the concrete: Start by pouring the concrete mix into the formwork, working from one end to the other. Fill the formwork to the desired depth, ensuring that the concrete is evenly distributed along the length of the walkway.
- Distribute the concrete: Use a shovel or a rake to spread the concrete evenly within the formwork. Make sure to push the concrete into the corners and edges, filling any gaps or voids.
- Level the surface: Use a screed board or a straight piece of wood to level the concrete surface. Place the screed board at one end of the formwork and slowly drag it across the surface, using a back-and-forth motion. This will remove excess concrete and create a flat, even surface.
- Smooth the surface: Use a bull float or a magnesium float to further smooth the surface of the concrete. Gently move the float across the surface, using long, sweeping motions to even out any minor imperfections or high spots.
- Check the level: Use a level to ensure that the surface is level from side to side and has a slight slope for proper drainage. Adjust the level by adding or removing concrete as necessary.
- Add finishing touches: Use an edging tool to create clean, crisp edges along the sides of the walkway. This will give it a polished and professional appearance.
It’s important to work quickly but efficiently during this step, as concrete begins to set within a relatively short period of time. Make sure to have your tools ready and a plan in place to ensure a smooth pouring and leveling process.
Once the concrete is poured and leveled, it’s time to move on to the next step: finishing the surface. This step will add the final touches to your walkway, so let’s continue the construction process and explore how to achieve a beautiful, durable finish!
Before pouring concrete for a walkway, make sure to properly prepare the area by leveling the ground, adding a base of gravel, and installing formwork to contain the concrete. This will ensure a strong and durable walkway.
Read more: How To Lay A Brick Walkway Over Concrete
Step 7: Finishing the Surface
Finishing the surface of your concrete walkway is an important step that adds both aesthetic appeal and functionality. The finishing process involves creating a smooth and slip-resistant surface while adding any desired decorative elements. Here are the steps to finishing the surface of your walkway:
- Wait for the bleed water to disappear: After pouring the concrete, wait until the surface water, known as bleed water, evaporates. This usually takes around 15 to 30 minutes, depending on weather conditions.
- Float the concrete: Use a float to smooth out any imperfections and create a uniform surface. This process also helps to consolidate the concrete, making it more durable. Start by using a bull float to cover larger areas, then switch to a hand float for more precise smoothing.
- Add texture: If you want to create a non-slip surface, work a broom across the concrete in parallel lines. This will create texture and improve traction, especially when the surface is wet.
- Consider decorative options: If you want to add decorative elements, such as stamping patterns or color pigments, this is the time to do it. Follow the manufacturer’s instructions for stamping or apply color pigments evenly across the surface for the desired effect.
- Smooth the edges: Use an edging tool or a trowel to smooth out the edges of the walkway. This will give it a clean and finished appearance.
- Cure the concrete: Cover the freshly finished concrete with a curing compound or plastic sheeting to prevent it from drying too quickly. Proper curing is crucial for the strength and longevity of your walkway.
During the finishing stage, it’s important to work carefully and pay attention to detail. Smooth out any rough areas, correct any imperfections, and ensure that the surface is uniform and visually appealing.
After finishing the surface, it’s time for the concrete to cure and harden. This process typically takes around 24 to 48 hours but can vary depending on weather conditions. Once the concrete is sufficiently cured, you can move on to the next step: curing and sealing the concrete to protect and enhance its longevity.
Step 8: Curing and Sealing the Concrete
Curing and sealing the concrete is a crucial step in the construction process as it enhances the durability and longevity of your walkway. Curing involves providing the necessary moisture to the concrete during its initial drying stages, while sealing provides a protective layer to guard against stains, moisture penetration, and surface damage. Here are the steps to properly cure and seal your concrete walkway:
- Cover the concrete: After finishing the surface, immediately cover the entire walkway with a curing compound or plastic sheeting. This will help to retain moisture and prevent the concrete from drying out too quickly. The curing period typically lasts for 7 to 14 days, depending on the climate and the concrete mix used.
- Water the concrete: During the curing period, it’s important to keep the concrete moist. Water the surface with a fine mist or use a garden hose to lightly spray the walkway multiple times a day. This continuous moisture helps to promote proper hydration and strength development in the concrete.
- Avoid traffic: While the curing process is underway, avoid walking or placing any heavy objects on the concrete. This can cause cracking or indentation, and interfere with the cure. Restrict access to the walkway by posting signs or temporarily blocking the area.
- Choose a sealer: Once the curing period is complete, it’s time to select a suitable sealer for your walkway. There are various types of sealers available, including acrylic, epoxy, and polyurethane sealers. Consider factors such as the desired appearance, level of protection, and ease of application when choosing a sealer.
- Prepare the surface: Before applying the sealer, ensure that the concrete surface is clean, dry, and free from any debris. Use a broom or a leaf blower to remove dirt and dust, and consider pressure washing if needed. Repair any cracks or imperfections before sealing.
- Apply the sealer: Follow the manufacturer’s instructions for applying the sealer. Use a sprayer, brush, or roller, depending on the sealer type and the size of your walkway. Apply the sealer in thin, even coats, and ensure complete coverage of the surface.
- Allow for drying and curing time: After applying the sealer, allow it to dry and cure as per the manufacturer’s instructions. This typically takes several hours to a day, depending on the sealer type and the ambient conditions. Avoid walking on the sealed surface until it is fully cured.
Curing and sealing the concrete will protect your walkway from stains, moisture damage, and help maintain its appearance over time. It’s important to follow the curing and sealing process carefully to ensure optimal results and a long-lasting concrete surface.
Once the sealer is fully cured, you can proceed to the final step: removing the formwork and revealing your beautiful new concrete walkway!
Step 9: Removing the Formwork
Removing the formwork is the final step in building your concrete walkway. This step allows you to reveal the true shape and structure of your walkway, and showcases the hard work you’ve put into the construction process. Here’s how to remove the formwork effectively:
- Allow the concrete to fully cure: Before removing the formwork, ensure that the concrete has thoroughly cured as per the manufacturer’s recommendations. This typically takes around seven to 14 days, but can vary depending on the weather conditions and the concrete mix used.
- Inspect the concrete: Before removing the formwork, inspect the concrete for any signs of damage or cracking. If you notice any issues, address them promptly by applying appropriate repairs.
- Carefully disassemble the formwork: Begin by removing any stakes or supports holding the formwork in place. Use a pry bar or a hammer to gently detach the formwork from the concrete. Take caution to avoid damaging the edges or the surface of the walkway as you remove the formwork.
- Dispose of or store the formwork: Once the formwork is removed, decide whether to dispose of it or store it for future projects. If the formwork is in good condition, you can clean and store it for reuse. Consider labeling and organizing the formwork components for easy retrieval and use in future construction projects.
- Clean the walkway: After removing the formwork, clean the walkway to remove any debris or residue that may have accumulated during the construction process. Use a broom or a leaf blower to sweep away loose dirt and dust.
- Enjoy your finished walkway: With the formwork removed and the walkway cleaned, take a moment to admire and enjoy the fruits of your labor. Walk along the newly created pathway and take pride in the beautiful addition to your outdoor space.
Removing the formwork is an exciting step that marks the completion of your concrete walkway project. Take care during this process to avoid any damage to the concrete and ensure a smooth and seamless transition from construction to the finished walkway.
Now that you have completed all the steps, you can confidently enjoy your newly constructed concrete walkway. Remember to maintain and care for your walkway regularly to ensure its longevity and to keep it looking its best for years to come.
Congratulations on successfully building your concrete walkway!
Conclusion
Building a concrete walkway is a rewarding DIY project that can add beauty, functionality, and value to your outdoor space. By following these step-by-step instructions, you can create a durable and visually appealing walkway that will withstand the test of time. Let’s recap the key steps involved in building a concrete walkway:
- Planning: Carefully plan the layout, materials, and design of your walkway.
- Gathering Materials and Tools: Ensure you have all the necessary materials and tools at hand.
- Site Preparation: Clear and prepare the area where the walkway will be constructed.
- Building the Formwork: Construct the formwork to define the shape and structure of the walkway.
- Mixing the Concrete: Follow proper procedures to mix the concrete for your walkway.
- Pouring and Leveling: Pour and level the concrete to create a smooth, even surface.
- Finishing the Surface: Apply finishing techniques such as floating, texturing, and edging to achieve the desired look.
- Curing and Sealing: Allow the concrete to cure and then apply a sealer for protection.
- Removing the Formwork: Carefully remove the formwork to reveal your completed walkway.
By following these steps and taking your time with each stage, you can create a walkway that not only serves its purpose but also enhances the overall aesthetics of your outdoor space. Remember to prioritize safety throughout the construction process and to use proper protective gear at all times.
Building a concrete walkway may require physical labor and basic construction skills, but the end result is a beautiful and functional addition to your home. Whether you’re creating a path to your front door, a meandering walkway through your garden, or a connection between different areas of your outdoor space, a well-constructed concrete walkway can greatly enhance the overall ambiance and usability of your outdoor environment.
Enjoy the process of creating your concrete walkway, and take pride in the finished product. With proper care and maintenance, your walkway will serve you and your family for many years to come.
Frequently Asked Questions about How To Make A Concrete Walkway
Was this page helpful?
At Storables.com, we guarantee accurate and reliable information. Our content, validated by Expert Board Contributors, is crafted following stringent Editorial Policies. We're committed to providing you with well-researched, expert-backed insights for all your informational needs.


0 thoughts on “How To Make A Concrete Walkway”