Articles
How To Make A Fence Door
Modified: August 28, 2024
Learn how to make a sturdy and functional fence door with step-by-step instructions in our comprehensive articles on fence building.
(Many of the links in this article redirect to a specific reviewed product. Your purchase of these products through affiliate links helps to generate commission for Storables.com, at no extra cost. Learn more)
Introduction
Welcome to the step-by-step guide on how to make a fence door. Having a fence door not only adds functionality to your fence but also enhances the overall aesthetic appeal of your property. Whether you are building a new fence or looking to upgrade an existing one, a fence door can make a significant difference in terms of convenience and accessibility.
By following this guide, you will learn how to create a sturdy and secure fence door that will withstand the test of time. We will walk you through the entire process, from planning and measuring to assembling and hanging the fence door. So grab your tools and let’s get started!
Key Takeaways:
- Building a fence door requires accurate measurements, sturdy materials, and careful assembly. From planning and cutting the frame to attaching hinges and installing a latch, each step contributes to a secure and functional fence door.
- A well-constructed fence door not only enhances accessibility and security but also adds visual appeal to your property. By following the step-by-step guide, you can enjoy the benefits of a stylish and functional fence door.
Read more: How To Make A Stucco Fence
Materials Needed
Before you begin constructing your fence door, make sure you have the following materials on hand:
- Wooden boards or pre-made fence panels
- Tape measure
- Saw (circular saw or hand saw)
- Drill
- Screwdriver
- Hinges
- Latch or lock
- Screws
- Pencil or marker
- Level
- Safety goggles
These materials are essential for building a basic fence door. You can customize the design and add additional elements based on your preferences and project requirements.
If you are using pre-made fence panels, make sure they are wide enough to create a door that allows easy access. If you prefer to build the door from scratch, select durable and weather-resistant wooden boards. Cedar or pressure-treated lumber are good options, as they are known for their durability and resistance to decay.
Keep in mind the measurements of your fence gate opening while purchasing the materials, ensuring a proper fit.
Step 1: Measure and Plan
The first step in making a fence door is to carefully measure the opening where the door will be installed. Use a tape measure to determine the width and height of the opening. It’s important to get accurate measurements to ensure a proper fit.
Once you have the measurements, you can determine the size of the door you will need. Take into consideration any allowances for hinges and clearance between the door and the ground. It’s a good idea to leave a small gap at the bottom of the door to prevent dragging or scraping on uneven surfaces.
After measuring and determining the size of the door, you can create a plan or sketch of the door’s design. This will help you visualize the final product and make any necessary adjustments before starting the construction process.
Consider the overall style of your fence and choose a design for the door that complements it. You can opt for a simple, clean look, or add decorative elements such as lattice panels or diagonal braces for added visual appeal.
Take note of any additional features you want to include, such as windows or hardware. This will help guide your material selection and ensure that you have all the necessary components before proceeding to the next step.
Once you have measured and planned out your fence door, you are ready to gather the tools needed for the construction process.
Step 2: Gather Tools
Before you start building your fence door, it’s important to gather all the necessary tools. Having the right tools on hand will make the construction process smoother and more efficient.
Here are the essential tools you will need:
- Tape measure: Used to accurately measure the dimensions of the door and the placement of hinges and hardware.
- Saw: Whether you use a circular saw, miter saw, or hand saw, it will be needed to cut the wooden boards to the desired size.
- Drill: Needed to create pilot holes for screws and attach hinges and hardware to the door.
- Screwdriver: Used to drive in screws and tighten them securely.
- Level: Ensures that the door is straight and properly aligned when being installed.
- Pencil or marker: Used to mark measurements and guide the cutting process.
- Safety goggles: Protects your eyes from any flying debris while cutting or drilling.
Having the appropriate tools will not only make the construction process easier, but it will also ensure that your fence door is constructed accurately and securely.
Additionally, consider having some extra screws and hinges on hand, as they may be needed during the installation process or in case of any unexpected issues.
With your tools gathered and ready, you are now prepared to move on to the next step: cutting the frame of the fence door.
Step 3: Cut the Frame
Now that you have your measurements and materials ready, it’s time to start cutting the frame for your fence door. This frame will provide the foundation for the door and hold all the components together.
Follow these steps to cut the frame:
- Measure and mark the dimensions of the door frame on the wooden boards or pre-made fence panels. Use a pencil or marker to make accurate marks.
- Using a saw, carefully cut the boards according to your marked measurements. Ensure that the cuts are straight and precise.
- If you prefer a more decorative design, you can use a router or a jigsaw to create desired shapes or patterns on the boards.
- Assemble the frame by attaching the horizontal and vertical boards using screws. Make sure to align the corners and use a level to ensure that the frame is square.
- Double-check the measurements again to ensure accuracy and make any necessary adjustments before moving on to the next step.
Remember to wear safety goggles during the cutting process to protect your eyes from any flying debris.
If you are using pre-made fence panels, you can skip the cutting step and go directly to assembling the frame by attaching the panels together.
Once the frame is cut and assembled, you are ready to proceed to the next step: attaching hinges to the door.
When building a fence door, make sure to use sturdy materials such as pressure-treated wood or metal to ensure durability. Additionally, install hinges and a latch that can withstand outdoor elements for a long-lasting fence door.
Read more: How To Make A Living Fence
Step 4: Assemble the Frame
Now that you have cut the frame for your fence door, it’s time to assemble it. This step involves joining the individual components of the frame together to create a solid and sturdy structure.
Follow these steps to assemble the frame:
- Place the horizontal boards on a flat surface, parallel to each other, with the ends aligned.
- Position the vertical boards between the horizontal boards, evenly spaced apart.
- Use screws to attach the horizontal boards to the vertical boards. Make sure to drive the screws through the horizontal boards and into the ends of the vertical boards.
- Repeat the process for the other side of the frame.
- Double-check the alignment and stability of the frame. Use a level to ensure that it is straight and square.
Assembling the frame securely is crucial to ensure the door’s strength and durability. Make sure the screws are driven in tightly, but be careful not to over-tighten them, as it may cause the wood to split.
If you are using pre-made fence panels, simply attach them to the frame using screws or nails, following the manufacturer’s instructions.
Once the frame is securely assembled, you are now ready to move on to the next step: attaching hinges to the door.
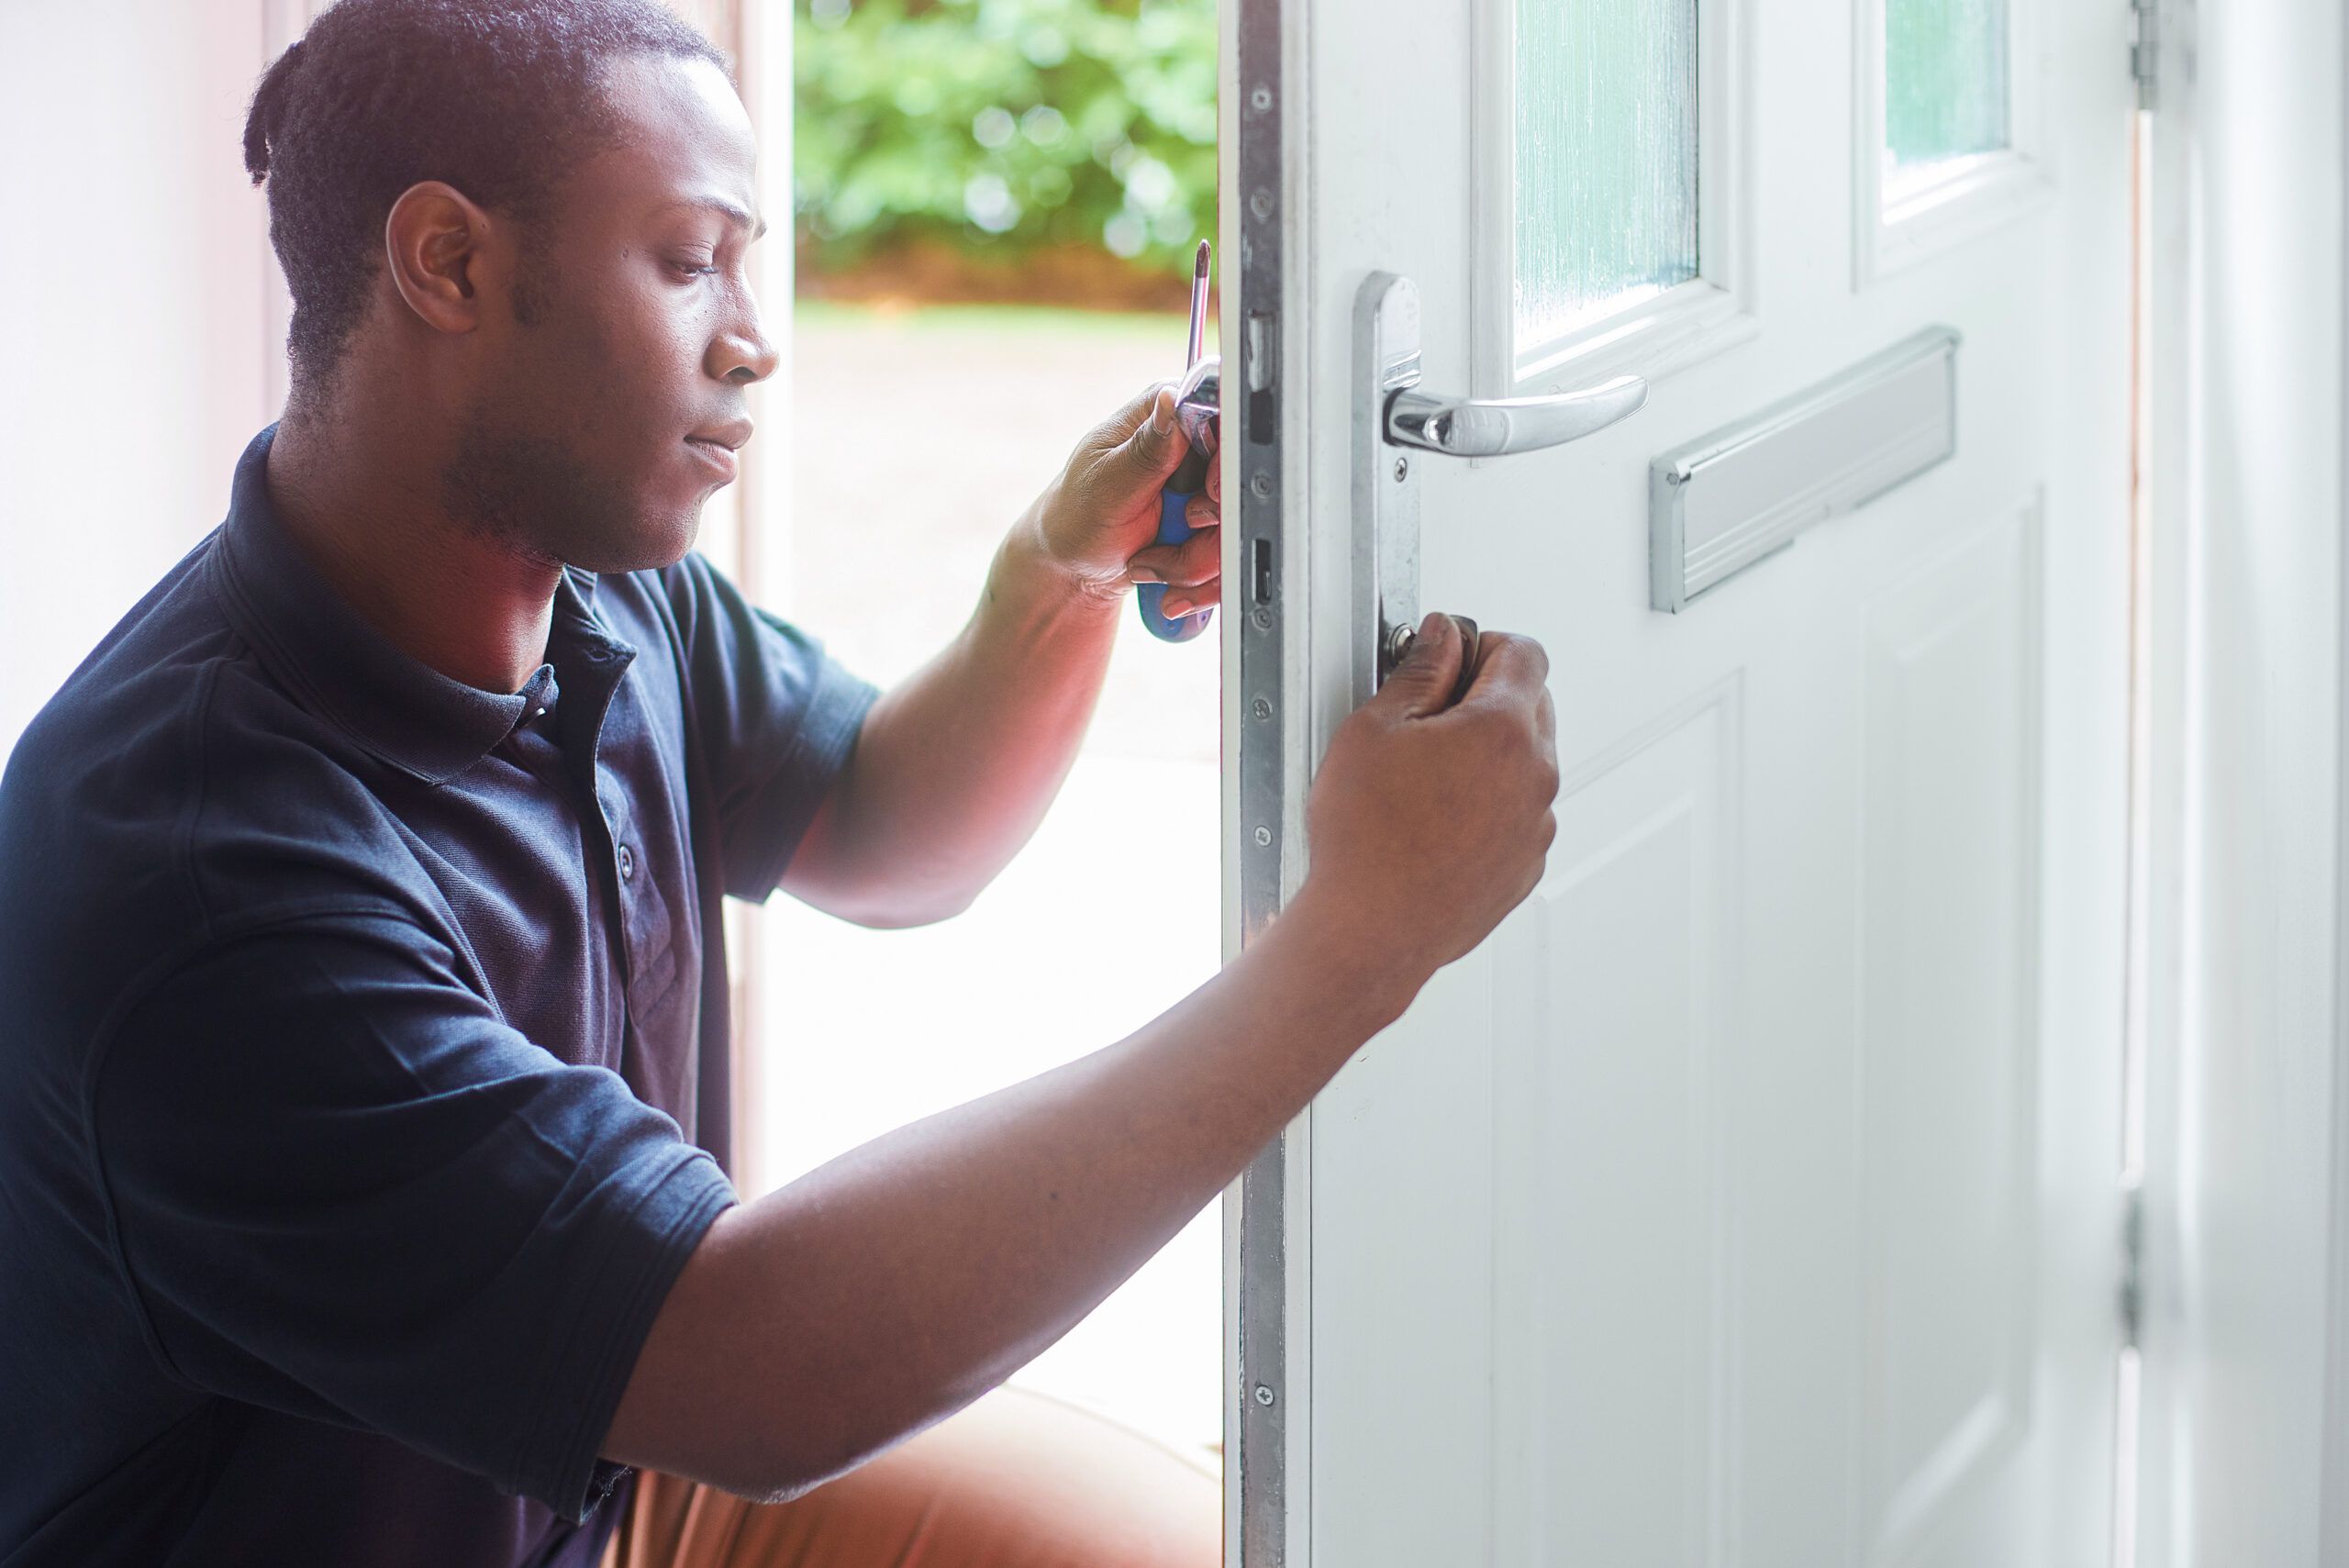
Step 5: Attach Hinges
Attaching hinges is a crucial step in creating a functional fence door. Hinges will allow the door to swing open and closed smoothly and securely. Follow these steps to properly attach hinges to the door:
- Decide on the placement of the hinges. Typically, three hinges are used for a standard-sized fence door – one at the top, one at the bottom, and one in the middle.
- Hold the door in position against the fence or gate opening. Mark the locations for the hinges on both the door and the corresponding fence or gatepost.
- Using a drill, create pilot holes on the marked locations for the hinges.
- Align the hinge plates with the pilot holes and attach them using screws. Make sure the hinges are flush with the door and gatepost.
- Repeat the process for each hinge, ensuring proper alignment and secure attachment.
It’s crucial to ensure the hinges are properly aligned and securely fastened, as they will bear the weight of the door and influence its overall functionality. Use long screws to ensure a strong and durable connection.
Once the hinges are attached, test the door by gently swinging it open and closed. Make any necessary adjustments to ensure smooth operation and proper alignment. Use a level to ensure the door is straight.
At this stage, your fence door is starting to take shape. The next step is crucial for security and convenience – installing a latch or lock.
Step 6: Install Latch or Lock
Installing a latch or lock on your fence door adds an extra layer of security and convenience. Whether you’re keeping pets and children safe or preventing unauthorized access, a latch or lock will help keep your property secure. Follow these steps to install a latch or lock:
- Determine the location for the latch or lock on the door and the corresponding gatepost. Typically, the latch is installed on the interior side of the door.
- Measure and mark the position for the latch or lock on both the door and gatepost.
- Using a drill, create pilot holes for the latch or lock screws.
- Align the latch or lock with the pilot holes and attach it securely using the provided screws or bolts.
- Ensure that the latch or lock functions properly by testing it with the door closed and open. It should securely hold the door in place when locked and release smoothly when unlocked.
There are various types of latches and locks available, including gate latches, barrel bolts, and padlocks. Choose the option that best suits your needs in terms of security, convenience, and aesthetics.
Remember to install the latch or lock at a height that is easily accessible for everyone who will be using the fence door, while also keeping it out of reach of children.
With the latch or lock installed, your fence door is now secure and ready for the next step: hanging the door on the hinges.
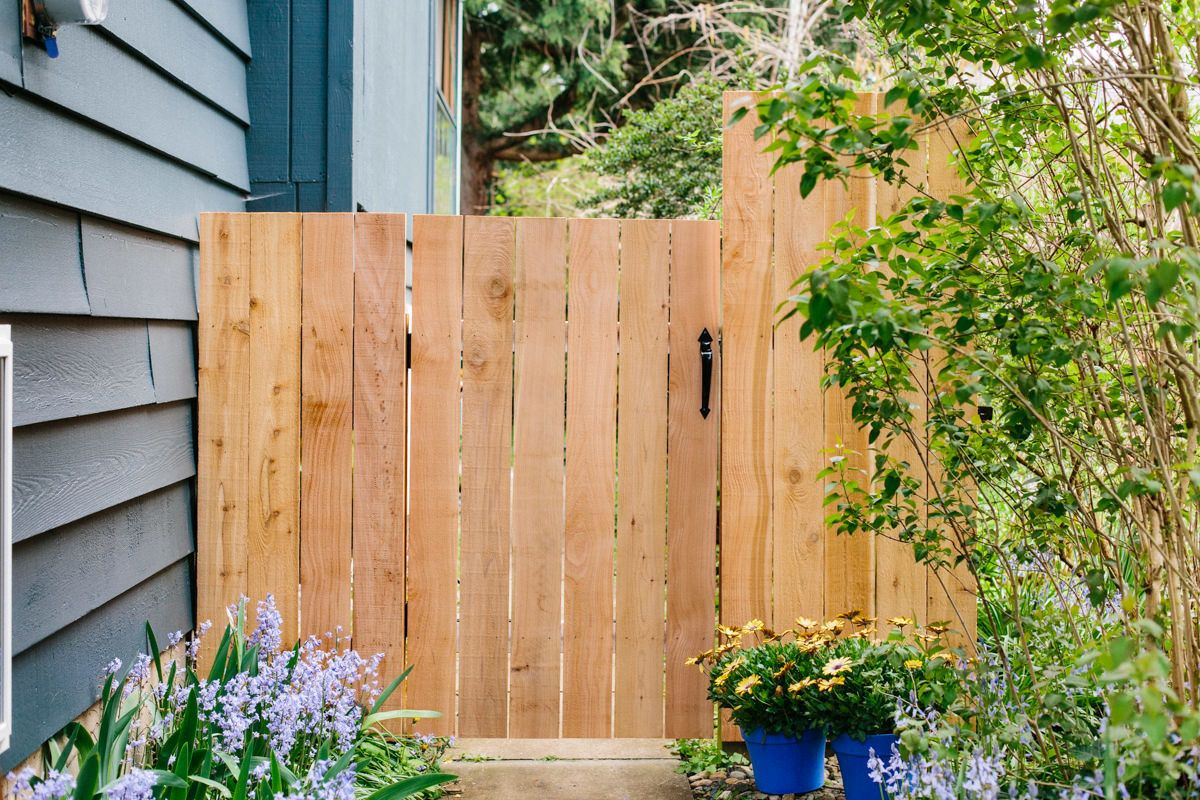
Step 7: Hang the Fence Door
In this final step, you will hang the fence door onto the hinges you previously attached. Hanging the door properly ensures smooth operation and a secure fit. Follow these steps to hang the fence door:
- With the assistance of a friend or family member, carefully lift the fence door and align the hinge plates on the door with the corresponding hinges on the gatepost.
- Ensure that the hinges are properly aligned and the hinge pins are inserted into the hinge plates.
- Secure the hinge pins in place to prevent the door from being lifted off the hinges. Some hinges may have a locking mechanism, while others may require the use of additional pins or clips.
- Test the door by gently swinging it open and closed to ensure smooth operation. Make any necessary adjustments to the hinges or latch/lock to ensure proper alignment and functionality.
- Check that the door is level and aligned with the fence or gate opening. Use a level to make any necessary adjustments.
Once the fence door is properly hung, take a step back and admire your work. Open and close the door several times to ensure it operates smoothly and securely.
It’s important to periodically check the hinges and latch/lock over time to ensure they remain in good condition and make any necessary adjustments or replacements as needed.
Congratulations! You have successfully constructed and installed a fence door that will provide convenience, security, and a stylish addition to your fence.
Before concluding, take a moment to review your work and make any final adjustments if necessary. If everything looks good, it’s time to enjoy the benefits of your newly installed fence door.
Read more: How To Make A Fence Straight
Conclusion
Building and installing a fence door is a rewarding project that adds functionality and beauty to your fence. By following the steps outlined in this guide, you have learned how to create a sturdy and secure fence door that will enhance the accessibility and security of your property.
Starting with accurate measurements and careful planning, you have learned how to cut and assemble the frame of the door, attach hinges, install a latch or lock, and hang the door onto the hinges. These steps ensure that your fence door operates smoothly and securely.
Remember to take safety precautions throughout the construction process, such as wearing safety goggles and handling tools with care. Double-check your work as you go to ensure accuracy and make any necessary adjustments along the way.
With your newly installed fence door, you can enjoy easy access to your yard, added security, and a visually appealing addition to your fence. Whether you are letting pets roam freely, providing a controlled entryway, or simply improving the overall functionality of your fence, a well-constructed fence door is an essential component.
Regularly inspect your fence door to ensure it remains in good condition. Check the hinges, latch or lock, and overall stability. Make any necessary repairs or replacements to maintain its functionality and security over time.
Now that you have successfully completed this project, take a moment to appreciate your hard work and enjoy the benefits of your newly installed fence door. It not only improves the accessibility of your property but also adds value and visual appeal to your outdoor space.
Thank you for following this step-by-step guide. We hope it has been informative and helpful in guiding you through the process of creating and installing a fence door.
Happy DIYing!
Frequently Asked Questions about How To Make A Fence Door
Was this page helpful?
At Storables.com, we guarantee accurate and reliable information. Our content, validated by Expert Board Contributors, is crafted following stringent Editorial Policies. We're committed to providing you with well-researched, expert-backed insights for all your informational needs.


0 thoughts on “How To Make A Fence Door”