Articles
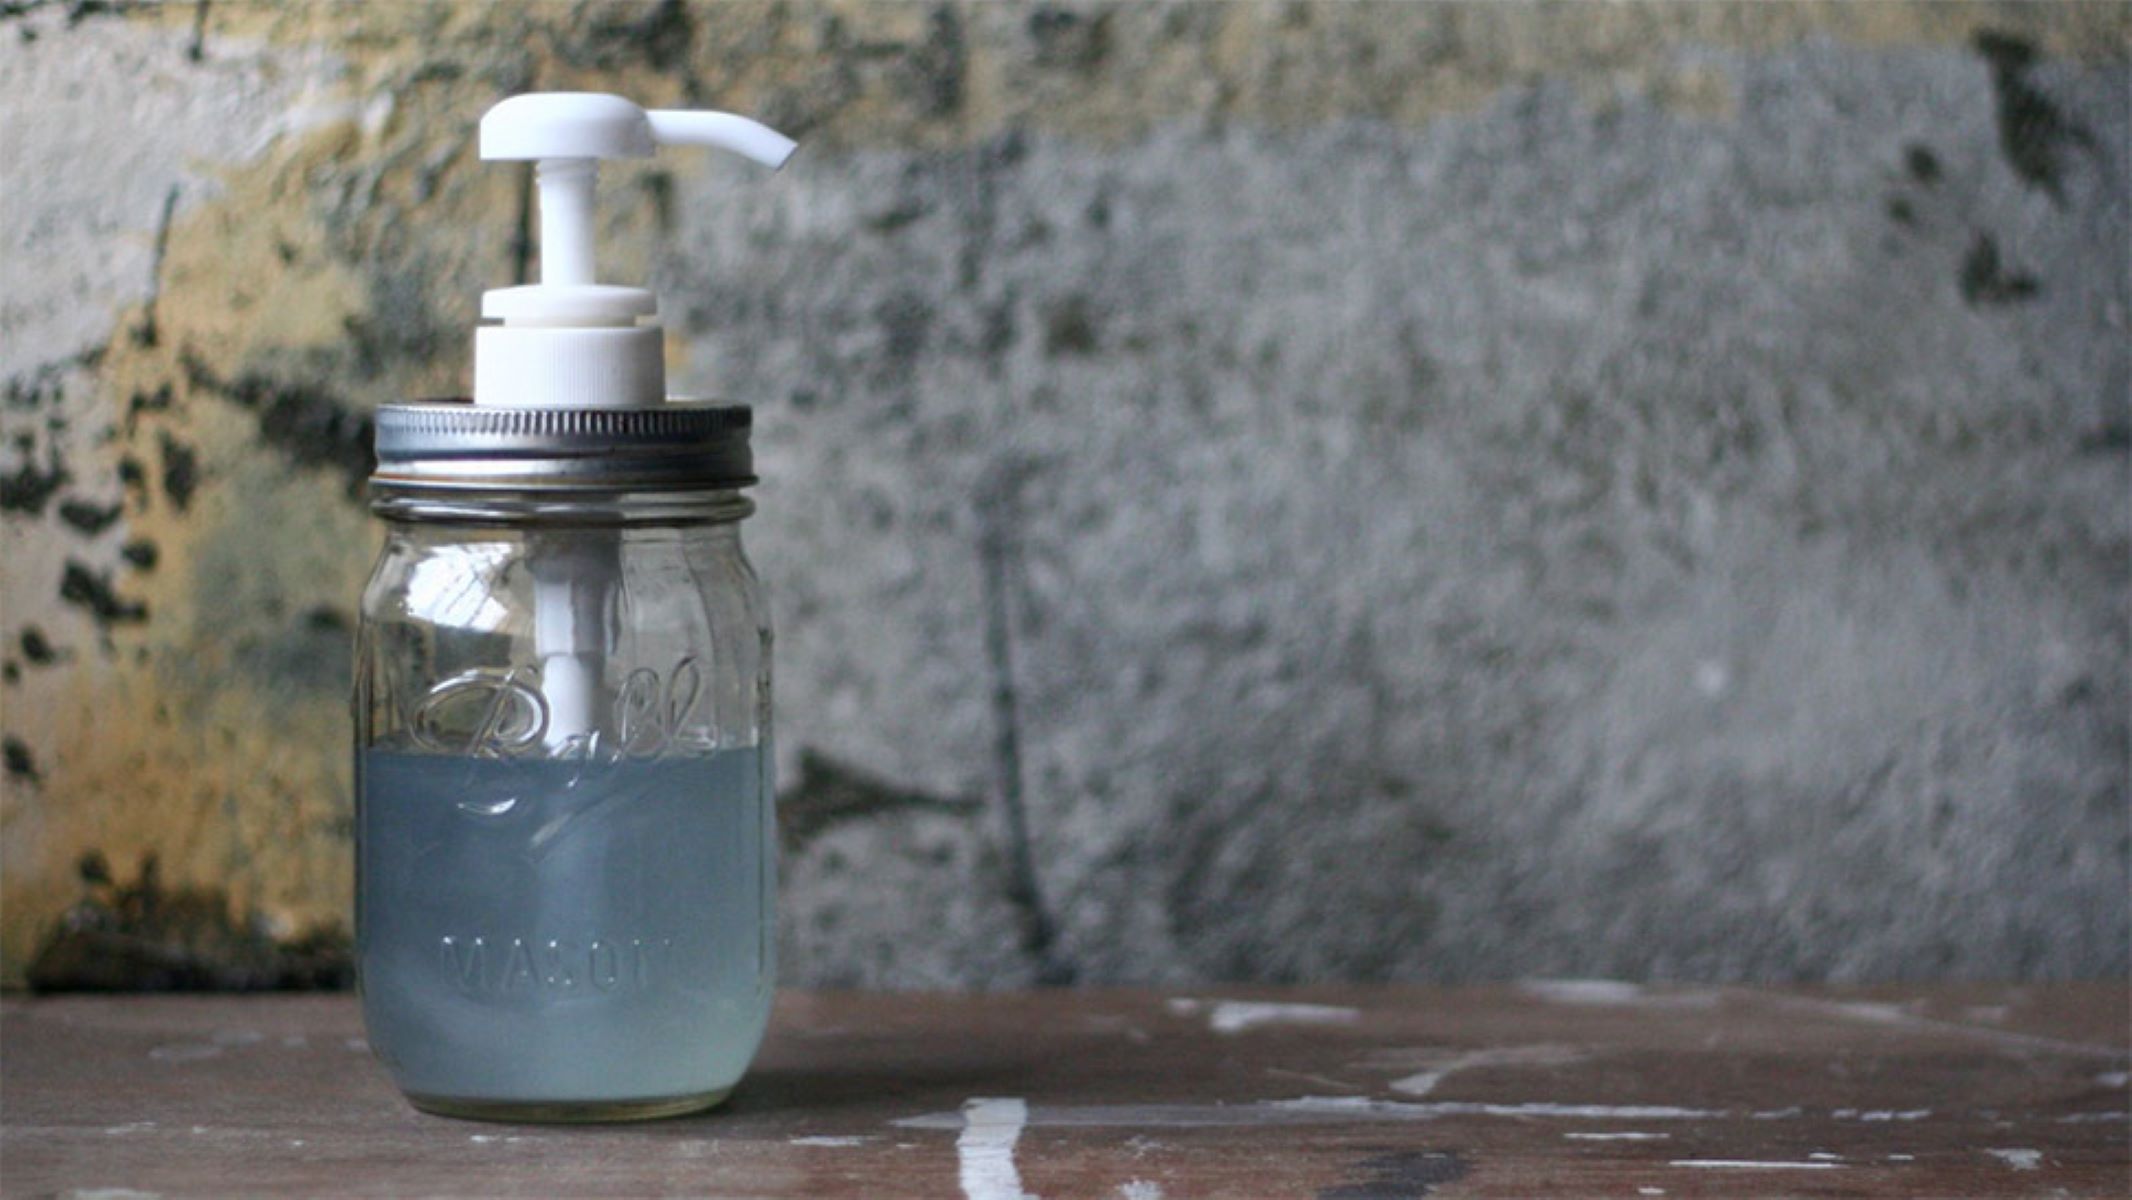
How To Make A Mason Jar Soap Dispenser
Modified: February 22, 2024
Discover the best articles on how to make a mason jar soap dispenser, providing step-by-step instructions and creative tips for a unique DIY project.
(Many of the links in this article redirect to a specific reviewed product. Your purchase of these products through affiliate links helps to generate commission for Storables.com, at no extra cost. Learn more)
Introduction
Welcome to the wonderful world of DIY soap dispensers! If you’re looking for a creative and budget-friendly way to add a touch of charm to your bathroom or kitchen, then making your own mason jar soap dispenser is the perfect project for you. Not only is it a practical solution for dispensing your favorite soap, but it also adds a rustic and vintage vibe to any space.
In this step-by-step guide, we will walk you through the process of creating your very own mason jar soap dispenser. This is a fun and easy project that can be completed in just a few simple steps with materials that are easy to find and inexpensive.
So, whether you have an old mason jar lying around or you want to pick one up from a thrift store, let’s dive in and get started on this exciting DIY adventure!
Key Takeaways:
- Create a charming and practical mason jar soap dispenser with just a few simple steps and budget-friendly materials, adding a rustic and vintage vibe to your bathroom or kitchen.
- Personalize your DIY soap dispenser with decorative elements like ribbons, labels, and charms to make it uniquely yours, adding a touch of creativity and personality to your space.
Read also: 15 Best Mason Jar Soap Dispenser for 2024
Materials Needed
Before you begin, make sure you have gathered all the necessary materials. Here’s a list of what you’ll need:
- 1 mason jar: Choose a size that suits your needs and preferences. You can use a new or old mason jar, depending on the look you want to achieve.
- 1 soap dispenser pump: Look for a pump that fits the size of the mason jar opening. You can find these pumps at craft stores or repurpose one from an old soap dispenser.
- 1 mason jar lid: Make sure the lid matches the size of your mason jar. You can either use the original lid or purchase a separate one.
- Drill and drill bit: You’ll need a drill to create a hole in the mason jar lid for the soap dispenser pump.
- Marker or pencil: This will be used to mark the spot where the hole will be drilled.
- Epoxy adhesive or hot glue gun: You’ll need an adhesive to secure the pump in place.
- Liquid soap: Choose your favorite liquid soap to fill the mason jar dispenser.
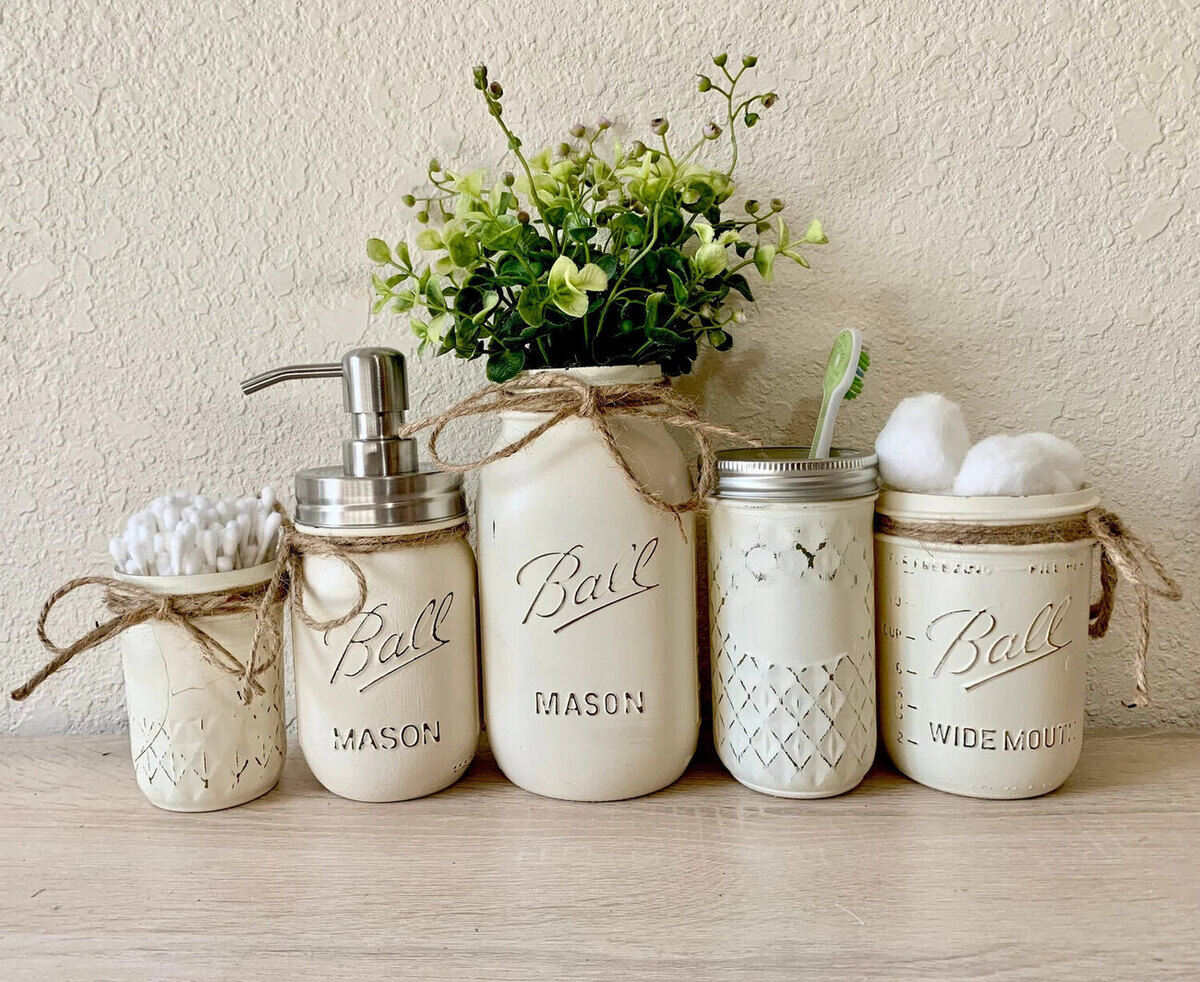
These are the basic materials you’ll need to get started on your mason jar soap dispenser project. Feel free to get creative and add decorative elements such as ribbons, labels, or charms to personalize your dispenser and make it uniquely yours.
Step 1: Gather your Supplies
The first step in creating your mason jar soap dispenser is to gather all the necessary supplies. Before you begin, make sure you have everything you need for this project. This will ensure a smooth and hassle-free process. Here’s what you’ll need:
- 1 mason jar: Choose a size and style that suits your preference. Make sure the jar is clean and free from any labels or residue.
- 1 soap dispenser pump: Look for a pump that fits the size of the mason jar opening. You can find these pumps at craft stores or repurpose one from an old soap dispenser.
- 1 mason jar lid: Ensure that the lid matches the size of your mason jar. You can either use the original lid or purchase a separate one.
- Drill and drill bit: You’ll need a drill with the appropriate size drill bit to create a hole in the mason jar lid for the soap dispenser pump.
- Marker or pencil: This will be used to mark the spot on the lid where the hole will be drilled.
- Epoxy adhesive or hot glue gun: You’ll need an adhesive to secure the pump in place.
- Liquid soap: Choose your favorite liquid soap to fill the mason jar dispenser.
Once you have gathered all the necessary supplies, you’re ready to proceed to the next step. Make sure you have a clean and clutter-free workspace where you can comfortably work on your project. Clear any obstructions and gather any additional tools or materials you may need throughout the process.
Preparing and organizing your supplies beforehand will save you time and make the process more enjoyable. So, take a few moments to gather everything you need and let’s move on to the next step of creating your mason jar soap dispenser.
Step 2: Prepare the Mason Jar
Now that you have gathered all the necessary supplies, it’s time to prepare the mason jar for your soap dispenser. Follow these steps to ensure that your jar is clean and ready for use:
- Remove any labels or residue: If your mason jar has any labels or sticky residue, soak it in warm soapy water to loosen them. Gently scrub off the labels using a sponge or scrub brush. Rinse the jar thoroughly to remove any soap residue.
- Inspect the jar for cracks or chips: Examine the mason jar for any cracks, chips, or imperfections. If you find any, it’s best to choose a different jar to ensure the longevity of your soap dispenser.
- Clean and dry the jar: Wash the mason jar with dish soap and warm water, scrubbing both the inside and outside. Rinse it well and wipe it dry with a clean towel. This will ensure that your soap dispenser is sanitary and ready for use.
Preparing the mason jar is an important step to ensure that your soap dispenser looks clean and professional. Taking the time to clean and inspect the jar will help prevent any issues later on and ensure that your soap dispenser lasts for a long time.
With your mason jar now prepared, you’re ready to move on to the next step: drilling a hole in the lid to accommodate the soap dispenser pump. This step requires some caution, so make sure to follow the instructions carefully to avoid any mishaps.
Step 3: Drill a Hole in the Lid
Now that your mason jar is clean and dry, it’s time to drill a hole in the lid to accommodate the soap dispenser pump. Follow these steps to ensure a precise and clean hole:
- Mark the center of the lid: Place the mason jar lid on a flat surface and use a marker or pencil to mark the center of the lid. This will serve as a guide for drilling the hole.
- Choose the appropriate drill bit: Select a drill bit that matches the diameter of your soap dispenser pump. It should be slightly smaller than the pump to create a snug fit.
- Secure the lid: Use a clamp or secure the lid in place to prevent it from moving while drilling the hole.
- Drill the hole: Position the drill bit over the center mark on the lid and slowly drill through the lid. Apply gentle pressure and take your time to avoid any cracks or damage to the lid. It’s best to start with a small pilot hole and gradually increase the size if needed.
- Clean off any debris: Once the hole is drilled, wipe off any metal shavings or debris from the lid to ensure a clean surface. You can use a damp cloth or compressed air to remove any residue.
Drilling the hole in the mason jar lid might seem intimidating, but with the right tools and proper technique, it can be a straightforward process. Take your time and proceed with caution to achieve a clean and accurate hole.
Now that you have successfully drilled a hole in the lid, you’re ready to move on to the next step: inserting the soap dispenser pump into the mason jar lid and securing it in place. This is where your soap dispenser starts to take shape, so let’s keep the momentum going!
Step 4: Insert the Pump
Now that you have drilled a hole in the mason jar lid, it’s time to insert the soap dispenser pump. Follow these steps to ensure a proper fit:
- Disassemble the soap dispenser pump: Take apart the soap dispenser pump by unscrewing the top and removing the pump mechanism from the container. This will make it easier to insert the pump into the mason jar lid.
- Insert the pump into the lid: Carefully insert the pump mechanism through the hole in the lid, ensuring that the pump fits snugly. The stem of the pump should protrude from the top of the lid, while the threaded base sits securely on the underside of the lid.
- Reassemble the pump: Once the pump is inserted into the lid, reassemble the pump mechanism by screwing the top back onto the pump container. Make sure it is tightly secured to prevent any leaks.
By inserting the soap dispenser pump into the mason jar lid, you’re one step closer to having a functional soap dispenser. The pump should fit securely in the lid, allowing for smooth and effortless dispensing of soap.
Now that the pump is in place, it’s time to move on to the next step: securing the pump in place using epoxy adhesive or a hot glue gun. This will ensure that the pump remains firmly attached to the lid during use.
When drilling a hole in the mason jar lid for the soap dispenser pump, start with a small pilot hole and gradually increase the size to prevent the lid from cracking.
Step 5: Secure the Pump in Place
Now that you have inserted the soap dispenser pump into the mason jar lid, it’s important to secure it in place to ensure stability and prevent any leaks. Follow these steps to secure the pump:
- Apply adhesive: Depending on the type of pump and lid you have, you can use epoxy adhesive or a hot glue gun to secure the pump to the lid. Apply a small amount of adhesive around the base of the pump where it meets the lid.
- Hold in place: Carefully press the pump down, holding it firmly against the lid for a few seconds. This will allow the adhesive to bond and create a strong connection.
- Let it dry: Follow the instructions provided with the adhesive you used to determine the drying time. It’s important to let the adhesive fully cure and dry before moving on to the next step.
Securing the pump in place is essential to ensure that it remains stable and doesn’t come loose while using the soap dispenser. Both epoxy adhesive and hot glue are effective options for securing the pump, but make sure to choose the one that suits your needs and preferences.
Once the adhesive has dried and the pump is securely attached to the mason jar lid, you can move on to the next step: filling the mason jar with your favorite liquid soap. Get ready to witness your DIY soap dispenser come to life!
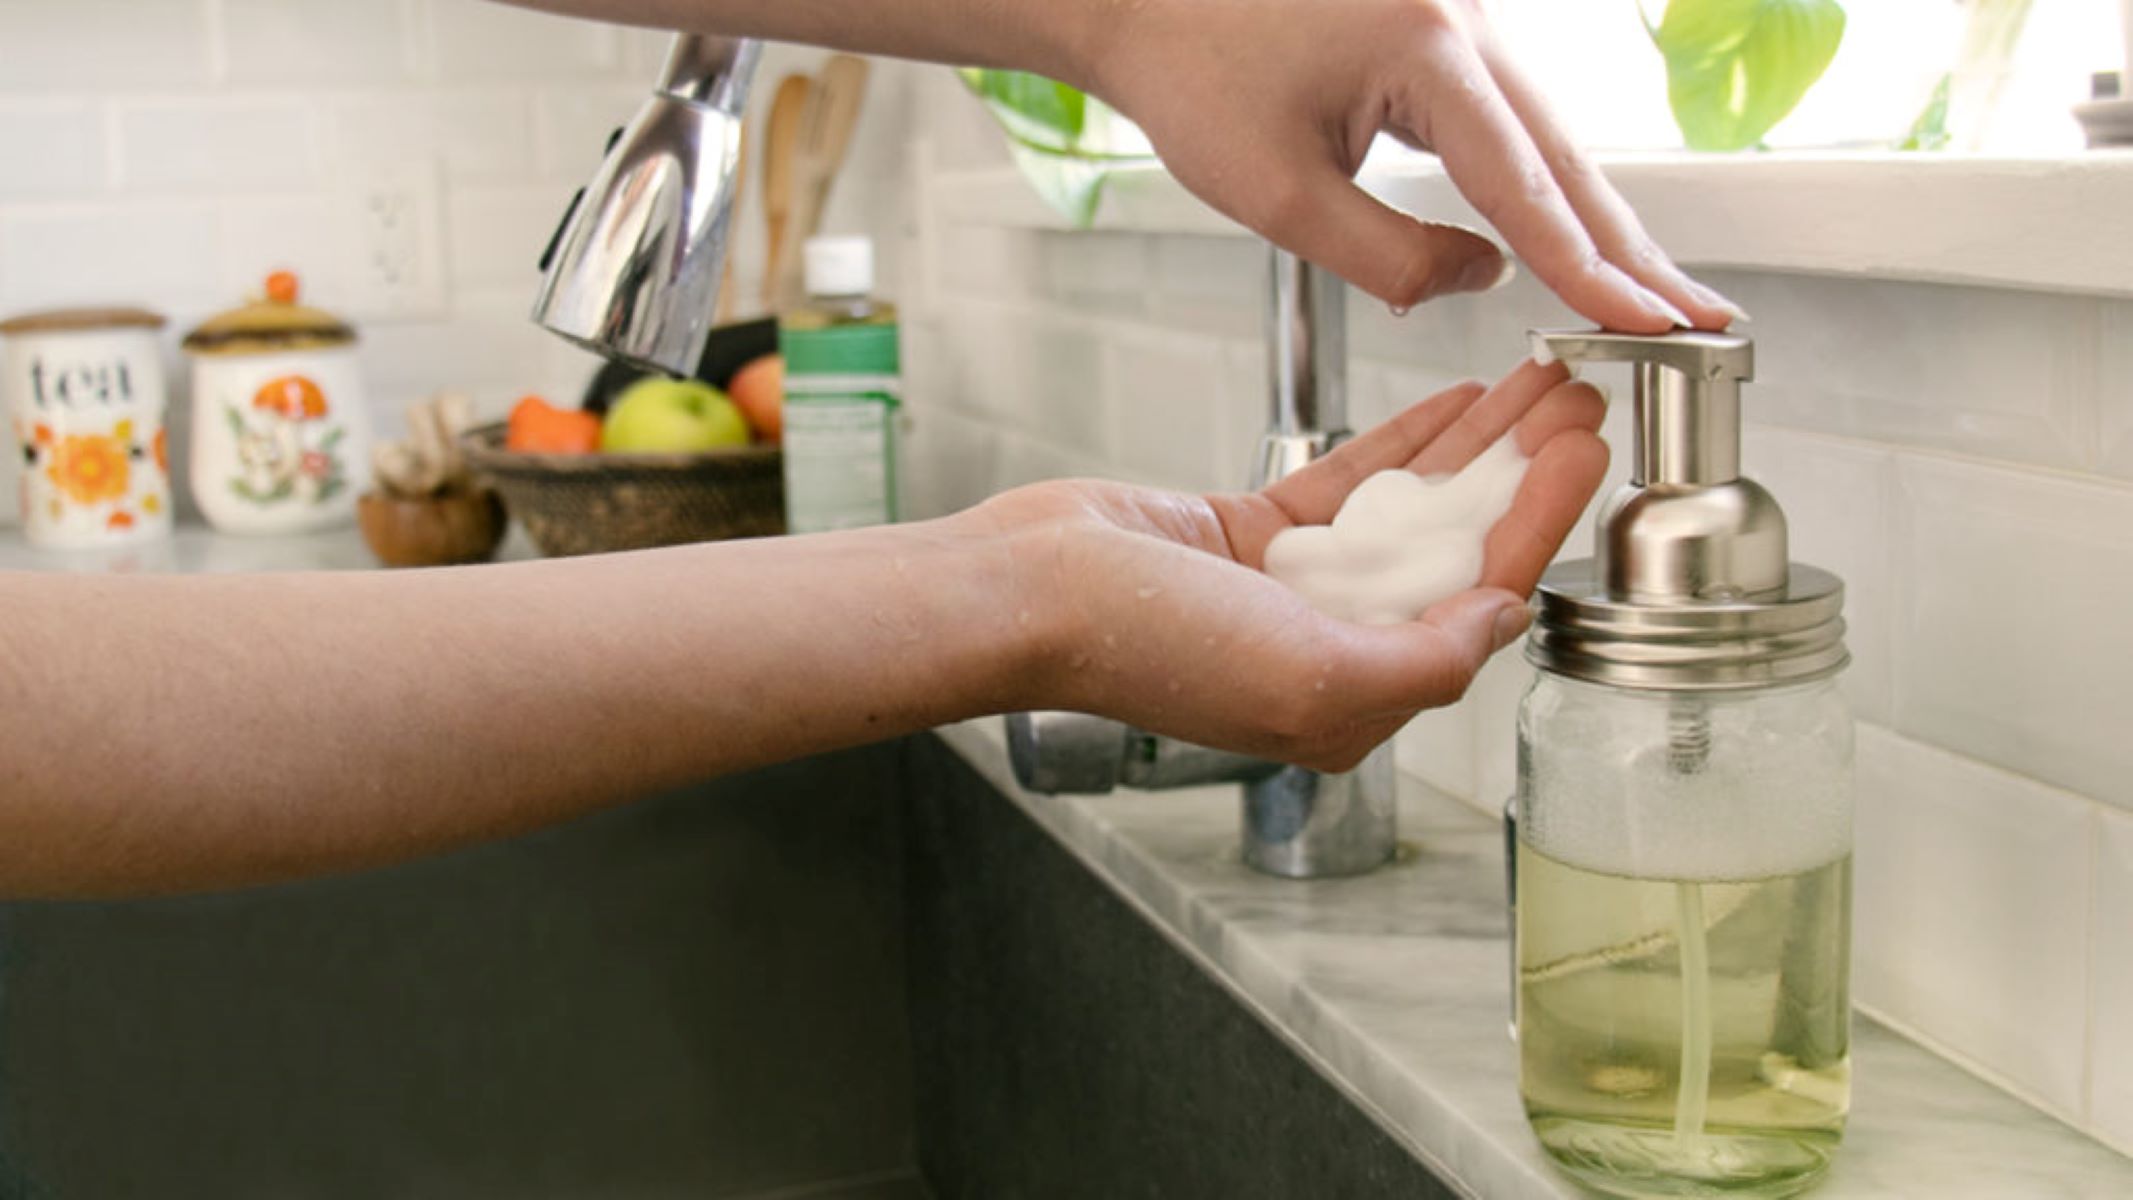
Step 6: Fill the Mason Jar with Soap
With the pump securely fastened to the mason jar lid, it’s time to fill the jar with your favorite liquid soap. Follow these simple steps to ensure a clean and successful filling process:
- Remove the pump: Unscrew the pump from the mason jar lid and set it aside. Make sure the lid is clean and dry before proceeding.
- Pour the soap into the jar: Carefully pour your chosen liquid soap into the mason jar, leaving a small amount of space at the top for the pump and room to dispense the soap.
- Avoid overfilling: Take care not to overfill the jar, as it may lead to spills or difficulty when reassembling the pump.
- Replace the pump: Once the jar is filled with soap, reattach the pump to the lid by screwing it back into place. Ensure that the pump is tightened securely.
Now your mason jar is filled with your preferred liquid soap, ready to be dispensed in a stylish and convenient manner. The clear glass of the jar allows you to easily see when it’s time to refill, adding both functionality and aesthetic appeal to your soap dispenser.
With the mason jar filled and the pump reassembled, you’re now ready to move on to the next step: screwing on the lid and testing the dispenser. Exciting times ahead!
Step 7: Screw on the Lid
Now that your mason jar is filled with soap and the pump is securely attached to the lid, it’s time to screw the lid onto the jar. Follow these steps to ensure a tight and secure fit:
- Hold the jar firmly: While gripping the mason jar, align the threads of the lid with the jar opening.
- Screw on the lid: Begin twisting the lid clockwise onto the jar, applying consistent pressure as you turn. Continue until the lid is securely tightened.
- Check for leaks: Once the lid is tightened, carefully inspect the soap dispenser for any signs of leaking. Gently tilt the jar back and forth to see if any soap seeps out. If you notice any leaks, unscrew the lid, check the seal, and re-tighten.
By screwing on the lid, you ensure that the soap dispenser is sealed and ready for use. It’s important to make sure the lid is tightened securely to prevent any leakage and maintain the overall functionality of the dispenser.
With the lid in place, your mason jar soap dispenser is almost complete! Just a few more steps remain to test the dispenser and add some personal touches to make it uniquely yours.
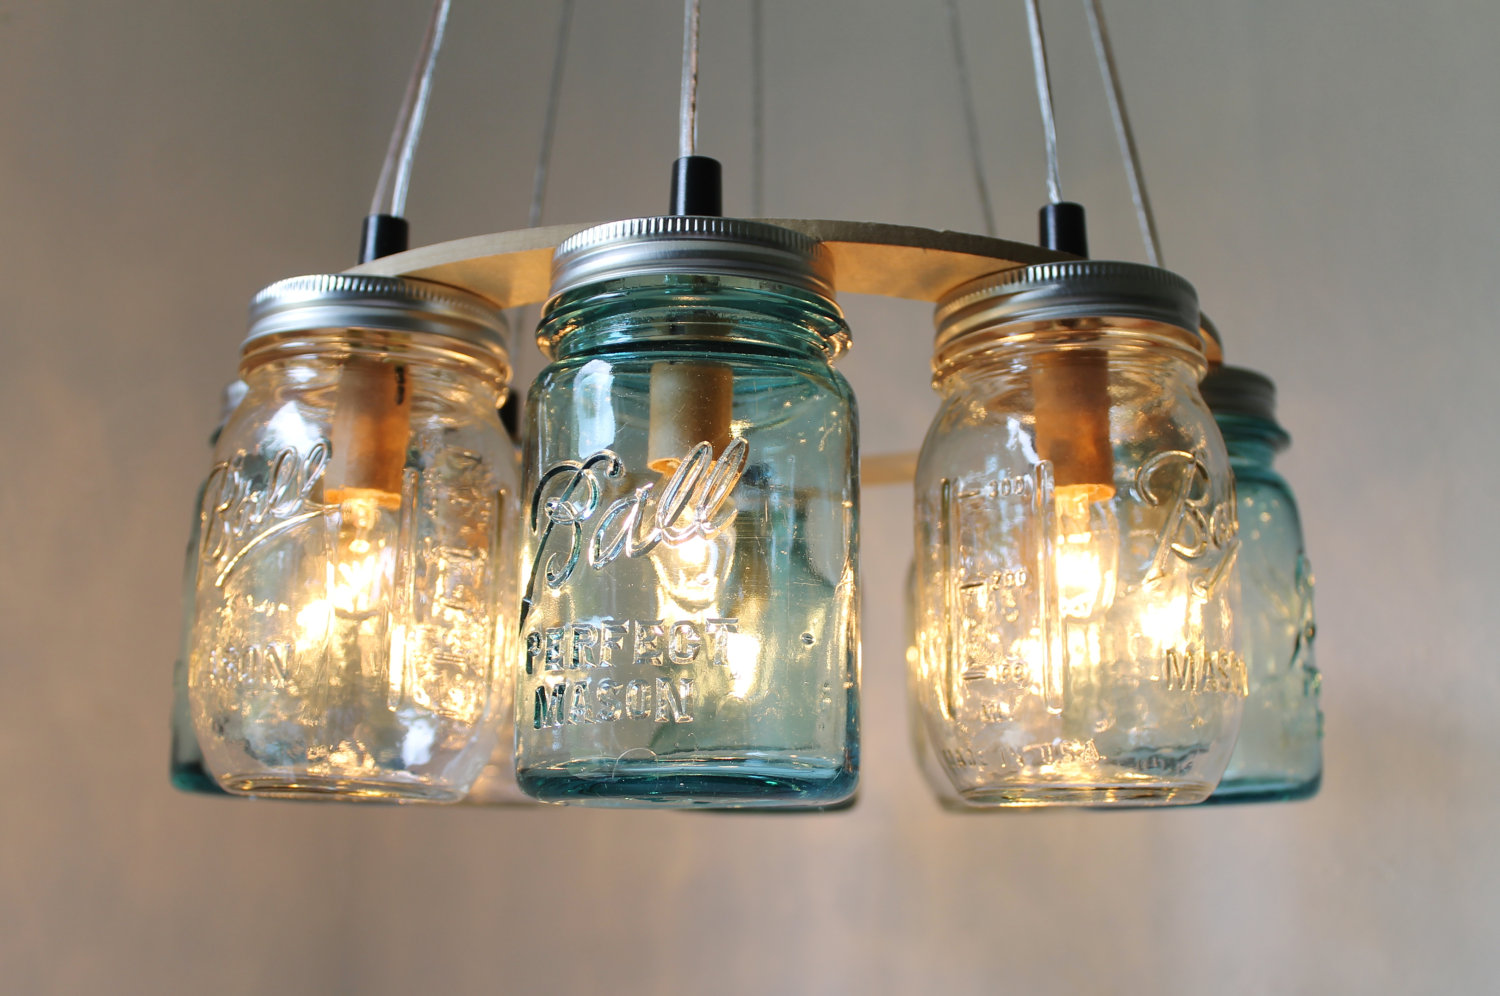
Read more: How To Make A Mason Jar Chandelier
Step 8: Test the Dispenser
Now that your mason jar soap dispenser is fully assembled and ready to go, it’s time to test its functionality. Follow these steps to ensure that the dispenser works smoothly:
- Hold the soap dispenser: Pick up the mason jar soap dispenser and hold it securely in one hand.
- Press the pump: With your other hand, press the pump down firmly to dispense the soap. You should notice a steady flow of soap coming out through the nozzle.
- Release the pump: Release the pressure on the pump, allowing it to spring back into its original position.
- Check for clogs or issues: Observe the dispenser to ensure that the soap flows smoothly without any clogs or issues. If you encounter any difficulty in dispensing the soap, check for any blockages in the pump or nozzle and clear them if necessary.
Testing the dispenser is an important step to make sure that it functions properly and provides a seamless soap dispensing experience. Make any necessary adjustments or repairs if you encounter any issues during the testing process.
Now that you’ve successfully tested your mason jar soap dispenser, you’re ready to move on to the final step: decorating and personalizing your dispenser to add that extra touch of creativity and charm.
Step 9: Decorate and Personalize
Now that you have a fully functional mason jar soap dispenser, it’s time to let your creativity shine and add your own personal touch to it. Follow these steps to decorate and personalize your soap dispenser:
- Choose decorative elements: Consider adding decorative elements such as ribbons, twine, or charms to enhance the aesthetic appeal of your soap dispenser. Select materials that match your style and the overall theme of your bathroom or kitchen.
- Wrap ribbons or twine around the neck: Take a ribbon or twine and wrap it around the neck of the mason jar, securing it with a knot or a bow. This simple addition can add a charming and rustic touch to the dispenser.
- Add labels or tags: Create custom labels or tags to identify the type of soap or to add a personal message. You can use printable labels, chalkboard labels, or even handwrite your own.
- Attach charms or decorative accents: Consider attaching small charms, beads, or other decorative accents to the pump or around the jar lid. This can add a unique and whimsical element to your soap dispenser.
- Showcase your creativity: Feel free to explore your artistic side and experiment with different materials, colors, and textures to create a soap dispenser that truly reflects your personality and style.
Decorating and personalizing your mason jar soap dispenser not only adds a visual flair but also makes it a unique and customized piece in your home. Let your imagination run wild and have fun with this creative process!
With your soap dispenser now beautifully decorated and personalized, you have successfully completed all the steps of making a mason jar soap dispenser. Step back and admire your handiwork – you’ve created a functional and stylish soap dispenser that will add a touch of charm to your bathroom or kitchen.
Remember to periodically clean and refill your soap dispenser as needed, and enjoy the convenience and aesthetic pleasure it brings to your daily routine.
Conclusion
Congratulations on successfully creating your very own mason jar soap dispenser! By following the step-by-step guide outlined in this article, you have transformed a simple mason jar into a functional and aesthetically pleasing soap dispenser for your bathroom or kitchen.
From gathering the materials to drilling a hole in the lid, inserting the pump, and securing it in place, each step has brought you closer to your finished product. By filling the mason jar with your favorite liquid soap and screwing on the lid, you have made a customizable soap dispenser that is both practical and visually appealing.
Remember to test the dispenser for smooth functionality and make any necessary adjustments along the way. Don’t forget to add your personal touch by decorating and personalizing your soap dispenser with ribbons, labels, charms, or other decorative accents to make it uniquely yours.
Your mason jar soap dispenser not only serves as a convenient tool for soap dispensing but also adds a touch of charm and personality to your space. It embodies the spirit of DIY creativity and repurposing, making it a budget-friendly and eco-friendly alternative to store-bought dispensers.
We hope that this article has inspired you to unleash your creativity and explore the world of DIY projects. Making your own mason jar soap dispenser is just the beginning – you can apply the same principles and techniques to create other unique and functional items for your home.
Thank you for joining us on this DIY journey, and we hope you enjoy using your handmade mason jar soap dispenser for years to come. Happy soap dispensing!
Frequently Asked Questions about How To Make A Mason Jar Soap Dispenser
Was this page helpful?
At Storables.com, we guarantee accurate and reliable information. Our content, validated by Expert Board Contributors, is crafted following stringent Editorial Policies. We're committed to providing you with well-researched, expert-backed insights for all your informational needs.


0 thoughts on “How To Make A Mason Jar Soap Dispenser”