Articles
How To Make A Modern Quilt
Modified: November 2, 2024
Learn how to make a modern quilt with our informative articles. Find step-by-step instructions and creative ideas to inspire your next quilting project.
(Many of the links in this article redirect to a specific reviewed product. Your purchase of these products through affiliate links helps to generate commission for Storables.com, at no extra cost. Learn more)
Introduction
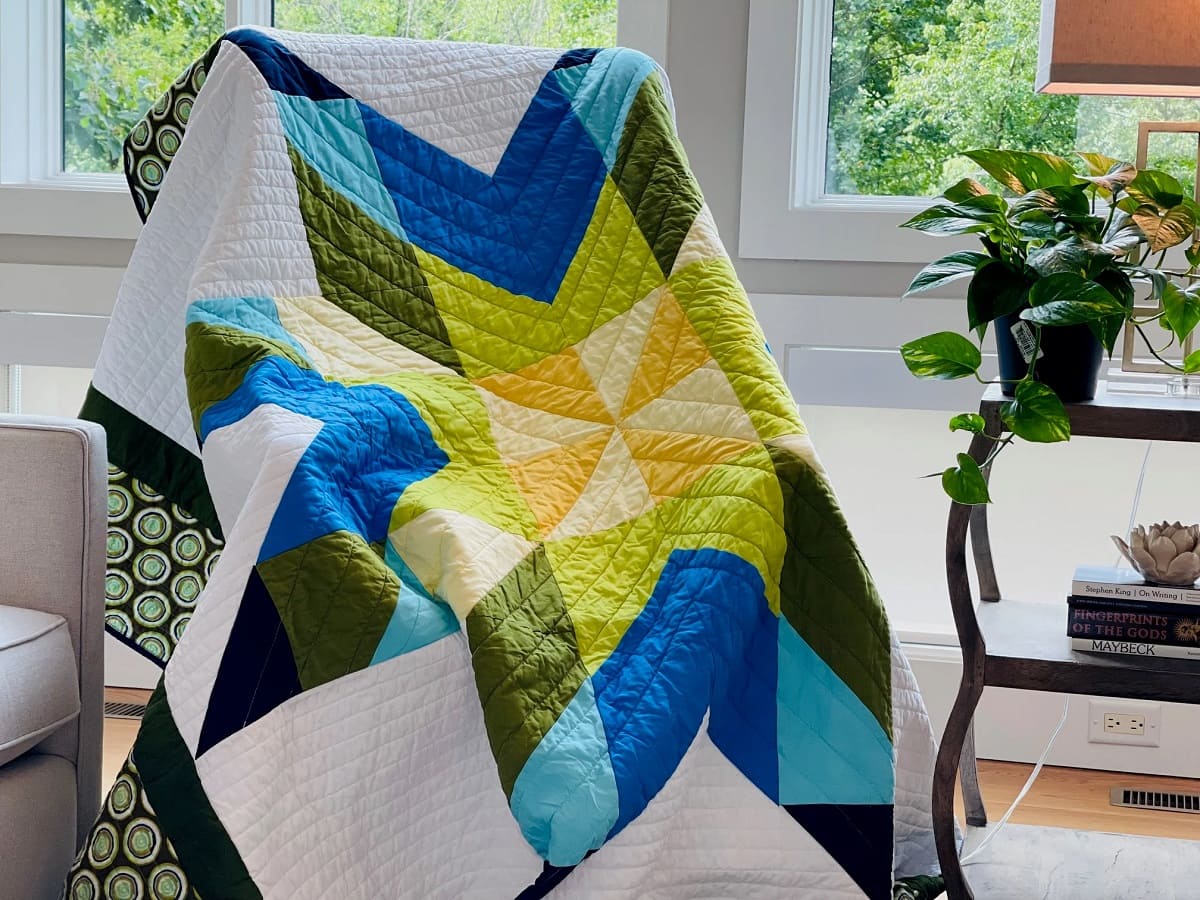
Welcome to the world of modern quilting! Quilting has come a long way from its traditional roots, with modern quilters incorporating fresh designs, bold colors, and innovative techniques to create stunning, contemporary quilts. Whether you are a beginner or an experienced quilter looking to try something new, this article will guide you through the process of making a modern quilt.
Modern quilting embraces creativity and individual expression, allowing you to break free from conventional patterns and explore your own unique style. By combining traditional quilting techniques with a modern twist, you can create quilts that are visually striking and infused with your own personal touch. So, let’s dive in and discover how to make a modern quilt that reflects your own creativity and personality.
Key Takeaways:
- Embrace your creativity and individuality when making a modern quilt by experimenting with bold colors, unconventional fabrics, and asymmetrical block shapes. Let your imagination run wild and break free from traditional quilting norms.
- Designing and sewing a modern quilt involves careful consideration of fabric choices, block layouts, and quilting techniques. Enjoy the process of creating a visually captivating and durable quilt that reflects your unique style and craftsmanship.
Read more: How To Make A Quilt
Choosing Fabric and Colors
One of the most exciting parts of making a modern quilt is selecting the fabric and colors for your project. With modern quilting, the possibilities are endless, allowing you to experiment with vibrant hues, geometric prints, and even incorporate unconventional fabrics.
When choosing fabrics for your modern quilt, consider the overall aesthetic you want to achieve. Are you aiming for a bold and graphic look, or perhaps a softer and more whimsical feel? Take some time to explore different fabric collections and patterns, and trust your intuition when it comes to selecting fabrics that speak to you.
While traditional quilts often stick to a specific color palette, modern quilts embrace a broader range of colors. Don’t be afraid to mix and match contrasting shades and experiment with color combinations that challenge traditional norms. Look for high-contrast prints or solids in complementary or analogous colors to create a visually striking quilt design.
In addition to considering color, keep in mind the scale and print of the fabric. Modern quilting often features large-scale prints or bold abstract patterns that can add drama and interest to your quilt design. Consider incorporating solids or fabrics with a range of textures to add depth and dimension to your quilt.
It’s also worth mentioning that modern quilting is open to the use of unconventional fabrics. Don’t be afraid to incorporate fabrics like linen, chambray, or even silk into your project. These unique fabric choices can add an unexpected element to your quilt and create a truly one-of-a-kind piece.
Remember, the key to choosing fabric and colors for your modern quilt is to follow your instincts and allow your creativity to shine. There are no strict rules when it comes to modern quilting, so have fun and let your imagination run wild as you select the fabric and colors that speak to you.
Cutting and Piecing the Blocks
Once you have chosen your fabric and colors, it’s time to start cutting and piecing the blocks for your modern quilt. This step is crucial in creating the overall design and structure of your quilt.
Begin by referring to your chosen quilt pattern or design and take note of the block sizes and shapes required. Use a rotary cutter, ruler, and cutting mat to accurately cut the fabric pieces according to these measurements. Be sure to follow the cutting instructions carefully to ensure that your blocks fit together seamlessly.
Next, it’s time to piece the blocks together. Lay out your cut fabric pieces on a design wall or a flat surface to visualize the layout and arrangement of the blocks. You can experiment with different block placements to create interesting visual effects or adopt a more random approach for a modern and improvisational look.
As you start piecing the blocks, remember to use a consistent seam allowance. A quarter-inch seam allowance is a common choice in quilting and ensures that your blocks will fit together accurately. Use pins to hold the fabric pieces in place before sewing to ensure precise alignment.
If you’re new to quilting, start with simple block patterns and gradually challenge yourself with more complex designs as you gain confidence and experience. Modern quilting often incorporates asymmetrical or irregular block shapes, so don’t be afraid to experiment and push boundaries in your design.
As you piece the blocks together, press the seams using a hot iron. This will help your blocks lay flat and create a smoother overall finish. Consider pressing your seams open to reduce bulk, especially if you’re working with thicker or heavier fabrics.
Continue piecing the blocks together until you have completed the desired number of blocks for your quilt top. Take a step back and admire your progress thus far. The cutting and piecing process is where your modern quilt truly starts to take shape, and you can see your design vision coming to life.
In the next section, we’ll explore how to design the quilt layout to create a visually captivating and balanced composition.
Designing the Quilt Layout
Designing the layout of your modern quilt is an exciting and creative process that allows you to arrange your blocks in a way that showcases your unique vision. The layout of your quilt can greatly impact the overall aesthetic and visual impact, so take some time to experiment and find a design that speaks to you.
Start by laying out your pieced blocks on a design wall or a flat surface. This will allow you to easily rearrange the blocks until you find a layout that you love. Consider the placement of colors, prints, and block shapes, and how they interact with one another.
Modern quilting often incorporates negative space, which is the empty or neutral space surrounding the blocks. This negative space can add balance to your quilt design and create a sense of openness and modernity. Play around with different amounts of negative space and experiment with its placement within your quilt layout.
Another popular approach in modern quilting is the use of asymmetry and irregular block placement. Rather than aligning your blocks in a uniform grid, consider offsetting them or clustering them in a more organic way. This can create dynamic movement and visual interest in your quilt design.
When designing the layout, it’s helpful to step back and view your quilt from a distance. This allows you to see how the colors and shapes interact and whether any adjustments are needed. Take your time to find a layout that is visually captivating and balanced.
If you’re feeling stuck or overwhelmed with choosing a layout, consider seeking inspiration from modern quilting books, magazines, or online platforms. Look for quilts that resonate with you and use them as a starting point for your own design. Don’t be afraid to put your own spin on it and make it unique to your vision.
Once you’re satisfied with your quilt layout, take a photo of it for reference and begin the process of sewing the rows together. In the next section, we’ll explore how to sew the rows of your quilt top together to bring your design to life.
Sewing the Rows Together
Now that you have designed the layout of your modern quilt, it’s time to sew the rows together and start seeing your design take shape. Sewing the rows together requires careful precision to ensure that your blocks align correctly and create a cohesive quilt top.
Before you start sewing, it’s a good idea to label your rows to keep them organized. You can use pins or small pieces of paper with numbers to mark the order of the rows. This will make it easier to keep track of the layout as you sew.
Begin by aligning the first two blocks of the first row, right sides together. Hold them in place with pins to ensure they won’t shift while sewing. Use a quarter-inch seam allowance and sew the blocks together, backstitching at the beginning and end of the seam to secure it.
Continue sewing the blocks of the first row together, one at a time, until the entire row is complete. Press the seams in one direction using a hot iron to create a smooth and flat row. Repeat this process for the remaining rows, ensuring that the blocks align with the corresponding blocks in the previous row.
As you sew the rows together, it’s essential to pay attention to matching up the seams. This will ensure that your blocks line up neatly and create a seamless quilt top. Take your time and use pins or clips to hold the seams in place before sewing.
If you encounter any blocks that don’t align perfectly, don’t worry! Modern quilting embraces imperfections and the organic nature of handmade quilts. Embrace these quirks and continue sewing, knowing that they add character and uniqueness to your quilt.
Once all the rows are sewn together, take a moment to admire your progress. You now have a complete quilt top that showcases your modern design and craftsmanship.
In the next section, we’ll explore how to add borders and sashing to your quilt to frame and enhance the overall design.
When making a modern quilt, consider using bold and geometric patterns, as well as a mix of solid and print fabrics to create a contemporary look.
Read more: How To Make A Quilt Larger
Adding Borders and Sashing
Adding borders and sashing to your modern quilt can elevate its design and provide a finished and polished look. Borders are strips of fabric that frame the quilt top, while sashing is the fabric strips that separate and visually separate the blocks.
First, let’s discuss borders. Borders can be a single fabric or multiple fabrics sewn together to create a visually interesting border. Measure the dimensions of your quilt top and cut the border fabric to the desired width. Align the border strips with the edges of the quilt top, ensuring they are straight and parallel. Sew the borders to the quilt top using a quarter-inch seam allowance, and press the seams open or towards the border fabric.
Sashing is another design element that can add interest to your quilt. Sashing strips are sewn vertically and horizontally between the blocks, creating a grid-like pattern. Sashing can be the same width as your borders or narrower for a more subtle effect.
To add sashing, measure the dimensions of your blocks and cut the sashing fabric to the desired width. Sew the sashing strips between the blocks, aligning them evenly and ensuring they are straight. Press the seams open or towards the sashing fabric.
Both borders and sashing can be a great opportunity to introduce additional colors, prints, or textures to your quilt. Consider using a contrasting fabric or incorporating a unique pattern to make the borders and sashing stand out.
When adding borders and sashing, it’s important to maintain the overall balance and proportion of your quilt design. Be mindful of the scale and size of the borders and sashing in relation to the blocks, ensuring that they complement and enhance the overall composition.
Once you have added borders and sashing, take a step back and admire your quilt top. The addition of these elements can truly transform your modern quilt, giving it a polished and cohesive look.
In the next section, we’ll explore how to quilt the layers together to create a finished and durable quilt.
Quilting the Layers Together
Quilting is the process of stitching the layers of your quilt together, creating a decorative and functional element that adds texture and durability. There are various quilting techniques you can choose from, ranging from hand quilting to machine quilting.
Before you start quilting, gather the following materials: a quilting needle or a sewing machine with a quilting foot, quilting thread, safety pins or basting spray, and a marking tool.
Start by layering your quilt top, batting, and backing fabric together. Place the backing fabric right side down, followed by the batting, and then the quilt top, right side up. Smooth out any wrinkles or creases, ensuring that the layers are aligned perfectly.
If you prefer hand quilting, use safety pins to baste the layers together, evenly spacing them across the quilt. Alternatively, you can use basting spray to temporarily adhere the layers. This will prevent them from shifting as you quilt.
If you are using a sewing machine for quilting, attach the quilting foot and thread your machine with quilting thread. Choose a quilting design that complements your quilt, such as straight lines, free-motion quilting, or a specific pattern. You may choose to mark the design on your quilt top before quilting, or you can freehand the design as you go.
Start quilting from the center of the quilt and work your way outwards. Take your time and ensure that your stitches are even and secure. If you are machine quilting, use a consistent speed and practice controlling the movement of your quilt to maintain smooth and even stitching.
Once you have quilted the entire surface of your quilt, trim off any excess batting and backing fabric. This will prepare your quilt for the final step, which is binding.
Quilting adds both beauty and structure to your quilt, making it a functional and long-lasting piece. Take pride in your quilting stitches as they contribute to the overall appearance and durability of your modern quilt.
In the next section, we’ll explore how to bind the edges of your quilt to give it a clean and professional finish.
Binding the Quilt
Binding is the final step in completing your modern quilt. It involves sewing a fabric strip around the raw edges of the quilt, creating a clean and finished edge. Binding not only gives your quilt a polished look but also serves to protect the edges and keep the layers secure.
To bind your quilt, you will need fabric for the binding strips, a ruler, a rotary cutter or fabric scissors, quilting pins or clips, and a sewing machine.
Start by cutting your fabric into strips for the binding. The width of the strips will depend on your preference, but 2.5 inches is a common size. Sew the strips together end-to-end diagonally to create a long continuous binding strip.
Next, prepare your quilt by trimming away the excess batting and backing fabric along the edges. This will ensure that the quilt edges are straight and even.
Take your binding strip and fold it in half lengthwise, wrong sides together, and press it with an iron. Align the raw edges of the binding with the raw edges of your quilt. Start sewing the binding strip to the quilt, leaving a small tail of binding unstitched.
Using a quarter-inch seam allowance, sew along the edge of the quilt, securing the binding strip in place. As you approach a corner, stop sewing a quarter-inch before reaching it. Backstitch to secure the stitching. Fold the binding strip up, away from the quilt, creating a 45-degree fold. Then, fold it back down, aligning it with the next edge of the quilt. Continue sewing from the corner, repeating this process for each corner.
Once you have sewn around the entire perimeter of the quilt, stop sewing a few inches before reaching the starting point. Trim the excess binding strip, leaving a small overlap. Fold the end of the binding strip inward and tuck it into the starting point. Continue sewing to close the binding, backstitching to secure the stitching.
Press the binding away from the quilt and fold it over the raw edges to the back of the quilt. Use quilting pins or clips to hold it in place. Hand stitch the binding to the back of the quilt using a blind stitch or a whip stitch, ensuring that your stitches are discreet and secure.
After stitching the entire binding to the back, your quilt is now complete! Take a moment to admire your finished modern quilt and celebrate the hard work and creativity that went into making it.
In the final section, we’ll explore some finishing touches and care instructions to keep your modern quilt looking beautiful for years to come.
Finishing Touches and Care Instructions
Congratulations on completing your modern quilt! Before you showcase your quilt or gift it to someone special, there are a few finishing touches to consider and some important care instructions to keep in mind.
First, examine your quilt for any loose threads or stray fibers. Trim any excess threads and give your quilt a final once-over to ensure it looks clean and polished.
If desired, you can add a label to your quilt. Include your name, the date, and any other meaningful details. A label adds a personal touch and serves as a record of your quilt for future generations.
Now that your quilt is complete, it’s important to know how to care for it to keep it looking its best. While machine washing is not recommended for quilts, spot cleaning or gentle hand washing may be necessary for specific stains or spills. Use mild detergent and cold water, and allow your quilt to air dry. Avoid wringing or twisting the fabric, as this can cause distortion.
When not in use, store your quilt in a cool, dry place to protect it from sunlight and humidity. Avoid storing it in plastic, as this can trap moisture and potentially lead to mildew. Instead, use a breathable cotton or muslin bag to protect your quilt from dust and dirt.
It’s also a good idea to periodically rotate your quilt to avoid excessive wear in certain areas. This will help maintain the overall appearance of your quilt and prevent uneven fading or damage.
Lastly, remember that quilts are meant to be enjoyed and used. Don’t be afraid to snuggle up with your quilt, display it on a wall, or gift it to someone you love. Your quilt is a testament to your creativity and skill, and it deserves to be cherished and admired.
With these finishing touches and care instructions in mind, your modern quilt is ready to take center stage and bring joy to all who see it.
Thank you for joining us on this journey of creating a modern quilt. We hope this article has inspired and empowered you to embark on your own quilting adventure. Happy quilting!
Now that you've got the hang of crafting a modern quilt, why not dive into some festive crafting? Our next feature offers a wealth of creative projects perfect for sprucing up your Easter celebrations. From charming decorations to unique gifts, these DIY crafts will surely bring a burst of spring joy into your home. Whether you're looking for a fun activity with kids or some elegant additions to your Easter decor, we've got just the thing. Dive in and let your creativity flow with these delightful Easter craft ideas.
Frequently Asked Questions about How To Make A Modern Quilt
Was this page helpful?
At Storables.com, we guarantee accurate and reliable information. Our content, validated by Expert Board Contributors, is crafted following stringent Editorial Policies. We're committed to providing you with well-researched, expert-backed insights for all your informational needs.


0 thoughts on “How To Make A Modern Quilt”