Articles
How To Make Epoxy Resin Wall Art
Modified: January 19, 2024
Learn all about creating stunning epoxy resin wall art with these informative articles. Discover tips, techniques, and inspiration for your next artistic masterpiece.
(Many of the links in this article redirect to a specific reviewed product. Your purchase of these products through affiliate links helps to generate commission for Storables.com, at no extra cost. Learn more)
Introduction
Creating epoxy resin wall art has become a popular way to add a unique and stunning touch to any living space. This art form combines the beauty of traditional painting techniques with the depth and glossy finish of epoxy resin. Whether you’re a seasoned artist or a creative enthusiast, making epoxy resin wall art is an exciting and rewarding process.
In this article, we will guide you through the step-by-step process of creating your very own epoxy resin wall art. From choosing the right materials and tools to applying the resin and adding color effects, you’ll learn all the techniques needed to create a masterpiece that will impress anyone who sees it.
Not only is epoxy resin wall art visually appealing, but it also offers versatility in design. You can create abstract pieces, landscapes, geometric patterns, or even customize it to match your home decor. The possibilities are endless, and your imagination is the only limit.
Before we dive into the process, let’s take a look at the materials and tools you’ll need to get started.
Key Takeaways:
- Unleash Your Creativity: Epoxy resin wall art offers endless design possibilities, allowing you to experiment with colors, textures, and patterns to create unique and captivating masterpieces that reflect your personal style.
- Attention to Detail: From preparing the canvas to removing air bubbles and adding finishing touches, the process of creating epoxy resin wall art requires patience, precision, and a keen eye for detail to achieve professional and stunning results.
Read more: How To Make Plaster Wall Art
Materials and Tools
Creating epoxy resin wall art requires a few essential materials and tools. Here’s a list of what you’ll need:
- Epoxy resin: Choose a high-quality, clear epoxy resin specifically made for artwork. It’s important to use a resin that is non-yellowing and has a long working time to give you enough time to work on your piece.
- Hardener: The epoxy resin should come with a corresponding hardener. Ensure that you have the correct ratio of resin to hardener for a proper cure.
- Canvas: Select a sturdy canvas board or canvas panel as the base for your artwork. The size and shape are entirely up to you, depending on your desired final piece.
- Paintbrushes: Have a variety of brushes in different sizes and shapes to apply the resin and create different effects.
- Pigments or colorants: You can use acrylic paints, alcohol inks, or resin-specific pigments to add color to your artwork. Experiment with different colors to achieve the desired effect.
- Heat gun or torch: A heat gun or torch is essential for removing air bubbles from the resin and creating unique patterns or effects.
- Mixing cups and stir sticks: Use disposable mixing cups and wooden or silicone stir sticks to mix the resin and hardener.
- Protective gear: Wear gloves, a mask, and protective clothing to ensure your safety and prevent any allergic reactions to the resin.
- Level: To ensure your artwork dries flat and level, use a level or bubble level to position the canvas correctly.
- Drop cloth or newspaper: Protect your workspace by laying down a drop cloth or covering it with newspaper to catch any resin drips or spills.
- Measuring tools: Depending on the epoxy resin you choose, you may need measuring tools such as a digital scale or graduated mixing cups to accurately measure the resin and hardener ratios.
Now that you have the necessary materials and tools, let’s move on to the next step – choosing a design for your epoxy resin wall art.
Choosing a Design
When it comes to epoxy resin wall art, the design possibilities are endless. You can choose to create a vibrant abstract piece, a serene landscape, or even a geometric pattern. Before you start, take some time to brainstorm and decide on the overall theme and style you want to achieve.
If you’re new to resin art, it’s a good idea to start with a simple design to get familiar with the materials and techniques. As you gain more experience, you can experiment with more complex and intricate designs.
Here are a few design ideas to inspire you:
- Abstract: Get creative and let your imagination run wild. Use vibrant colors and bold brush strokes to create a visually stunning abstract piece.
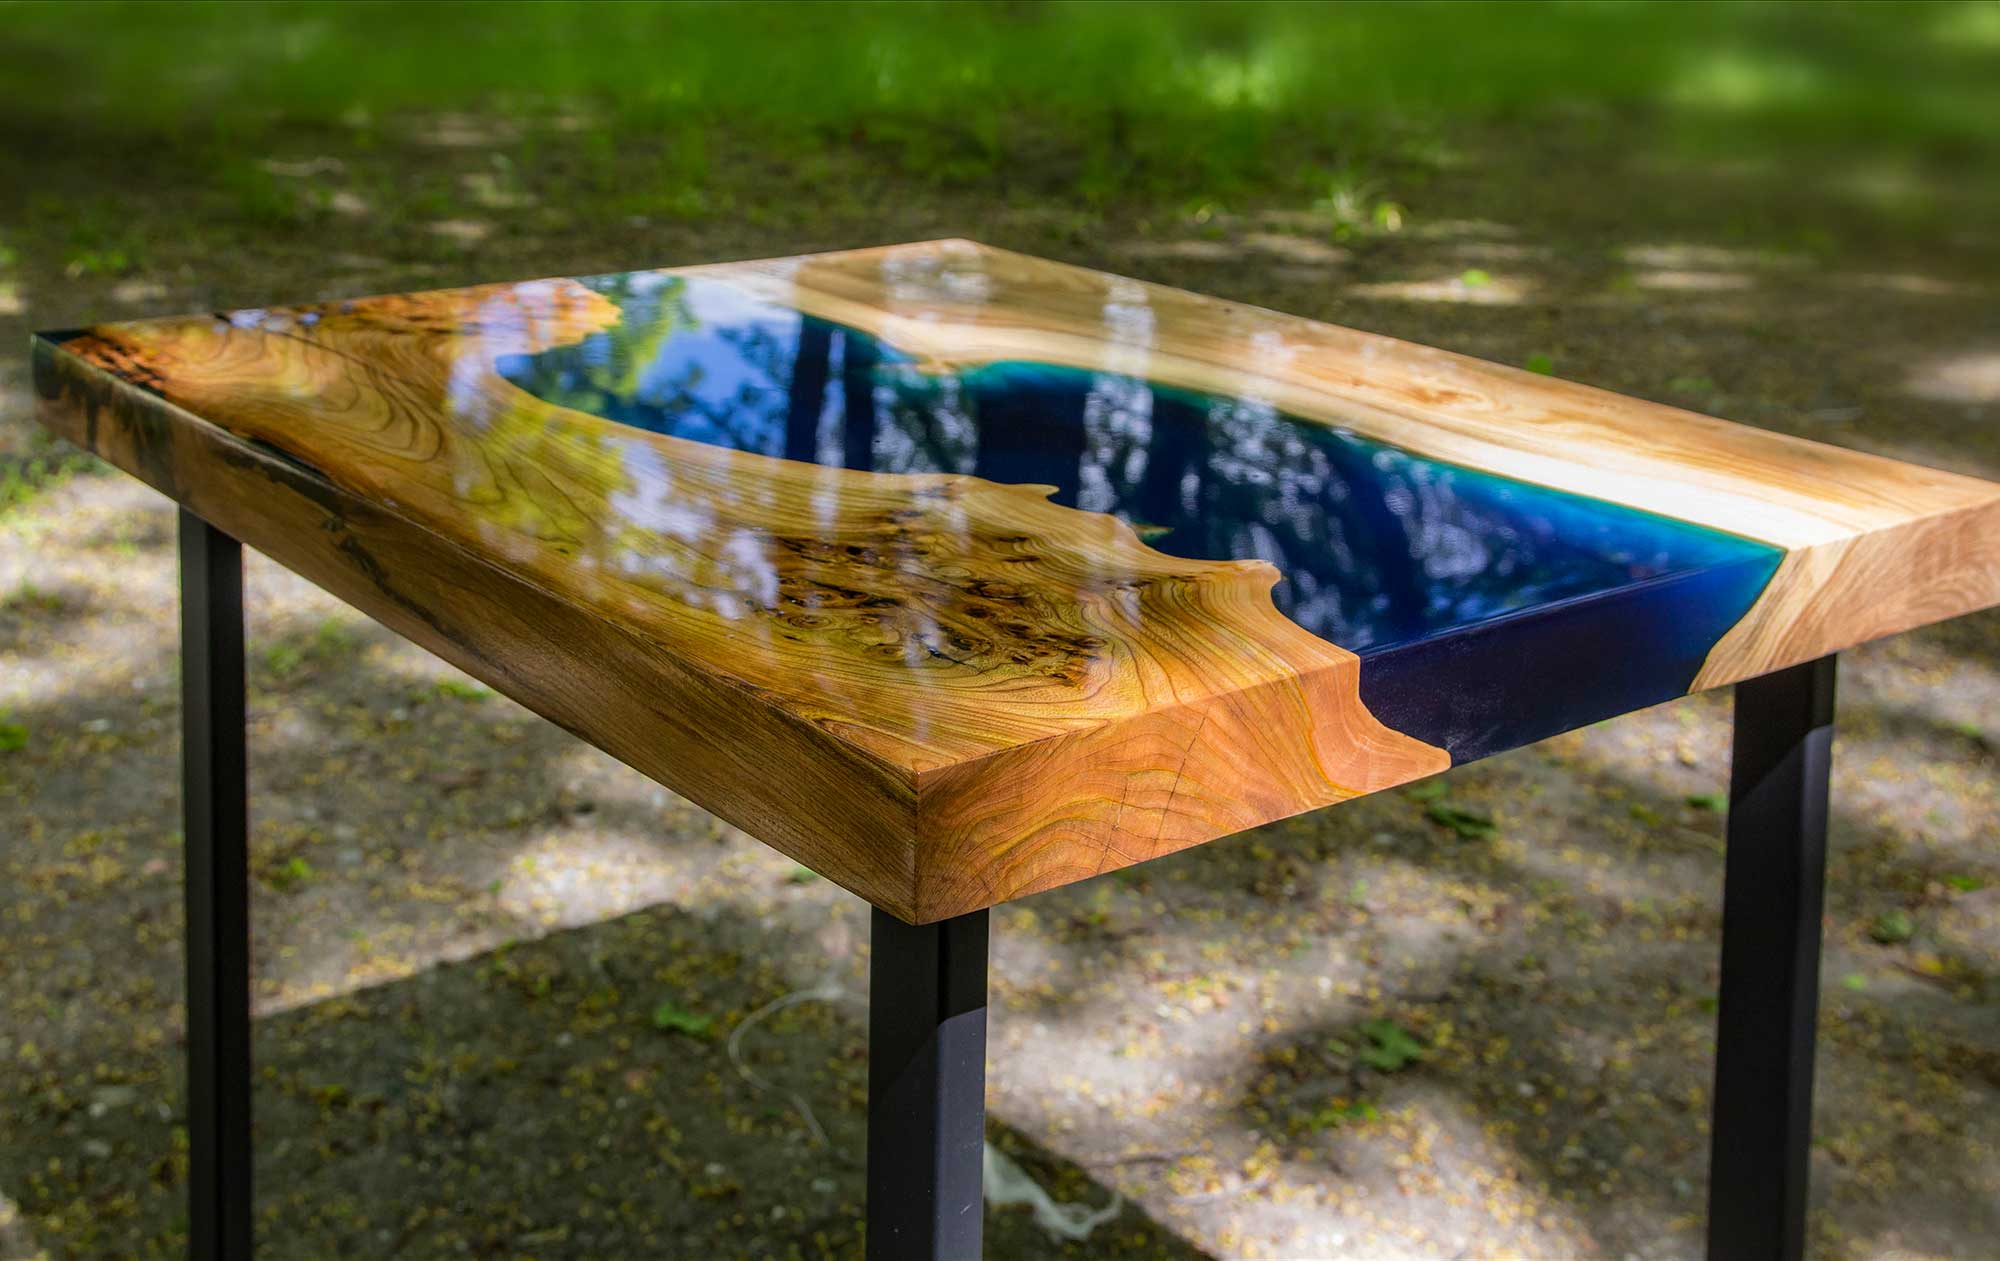
- Landscape: Capture the beauty of nature in your resin artwork. Choose a serene landscape, such as a beach scene or a forest, and bring it to life with resin and pigments.
- Geometric: Create a modern and stylish piece by incorporating geometric shapes and patterns. Combine different colors and angles to achieve a visually striking effect.
- Marble: Mimic the luxurious look of marble by using resin and pigments in white and gray tones. Swirl the colors together to create a realistic marble effect.
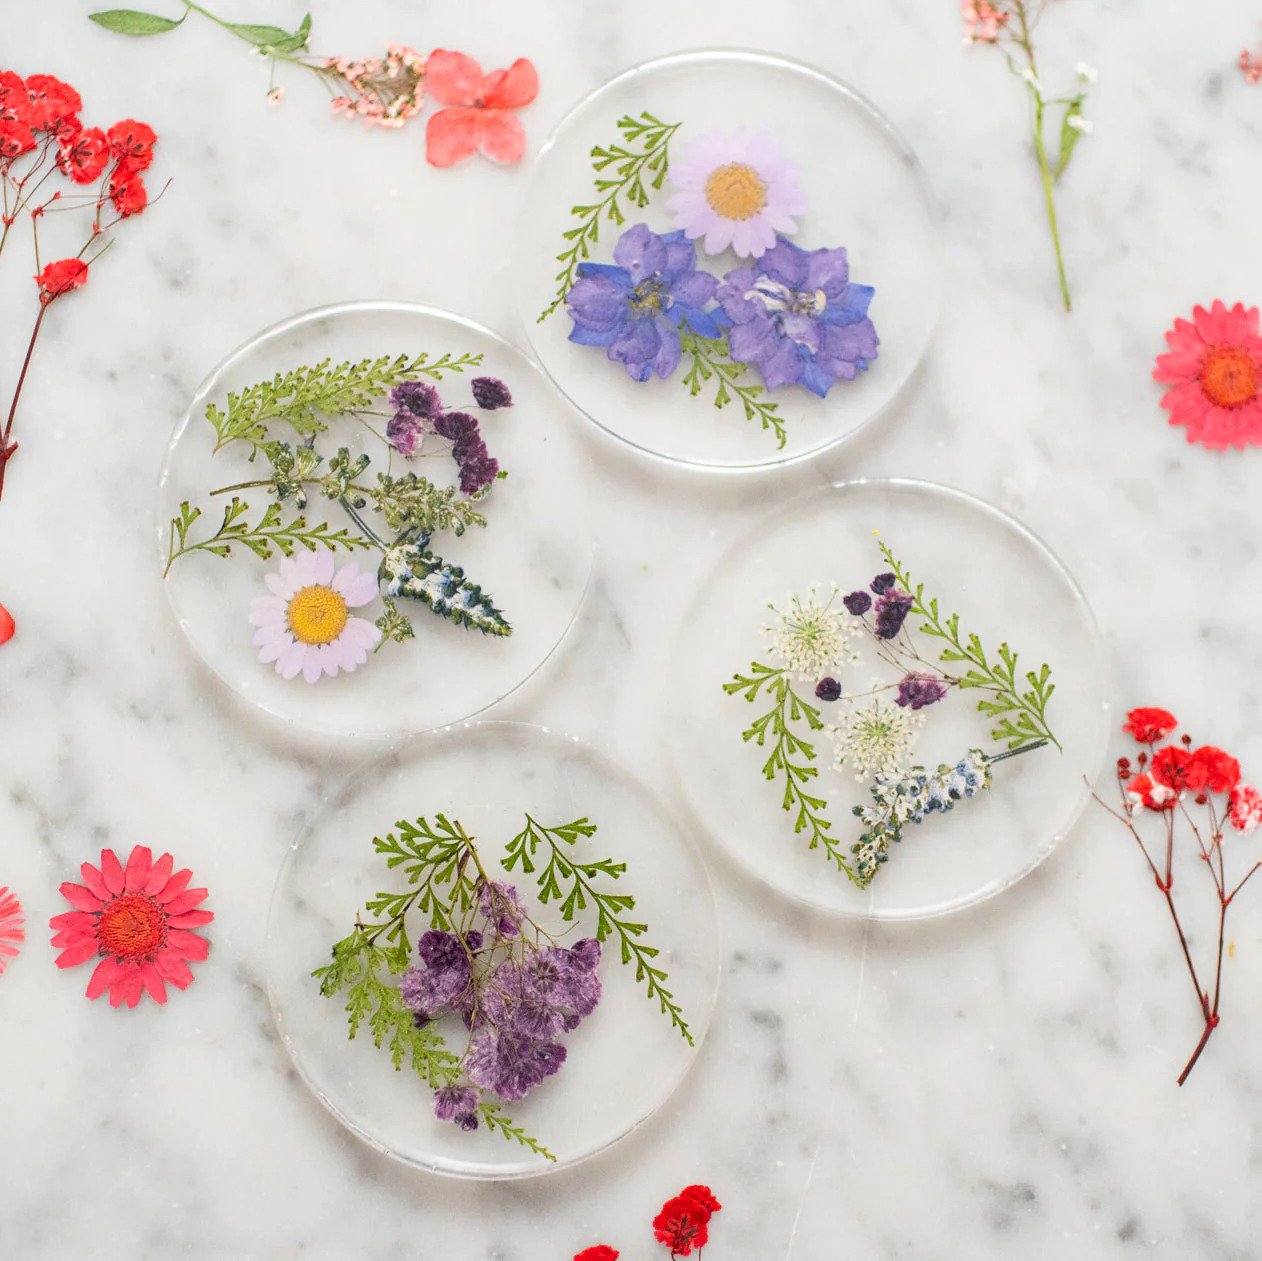
- Mixed Media: Incorporate other materials such as shells, dried flowers, or glitter into your resin artwork for added texture and interest.
Once you have an idea of the design you want to create, it’s time to prepare the canvas to ensure a smooth and flawless finish. Read on to learn how to properly prepare the canvas for your epoxy resin wall art.
Preparing the Canvas
Before you start working with epoxy resin, it’s crucial to prepare the canvas properly to ensure a smooth and flawless finish. Follow these steps to get your canvas ready:
- Clean the canvas: Start by ensuring that the canvas is clean and free from any dust or debris. Use a soft brush or cloth to gently remove any particles that might interfere with the resin application.
- Prime the canvas: Apply a layer of gesso or acrylic paint as a primer to seal the canvas surface. This will create a smooth and even base for the resin. Let the primer dry completely according to the manufacturer’s instructions.
- Sand the canvas: Use fine-grit sandpaper to lightly sand the canvas after the primer has dried. Sanding helps to remove any imperfections and creates a slightly rough surface that allows the resin to adhere better.
- Remove any dust: After sanding, use a clean, dry cloth or brush to remove any residual dust from the canvas. Ensure the surface is free from any particles that could affect the resin application.
- Protect the edges: Use painter’s tape to cover the edges of the canvas. This will create clean, crisp lines and prevent resin from dripping onto the sides, which can be difficult to clean up later.
Once you have prepared the canvas, you are ready to move on to the exciting part – mixing and applying the epoxy resin. Read on to learn how to properly mix the resin and hardener.
Mixing the Epoxy Resin
The process of mixing epoxy resin is crucial to achieving a successful and durable finish for your epoxy resin wall art. Follow these steps to mix the resin and hardener correctly:
- Read the instructions: Carefully read and follow the instructions provided by the manufacturer of the epoxy resin. Different brands may have different mixing ratios and instructions, so it’s essential to understand the specific guidelines for the product you’re using.
- Prepare a clean and well-ventilated workspace: Find a well-ventilated area to work in, as epoxy resin can produce fumes during the mixing process. Lay down a protective drop cloth or covering to catch any spills or drips.
- Wear protective gear: Put on gloves, a mask, and protective clothing to safeguard yourself from any potential skin irritations or inhalation of fumes. Safety should always be a top priority when working with epoxy resin.
- Measure the resin and hardener: Use measuring cups or a digital scale to measure the desired amounts of epoxy resin and hardener according to the manufacturer’s instructions. Be precise and follow the recommended mixing ratio to ensure a proper cure.
- Pour the resin and hardener into a mixing cup: Pour both the resin and hardener into a clean mixing cup simultaneously. Make sure to scrape the sides and bottom of the containers to get an accurate measurement.
- Mix slowly and thoroughly: Begin stirring the resin and hardener together slowly, making sure to scrape the sides and bottom of the mixing cup. Stir gently but thoroughly to avoid introducing any air bubbles into the mixture. Continue stirring for the recommended time specified by the manufacturer.
- Avoid over-mixing: Be cautious not to over-mix the resin. Over-mixing can introduce more air bubbles into the mixture and affect the final result. Stop stirring once the resin and hardener are thoroughly combined and have a uniform consistency.
Now that you have successfully mixed the epoxy resin, it’s time to move on to the next step – applying the base coat to the prepared canvas.
Read more: How To Make Metal Wall Art
Applying the Base Coat
Applying a base coat to your canvas is an essential step in the epoxy resin wall art process. The base coat creates a smooth foundation and helps the resin adhere to the canvas. Follow these steps to apply the base coat:
- Prepare your workspace: Ensure that your workspace is clean and well-ventilated. Place your prepared canvas on a level surface, preferably on top of a drop cloth or newspaper to catch any drips or spills.
- Mix the base coat: In a clean mixing cup, prepare a small amount of epoxy resin mixture for the base coat. Follow the manufacturer’s instructions for the resin-to-hardener ratio and mix it thoroughly.
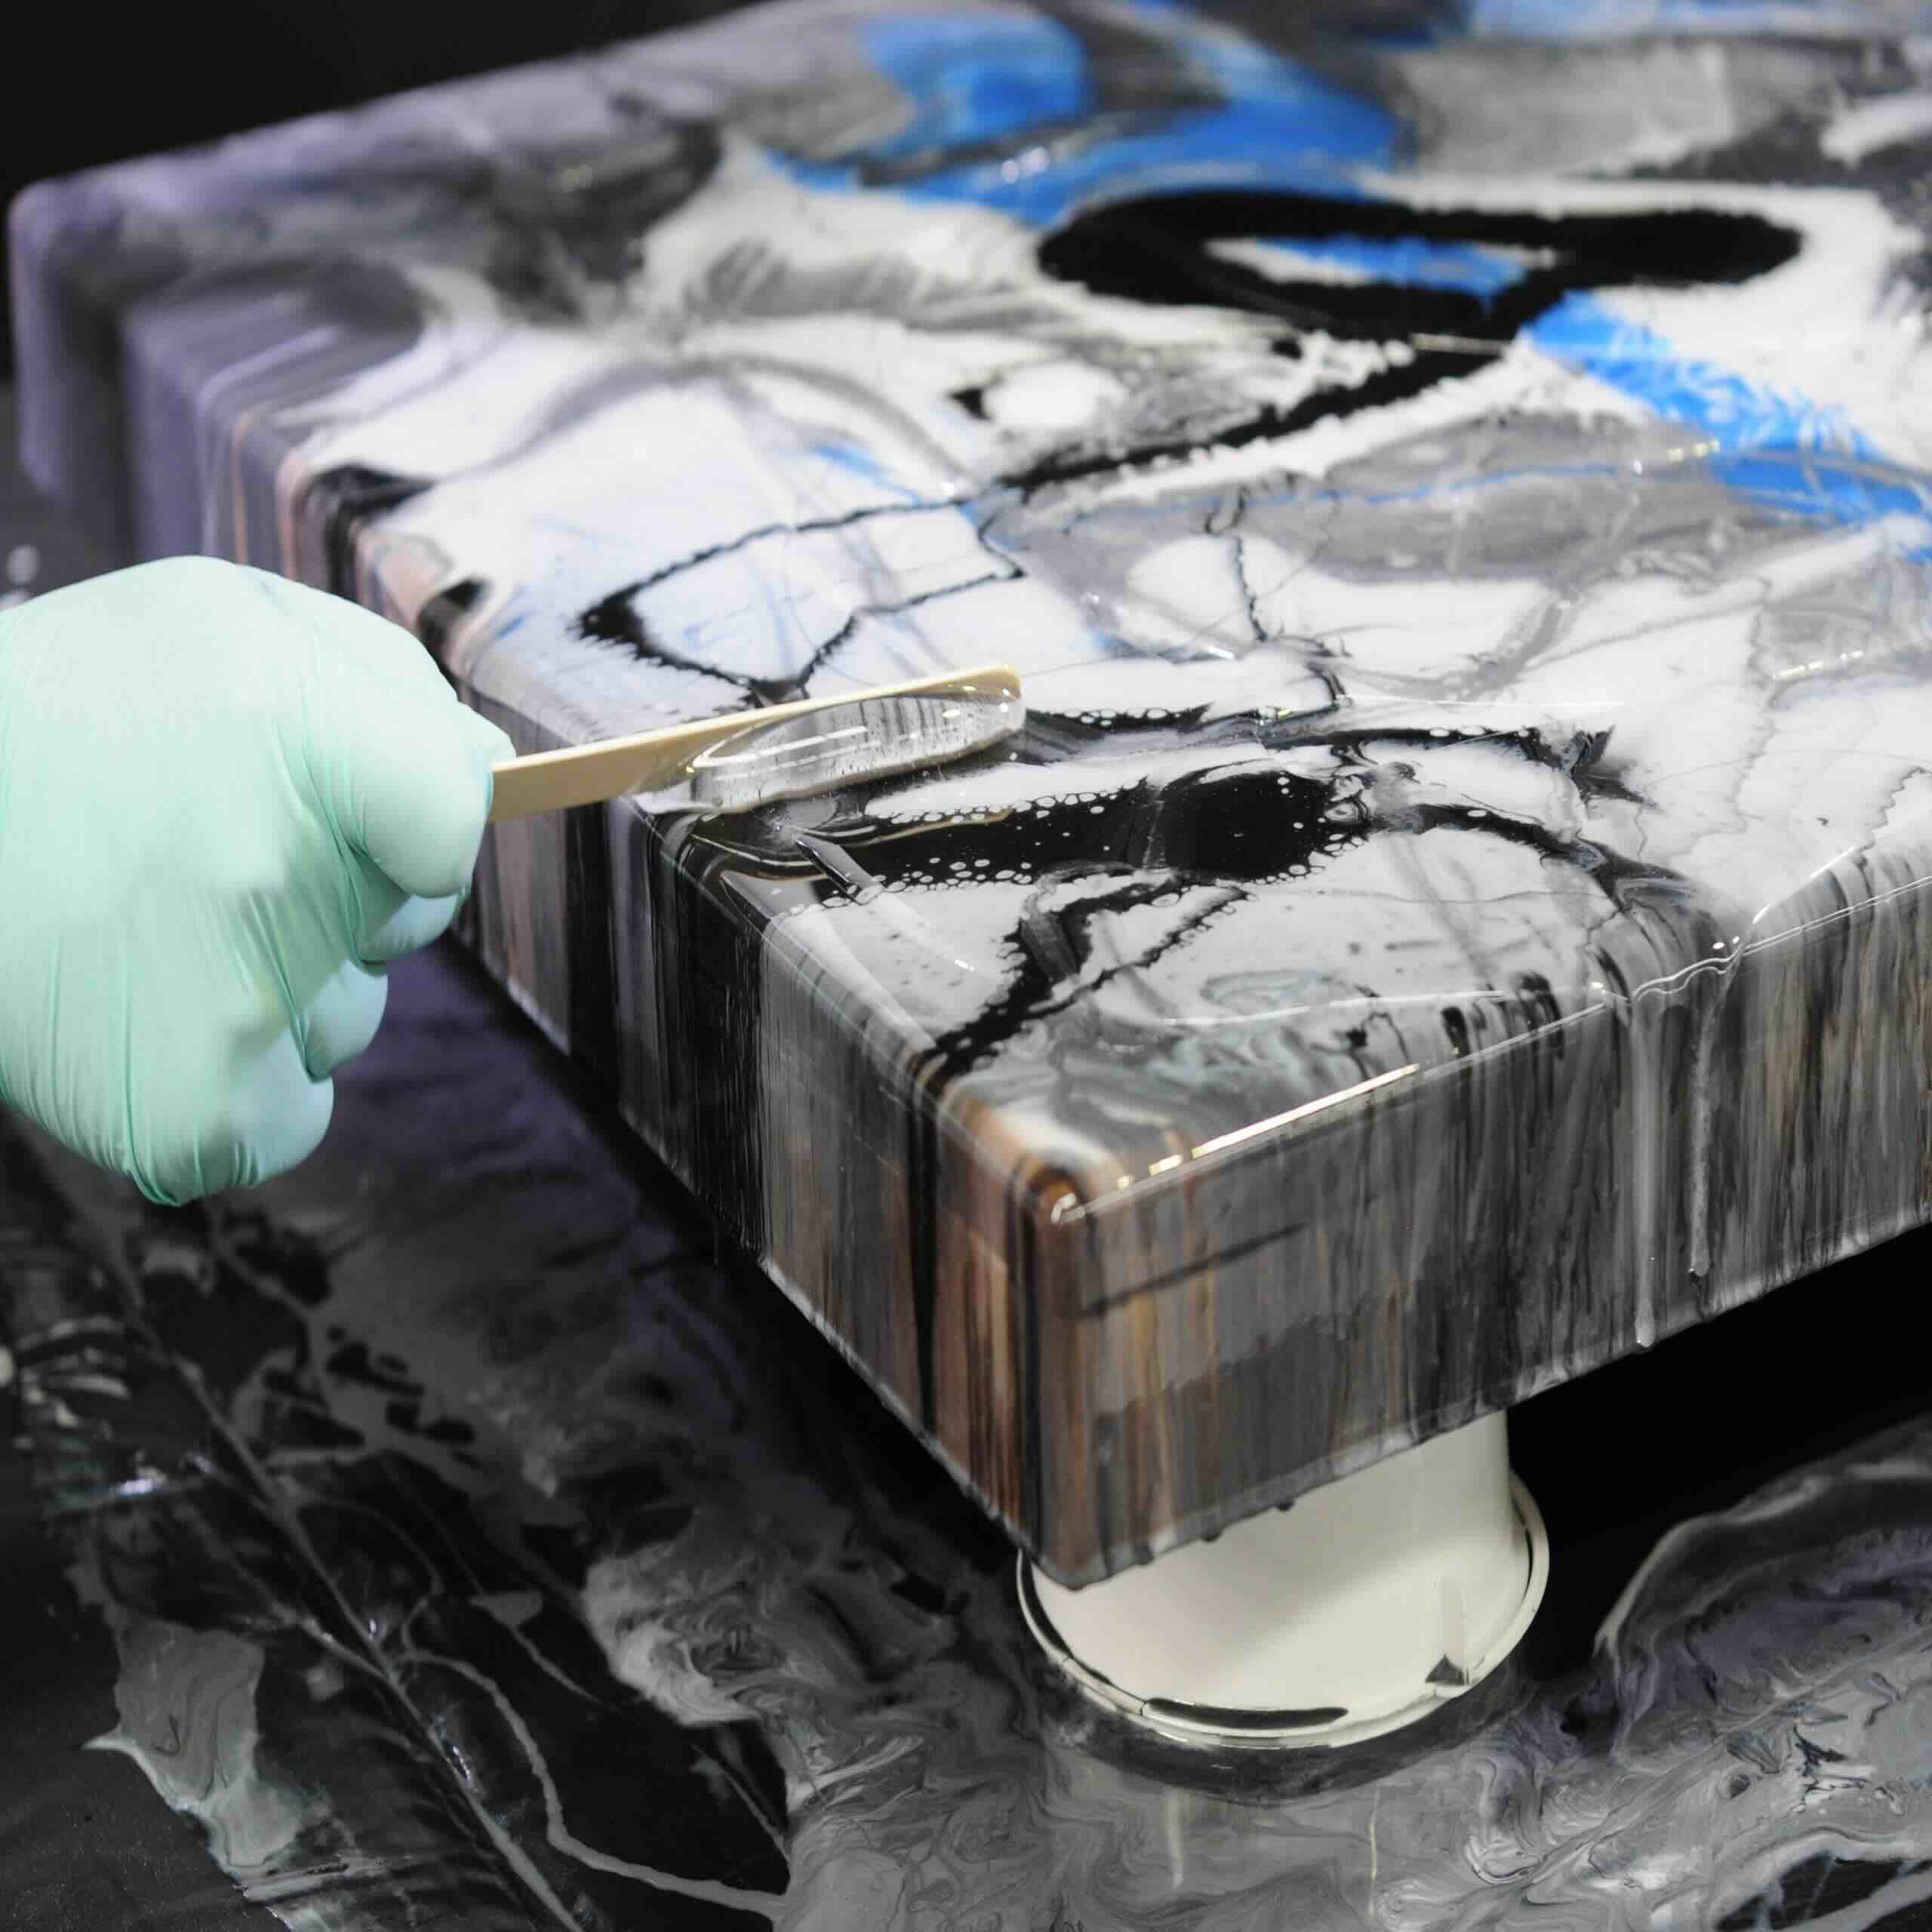
- Apply the base coat: Pour the base coat mixture onto the center of the canvas. Use a paintbrush or a plastic spreader to evenly spread the resin mixture across the entire surface of the canvas, ensuring it covers the edges as well.
- Eliminate any air bubbles: After applying the base coat, use a heat gun or a torch to gently pass over the surface of the resin. This will help remove any trapped air bubbles and create a smooth finish. Take care not to hold the heat source too close to the resin to prevent overheating or scorching.
- Check for drips: Inspect the edges of the canvas for any resin drips. If you notice any, carefully remove them with a clean brush or a plastic spreader before they cure.
- Allow the base coat to cure: Let the base coat cure according to the manufacturer’s instructions. This typically takes several hours or overnight. Make sure to keep the canvas in a dust-free and undisturbed area during the curing process.
Once the base coat is fully cured, you’re ready to take your epoxy resin wall art to the next level by adding colors and effects. Read on to learn how to create stunning visual effects in your artwork.
Adding Colors and Effects
Adding colors and effects is where the true magic of epoxy resin wall art happens. This step allows you to unleash your creativity and bring your artwork to life. Here are some techniques for adding colors and effects to your epoxy resin wall art:
- Pigments: Use acrylic paints, resin-specific pigments, or alcohol inks to add color to your artwork. Mix your desired pigments with small amounts of resin in separate mixing cups before pouring them onto the base coat.
- Layering: Create depth and dimension by layering different colors of resin. Pour small amounts of pigmented resin onto the cured base coat, allowing them to blend and interact with each other.
- Swirling: Use a mixing stick or a skewer to gently swirl the colors together, creating mesmerizing patterns and marbled effects. Be careful not to overmix, as it can result in a muddy appearance.
- Opacity and transparency: Experiment with different levels of opacity and transparency by adjusting the pigment-to-resin ratio. This can create stunning translucency or vibrant and opaque areas within your artwork.
- Resin cells: To create beautiful cells within your resin artwork, use techniques like adding silicone oil or using a heat gun to create heat-induced cells. These cells add a captivating and unique element to your piece.
- Glitter and embellishments: For added sparkle and texture, consider incorporating glitter, sequins, or other small embellishments into your epoxy resin wall art. Sprinkle them onto the wet resin and gently press them down to ensure they adhere.
- Experiment and have fun: Don’t be afraid to try new techniques or combine different colors and effects. Epoxy resin art is all about experimentation and discovering your own style.
Remember, resin has a self-leveling property, so the colors and effects you create on the surface will naturally settle and even out as the resin cures. Be patient and let the resin do its magic.
Once you’re satisfied with the colors and effects in your artwork, it’s important to address any air bubbles that may have formed during the mixing and pouring process. We’ll explore ways to remove air bubbles in the next step.
When working with epoxy resin for wall art, make sure to work in a well-ventilated area and wear protective gloves and a mask to avoid inhaling fumes or getting the resin on your skin.
Creating Texture and Patterns
Adding texture and creating patterns is an exciting way to enhance the visual interest of your epoxy resin wall art. It allows you to bring depth and dimension to your piece. Here are some techniques to create texture and patterns in your artwork:
- Mixing different viscosities: Experiment with different viscosities of epoxy resin by adding resin thickener or diluting it with a resin-compatible solvent. This allows you to create varying levels of thickness and texture in your artwork.
- Brush strokes: Use different types and sizes of brushes to create texture through brush strokes. Apply the resin mixture to the canvas with a brush and experiment with techniques like stippling, dabbing, or using sweeping strokes to create unique textures and patterns.
- Mixing in additional materials: Consider incorporating other materials into your resin artwork to create texture and interest. You can include things like sand, crushed glass, or dried leaves, carefully embedding them into the wet resin to add depth and a tactile quality.
- Using textured tools: Experiment with different textured tools such as combs, sponges, or even the edge of a palette knife. Drag these tools through the wet resin to create interesting patterns and textures.
- Masking techniques: Utilize masking techniques with tape or stencils to create crisp lines and geometric patterns. Apply the resin around the masked areas, let it cure, and then remove the tape or stencil to reveal the desired pattern.
- Layering and embedding: Create dimension by layering multiple pours of resin, allowing each layer to cure before adding the next. You can also embed items like beads, shells, or small trinkets between the layers to create a visually captivating effect.
- Experiment and improvise: Remember, there are endless possibilities when it comes to creating texture and patterns in epoxy resin wall art. Let your creativity flow and don’t be afraid to experiment and improvise with different techniques and materials.
As you explore these techniques, keep in mind the overall design and composition of your artwork. Consider how the texture and patterns you create will complement or enhance the colors and effects already present in the piece.
After applying texture and patterns, it’s time to address any air bubbles that may have formed. We’ll cover how to remove air bubbles in the next step.
Removing Air Bubbles
Air bubbles can sometimes form during the mixing and pouring process of epoxy resin. While they can be a common occurrence, it’s essential to remove them to achieve a smooth and professional-looking finish. Here are a few methods to remove air bubbles from your epoxy resin wall art:
- Heat gun or torch: Use a heat gun or a handheld torch to gently pass over the surface of the resin. The heat will help to release and pop the air bubbles. Move the heat source in a sweeping motion, keeping it a few inches away from the surface to avoid overheating or scorching the resin. Be careful not to stay in one area for too long to prevent any surface damage.
- Poking with a pin or needle: If you notice smaller air bubbles on the surface of the resin, gently poke them with a pin or needle. This will encourage the trapped air to escape. Use this method cautiously, and avoid creating any noticeable puncture marks on the artwork.
- Quickly passing a flame: If you have smaller air bubbles, you can quickly pass a flame, such as a lighter, candle, or butane torch, over the surface of the resin. The heat will cause the air bubbles to rise and burst. Just be careful not to hold the flame too close to the resin or expose it to the flame for too long.
- Vibrating the surface: Vibrating the surface of the resin can help larger air bubbles rise to the top and eventually pop. You can do this by using a vibrating tool, like a handheld sander or a vibrating massage tool, and gently placing it against the bottom of the canvas. The vibrations will travel through the resin and encourage air bubbles to escape.
- Avoid excessive stirring: Excessive stirring of the resin can introduce more air bubbles into the mixture. To minimize the formation of air bubbles, mix the resin and hardener gently and avoid stirring too vigorously.
Remember, prevention is better than cure when it comes to air bubbles. Taking extra care during the mixing process and pouring the resin in a thin, steady stream can help reduce the occurrence of air bubbles in the first place.
Once you have successfully removed the air bubbles, it’s time for the next step – adding the finishing touches to your epoxy resin wall art.
Read more: How To Make Textured Wall Art
Finishing Touches
The finishing touches of your epoxy resin wall art can elevate it from a beautiful piece to a stunning masterpiece. Here are some ideas on how to add those final touches:
- Resin Gloss Coat: Once your artwork has cured completely, you can apply a resin gloss coat to enhance the shine and depth of the colors. Follow the manufacturer’s instructions for the gloss coat application and curing time.
- Edges and borders: Consider painting the edges of the canvas with a complementary color or metallic paint to create a finished and cohesive look. This can give your artwork a professional and polished appearance.
- Signature: Sign your artwork with a small brush or a fine-tipped marker. Adding your signature adds a personal touch and makes your piece even more unique.
- Protective finish: Apply a clear, protective finish on top of the cured resin to protect your artwork from dust, UV rays, and potential damage. Look for a resin-compatible varnish or a clear coat specifically made for epoxy resin art.
- Display options: Consider how you want to display your artwork. You can frame it, mount it on a wooden panel, or hang it as it is. Choose a display option that complements your artwork and suits your personal style.
- Photograph your artwork: Take high-quality photographs of your finished piece to document and share your creation. These photos can be used to showcase your work on social media, your portfolio, or for print purposes.
- Storing and caring for your artwork: Properly store and care for your epoxy resin wall art to ensure its longevity. Avoid exposing it to direct sunlight for extended periods, clean it with a soft, lint-free cloth, and handle it with care to prevent accidental scratches or damage.
Remember, the finishing touches are a reflection of your artistic vision and style. Take your time to incorporate those final details that make your artwork truly unique and special.
Now that your epoxy resin wall art is complete, you’re ready to showcase it in your home or share it with others. Let’s move on to the next step – curing and drying your artwork.
Curing and Drying
Curing and drying your epoxy resin wall art is a crucial step to ensure that it sets and hardens properly, providing a durable and long-lasting finish. Follow these steps to properly cure and dry your artwork:
- Follow manufacturer’s instructions: Each brand of epoxy resin may have different curing and drying times. Read and follow the specific instructions provided by the manufacturer to ensure the best results.
- Keep the artwork level: During the curing process, it’s important to keep your artwork level to ensure an even surface. Use a level or bubble level to make sure your artwork is flat.
- Avoid touching or moving: Once you’ve completed the artwork and placed it in the curing area, avoid touching or moving it while it cures. This can help prevent any accidental disturbances or damage to the resin surface.
- Allow ample curing time: Give your artwork enough time to fully cure and harden. This can range from a few hours to several days, depending on the specific epoxy resin you use. Be patient and resist the temptation to handle or display the artwork before it has completely cured.
- Provide proper ventilation: During the curing and drying process, it’s important to have adequate ventilation in the area where your artwork is placed. This helps to ensure that any fumes or odors emitted by the resin can dissipate properly.
Keep in mind that even after the initial curing period, epoxy resin continues to harden and cure over the following days or weeks. It may take up to a month for the resin to fully cure and reach its maximum hardness.
Once your epoxy resin wall art is fully cured and dried, you’re ready to hang or display it for everyone to admire. Let’s explore various hanging and displaying options in the next step.
Hanging and Displaying your Artwork
Now that your epoxy resin wall art is cured and ready, it’s time to showcase it in your home or display it for others to enjoy. Here are some options for hanging and displaying your artwork:
- Wall mounting: The most common way to display artwork is by hanging it on a wall. Install picture hooks, nails, or screws on the wall, following the weight and size of your artwork. Use a level to ensure that it hangs straight.
- Frames: Enhance the presentation of your resin art by placing it in a frame. Choose a frame that complements the style and colors of your artwork. Consider using a floating frame to showcase the edges of the canvas along with the resin.
- Grouping: Create an eye-catching display by grouping multiple epoxy resin wall art pieces together. Arrange them in a visually appealing composition on a gallery wall or a dedicated art display area.
- Art easel: If you prefer a freestanding display option, consider using an art easel. This allows you to showcase your artwork on a tabletop, shelf, or any flat surface.
- Art stands or holders: Display your epoxy resin art on specialized art stands or holders. These holders typically come in various materials and designs, allowing your artwork to stand upright and be the centerpiece of any space.
- Rotate and refresh: Change the position or location of your artwork periodically to keep the display fresh and interesting. This can help you appreciate different angles and perspectives of your artwork.
Remember, the way you choose to hang or display your epoxy resin wall art should reflect your personal style and the overall aesthetic of the space. Experiment with different options until you find the perfect display that showcases your artwork in its best light.
Lastly, enjoy the fruits of your labor and feel proud of the stunning epoxy resin wall art you have created. Congratulations on completing your masterpiece!
Need any further assistance? Feel free to ask!
Conclusion
Creating epoxy resin wall art is a delightful and rewarding experience that allows you to express your creativity and bring a touch of uniqueness to your living space. Throughout this article, we have discussed the step-by-step process of making epoxy resin wall art, from selecting the right materials and tools to applying the resin and adding colors and effects.
Starting with a thorough understanding of the materials and tools needed, we explored the importance of choosing a design that aligns with your artistic vision. The preparation of the canvas ensured a smooth foundation for the resin application, while the mixing of the resin and hardener in the correct ratios was emphasized to achieve optimal results.
We delved into various techniques to add colors, texture, and patterns, allowing you to experiment and create truly unique and captivating pieces of artwork. We also discussed the importance of removing air bubbles and the various methods to accomplish this to ensure a professional finish.
With the finishing touches added, including gloss coats, edge treatments, and your signature, your epoxy resin wall art is ready to be displayed. We explored different options for hanging and displaying your artwork, from wall mounting to framing and grouping.
Remember, the process of creating epoxy resin wall art is a journey of exploration and self-expression. Take your time, experiment, and enjoy the artistic process. Each piece you create is a reflection of your creativity and personal style.
Now that you have a comprehensive understanding of how to create epoxy resin wall art, it’s time to unleash your creativity and start making your own stunning masterpieces. Embrace the joy of this artistic endeavor and let your imagination soar!
If you have any further questions or need assistance along the way, don’t hesitate to seek guidance or reach out for expert advice. Happy resin art creating!
Frequently Asked Questions about How To Make Epoxy Resin Wall Art
Was this page helpful?
At Storables.com, we guarantee accurate and reliable information. Our content, validated by Expert Board Contributors, is crafted following stringent Editorial Policies. We're committed to providing you with well-researched, expert-backed insights for all your informational needs.


0 thoughts on “How To Make Epoxy Resin Wall Art”