Articles
14 Best Paper Picture Frames for 2025
Modified: June 10, 2025
Looking for the best paper picture frames? Discover our top 14 picks for 2025, featuring stylish designs and high-quality materials. Perfect for showcasing your favorite memories!
(Many of the links in this article redirect to a specific reviewed product. Your purchase of these products through affiliate links helps to generate commission for Storables.com, at no extra cost. Learn more)
Introducing the 14 Best Paper Picture Frames for 2025, where sleek design meets versatility. Picture frames are not only a perfect way to display your cherished memories but also add a tasteful touch to any space. Whether you're looking for a minimalist frame that seamlessly blends into your decor or a statement piece that stands out, we've curated a selection of the finest paper picture frames to suit your needs. From classic black and white frames to vibrant colors and unique shapes, this list has something for everyone. Join us as we explore the top picks for 2025 that promise to elevate your photos to a whole new level.

Overall Score: 9.2/10
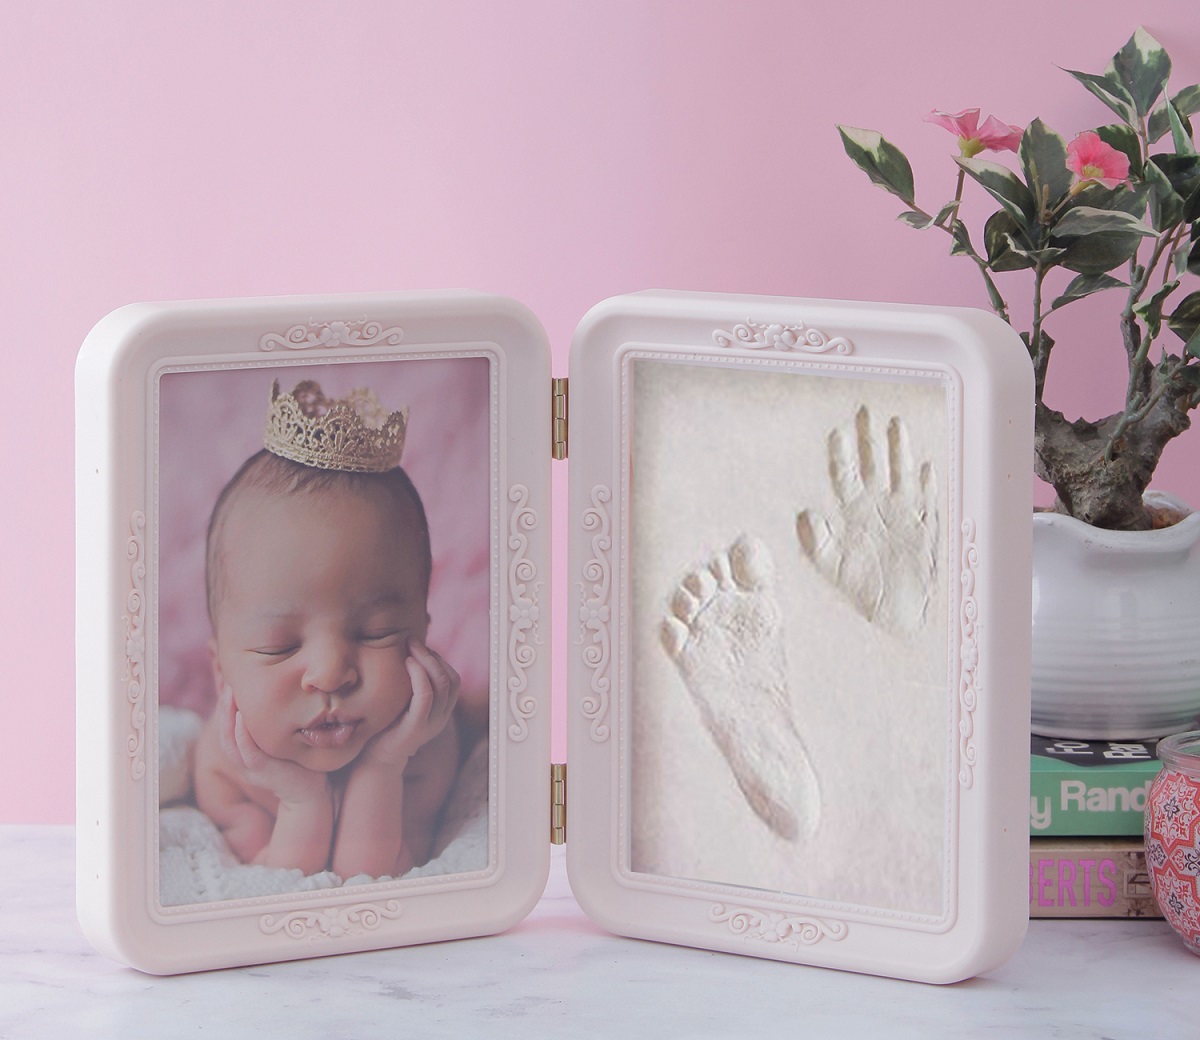
The AntNest 4×6 Inch Paper Picture Frames with Easel are perfect for displaying your favorite family photos, artwork, or certificates. Made with durable paper material, these frames are lightweight and easy to handle. Each frame consists of three layers of paper to prevent the photo inside from shifting. These DIY frames can be customized with subtitles, glitters, or drawings to create unique photo gift cards. With strong brackets on the back, you can stand them horizontally or vertically on a table for display. Available in various sizes, these frames fit a 4×6 inch photo with a display window of 3.5×5.5 inches. They make for a perfect gift for any occasion, including weddings, baby showers, graduations, and more.
Key Features
- Made with durable paper material
- Can be customized with subtitles, glitters, or drawings
- Can be placed horizontally or vertically
- Available in various sizes
- Ideal for family photos, artwork, or certificates
Specifications
- Color: White
- Dimension: 4.00Lx6.00Wx0.99H
- Size: 4 x 6
Pros
- Durable and lightweight
- Allows customization
- Versatile display options
- Fits various photo sizes
- Perfect for gifting
Cons
- Can be tricky to insert larger photos
- Not suitable for heavy use
The AntNest 4×6 Inch Paper Picture Frames with Easel are a great way to add a touch of uniqueness to your home decor. With their durable yet lightweight design, customizable features, and versatile display options, these frames are perfect for showcasing your favorite memories. They make for an excellent gift option and are suitable for various occasions. However, if you have larger photos, inserting them into the frame might require some extra effort. Additionally, these frames may not hold up well to heavy use. Overall, these paper picture frames offer great value for their price and are a stylish addition to any space.

Overall Score: 9/10
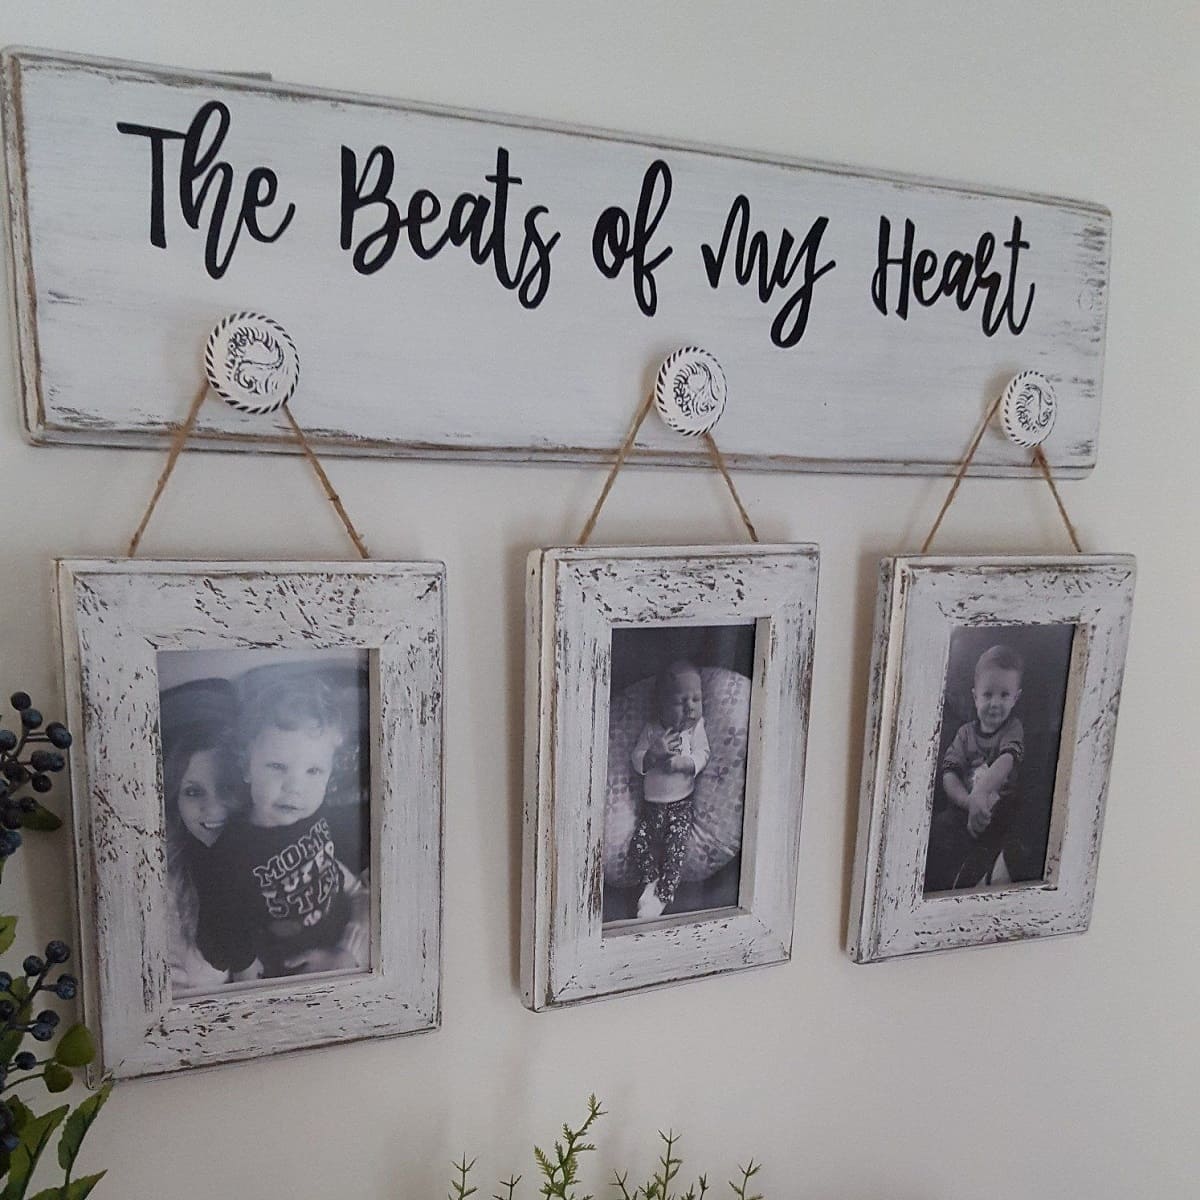
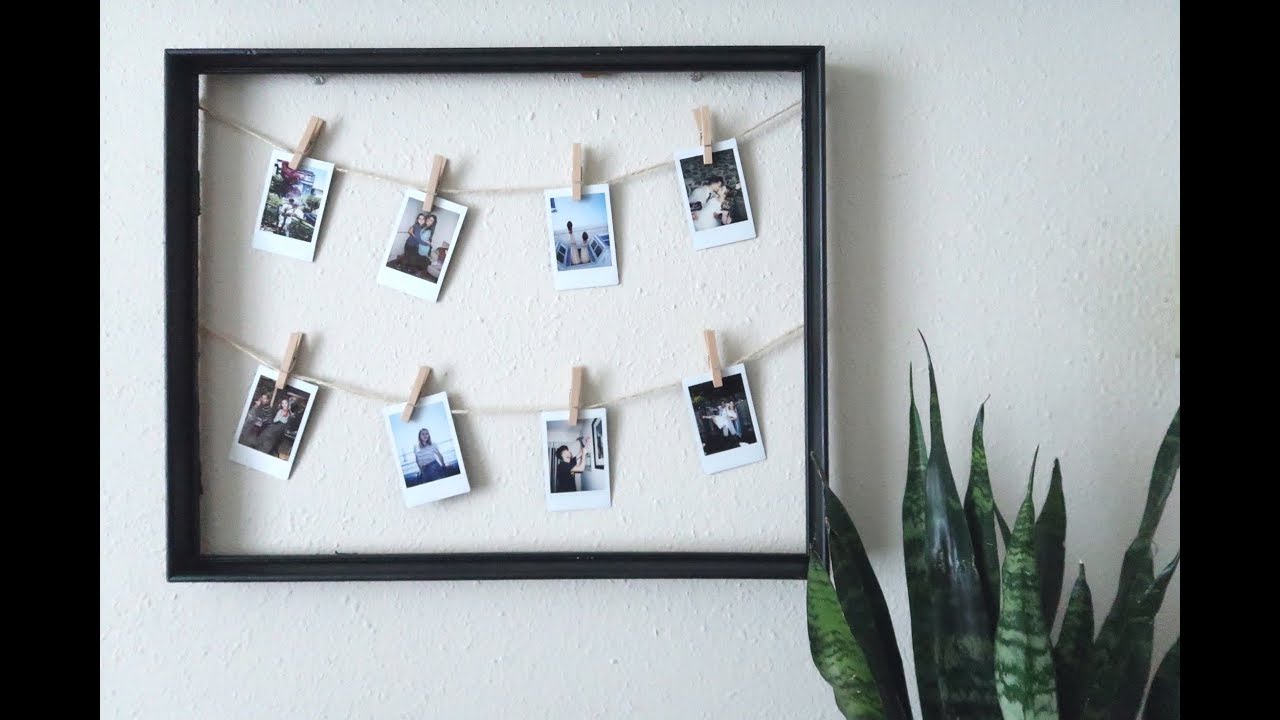
Enhance your home or party decor with the Anwyll Paper Picture Frames. This set includes 20 black paper photo frames that can be used for DIY projects and decorations. Made of high-quality durable cardstock, these frames are long-lasting, thick, and non-toxic. They come with mini wooden clips and jute strings for easy hanging. The frames are simple yet stylish, allowing you to showcase your favorite photos in a unique way. Whether it's for indoor decoration, party displays, or thoughtful gifts for special occasions, these DIY clip photo holders are the ideal choice. Create beautiful art walls in your home, office, classroom, or store with these versatile and easy-to-use picture frames.
Key Features
- 20 pcs 4×6 paper picture frames
- Mini wooden clips and jute strings included
- High-quality durable cardstock
- Suitable for DIY and decorations
- Ideal for home, office, classroom, and party decor
Specifications
- Color: Black
- Dimension: 6.00Lx4.00Wx0.01H
Pros
- Nice quality and durable
- Easy to use with smooth photo insertion
- Versatile for various occasions and locations
- Can switch out photos easily
Cons
- Limited to 4×6 photo size
- May not fit all types of decor styles
The Anwyll Paper Picture Frames provide an excellent and creative way to display your favorite photos. With their stylish design and high-quality materials, these frames are a great addition to any home or office decor. The DIY aspect allows for personalization and the ability to switch out photos easily. They are also versatile, making them suitable for various occasions and locations. The only drawback is the limited photo size compatibility and potential mismatch with certain decor styles. Overall, these frames offer great value for the price and are sure to enhance your space with a touch of charm.

Overall Score: 8.5/10
The jijAcraft 20 Pcs Paper Photo Frames are a stylish and easy-to-use option for displaying your favorite photos. The set includes 20 high-quality colorful cardboard frames, wooden clips, and jute twine. Each frame measures 4"x6", making them just the right size to showcase your memories. The frames are made of durable cardboard material that won't crease or fade over time. They can be personalized with paint, glitter, or stickers to match your decor. The frames are easy to install – simply insert your photos and use the wooden clips to attach them to the twine. These versatile frames are perfect for decorating your home, office, or any special occasion. Whether it's a wedding, baby shower, or birthday party, these paper photo frames add a charming touch to any event.
Key Features
- Set includes 20 colorful cardboard frames, wooden clips, and jute twine
- Frames measure 4"x6" with a window for photos
- Frames are made of non-toxic and odorless durable cardboard material
- Easy to personalize with paint, glitter, or stickers
- Versatile for home, office, or special occasions
Specifications
- Color: Colorful
- Dimension: 6.00Lx4.00Wx0.01H
- Size: 20Pcs 4"x 6"
Pros
- High-quality and durable materials
- Easy to install and personalize
- Versatile for various occasions and locations
- Can hold multiple photos
Cons
- Wide borders may block a portion of the photos
- Slightly more expensive than buying supplies separately
The jijAcraft 20 Pcs Paper Photo Frames are a great option for anyone looking to display their favorite photos in a stylish and customizable way. With their colorful cardboard frames, wooden clips, and jute twine, these frames add a charming touch to any home, office, or special occasion. They are easy to install and can be personalized to match your decor. The only downside is that the wide borders may block a portion of the photos. However, overall, these frames offer good quality and versatility for displaying your memories. Give your photos a special place to shine with the jijAcraft Paper Photo Frames!

Overall Score: 8/10
Create a casual and artistic wall decoration with the Perfect 4U 30 PCS DIY Paper Photo Frames. This set includes 30 high-quality kraft paper frames, 30 mini wooden clips, and 3 hemp ropes. The frames have an overall size of 6" x 4.5" with an inner size of 4.3" x 3.1", and the hemp rope measures 6.7 feet in length. Made of lightweight cardboard, these frames are easy to install and come with simple clips for easy hanging. They are designed to display photos, artworks, and Christmas cards in a creative way. Perfect for home, classroom, office, bar, restaurant, corridor, or store decorations. Guaranteed 100% satisfaction!
Key Features
- High quality kraft paper set: 30 pieces frames, 30 pieces mini wooden clips, 3 pieces hemp rope
- Overall size: 6" x 4.5", inner size(display area): 4.3" x 3.1", length of hemp rope: 6.7 feet
- Made of a lightweight cardboard, very easy to install, simple clips, easy to hang
- Perfect for wall decoration, for home, classroom, office, bar, restaurant, corridor, store
- Designed for displaying photos, artworks and Christmas cards in a casual and artistic way
- Guaranteed 100% satisfaction
Specifications
- Color: Black 30pcs
- Dimension: 7.87Lx4.72Wx1.65H
Pros
- High-quality materials for durability
- Easy and simple installation
- Versatile for various locations and occasions
- Creative and artistic way to display photos and artworks
- Guaranteed satisfaction
Cons
- Some colors are missing or slightly different from photos
- Frames may have cut marks or rips
- Not suitable for standard 4×6 photos
The Perfect 4U 30 PCS DIY Paper Photo Frames offer an affordable and creative way to decorate your walls with photos and artworks. The set includes high-quality kraft paper frames, mini wooden clips, and hemp ropes. They are easy to install and perfect for various locations such as home, office, or restaurant. However, some customers mentioned missing colors and quality issues with the frames. Additionally, the frames are not suitable for standard 4×6 photos due to their size. Overall, these photo frames provide a unique and artistic way to showcase your memories.

Overall Score: 8.5/10
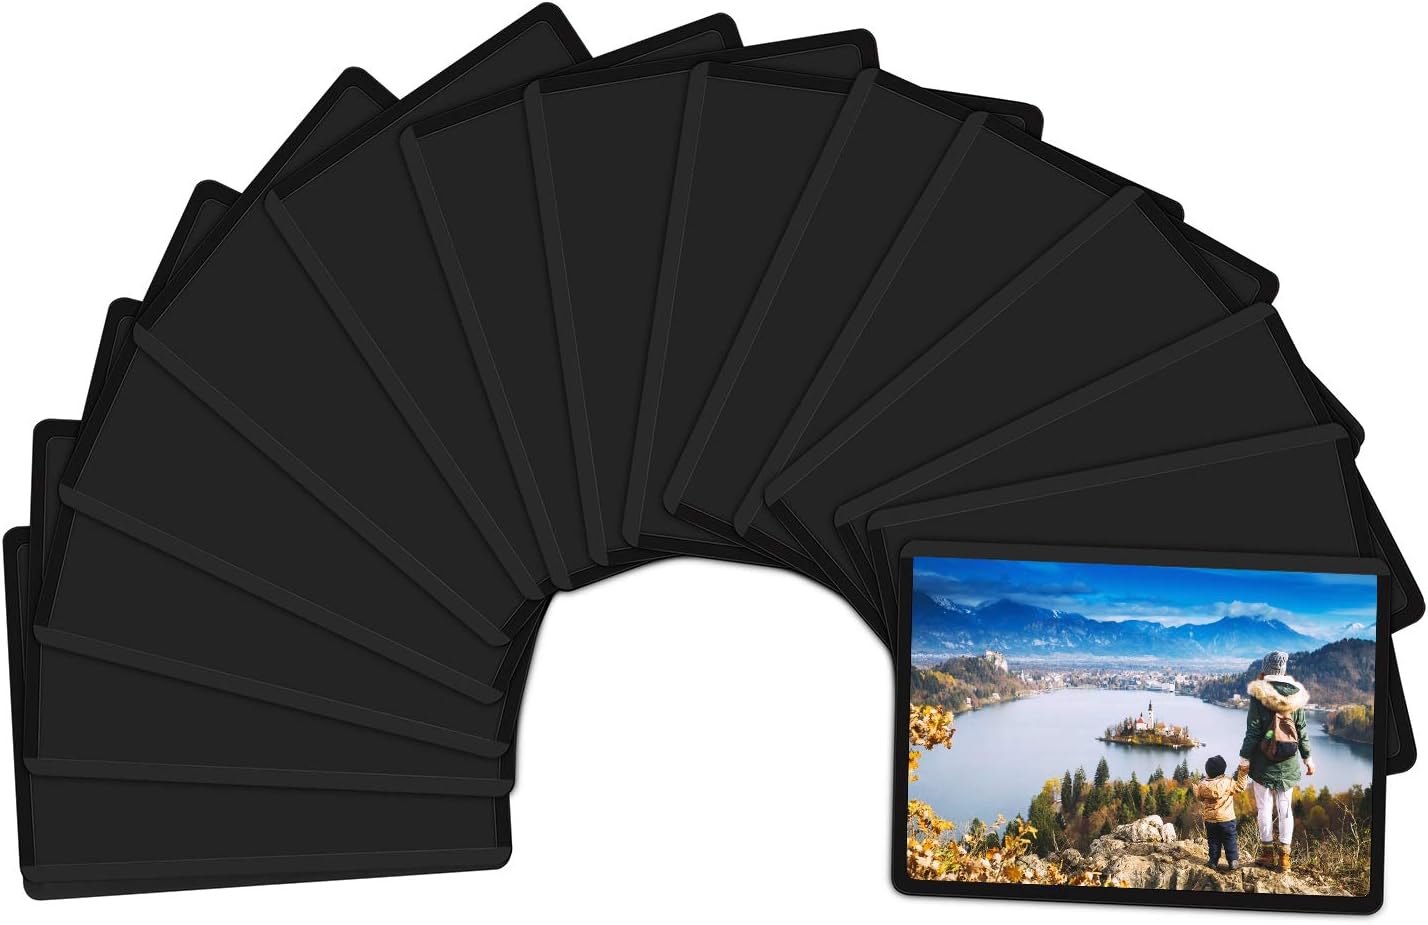
Preserve and display your precious memories with the Juvale 50 Pack Black Paper Picture Frames 4×6. These blank cardboard frames are customizable, allowing you to add a personal touch using various art supplies. Made from quality cardboard, these frames feature an attached stand for convenient display of 4×6 inch photos. With a pack of 50 frames, you'll have ample supply for gifting or creating DIY projects. The frames are the perfect size for 4×6 inch photos, with a display window measuring 3.5 x 5 inches. Juvale 50 Pack Black Paper Picture Frames 4×6 gives you an affordable and versatile solution for preserving and showcasing your cherished memories.
Key Features
- 4 x 6 Picture Frames Bulk: Give your loved ones the perfect way to preserve life's precious memories with our personalized black picture frames that are ideal for any birthday, holiday, or special occasion
- Customizable: These blank cardboard frames can be customized using crayons, markers, pencils, rubber stamps, oil and water-based artist paints, inks, watercolors, and stickers
- Material: These frames are made from quality cardboard and feature an attached stand to display 4×6 inch photos horizontally or vertically conveniently
- Dimensions: Our paper frames are the perfect size for 4×6 inch photos; with a 3.5 x 5-inch display window and an overall size of 4.7 x 7 inches, you can proudly display your cherished memories
- Package Contents: In this pack, you will receive 50 black cardboard picture frames 4×6
Specifications
- Color: Black
- Dimension: 7.00Lx4.70Wx0.99H
Pros
- Customizable frames for a personalized touch
- Quality cardboard material with attached stand for convenient display
- Comes in a pack of 50 frames
- Perfect size for 4×6 inch photos
Cons
- Not very sturdy due to paper material
- Edges of photos may be covered by frame
The Juvale 50 Pack Black Paper Picture Frames 4×6 is a versatile and cost-efficient solution for preserving and displaying cherished memories. These customizable frames allow you to add a personal touch to your photos, making them perfect for birthdays, holidays, or special occasions. Made from quality cardboard, these frames come with an attached stand for easy display in both horizontal and vertical orientations. With a pack of 50 frames, you’ll have plenty to share with your loved ones. However, keep in mind that these frames are not very sturdy due to the paper material, and the edges of photos may be partially covered. Overall, this product offers great value for its affordable price.

Overall Score: 6.5/10
The Better Office Products Paper Picture Frames are a bulk pack of 50 frames made from heavy cardstock with a matte finish. They are designed to display 4 x 6-inch photos vertically or horizontally. The frames are customizable, allowing you to decorate them using markers, crayons, colored pencils, stickers, rubber stamps, and more. Each frame comes with an easel for easy standing display. The frames are available in a black color that complements any setting. However, some customers have reported that the frames are flimsy and not consistent, making it difficult to insert the photos. They have also mentioned that the frames are not suitable for 4×6 photos as advertised. Overall, the Better Office Products Paper Picture Frames offer an affordable option for displaying photos, but they may not be the most durable choice.
Key Features
- 50-pack of black heavy cardstock frames with a matte finish
- Perfect color for displaying photos in any setting
- Displays 4 x 6-inch photos vertically or horizontally
- Customizable with markers, crayons, stickers, and more
Specifications
- Color: Assorted
- Dimension: 7.13L x 4.75W x 0.99H
Pros
- Bulk pack of 50 frames
- Easel for easy standing display
- Affordable option for displaying photos
Cons
- Flimsy and inconsistent construction
- Not suitable for 4×6 photos as advertised
The Better Office Products Paper Picture Frames offer an economical solution for displaying your 4×6 photos. The bulk pack of 50 frames allows you to showcase multiple pictures in any setting. With their customizable design, you can add a personal touch to each frame. However, the frames have received mixed reviews, with some customers expressing dissatisfaction with the flimsy construction and inaccurate sizing. If you’re looking for a budget-friendly option and don’t mind the potential drawbacks, these frames could be a decent choice. Just keep in mind that they may not provide the sturdiness and accuracy you expect from higher-quality frames.

Overall Score: 8.5/10
The Litpoetic 50 Pack Standing Paper Picture Frames 4×6 is a set of high-quality, acid-free cardstock frames that are perfect for displaying your favorite photos. Each frame fits a 4×6 inch photo, with a display window measuring 3.5 x 5 inches. The frames are sturdy and come with easel stands for both horizontal and vertical pictures. They can be easily folded flat for storage when not in use. These multi-purpose frames are great for baby showers, weddings, school projects, and more. You can also personalize them by adding subtitles, glitters, or drawings to create unique photo gift cards. With a 4.4/5 rating from customers, these affordable and elegant frames are a must-have for any occasion.
Key Features
- Made of acid-free, high-quality thick cardstock
- Fits 4×6 inch photos with a display window measuring 3.5 x 5 inches
- Sturdy easel stands for both horizontal and vertical pictures
- Multi-purpose frames for various events and gatherings
- Ideal for personalization and creating unique photo gift cards
Specifications
- Color: Black
- Pack Size: 50
- Dimension: 4.70L x 7.00W x 0.99H
Pros
- High-quality and durable
- Sturdy easel stands
- Versatile and multi-purpose
- Ideal for personalization
Cons
- Tight fit for pictures
- May rip photos
- Not suitable for 4×6 photos
- Difficult to insert photos
The Litpoetic 50 Pack Standing Paper Picture Frames 4×6 is an affordable and versatile option for displaying your favorite photos. While there may be some minor issues with tight fits and difficulty inserting photos, the overall quality and durability of these frames make them worth considering. They are perfect for various occasions, such as weddings, baby showers, and school projects. The ability to personalize these frames and create unique photo gift cards adds an extra touch of customization. With a 4.4/5 customer rating, these frames have received positive feedback for their value and bright colors. Overall, the Litpoetic frames offer a great way to organize and showcase your photos in an elegant and sturdy manner.

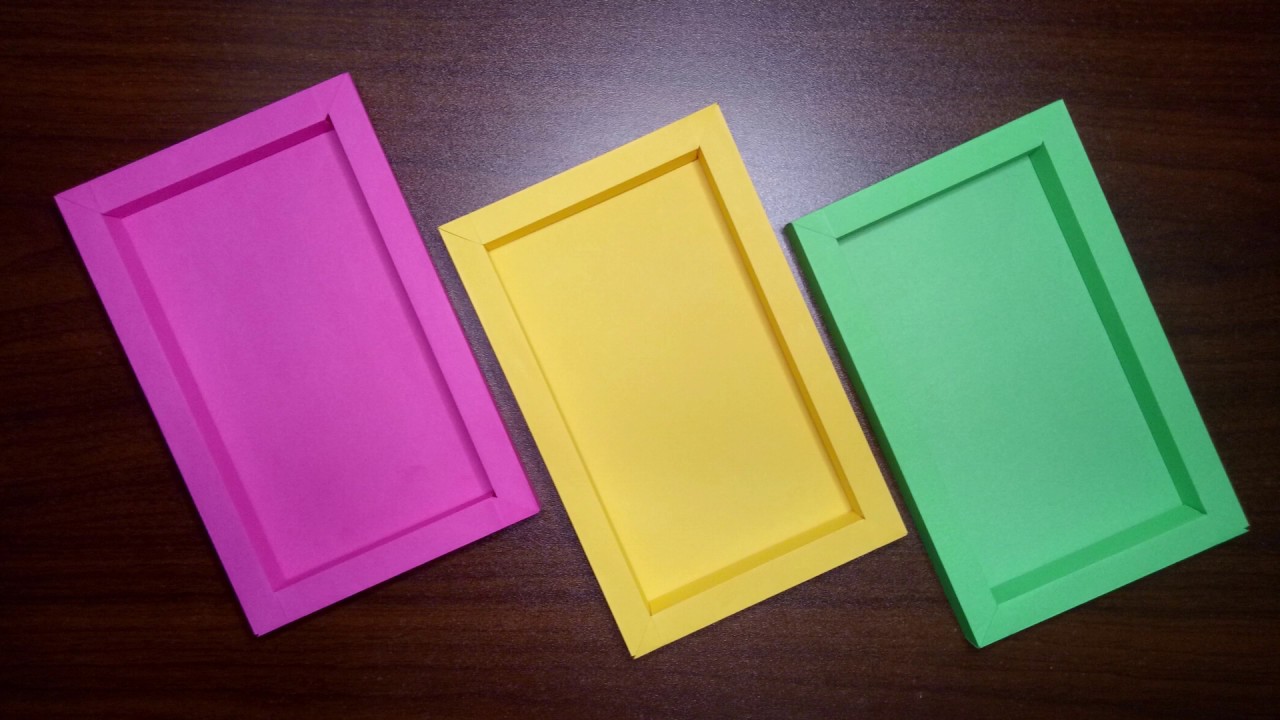
Overall Score: 8.5/10
Use your creativity with our colored picture frames to create one-of-a-kind masterpieces by adding fun embellishments. Perfect for home, office, classroom, or party decor.
Key Features
- Paper frames for crafts
- Ideal for displaying photos, artwork, or kid's drawings
- Comes in 10 different colors
- Fits 4×6" photos
- Package includes 50 frames, clips, and hanging string
Specifications
- Dimension: 6.00Lx4.00Wx0.00H
Pros
- Wide variety of colors to choose from
- Can be hung vertically or horizontally
- Affordable and convenient package
Cons
- Opening is smaller than a 4×6 photo
- String provided may be rough
The Juvale 50 Pack Paper Picture Frames are a fantastic option for adding a creative touch to your photos or artwork. With a wide range of colors to choose from, you can easily match them to any home or party decor. The frames are easy to use and are a great way to showcase your cherished memories. Although the opening is slightly smaller than a 4×6 photo, they still provide a beautiful display. Overall, these paper frames offer excellent value for your money and are perfect for both personal and gifting purposes.

Overall Score: 8.5/10
The Perfect 4U 40PACK Paper Photo Frames is a high-quality kraft paper set that includes 40 frames, 40 mini wooden clips, and 4 hemp ropes. It is perfect for displaying photos, artworks, and Christmas cards in a casual and artistic way. The frames are made of lightweight cardboard and are very easy to install with simple clips. They are suitable for hanging on walls and are great for home, classroom, office, bar, restaurant, corridor, or store decoration. The frames have an overall size of 6" x 4.5" and an inner size of 4.3" x 3.1". The package also includes a 6.7 feet hemp rope. Customers have rated this product 4.5/5.
Key Features
- High quality kraft paper set: 40 pieces frames + 40 pieces mini wooden clips + 4 pieces hemp rope
- Overall size: 6" x 4.5", inner size(display area): 4.3" x 3.1", length of hemp rope: 6.7 feet
- Made of a lightweight cardboard, very easy to install, simple clips, easy to hang
- Perfect for wall decoration, for home, classroom, office, bar, restaurant, corridor, store
- Designed for displaying photos, artworks and Christmas cards in a casual and artistic way
- Perfect for school home bedroom family birthday party
- What u see is what u get! Guaranteed 100% satisfaction
Specifications
- Color: Black 40Pcs
- Dimension: 6.00Lx4.50Wx0.99H
Pros
- High-quality and lightweight cardboard frames
- Easy to install and hang with simple clips
- Versatile for various settings and occasions
- Includes mini wooden clips and hemp rope
- Provides casual and artistic photo display
Cons
- Border may cover edges of 4×6 photos
- Thick border may require cutting of photos
- Creates border on top of 4×6 photos
- May crop out parts of photos
- Not suitable for creating border around photos
The Perfect 4U 40PACK Paper Photo Frames is a great choice for anyone looking to display photos and artworks in a casual and artistic way. The high-quality kraft paper frames are easy to install and come with mini wooden clips and a hemp rope for easy hanging. They are versatile and suitable for various settings such as home, classroom, office, bar, restaurant, corridor, or store. However, it’s important to note that the frames may cover the edges of 4×6 photos and create a border on top of the picture. Overall, this product offers a stylish and affordable solution for personalized wall decoration.

Overall Score: 8.5/10
The Juvale Cardboard Paper Picture Frame DIY Hanging Kit is a versatile and affordable option for displaying your favorite photos. It comes with 50 paper cardboard photo frames, 50 mini clothespins, and hanging twine, allowing you to create a personalized photo display. The frames fit 4 x 6 inch photos and can be displayed vertically or horizontally. They are ideal for decorating your home, office, classroom, or party decor, and can be embellished with paints, jewels, rhinestones, glitter, labels, stickers, and other decorative items. The frames are of good quality and very sturdy. However, some users have mentioned that the border around the frames is thicker than expected, which may cover some details around the edges of the photos. Overall, the Juvale Cardboard Paper Picture Frame DIY Hanging Kit is a great value for money and perfect for DIY crafts and personalization.
Key Features
- Fits 4 x 6 inch photos
- Includes 50 paper cardboard photo frames, 50 mini clothespins, and hanging twine
- Frames can be displayed vertically or horizontally
- Ideal for decorating home, office, classroom, or party decor
- Great for DIY crafts and personalization
Specifications
- Color: White
- Dimension: 6.00Lx4.00Wx0.00H
Pros
- Versatile and affordable
- Comes with all necessary components
- Can be embellished with various decorative items
- Good quality and sturdy
Cons
- Thicker border may block some details of the photos
The Juvale Cardboard Paper Picture Frame DIY Hanging Kit is an excellent choice for creating a personalized photo display. It offers good value for money with its 50 frames, clothespins, and twine. The frames can be easily decorated and customized according to your preferences, making them suitable for various occasions and settings. While the thicker border might be a slight drawback for those wanting to showcase every detail of their photos, it doesn’t diminish the overall quality and functionality of the frames. Whether you’re looking to decorate your home or create special gifts, this kit provides all the essentials. Get creative and start showcasing your favorite memories with the Juvale Cardboard Paper Picture Frame DIY Hanging Kit!

Overall Score: 8/10
The Tenceur 100 Pcs Paper Picture Frames with Easel is a set of black paper frames designed to showcase your photos and artwork. Made of quality cardboard paper, these frames are lightweight yet sturdy, ensuring durability. With 100 frames in the package, you'll have plenty to meet your daily use and replacement needs. The frames can be easily customized with various art supplies, allowing you to create unique patterns. You can display these frames either horizontally or vertically on a table using the easel on the back, or stick them on the wall to decorate your home. Whether it's for weddings, birthdays, graduations, or other occasions, these multipurpose frames are perfect for adding a personal touch to any event or space.
Key Features
- Package includes 100 pcs black paper picture frames
- Reliable and sturdy cardboard construction
- Fit 4 x 6 inch photos and allow for creative customization
- Easy to use with a back easel or wall-mount option
- Suitable for various occasions and decorations
Specifications
- Color: Black
- Dimension: 4.70Lx7.00Wx0.99H
Pros
- Generous quantity in the package
- Durable and long-lasting
- Customizable and creative
- Versatile for different events and holidays
Cons
- Limited to 4 x 6 inch photos
The Tenceur 100 Pcs Paper Picture Frames with Easel is an excellent choice for anyone looking to showcase their photos or artwork. The package includes a sufficient quantity of sturdy and reliable frames that can be used for a long time. The option to customize these frames with various art supplies adds a fun and creative touch. The frames are easy to use, either with the back easel or by sticking them on the wall. While they only accommodate 4 x 6 inch photos, their versatility makes them suitable for any occasion or holiday decoration. Overall, these paper picture frames are a fantastic addition to your home or any event where you want to display cherished memories.

Overall Score: 8.2/10
The LEJHOME Paper Picture Frames are a vibrant and versatile option for displaying your favorite photos and artworks. This set includes 30 multi-color paper frames, 30 clothespins, and 3 twine cords, offering a customizable and decorative way to showcase your memories. The frames are designed to fit 4x6in photos and are perfect for home decoration, school, weddings, and various parties. They are also ideal for use in classrooms, restaurants, stores, and more. With easy assembly and flexible use, you can change photos whenever you desire. The frames feature a window size of 3.1×4.3in, which may partially cover the pictures. Nonetheless, they provide a fun and delightful way to enhance your living and working spaces.
Key Features
- 30 multi-color paper frames with clothespins and twine cords
- Fits 4x6in photos and artworks
- Flexible and multipurpose
- Easy assembly and use
- 100% satisfaction guarantee
Specifications
- Color: Multicolor
- Dimension: 6.10Lx4.53Wx0.59H
- Size: 4x6in
Pros
- Vibrant and colorful frames
- Versatile for various decorations and occasions
- Easy to assemble and change photos
- Thick and durable paper material
- Suitable for kids and classrooms
Cons
- Window size may partially cover the pictures
- Frames don't stand very well
The LEJHOME Paper Picture Frames offer a playful and charming way to decorate your living or working spaces. With their vibrant colors and versatile design, these frames are perfect for displaying photos at home, school, or parties. The easy assembly and ability to change photos make them convenient to use, while the thick and durable paper material ensures their longevity. Although the window size may partially cover the pictures, this doesn’t detract from the overall appeal. However, the frames may not stand very well on their own. Overall, these frames provide a delightful and customizable solution for showcasing your favorite memories.

Overall Score: 7.5/10
The Monolike Paper Photo Frames are a set of 20 simple white frames that are designed to fit 4×6 inch pictures. The frames have a moderate thickness and are made with smooth rounded edges. The back plate of the frame has a hole for easy insertion and removal of pictures. The frame is made just right so that the picture inside does not shift. Each set includes 20 sheets of white paper frames. These frames are made in Korea and offer a satisfying way to display your favorite photos.
Key Features
- Simple white color with moderate thickness
- Fits 4×6 inch pictures with 0.3" coverage
- Smoothly rounded outer ends of the frame
- Back plate has a hole for easy insertion and removal
- Made in Korea
Specifications
- Color: White
- Dimension: 6.00Lx4.00Wx0.00H
- Size: 20P
Pros
- Satisfying thickness and white color
- Smooth rounded edges for a polished look
- Easy insertion and removal of pictures
- Made with precision to prevent picture shifting
- Value for money
Cons
- Package may have missing frames
- Some difficulty inserting pictures
- Frames may bend pictures if they get stuck
- Might require careful handling to prevent tearing
The Monolike White Paper Photo Frames are a budget-friendly option for displaying your 4×6 inch pictures. They offer a satisfying thickness and a simple, polished look with their smooth rounded edges. While some users may experience difficulty inserting pictures and there have been reports of missing frames, these frames still provide good value for the money. Made in Korea, these frames are perfect for creating memories, gifting photos, or adding a personal touch to your office decor. Overall, they provide an affordable and versatile solution for showcasing your favorite moments.

Overall Score: 7/10
The Chosky DIY Paper Photo Frame is a set of 30 multi-color frames, mini wooden clips, and hemp ropes that allow you to easily display and change your 4"x6" pictures. Made of durable cardboard, the frames come in a variety of bright colors, while the mini wooden clips add a fun touch. With a length of about 7.2 feet, the hemp ropes make it easy to hang your framed pictures. This set is perfect for adding a personal and creative touch to your home, college dorm, or office. It also makes for a great gift idea. The Chosky DIY Paper Photo Frame allows you to decorate your life or work space in a fun and eye-catching way.
Key Features
- Durable material: cardboard frames and wooden clips
- Set includes: 30 frames, 30 wooden clips, 3 hemp ropes
- Easy to install and change pictures
- Fits 4"x6" pictures
- Great inexpensive gift idea
Specifications
- Color: Multicolor
- Dimension: 5.94Lx4.57Wx0.00H
- Size: 4"x 6"
Pros
- Durable cardboard frames
- Variety of bright colors
- Easy to hang with hemp ropes
- Fun and creative way to display photos
- Great for gifts
Cons
- Paper could be thicker
- Size of picture opening is smaller than advertised
The Chosky DIY Paper Photo Frame is a colorful and affordable set that allows you to showcase your favorite 4″x6″ pictures in a fun and creative way. The durable cardboard frames and wooden clips add a charming touch to any space. While the paper could be thicker, the overall quality is decent for arts and crafts projects, especially with kids. It’s worth noting that the advertised size of the picture opening may be smaller than expected, so it’s important to read the full description before purchasing. Despite these minor drawbacks, this set is a great option for adding a personal touch to your home or gifting to your loved ones.
BUYER'S GUIDE: PAPER PICTURE FRAMES
*Capture and Showcase Your Memories in Style*When it comes to preserving cherished photos, nothing beats the timeless charm and elegance of paper picture frames. These versatile frames not only protect your precious memories but also provide a beautiful way to display them in your home or office. If you're in the market for paper picture frames, look no further! This comprehensive buyer's guide will help you make an informed decision and find the perfect frame to complement your photographs.
Read also: 14 Incredible Beach Picture Frames for 2025
Key Considerations
To ensure you select the ideal paper picture frame, keep the following factors in mind:
- Size: Determine the desired size of your frame based on the dimensions of your photograph. Frames usually come in standard sizes such as 4×6, 5×7, and 8×10, but you can also find custom options.
- Design: Paper picture frames come in a variety of designs, from simple and minimalistic to intricate and decorative. Consider the overall aesthetic you wish to achieve and select a frame that aligns with your style.
- Material: Opt for frames made from durable and high-quality paper materials to ensure stability and longevity. Look for acid-free paper to protect your photographs from yellowing or fading over time.
- Color: Choose a color that complements your photographs and the room where the frame will be displayed. Neutral shades like white, black, or brown are versatile options, while bold colors can add a pop of personality to your decor.
- Orientation: Determine if you want a portrait (vertical) or landscape (horizontal) orientation for your frame, depending on the orientation of your photo.
- Closure Mechanism: Some paper picture frames have adhesive backs, while others feature a foldable design with tabs or a slide-in mechanism. Consider your preference and ease of use when choosing a closure mechanism.
- Multipacks: If you have multiple photos to display or are planning to create a gallery wall, consider purchasing multipacks of paper picture frames. These bundles often offer cost savings and allow for cohesive display arrangements.
- Extras: Some paper picture frames may come with additional features such as pre-cut mats, easel backs for tabletop display, or hanging hardware for wall mounting. Determine which extra features are essential for your needs.
Tips for Proper Use and Maintenance
To ensure your paper picture frames last a lifetime and keep your cherished memories intact, consider the following tips:
- Avoid exposing paper picture frames to direct sunlight, extreme temperatures, or high humidity. These conditions can cause the paper to warp, fade, or deteriorate.
- Dust your frames regularly with a soft cloth or a gentle brush to keep them looking clean and pristine.
- If possible, avoid touching the surface of the photograph when placing it inside the frame to prevent fingerprints or smudges. Handle the photo by its edges or wear clean cotton gloves.
- Use archival-quality adhesive tape or photo corners to secure your photographs within the frame. This will prevent any damage caused by adhesives or unsightly residue.
- Display your paper picture frames away from potential hazards, such as heavy traffic areas or spots prone to accidental bumps, to minimize the risk of damage or falls.
- When cleaning your frames, use a mild detergent diluted with water and a soft cloth. Gently wipe the frame, avoiding excessive moisture, and allow it to air dry completely.
Frequently Asked Questions about 14 Best Paper Picture Frames For 2025
While paper picture frames are great for everyday use and informal displays, they may not offer the same level of protection or longevity as more robust framing options. Consider archival frames or professional framing services for exhibitions or long-term displays.
Paper picture frames are more commonly available in standard or smaller sizes. For larger or panoramic photographs, it’s recommended to opt for sturdier frames made from materials like wood or metal.
Many paper picture frames allow for personalization through hand-drawn designs or added embellishments. Some frames even come with blank or customizable mats, providing a platform for creativity.
Yes, paper picture frames are generally considered more environmentally friendly than frames made from plastic or other non-biodegradable materials. Look for frames made from recycled or sustainably sourced paper for a greener choice.
Yes, paper picture frames can be hung on walls using adhesive hanging strips or wall hooks suitable for lightweight frames. Ensure the frame is securely fastened to prevent it from falling.
Was this page helpful?
Trust Storables.com for unbiased and honest product reviews. Our reviews are rigorously assessed by our Expert Board Contributors and adhere to strict Editorial Standards. We ensure that each review is transparent and trustworthy, helping you make informed purchasing decisions.

0 thoughts on “14 Best Paper Picture Frames for 2025”