Home>Furniture & Design>Outdoor Furniture>How To Install Outdoor Carpet On Concrete Steps

Outdoor Furniture
How To Install Outdoor Carpet On Concrete Steps
Modified: March 6, 2024
Learn how to install outdoor carpet on concrete steps with our step-by-step guide. Transform your outdoor space with our expert tips and advice. Ideal for outdoor furniture, furniture, and design.
(Many of the links in this article redirect to a specific reviewed product. Your purchase of these products through affiliate links helps to generate commission for Storables.com, at no extra cost. Learn more)
Introduction
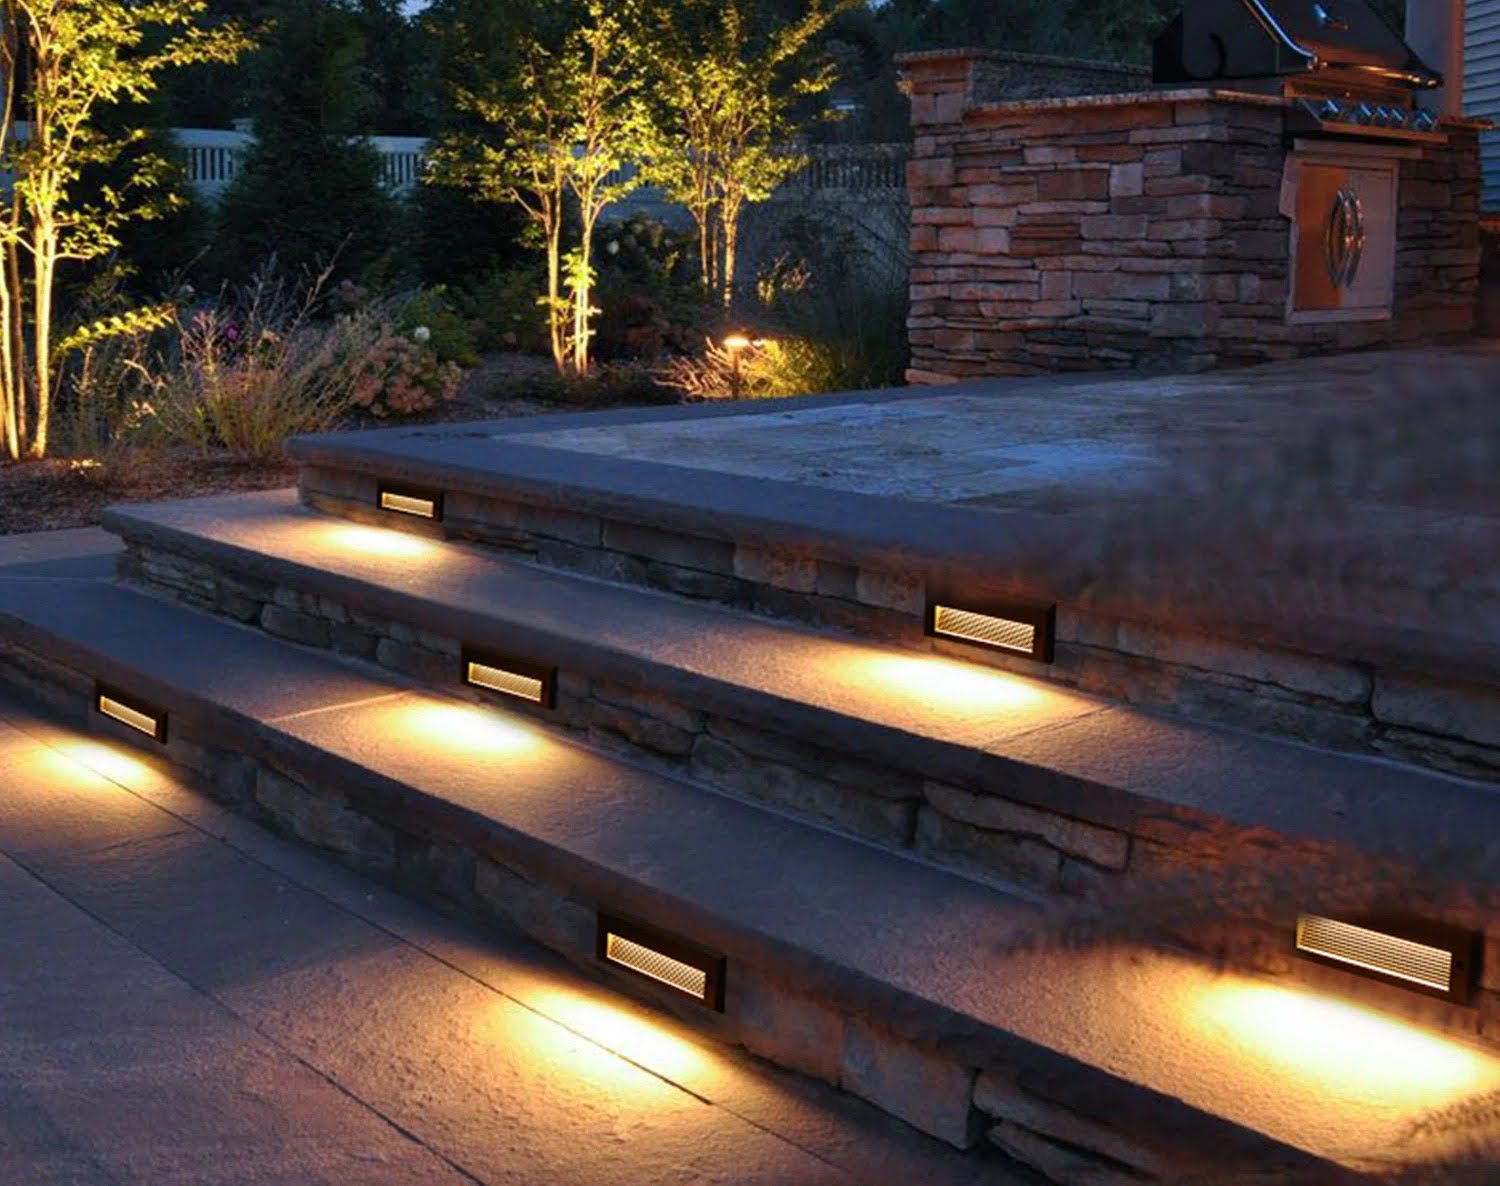
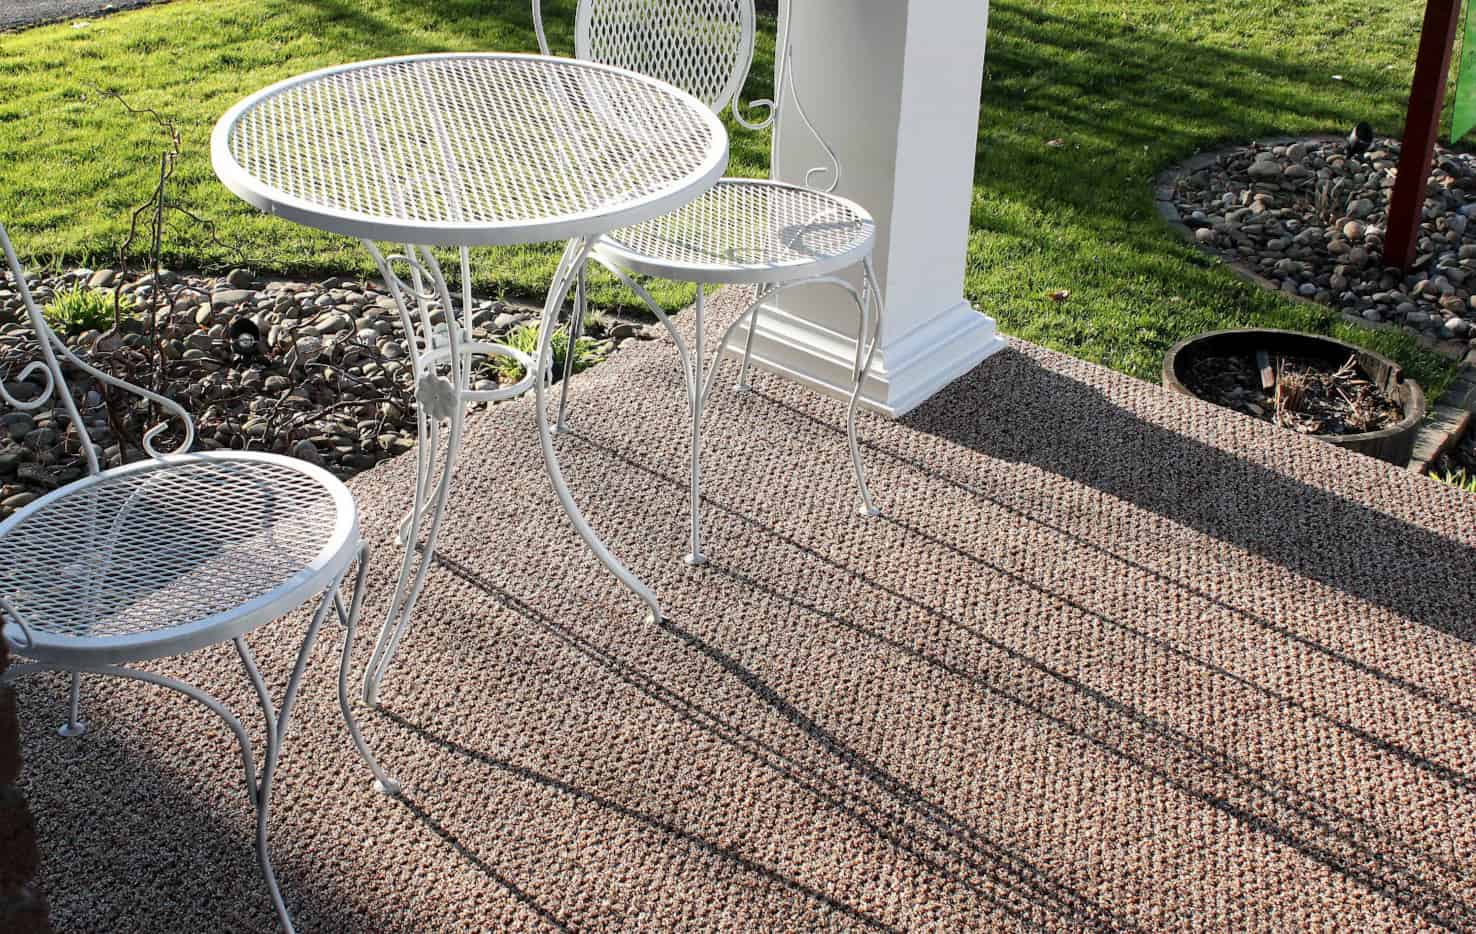
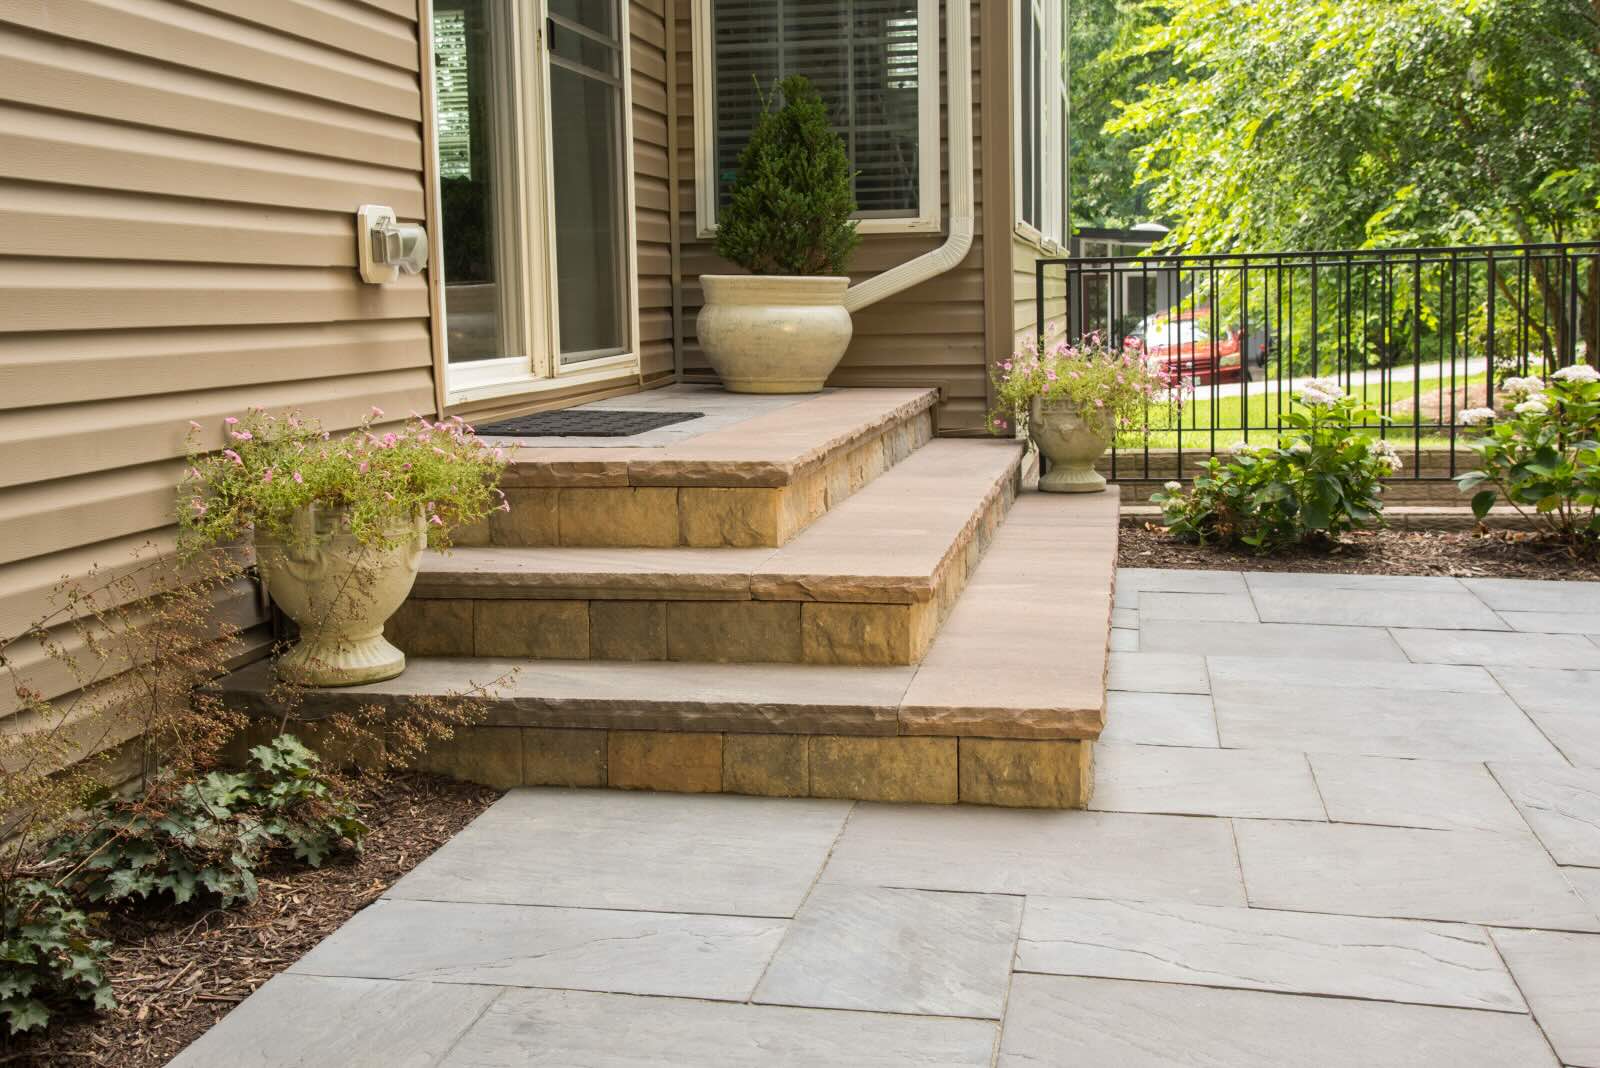
Welcome to the world of outdoor design and comfort! Transforming your concrete steps with outdoor carpet not only enhances the aesthetic appeal of your outdoor space but also adds a layer of safety and comfort. Whether you're looking to revamp your front porch, patio, or any outdoor staircase, installing outdoor carpet on concrete steps is a simple and rewarding project.
The process of installing outdoor carpet on concrete steps requires careful preparation and attention to detail. By following the steps outlined in this guide, you'll be able to achieve a professional-looking result that withstands the elements and complements your outdoor decor.
In this comprehensive guide, we'll walk you through each step of the installation process, from preparing the steps and cleaning the concrete to applying adhesive and installing the outdoor carpet. By the end of this tutorial, you'll have the knowledge and confidence to take on this project and elevate the visual appeal and functionality of your outdoor living space. So, let's gather the necessary materials and get ready to transform your concrete steps into a stylish and inviting feature of your outdoor oasis.
Key Takeaways:
- Transform your outdoor space with outdoor carpet on concrete steps for added safety and style. Follow the step-by-step guide for a professional-looking result that withstands the elements.
- Prioritize safety and precision when measuring, cleaning, and installing outdoor carpet on concrete steps. Elevate your outdoor living space with a durable and visually appealing addition.
Read more: How To Install Outdoor Carpet On Concrete
Materials Needed
Before diving into the installation process, it’s essential to gather the necessary materials to ensure a smooth and successful project. Here’s a list of items you’ll need to install outdoor carpet on concrete steps:
- Outdoor Carpet: Choose a durable outdoor carpet designed to withstand varying weather conditions. Consider the size and shape of your steps when purchasing the carpet to ensure proper coverage.
- Adhesive: Opt for a high-quality outdoor carpet adhesive that provides strong bonding and is suitable for concrete surfaces. Ensure that the adhesive is formulated for outdoor use and can withstand moisture and temperature changes.
- Measuring Tape: Accurate measurements are crucial for a precise carpet fit. A reliable measuring tape will help you determine the dimensions needed for the carpet to cover the steps effectively.
- Cleaner and Scrub Brush: Prepare the concrete surface by cleaning it thoroughly. Use a concrete cleaner and a sturdy scrub brush to remove any dirt, debris, and stains from the steps.
- Utility Knife: A sharp utility knife will be essential for trimming the carpet to fit the steps accurately and neatly.
- Roller or Tamping Tool: To ensure proper adhesion between the carpet and the concrete, a roller or tamping tool will help smooth out the carpet and remove any air pockets or wrinkles.
- Protective Gear: Prioritize safety by wearing gloves and eye protection when handling adhesive and using cutting tools.
- Paintbrush or Trowel: Depending on the type of adhesive, you may need a paintbrush or trowel to apply the adhesive evenly to the concrete surface.
- Straight Edge or T-Square: These tools will aid in making precise cuts and ensuring straight edges when trimming the carpet to fit the steps.
By having these materials on hand, you’ll be well-equipped to proceed with the installation process and achieve professional results. Now that we have the materials ready, let’s move on to the first step: measuring and preparing the steps for the outdoor carpet installation.
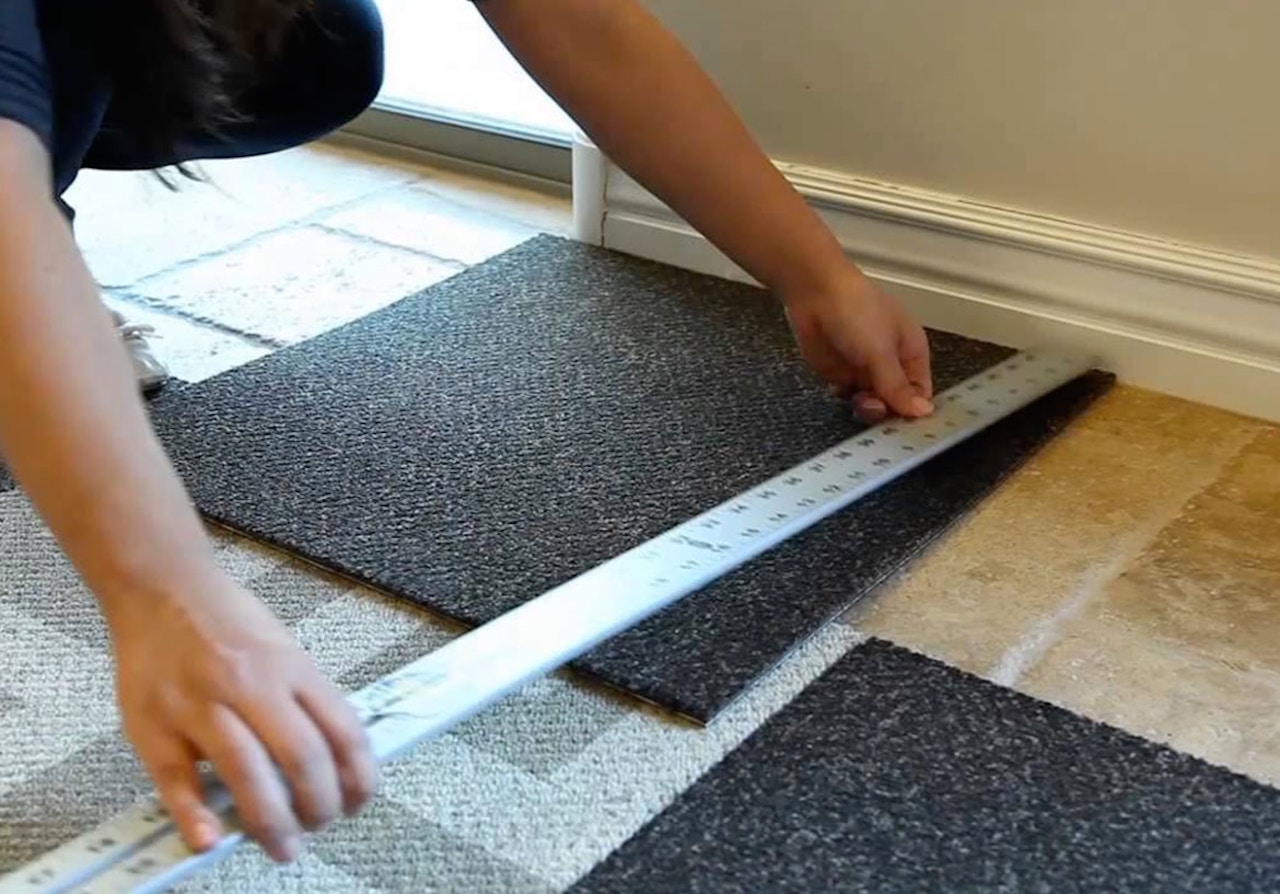
Step 1: Measure and Prepare the Steps
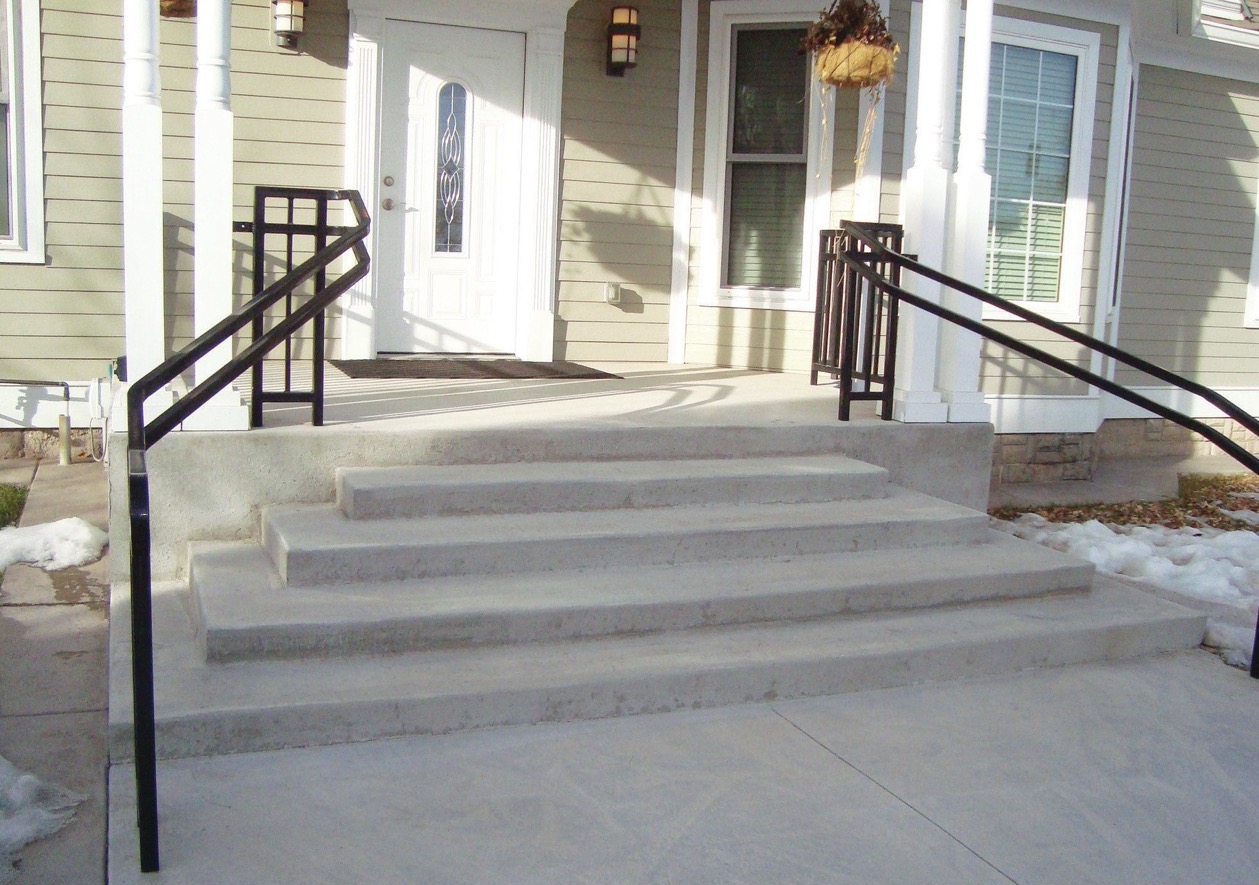
Before diving into the installation process, it’s crucial to take accurate measurements of your concrete steps to ensure that the outdoor carpet fits precisely and covers the entire surface. Here’s how to measure and prepare the steps:
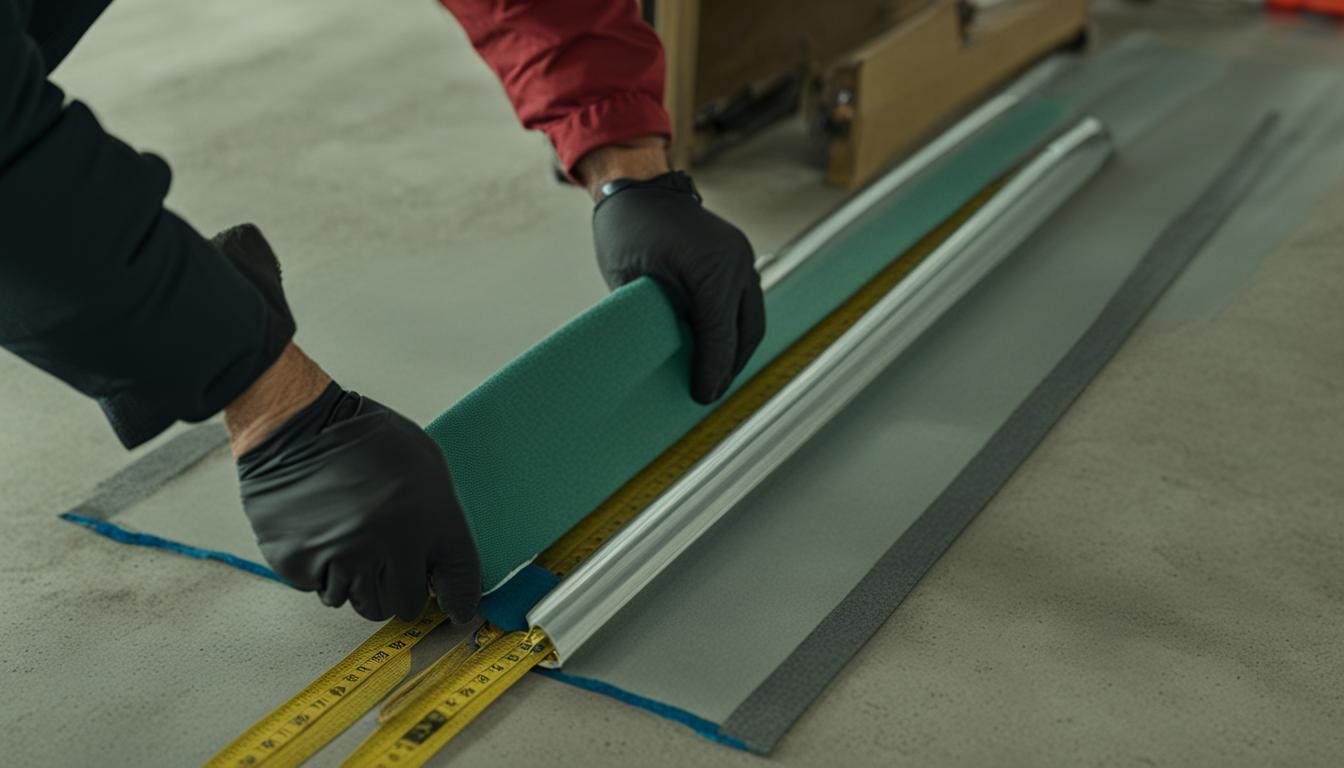
Measure the Steps: Use a measuring tape to determine the width and depth of each step. Measure from the outer edge of the step to the riser (vertical part) and record the dimensions. Additionally, measure the total length of the steps to calculate the amount of outdoor carpet needed for the project.
Clean the Surface: Thoroughly clean the concrete steps to remove any dirt, debris, or existing adhesive residue. Use a concrete cleaner and a scrub brush to scrub the surface, ensuring that it’s free from any substances that could hinder the adhesion of the outdoor carpet.
Inspect for Damage: Take this opportunity to inspect the steps for any signs of damage or wear. Address any cracks, chips, or uneven surfaces before proceeding with the installation. Repairing the concrete will ensure a smooth and stable foundation for the outdoor carpet.
Allow for Drying Time: If you’ve used any cleaning agents or repaired the concrete, allow sufficient time for the steps to dry completely before moving on to the next steps of the installation process. Adequate drying time will promote better adhesion and long-term durability of the outdoor carpet.
By taking the time to measure and prepare the steps meticulously, you’ll set the stage for a seamless installation process and a professional-looking end result. With the steps cleaned, inspected, and ready for the next phase, we can proceed to the crucial step of cleaning the concrete surface in preparation for the adhesive application.
Step 2: Clean the Concrete
Preparing the concrete surface is a critical step in ensuring the successful installation of outdoor carpet on your steps. By thoroughly cleaning the concrete, you’ll create an optimal foundation for the adhesive and the carpet, promoting strong adhesion and long-term durability. Here’s how to clean the concrete effectively:
Select a Suitable Cleaner: Choose a high-quality concrete cleaner designed to remove dirt, grime, and stains from outdoor surfaces. Ensure that the cleaner is safe for outdoor use and compatible with the concrete material.
Apply the Cleaner: Following the manufacturer’s instructions, apply the concrete cleaner to the steps. Use a scrub brush or a stiff bristle broom to work the cleaner into the surface, paying particular attention to any areas with noticeable stains or discoloration.
Scrub Thoroughly: Scrub the entire surface of the concrete steps, applying extra pressure to stubborn stains or heavily soiled areas. Thorough scrubbing will help dislodge embedded dirt and prepare the surface for the next steps of the installation process.
Rinse the Steps: Once the concrete has been thoroughly scrubbed, rinse the steps with clean water. Use a garden hose or a bucket of water to remove the cleaner and any loosened debris from the surface. Ensure that all traces of the cleaner are completely washed away.
Allow for Drying: After rinsing, allow the steps to dry completely before proceeding to the next phase of the installation. Adequate drying time is essential to ensure that the concrete surface is free from moisture, promoting optimal adhesion when applying the adhesive and outdoor carpet.
By diligently cleaning the concrete steps, you’ll create a clean, stable, and adhesive-ready surface for the subsequent steps of the installation process. With the steps cleaned and dried, we can now move on to the pivotal step of applying the adhesive in preparation for installing the outdoor carpet.
Before installing outdoor carpet on concrete steps, make sure the surface is clean and dry. Use a strong adhesive made for outdoor use, and press the carpet firmly into place to ensure a secure bond.
Step 3: Apply Adhesive
Applying the right adhesive is crucial to ensure that the outdoor carpet adheres securely to the concrete steps, withstanding outdoor elements and foot traffic. Here’s a step-by-step guide on how to apply adhesive for the installation of outdoor carpet:
Choose the Correct Adhesive: Select a high-quality outdoor carpet adhesive that is specifically designed for use on concrete surfaces. Ensure that the adhesive is suitable for outdoor applications and can withstand varying weather conditions.
Prepare the Adhesive: Following the manufacturer’s instructions, prepare the adhesive for application. Some adhesives may require stirring or specific temperature conditions for optimal performance. Adhere to the recommended guidelines to ensure the adhesive is ready for use.
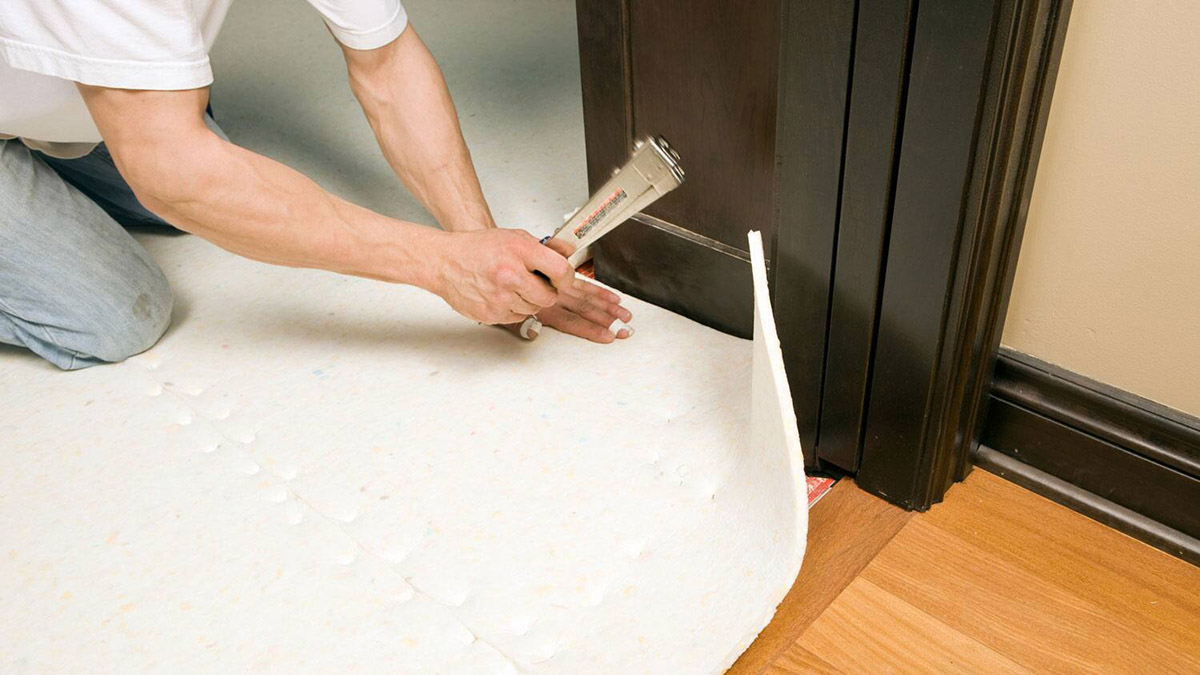
Apply the Adhesive: Using a paintbrush or trowel, apply a uniform layer of adhesive to the clean, dry concrete surface of the steps. Work methodically, covering the entire area where the outdoor carpet will be installed. Ensure that the adhesive is spread evenly to promote strong and consistent adhesion.
Work in Sections: Depending on the size of the steps, it may be beneficial to work in manageable sections when applying the adhesive. This approach helps prevent the adhesive from drying out before the carpet is installed, ensuring a secure bond throughout the process.
Follow Time and Temperature Guidelines: Adhering to the recommended drying time and temperature conditions specified by the adhesive manufacturer is essential. Proper curing of the adhesive is crucial for achieving a strong and durable bond between the concrete and the outdoor carpet.
Exercise Caution: Take precautions to avoid skin contact with the adhesive, and ensure that the application area is well-ventilated during the process. Prioritize safety by wearing gloves and, if necessary, a protective mask to minimize exposure to fumes.
By following these steps, you’ll effectively apply the adhesive, setting the stage for the next phase of the installation process: installing the outdoor carpet on the prepared concrete steps. With the adhesive in place, we can now proceed to the exciting step of transforming the steps with the installation of the outdoor carpet.
Read more: How To Install A Carpet On Steps
Step 4: Install the Outdoor Carpet
With the concrete steps cleaned and the adhesive applied, it’s time to embark on the transformative process of installing the outdoor carpet. This step will bring your vision of a stylish and comfortable outdoor space one step closer to reality. Here’s a detailed guide on how to install the outdoor carpet on the prepared concrete steps:
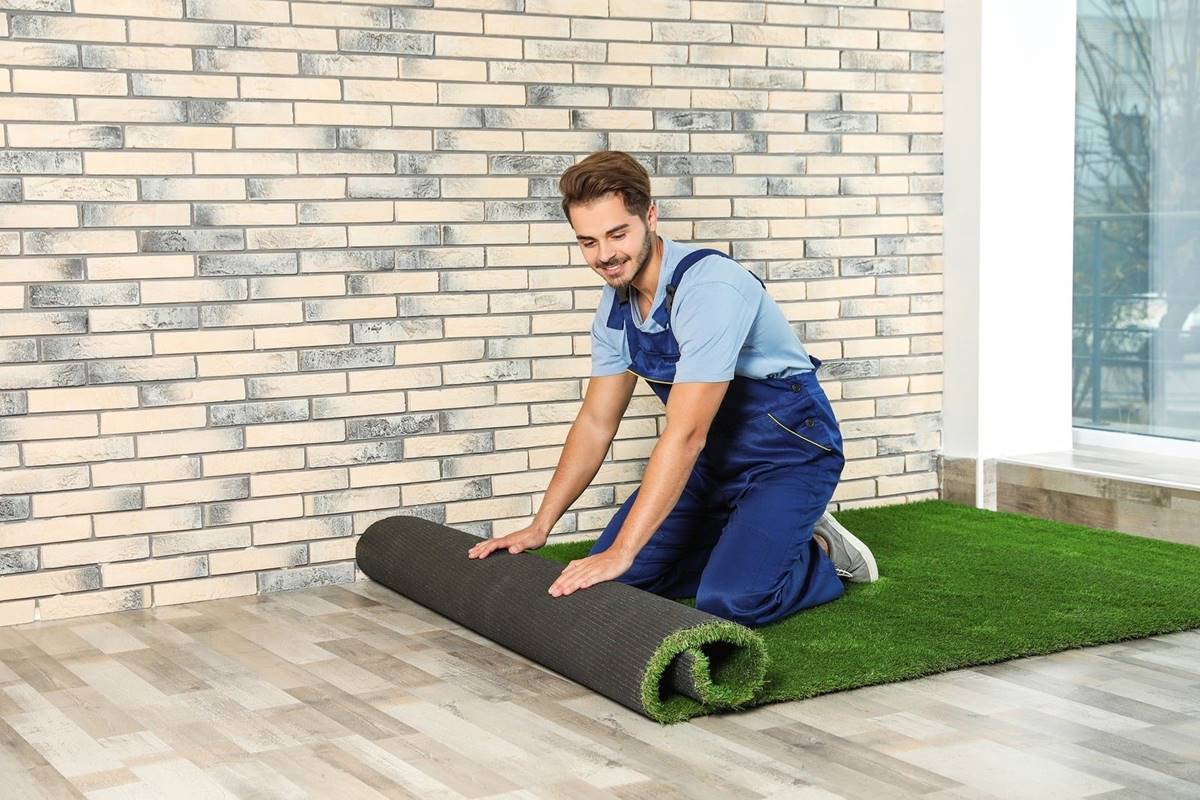
Position the Carpet: Carefully position the outdoor carpet over the adhesive-coated concrete steps, ensuring that it aligns evenly and covers the entire surface. Take your time to adjust the positioning, ensuring a proper fit and alignment with the edges and contours of the steps.
Smooth Out the Carpet: Using a roller or tamping tool, gently smooth out the carpet from the center towards the edges. This process helps eliminate air pockets and ensures that the carpet adheres securely to the adhesive, creating a smooth and professional finish.
Press Firmly: Apply firm pressure to the carpet, pressing it into the adhesive to promote strong adhesion. Pay particular attention to the edges and corners, ensuring that they adhere securely to the step’s contours for a neat and polished appearance.
Trim Excess Material: Using a sharp utility knife, carefully trim any excess carpet material along the edges of the steps. Take precise measurements and make clean, straight cuts to achieve a tailored and professional look. Ensure that the carpet fits snugly against the edges without any overhang.
Check for Alignment: Once the carpet is installed, double-check the alignment and smoothness of the surface. Ensure that the carpet is securely bonded to the steps and that there are no visible wrinkles or loose areas that require adjustment.
Allow for Setting Time: After installing the carpet, allow sufficient time for the adhesive to set and bond the carpet to the concrete surface effectively. Adhere to the recommended setting time provided by the adhesive manufacturer to ensure optimal adhesion and long-term durability.
By following these steps, you’ll successfully install the outdoor carpet on your concrete steps, elevating the visual appeal and comfort of your outdoor space. With the carpet securely in place, we can now move on to the final step of trimming the edges to achieve a polished and professional finish.
Step 5: Trim the Edges
Trimming the edges of the outdoor carpet is the final step in achieving a polished and professional finish for your concrete steps. This process ensures that the carpet fits snugly and neatly against the edges, enhancing both the appearance and longevity of the installation. Here’s a detailed guide on how to trim the edges of the outdoor carpet:
Assess the Edges: Carefully examine the edges of the installed carpet to identify any areas where trimming is required. Pay attention to the contours and angles of the steps, ensuring that the carpet fits seamlessly against the edges without any excess material.
Measure and Mark: Use a measuring tape to determine the precise areas that require trimming. Mark the areas with a pencil or chalk, indicating the line where the excess carpet will be trimmed to achieve a clean and tailored fit.
Make Clean Cuts: Using a sharp utility knife, carefully cut along the marked lines to trim the excess carpet material. Exercise caution and make precise, straight cuts to achieve a neat and professional finish. Take your time to ensure accuracy and avoid jagged edges.
Ensure a Snug Fit: As you trim the edges, focus on creating a snug fit between the carpet and the steps. Pay attention to the corners and any intricate contours, ensuring that the carpet follows the shape of the steps for a seamless and visually appealing result.
Smooth and Inspect: After trimming the edges, run your hand along the newly cut edges to ensure a smooth and consistent finish. Double-check the entire perimeter of the carpet, ensuring that the edges are neatly trimmed and securely bonded to the steps.
Clean Up Excess Material: Remove any trimmed pieces of carpet and clean up the work area to reveal the polished and transformed appearance of your concrete steps. Dispose of the excess material responsibly, leaving behind a tidy and inviting outdoor space.
By following these steps, you’ll achieve a precise and tailored fit for the outdoor carpet, enhancing the overall aesthetic and functionality of your concrete steps. With the edges neatly trimmed, your outdoor space will exude a professional and inviting ambiance, ready to be enjoyed for years to come.
Conclusion
Congratulations on successfully completing the installation of outdoor carpet on your concrete steps! By following the comprehensive steps outlined in this guide, you’ve transformed your outdoor space into a stylish and inviting area that seamlessly combines aesthetics and functionality. The addition of outdoor carpet not only enhances the visual appeal of your steps but also provides a comfortable and safe surface for your family and guests to enjoy.
As you admire the newly installed outdoor carpet, take pride in the meticulous preparation, precise installation, and attention to detail that have culminated in this impressive outcome. Your outdoor space now boasts a feature that seamlessly integrates with your design aesthetic while offering practical benefits for everyday use.
Furthermore, the durability and weather-resistant properties of outdoor carpet ensure that your investment will withstand the elements and maintain its allure for years to come. Whether it’s a front porch, patio, or any outdoor staircase, the addition of outdoor carpet has elevated the overall appeal and functionality of your outdoor living space.
As you revel in the enhanced ambiance of your outdoor area, take a moment to appreciate the effort and dedication you’ve invested in this project. The result is not just an aesthetically pleasing addition to your home but a testament to your creativity and commitment to creating a welcoming and comfortable environment for yourself and those around you.
With the installation process complete, it’s time to savor the fruits of your labor and relish the transformed outdoor space. Whether you’re hosting gatherings, enjoying quiet moments outdoors, or simply admiring the newfound charm of your steps, the addition of outdoor carpet has undoubtedly made a remarkable difference in your outdoor living experience.
Thank you for embarking on this journey of outdoor design and transformation with us. We hope this guide has empowered you to take on future projects with confidence and creativity, further enhancing your outdoor oasis with personalized touches and functional upgrades.
Frequently Asked Questions about How To Install Outdoor Carpet On Concrete Steps
Was this page helpful?
At Storables.com, we guarantee accurate and reliable information. Our content, validated by Expert Board Contributors, is crafted following stringent Editorial Policies. We're committed to providing you with well-researched, expert-backed insights for all your informational needs.


0 thoughts on “How To Install Outdoor Carpet On Concrete Steps”