Articles
How To Remove A Bathtub Faucet
Modified: March 1, 2024
Learn how to easily remove a bathtub faucet with our informative article. Gain step-by-step instructions and expert tips!
(Many of the links in this article redirect to a specific reviewed product. Your purchase of these products through affiliate links helps to generate commission for Storables.com, at no extra cost. Learn more)
Introduction
Welcome to our handy guide on how to remove a bathtub faucet. Whether you’re looking to upgrade your bathroom fixtures or need to replace a leaky faucet, removing a bathtub faucet is a task that can be accomplished with the right tools and a little know-how. In this article, we’ll walk you through the step-by-step process to help you successfully remove your old bathtub faucet and prepare for the installation of a new one.
Before we begin, it’s important to note that while removing a bathtub faucet may seem daunting at first, it can be a relatively simple DIY project. However, we recommend always consulting the manufacturer’s instructions provided with your specific faucet model, as each faucet may have unique installation and removal requirements.
Now that we’ve cleared that up, let’s dive into the step-by-step process of removing a bathtub faucet.
Key Takeaways:
- Upgrade your bathroom fixtures or replace a leaky faucet with ease by following our step-by-step guide to remove and install a new bathtub faucet. Gather the right tools, shut off the water supply, and proceed with caution for a successful DIY project.
- Enjoy improved water flow, temperature control, and a refreshed look in your bathroom by successfully removing and replacing your bathtub faucet. Follow our comprehensive guide, double-check for leaks, and test the faucet’s functionality for a satisfying DIY accomplishment.
Read more: How To Remove An Old Bathtub?
Step 1: Gather the necessary tools and materials
Before you begin the process of removing a bathtub faucet, it’s essential to gather all the necessary tools and materials. Having everything on hand will make the task much easier and more efficient. Here’s a list of the items you’ll need:
- Adjustable wrench
- Phillips screwdriver
- Flathead screwdriver
- Plumber’s tape
- Bucket or towels
- New bathtub faucet (if you’re planning to install a new one)
The adjustable wrench will be used to loosen and remove the mounting nuts that hold the faucet in place. The Phillips and flathead screwdrivers are necessary for removing screws or securing components of the faucet. Plumber’s tape is required to create a watertight seal when reconnecting the supply lines. Having a bucket or towels nearby will help catch any water that may spill during the removal process.
If you’re replacing your old bathtub faucet with a new one, make sure you have the new faucet ready for installation. Be sure it’s compatible with your existing plumbing and has all the necessary components included. Take note of any specific instructions or additional tools required for the installation process.
Once you have all the tools and materials, you’re ready to move on to the next step: shutting off the water supply.
Step 2: Shut off the water supply
Before you can begin removing the bathtub faucet, it’s crucial to shut off the water supply to prevent any water leakage or accidents during the process. Here’s how you can do it:
- Locate the main water shut-off valve: The shut-off valve is typically found in the basement, crawl space, or utility room of your home. It may be a round wheel valve or a lever-type valve.
- Turn off the valve: If you have a wheel valve, use a clockwise motion to tightly close it. If you have a lever-type valve, flip it to the “off” position.
- Drain any remaining water: To drain the residual water in the pipes, turn on a faucet at a lower level in your home, such as in the basement or on the first floor. This will help relieve any pressure and drain the water.
It’s important to ensure the water supply is completely shut off before proceeding with the faucet removal. This step will help prevent any accidental water leaks or damage during the process.
Once you’ve successfully shut off the water supply, you’re ready to move on to the next step: removing the faucet handle.
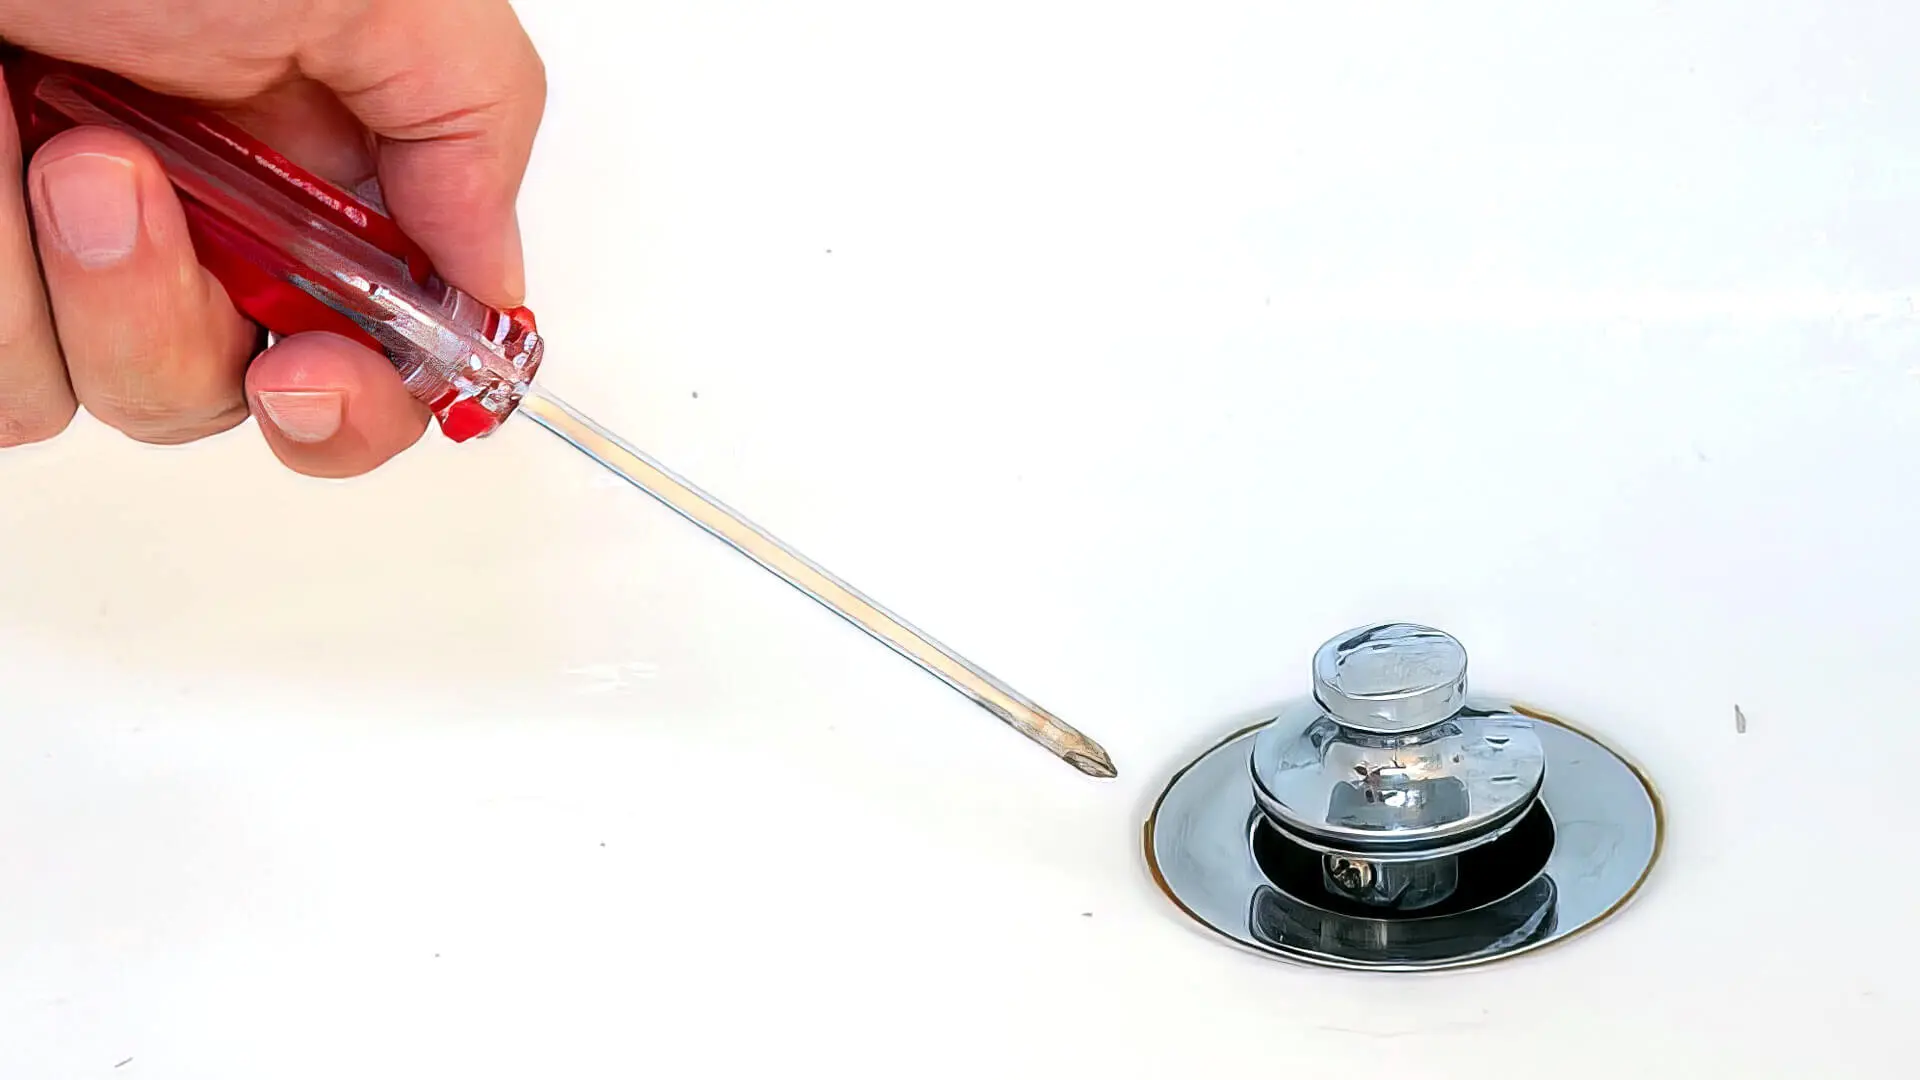
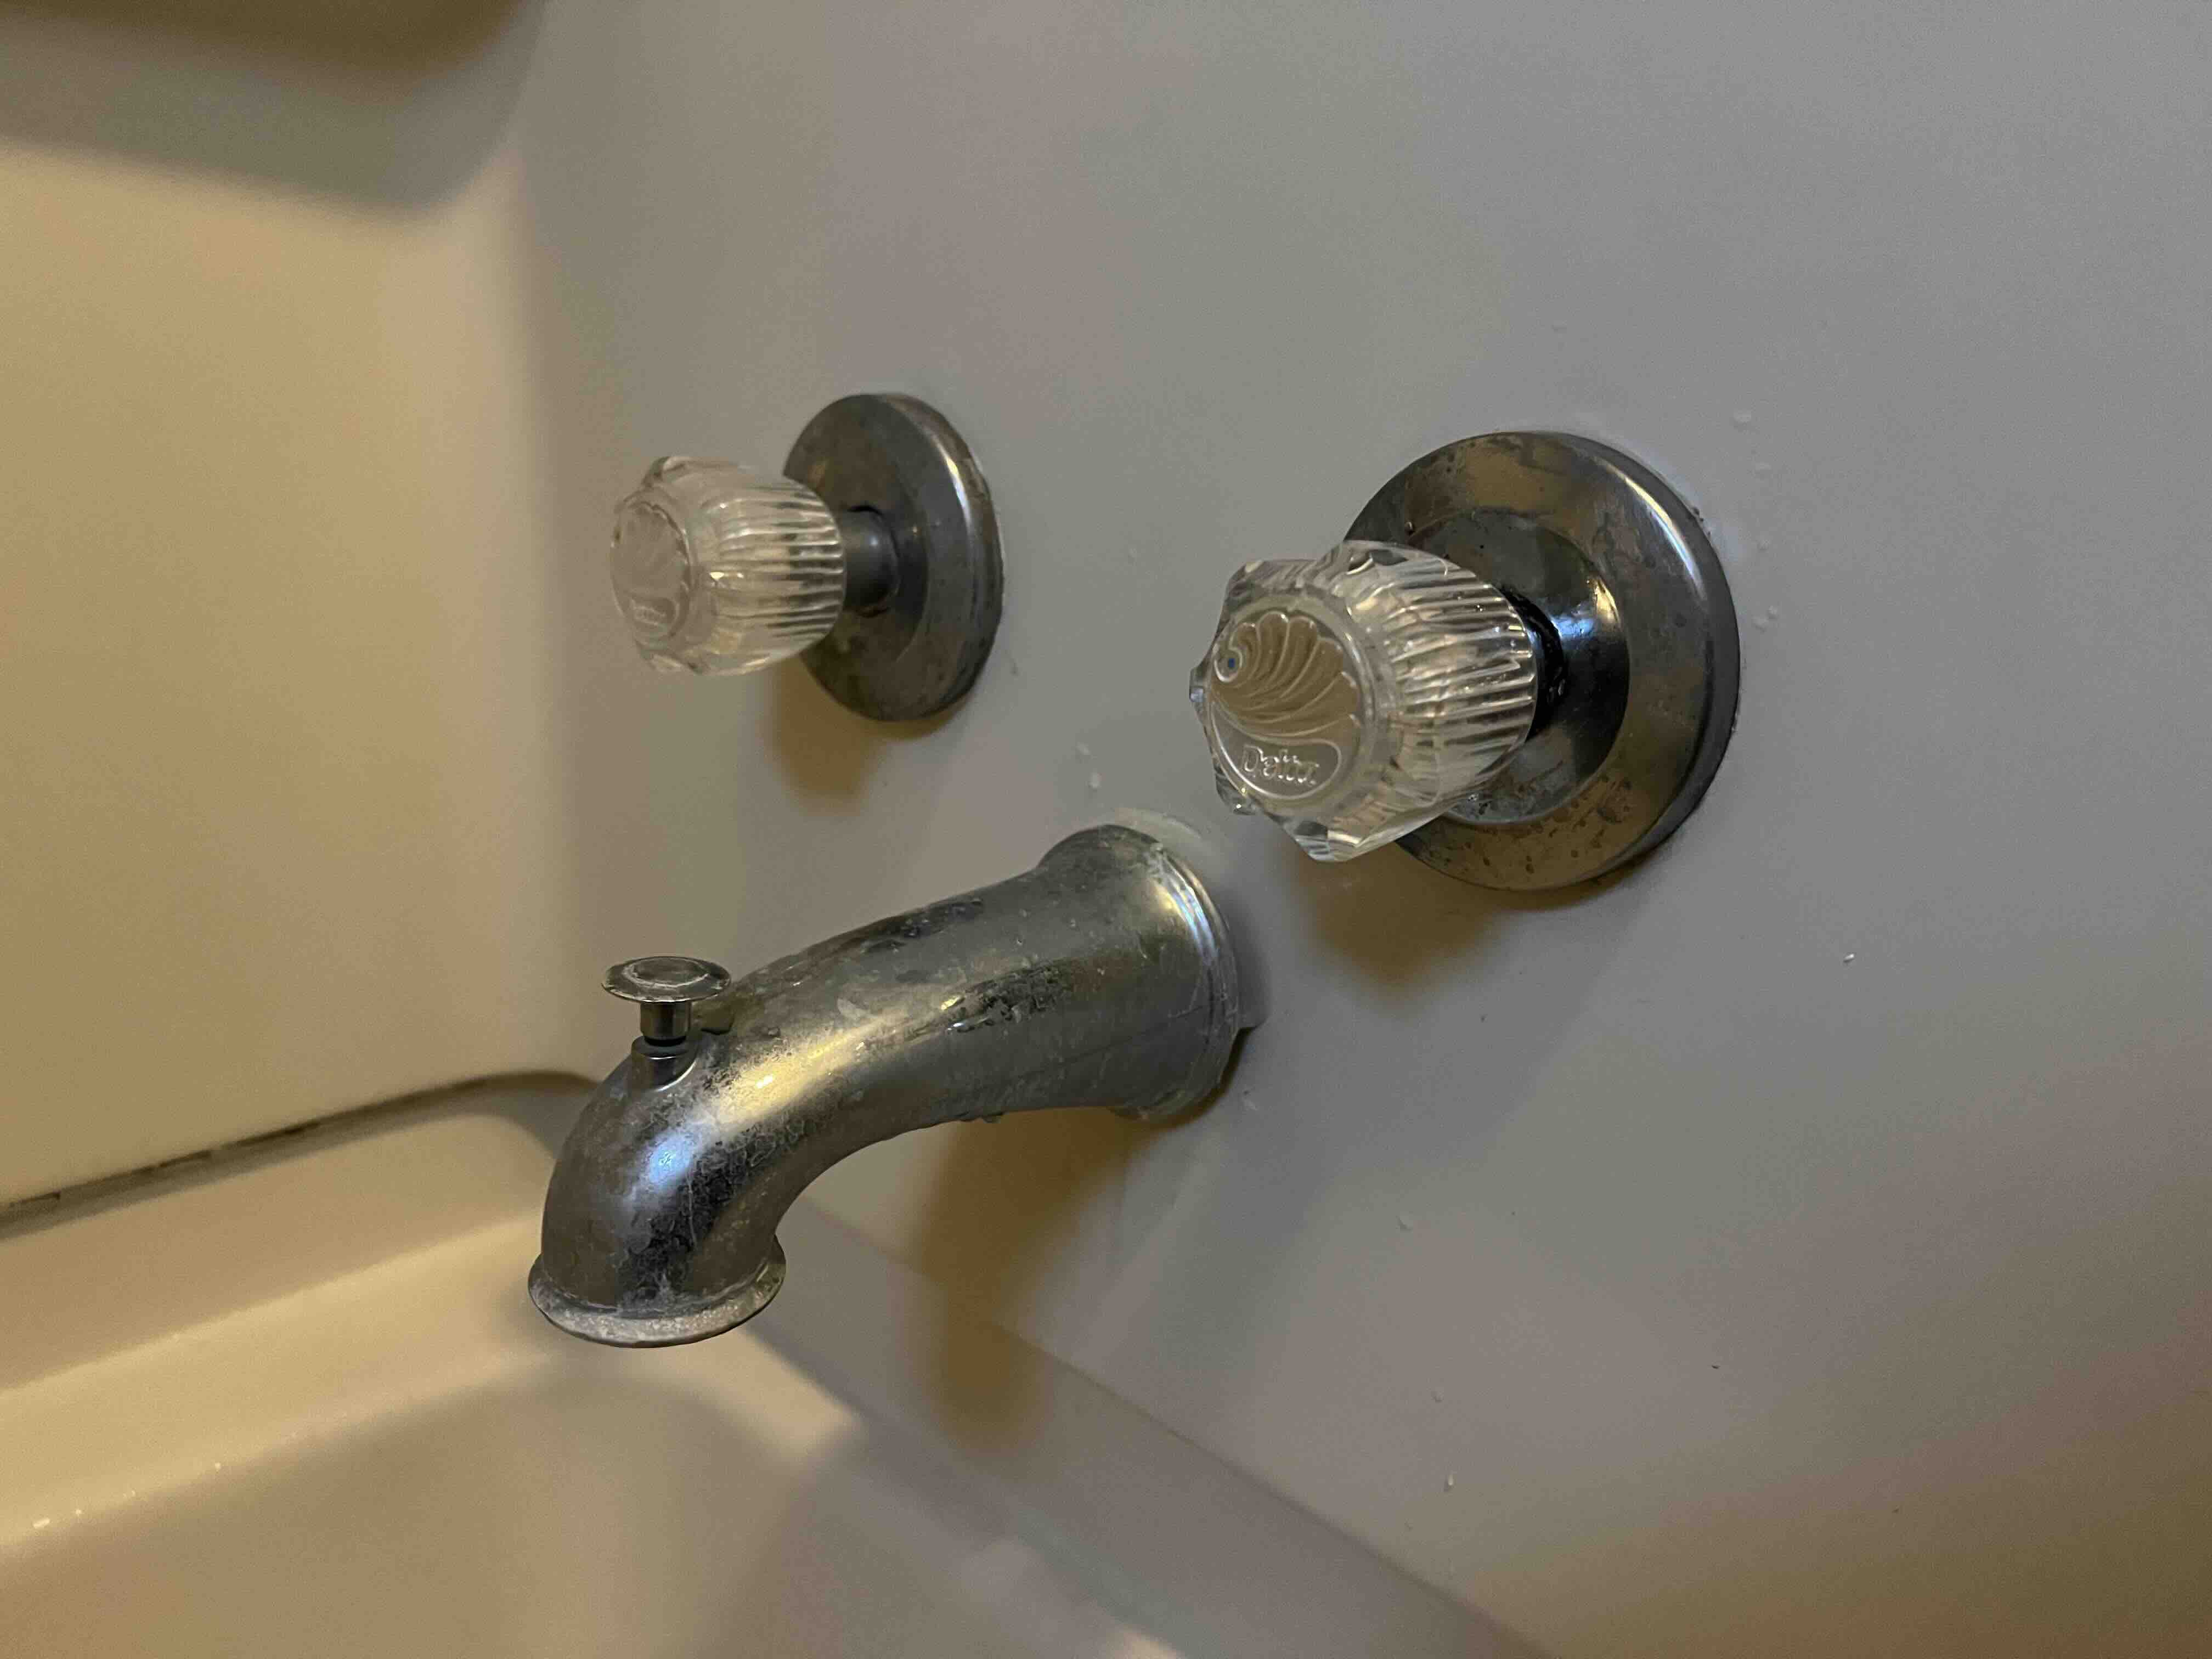
Step 3: Remove the faucet handle
Now that you have shut off the water supply, it’s time to remove the faucet handle. Here’s how you can do it:
- Examine the handle: Take a close look at the handle to identify any visible screws or caps covering hidden screws. The location of these screws may vary depending on the type and model of your faucet.
- Remove the screw or cap: If there is a visible screw, use a screwdriver to unscrew it counterclockwise. If there is a cap covering a hidden screw, use a flathead screwdriver to carefully pry off the cap.
- Unscrew the handle: Once the screw or cap is removed, you should be able to easily lift off the handle. If it feels stuck, gently wiggle it back and forth while pulling upwards to release it from any remaining friction or adhesive.
It’s important to be gentle during this process to avoid damaging the handle or other components. If you encounter any resistance, carefully inspect the handle for any additional screws or fasteners that may be securing it in place.
With the faucet handle successfully removed, you can now move on to the next step: removing the escutcheon plate.
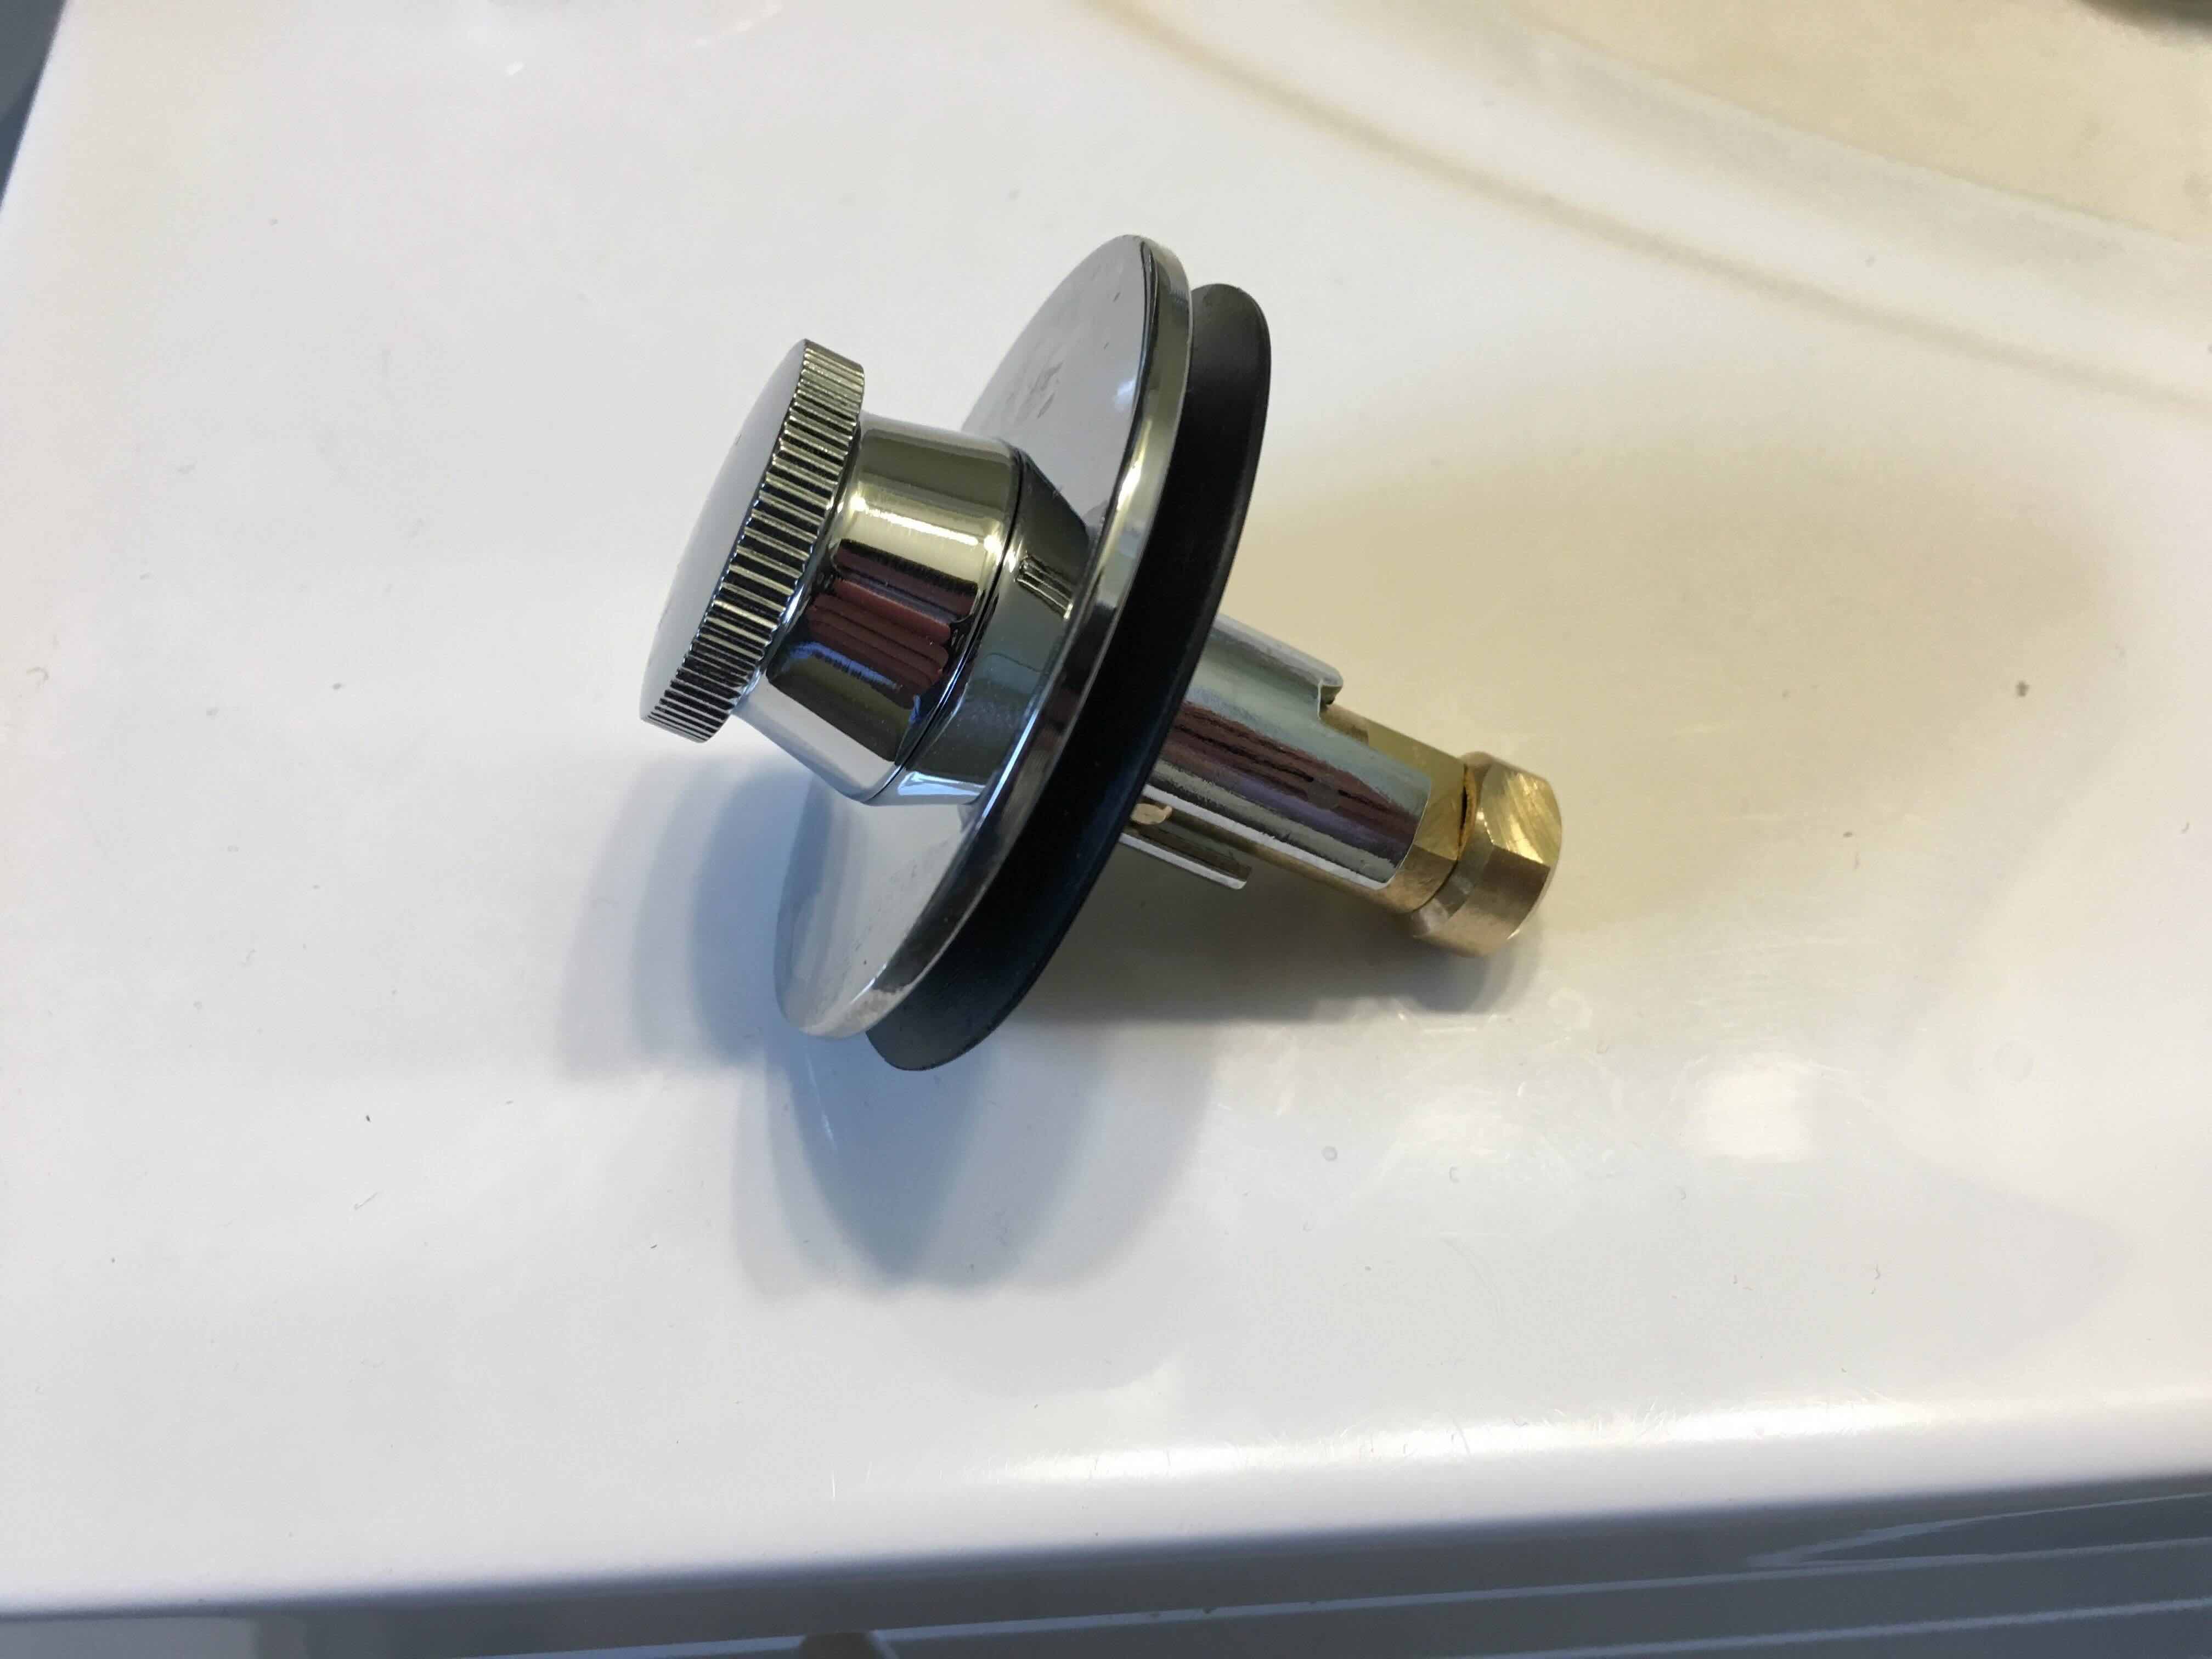
Step 4: Remove the escutcheon plate
After removing the faucet handle, the next step is to remove the escutcheon plate. The escutcheon plate is the decorative cover that surrounds the base of the faucet. Here’s how you can remove it:
- Inspect the escutcheon plate: Look for any visible screws or clips holding the plate in place. These fasteners may be located on the top or bottom of the plate.
- Remove the screws or clips: If there are screws, use a screwdriver to loosen and remove them. If there are clips, use a flathead screwdriver to carefully pry them off.
- Gently pry off the escutcheon plate: Once the screws or clips are removed, the escutcheon plate should be loose. Use a flathead screwdriver or your fingers to gently pry it off the wall or bathtub surface.
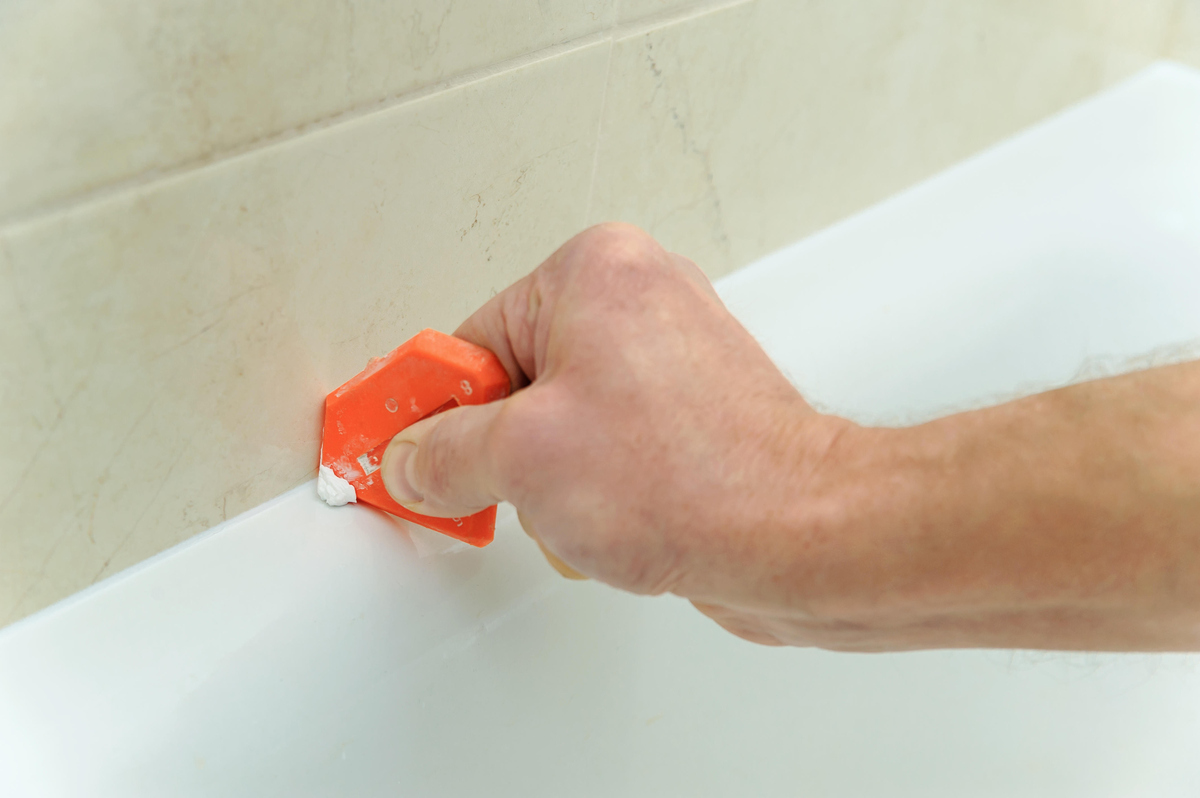
Be cautious while removing the escutcheon plate to avoid scratching or damaging the surrounding surfaces. If the plate is tightly secured or stuck, you can try using a lubricant or adhesive remover to loosen it before attempting to remove it.
Once the escutcheon plate is successfully removed, you’re ready to move on to the next step: disconnecting the supply lines.
Read more: How To Remove Mold In A Bathtub
Step 5: Disconnect the supply lines
With the escutcheon plate removed, it’s time to disconnect the supply lines that are connected to the bathtub faucet. Here’s how you can do it:
- Locate the supply lines: The supply lines are the pipes that connect the faucet to the water supply. They are typically located underneath the bathtub or behind the wall.
- Turn off the supply valves: Each supply line should have its own shut-off valve. Use an adjustable wrench to turn the valve clockwise until it is tightly closed.
- Disconnect the supply lines: Use an adjustable wrench to loosen the nuts securing the supply lines to the faucet. Turn the nuts counterclockwise until they are completely loose. Once loose, you can typically unscrew them by hand.
- Remove the supply lines: Once the nuts are fully unscrewed, carefully pull the supply lines away from the faucet. Be mindful of any remaining water in the lines, as it may still flow out.
It’s essential to turn off the supply valves and ensure there is no water pressure in the lines before disconnecting them. This will prevent any water leakage or accidents during the process.
Once the supply lines are successfully disconnected, you can now move on to the next step: removing the mounting nuts.
Step 6: Remove the mounting nuts
After disconnecting the supply lines, it’s time to remove the mounting nuts that secure the bathtub faucet in place. Here’s how you can do it:
- Locate the mounting nuts: The mounting nuts are typically located underneath the bathtub, securing the faucet to the plumbing.
- Use an adjustable wrench: Take your adjustable wrench and loosen the mounting nuts by turning them counterclockwise. Depending on the accessibility and tightness, you may need to use some force to break them loose.
- Remove the mounting nuts: Once the nuts are loosened, you can continue unscrewing them by hand or with the wrench. Remove all the mounting nuts and set them aside for future use or discard them if they are no longer needed.
Take note of the size of the mounting nuts, as you may need to use the same size during the installation of the new bathtub faucet. Keep the nuts in a safe place to ensure you have them readily available when needed.
With the mounting nuts successfully removed, you can now proceed to the next step: removing the bathtub faucet from the tub.
Before attempting to remove a bathtub faucet, make sure to turn off the water supply to the faucet. This will prevent any water from leaking and causing a mess during the removal process.
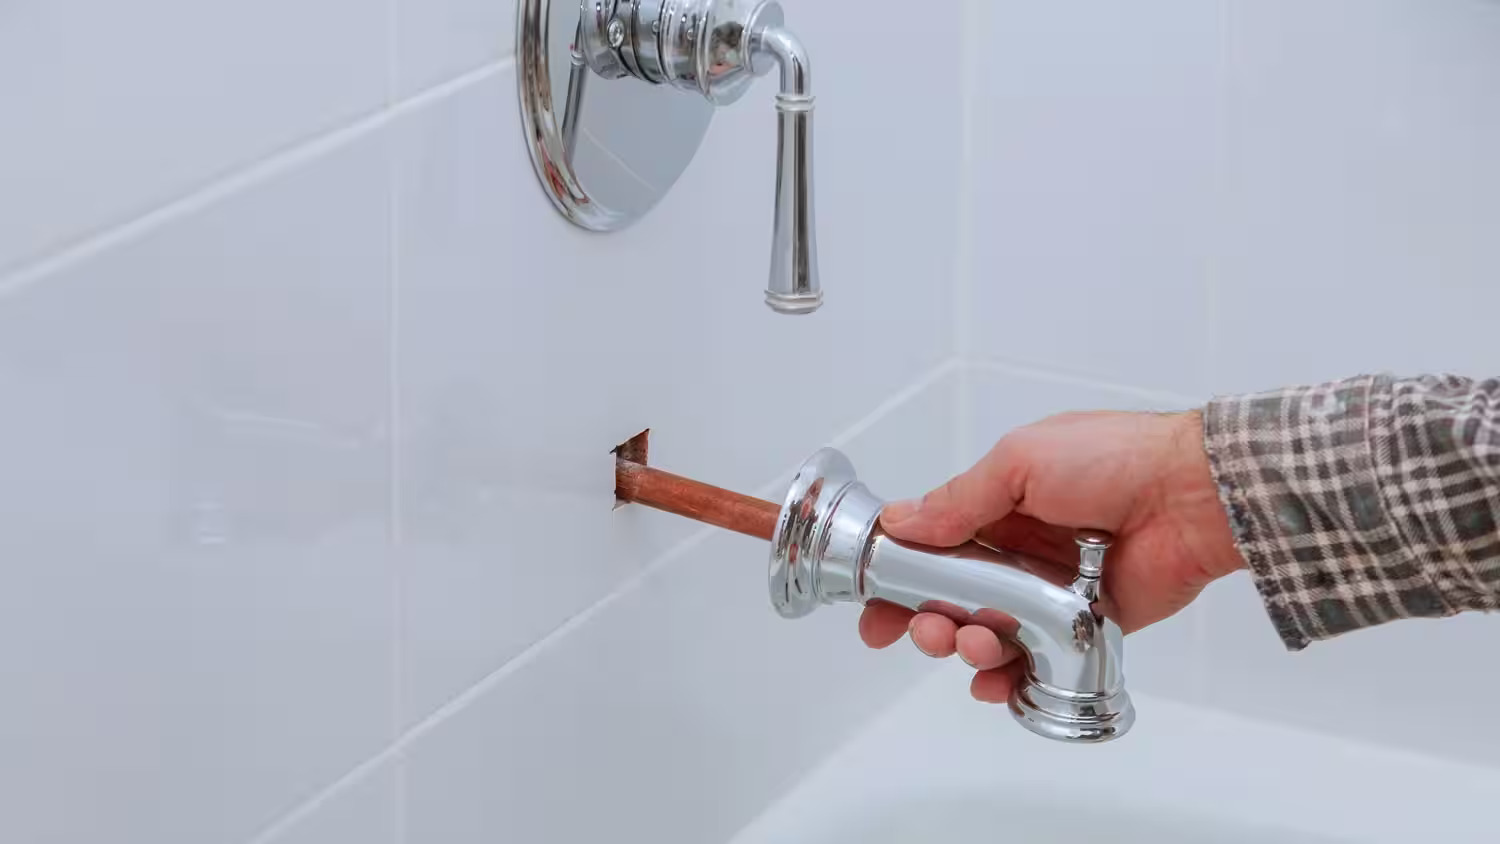
Step 7: Remove the faucet from the bathtub
Now that the mounting nuts are removed, it’s time to remove the bathtub faucet from the tub. Here’s how you can do it:
- Gently pull the faucet: Carefully pull the faucet away from the bathtub surface. It may require a bit of force to detach it from any remaining sealant or adhesive.
- Inspect for any additional connections: While pulling the faucet, check for any hidden connections or fasteners that may be holding it in place. Some faucets may have additional clips or screws that need to be removed before the faucet can be fully detached.
- Continue removing the faucet: Once you’ve ensured there are no additional connections, continue pulling the faucet until it is completely free from the bathtub.
Be cautious while removing the faucet to prevent any damage to the bathtub surface or surrounding areas. If you encounter any resistance, double-check for any missed connections or fasteners that may still be securing the faucet.
With the old faucet successfully removed from the bathtub, you’re now ready to move on to the next step: installing the new bathtub faucet.
Step 8: Install the new bathtub faucet
With the old faucet removed, it’s time to install the new bathtub faucet. Here’s how you can do it:
- Prepare the new faucet: Take out the new bathtub faucet and ensure that all the necessary components are included. Refer to the manufacturer’s instructions for any specific guidelines.
- Position the new faucet: Carefully position the new faucet over the mounting holes in the bathtub. Make sure it aligns properly and sits flush against the surface.
- Secure the faucet: From underneath the bathtub, attach the mounting nuts to the faucet. Use an adjustable wrench to tighten them clockwise. Ensure that the faucet is firmly secured in place.
- Test the faucet alignment: Once the faucet is secured, check if it’s properly aligned and level with the bathtub surface. Make any necessary adjustments to ensure a proper fit.
During the installation process, be mindful of any rubber gaskets or seals that may need to be placed between the faucet and the bathtub surface. These components help create a watertight seal and prevent any leaks.
With the new bathtub faucet securely installed, you can now proceed to the next step: reconnecting the supply lines.
Read more: How To Remove A Bathtub Handle
Step 9: Reconnect the supply lines
After successfully installing the new bathtub faucet, it’s time to reconnect the supply lines. Here’s how you can do it:
- Inspect the supply lines: Take a look at the supply lines and ensure they are in good condition. If they appear damaged or worn, it’s recommended to replace them with new ones.
- Apply plumber’s tape: Wrap plumber’s tape clockwise around the threaded ends of the supply lines. This will create a tight and secure seal when reconnecting them to the faucet.
- Connect the supply lines: Attach the supply lines to the corresponding hot and cold water connections on the new faucet. Hand-tighten them initially, and then use an adjustable wrench to give them a final twist for a secure fit.
- Check for leaks: Once the supply lines are reconnected, turn on the main water supply valve and check for any leaks around the connections. If you notice any leaks, tighten the connections further or consider using a new gasket or seal.
It’s important to ensure that the supply lines are properly connected and tightened to prevent any water leaks. The plumber’s tape adds an extra layer of protection and helps maintain a watertight seal.
With the supply lines successfully reconnected, you can now proceed to the next step: installing the escutcheon plate.
Step 10: Install the escutcheon plate
After reconnecting the supply lines, it’s time to install the escutcheon plate. The escutcheon plate is the decorative cover that goes around the base of the faucet. Here’s how you can install it:
- Examine the escutcheon plate: Take a close look at the escutcheon plate and locate any screw holes or clips that will secure it in place. The number and placement of these fasteners may vary depending on the specific design of your faucet.
- Position the plate: Align the escutcheon plate over the faucet holes and ensure it sits evenly on the bathtub surface. Make sure it covers the area around the faucet neatly and matches the overall aesthetic of your bathroom.
- Screw or clip the plate: If there are screw holes, insert screws into the holes and use a screwdriver to tighten them clockwise until the plate is securely fastened. If there are clips, snap them into place to secure the plate.
When installing the escutcheon plate, be careful not to overtighten the screws, as it may cause damage to the plate or the bathtub surface. Ensure that the plate is aligned straight and sits flush against the bathtub.
With the escutcheon plate successfully installed, you can now move on to the next step: reattaching the faucet handle.
Step 11: Reattach the faucet handle
With the escutcheon plate in place, it’s time to reattach the faucet handle. Here’s how you can do it:
- Inspect the handle: Check the faucet handle for any visible screws or caps that need to be removed before attaching it.
- Attach screws or caps: If there are screws, align the handle over the faucet stem and secure it by tightening the screws clockwise. If there are caps covering hidden screws, press them into place to secure the handle.
- Test the handle: Give the handle a gentle turn to ensure it operates smoothly and controls the flow of water. Make any necessary adjustments or tighten the screws further if needed.
Double-check the alignment and positioning of the faucet handle to ensure it matches the desired look and functionality. The handle should be properly secured without any wobbling or looseness.
With the faucet handle successfully reattached, you’re now ready to move on to the final step: turning on the water supply.
Step 12: Turn on the water supply
Now that everything is in place and securely attached, it’s time to turn on the water supply. Here’s the final step in the process:
- Locate the main water shut-off valve: This valve is usually located near the water meter or in a utility room. It can be a wheel valve that you need to turn clockwise to open.
- Slowly turn on the water supply: Use a clockwise motion to slowly turn the main water shut-off valve. This will gradually allow water to flow back into the pipes and fill the system.
- Check for leaks: Once the water supply is turned on, inspect all the connections – supply lines, faucet handle, and escutcheon plate – for any signs of leakage. If you notice any leaks, tighten the connections further or make the necessary adjustments.
- Test the new faucet: Turn on the faucet and check for proper water flow and temperature. Let the water run for a few minutes to flush out any air or debris that may have accumulated during the installation process.
It’s important to check for leaks and ensure everything is functioning properly before considering the job complete. Plumbing connections may need some time to fully seal and adjust, so be patient and observant during this step.
Congratulations! You have successfully removed and replaced your bathtub faucet. Enjoy your newly installed faucet and the improved functionality and aesthetics it brings to your bathroom.
Remember, if you encounter any difficulties or are unsure about any step in the process, it’s always recommended to consult a professional plumber for assistance.
Read more: How To Remove A Bathtub Spout
Conclusion
Removing and replacing a bathtub faucet may seem like a daunting task, but with the right tools, knowledge, and patience, it can be a manageable DIY project. By following the step-by-step guide outlined in this article, you can successfully remove your old bathtub faucet and install a new one, enhancing the functionality and appearance of your bathroom.
Throughout the process, it’s important to gather all the necessary tools and materials, shut off the water supply, and proceed with caution to avoid any damage to the plumbing or surrounding surfaces. Carefully removing the faucet handle, escutcheon plate, and disconnecting the supply lines will pave the way for installing the new faucet with ease.
Remember to double-check for any leaks, ensure proper alignment and secure attachment of components, and test the faucet’s functionality before considering the job complete. At any point, if you encounter challenges or feel unsure about any step, consulting a professional plumber is always a smart decision.
With your new bathtub faucet installed, you can enjoy improved water flow, temperature control, and a refreshed look in your bathroom. Take pride in your DIY accomplishment, and admire the beauty and functionality of your newly upgraded bathtub faucet.
Thank you for following this comprehensive guide, and we hope your experience of removing and installing a bathtub faucet was a success!
Frequently Asked Questions about How To Remove A Bathtub Faucet
Was this page helpful?
At Storables.com, we guarantee accurate and reliable information. Our content, validated by Expert Board Contributors, is crafted following stringent Editorial Policies. We're committed to providing you with well-researched, expert-backed insights for all your informational needs.


0 thoughts on “How To Remove A Bathtub Faucet”