
Articles
How To Replace Sink Faucet
Modified: August 16, 2024
Learn how to replace a sink faucet with step-by-step instructions and helpful tips in this informative article. Upgrade your bathroom or kitchen with ease.
(Many of the links in this article redirect to a specific reviewed product. Your purchase of these products through affiliate links helps to generate commission for Storables.com, at no extra cost. Learn more)
Introduction
Replacing a sink faucet is a common home improvement project that can instantly update the look and functionality of your kitchen or bathroom. Whether you’re looking to upgrade to a more modern design or simply need to replace a worn-out faucet, this step-by-step guide will help you through the process.
With the right tools and materials, replacing a sink faucet can be a relatively straightforward task that can be completed in just a few hours. Not only will you save money by doing it yourself, but you’ll also gain the satisfaction of knowing that you’ve tackled a DIY project that can make a big impact.
In this article, we’ll walk you through the process of replacing a sink faucet, from gathering the necessary tools and materials to testing the faucet operation once it’s installed. So let’s dive in and get started!
Key Takeaways:
- Upgrade your kitchen or bathroom with a modern sink faucet by following this straightforward DIY guide. Save money and enjoy the satisfaction of a successful home improvement project.
- Ensure a smooth and leak-free faucet replacement by carefully following each step, from gathering tools to testing the faucet operation. Enjoy the benefits of a fresh and functional fixture.
Read more: How To Replace A Kitchen Sink Faucet
Step 1: Gather Necessary Tools and Materials
Before you begin replacing your sink faucet, it’s important to gather all the necessary tools and materials. Having everything you need at hand will help make the installation process smoother and more efficient. Here’s a checklist of what you’ll need:
- Adjustable wrench: This will be used to loosen and tighten nuts and bolts during the installation process. Make sure you have a wrench that fits the size of the nuts on your faucet.
- Screwdrivers: You may need both a Phillips-head and a flat-head screwdriver, depending on the type of faucet you’re installing.
- Teflon tape: This thin, white tape will be wrapped around the threads of the water supply connections to create a watertight seal.
- Plumber’s putty: This waterproof sealant is used to create a watertight seal between the faucet and the sink surface.
- New faucet: Choose a faucet that suits your style and meets your functional needs. Make sure it comes with all the necessary components, including handles, spout, and connections.
- Bucket or towel: Use a bucket or towel to catch any water that may drip during the installation process.
- Flashlight: A flashlight will come in handy for seeing into tight spaces and ensuring a proper installation.
- Cleaning supplies: Have some cleaning supplies ready to clean the sink surface and remove any residue left behind by the old faucet.
By gathering all these tools and materials before you start, you’ll have everything within reach as you progress through the installation process. This will save you time and frustration and ensure that you have a smooth and successful faucet replacement.
Step 2: Turn Off the Water Supply
Before you can begin removing the old sink faucet, you need to turn off the water supply to prevent any leaks or water damage during the installation process. Here’s how to do it:
- Locate the water shut-off valves: Look under the sink for the water shut-off valves. There should be one for hot water and one for cold water. These valves are typically small, round handles that you can turn clockwise to shut off the water.
- Turn off the water supply: Use an adjustable wrench or your hand to turn the shut-off valves clockwise until they are fully closed. This will stop the flow of water to the faucet.
- Test the water supply: Turn on the faucet to make sure the water supply is turned off. If no water comes out, you have successfully shut off the water supply. If water continues to flow, double-check that the shut-off valves are fully closed.
Turning off the water supply is a crucial step to prevent any water damage or flooding during the faucet replacement process. It’s important to ensure that the shut-off valves are fully closed before proceeding to the next steps.
Once you have successfully turned off the water supply, you can move on to the next step: removing the old faucet.
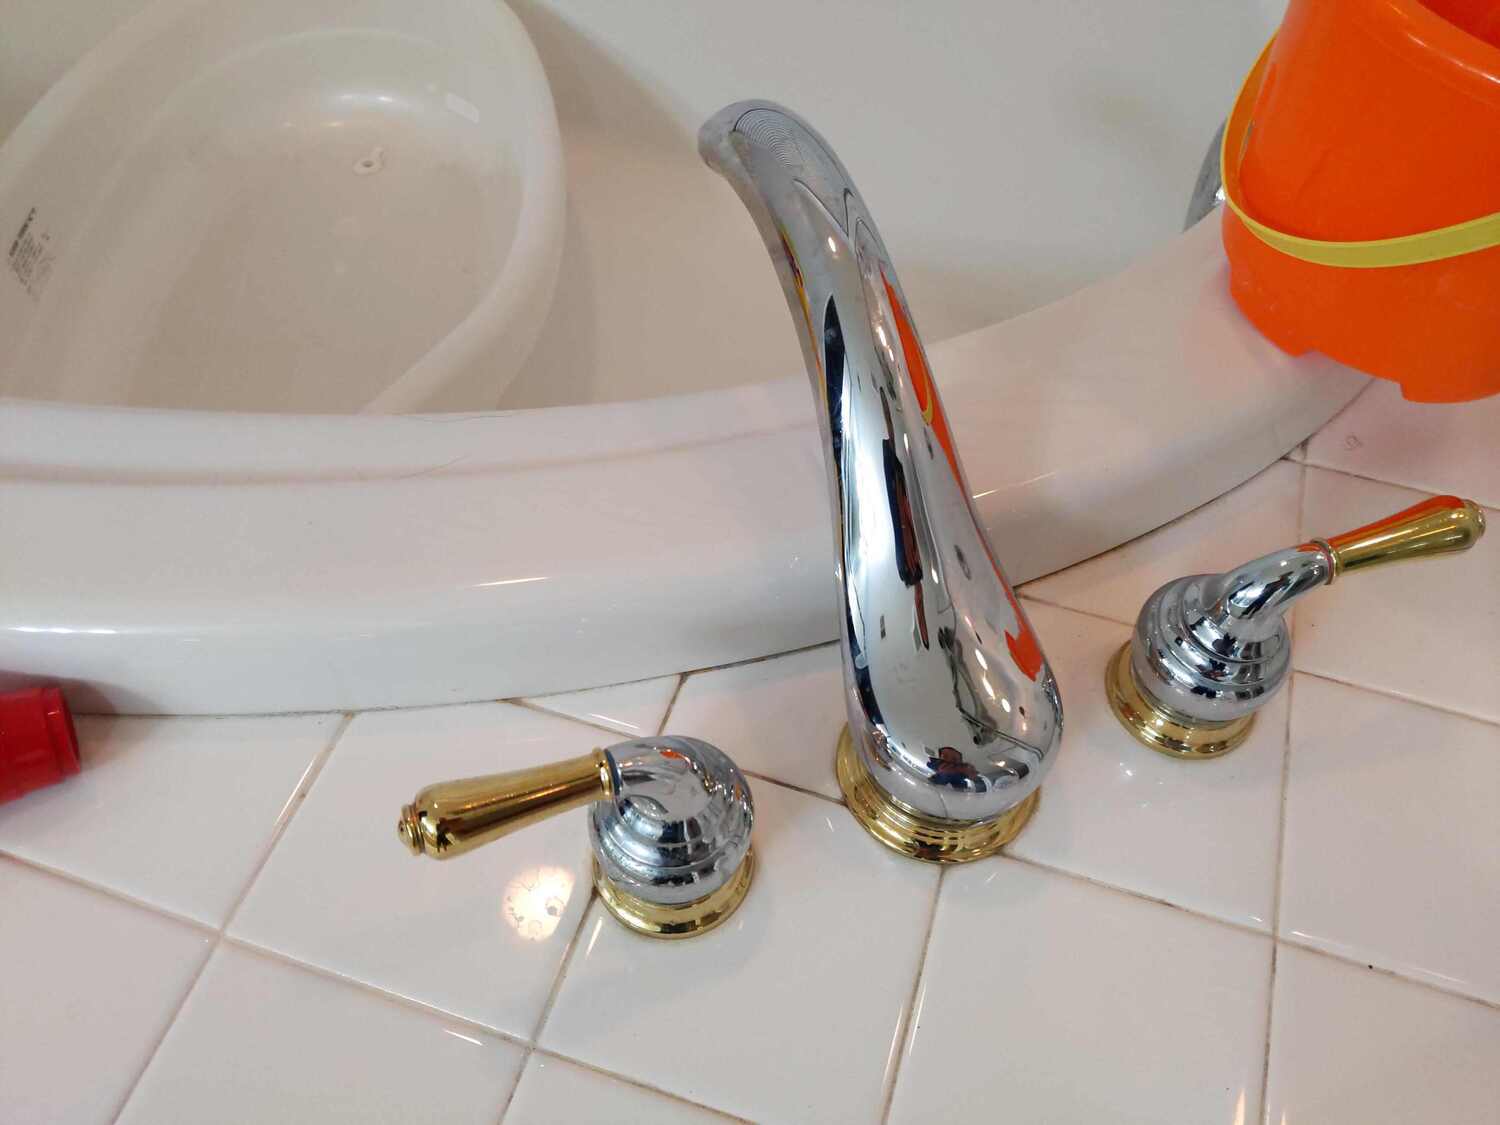
Step 3: Remove the Old Faucet
With the water supply turned off, it’s time to remove the old faucet from your sink. Follow these steps to safely and effectively remove the old faucet:
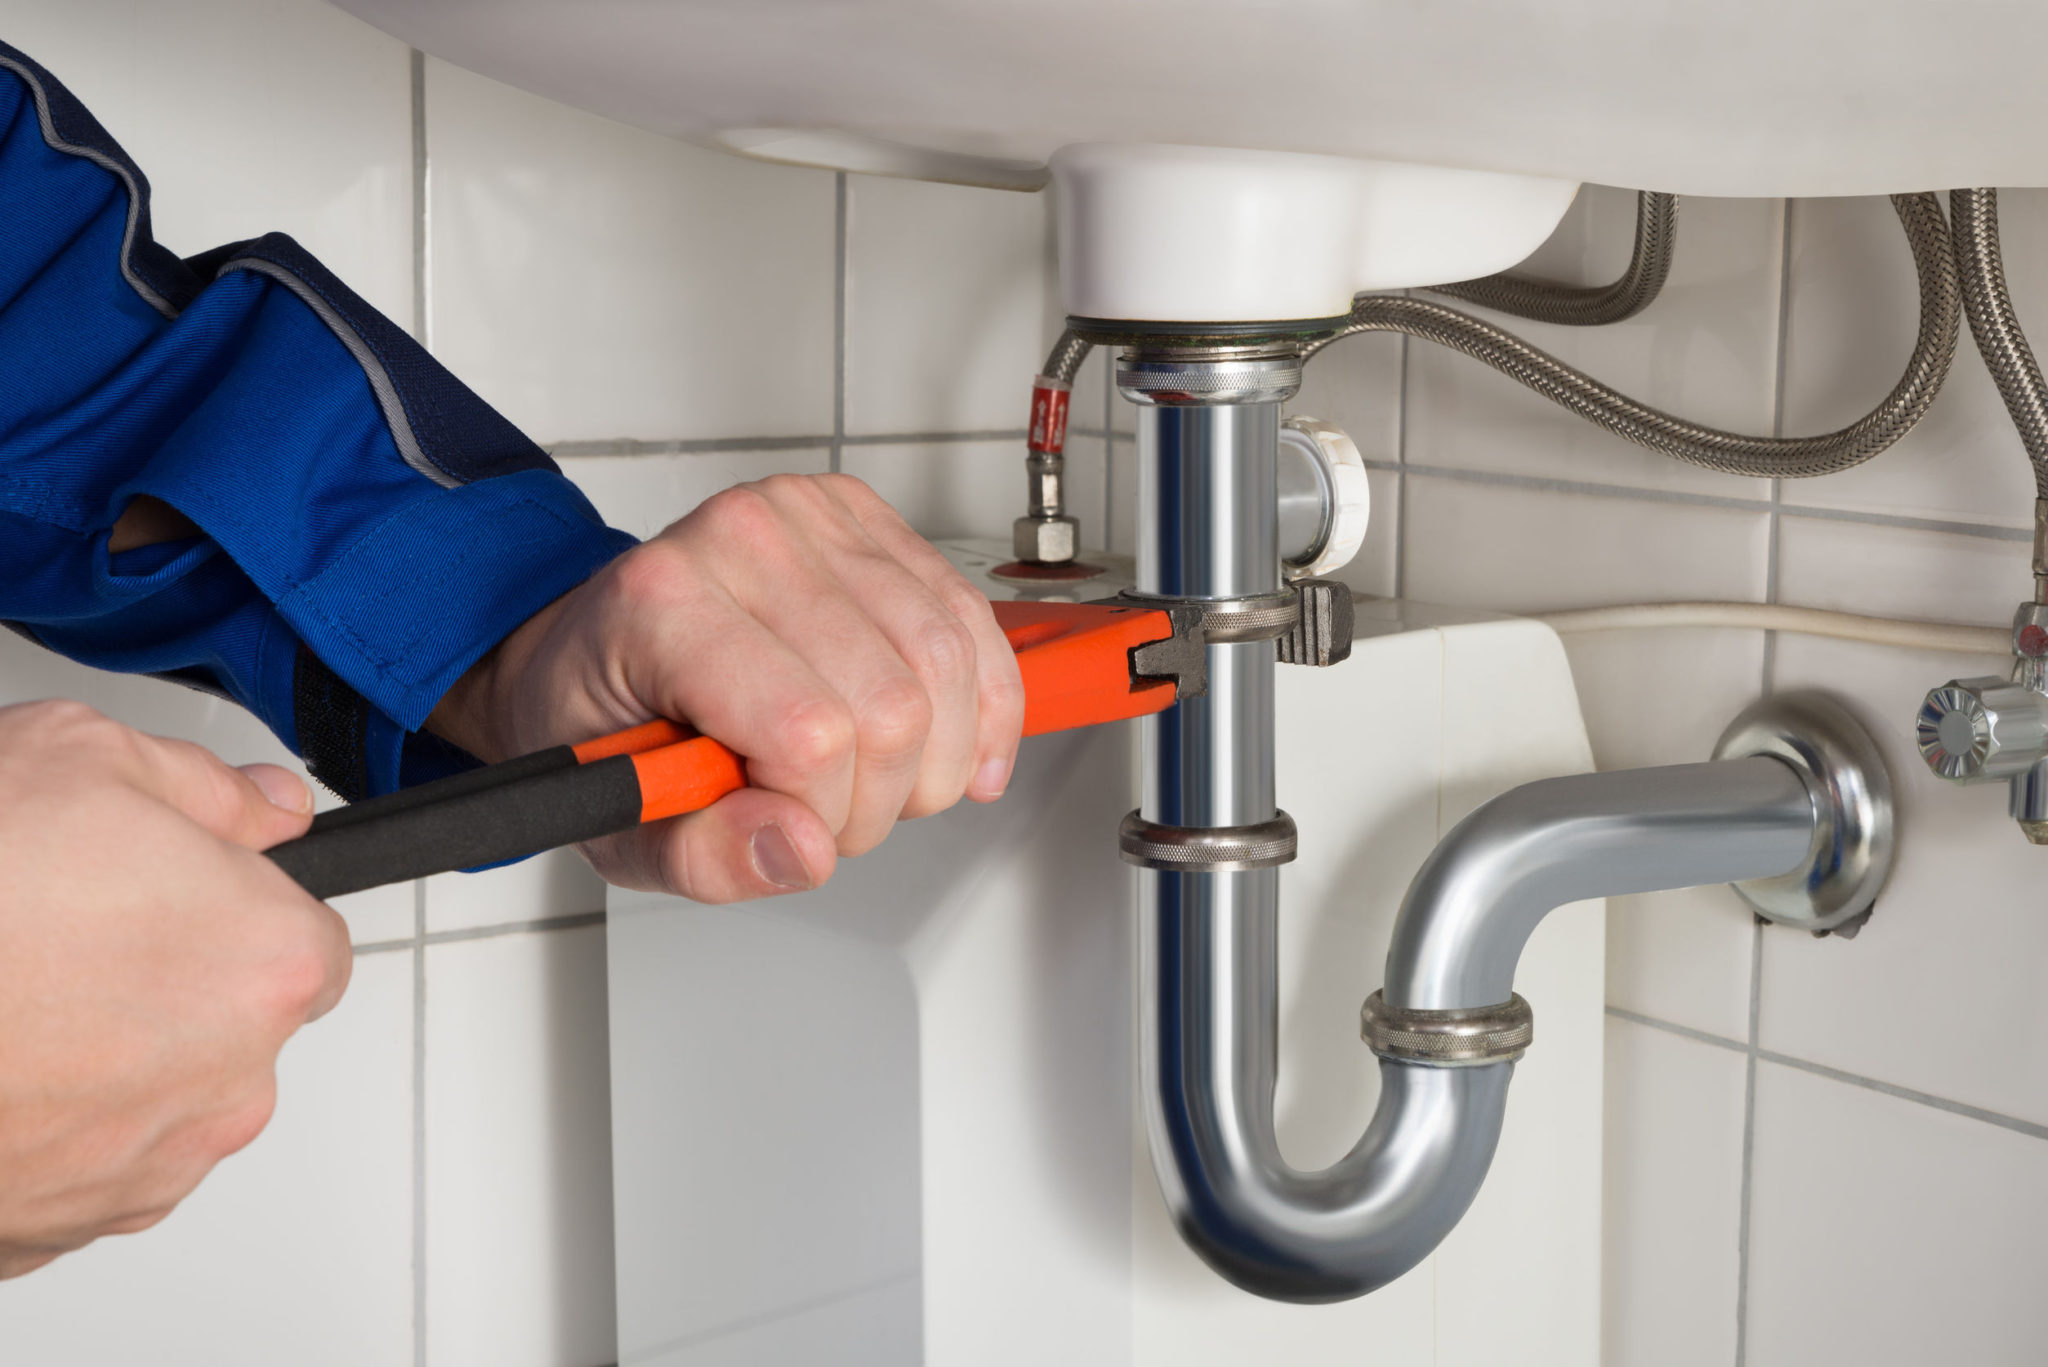
- Disconnect the water supply lines: Use an adjustable wrench to loosen the nuts that connect the water supply lines to the faucet. Turn the nuts counterclockwise until they are loose, then use your hand to fully remove them. Be prepared for a small amount of water to drain from the lines.
- Remove the mounting nuts: Underneath the sink, locate the mounting nuts that secure the faucet in place. Use an adjustable wrench or pliers to loosen and remove these nuts. The faucet should now be free from the sink.
- Disconnect any additional connections: Depending on the type of faucet you have, there may be additional connections such as a sprayer or soap dispenser. Disconnect these connections according to the manufacturer’s instructions.
- Remove the old faucet: Gently lift the old faucet out of the sink, taking care not to damage the sink surface. If the faucet is stuck, you may need to use a small pry bar or screwdriver to carefully loosen it.
Once the old faucet is removed, it’s a good idea to clean the sink surface and remove any residue left behind. This will ensure a clean and smooth surface for the installation of the new faucet.
Removing the old faucet can sometimes be a bit challenging, especially if it has been in place for a long time. Take your time and be careful not to force anything, as this could cause damage to the sink or the plumbing connections.
Now that the old faucet has been successfully removed, you’re ready to move on to the next step: cleaning the sink surface.
Step 4: Clean the Sink Surface
Cleaning the sink surface is an important step before installing the new faucet. This ensures that the area is free from any debris, residue, or old putty that may interfere with the installation or affect the appearance of the new faucet. Follow these steps to clean the sink surface:
- Remove any debris: Use a soft brush or sponge to remove any loose debris or dirt from the sink surface. Pay attention to the area around the faucet holes and the edges of the sink.
- Apply a cleaning solution: Prepare a mixture of mild dish soap and warm water. Apply the cleaning solution to the sink surface and use a sponge or cloth to scrub away any stains or residue.
- Remove old putty: If there is any old plumber’s putty remaining from the previous faucet, carefully scrape it off using a putty knife or a plastic scraper. Take care not to scratch the sink surface.
- Rinse and dry: Thoroughly rinse the sink surface with clean water to remove any soap residue. Use a clean towel or cloth to dry the sink surface completely.
By cleaning the sink surface, you ensure that the new faucet will have a clean and stable base. This will not only improve the appearance of the installation but also create a better seal between the faucet and the sink.
Once the sink surface is clean and dry, you’re ready to move on to the next step: installing the new faucet. But before you do, be sure to read the manufacturer’s instructions and familiarize yourself with the specific installation requirements for your new faucet.
When replacing a sink faucet, be sure to turn off the water supply before starting. Use a bucket to catch any remaining water in the pipes when disconnecting the old faucet.
Read more: How To Replace Sink Sprayer
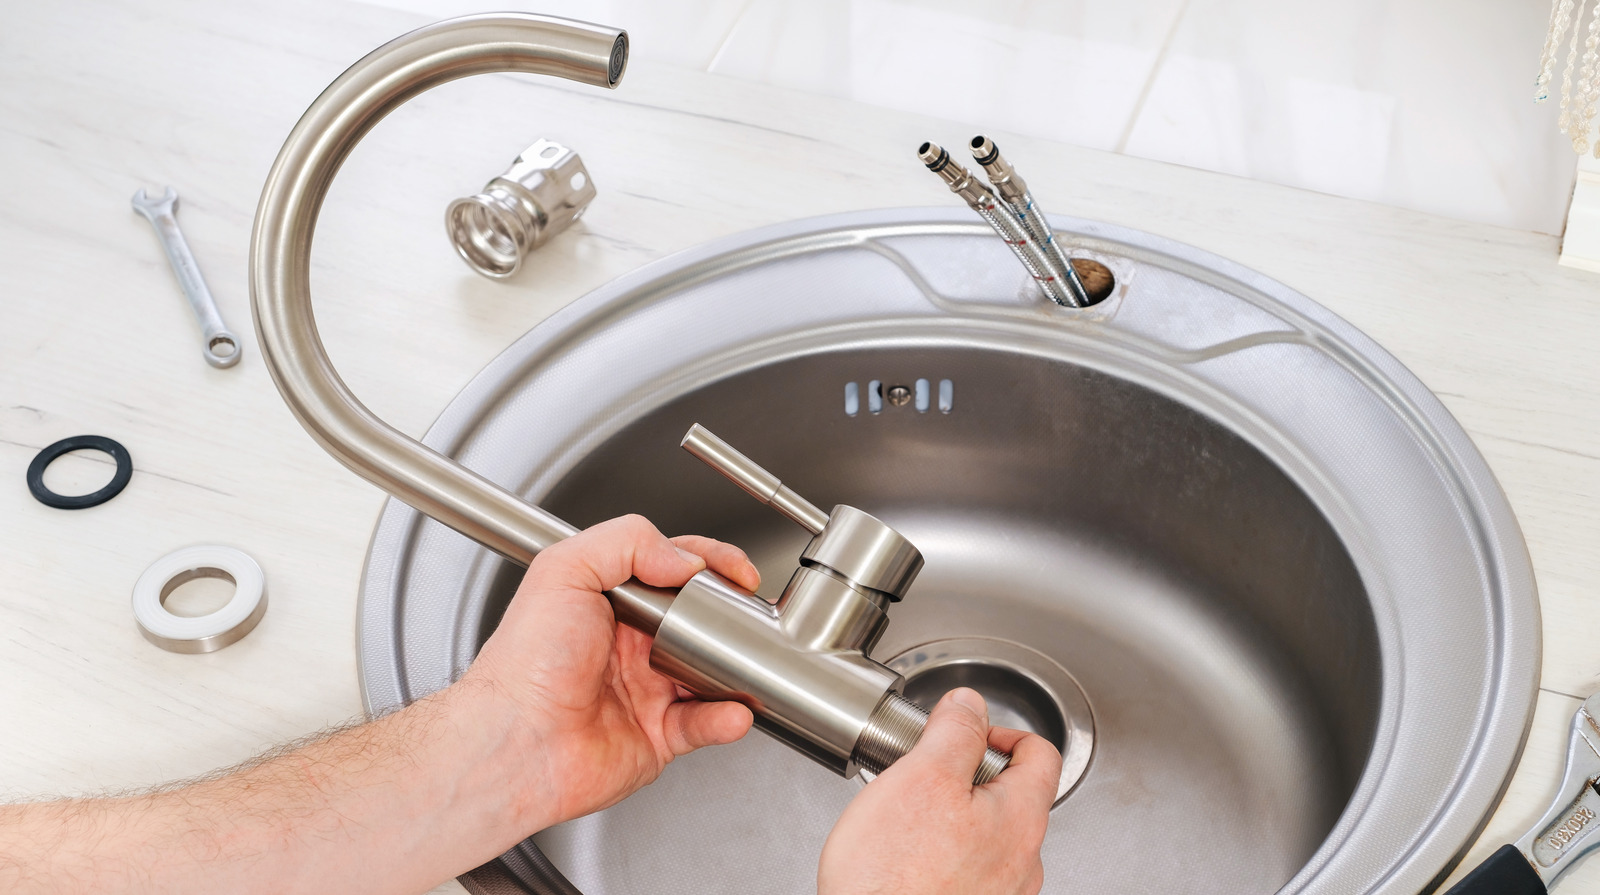
Step 5: Install the New Faucet
Installing the new faucet is an exciting step as it brings you closer to completing the project and enjoying your updated sink. Follow these steps to properly install the new faucet:
- Check the manufacturer’s instructions: Before you begin, carefully read the manufacturer’s instructions that came with your new faucet. This will ensure that you follow any specific steps or requirements for your particular model.
- Apply plumber’s putty: Take a small amount of plumber’s putty and roll it into a thin rope. Apply it to the bottom of the faucet where it will come into contact with the sink surface. This will create a watertight seal.
- Position the faucet: Carefully lower the new faucet into the sink’s faucet holes, making sure it is aligned properly. Press it gently onto the sink surface to ensure a secure fit.
- Secure the faucet: Underneath the sink, thread the mounting nuts onto the faucet tailpieces. Tighten the nuts using an adjustable wrench or pliers, ensuring that the faucet is securely fastened to the sink.
- Attach any additional components: If your new faucet has a sprayer or soap dispenser, follow the manufacturer’s instructions to attach these components. Make sure all connections are secure.
During the installation process, be mindful of not overtightening the nuts or screws, as this can cause damage to the faucet or sink. Use just enough force to create a secure and stable installation.
Once the new faucet is securely installed, take a moment to double-check its alignment and positioning. Make any necessary adjustments to ensure that it sits straight and level on the sink.
Congratulations! You have successfully installed the new faucet. Now it’s time to move on to the next step: connecting the water supply lines.
Step 6: Connect the Water Supply Lines
Connecting the water supply lines is a crucial step in completing the installation of your new sink faucet. The water supply lines will provide the necessary water flow to your faucet. Follow these steps to properly connect the water supply lines:
- Check the type of connections: Determine the type of connections your new faucet requires. It may have compression fittings, solder connection, or quick-connect fittings. Refer to the manufacturer’s instructions to confirm the type.
- Apply plumber’s tape: Wrap some Teflon tape around the threads of the faucet tailpieces. This will help create a watertight seal and prevent any leaks.
- Connect the supply lines: Attach the supply lines to the faucet tailpieces, ensuring a tight connection. If your faucet has hot and cold supply lines, connect them accordingly to the corresponding shut-off valves.
- Tighten the connections: Use an adjustable wrench to carefully tighten the nuts or compression fittings. Be cautious not to over-tighten, as this can cause damage to the connections.
Before you turn on the water supply, take a moment to visually inspect all the connections. Ensure that they are secure and properly aligned. This will help prevent any leaks once the water is turned on.
Once the water supply lines are connected, you’re almost done! But before you can enjoy your new faucet, there’s one more important step to complete: checking for leaks.
Step 7: Check for Leaks
Checking for leaks is a crucial step to ensure that your new sink faucet is properly installed and working correctly. Follow these steps to check for leaks:
- Turn on the water supply: Slowly turn on the water supply by opening the shut-off valves. Start with the cold water valve, then gradually open the hot water valve. Listen and observe for any signs of water leakage.
- Check the faucet connections: Inspect the connections between the faucet and the water supply lines. Look for any visible signs of water leakage, such as dripping or puddling.
- Verify the drain connections: Check the drain connections under the sink. Ensure that the drain pipe and any associated seals or gaskets are properly connected and not leaking.
- Watch for any drips or leaks: Run the faucet for a few minutes and observe closely for any drips or leaks. Pay attention to both the hot and cold water sides, as well as the spout and any additional components.
If you notice any leaks or drips during this process, it’s important to address them promptly. Tighten any loose connections or fittings, or consider replacing any faulty components or seals. A properly installed faucet should not leak or drip, so taking the time to check for potential issues is essential.
Once you have checked for leaks and ensured that everything is dry and secure, you’re ready for the final step: testing the faucet operation.
Step 8: Test the Faucet Operation
Testing the faucet operation is the final step in the process of replacing your sink faucet. This step allows you to ensure that the faucet is functioning properly and that all features are working as expected. Follow these steps to test the faucet operation:
- Turn on the water: Open the faucet handles by turning them counterclockwise. Gradually increase the water flow by adjusting the handles.
- Test the hot and cold water: Check that both the hot and cold water handles are functioning correctly, providing the desired water temperature when adjusted.
- Operate any additional features: If your faucet has any additional features, such as a sprayer or soap dispenser, test their operation as well.
- Check for smooth handle operation: Ensure that the faucet handles operate smoothly and without any difficulty or resistance. They should turn on and off easily.
While testing the faucet operation, keep an eye out for any abnormalities or issues. Be aware of any strange noises, leaks, or inconsistent water pressure. If you encounter any problems, double-check the connections and make any necessary adjustments or repairs.
Once you are satisfied with the faucet’s performance and everything is in working order, congratulations! You have successfully replaced your sink faucet. Take a moment to clean up any water drips or spills and enjoy your updated sink appearance and improved functionality.
Remember, proper maintenance and periodic inspections can help prolong the lifespan of your faucet and prevent potential issues. Regularly check for leaks, clean the faucet, and address any repairs promptly to keep your faucet in optimal condition for years to come.
Thank you for following this step-by-step guide. We hope it has been helpful in replacing your sink faucet!
Read more: How To Replace Sink Strainer
Conclusion
Replacing a sink faucet can be a rewarding home improvement project that instantly updates the look and functionality of your kitchen or bathroom. By following the step-by-step guide outlined above, you can successfully replace your sink faucet and enjoy the benefits of a fresh and functional fixture.
Throughout the process, we covered important steps such as gathering necessary tools and materials, turning off the water supply, removing the old faucet, cleaning the sink surface, installing the new faucet, connecting the water supply lines, checking for leaks, and testing the faucet operation. Each step is crucial in achieving a successful and long-lasting installation.
Remember to always refer to the manufacturer’s instructions specific to your new faucet model. This ensures that you follow any unique steps or requirements they may have provided.
By taking the time to carefully replace your sink faucet, you can not only improve the aesthetics of your space but also enhance the functionality and efficiency of your everyday tasks. Enjoy the convenience of a smooth operating faucet that brings both style and practicality to your kitchen or bathroom.
We hope this comprehensive guide has provided you with the knowledge and confidence to take on this DIY project. Happy faucet replacement!
Now that you've mastered replacing your sink faucet, why stop there? Upgrading your kitchen with a modern faucet that includes a sprayer can dramatically improve your cooking and cleaning efficiency. Our next guide walks you through every step of this exciting upgrade, ensuring you handle faucet installation like a pro. Don’t miss out on making your kitchen more functional and stylish.
Frequently Asked Questions about How To Replace Sink Faucet
Was this page helpful?
At Storables.com, we guarantee accurate and reliable information. Our content, validated by Expert Board Contributors, is crafted following stringent Editorial Policies. We're committed to providing you with well-researched, expert-backed insights for all your informational needs.


0 thoughts on “How To Replace Sink Faucet”