Articles
How To Repair A Chimney Crown
Modified: August 22, 2024
Learn effective techniques and methods to repair a chimney crown with our informative articles. Enhance the lifespan of your chimney and ensure its structural integrity.
(Many of the links in this article redirect to a specific reviewed product. Your purchase of these products through affiliate links helps to generate commission for Storables.com, at no extra cost. Learn more)
Introduction
Welcome to this comprehensive guide on how to repair a chimney crown. The chimney crown, also known as the chimney cap or chimney top, is a crucial component of the chimney structure. It plays a vital role in protecting the chimney from weather damage and preventing moisture from seeping into the chimney system.
Over time, chimney crowns can deteriorate due to exposure to harsh weather conditions, causing cracks, crumbling, and water infiltration. If left unrepaired, this can lead to more significant issues such as water damage, chimney leaks, and even structural damage to your home.
Repairing a chimney crown may seem like a daunting task, but with the right tools, materials, and a little guidance, you can restore the functionality and aesthetics of your chimney. In this article, we will walk you through the steps involved in repairing a chimney crown, from understanding the chimney crown to completing the repair process.
Before we delve into the repair process, it is important to note that if you are not comfortable working at heights, or if the damage to your chimney crown is severe, it is advisable to seek the assistance of a professional chimney repair expert. They will have the necessary expertise and equipment to handle the repair effectively and safely.
Now, let’s begin our journey into the world of chimney crown repairs, and learn how to restore the integrity of your chimney.
Key Takeaways:
- Protect Your Chimney, Protect Your Home
Understanding the importance of a chimney crown and following the repair process can safeguard your chimney from water damage, debris, and animals, preserving the integrity of your home. - DIY Chimney Crown Repair Made Easy
With the right tools, materials, and guidance, repairing a chimney crown is achievable. From assessing damage to building the new crown, this comprehensive guide empowers you to restore your chimney’s functionality.
Read more: How To Rebuild A Chimney
Understanding the Chimney Crown
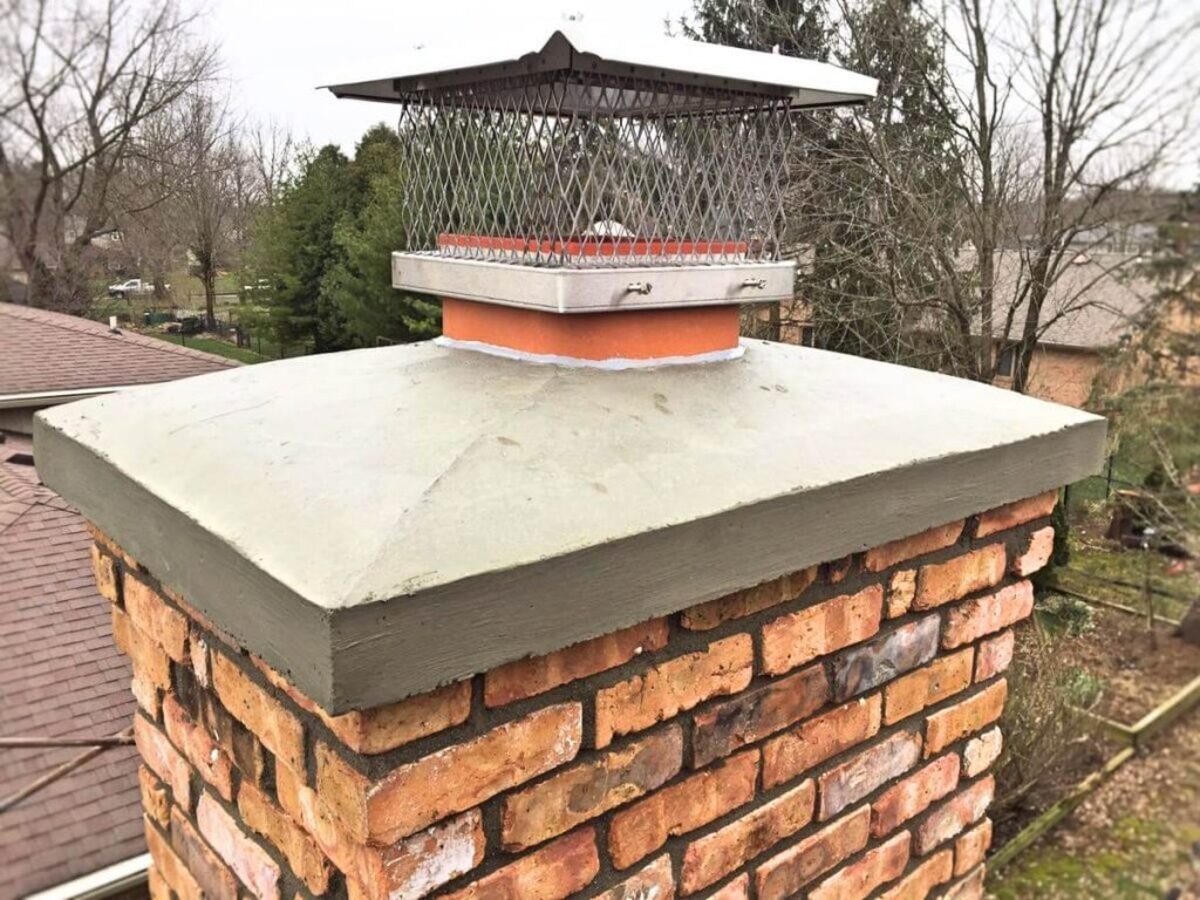
Before embarking on the repair process, it’s essential to have a clear understanding of what a chimney crown is and its purpose. The chimney crown is a slab or concrete cap that covers the top of the chimney structure. It sits on top of the chimney walls, acting as a protective barrier against external elements such as rain, snow, debris, and animals.
The chimney crown serves several important functions. Firstly, it prevents water from seeping into the chimney system. This is crucial because water can cause extensive damage to the chimney, including deteriorating the bricks, creating cracks, and leading to chimney leaks. A properly functioning chimney crown ensures that water is directed away from the flue and down the sides of the chimney structure.
Secondly, the chimney crown acts as a barrier against debris and animals. It prevents leaves, branches, and animals from entering the chimney flue, which can obstruct the ventilation and pose a fire hazard. By keeping the chimney flue clear, the chimney crown ensures that smoke and toxic gases can safely exit the chimney while preventing unwanted intrusions.
Another essential function of the chimney crown is to protect the masonry of the chimney structure. It acts as a shield, preventing rainwater from directly saturating the bricks and mortar. This helps to preserve the structural integrity of the chimney, reducing the likelihood of cracks, crumbling, and other forms of water-related damage.
Chimney crowns are typically constructed using concrete or mortar mixtures that contain a blend of cement, sand, and other additives. They are designed to be sloped, with a gentle slope away from the flue opening to ensure proper water runoff. The size and shape of the chimney crown vary depending on the chimney’s design and dimensions.
Over time, however, chimney crowns can deteriorate due to constant exposure to the elements. Cracks may develop, allowing water to penetrate the masonry, leading to further damage and compromising the chimney’s functionality. Therefore, regular inspection and maintenance of the chimney crown are crucial to identify any issues and address them promptly.
Now that we have a clear understanding of the chimney crown and its importance, let’s move on to the next step—assessing the damage to determine the necessary repairs.
Assessing the Damage
Before diving into the repair process, it is essential to assess the extent of the damage to the chimney crown. This step will help you determine the best approach to repairing the crown and ensure that you address all the underlying issues that may be present.
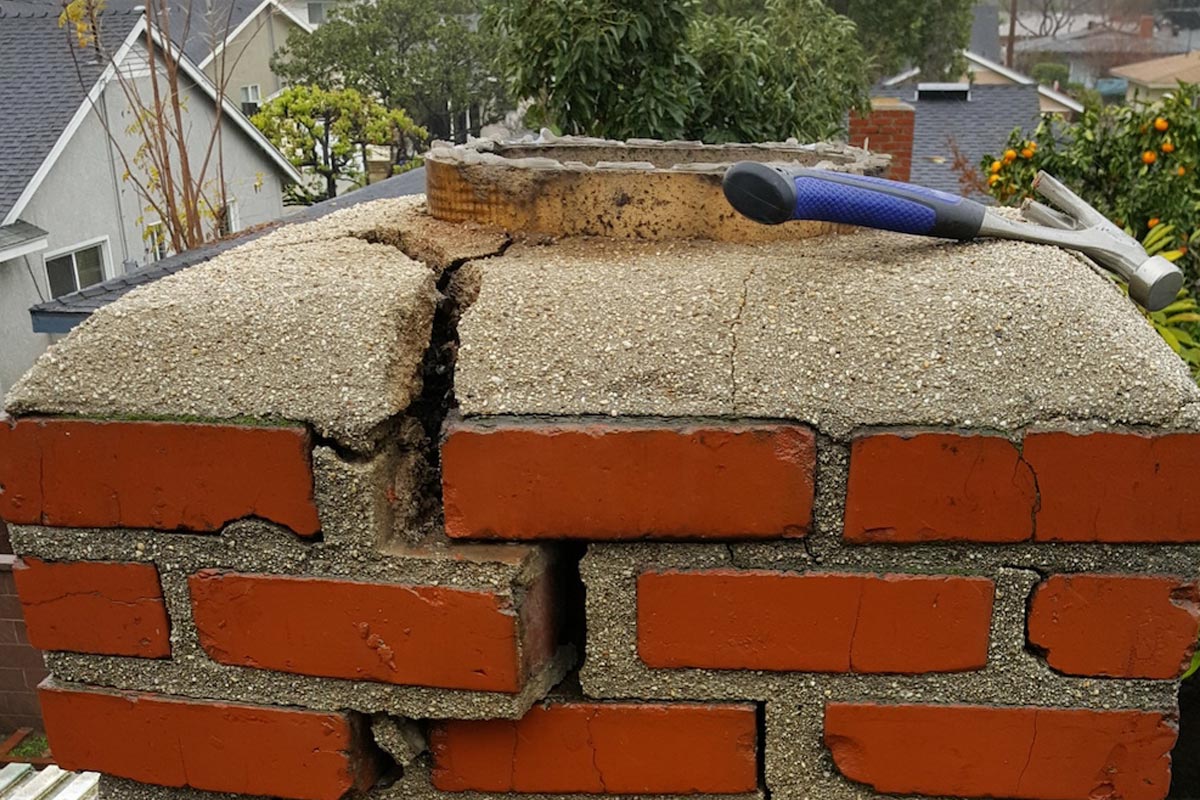
Start by visually inspecting the chimney crown from ground level. Look for any noticeable cracks, chips, or signs of deterioration. These can indicate water damage, freeze-thaw cycles, or general wear and tear. Additionally, pay attention to any gaps between the crown and the chimney walls, as these can create entry points for water and pests.
If you feel comfortable doing so, you can use binoculars or a ladder to get a closer look at the chimney crown. Look for smaller cracks or hairline fractures that may not be visible from the ground. Pay attention to the condition of the mortar joints between the crown and the chimney walls as well.
In some cases, the damage to the chimney crown may be more severe, such as large cracks, crumbling sections, or even a completely broken crown. These issues can pose a higher risk and require more extensive repairs. If you are unsure about the severity of the damage or are uncomfortable assessing it yourself, it is advisable to consult a professional chimney repair expert.
During the assessment, it’s also essential to check for any signs of water damage inside your home. Look for water stains on the ceiling or walls near the chimney, musty odors, or discoloration. These can indicate that water is entering the chimney system and may require more than just crown repairs.
By thoroughly assessing the damage, you will gain a better understanding of the repairs needed and can plan accordingly. Whether it’s minor cracks that can be patched or a complete reconstruction of the chimney crown, knowing the extent of the damage will ensure you take the appropriate steps to restore the crown’s functionality and protect your chimney from further harm.
With the damage assessed, it’s time to gather the necessary tools and materials for the repair process, which we will explore in the next section.
Gathering the Necessary Tools and Materials
Before you begin repairing the chimney crown, it is essential to gather all the necessary tools and materials. Having everything organized and readily available will streamline the repair process and ensure that you can work efficiently and effectively.
Here is a list of tools and materials you will need:
- Tarp or plastic sheeting: To protect surrounding areas from debris and mortar splatter.
- Safety goggles and gloves: To protect your eyes and hands during the repair process.
- Dust mask: To prevent inhalation of dust and particles.
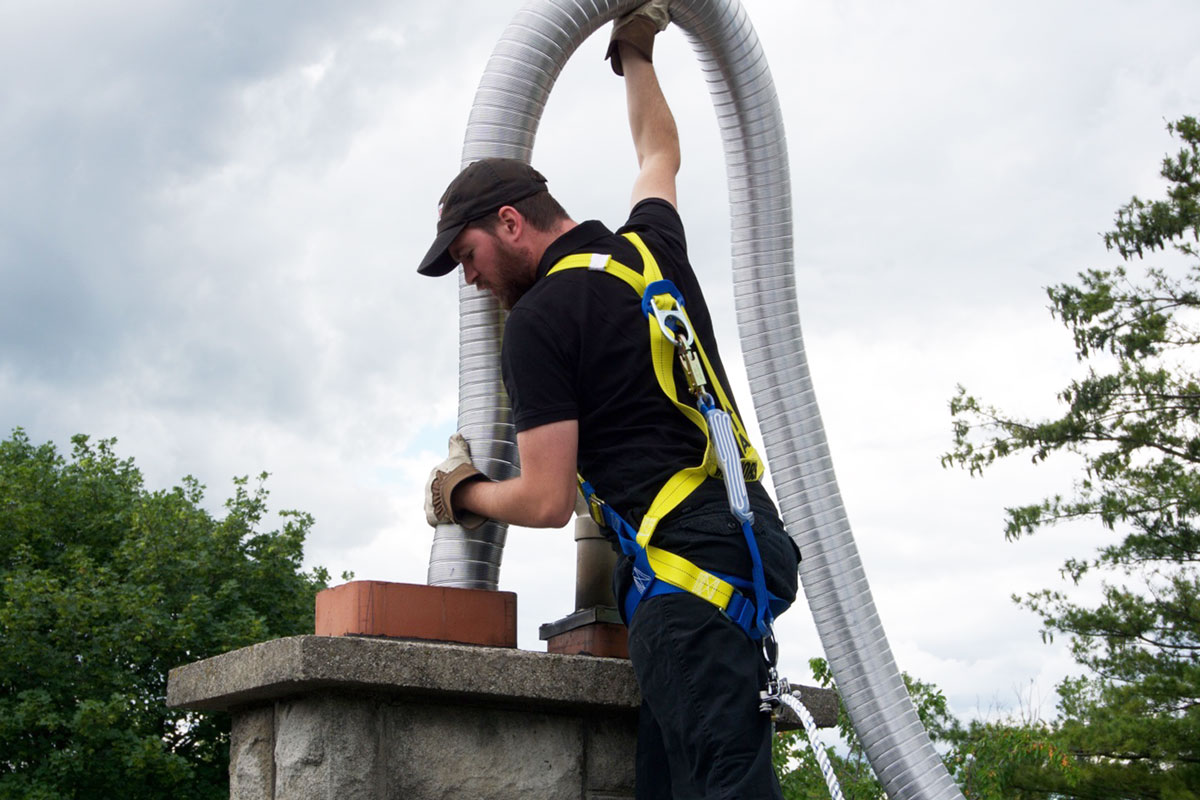
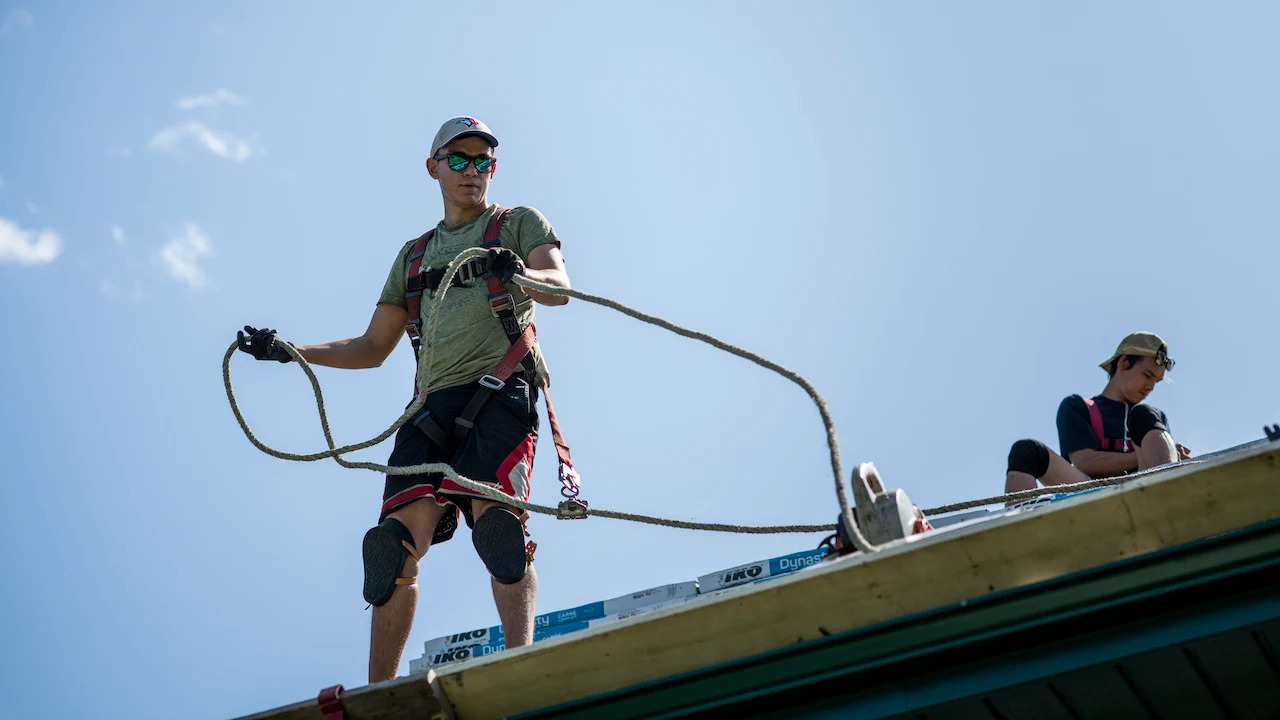
- Safety harness and sturdy ladder: If you are working at heights or on a steep roof slope, ensure you have the necessary safety equipment to prevent accidents.
- Hammer and chisel: For removing the damaged crown and any loose mortar.
- Masonry brush: To clean the chimney crown surface.
- Wire brush or grinder: To remove any stubborn debris or damaged areas on the chimney crown.
- Masonry adhesive or bonding agent: To enhance the bond between the existing chimney crown and the new mortar.
- Mortar mix: Choose a high-quality mortar mix suitable for chimney crown repairs. Opt for one with a good water resistance rating.
- Trowel: For mixing and applying the mortar mix.
- Bucket or large container: To mix the mortar.
- Water source: Access to water for mixing the mortar.
- Plastic sheet or tarp: To cover the newly repaired chimney crown and protect it until the mortar cures.
It is important to ensure that you have the correct tools and materials for the specific repair job. Additionally, double-check that all tools are in good working condition and that you have enough mortar mix to complete the repair.
Before you begin gathering the tools and materials, it’s a good idea to measure the dimensions of the chimney crown. This will help you determine the amount of mortar mix needed and ensure that you have enough to complete the repair without interruptions.
Once you have all the necessary tools and materials assembled, you are ready to move on to the next step: clearing the area around the chimney to create a safe work environment.
Clearing the Area Around the Chimney
Before you begin repairing the chimney crown, it is important to clear the area around the chimney to create a safe and accessible work environment. Clearing the area will not only prevent accidents and injuries but also allow for easier access to the chimney crown during the repair process.
Follow these steps to clear the area around the chimney:
- Remove any furniture, vehicles, or other obstacles from the immediate vicinity of the chimney. This will ensure that you have a clear and unobstructed workspace.
- Cover any nearby plants, shrubs, or delicate surfaces with a tarp or plastic sheeting. This will protect them from any falling debris, mortar splatter, or accidental damage during the repair process.
- Lay down a drop cloth or plastic sheeting on the ground beneath the chimney. This will catch any debris or mortar that falls during the repair and make cleanup easier.
- If possible, position a ladder securely against the chimney, ensuring it is stable and properly anchored. Use a ladder with non-slip feet and follow all safety guidelines when ascending and descending the ladder.
- Ensure there are no loose or hanging branches above the chimney that could pose a hazard. Use pruning shears or a saw to trim any overhanging branches or vegetation.
- If you are working on a pitched roof, use caution and consider using a safety harness or other fall protection equipment. Always prioritize your safety and take necessary precautions to prevent accidents.
Clearing the area around the chimney will create a safe and organized workspace, allowing you to focus on the chimney crown repair without any unnecessary distractions or hazards.
Once the area is cleared and prepped, you can proceed to the next step: removing the damaged chimney crown.
Read more: How To Stucco A Chimney
Removing the Damaged Crown
Now that you have cleared the area around the chimney and prepared it for the repair process, it is time to remove the damaged chimney crown. Removing the damaged crown is an essential step to ensure a clean and stable surface for the repair.
Follow these steps to remove the damaged chimney crown:
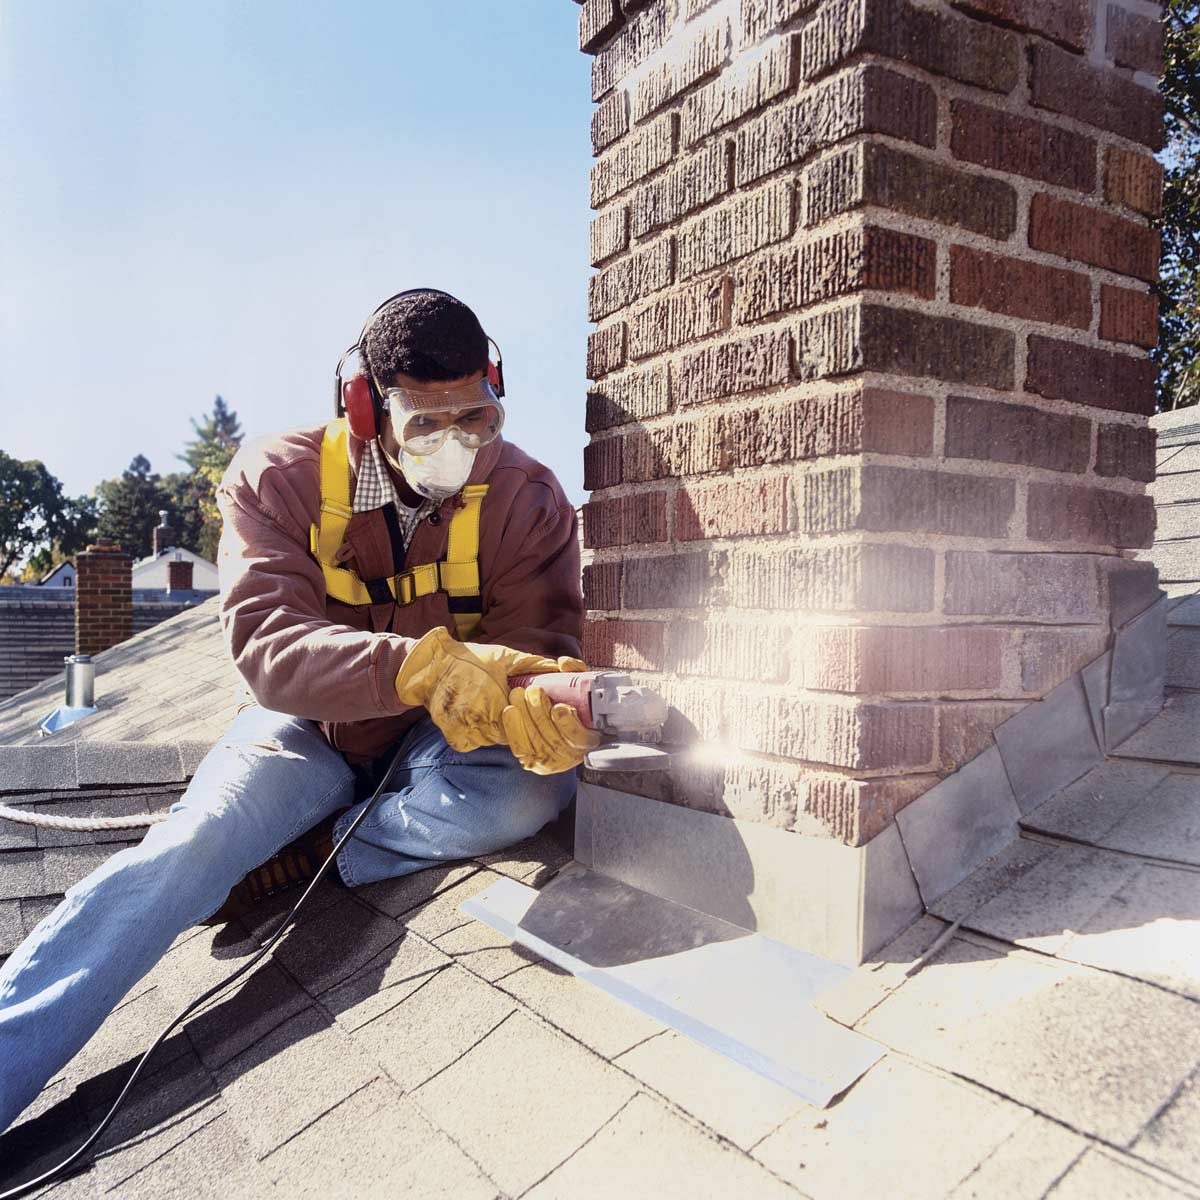
- Put on safety goggles, gloves, and a dust mask to protect yourself from any debris or dust.
- Start by inspecting the chimney crown for any loose or cracked sections. Use a hammer and chisel to carefully remove these damaged areas. Work slowly and methodically to avoid causing further damage to the chimney structure.
- If the entire chimney crown needs to be removed, begin by creating a small hole in the center of the crown. Use the hammer and chisel to chip away at the crown, gradually expanding the hole and working your way towards the edges.
- Once you have removed a significant portion of the crown, switch to a wire brush or grinder to clear away any remaining debris or stubborn mortar. Be cautious not to damage the underlying chimney bricks during this process.
- Continue removing the damaged crown until you have a clean and even surface. Use a masonry brush to sweep away any loose debris from the chimney walls and surrounding area.
- Inspect the chimney walls for any cracks, loose mortar, or other signs of damage. It is important to address these issues before proceeding with the crown repair.
Removing the damaged chimney crown can be a time-consuming task, so be patient and work diligently to ensure you have a solid foundation for the repair. Once the damaged crown has been removed and the area is clear, you can move on to preparing the surface for the new crown.
Regularly inspect your chimney crown for cracks and damage. Use a high-quality sealant to repair any small cracks, and consider hiring a professional for larger repairs to ensure the structural integrity of the crown.
Preparing the Surface
Now that the damaged chimney crown has been removed, it is crucial to properly prepare the surface before applying the new crown. Proper surface preparation will ensure optimal adhesion and longevity for the repaired chimney crown.
Follow these steps to prepare the surface:
- Inspect the chimney walls for any loose or crumbling mortar. Use a hammer and chisel to carefully remove any deteriorated mortar, creating a clean and stable surface.
- Once the loose mortar has been removed, use a wire brush or grinder to smooth out the surface and remove any remaining debris. This will promote better bonding between the new crown and the chimney walls.
- Clean the chimney walls and the surrounding area with a masonry brush. Remove any dust, dirt, or loose particles to ensure a clean bonding surface.
- Moisten the surface of the chimney walls with water using a spray bottle. This will prevent the bricks from absorbing moisture from the mortar too quickly and ensure proper curing.
- If there are any gaps or voids between the chimney walls and the chimney crown, fill them using a masonry adhesive or bonding agent. This will improve the bond between the existing chimney walls and the new crown.
- Allow the surface to dry for a short period, following the instructions provided with the masonry adhesive or bonding agent.
Proper surface preparation is essential to create a strong and durable bond between the new chimney crown and the chimney walls. Take your time during this step to ensure that the surface is clean and free from any loose debris or deteriorated mortar.
With the surface prepared, you can now move on to the next step: mixing and applying the mortar for the new chimney crown.
Mixing and Applying the Mortar
With the surface properly prepared, it’s time to mix and apply the mortar for the new chimney crown. The mortar will provide the strength and stability necessary to support and protect the chimney structure. Follow these steps for a successful mortar application:
- Start by selecting a high-quality mortar mix suitable for chimney crown repairs. Follow the instructions provided by the manufacturer regarding the mixing ratio and water requirements.
- Use a bucket or large container to mix the mortar. Add the mortar mix gradually while pouring in the appropriate amount of water. Use a trowel or mixing paddle to combine the materials until you achieve a smooth and workable consistency. Avoid making the mixture too runny, as it can compromise the structural integrity of the crown.
- Once the mortar is mixed to the desired consistency, begin applying it to the prepared surface. Use a trowel to scoop and spread the mortar evenly across the chimney crown area. Work in small sections, ensuring complete coverage and a thickness of about 1-2 inches.
- Smooth and shape the mortar using the trowel or a finishing tool. This will help create a clean and aesthetically pleasing finish for the new chimney crown.
- Pay extra attention to the edges of the chimney crown, ensuring a seamless transition between the crown and the chimney walls. Use the trowel to blend and feather the mortar to achieve a cohesive appearance.
- Continue applying and shaping the mortar until the entire chimney crown area is covered. Take breaks as needed to avoid rushing the process and ensure the mortar is applied correctly.
While applying the mortar, it is important to work efficiently to prevent the mortar from drying out too quickly. Keep the mortar mix covered with a damp cloth or plastic sheet to retain moisture in between applications.
Once the mortar has been applied, allow it to cure according to the manufacturer’s instructions. This typically involves keeping the newly repaired chimney crown slightly damp and protected from direct sunlight for a specified period of time.
With the mortar applied, your new chimney crown is starting to take shape. The next step is building the new crown to its final form and ensuring it is properly cured and finished.
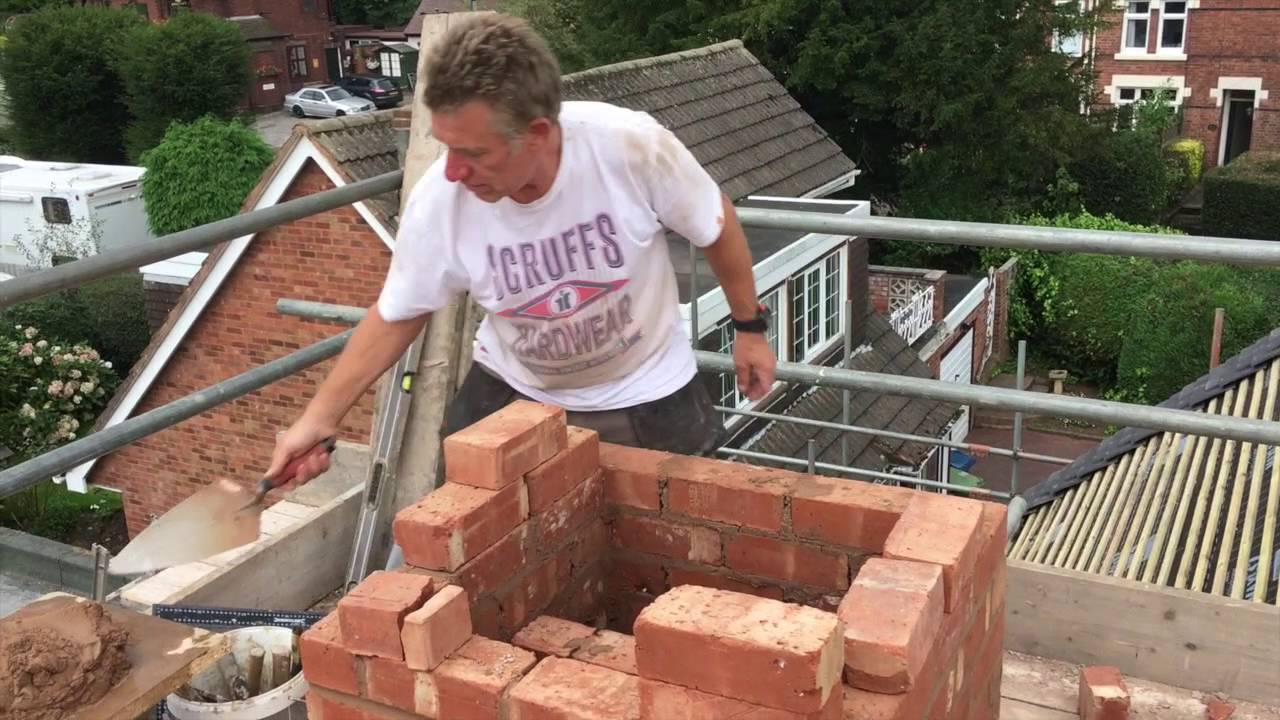
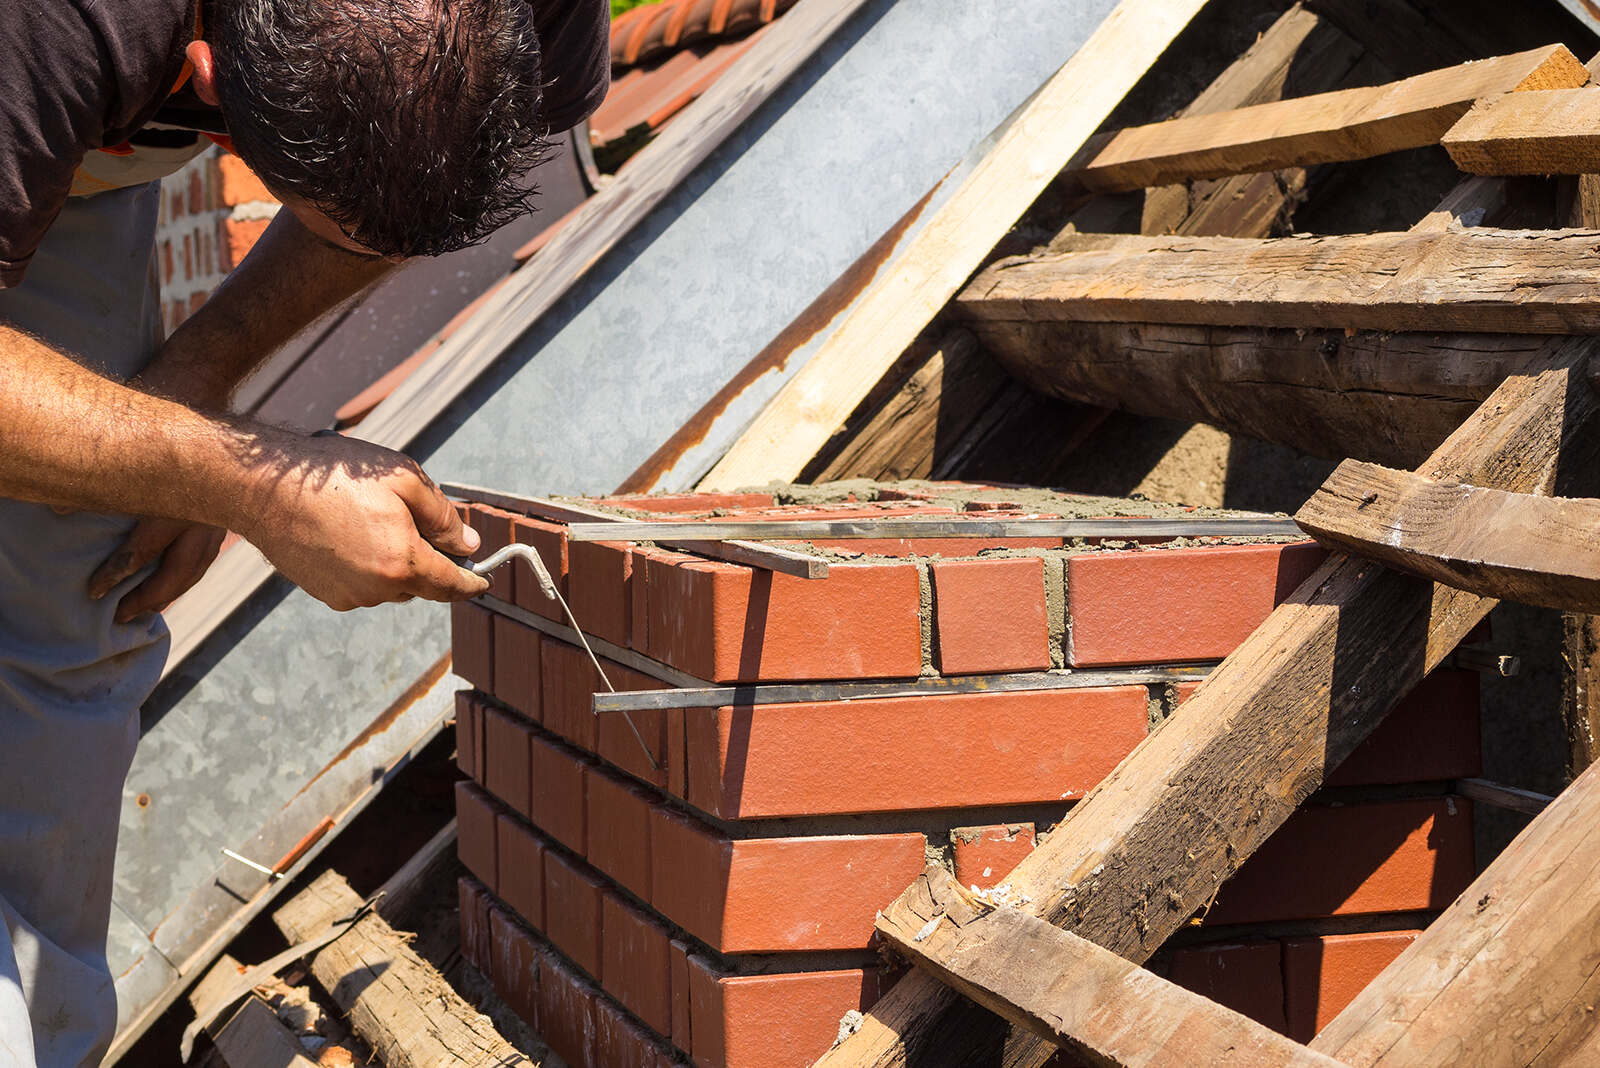
Building the New Chimney Crown
Now that the mortar has been applied, it’s time to build the new chimney crown to its final form. This process involves shaping and finishing the mortar to create a durable and visually appealing crown that will protect your chimney for years to come. Follow these steps to build the new chimney crown:
- Begin by using a trowel to shape the mortar into the desired form of the chimney crown. Ensure that it has a slight slope away from the flue opening to allow water to properly drain.
- Smooth and level the surface of the crown using a trowel or a straight edge. This will ensure an even and professional finish.
- Create a drip edge by angling the outer edge of the crown slightly downward. This will help divert water away from the chimney walls.
- To enhance the structural integrity of the chimney crown, embed a piece of wire mesh or reinforcement material into the mortar. This will help prevent cracking and add strength to the crown.
- If desired, add decorative touches to the chimney crown using a trowel or other shaping tools. You can create a brick, stone, or textured pattern to match the aesthetics of your chimney.
- Take breaks as needed during the building process to let the mortar set and prevent it from becoming too dry or difficult to work with. Keep the newly built crown slightly damp and protected from direct sunlight to ensure proper curing.
- Refer to the manufacturer’s instructions for curing time. Depending on the specific mortar mix used, the crown may need to cure for several days before it is fully hardened and ready for use.
Building the new chimney crown requires attention to detail and a steady hand. Take your time during this step to ensure that the crown is structurally sound and visually appealing. By following these steps and allowing for proper curing, you will maximize the effectiveness and longevity of the new chimney crown.
Now that the new chimney crown is built, it’s time to move on to the final step – curing and finishing the repair.
Read more: How To Seal Chimney Pipe
Curing and Finishing the Repair
With the new chimney crown built, it’s important to allow it to properly cure and finish the repair process. Curing refers to the process of allowing the mortar to dry and harden, ensuring its durability and strength. Follow these steps to properly cure and finish the chimney crown repair:
- Refer to the manufacturer’s instructions for the specific curing time required for the mortar mix used. Typically, it takes several days for the mortar to fully cure and reach its maximum strength. Avoid placing any heavy loads or applying excessive force to the newly repaired crown during this period.
- During the curing process, it’s essential to keep the crown slightly damp to promote proper hydration and prevent the mortar from drying out too quickly. Mist the crown with water regularly or cover it with a damp cloth or plastic sheet.
- Protect the new chimney crown from direct sunlight during the curing period, as excessive heat can cause the mortar to dry too quickly and potentially lead to cracking.
- Monitor the weather conditions and cover the newly repaired crown with a plastic sheet or tarp if rain is expected. This will prevent the mortar from being washed away or damaged during the crucial curing phase.
- After the recommended curing time has passed, inspect the chimney crown for any imperfections or rough edges. Use a masonry brush or sandpaper to smooth out any rough areas and create a clean finish.
- If desired, you can apply a waterproofing sealant to the chimney crown to provide an additional layer of protection against moisture. Choose a high-quality chimney crown sealer and follow the manufacturer’s instructions for proper application.
- Lastly, remove any debris or construction materials from the area surrounding the chimney and clean up the workspace. Dispose of any waste materials responsibly.
By following these steps, you will ensure that the new chimney crown is properly cured and finished, ready to withstand the elements and protect your chimney.
Remember to perform regular maintenance and inspections of your chimney crown to identify any signs of damage or wear. Prompt repairs and maintenance will help prolong the life of your chimney and maintain its functionality.
Congratulations! You have successfully completed the repair of your chimney crown. With proper maintenance and care, your chimney will continue to provide warmth and ambiance to your home for years to come.
Conclusion
Repairing a chimney crown is a crucial step in maintaining the integrity and functionality of your chimney system. By following the steps outlined in this comprehensive guide, you have gained the knowledge and understanding to successfully repair a damaged chimney crown.
We began by understanding the importance of the chimney crown and its role in protecting the chimney from water damage, debris, and animals. We then proceeded to assess the damage and gather the necessary tools and materials for the repair process. Clearing the area around the chimney and removing the damaged crown were the next steps, ensuring a clean and stable surface for the new crown.
Preparing the surface involved removing loose mortar, cleaning the chimney walls, and applying a bonding agent to enhance the adhesion of the new crown. We then mixed and applied the mortar, carefully building the new chimney crown and shaping it to its final form.
After the construction, we discussed the importance of curing the mortar and finishing the repair. Proper curing and finishing ensure the durability and longevity of the chimney crown. It is crucial to allow the mortar to fully cure before subjecting it to heavy loads or extreme weather conditions.
By completing the repair process and taking the necessary precautions, you have now restored the functionality and protection offered by your chimney crown. Regular maintenance and inspections are key to identifying any signs of damage early on and addressing them promptly.
Remember, safety should always be a top priority, and if you are unsure about any aspect of the repair process or if the damage is severe, it is best to consult a professional chimney repair expert.
With a properly repaired chimney crown, you can enjoy the warmth and ambiance of your fireplace with the peace of mind that your chimney is well-maintained and protected. Stay proactive in caring for your chimney, and it will serve you for many years to come.
Frequently Asked Questions about How To Repair A Chimney Crown
Was this page helpful?
At Storables.com, we guarantee accurate and reliable information. Our content, validated by Expert Board Contributors, is crafted following stringent Editorial Policies. We're committed to providing you with well-researched, expert-backed insights for all your informational needs.


0 thoughts on “How To Repair A Chimney Crown”