Home>Storage Ideas>Kitchen Storage>DIY Outdoor Kitchen Plumbing
Kitchen Storage
DIY Outdoor Kitchen Plumbing
Modified: August 27, 2024
Looking for kitchen storage ideas for your DIY outdoor kitchen plumbing? Discover creative solutions to make the most of your space and keep everything organized.
(Many of the links in this article redirect to a specific reviewed product. Your purchase of these products through affiliate links helps to generate commission for Storables.com, at no extra cost. Learn more)
Introduction
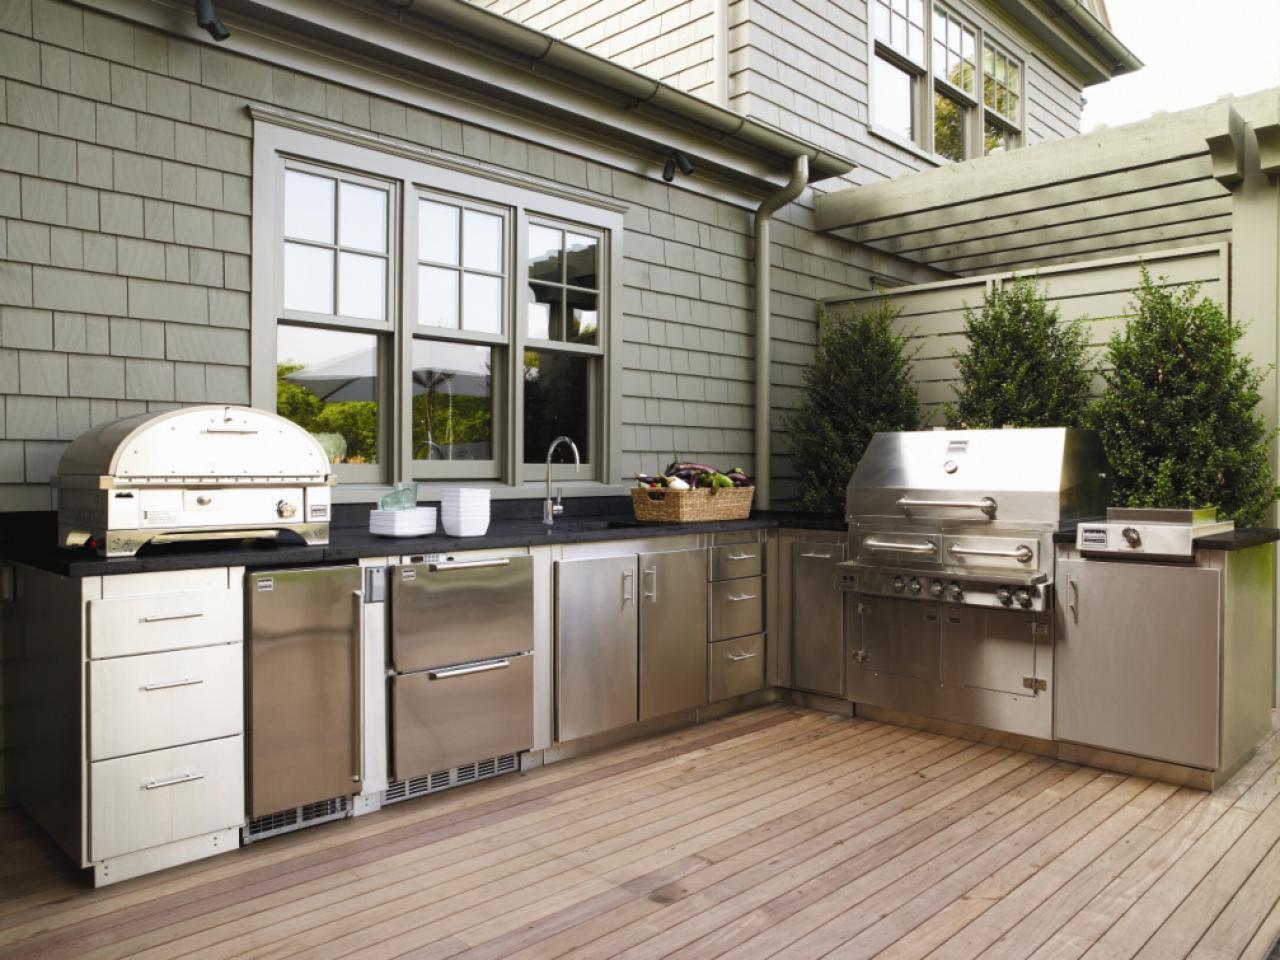
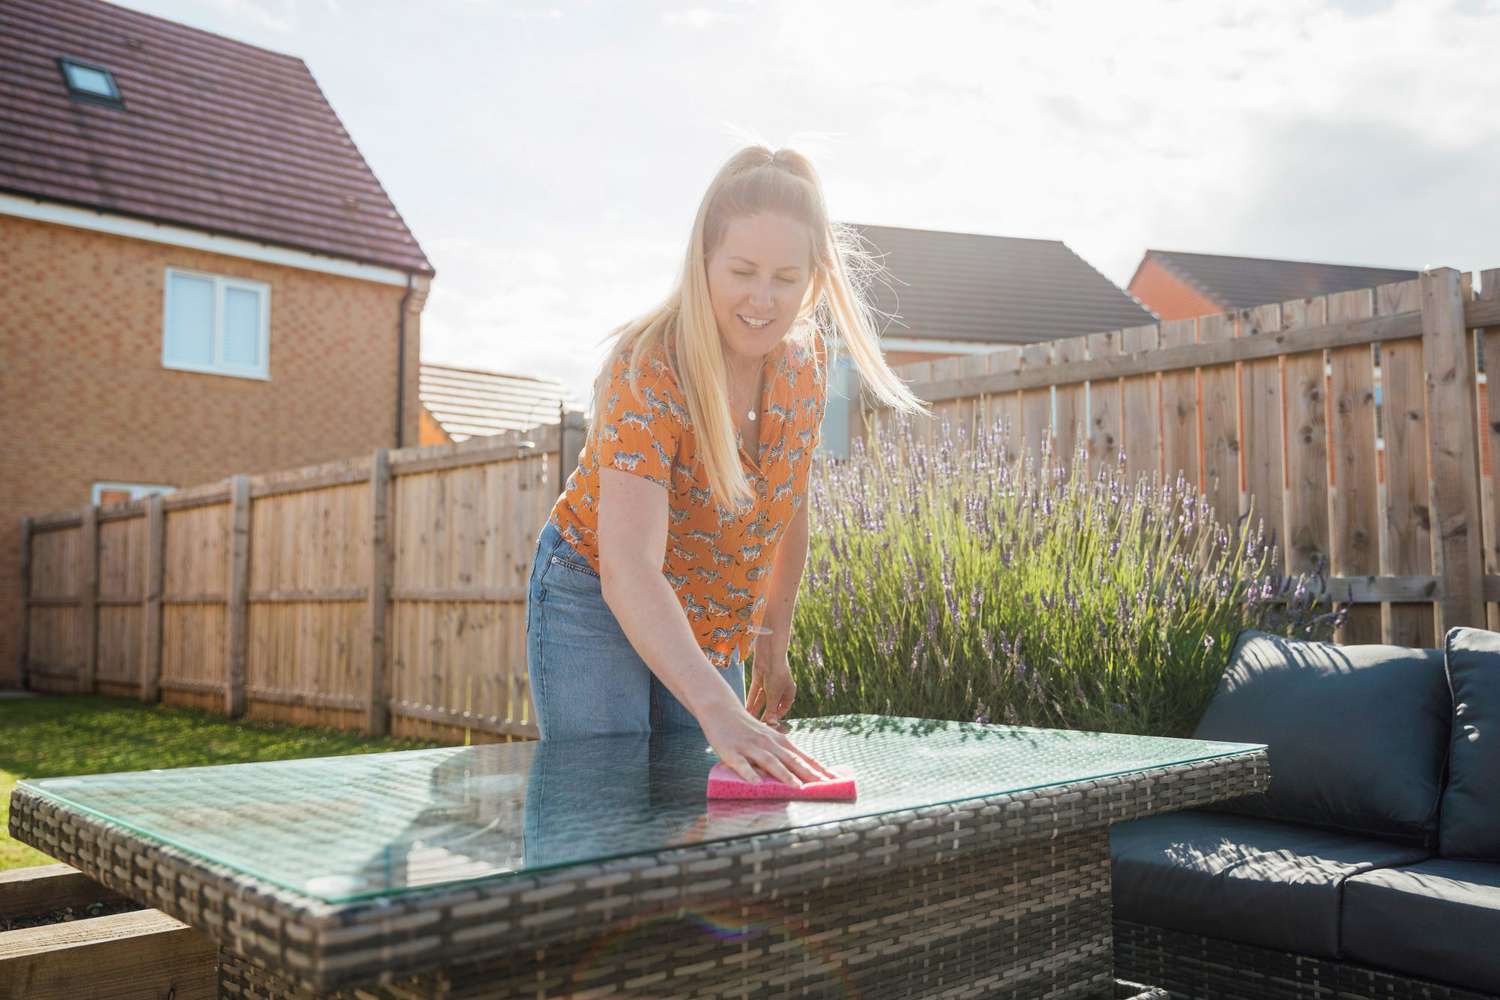
Welcome to the world of outdoor kitchens, where you can turn your backyard into a culinary oasis. Kitchen storage is an essential aspect of any functional outdoor kitchen. Whether you’re a master chef or a weekend griller, having an organized and efficient storage system can make a world of difference in your cooking experience.
In this article, we will explore some creative and practical kitchen storage ideas that will help you maximize the space in your outdoor kitchen. From clever cabinet designs to innovative shelving solutions, you’ll discover a plethora of options to keep all your cooking essentials organized and easily accessible.
Before we dive into the exciting world of kitchen storage, it’s important to remember that proper planning is key. Consider the layout and dimensions of your outdoor kitchen, as well as the functional requirements that cater to your cooking style. By taking these factors into account, you can ensure that your storage solutions seamlessly integrate with your overall design.
Now, let’s explore some inspiring kitchen storage ideas to transform your outdoor cooking space into a chef’s paradise.
Key Takeaways:
- Transform your backyard into a culinary oasis with a well-planned outdoor kitchen plumbing system. From connecting to the main water supply to installing gas lines, ensure safety and functionality for a seamless outdoor cooking experience.
- Maximize your outdoor kitchen storage with creative and practical ideas. From clever cabinet designs to innovative shelving solutions, tailor your storage choices to create an organized and efficient outdoor culinary haven.
Read more: How To Plumb Outdoor Sink
Planning Your Outdoor Kitchen Plumbing
When it comes to designing your outdoor kitchen, plumbing is a crucial aspect to consider. Proper planning for the plumbing system is essential to ensure a smooth and functional outdoor cooking experience. Here are some key factors to keep in mind when planning your outdoor kitchen plumbing:
- Location: Determine the ideal location for your outdoor kitchen, taking into account the proximity to your main water supply and drainage system. It’s important to choose a spot that allows for easy access to plumbing connections.
- Budget: Establish a budget for your outdoor kitchen plumbing project. This will help guide your choices and ensure that you stay within your financial means.
- Permits and Codes: Check with local authorities regarding any permits and building codes that may be required for your outdoor kitchen plumbing installation. It’s crucial to comply with regulations to avoid any future complications.
- Water Source: Determine the source of water for your outdoor kitchen. This can be a dedicated line from your main supply or a separate tank if you’re in an area with water restrictions. Ensure that the chosen water source will provide enough pressure and flow for all your needs.
- Drainage: Plan for proper drainage to avoid water pooling and potential damage to your outdoor kitchen. Consider installing a drainage system with proper slope and runoff capabilities.
- Utility Connections: Take into account any additional utility connections you may need, such as gas lines for your grill or power outlets for appliances. Ensure that these connections are properly installed and meet safety requirements.
- Future Expansion: Anticipate future expansion of your outdoor kitchen by leaving room for additional plumbing fixtures or appliances. This will save you from having to make significant modifications in the future.
By carefully considering these factors during the planning phase, you can lay a solid foundation for your outdoor kitchen plumbing. This will help ensure that your kitchen functions smoothly and efficiently, allowing you to focus on what’s most important – creating delicious meals and enjoying the outdoor cooking experience.
Gathering Necessary Tools and Materials
Before diving into the installation of outdoor kitchen plumbing, it’s important to gather all the necessary tools and materials. Having the right equipment at hand will make the process more efficient and help you achieve professional results. Here are some essential tools and materials you’ll need for your outdoor kitchen plumbing project:
- Pipe Cutter: A pipe cutter is essential for cutting and resizing pipes to the required lengths. Choose a cutter that suits the type and size of pipes you’ll be working with.
- Pipe Wrench: This tool is used to grip and turn pipes while tightening or loosening fittings. A pipe wrench with an adjustable jaw is recommended for versatility.
- Teflon Tape: Teflon tape, also known as plumber’s tape, is used to create a waterproof seal between pipe threads. It helps prevent leaks and ensures a secure connection.
- Pipe Fittings: Gather a variety of pipe fittings, including elbows, couplers, tees, and adapters, to connect and redirect pipes as needed.
- Polyethylene Tubing: Polyethylene tubing is commonly used for water supply lines. It is flexible, durable, and resistant to corrosion, making it ideal for outdoor applications.
- Valves and Shut-Offs: Install valves and shut-offs to control the flow of water to specific areas of your outdoor kitchen. This will allow for easy maintenance and repairs in the future.
- Plumber’s Putty or Caulk: Plumber’s putty or caulk is used to create a watertight seal between sinks, faucets, and countertops. Choose a product suitable for outdoor use and resistant to moisture and UV rays.
- Tubing Cutter: A tubing cutter is essential if you’ll be working with plastic tubing. It provides clean and precise cuts without the risk of crushing or deforming the tubing.
- Measuring Tape: Accurate measurements are crucial for proper installation. A measuring tape will come in handy for determining pipe lengths and distances between fixtures.
- Pipe Supports: Use pipe supports, such as clamps or hangers, to secure pipes and prevent sagging or shifting over time.
Remember to wear appropriate safety gear, such as gloves and safety glasses, when working with plumbing tools and materials. Additionally, consult with local hardware stores or plumbing suppliers to ensure you have all the specific tools and materials required for your outdoor kitchen plumbing project.
By gathering these necessary tools and materials, you’ll be well-equipped to tackle the installation of your outdoor kitchen plumbing efficiently and effectively.
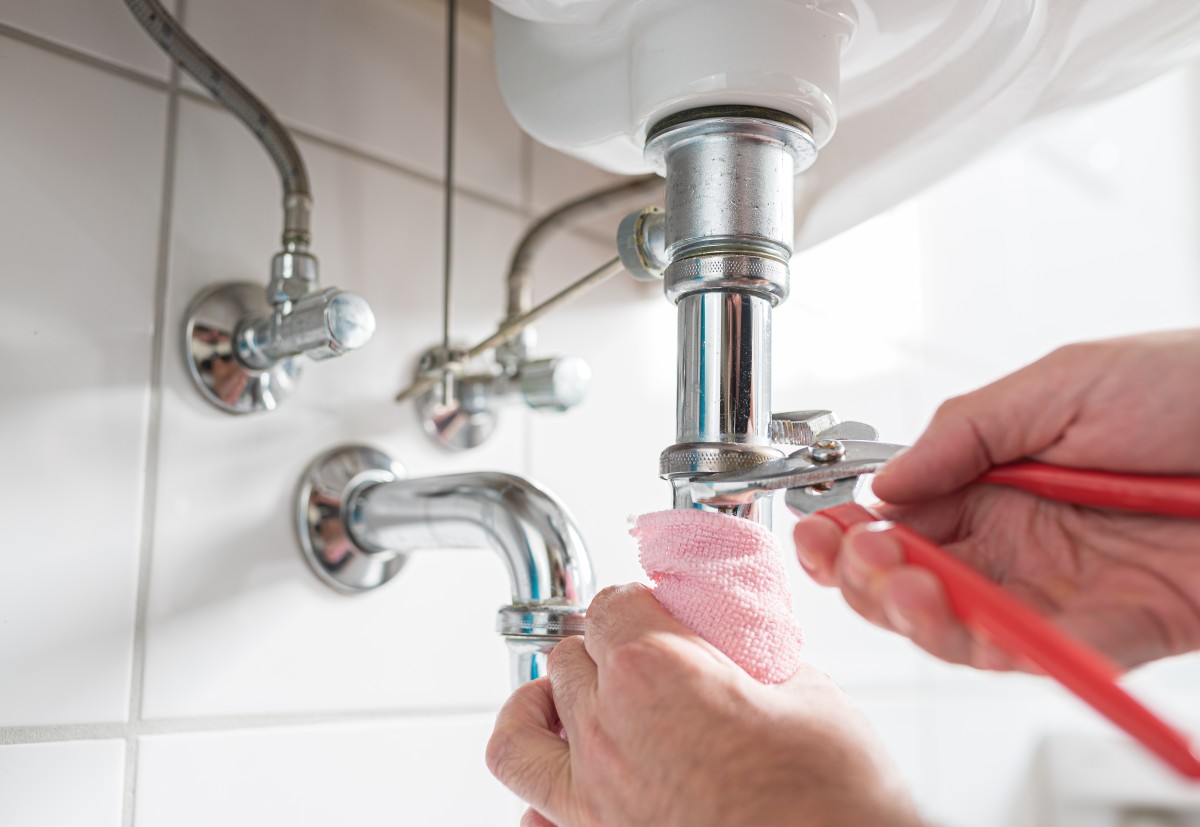
Connecting to the Main Water Supply
Connecting your outdoor kitchen to the main water supply is a crucial step in the plumbing installation process. Here’s a step-by-step guide to help you connect your outdoor kitchen plumbing to the main water supply:
- Locate the main water supply: Identify the location of the main water supply line in your home. This will be where you connect your outdoor kitchen plumbing.
- Shut off the water: Turn off the main water supply to your home before starting any plumbing work. This will prevent any water flow while you make the necessary connections.
- Install a water line: Determine the appropriate size and type of water line needed for your outdoor kitchen. Connect the new water line to the main supply using a tee fitting and a shut-off valve. This will allow you to isolate the water supply to your outdoor kitchen if needed.
- Bury the water line: If the water line needs to be buried, dig a trench at the necessary depth and lay the water line inside. Use appropriate insulation or protective sleeves to prevent damage from freezing or shifting soil.
- Connect the water line to the outdoor kitchen: Extend the water line from the main supply to your outdoor kitchen area. Consider the layout and location of your kitchen appliances and fixtures when determining the routing of the water line.
- Install shut-off valves: Install shut-off valves at strategic points along the water line. This will allow you to control the water flow to specific areas of your outdoor kitchen, such as the sink or dishwasher.
- Pressure testing: After connecting the water line, it’s important to perform a pressure test to check for any leaks. Close all shut-off valves and turn on the main water supply. Monitor the system for any signs of water leakage.
- Ensure proper drainage: As you connect to the main water supply, make sure you have a proper drainage system in place for any potential water runoff or waste water. This will help prevent any water pooling or damage to your outdoor kitchen.
Consult with a professional plumber if you’re not experienced in connecting plumbing to the main water supply. They can ensure that the process is done correctly, adhering to local codes and regulations.
By following these steps, you’ll be well on your way to connecting your outdoor kitchen plumbing to the main water supply. This will provide you with a reliable water source for your outdoor cooking and cleaning needs.
Running Water Lines
Now that you’ve connected your outdoor kitchen to the main water supply, it’s time to run water lines to the different fixtures and appliances. Properly routing and installing water lines is essential to ensure a seamless and reliable water flow in your outdoor kitchen. Here’s a step-by-step guide to help you run water lines:
- Plan the water line layout: Take into consideration the location of your outdoor kitchen fixtures, such as the sink, faucet, and dishwasher. Plan the route of the water lines to ensure optimal functionality and minimum interference with other elements of your outdoor kitchen.
- Measure and cut the water lines: Using a pipe cutter or tubing cutter, measure and cut the water lines to the desired length. Make sure to account for the fittings and connections that will be installed.
- Connect the water lines: Use appropriate fittings and connectors to join the water lines together. It’s important to use the correct size and type of fittings to ensure a secure and leak-proof connection.
- Secure the water lines: Use pipe supports, such as clamps or hangers, to secure the water lines to the structure of your outdoor kitchen. This will prevent sagging or shifting over time.
- Install shut-off valves and faucets: Install shut-off valves at strategic points along the water lines to allow for easy maintenance and repairs. Also, install faucets or taps at the desired locations, ensuring a proper connection to the water lines.
- Test for leaks: Once the water lines are installed, it’s crucial to test for any leaks. Turn on the water supply and monitor the system for any signs of water leakage. If you notice any leaks, adjust and tighten the connections as necessary.
- Insulate water lines (if necessary): If you live in an area with freezing temperatures, consider insulating the water lines to prevent them from freezing and causing damage. This is especially important if the water lines are exposed or located in areas prone to low temperatures.
It’s important to note that if you’re not comfortable with running water lines or dealing with plumbing connections, it’s best to consult with a professional plumber. They have the expertise and knowledge to ensure that the water lines are installed correctly and in compliance with local codes and regulations.
By following these steps and taking proper precautions, you’ll be able to efficiently run water lines in your outdoor kitchen. This will provide you with a reliable and functional water supply for all your cooking and cleaning needs.
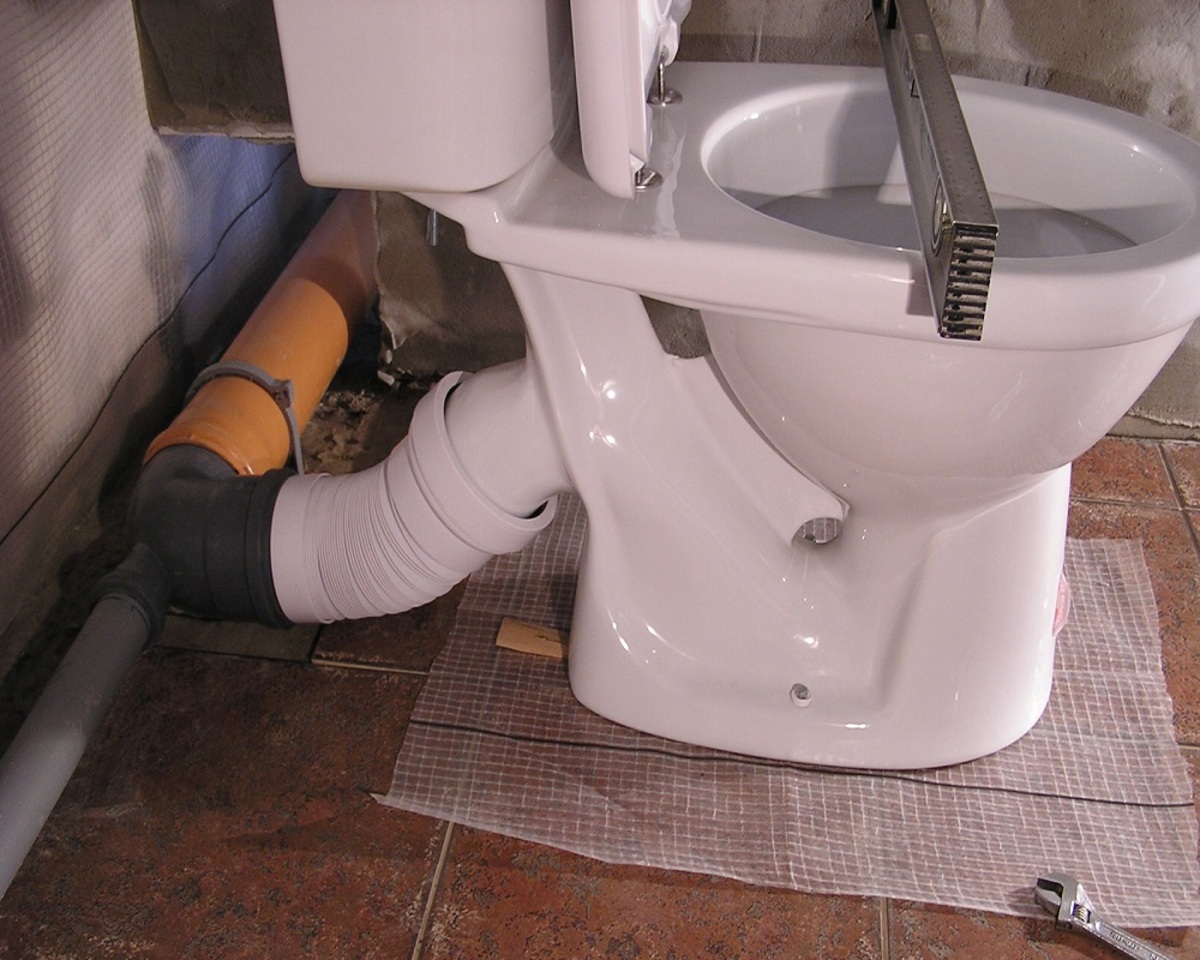
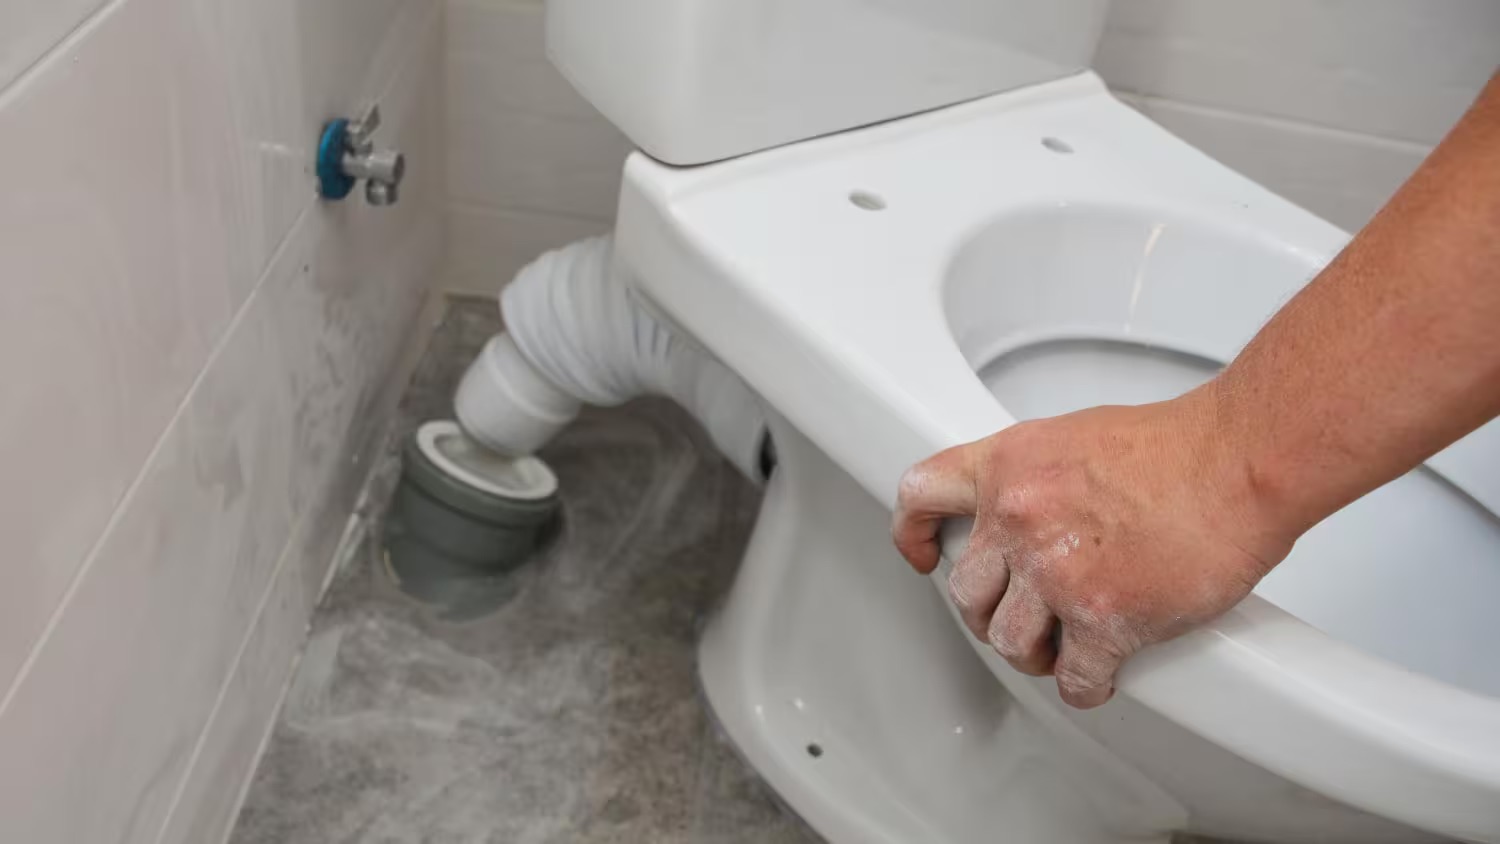
Read more: How To Install A Toilet Without Plumbing
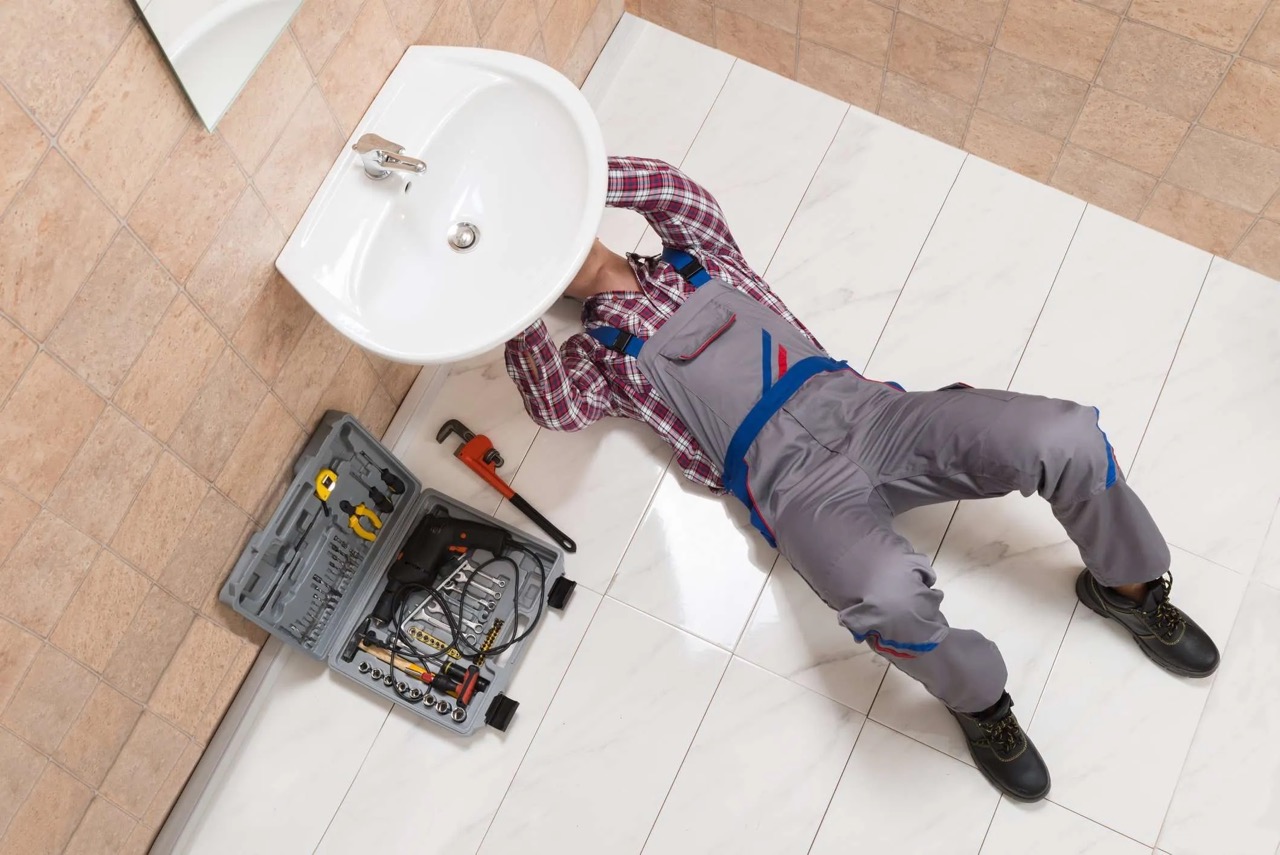
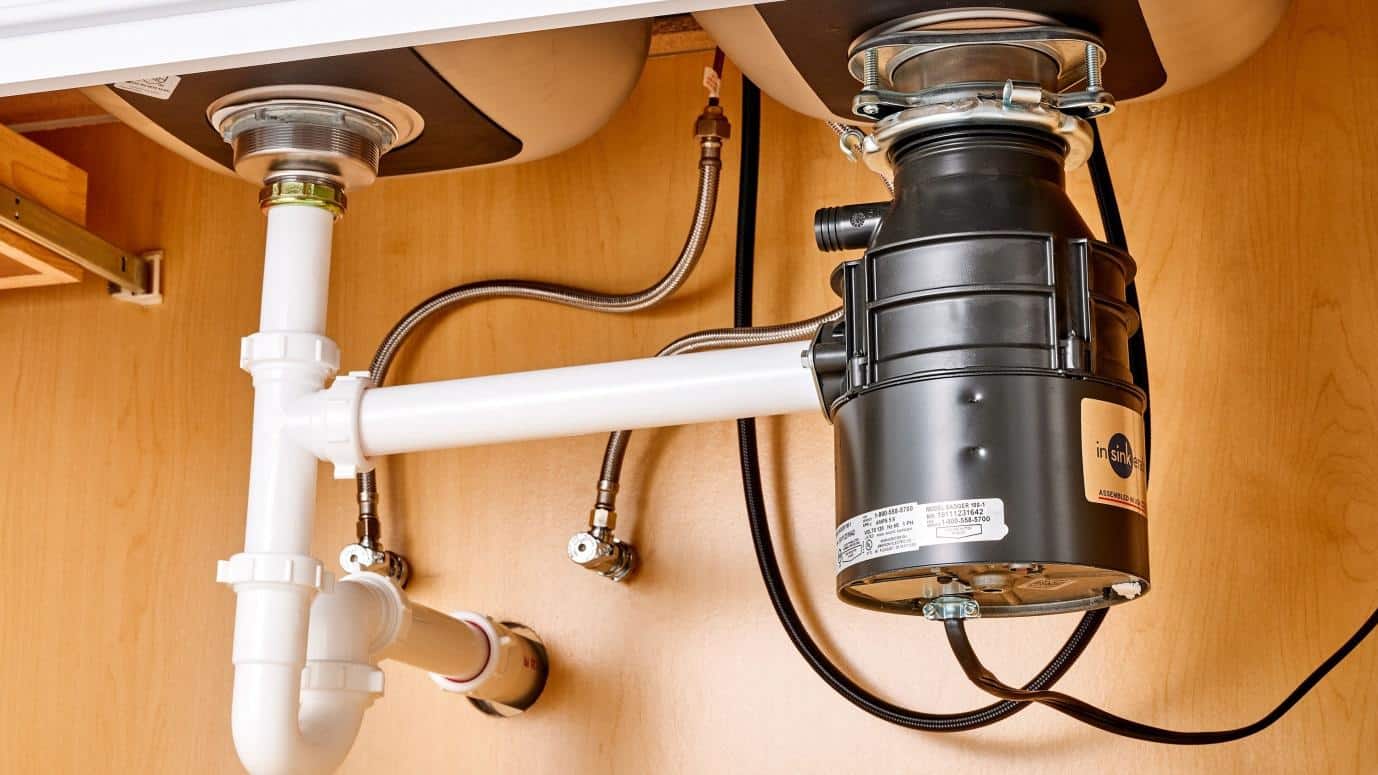
Installing a Sink
A sink is an essential fixture in any outdoor kitchen, providing a convenient space for washing dishes, prepping food, and cleaning up after cooking. Installing a sink in your outdoor kitchen requires careful planning and proper execution. Here are the steps to guide you through the process:
- Choose the right sink: Select a sink that is specifically designed for outdoor use. Consider factors such as durability, resistance to weather and temperature extremes, and ease of maintenance.
- Plan the location: Determine the ideal location for your sink, taking into account factors such as proximity to the main water supply, plumbing connections, and the layout of your outdoor kitchen. Ensure that there is adequate space for the sink and that it is conveniently located for your cooking and cleaning needs.
- Mark the cutout: If your outdoor kitchen has a countertop, mark the cutout area for the sink based on its dimensions. Use a template provided by the sink manufacturer or create your own by placing the sink upside down on the countertop and tracing around it.
- Cut the countertop: Using a jigsaw or a similar cutting tool, carefully cut along the marked lines to create the opening for the sink. Take your time and follow the manufacturer’s instructions to ensure a precise cut.
- Install the sink: Place the sink into the cutout opening and ensure that it fits securely. Most sinks come with mounting clips or brackets that need to be affixed to the underside of the countertop to hold the sink in place. Follow the manufacturer’s instructions for the specific installation process.
- Connect the plumbing: Once the sink is securely installed, connect the plumbing lines. Attach the supply lines to the corresponding hot and cold faucets, ensuring a tight connection. Use plumber’s tape or thread sealant to create a watertight seal.
- Install a P-trap: Install a P-trap under the sink to prevent sewer gases from entering your outdoor kitchen. The P-trap connects to the drainpipe and is responsible for trapping debris and preventing clogs.
- Test for leaks: After connecting the plumbing, turn on the water supply and check the sink for any leaks. Keep an eye on the connections and the P-trap. If you notice any leaks, tighten the connections or replace any faulty parts.
- Finish the installation: Once the sink is in place and there are no leaks, complete the installation by securing the sink to the countertop using the provided clips or brackets. Seal around the edges of the sink with a waterproof caulk or silicone to create a watertight barrier.
It’s important to note that if you’re not confident in your plumbing skills or cutting countertops, it’s best to hire a professional to ensure a proper and safe installation. They can also provide expert advice and guidance on outdoor-specific sink options and the best practices for your outdoor kitchen’s unique setup.
By following these steps, you’ll be able to successfully install a sink in your outdoor kitchen. It will provide you with a functional and convenient space for all your cleaning and food preparation needs, making your outdoor cooking experience even more enjoyable.
When installing plumbing for your DIY outdoor kitchen, make sure to use materials that are rated for outdoor use and can withstand exposure to the elements. This will help prevent corrosion and ensure the longevity of your plumbing system.
Installing a Faucet
A faucet is a crucial component of your outdoor kitchen, providing a source of running water for various tasks like washing hands, filling pots, and rinsing dishes. Installing a faucet requires careful attention to detail to ensure proper functionality and a secure connection. Here’s a step-by-step guide to help you install a faucet in your outdoor kitchen:
- Select the right faucet: Choose a faucet that is suitable for outdoor use, considering factors such as durability, resistance to weather elements, and ease of maintenance. Look for faucets labeled as “outdoor” or “all-weather” to ensure they can withstand outdoor conditions.
- Prepare the sink: Before installing the faucet, ensure that the sink is clean and free from any debris or residue. This will provide a clean surface for a secure installation.
- Position the faucet: Determine the optimal position for your faucet on the sink. Consider factors such as convenience, accessibility, and the height of the spout. Mark the position on the sink using a pencil or masking tape.
- Make the faucet holes: Based on the manufacturer’s instructions, drill the appropriate-sized holes in the sink for the faucet and any additional accessories, such as a soap dispenser. Take care to align the holes with the marked positions.
- Attach the faucet: Place the faucet through the holes in the sink, ensuring that the mounting plate or gasket is securely positioned underneath. From underneath the sink, fasten the faucet to the sink using the provided nuts or brackets. Follow the manufacturer’s instructions for tightening the faucet properly.
- Connect the water lines: Once the faucet is securely attached, connect the water lines to the corresponding hot and cold supply lines. Use plumber’s tape or thread sealant to create a watertight seal. Tighten the connections with an adjustable wrench, being careful not to over-tighten and damage the fittings.
- Test for leaks: Turn on the water supply and check for any leaks around the faucet and water connections. Inspect the connections closely and ensure there are no visible leaks. If you detect any leaks, tighten the connections or replace any faulty parts as necessary.
- Install additional accessories: If you’re installing a soap dispenser or any other accessory, follow the manufacturer’s instructions to securely attach and connect them to the faucet or sink.
- Finish the installation: Once the faucet is properly installed and tested for leaks, clean the sink and surrounding area. Remove any debris or excess sealant. If necessary, apply a thin bead of waterproof caulk or silicone around the base of the faucet to create a watertight seal and enhance the visual appearance.
If you’re unsure about any step of the installation process or don’t have the necessary tools, it’s advisable to consult a professional plumber. They can ensure that your faucet is installed correctly, meeting all safety and building code requirements.
By following these steps, you’ll be able to install a faucet in your outdoor kitchen, providing a reliable and convenient water source for your outdoor cooking and cleaning needs. Enjoy the convenience and functionality of a well-installed faucet in your outdoor culinary oasis!
Adding a Dishwasher
A dishwasher in your outdoor kitchen can be a game-changer, saving you time and effort when it comes to cleaning up after cooking and entertaining. Adding a dishwasher to your outdoor kitchen requires careful consideration and installation to ensure proper functionality and performance. Here’s a step-by-step guide to help you add a dishwasher to your outdoor kitchen:
- Select the right dishwasher: Choose a dishwasher specifically designed for outdoor use. Look for models that are built to withstand outdoor conditions, such as exposure to rain, heat, and varying temperatures. Opt for a reliable and durable dishwasher that suits the size and needs of your outdoor kitchen.
- Find a suitable location: Determine the ideal location for your dishwasher, considering factors such as proximity to the sink, electrical and plumbing connections, and practicality of use. Ensure that there is enough space to accommodate the dimensions of the dishwasher and that it fits seamlessly into your outdoor kitchen design.
- Prepare the space: Clear the area where the dishwasher will be installed, ensuring that it is clean and free from any debris or obstacles. If necessary, make any adjustments to cabinets or countertops to accommodate the dishwasher’s dimensions.
- Install electrical and plumbing connections: If the area where you are installing the dishwasher doesn’t have existing electrical and plumbing connections, hire a professional to run the necessary lines. Ensure that the electrical and plumbing systems meet local codes and regulations.
- Position and secure the dishwasher: Carefully position the dishwasher in its designated location. Adjust the leveling feet to ensure that the dishwasher is level and stable. Secure the dishwasher to the adjacent cabinetry or countertop using appropriate screws or brackets, following the manufacturer’s instructions.
- Connect the water supply: Attach the dishwasher’s water supply hose to the hot water line under the sink. Use a wrench to tighten the connection, being careful not to over-tighten. Ensure that there are no leaks at the connection point.
- Connect the drain hose: Connect the dishwasher’s drain hose to the sink’s drainpipe or an appropriate drainage system. Use a hose clamp or similar device to secure the connection, ensuring that it is watertight and secure.
- Connect the electrical supply: If the dishwasher requires an electrical connection, follow the manufacturer’s instructions to safely connect it to a dedicated circuit. If you’re not experienced in electrical work, consult with a qualified electrician to ensure proper installation.
- Test the dishwasher: Before using the dishwasher, run a test cycle to ensure that it is working properly. Check for any leaks, vibrations, or unusual noises during the cycle. Make any necessary adjustments or repairs before regular use.
- Add finishing touches: Once you’re satisfied with the dishwasher’s installation, clean the exterior and surrounding area. Remove any protective films or stickers. If necessary, apply a thin bead of waterproof caulk or silicone around the edges of the dishwasher to create a seamless and water-resistant seal.
If you’re not comfortable with the installation process or don’t have the necessary skills and tools, it’s recommended to hire a professional to ensure a safe and proper installation of the dishwasher.
By following these steps, you’ll be able to add a dishwasher to your outdoor kitchen, making cleanup a breeze and allowing you to enjoy your outdoor cooking and entertaining experience to the fullest!
Installing an Outdoor Gas Grill
An outdoor gas grill is a staple in any outdoor kitchen, providing a convenient and efficient way to cook delicious meals for family and friends. Installing an outdoor gas grill requires careful planning and execution to ensure safety and optimal performance. Here’s a step-by-step guide to help you install your outdoor gas grill:
- Select the right grill: Choose a gas grill that suits your cooking needs and the size of your outdoor kitchen. Consider factors such as the number of burners, cooking surface area, BTU output, and additional features. Look for a reputable brand that offers durability and reliable performance.
- Choose a suitable location: Determine the ideal location for your gas grill. Consider factors such as proximity to the main gas supply, proper ventilation, and safety. Ensure that there is enough space for the grill and that it is situated away from flammable materials.
- Check local regulations: Before installation, check with local authorities or homeowner’s associations to ensure compliance with any regulations or restrictions regarding outdoor grills. This may include clearance requirements, fire safety standards, or installation permits.
- Prepare the space: Clear the area where the grill will be installed, removing any obstructions or debris. Ensure that the surface is stable and level, providing a solid foundation for the grill.
- Connect the gas supply: If there is an existing gas line in your outdoor kitchen, consult a professional to connect the gas supply to the grill. Ensure that all connections are tight and properly sealed to prevent gas leaks. If there is no existing gas line, consult with a professional to install one according to local codes and regulations.
- Position and secure the grill: Carefully position the grill in its designated location. If the grill has wheels, lock them to secure the grill in place. If the grill requires permanent installation, follow the manufacturer’s instructions to securely mount it to the outdoor kitchen structure or a suitable surface.
- Test the gas connections: Before using the grill, perform a gas leak test. Apply a soapy water solution to the gas connections and inspect for any bubbles, which indicate a gas leak. If a leak is detected, turn off the gas supply and tighten the connections. If the leak persists, consult a professional for further inspection and repairs.
- Follow grill manufacturer’s instructions: Each grill model comes with specific instructions for proper installation, safety guidelines, and maintenance. Read and follow the manufacturer’s instructions carefully to ensure the safe and efficient operation of your gas grill.
- Install proper ventilation: Adequate ventilation is crucial for outdoor gas grills to allow for proper airflow and heat dissipation. Ensure that your outdoor kitchen is equipped with sufficient ventilation, such as an overhead hood or vented cabinets, to prevent the buildup of smoke and heat.
- Perform a test run: Once the grill is installed and the gas connections are secure, heat up the grill and perform a test run. This allows you to ensure that all burners are working properly and that the grill reaches the desired temperature. Make any necessary adjustments or repairs before regular use.
If you’re not experienced in gas line connections or grill installation, it’s strongly recommended to consult with a professional to ensure a safe and proper installation. They can guide you through the process and ensure compliance with local safety regulations.
By following these steps, you’ll be able to install your outdoor gas grill and embark on a culinary journey, creating delicious meals for your family and friends in your outdoor kitchen.
Connecting Gas Lines
Connecting gas lines is a crucial step in the installation process of your outdoor kitchen. Properly connecting gas lines ensures the safe and efficient operation of your appliances, such as grills, cooktops, and pizza ovens. Here’s a step-by-step guide to help you connect gas lines in your outdoor kitchen:
- Consult a professional: Gas line connections should be performed by a licensed professional who has experience in working with gas systems. They have the knowledge and expertise to ensure a safe and compliant installation.
- Follow local regulations: Before proceeding with any gas line connections, research and understand the local regulations and codes governing gas line installations. Compliance with these regulations is essential for safety and legal purposes.
- Identify the gas source: Determine the location of the main gas line or propane tank that will supply gas to your outdoor kitchen. This could be an existing line for natural gas or a dedicated tank for propane.
- Measure and plan: Measure the distance between the gas source and your outdoor kitchen appliances. Plan the routing of the gas lines, considering factors such as accessibility, avoiding sharp bends, and providing sufficient clearance.
- Choose the correct piping: Select the appropriate piping material for your gas lines, based on the gas type used and local regulations. Common materials include copper, steel, and flexible stainless-steel piping known as CSST (Corrugated Stainless Steel Tubing).
- Cut and assemble the pipes: Measure and cut the gas pipes to the required lengths using a pipe cutter or appropriate cutting tool. Ensure that the ends are clean and burr-free. Connect the pipes using proper fittings and connectors, following the manufacturer’s instructions and procedures.
- Secure the pipes: Use pipe straps or clamps to secure the gas pipes to the structure of your outdoor kitchen. This will prevent movement and reduce stress on the connections. Ensure that the pipes are not in contact with any sharp objects or surfaces that may damage them.
- Make the connections: Follow the manufacturer’s instructions and guidelines to make the necessary connections, such as threaded connections or compression fittings. Apply an approved gas sealant, like Teflon tape or pipe dope, to ensure a tight and leak-free connection.
- Perform a leak test: After making the connections, it’s crucial to perform a thorough leak test. Apply a leak detection solution, usually a mixture of soap and water, to all the connections. Check for any bubbles, which indicate a gas leak. If a leak is detected, shut off the gas supply immediately and rectify the issue before proceeding.
- Secure gas shut-off valves: Install gas shut-off valves at strategic points in your gas line system. This will allow for easy maintenance, repair, or emergency shut-off when needed. Ensure that the valves are easily accessible and properly labeled.
- Consult a professional for final inspection: Once the gas lines are connected and the leak test is completed, reach out to a professional for a final inspection. They will ensure that the installation meets all safety standards and local codes.
Remember, gas line connections should only be performed by qualified professionals. Safety should be your utmost priority when working with gas systems, so it’s advisable to seek professional assistance to ensure a proper and secure connection.
By following these steps and consulting with professionals, you’ll be able to connect gas lines in your outdoor kitchen safely and efficiently. This will allow you to enjoy the convenience and performance of your gas-powered appliances while ensuring the well-being of your outdoor cooking space.
Testing and Inspections
Once all the components of your outdoor kitchen, including plumbing, water lines, sinks, faucets, dishwashers, gas lines, and appliances, have been installed, it’s crucial to perform thorough testing and inspections. This step ensures the functionality, safety, and compliance of your outdoor kitchen. Here’s a step-by-step guide on how to effectively test and inspect your outdoor kitchen:
- Water pressure and flow test: Turn on all the water fixtures in your outdoor kitchen, such as faucets and the dishwasher, and observe the water pressure and flow. Ensure that the pressure is consistent and that there are no signs of low water flow or blockages. Adjust any valves if necessary.
- Leak test: Check all plumbing connections for any signs of leaks. Inspect the water lines, sinks, faucets, and dishwashers for any water drips, puddles, or moisture. Use a flashlight or a mirror if needed to access hard-to-reach areas. If any leaks are detected, tighten the connections or replace faulty parts.
- Drainage system test: Run water through the sink and dishwasher and observe the drainage system. Ensure that water is draining properly and that there are no clogs or slow drainage. Test the P-trap under the sink to make sure it is functioning effectively.
- Gas leak test: Perform a gas leak test on all the gas connections using a gas leak detection solution. Apply the solution to the connections and check for any bubble formation, which indicates a gas leak. If a leak is detected, shut off the gas supply immediately and rectify the issue before proceeding.
- Gas appliance functionality test: Test each gas-powered appliance individually, such as the grill or cooktop, to ensure they are functioning correctly. Follow the manufacturer’s instructions for proper ignition and use. Check for any irregularities in flames or unusual sounds.
- Verification of electrical connections: If your outdoor kitchen has electrical components, such as lighting or appliances, verify that the electrical connections are properly installed and functioning. Ensure that outlets are grounded and protected from the elements.
- Fire safety inspection: Check for proper ventilation and clearances around gas appliances. Make sure there is sufficient airflow and that flammable materials are kept at a safe distance. Install fire extinguishers in easily accessible locations and ensure they are properly charged and in good working condition.
- Final inspection by professionals: Engage the services of professionals, such as plumbers or gas technicians, to conduct a final inspection of your outdoor kitchen. They can ensure that all installations meet safety standards and local codes.
It’s important to note that outdoor kitchens, particularly those with gas lines, should undergo periodic inspections to ensure ongoing safety and functionality. Regular maintenance and inspections by professionals will help identify and address any potential issues before they become serious concerns.
By following these testing and inspection procedures, you can enjoy peace of mind knowing that your outdoor kitchen is safe, in compliance with regulations, and ready for you to create culinary masterpieces and memorable outdoor experiences.
Conclusion
Congratulations on completing the installation of your outdoor kitchen plumbing and storage! By following the steps outlined in this article, you have transformed your backyard into a functional and efficient culinary oasis. From connecting to the main water supply and running water lines to installing sinks, faucets, dishwashers, and gas grills, you have created a space that is ready to cater to your cooking and entertaining needs.
Proper planning and careful execution are key when it comes to outdoor kitchen installations. By considering factors such as location, budget, regulations, and future expansion, you have ensured a seamless integration of plumbing and storage solutions into your outdoor kitchen design.
Remember to regularly inspect and maintain your outdoor kitchen to ensure its continued performance and safety. Conduct tests for water pressure, leaks, drainage, and gas connections. Engage professionals for final inspections and periodic maintenance to keep your outdoor kitchen running smoothly for years to come.
We hope that the comprehensive kitchen storage ideas provided in this article have inspired you to create an organized and functional space. From clever cabinet designs to innovative shelving solutions, there are plenty of options to maximize storage in your outdoor kitchen. Tailor your storage choices to your specific needs, keeping in mind the size of your outdoor kitchen and the types of items you need to store.
With your outdoor kitchen plumbing and storage in place, you can now fully enjoy the pleasures of outdoor cooking and entertaining. Gather friends and family, fire up the grill, and savor delicious meals in the comfort of your outdoor culinary haven.
As with any project, it’s important to prioritize safety and compliance with local regulations. If you’re unsure about any aspect of the installation process or lack the necessary skills, it’s advised to consult with professionals who can provide expert guidance and assistance.
Now, it’s time to embrace the joy of outdoor cooking and make lasting memories in your beautifully designed and functional outdoor kitchen. Cheers to great food, great company, and the satisfaction of a job well done!
Frequently Asked Questions about DIY Outdoor Kitchen Plumbing
Was this page helpful?
At Storables.com, we guarantee accurate and reliable information. Our content, validated by Expert Board Contributors, is crafted following stringent Editorial Policies. We're committed to providing you with well-researched, expert-backed insights for all your informational needs.


0 thoughts on “DIY Outdoor Kitchen Plumbing”