Articles
How To Strip Electrical Wire For Recycling
Modified: October 20, 2024
Learn the proper technique to strip electrical wire for recycling in this informative article. Discover the steps and tools needed for effective wire stripping.
(Many of the links in this article redirect to a specific reviewed product. Your purchase of these products through affiliate links helps to generate commission for Storables.com, at no extra cost. Learn more)
Introduction
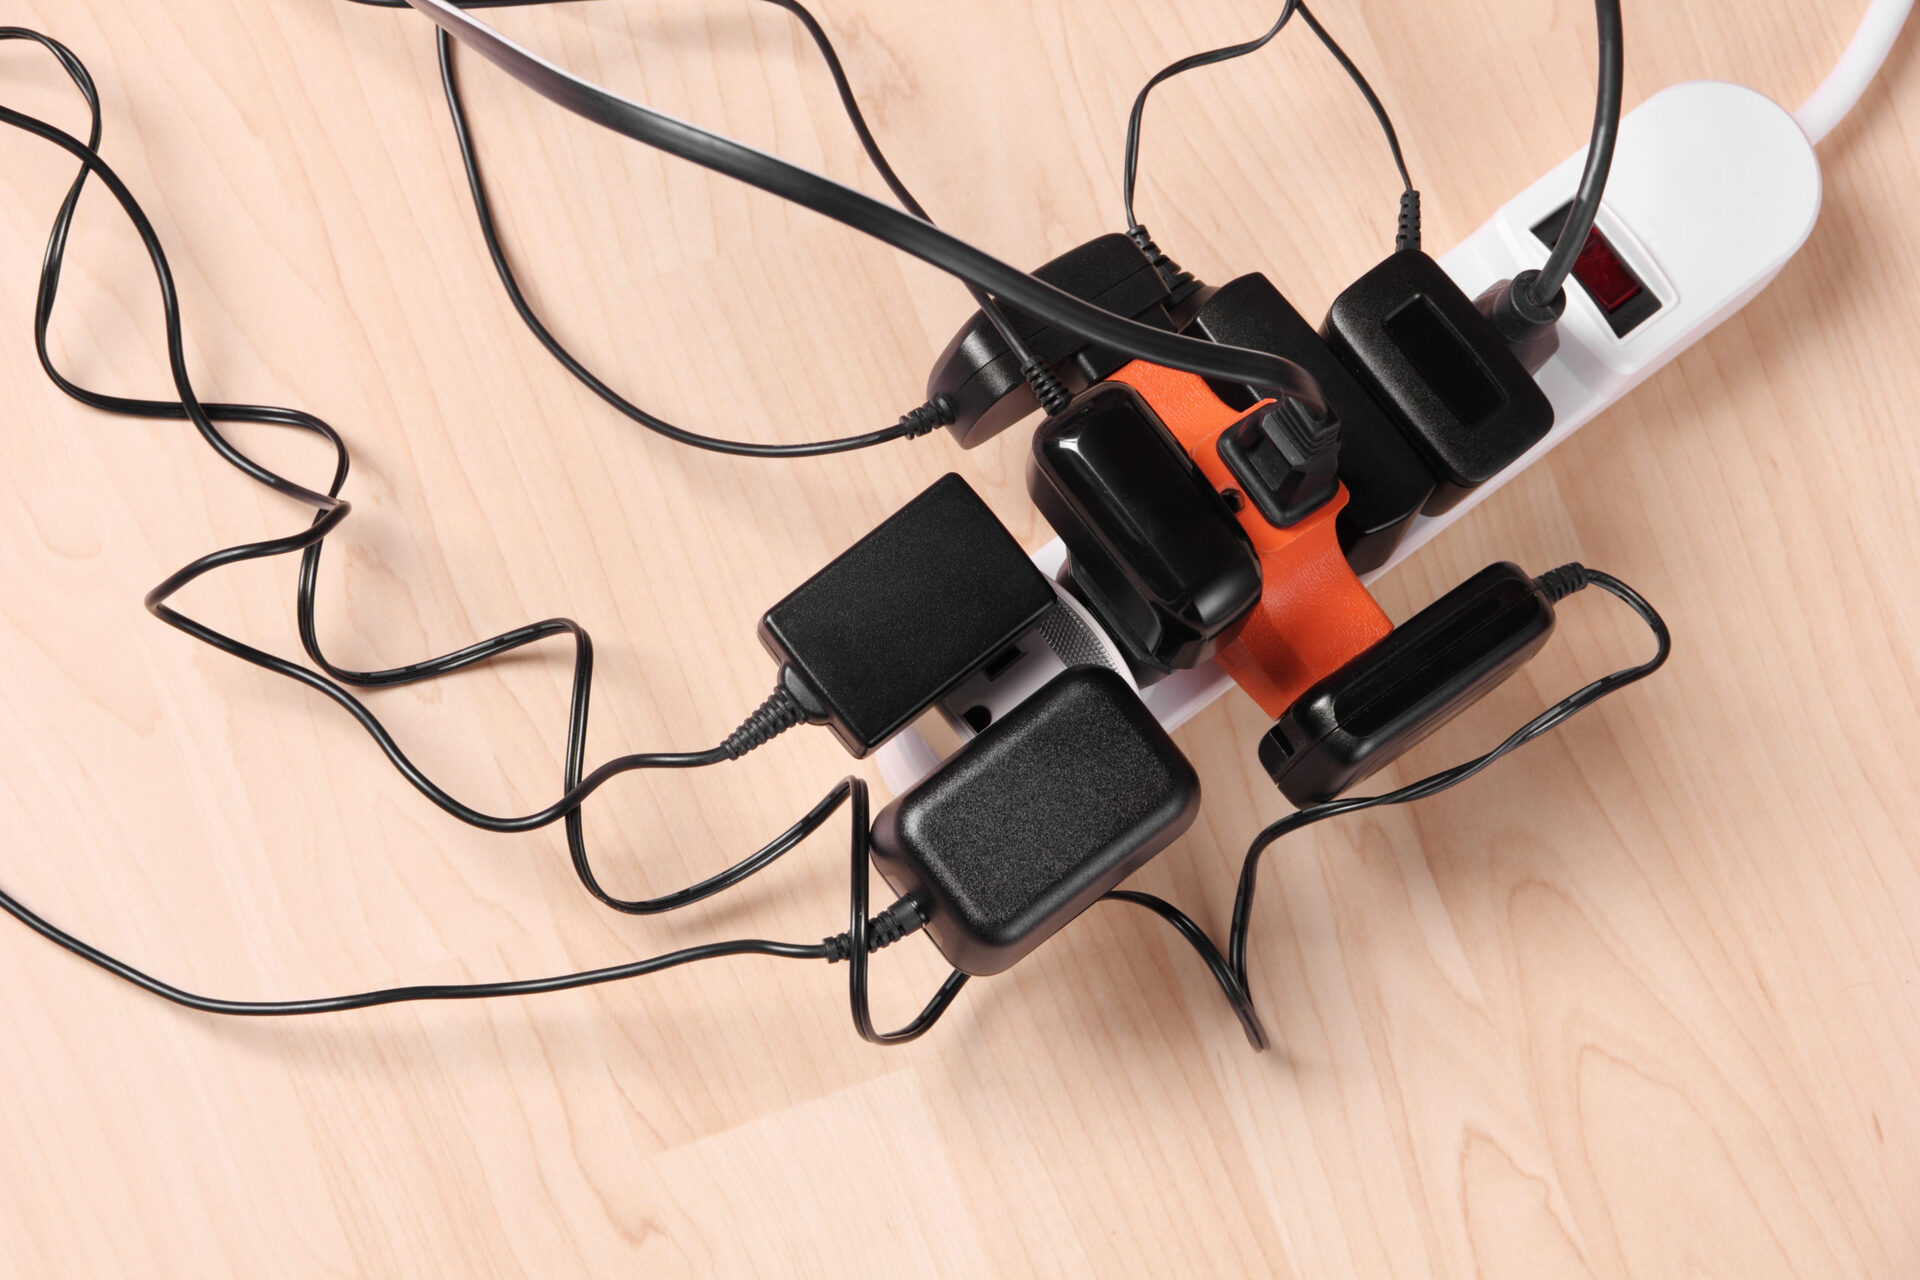
Recycling has become more important than ever in today’s society, with efforts focused on reducing waste and preserving our environment. One area where recycling can make a significant impact is in the realm of electrical wire. Stripping electrical wire for recycling not only helps reduce landfill waste but also allows for the recovery of valuable metals such as copper and aluminum.
However, stripping electrical wire can be a daunting task for those who are unfamiliar with the process. Knowing the right tools to use and the correct techniques can make the job much easier and efficient. In this article, we will guide you through the steps involved in stripping electrical wire for recycling.
By following these steps, you will not only be able to reuse and repurpose the wire but also contribute to a more sustainable future. So let’s dive in and learn how to properly strip electrical wire for recycling!
Key Takeaways:
- Stripping electrical wire for recycling is a valuable skill that contributes to a sustainable future. By following safety precautions, choosing the right tools, and properly preparing and storing the wire, you can make a positive impact on the environment.
- Recycling electrical wire not only reduces landfill waste but also allows for the recovery of valuable metals like copper and aluminum. By understanding the wire stripping process and adhering to environmental guidelines, you can contribute to responsible recycling practices.
Read more: How To Recycle An Electric Toothbrush
Tools and Materials Needed
Before you begin stripping electrical wire for recycling, it’s important to gather the necessary tools and materials to ensure a smooth and efficient process. Here are the items you will need:
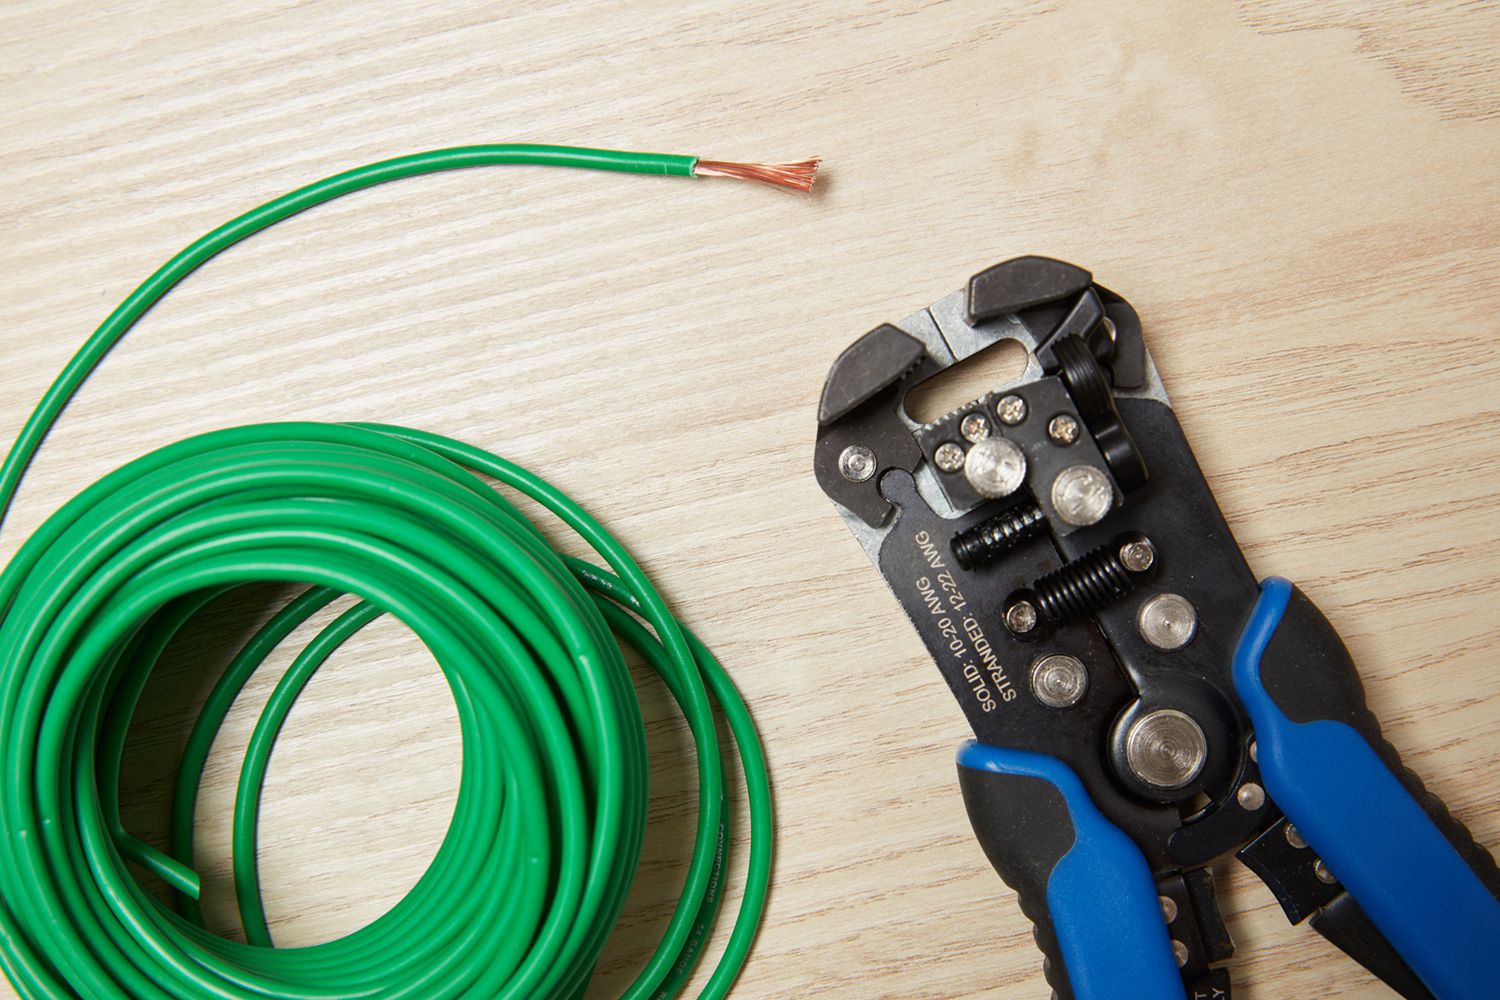
- Wire Stripper: This is the key tool you will need to remove the insulation from the wire. It is designed to cut, strip, and crimp wires of different sizes. There are various types of wire strippers available, so make sure you choose one that is suitable for the gauge and type of wire you will be working with.
- Safety Gloves: As you will be handling wire and using cutting tools, it is important to protect your hands from any potential injuries. Make sure to wear safety gloves that offer good grip and dexterity.
- Safety Glasses: When working with wire, there is a risk of small particles or wires flying off. It is crucial to protect your eyes by wearing safety glasses to prevent any potential eye injuries.
- Wire Cutter: Although a wire stripper is the primary tool for stripping wire, it can also be helpful to have a wire cutter for any larger wire that doesn’t fit into the wire stripper.
- Container or Bin: As you strip the wire, you will need a container or bin to collect the stripped wire and separate it from the waste insulation. This will help keep your workspace organized and make it easier to handle the stripped wire later on.
With these tools and materials on hand, you will be well equipped to effectively strip electrical wire for recycling. Remember, safety should always be a priority, so be sure to wear the appropriate protective gear before starting the process. Now that you have gathered your supplies, let’s move on to the next step!
Step 1: Gather Your Supplies
Before you begin the process of stripping electrical wire for recycling, it’s essential to gather all the necessary supplies. This step ensures that you have everything you need within arm’s reach, making the process more efficient and smoother. Here’s what you’ll need:
- Electrical Wire: Start by collecting the electrical wire that you plan to strip. It can be old cables, wires from electronics, or any other scrap wire you have access to. Sort the wire based on its size and type for easier handling.
- Wire Stripper: There are different types and sizes of wire strippers available on the market. Make sure to select a wire stripper that suits the gauge and type of wire you are working with.
- Safety Gloves: It’s crucial to protect your hands while working with wire. Wear a pair of sturdy safety gloves to avoid any potential injuries from sharp edges or metal burrs.
- Safety Glasses: Protect your eyes from flying debris or metal particles by wearing safety glasses. This simple precaution can prevent serious eye injuries.
- Container: Prepare a container or a bin to collect the stripped wire and separate it from the insulation. This will help keep your workspace organized and make it easier to handle the stripped wire later on.
Gathering these supplies before starting will save you time and effort in the long run. It’s important to have everything within reach to maintain a smooth workflow during the stripping process. Once you have gathered your supplies, you’re ready to proceed to the next step – ensuring safety precautions.
Step 2: Safety Precautions
When it comes to stripping electrical wire for recycling, taking proper safety precautions is of utmost importance. Working with wires can present potential hazards, such as sharp edges and exposure to electrical current. By following these safety guidelines, you can minimize the risk of accidents or injuries:
- Wear Safety Gloves and Glasses: Protect your hands by wearing sturdy safety gloves. They will shield your skin from any sharp edges or metal burrs on the wire. Additionally, wear safety glasses to safeguard your eyes from debris or particles that may become airborne during the stripping process.
- Ensure a Safe Work Area: Set up your work area in a well-lit and ventilated space. Remove any clutter or obstacles that may impede your movement. Keep the floor clean, ensuring there are no tripping hazards.
- Disconnect Power: If you are working with live wires, always disconnect the power before starting the stripping process. This will prevent the risk of electric shock.
- Inspect the Wire: Check the wire for any signs of damage, such as frayed insulation or exposed conductors. Do not attempt to strip damaged or compromised wires, as they may pose a safety risk.
- Use Proper Techniques: Familiarize yourself with the correct wire stripping techniques. Apply steady pressure and avoid excessive force while using the wire stripper to avoid accidental cuts or injuries.
- Dispose of Waste Materials Correctly: Collect the stripped wire and the waste insulation separately. Dispose of the waste insulation in accordance with local regulations or recycle it if possible. Be mindful of the environment and handle hazardous materials responsibly.
By adhering to these safety precautions, you can ensure a safe working environment and minimize the risk of accidents. Remember, safety should always be your top priority throughout the wire stripping process. With the necessary safety measures in place, you can proceed with selecting the appropriate wire stripper in the next step.
Step 3: Choose the Right Wire Stripper
Choosing the right wire stripper is crucial for effective and efficient wire stripping. With different types and sizes of wire strippers available, it’s important to select the one that suits the gauge and type of wire you are working with. Here are some factors to consider when choosing a wire stripper:
- Gauge Compatibility: Wire strippers are designed to handle specific wire gauges. Ensure that the wire stripper you choose can accommodate the gauge range of the wires you will be stripping. Using an incorrect wire stripper for a specific gauge can lead to damaged wires or ineffective stripping.
- Wire Type: Different wire strippers are designed to handle specific types of wire insulation, such as PVC, rubber, or Teflon. Consider the type of insulation you will be encountering and select a wire stripper with blades suitable for that type of insulation.
- Adjustability: Look for a wire stripper that offers adjustable settings for different wire sizes. This will allow for greater versatility and precision in stripping wires of varying diameters.
- Ergonomics: Consider the design and ergonomics of the wire stripper. Look for comfortable handles that provide a good grip and reduce hand fatigue during prolonged use.
- Durability: Choose a wire stripper made from durable materials that can withstand frequent use. A sturdy construction will ensure that the wire stripper lasts longer and performs optimally.
Take the time to research different models and read reviews to find a wire stripper that suits your specific needs. Investing in a high-quality wire stripper will make the wire stripping process much easier and efficient, saving you time and effort.
Once you have selected the appropriate wire stripper, you can move on to the next step – identifying the types of wire you will be working with. This knowledge will help you determine the best stripping technique for each wire.
Read more: How To Wire LED Strips
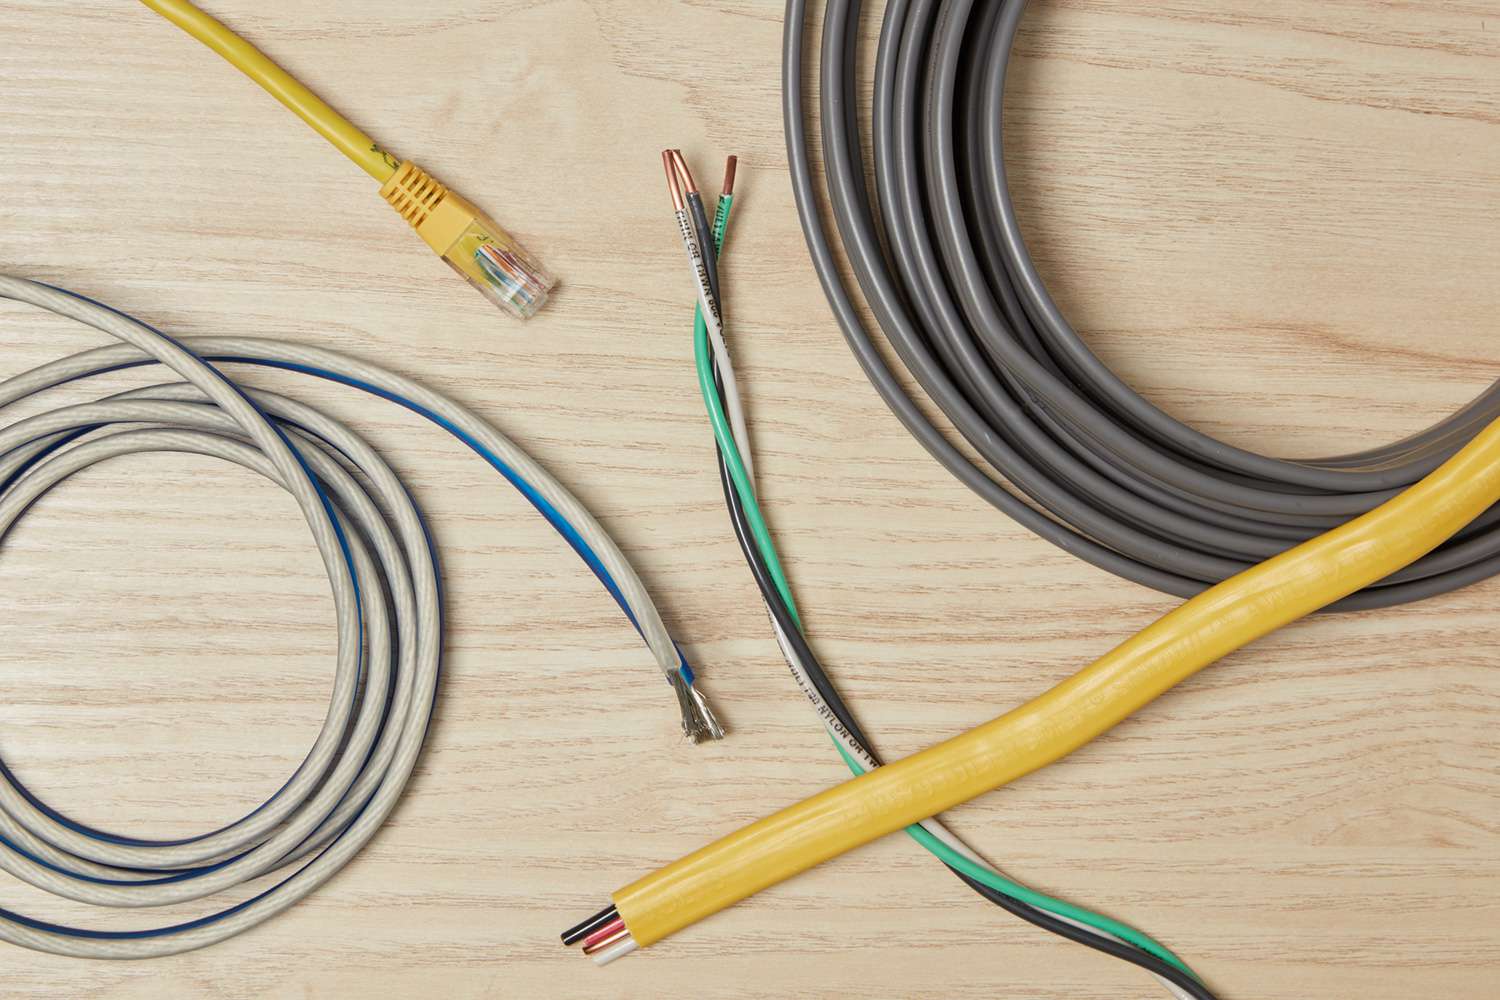
Step 4: Identify the Types of Wire
Before you begin stripping the wire, it’s important to properly identify the types of wire you will be working with. Different types of wire may require different stripping techniques and tools. Here are some common types of wire you may come across:
- Copper Wire: Copper wire is one of the most commonly recycled types of wire due to its high value. It is often found in electrical wiring, household appliances, and electronic devices. Copper wire is typically reddish-brown or orange in color.
- Aluminum Wire: Aluminum wire is another commonly recycled wire type. It is lightweight and commonly used in electrical transmission and distribution systems. Aluminum wire is typically silver or gray in color.
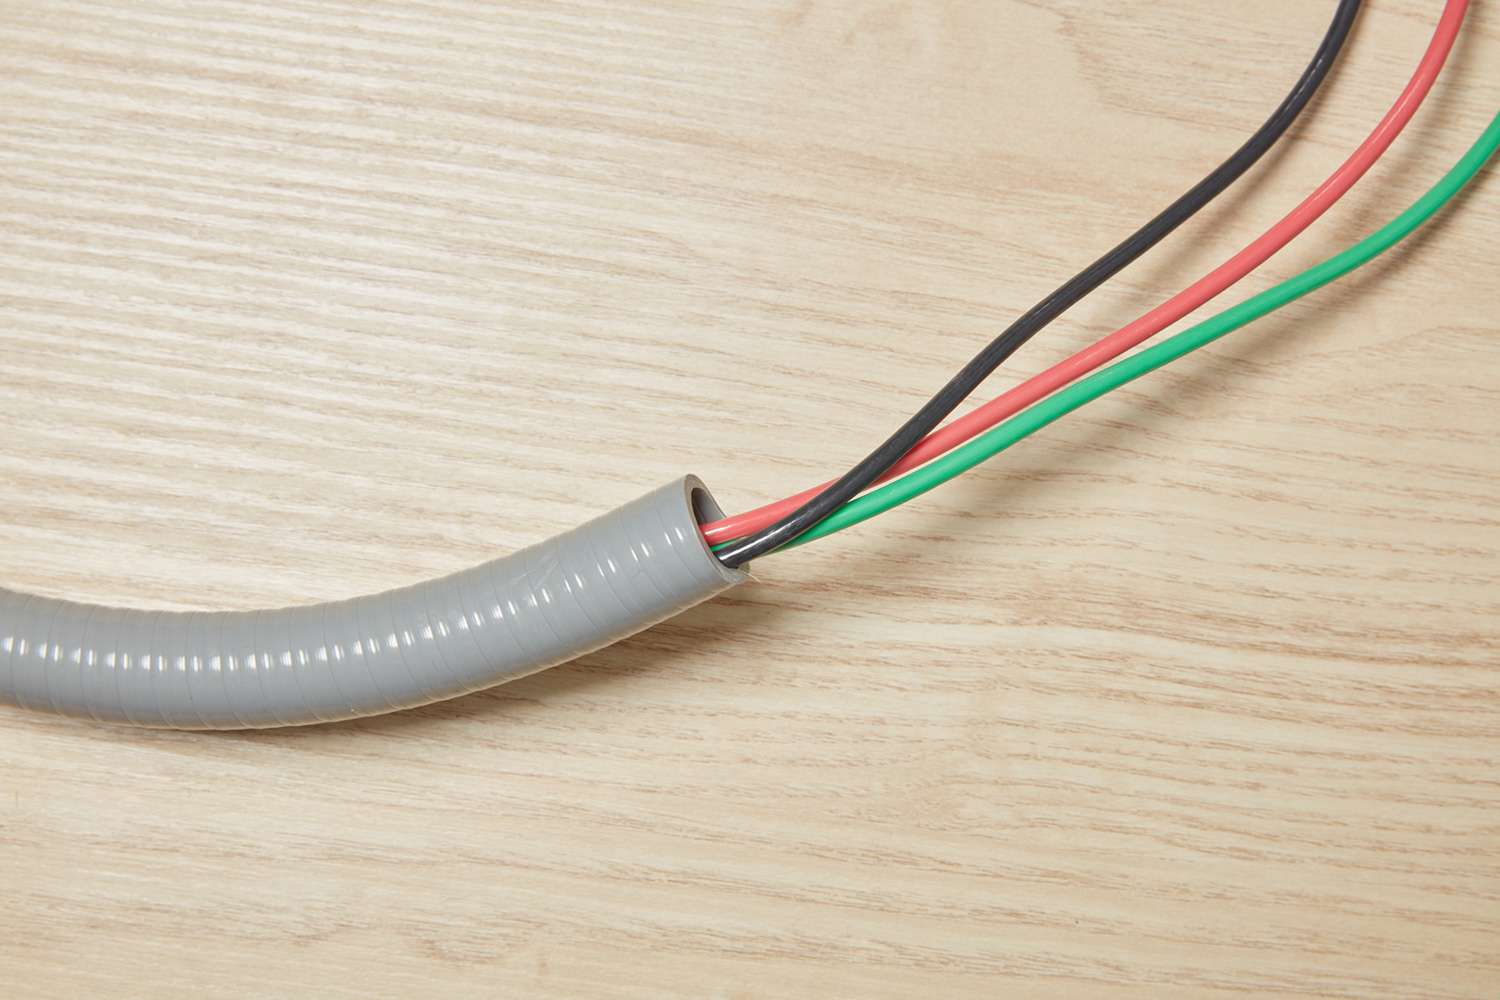
- Coaxial Cable: Coaxial cables are used for transmitting high-frequency signals, such as for television or internet connections. They consist of an inner conductor, insulation, a metallic shield, and an outer protective jacket.
- Ethernet Cable: Ethernet cables are used for network connections. They contain multiple twisted pairs of wires and are often categorized as CAT5, CAT5e, or CAT6, depending on their capabilities.
- Power Cord: Power cords are used to connect devices to electrical outlets. They usually have a thicker gauge and may have additional layers of insulation for added safety.
Understanding the different wire types will help you determine the appropriate stripping technique and the value of the materials you will be working with. Copper and aluminum wires, in particular, have high recyclable value due to the metal content. By identifying the types of wire you have, you can better assess the potential value and the importance of proper recycling.
Now that you have identified the wire types, it’s time to move on to preparing the wire for stripping in the next step.
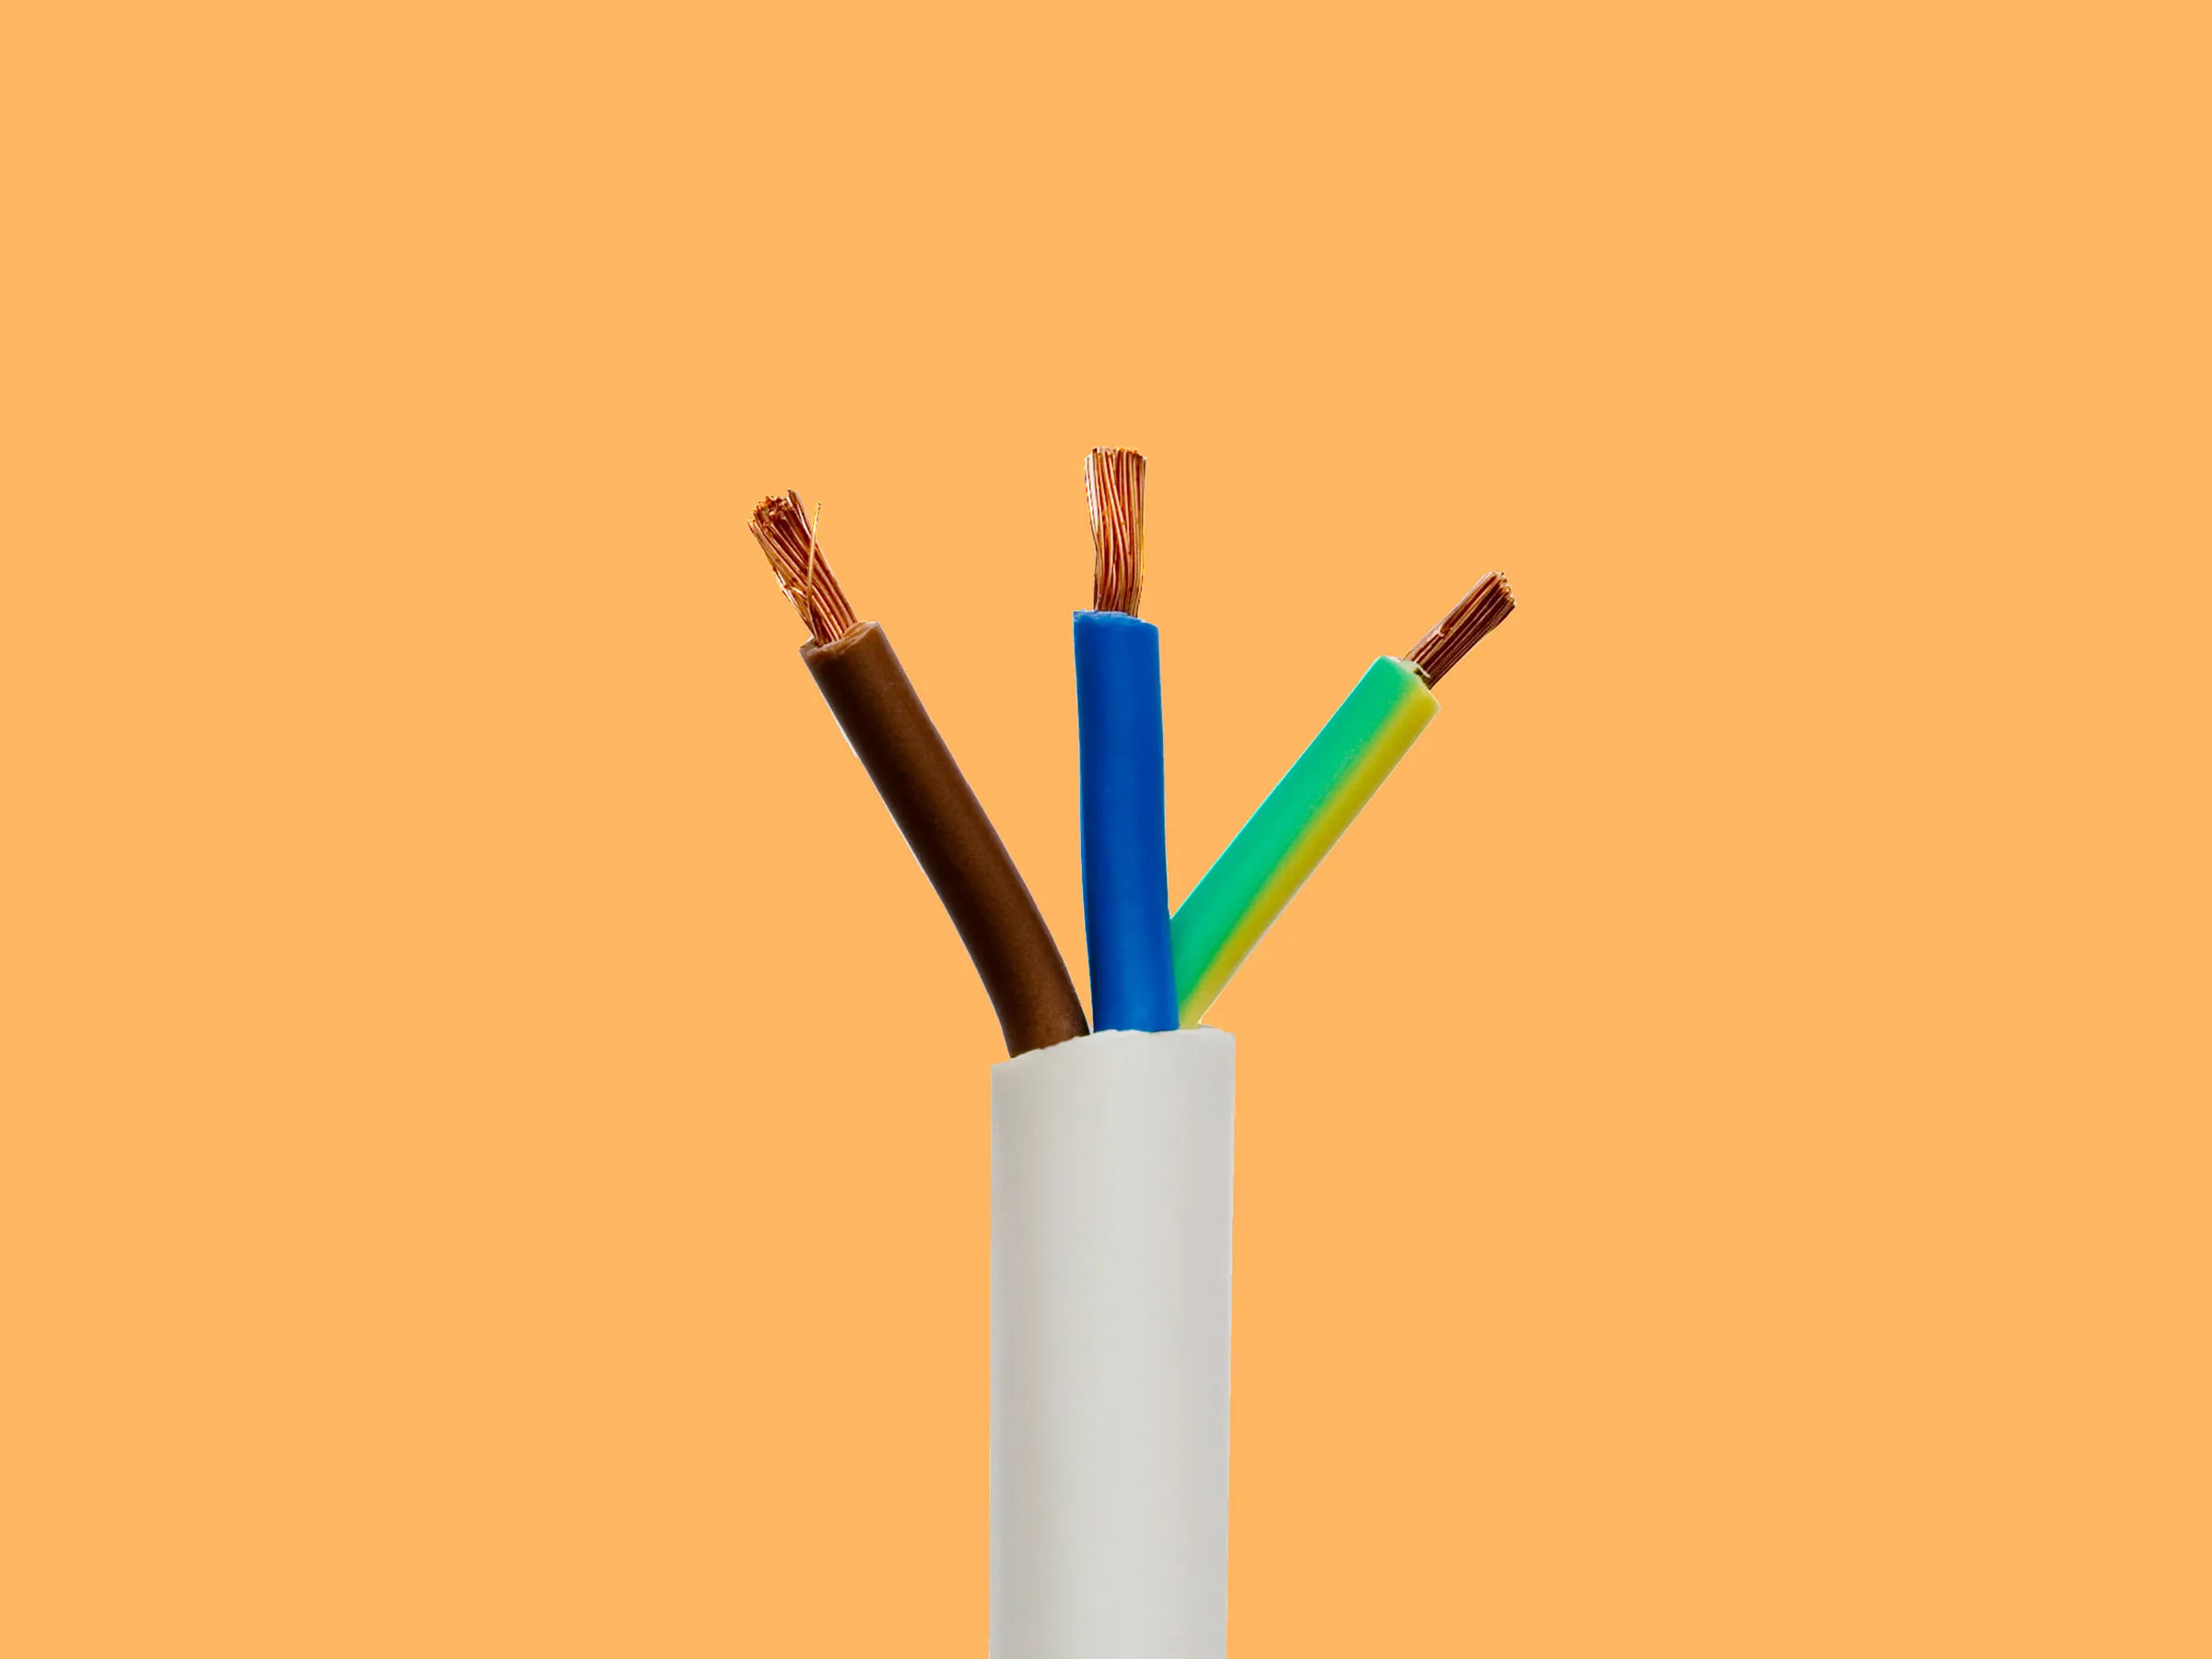
Step 5: Prepare the Wire
Before you can start stripping the wire, it’s important to properly prepare it to ensure a smooth and efficient stripping process. Here are some steps to follow to prepare the wire:
- Sort and Organize: Sort the wire based on its type and size. This will help you streamline the stripping process and make it easier to handle different wires.
- Remove Obstacles: Inspect the wire for any obstacles that may hinder the stripping process, such as connectors, plugs, or clips. Remove these obstacles using wire cutters or pliers.
- Straighten the Wire: If the wire is bent or kinked, straighten it out before stripping. This will make it easier to handle and ensure cleaner cuts during the stripping process.
- Trim Excess Lengths: If the wire is longer than necessary, consider trimming off any excess lengths. This will make the wire more manageable and reduce the amount of insulation to be stripped.
- Clean the Wire: In some cases, wires may be dirty or covered in grime. Clean the wire using a mild detergent and water to remove any dirt or debris. Ensure the wire is completely dry before proceeding with the stripping process.
Properly preparing the wire will make the stripping process easier and yield better results. By organizing and straightening the wire, you’ll be able to handle it more efficiently and ensure cleaner cuts during stripping. Additionally, removing any obstacles and trimming excess lengths will help streamline the process and save time.
Once the wire is properly prepared, you can move on to the next step – using the wire stripper to strip the wire. This is where the actual stripping process begins, so make sure you have the correct wire stripper for the job.
When stripping electrical wire for recycling, use a wire stripper tool to carefully remove the insulation without damaging the copper wire inside. This will ensure you get the best value for your recycled wire.
Step 6: Use the Wire Stripper
Now that you have prepared the wire, it’s time to use the wire stripper to strip off the insulation. Here’s how to use the wire stripper effectively:
- Hold the Wire Properly: Take the wire and hold it firmly in your non-dominant hand. This will provide stability and control throughout the stripping process.
- Select the Correct Slot: Most wire strippers have multiple slots of different sizes. Choose the slot that matches the gauge of the wire you are working with. The slot should allow the wire to fit snugly without being too loose or too tight.
- Position the Wire: Position the wire inside the selected slot of the wire stripper so that the insulation is aligned with the stripping blades. Make sure the wire is inserted straight and evenly without any bending or twisting.
- Apply Pressure: Squeeze the handles of the wire stripper firmly to apply pressure on the wire. The stripping blades should cut through the insulation but not damage the underlying wire. Apply enough pressure to ensure a clean cut without excessive force.
- Rotate and Pull: While maintaining pressure on the handles, rotate the wire stripper slightly or move it back and forth along the length of the wire. This helps loosen the insulation and facilitates the stripping process. Then, gently pull the insulated portion away from the exposed wire.
- Inspect the Result: Once the insulation is removed, examine the stripped wire to ensure the cut is clean and the exposed wire is undamaged. If there are any cuts or nicks on the wire, consider trimming and repeating the stripping process if necessary.
Remember to practice caution and take your time while using the wire stripper. Rushing through the process can lead to mistakes or damage to the wire. It’s important to maintain a steady and controlled grip on the wire and apply pressure evenly to ensure clean and accurate stripping.
Now that you’ve successfully stripped the wire, it’s time to collect and separate the stripped wire from the insulation. Move on to the next step to learn how.
Step 7: Strip the Wire
With the wire prepared and the wire stripper in hand, it’s time to strip the wire and remove the insulation. Follow these steps to strip the wire effectively:
- Select the Area to Strip: Choose the section of the wire where you want to remove the insulation. This could be at the ends of the wire or along its length, depending on your specific needs.
- Position the Wire: Hold the wire firmly and insert it into the appropriate slot on the wire stripper. Ensure that the slot size matches the gauge of the wire to achieve clean and precise stripping.
- Apply Pressure: Squeeze the handles of the wire stripper firmly to apply pressure on the wire. The stripping blades should cut through the insulation without damaging the underlying wire. Apply enough pressure to ensure a clean cut but avoid using excessive force.
- Rotate and Pull: While maintaining pressure on the handles, rotate the wire stripper slightly or move it back and forth along the length of the wire. This helps loosen the insulation and facilitates the stripping process. Then, gently pull the insulated portion away from the exposed wire.
- Inspect the Result: Once the insulation is removed, carefully inspect the stripped wire. Look for any signs of damage to the wire or any remaining pieces of insulation. If needed, trim any damaged sections of the wire and repeat the stripping process.
It’s important to maintain control and precision while stripping the wire. Pay attention to the pressure applied and ensure that the blades of the wire stripper cut smoothly through the insulation. Adjust your technique and grip as needed to achieve the desired results.
As you strip the wire, collect the stripped wire in a designated container or bin. It’s important to separate the stripped wire from the insulation to keep your workspace organized and facilitate further processing or recycling.
Now that you have successfully stripped the wire, it’s time to move on to the next step – separating the insulation from the stripped wire. Continue reading to learn how.
Read more: What Is 4 Wire Electrical Wire
Step 8: Collect the Stripped Wire
After successfully stripping the wire, it’s crucial to collect the stripped wire and separate it from the insulation. Here’s how you can effectively collect the stripped wire:
- Use a Container: Prepare a container or bin to collect the stripped wire. This will help keep your workspace organized and prevent the stripped wire from getting mixed up with the insulation.
- Handle with Care: Carefully place the stripped wire into the container, making sure not to damage or bend it. Handle the stripped wire gently to avoid any kinks or tangles.
- Group by Type or Size: If you have stripped wires of different types or sizes, consider grouping them together for easy identification and further processing. You can use separate containers or label them accordingly.
- Remove Excess Insulation: As you collect the stripped wire, you may notice small pieces of insulation sticking to it. Take a moment to remove any loose insulation to ensure a clean collection of the stripped wire.
- Organize and Store: Once the stripped wire is collected, organize it in a way that makes it easy to handle and transport for further processing or recycling. Coil the wire neatly to prevent tangling and store it in a secure location.
By collecting the stripped wire properly, you ensure that it remains separate from the insulation and minimize the risk of mix-ups or confusion. This will make it easier to handle, sort, and process the stripped wire for further use or recycling.
Remember to handle the stripped wire with care to maintain its integrity and prevent any damage. Keeping the stripped wire organized and stored in a secure location will also help prevent accidental damage or loss.
Now that you have collected the stripped wire, it’s time to move on to the next step – separating the insulation from the wire. Continue reading to learn how.
Step 9: Separate the Insulation
Once you have collected the stripped wire, the next step is to separate the insulation from the wire. Separating the insulation is important as it allows for proper recycling and recovery of the valuable metals within the wire. Here’s how you can effectively separate the insulation:
- Inspect the Stripped Wire: Take a close look at the stripped wire to assess if there are any residual pieces of insulation stuck to it. This might occur, especially in the case of stubborn or difficult-to-strip wires.
- Remove Loose or Lingering Insulation: Using your fingers or a small tool, carefully remove any loose or lingering pieces of insulation from the stripped wire. Be gentle to avoid damaging the wire itself.
- Consider Mechanical Assistance: In some cases, where the insulation is tightly clinging to the wire and manual removal is challenging, you might consider using a mechanical method. Tools such as wire brushes or abrasive pads can help remove stubborn insulation, but exercise caution to prevent damage to the wire.
- Dispose of the Insulation Properly: Collect the separated insulation in a separate container or bag for disposal. Be mindful of local regulations regarding the proper disposal of insulation materials. Some areas may have specific guidelines for the disposal of certain types of insulation, so it’s important to follow proper protocols.
By effectively separating the insulation from the wire, you ensure that the wire is in its purest state and ready for recycling or further processing. Additionally, proper insulation removal allows for better assessment of the wire’s quality and value.
Keep in mind that different types of wire insulation may require different methods of removal. Be adaptable and adjust your approach accordingly to achieve the best results. Remember to prioritize safety throughout this process and handle the materials with care.
Now that you have successfully separated the insulation, let’s move on to the final step – storing the stripped wire. Continue reading to learn more.
Step 10: Store the Stripped Wire
After separating the insulation from the wire, it’s important to properly store the stripped wire to maintain its integrity and ensure easy management. Here’s how you can effectively store the stripped wire:
- Coil the Wire: Neatly coil the stripped wire to prevent tangling and to make it easier to handle. Start by grasping one end of the wire and begin winding it into a tight and even coil. Continue coiling until the entire length of the wire is neatly organized.
- Secure the Coil: Once the wire is coiled, use zip ties, twist ties, or wire clips to secure the coil. This will prevent the wire from unraveling and becoming tangled during storage or transportation.
- Label and Identify: If you have multiple types or sizes of stripped wires, consider labeling each coil to make it easier to identify and sort. You can use adhesive labels, tape, or even color-coded markers to differentiate between different coils.
- Choose Appropriate Storage: Select a suitable storage option for your stripped wire. This can be a storage bin, plastic bag, or any other container that provides protection from moisture, dust, and physical damage. Ensure the storage area is dry and well-ventilated.
- Store in a Controlled Environment: Ideally, store the stripped wire in a controlled environment with moderate temperature and humidity levels. Extreme temperatures or exposure to moisture can degrade the wire over time, affecting its quality and resale value.
- Keep Inventory: Maintain a record or inventory of the types and quantities of stripped wire you have stored. This will help you easily track and manage your wire recycling efforts and ensure you’re aware of the materials you have on hand.
Proper storage of the stripped wire is essential for maintaining its value and preventing unnecessary damage. By following these storage guidelines, you can ensure that the wire remains in good condition and easily accessible for future use or recycling.
Remember to handle the stripped wire with care during storage to prevent any accidental damage or tangling. Regularly inspect your stored inventory to identify any issues, such as corrosion or deterioration, and address them promptly.
By effectively storing the stripped wire, you have successfully completed the wire stripping process! Your efforts in recycling and repurposing electrical wire contribute to a more sustainable future and help reduce environmental waste.
Congratulations on completing the steps to strip electrical wire for recycling!
Conclusion
Stripping electrical wire for recycling is a valuable skill that allows us to reduce waste and contribute to a more sustainable future. With the right tools, materials, and techniques, you can effectively strip the wire and recover valuable metals such as copper and aluminum.
Throughout this article, we have covered the step-by-step process of stripping electrical wire, from gathering the necessary supplies to properly storing the stripped wire. By following these steps, you can ensure a safe and efficient wire stripping experience.
Remember to prioritize safety by wearing safety gloves and glasses and following proper procedures. Take your time to choose the right wire stripper and familiarize yourself with the different types of wire you may encounter. Properly prepare the wire, use the wire stripper with care, collect and separate the stripped wire from the insulation, and store it in a suitable manner.
By stripping electrical wire for recycling, you not only contribute to reducing landfill waste but also have the opportunity to recover valuable materials. Copper and aluminum, among other metals, can be reused and repurposed, reducing the need for excessive mining and manufacturing of new materials.
Always be mindful of local regulations and guidelines for recycling and disposal of wires and insulation materials. By adhering to these guidelines, you can ensure that your wire stripping efforts align with environmentally responsible practices.
Thank you for taking the initiative to learn how to strip electrical wire for recycling. Your commitment to sustainability and environmental preservation is commendable. Now, go forth and make a positive impact by properly stripping and recycling electrical wire!
Frequently Asked Questions about How To Strip Electrical Wire For Recycling
Was this page helpful?
At Storables.com, we guarantee accurate and reliable information. Our content, validated by Expert Board Contributors, is crafted following stringent Editorial Policies. We're committed to providing you with well-researched, expert-backed insights for all your informational needs.


0 thoughts on “How To Strip Electrical Wire For Recycling”