
Articles
How To Take Off A Kitchen Faucet
Modified: February 22, 2024
Learn how to easily remove a kitchen faucet with step-by-step instructions. Find informative articles on DIY faucet removal and installation.
(Many of the links in this article redirect to a specific reviewed product. Your purchase of these products through affiliate links helps to generate commission for Storables.com, at no extra cost. Learn more)
Introduction
Installing a new kitchen faucet can be an exciting home improvement project that can give your kitchen a fresh and updated look. However, before you can install the new faucet, you need to first remove the old one. Taking off a kitchen faucet may seem like a daunting task, but with the right tools and a little know-how, you can easily accomplish this DIY project.
In this article, we will guide you through the step-by-step process of how to take off a kitchen faucet. We will provide you with a list of the required tools and materials, as well as detailed instructions on how to disconnect the water lines, remove the faucet handle, loosen the mounting nuts, and ultimately remove the old faucet. We will also cover how to clean the sink surface and install the new faucet, ensuring a seamless transition from the old to the new.
Whether you are replacing a worn-out faucet or simply upgrading to a more modern style, removing the old faucet is the first step towards achieving your desired outcome. So, let’s dive in and learn how to take off a kitchen faucet!
Key Takeaways:
- Removing a kitchen faucet is a manageable DIY project with the right tools and steps. Shut off the water supply, disconnect water lines, and follow manufacturer’s instructions for a successful installation.
- Cleaning the sink surface is crucial before installing a new faucet. Properly position and secure the new faucet, reconnect water lines, and enjoy the upgraded kitchen functionality.
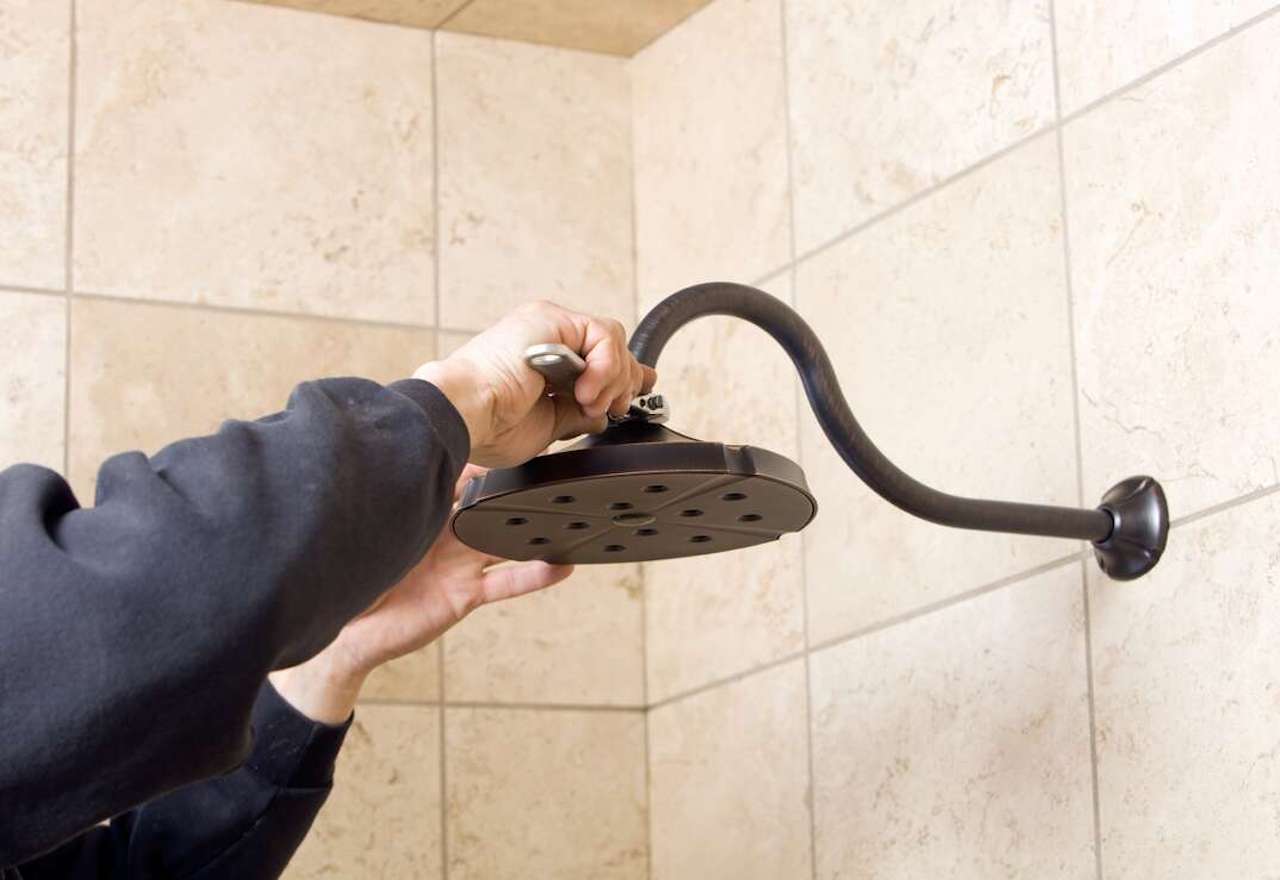
Read more: How To Take Off A Shower Faucet
Required Tools and Materials
Before you begin the process of taking off a kitchen faucet, it’s important to gather all the necessary tools and materials. Having everything prepared in advance will make the job easier and more efficient. Here’s a list of what you’ll need:
- Adjustable wrench
- Basin wrench
- Phillips screwdriver
- Plumber’s tape
- Bucket or towels to catch any water
- Clean cloth or sponge
- New kitchen faucet
- New supply lines (if needed)
- Plastic gloves
- Eye protection
The adjustable wrench and basin wrench will be essential for loosening the nuts that hold the faucet in place. The Phillips screwdriver will be used to remove any screws or fasteners that may be securing the faucet handle. Plumber’s tape is necessary to ensure a tight and leak-free connection when installing the new faucet.
It’s always a good idea to have a bucket or towels handy to catch any water that may leak or spill during the removal process. This will help prevent any mess and water damage. Additionally, having a clean cloth or sponge nearby will allow you to wipe down the sink surface once the old faucet has been removed.
Of course, it’s important to have a new kitchen faucet and, if necessary, new supply lines ready to install once the old faucet is taken off. Make sure to choose a faucet that fits your sink and matches your desired style and functionality.
Lastly, it’s crucial to wear plastic gloves and eye protection when working with plumbing fixtures. This will keep your hands protected and prevent any debris or water from getting into your eyes.
By gathering these tools and materials before you start, you’ll be well-prepared to take off your kitchen faucet with ease.
Step 1: Gather Your Tools
Before you can begin the process of removing your kitchen faucet, it’s important to gather all the necessary tools. Having these tools on hand will make the job much easier and more efficient. Here’s what you’ll need:
- Adjustable wrench
- Basin wrench
- Phillips screwdriver
- Plumber’s tape
- Bucket or towels to catch any water
- Clean cloth or sponge
- New kitchen faucet
- New supply lines (if needed)
- Plastic gloves
- Eye protection
The adjustable wrench and basin wrench will be essential for loosening the nuts that hold the faucet in place. The adjustable wrench allows you to grip and turn the nuts, while the basin wrench is specifically designed to reach tight spaces under the sink. The Phillips screwdriver will be used to remove any screws or fasteners that may be securing the faucet handle.
Plumber’s tape is an essential item to ensure a tight and leak-free connection when installing the new faucet. It creates a watertight seal between threaded connections, preventing any water from leaking out. Make sure to wrap the tape around the threads in a clockwise direction before connecting the supply lines.
Having a bucket or towels nearby is crucial to catch any water that may leak or spill during the removal process. This will help prevent any mess and water damage under your sink. Additionally, having a clean cloth or sponge on hand will allow you to wipe down the sink surface once the old faucet has been removed.
It’s important to have a new kitchen faucet ready for installation once the old faucet is removed. Make sure to choose a faucet that fits your sink and matches your desired style and functionality. If you’re replacing an old faucet, you may also need new supply lines. Check the condition of the existing supply lines and replace them if necessary.
Lastly, it’s crucial to wear plastic gloves and eye protection when working with plumbing fixtures. This will keep your hands protected from any sharp edges or debris, and prevent any water or debris from getting into your eyes.
By gathering these tools before you start, you’ll be well-prepared to tackle the process of removing your kitchen faucet.
Step 2: Shut off the Water Supply
Before you begin removing your kitchen faucet, it’s important to shut off the water supply to prevent any leaks or water damage. Follow these steps to safely turn off the water:
- Locate the shut-off valves: The shut-off valves are typically located underneath the sink. These valves control the water flow to the faucet.
- Turn off the hot water valve: Rotate the handle of the hot water shut-off valve in a clockwise direction to close it. This will stop the flow of hot water to the faucet.
- Turn off the cold water valve: Rotate the handle of the cold water shut-off valve in a clockwise direction to close it. This will stop the flow of cold water to the faucet.
Once the water supply is shut off, open the faucet handles to release any remaining water pressure. This will help prevent any water from spraying when you disconnect the water lines.
It’s important to note that some older homes may not have individual shut-off valves located under the sink. In this case, you may need to shut off the main water supply to your house. The main shut-off valve is typically located near the water meter or where the main water line enters your home. Make sure to consult your local plumbing codes and guidelines for assistance if needed.
By shutting off the water supply, you’ll eliminate the risk of water flowing while you remove the kitchen faucet. This step is crucial to ensure a smooth and mess-free removal process.
Step 3: Disconnect the Water Lines
Now that you have shut off the water supply, it’s time to disconnect the water lines that connect the faucet to the plumbing system. Follow these steps to safely disconnect the water lines:
- Locate the water supply lines: The water supply lines are connected to the bottom of the faucet. They are typically made of flexible hoses or metal pipes.
- Use an adjustable wrench: Place an adjustable wrench around the nut where the water supply line connects to the faucet. Hold the faucet steady with one hand to prevent it from moving while you loosen the nut.
- Turn the wrench counterclockwise: With the adjustable wrench in place, turn it counterclockwise to loosen the nut. Be careful not to twist or damage the water supply line.
- Repeat for the other water supply line: If you have both hot and cold water supply lines, repeat the previous steps to disconnect the other line.
Once you have loosened the nuts, carefully pull the water supply lines away from the faucet. Place a bucket or towels underneath to catch any remaining water that may drip out.
If the water supply lines are old or damaged, this is an ideal time to replace them with new ones. Measure the length of the existing water supply lines and purchase suitable replacements. Apply plumber’s tape to the threaded ends of the new supply lines before connecting them to the faucet.
By disconnecting the water lines, you are detaching the faucet from the plumbing system. This step is crucial before proceeding to remove the rest of the faucet components.
Read more: How To Take Off Sink Faucet Head
Step 4: Remove the Faucet Handle
After disconnecting the water lines, it’s time to remove the faucet handle. The handle is typically held in place by screws or fasteners. Follow these steps to remove the faucet handle:
- Inspect the handle: Examine the handle carefully to locate any screws or fasteners that are securing it to the faucet body. Depending on the faucet design, the screws may be located on the top, underneath a decorative cap, or on the sides.
- Use a Phillips screwdriver: Once you have identified the screws, use a Phillips screwdriver to remove them. Turn the screws counterclockwise to loosen and remove them.
- Gently lift off the handle: Once the screws are removed, you can gently lift off the faucet handle. If the handle is stuck, try giving it a slight twist or wiggle to loosen it.
If the faucet handle is still difficult to remove, check if there are any additional screws or fasteners that you may have missed. Some faucet handles may have hidden screws underneath caps or decorative covers. Use a flat-head screwdriver or a small utility knife to pry off these caps and access the hidden screws.
Once the faucet handle is removed, set it aside in a safe place. You may need it later if you are planning to reuse it or if it needs to be replaced.
Removing the faucet handle is an important step in disassembling the old faucet. By following these instructions, you will be one step closer to effectively removing the entire faucet from your kitchen sink.
Step 5: Loosen the Mounting Nuts
With the faucet handle removed, it’s time to loosen the mounting nuts that secure the faucet to the sink. These nuts hold the faucet in place and can usually be found directly underneath the sink. Follow these steps to loosen the mounting nuts:
- Locate the mounting nuts: Look for the mounting nuts that are securing the faucet to the sink. They are typically large, round nuts located on threaded rods or bolts.
- Use a basin wrench or adjustable wrench: Depending on the design of your faucet and sink, you may need to use a basin wrench or an adjustable wrench to grip and turn the mounting nuts. The basin wrench is specifically designed to reach tight spaces under the sink.
- Loosen the mounting nuts: Place the wrench around the mounting nuts and turn them counterclockwise to loosen them. Depending on the tightness, you may need to apply some force to break the initial seal.
- Repeat for all mounting nuts: If your faucet has multiple mounting nuts, repeat the previous step to loosen them all. Make sure to loosen each nut evenly to prevent any imbalances or strain on the faucet.
As you loosen the mounting nuts, you may notice that the faucet starts to become loose. This is a good sign that the nuts are properly loosened and the faucet is ready to be removed.
Keep in mind that some faucets may have additional attachment points, such as clips or screws, that secure the faucet to the sink. Check the manufacturer’s instructions or documentation to ensure you remove all necessary components.
Loosening the mounting nuts is a critical step in taking off the kitchen faucet. By following these instructions, you’ll be well on your way to completely removing the faucet from your sink.
Before removing a kitchen faucet, make sure to turn off the water supply to the faucet. Then, use a wrench to loosen the nuts and bolts holding the faucet in place. Finally, carefully lift the faucet out of the sink.
Step 6: Take off the Old Faucet
Now that you have loosened the mounting nuts, it’s time to take off the old faucet from your kitchen sink. Follow these steps to remove the faucet:
- Gently lift the faucet: With the mounting nuts loosened, gently lift the faucet upwards to remove it from the sink. As you lift, be mindful not to damage any surrounding fixtures, such as soap dispensers or sprayers.
- Check for any remaining attachments: Once the faucet is lifted, visually inspect the area to ensure that there are no remaining attachment points or components still connected to the sink. Look for any clips, screws, or brackets that may need to be detached before fully removing the faucet.
- Remove any remaining components: If you do find any additional attachments, carefully remove them using the appropriate tools. This might involve unscrewing screws or unclipping any clips that are holding the components in place.
- Set aside and dispose of the old faucet: Once the faucet is completely detached, set it aside in a safe location. If the faucet is in good condition, you might consider donating it or giving it away to someone who can make use of it. Otherwise, properly dispose of it according to your local waste disposal guidelines.
Removing the old faucet marks an important milestone in your kitchen upgrade project. With the old faucet now out of the way, you’re ready to move on to the next steps of cleaning the sink surface and installing the new faucet.
Take a moment to appreciate your progress and get ready to transform your kitchen with a brand-new faucet.
Step 7: Clean the Sink Surface
Now that you have removed the old faucet, it’s essential to clean the sink surface before installing the new faucet. This step ensures a clean and smooth surface for the installation and helps maintain the overall hygiene and appearance of your kitchen. Follow these steps to clean the sink surface:
- Remove any debris: Start by removing any loose debris or objects from the sink, such as food scraps or utensils. Use a sponge or a cloth to wipe away any residue or dirt.
- Scrub the sink: Apply a mild cleaning solution or a mixture of warm water and dish soap to the sink surface. Use a scrub brush or a non-abrasive sponge to gently scrub the sink in circular motions, paying attention to the areas where the old faucet was attached.
- Remove stubborn stains: If there are any stubborn stains or mineral buildup on the sink surface, you can use a mixture of vinegar and water or a mild abrasive cleaner specifically designed for your sink material. Follow the manufacturer’s instructions and use a soft brush or cloth to gently scrub away the stains.
- Rinse the sink: After cleaning, thoroughly rinse the sink with warm water to remove any cleaning solution residue.
- Dry the sink: Use a clean towel or a microfiber cloth to dry the sink completely. This will help prevent water spots and maintain the sink’s luster.
By cleaning the sink surface, you not only create a clean and sanitary environment for your new faucet, but also ensure that it adheres properly to the sink. A clean surface also allows for a more secure and stable installation, preventing any potential issues down the line.
Take your time to give the sink a thorough cleaning to ensure the best possible foundation for your new faucet.
Read more: How To Take Off A Chandelier
Step 8: Install the New Faucet
Now that the sink surface is clean and prepped, it’s time to install the new faucet. Follow these steps to properly install your new kitchen faucet:
- Read the manufacturer’s instructions: Carefully review the instructions provided by the faucet manufacturer before beginning the installation process. Different faucets may have specific installation requirements and steps, so it’s important to familiarize yourself with the instructions.
- Position the faucet: Place the new faucet into the mounting holes in the sink. Ensure that it aligns properly and sits level. If needed, use the mounting nuts or brackets provided with the faucet to secure it in place.
- Tighten the mounting nuts: Use an adjustable wrench or a basin wrench to tighten the mounting nuts underneath the sink. Gradually tighten each nut while ensuring that the faucet remains level and properly aligned.
- Connect the water supply lines: Attach the water supply lines to the corresponding hot and cold water valves. Apply plumber’s tape to the threaded ends of the supply lines to ensure a tight and leak-free connection. Use an adjustable wrench to secure the connections, but be careful not to overtighten.
- Check for leaks: Once all the connections are made, turn the water supply valves back on. Slowly turn on the faucet handles and check for any leaks around the water supply lines and the faucet itself. If you spot any leaks, tighten the connections as needed.
It’s essential to follow the manufacturer’s instructions for your specific faucet model during the installation process. These instructions will guide you through any unique features or requirements of your faucet, ensuring that it is installed correctly and functions properly.
By installing the new faucet properly, you’ll enjoy a well-functioning and stylish addition to your kitchen sink.
Step 9: Reconnect the Water Lines
With the new faucet securely installed, it’s time to reconnect the water lines that supply water to the faucet. Follow these steps to ensure a proper and leak-free connection:
- Locate the water supply lines: The water supply lines are usually located underneath the sink. They connect the faucet to the hot and cold water supply valves.
- Attach the supply lines: Take the new supply lines and attach them to the respective hot and cold water supply valves. Make sure to connect the lines securely, but avoid overtightening.
- Use plumber’s tape: Before connecting the supply lines, apply plumber’s tape to the threaded ends of the supply lines. This helps create a tight and watertight seal.
- Use an adjustable wrench: Use an adjustable wrench to tighten the connections between the supply lines and the water supply valves. Again, be cautious not to overtighten and damage the connections.
Once the water lines are properly connected, turn on the water supply valves and slowly open the faucet handles. Check for any leaks around the connections. If you notice any leaks, tighten the connections further or use plumber’s tape to create a better seal.
Ensure that both hot and cold water are flowing freely from the faucet when the handles are turned on. If the water flow is weak or there are any other issues, check the manufacturer’s instructions or consult a professional plumber for assistance.
By reconnecting the water lines correctly, you can confidently enjoy a steady and reliable water supply to your new kitchen faucet.
Step 10: Turn on the Water Supply
Now that the new faucet is fully installed and the water lines are reconnected, it’s time to turn on the water supply and enjoy the use of your upgraded kitchen faucet. Follow these steps to properly turn on the water supply:
- Locate the hot and cold water supply valves: These valves are usually located underneath the sink near the water lines. They control the flow of water to the faucet.
- Turn on the hot water valve: Rotate the handle of the hot water supply valve in a counterclockwise direction to open it. This allows hot water to flow to the faucet.
- Turn on the cold water valve: Similarly, rotate the handle of the cold water supply valve counterclockwise to open it. This allows cold water to flow to the faucet.
Once the water supply valves are open, turn on the faucet handles and let the water flow for a few minutes. This helps flush out any debris or air that may have accumulated during the installation process.
Check for any leaks around the faucet and water lines while the water is flowing. If you notice any leaks, tighten the connections or consult a professional plumber for assistance.
Now, you can enjoy the benefits of your new kitchen faucet. Test both hot and cold water to ensure proper functionality and adjust the water temperature to your preference.
Congratulations! You have successfully completed the installation of your new kitchen faucet and restored the water supply to your sink.
Conclusion
Congratulations on successfully removing your old kitchen faucet and installing a new one! Taking off a kitchen faucet may seem like a daunting task, but with the right tools, instructions, and a little patience, it can be a rewarding DIY project.
In this article, we guided you through the step-by-step process of how to take off a kitchen faucet. We discussed the importance of gathering the necessary tools and materials, shutting off the water supply, disconnecting the water lines, removing the faucet handle, loosening the mounting nuts, and ultimately taking off the old faucet from the sink. We also covered cleaning the sink surface and installing the new faucet, reconnecting the water lines, and turning on the water supply.
By following these instructions and taking the time to properly remove and install your kitchen faucet, you have ensured a functioning and visually appealing addition to your kitchen sink. Not only does a new faucet enhance the aesthetics of your kitchen, but it also improves the functionality and convenience of your daily kitchen tasks.
Remember to refer to the manufacturer’s instructions for your specific faucet model throughout the process. Each faucet may have unique requirements and specifications, so it’s important to follow the recommended guidelines.
We hope this article has been useful in guiding you through the process of taking off a kitchen faucet. As always, if you encounter any difficulties or feel unsure about any step, it’s advisable to consult a professional plumber for assistance.
Enjoy your newly installed kitchen faucet and the many years of reliable use it will provide. Happy cooking and cleaning!
Frequently Asked Questions about How To Take Off A Kitchen Faucet
Was this page helpful?
At Storables.com, we guarantee accurate and reliable information. Our content, validated by Expert Board Contributors, is crafted following stringent Editorial Policies. We're committed to providing you with well-researched, expert-backed insights for all your informational needs.


0 thoughts on “How To Take Off A Kitchen Faucet”