Home>Articles>How To Test An Electrical Cord With A Voltmeter
Articles
How To Test An Electrical Cord With A Voltmeter
Modified: August 26, 2024
Learn how to test an electrical cord with a voltmeter in this informative article, providing step-by-step instructions and tips for accurate results.
(Many of the links in this article redirect to a specific reviewed product. Your purchase of these products through affiliate links helps to generate commission for Storables.com, at no extra cost. Learn more)
Introduction
Welcome to the world of electrical repairs! Whether you’re a seasoned DIY enthusiast or just starting out, knowing how to test an electrical cord with a voltmeter is an essential skill. Electrical cords are subjected to wear and tear over time, and it’s important to ensure they are in proper working condition to avoid any potential hazards.
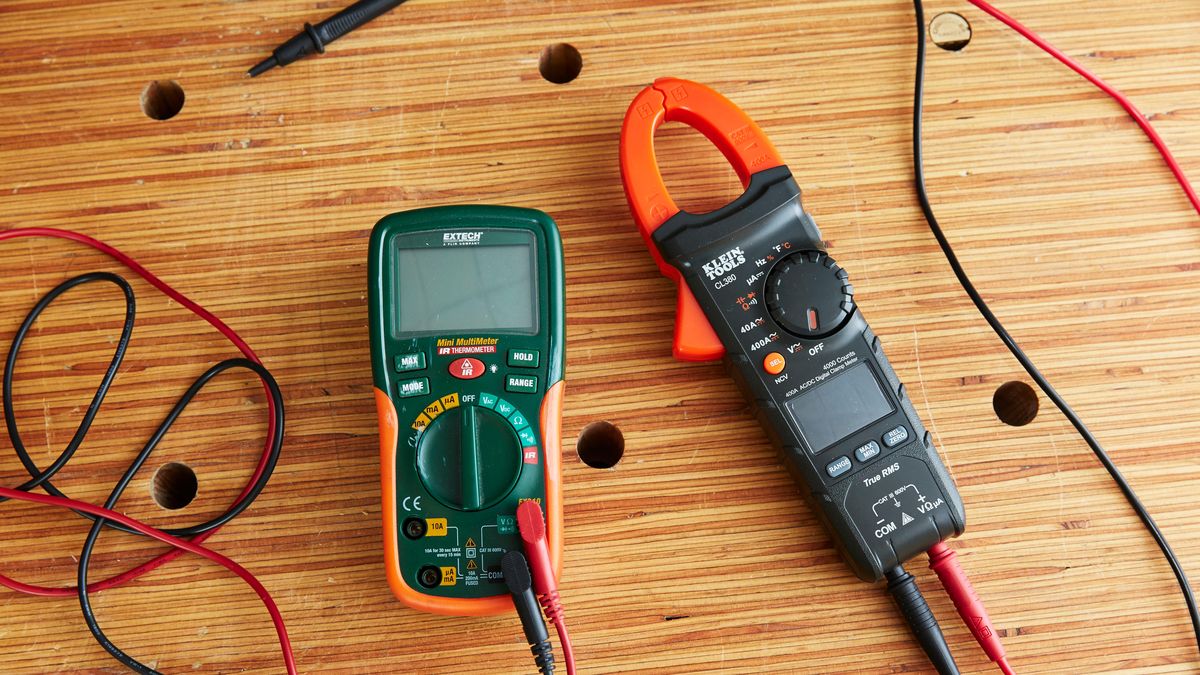
A voltmeter is a versatile tool that allows you to measure voltage and continuity in electrical circuits. By using a voltmeter, you can determine if an electrical cord is functioning correctly or if it needs repair or replacement. In this article, we will guide you through the steps of testing an electrical cord with a voltmeter, ensuring your safety and the proper functioning of your devices.
Key Takeaways:
- Ensure safety by testing electrical cords with a voltmeter. Follow step-by-step instructions to determine if a cord is safe to use or needs repair/replacement. Prioritize safety and consult a professional if uncertain.
- Master the art of testing electrical cords with a voltmeter to enhance safety and prevent hazards. Prioritize safety, interpret voltmeter readings, and confidently maintain electrical devices.
Read more: How To Test Extension Cord With Multimeter
Step 1: Gather the necessary tools
Before you begin testing an electrical cord with a voltmeter, it’s crucial to have the right tools at your disposal. Here’s a list of items you will need:
- A digital voltmeter: Ensure you have a reliable digital voltmeter with probes that can accurately measure voltage and continuity.
- Protective gear: Safety should always be a priority. Wear safety glasses and insulated gloves to protect yourself from potential electrical shocks.
- A working electrical cord: To test the cord, you’ll need a known working cord to compare the results and determine if the one you’re testing is faulty.
Having the proper tools not only ensures accurate measurements but also helps maintain your safety while working with electricity. Once you have gathered these tools, you’re ready to move on to the next step.
Step 2: Turn off the electrical device
Before testing the electrical cord, it’s crucial to turn off the electrical device that the cord is connected to. This step is essential to prevent any accidents or electrical shocks while working on the cord.
Ensure that the device is completely powered off and unplugged from any power source. This step guarantees your safety and allows you to work on the cord without any potential risks.
Take the time to double-check that the device is indeed turned off and unplugged. It’s always better to be safe than sorry when it comes to working with electricity.
Once you’ve verified that the electrical device is turned off and disconnected from power, you can proceed to the next step of testing the cord with a voltmeter.
Step 3: Set the voltmeter to the appropriate voltage range
Now that you have ensured the electrical device is turned off and unplugged, it’s time to set your voltmeter to the appropriate voltage range. This step is necessary to obtain accurate readings and ensure the safety of the testing process.
Start by turning on your voltmeter and selecting the voltage setting. Most digital voltmeters have a dial or button that allows you to choose the voltage range. Refer to the user manual of your specific voltmeter if you’re unsure how to do this.
Next, determine the voltage rating of the electrical cord you are testing. Standard household cords typically operate at 120 volts, while heavy-duty cords may handle higher voltages. Make sure to set your voltmeter to a range that can measure the voltage of the cord you are testing.
Setting the voltmeter to the appropriate voltage range is important because using the wrong range can lead to inaccurate readings and potentially damage the voltmeter. Take your time to ensure you have selected the correct range before moving on to the next step.
Once your voltmeter is set to the proper voltage range, you’re ready to proceed with testing the continuity and voltage presence in the electrical cord.
Step 4: Test the continuity of the cord
Continuity testing is essential to determine if there are any breaks or interruptions in the electrical cord. This step will help identify any potential faults that may be affecting the cord’s functionality.
To test the continuity of the cord, follow these steps:
- Ensure that the voltmeter is still set to the appropriate continuity setting (often represented by a sound wave symbol).
- Take one probe from the voltmeter and touch it to one end of the cord’s plug.
- Take the other probe and touch it to the other end of the plug.
- If the cord has continuity, the voltmeter should produce a beep or display a reading indicating that the circuit is complete.
- If there is no continuity, it means that there is a break in the cord, and it will need to be repaired or replaced.
Testing the continuity of the cord is critical to ensure its proper functionality. It helps identify any physical damage or cuts in the cord, which can affect the flow of electricity and render it unsafe for use.
If you find that there is no continuity in the cord, please consult a qualified electrician or consider replacing the cord to avoid any potential hazards.
Once you have tested the continuity of the cord, you can proceed to the next step of testing for voltage presence.
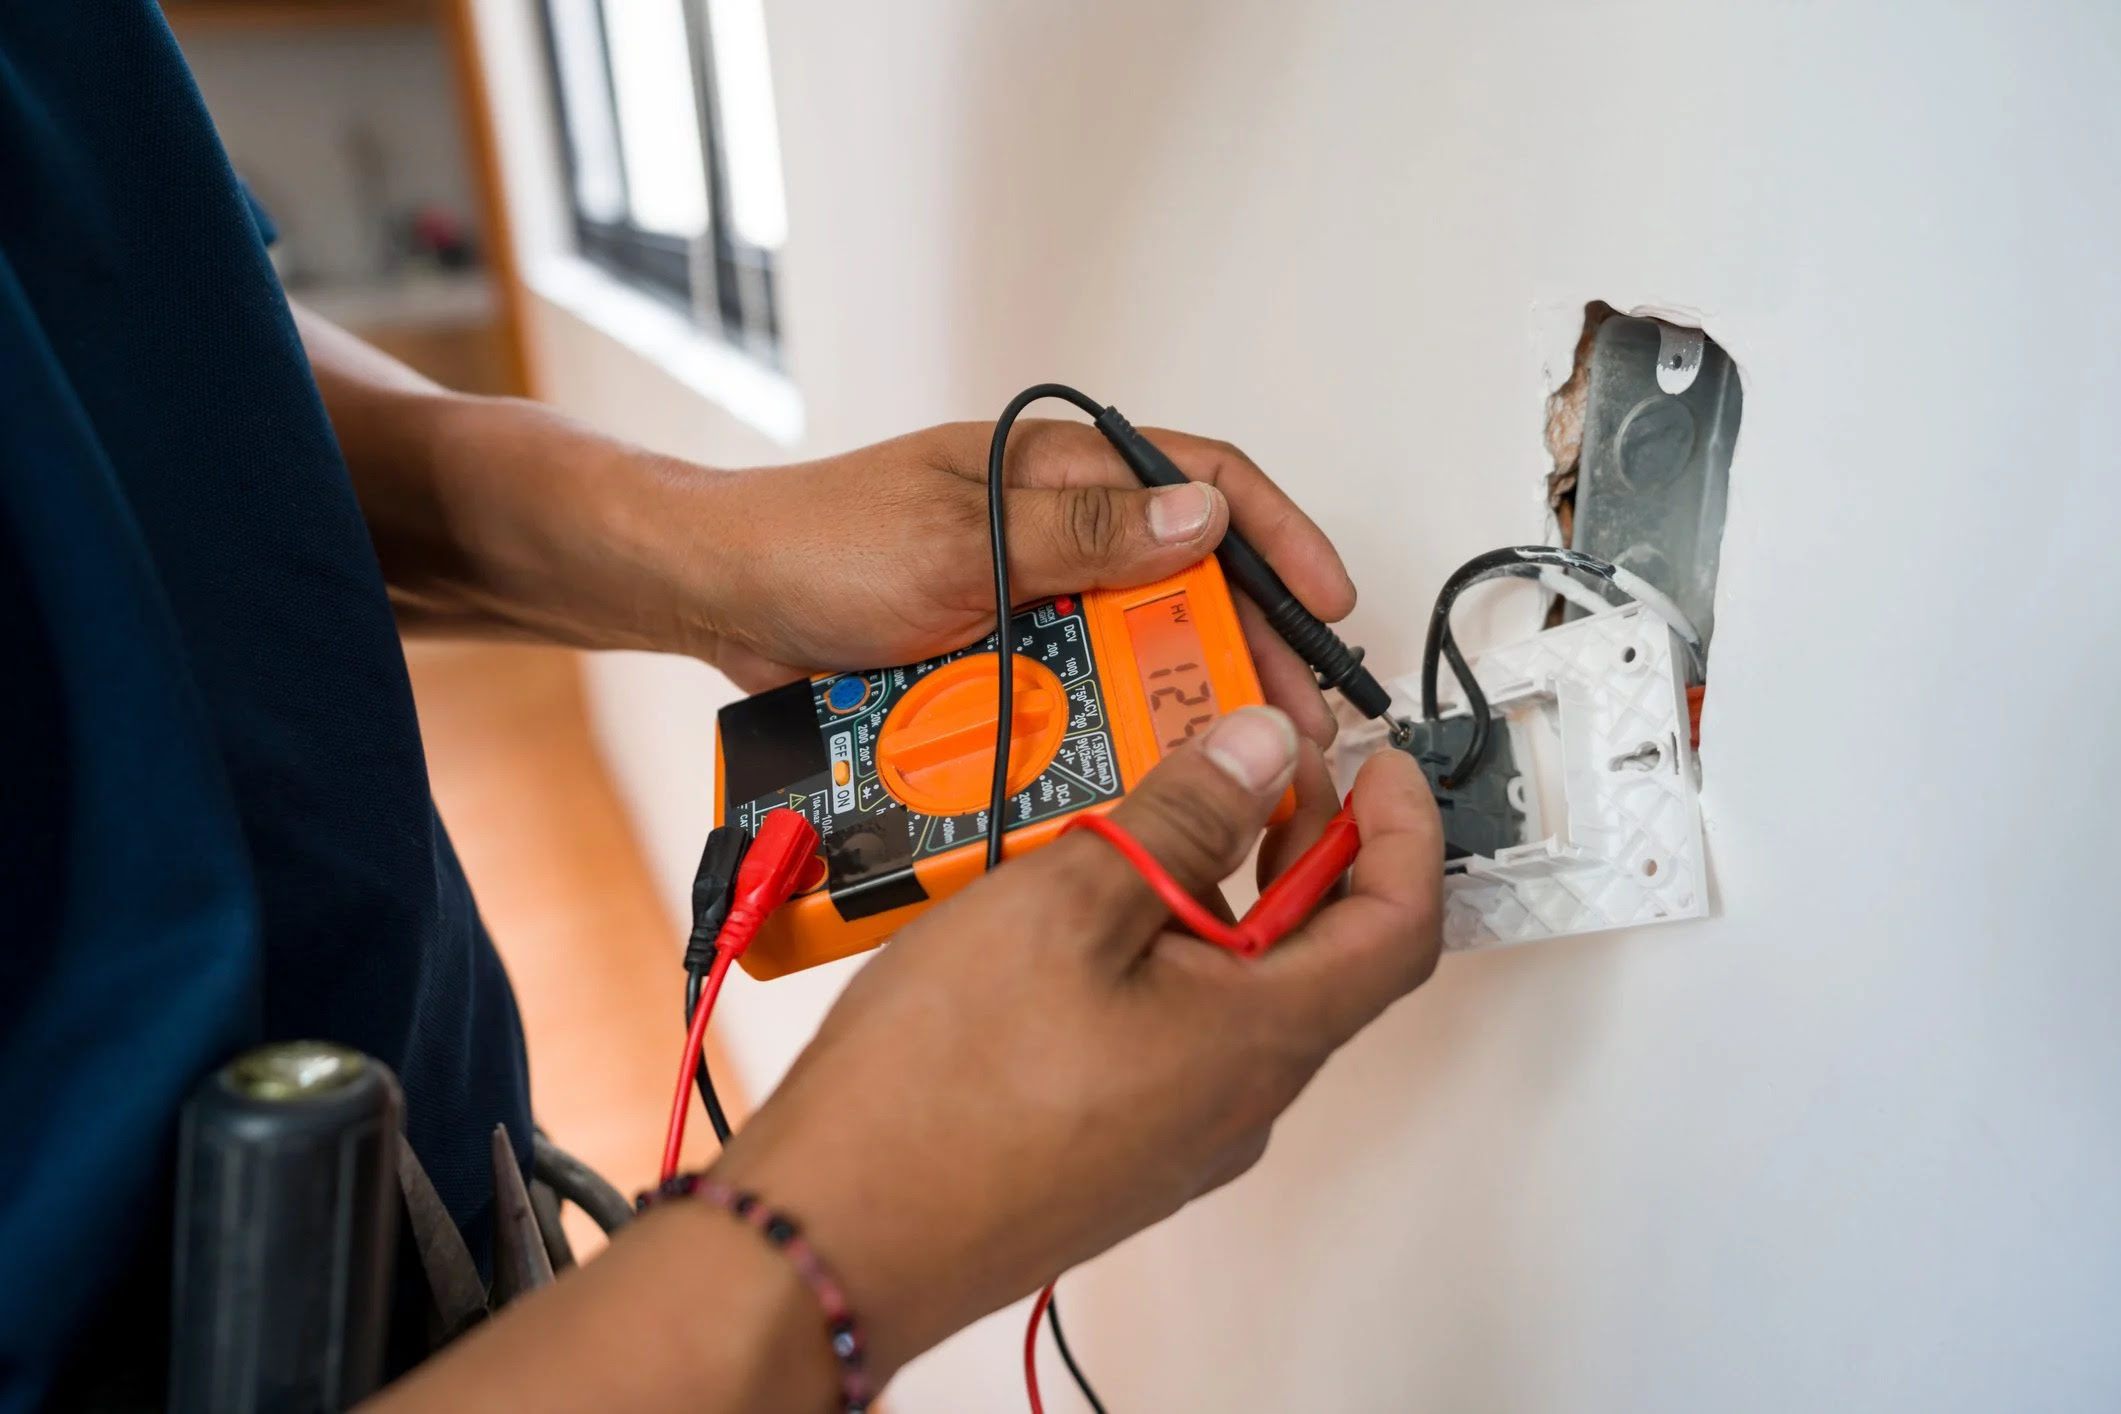
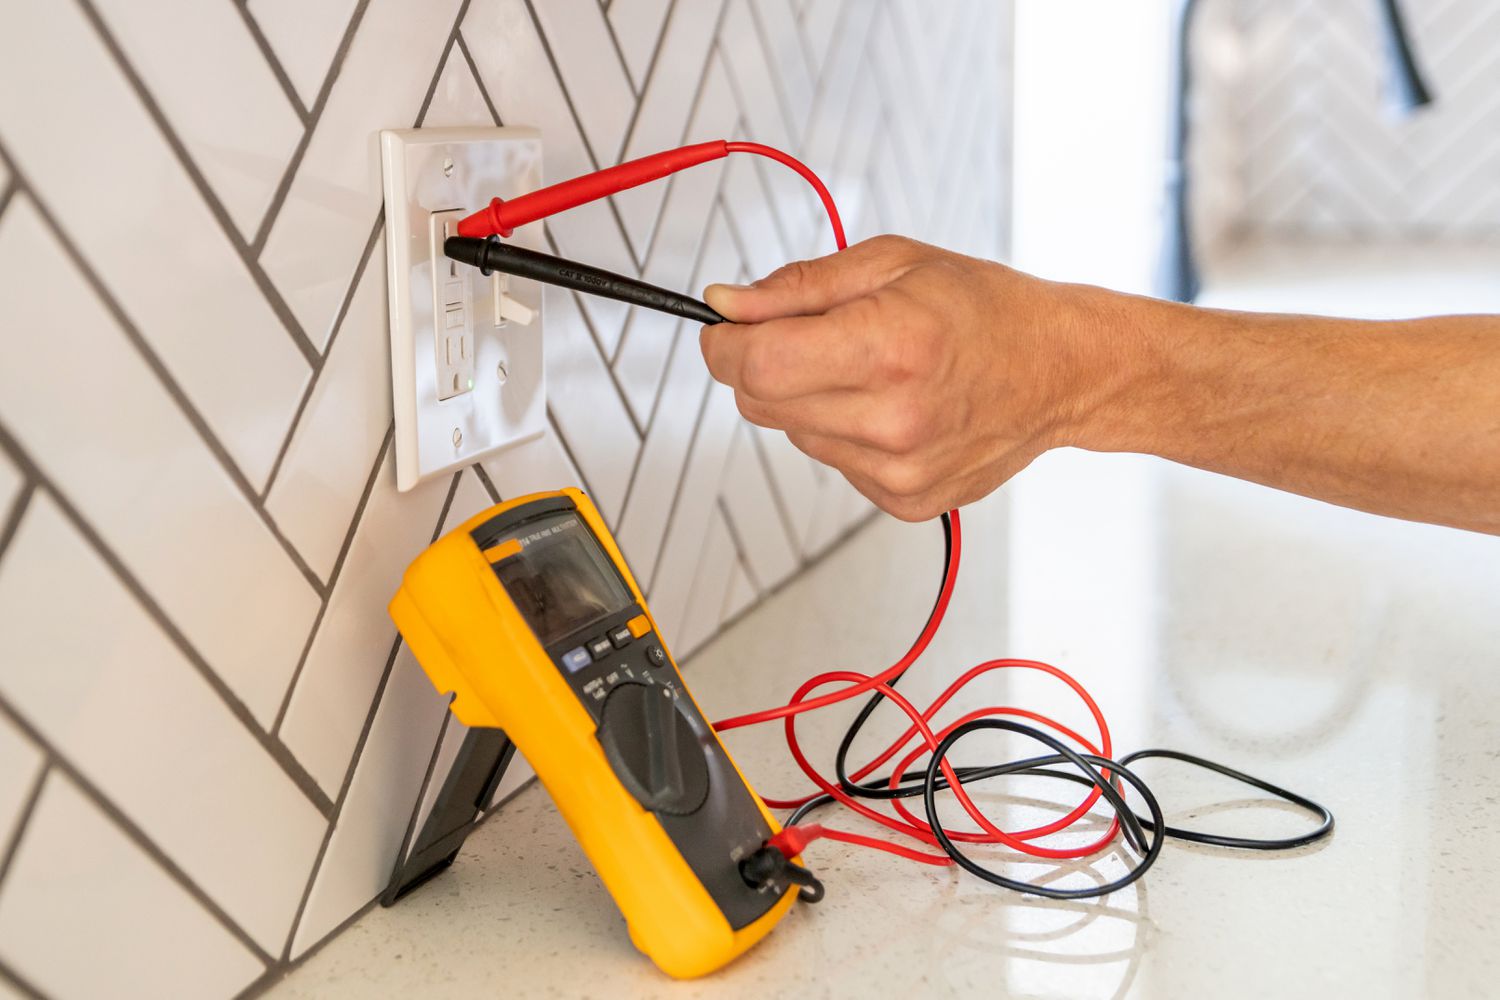
When testing an electrical cord with a voltmeter, make sure to set the voltmeter to the appropriate voltage range before making contact with the cord to ensure an accurate reading.
Step 5: Test for voltage presence in the cord
Testing for voltage presence in the electrical cord is crucial to ensure that it is properly energized and capable of supplying power to your devices. By following this step, you can determine if voltage is flowing through the cord as intended.
To test for voltage presence in the cord, follow these steps:
- Ensure that the voltmeter is still set to the appropriate voltage range.
- Take one probe from the voltmeter and touch it to one of the prongs of the cord’s plug.
- Take the other probe and touch it to the other prong of the plug.
- Check the voltmeter’s reading. If it displays the expected voltage (120V for standard household cords), it indicates that voltage is present in the cord.
- If there is no voltage reading or a significantly lower reading, it suggests that there may be an issue with the cord or the electrical supply.
Testing for voltage presence helps ensure that the cord is functioning correctly and capable of supplying power. If you find that there is no voltage reading or an unexpected reading, it is advisable to consult a qualified electrician to diagnose and address the issue.
Remember, working with electricity can be dangerous, and it is important to prioritize safety at all times. If you are unsure about testing for voltage presence or are uncomfortable doing so, it is best to seek professional assistance.
Once you have completed testing for voltage presence, you can move on to the next step to interpret the voltmeter readings.
Step 6: Interpret the voltmeter readings
Interpreting the voltmeter readings is crucial in understanding the condition of the electrical cord and determining if it is safe to use or in need of repair or replacement.
To interpret the voltmeter readings, follow these guidelines:
- If the continuity test and voltage presence test indicated that the cord is in good working condition, and the voltmeter reading matches the expected voltage (e.g., 120V for household cords), it indicates that the cord is safe to use.
- If the continuity test indicated a break in the cord, and the voltmeter reading shows no voltage or a significantly lower reading, it suggests that there is a fault in the cord. In this case, the cord should be repaired or replaced to ensure safe operation.
- If the voltmeter reading is significantly higher than expected or fluctuates excessively, it may indicate an issue with the electrical supply or a problem with the cord itself. In such cases, it is recommended to consult a professional electrician to diagnose and address the problem.
Interpreting voltmeter readings requires careful analysis and consideration. If you are uncertain about the readings or have any doubts about the safety of the electrical cord, it is always best to consult a qualified electrician for further assistance.
Remember, electrical safety should never be compromised, and it’s important to prioritize the well-being of yourself and others when working with electricity.
Once you have interpreted the voltmeter readings, you can proceed to the final step to determine if the cord is safe or needs repair/replacement.
Step 7: Determine if the cord is safe or needs repair/replacement
After conducting the necessary tests and interpreting the voltmeter readings, it’s time to determine the safety of the electrical cord and decide if it requires repair or replacement.
Consider the following factors when making your assessment:
- If the cord passed the continuity test, showed voltage presence within the expected range, and displayed stable and accurate voltmeter readings, it is likely safe to use. You can proceed with confidence knowing that the cord is in good working condition.
- If the cord failed the continuity test, had no voltage presence, or presented unstable or abnormal voltmeter readings, it is a clear indication that it is unsafe to use. In such cases, the cord should be repaired or replaced to avoid potential hazards.
- Additionally, if you notice any visible signs of damage such as frayed wires, exposed conductors, or cracked insulation, it is recommended to replace the cord. These visible abnormalities can compromise the safety and performance of the cord.
It is important to prioritize safety when making a decision about the use of an electrical cord. If you are uncertain about the condition of the cord or have any reservations, it is always advisable to err on the side of caution and seek professional help from a qualified electrician.
By assessing the results of the tests and considering the condition of the cord, you can make an informed decision regarding its safety and take the necessary steps to repair or replace it if needed.
Remember, electrical safety is paramount, and regular inspections and maintenance of cords and other electrical devices can help prevent accidents and ensure a secure and efficient electrical system.
With the completion of Step 7, you have now successfully tested the electrical cord and determined its safety status. Congratulations on acquiring this valuable knowledge!
Remember to always exercise caution and follow safety guidelines when working with electricity to protect yourself and others.
Conclusion
Testing an electrical cord with a voltmeter is an essential skill for anyone involved in electrical repairs or maintenance. By following the step-by-step process outlined in this article, you can accurately assess the safety and functionality of an electrical cord.
Throughout the testing process, remember to prioritize safety. Always turn off and unplug the electrical device before conducting any tests, wear appropriate protective gear, and exercise caution when working with electricity.
Gathering the necessary tools, setting the voltmeter to the appropriate voltage range, and conducting continuity and voltage presence tests are essential steps in assessing the condition of the cord. Pay close attention to the voltmeter readings and interpret them carefully to determine if the cord is safe to use or requires repair/replacement.
If the cord passes all the tests and exhibits expected voltmeter readings, you can rest assured that it is in good working condition. However, if any abnormalities, such as breaks in continuity or unstable voltage readings, are detected, it is important to address the issues promptly and either repair or replace the cord.
Remember, when in doubt, always consult a qualified electrician. They have the expertise to properly diagnose and address electrical issues to ensure a safe working environment.
By mastering the art of testing electrical cords with a voltmeter, you can enhance your safety, prevent potential hazards, and confidently utilize your electrical devices without any concerns.
Thank you for joining us on this journey of learning. Stay safe, and may your electrical repairs always be successful!
Frequently Asked Questions about How To Test An Electrical Cord With A Voltmeter
Was this page helpful?
At Storables.com, we guarantee accurate and reliable information. Our content, validated by Expert Board Contributors, is crafted following stringent Editorial Policies. We're committed to providing you with well-researched, expert-backed insights for all your informational needs.


0 thoughts on “How To Test An Electrical Cord With A Voltmeter”