Articles
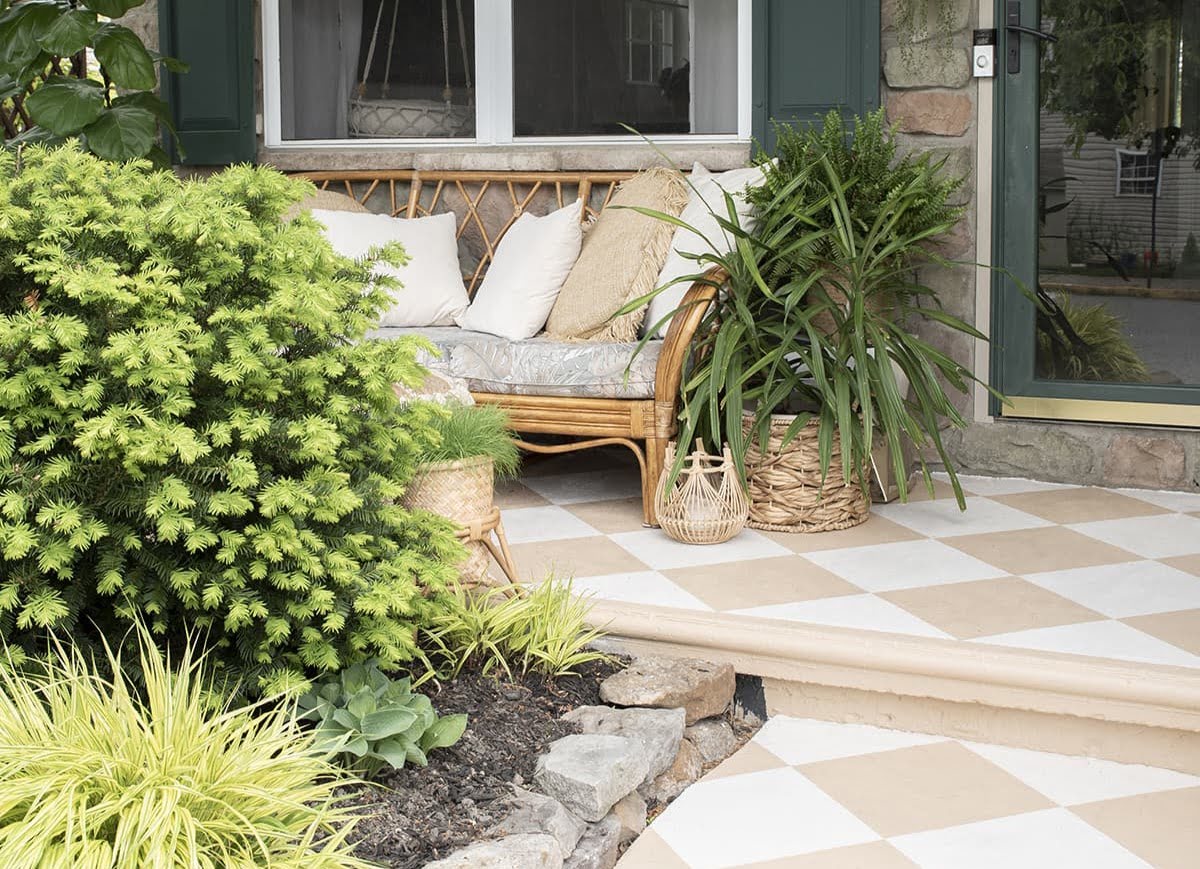
How To Repaint The Porch
Modified: January 26, 2024
Learn how to repaint your porch with our informative articles. Get expert tips and tricks to achieve a flawless finish. Enhance your curb appeal today!
(Many of the links in this article redirect to a specific reviewed product. Your purchase of these products through affiliate links helps to generate commission for Storables.com, at no extra cost. Learn more)
Introduction
Welcome to our comprehensive guide on how to repaint your porch! Repainting your porch is a great way to breathe new life into your home’s exterior and enhance its curb appeal. Whether your porch is made of wood, concrete, or another material, giving it a fresh coat of paint can transform its appearance and protect it from the elements.
In this article, we will provide you with step-by-step instructions on how to repaint your porch, from preparing the surface to applying the final touches. We’ll also discuss the materials you’ll need to complete the project successfully.
Repainting your porch can be a rewarding DIY project, but it does require some time and effort. However, with the right tools and techniques, you’ll be able to achieve professional-looking results. So, roll up your sleeves and let’s get started on revitalizing your porch!
Key Takeaways:
- Proper preparation is essential for repainting your porch. From cleaning and priming to repairing damaged areas, taking the time to prepare the surface will ensure a flawless and long-lasting finish.
- Attention to detail during the painting process, including choosing the right paint, applying multiple coats, and inspecting for touch-ups, is crucial for achieving a professional-looking result. Enjoy the transformation and maintain your freshly painted porch for years to come!
Read more: How To Repaint A Bathtub
Materials Needed
Before you begin repainting your porch, gather the following materials:
- Paint of your choice – Make sure to choose a high-quality exterior paint designed for the specific material of your porch.
- Primer – If your porch has never been painted before or if the existing paint is in poor condition, you’ll need a primer to ensure proper adhesion and durability of the new paint.
- Paintbrushes – Invest in a variety of brushes, including a wide brush for larger areas and a smaller brush for detailed work.
- Roller and tray – A roller will help you cover larger sections of the porch more quickly and evenly. Be sure to choose a roller cover suitable for the surface you’re painting.
- Painter’s tape – Use painter’s tape to protect areas you don’t want to paint, such as trim, railings, or windows.
- Sandpaper – Opt for coarse sandpaper to remove old paint and smooth out any rough areas on the porch.
- Putty knife – You’ll need a putty knife to scrape away loose or peeling paint and to apply wood filler or spackle for repairing damaged areas.
- Cleaner – Use a mild detergent or a specialized porch cleaner to thoroughly clean the surface before painting.
- Drop cloths – Protect the surrounding areas from drips and spills by using drop cloths or plastic sheets.
- Safety goggles and gloves – It’s always important to prioritize safety when working with paint and chemicals. Wear goggles to protect your eyes and gloves to keep your hands safe.
- Sanding block or electric sander – If you have a large porch or a lot of rough areas to smooth out, using an electric sander or a sanding block can save you time and effort.
Make sure to check the specific product instructions and recommendations for your porch’s material before purchasing the materials. By having all the necessary supplies on hand, you’ll be prepared to tackle the project without any unnecessary interruptions.
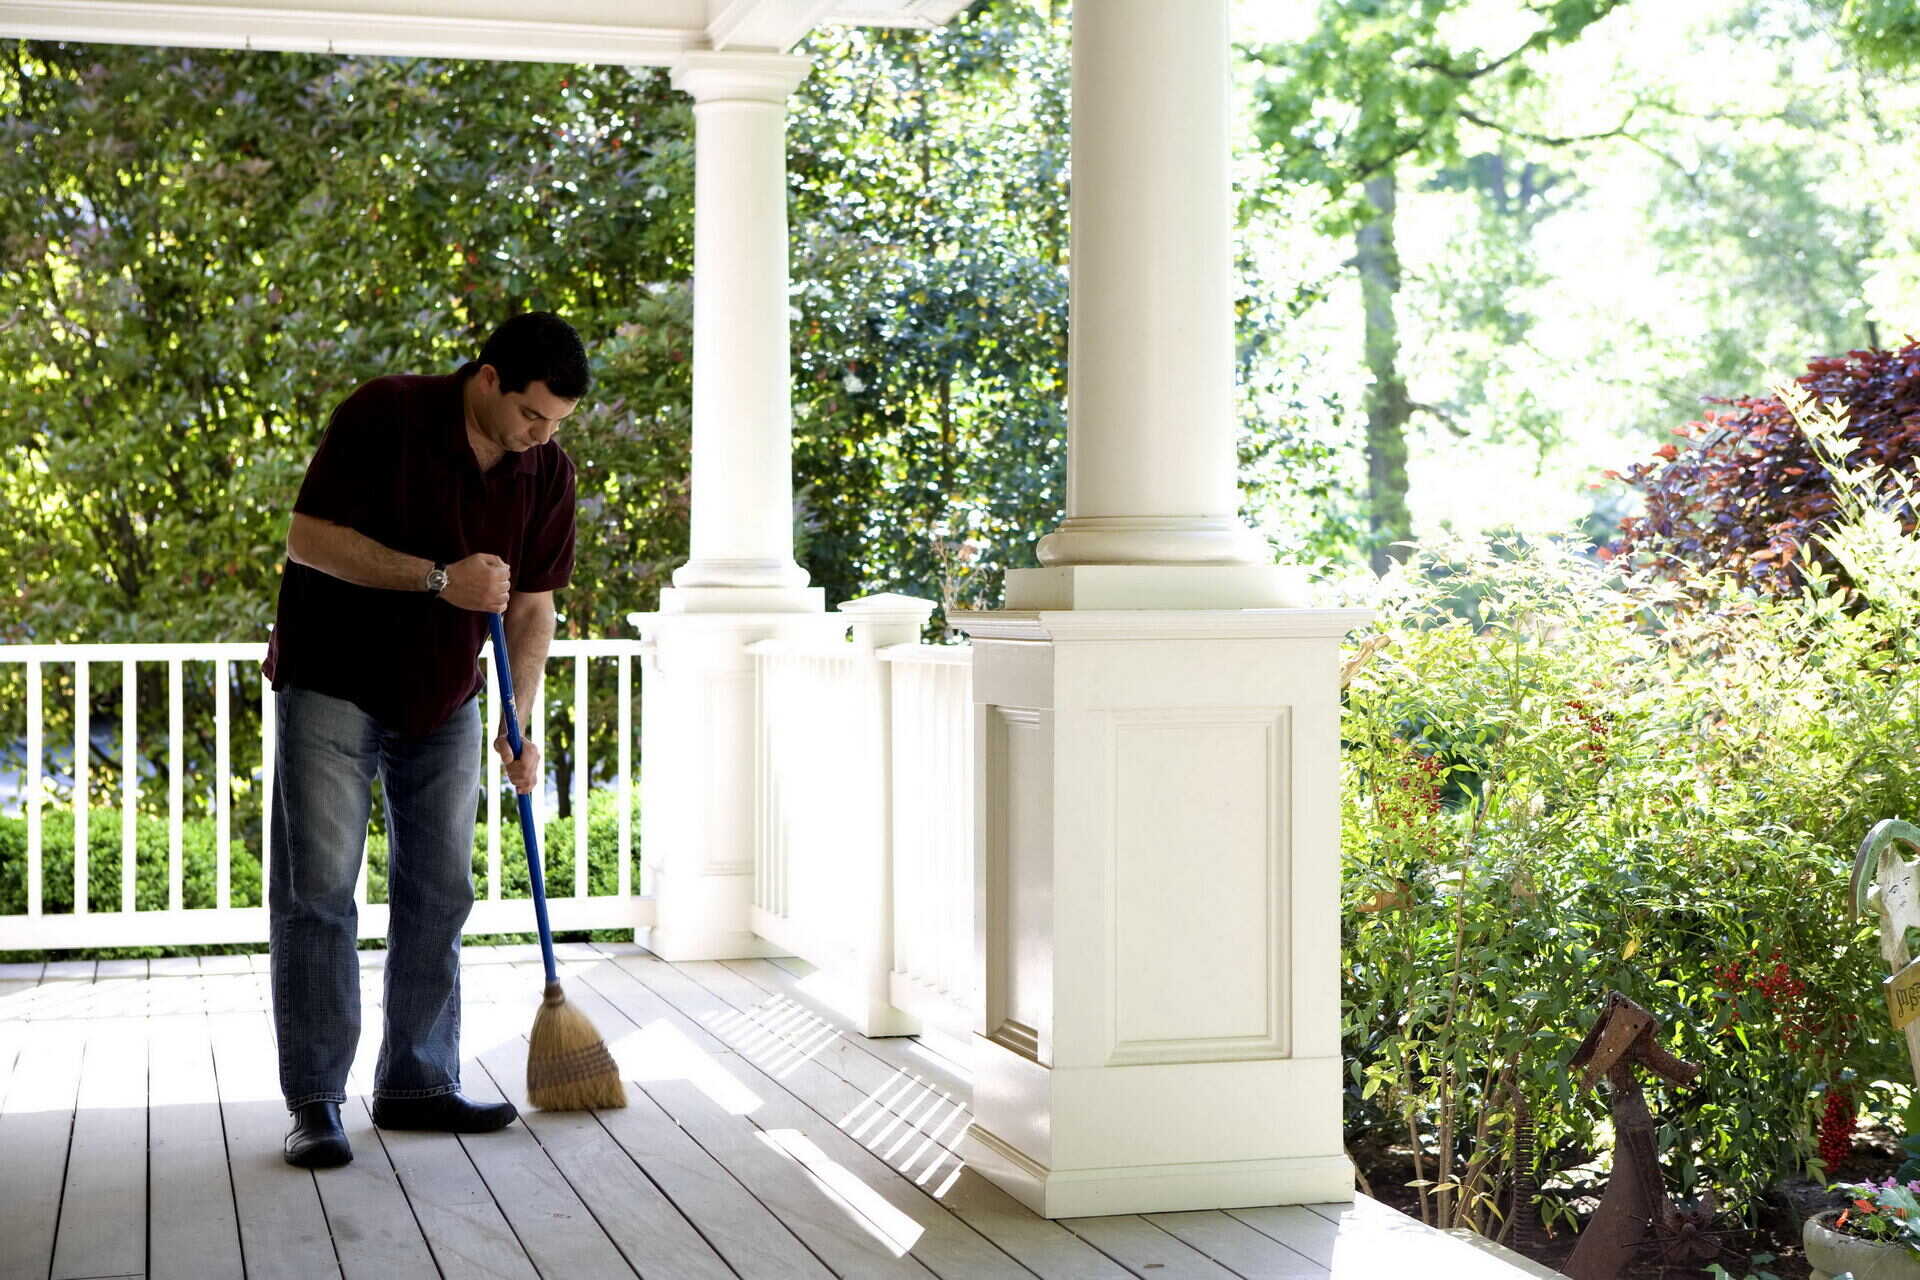
Step 1: Preparing the Porch
Before you start repainting your porch, you’ll need to properly prepare the surface to ensure the best results. Follow these steps:
- Clean the porch: Remove any dirt, dust, or debris from the porch surface. Sweep or use a leaf blower to get rid of loose particles. Then, use a mild detergent or a specialized porch cleaner to thoroughly clean the surface. Rinse off the cleaner with water and allow the porch to dry completely.
- Trim and protect: Use painter’s tape to protect any trim, railings, or other areas that you don’t want to paint. Take your time to ensure that the tape is applied evenly and securely. This step will help you achieve clean and sharp paint lines.
- Mend and repair: Inspect the porch for any cracks, holes, or damaged areas. Use a putty knife to scrape away any loose or peeling paint. Fill in the cracks and holes with wood filler or spackle, and smooth it out with the putty knife. Allow the filler to dry completely before proceeding.
- Sand the surface: If there are any rough areas or remaining bits of old paint, use sandpaper or an electric sander to smooth them out. Sand in the direction of the wood grain or the surface material to avoid leaving visible marks. Be sure to wear a mask to protect yourself from dust.
- Clean again: After sanding, clean the porch surface once more to remove any dust or debris. Use a damp cloth or sponge to wipe down the surface.
By properly preparing your porch, you’ll create a clean and smooth surface for the new paint to adhere to. This will ensure a beautiful and long-lasting finish for your repainted porch.
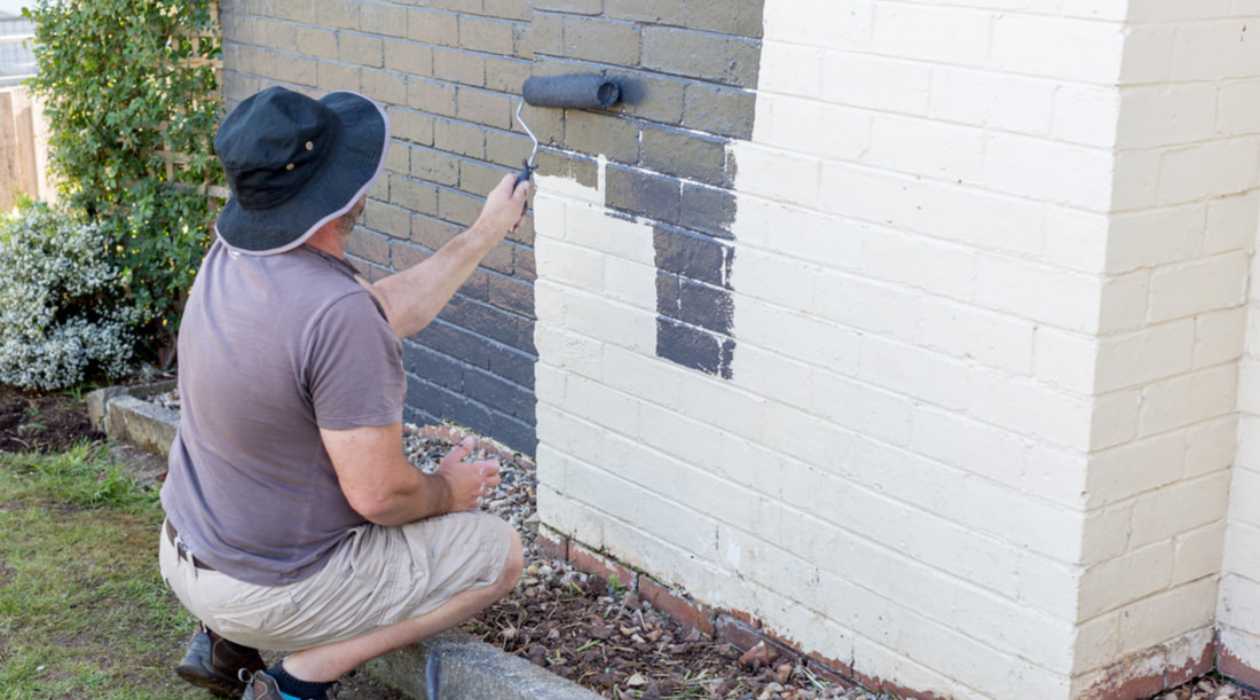
Step 2: Removing Old Paint
If your porch has old paint that is peeling, chipping, or in poor condition, it’s important to remove it before applying a new coat of paint. Follow these steps to remove the old paint:
- Protect yourself: Start by wearing safety goggles, gloves, and a dust mask to protect yourself from paint chips and dust.
- Scrape the paint: Use a putty knife or a paint scraper to gently scrape away the old paint. Work in small sections, applying steady pressure to remove the peeling or loose paint. Be careful not to gouge or damage the porch surface.
- Heat gun or paint stripper: If there are stubborn layers of paint that are difficult to remove with scraping alone, you can use a heat gun or paint stripper. Follow the instructions on the paint stripper product carefully, and use caution when using a heat gun to avoid scorching the wood.
- Sand the surface: After removing the majority of the old paint, use sandpaper or an electric sander to smooth out any remaining paint residue. Sand in the direction of the wood grain or the surface material to achieve a smooth and even surface.
- Clean the porch: Once you have successfully removed the old paint, thoroughly clean the porch surface to remove any dust or debris. Use a damp cloth or sponge to wipe down the surface, and allow it to dry completely before moving on to the next step.
Removing old paint can be a labor-intensive process, but it is essential for achieving a flawless and long-lasting finish. Taking the time to properly remove the old paint will ensure that the new paint adheres well to the porch surface and provides a beautiful and durable result.
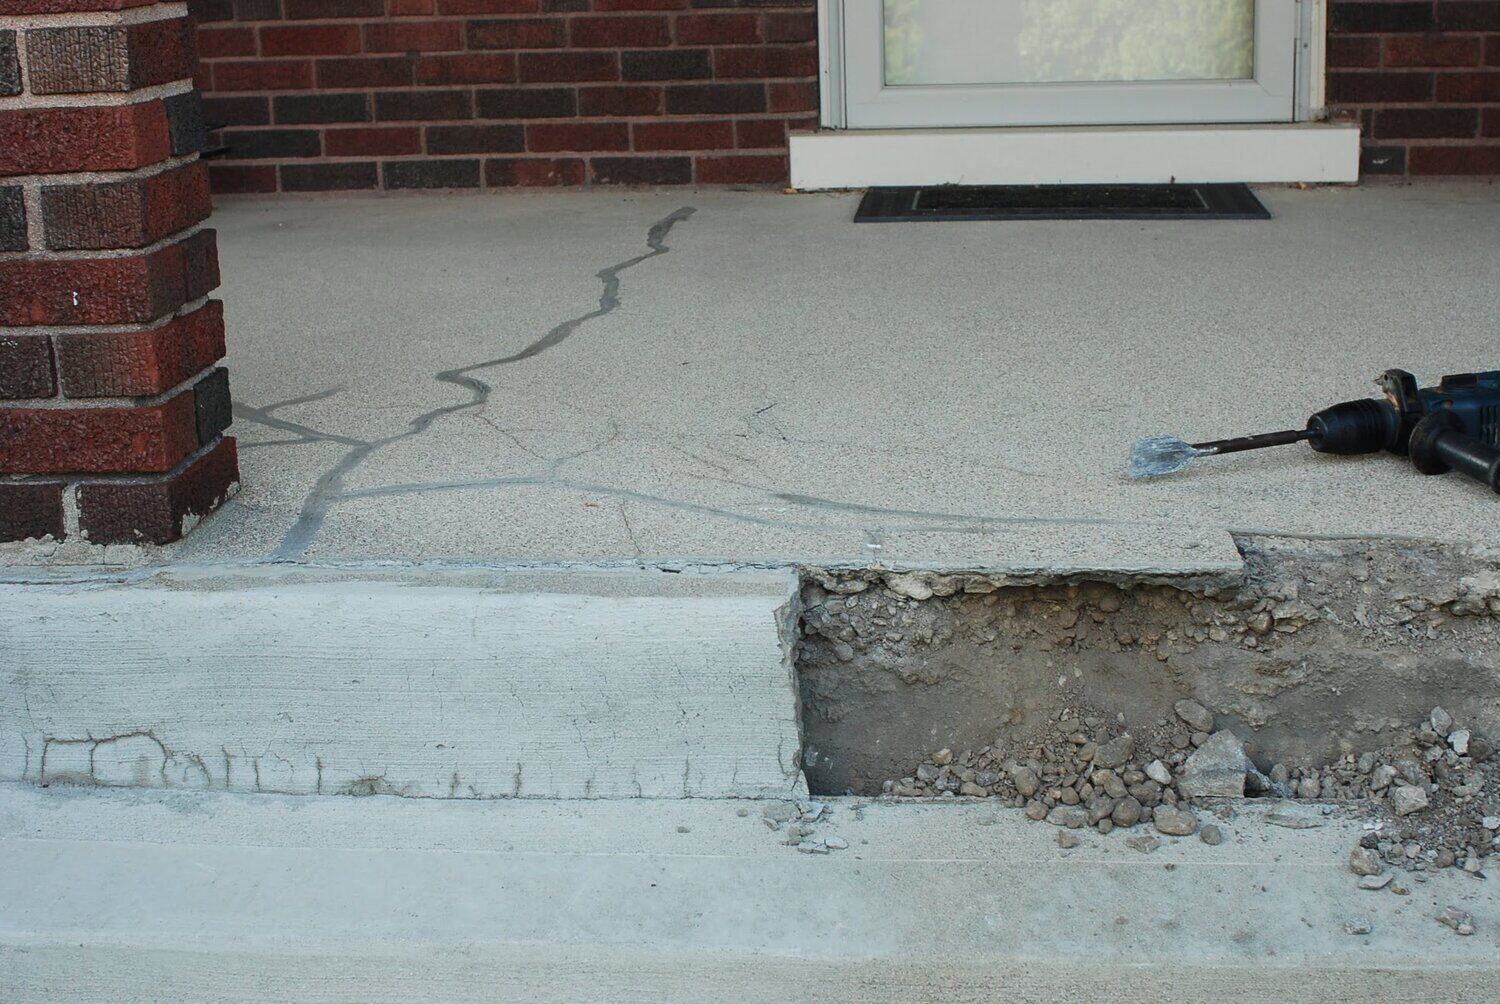
Step 3: Repairing Damaged Areas
Before you proceed with painting your porch, it’s important to address any damaged areas and make necessary repairs. Follow these steps to repair damaged areas:
- Inspect the porch: Carefully examine the porch for any cracks, holes, or other damage. Pay attention to areas that may have been affected by water or are showing signs of wear and tear.
- Scrape away loose material: Use a putty knife or scraper to remove any loose or peeling paint or other materials from the damaged area. This will ensure a clean surface for repairs.
- Fill the cracks and holes: Depending on the extent of the damage, you may need to use wood filler, spackle, or an appropriate patching compound to fill in cracks and holes. Apply the filler with a putty knife, smoothing it out to create an even surface. Allow the filler to fully dry according to the manufacturer’s instructions.
- Sand the repaired areas: Once the filler is dry, use sandpaper or an electric sander to smooth out the repaired areas. Sand gently until the surface is flush with the rest of the porch. Wipe away any dust or debris.
- Inspect and touch up: After the repairs are complete, take a close look at the repaired areas. If there are any imperfections or unevenness, apply another layer of filler and repeat the sanding process until you are satisfied with the results.
Repairing any damaged areas ensures that the porch surface is in good condition and ready for painting. By taking the time to address these issues, you’ll be able to create a smooth and seamless finish that not only looks aesthetically pleasing but also extends the longevity of your porch.
Before repainting your porch, make sure to thoroughly clean the surface to remove any dirt, debris, and old paint. This will help the new paint adhere better and last longer.
Read more: How To Repaint Interior Walls
Step 4: Cleaning the Surface
Before you can start painting your porch, it’s crucial to thoroughly clean the surface to remove any dirt, grime, or residue. Follow these steps to ensure a clean and ready-to-paint surface:
- Sweep or brush: Begin by sweeping or brushing the porch surface to remove any loose debris or dirt. This will help prevent these particles from getting trapped in the new paint.
- Prepare a cleaning solution: Depending on the material of your porch, prepare a cleaning solution that is appropriate for the surface. For most porches, a mixture of mild detergent and water will suffice. Follow the instructions on the detergent package for the recommended dilution.
- Scrub the surface: Use a scrub brush or sponge to apply the cleaning solution to the porch surface. Scrub thoroughly, focusing on areas that may have heavier dirt or stains. Pay attention to corners, edges, and any hard-to-reach areas.
- Rinse with water: Once you have scrubbed the entire porch surface, rinse it thoroughly with clean water. A garden hose or a bucket of water can be used for rinsing. Make sure to remove all traces of the cleaning solution and residue.
- Allow to dry: After rinsing, allow the porch surface to dry completely before proceeding with the next steps. This may take a few hours, depending on the weather conditions. Ensure that there is no moisture remaining on the surface.
A clean surface is essential for the paint to adhere properly and provide a smooth and even finish. By taking the time to clean your porch thoroughly, you’ll eliminate any dirt or contaminants that could impact the quality and longevity of your paint job.
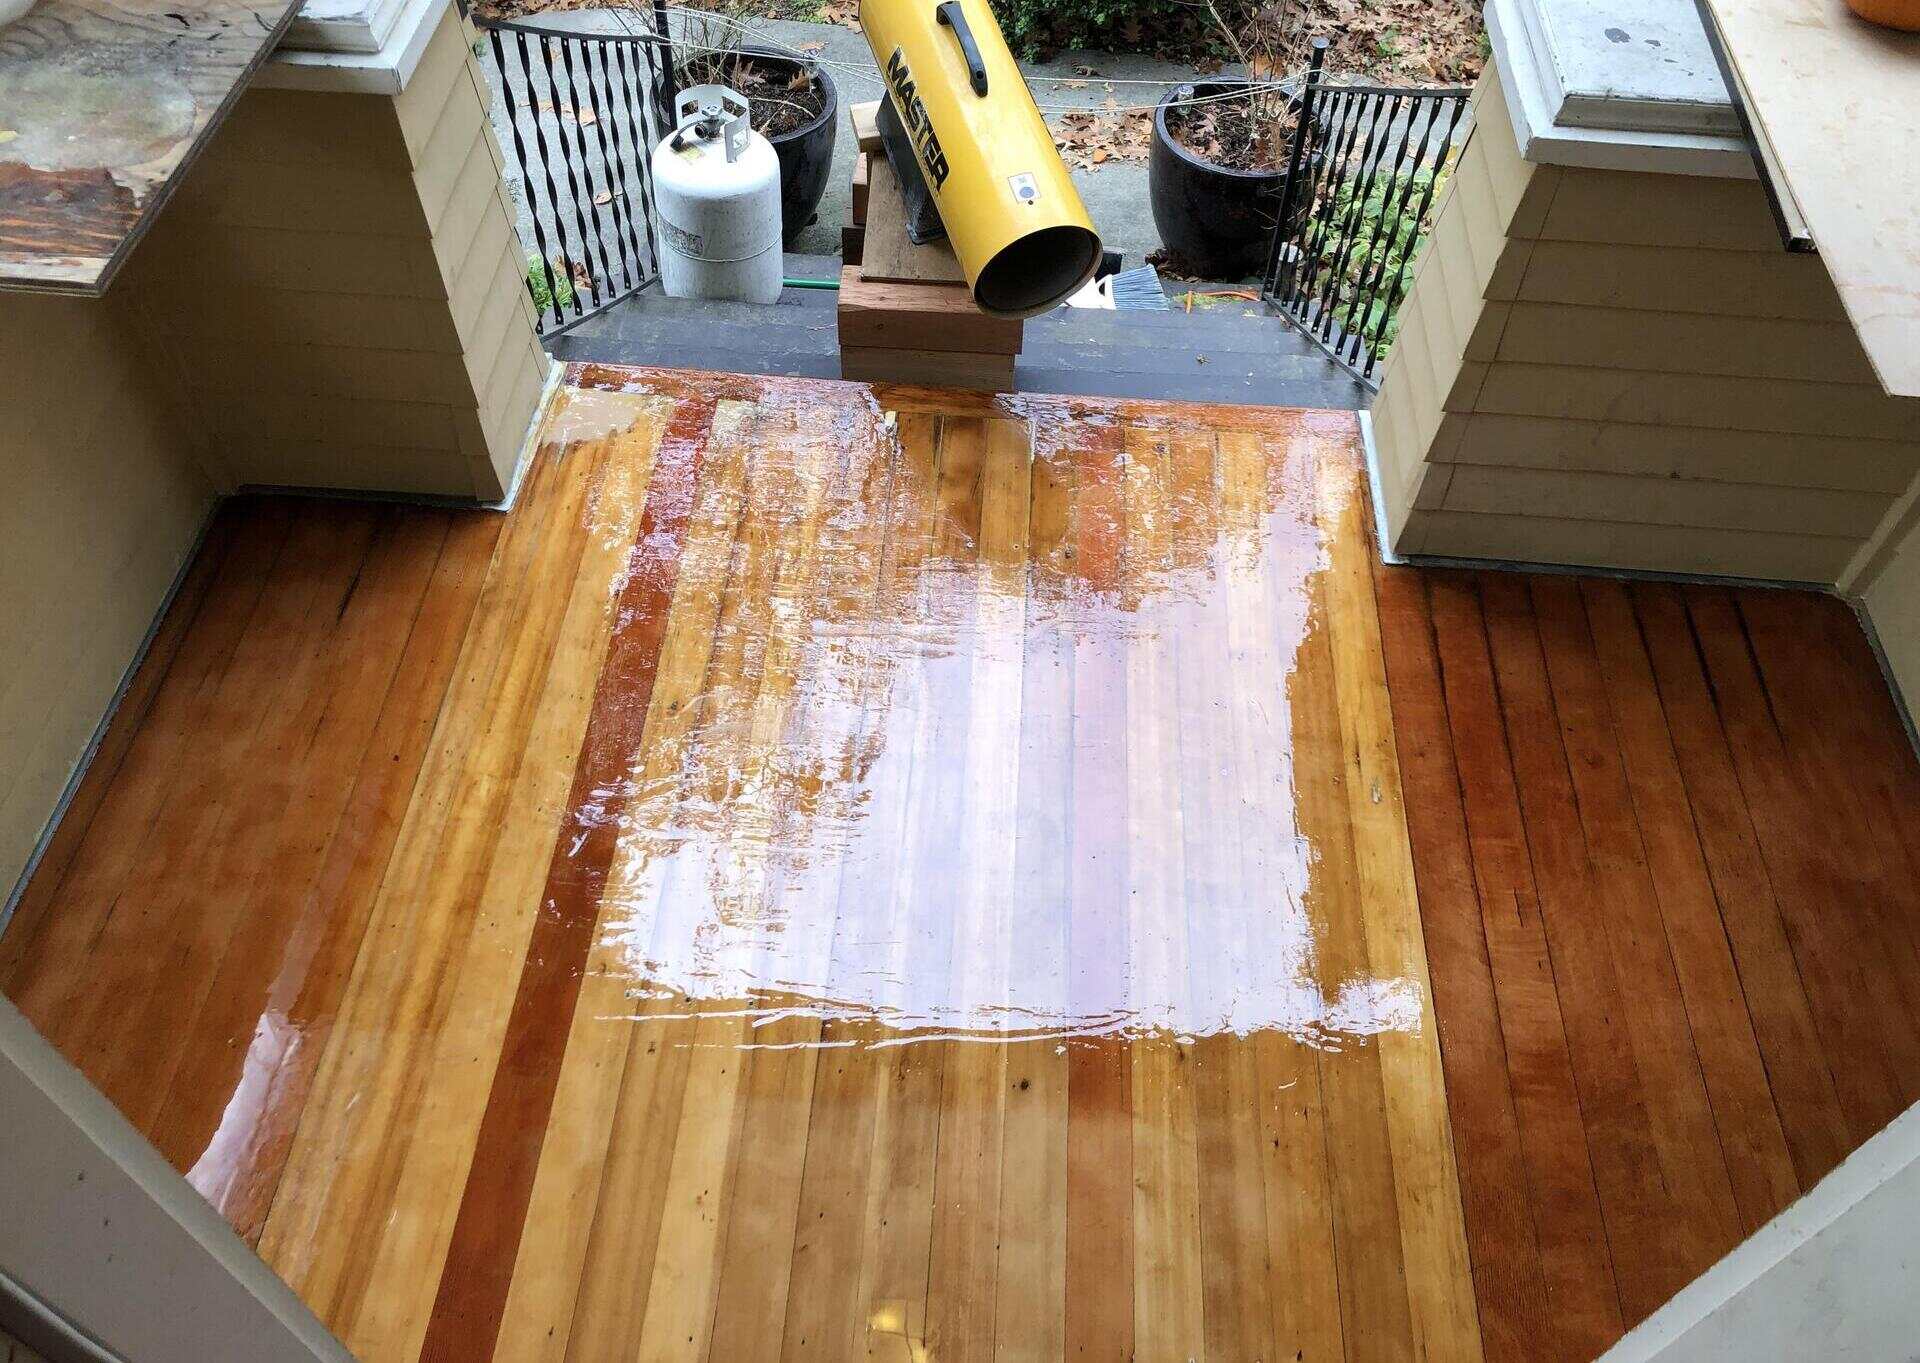
Step 5: Priming the Porch
Priming your porch is an important step in the repainting process, especially if you’re painting over bare wood or if the existing paint is in poor condition. Priming helps improve paint adhesion, seals the surface, and promotes better paint coverage. Follow these steps to prime your porch:
- Select the right primer: Choose a primer that is suitable for the material of your porch and compatible with the paint you’ll be using. For bare wood, opt for a high-quality exterior wood primer. If you’re painting over existing paint, select a primer that is designed to adhere to the existing surface.
- Prepare the primer: Follow the manufacturer’s instructions to properly mix and prepare the primer. Use a paint stirrer to ensure that the primer is well-blended and ready for application.
- Apply the primer: Use a paintbrush or a roller to apply a thin and even coat of primer to the porch surface. Work in small sections, starting from one corner and moving across the porch. Be sure to follow the grain of the wood or the surface material for a smooth finish.
- Allow to dry: Check the drying time specified on the primer’s label and allow it to dry completely. This usually takes a few hours, but it may vary depending on the product and environmental conditions. Avoid touching or disturbing the primed surface during this time.
- Sand, if necessary: Once the primer is dry, inspect the porch surface for any imperfections or rough spots. If needed, lightly sand the primed surface with fine-grit sandpaper to create a smooth and even surface for the final coat of paint.
- Clean the brushes or rollers: After priming, clean your brushes or rollers according to the manufacturer’s instructions. Proper cleaning will ensure that your tools are ready for the next steps of the painting process.
Priming your porch helps create a solid foundation for the paint and improves its durability and longevity. It’s a crucial step that shouldn’t be skipped, especially for unpainted surfaces or surfaces with existing paint issues.
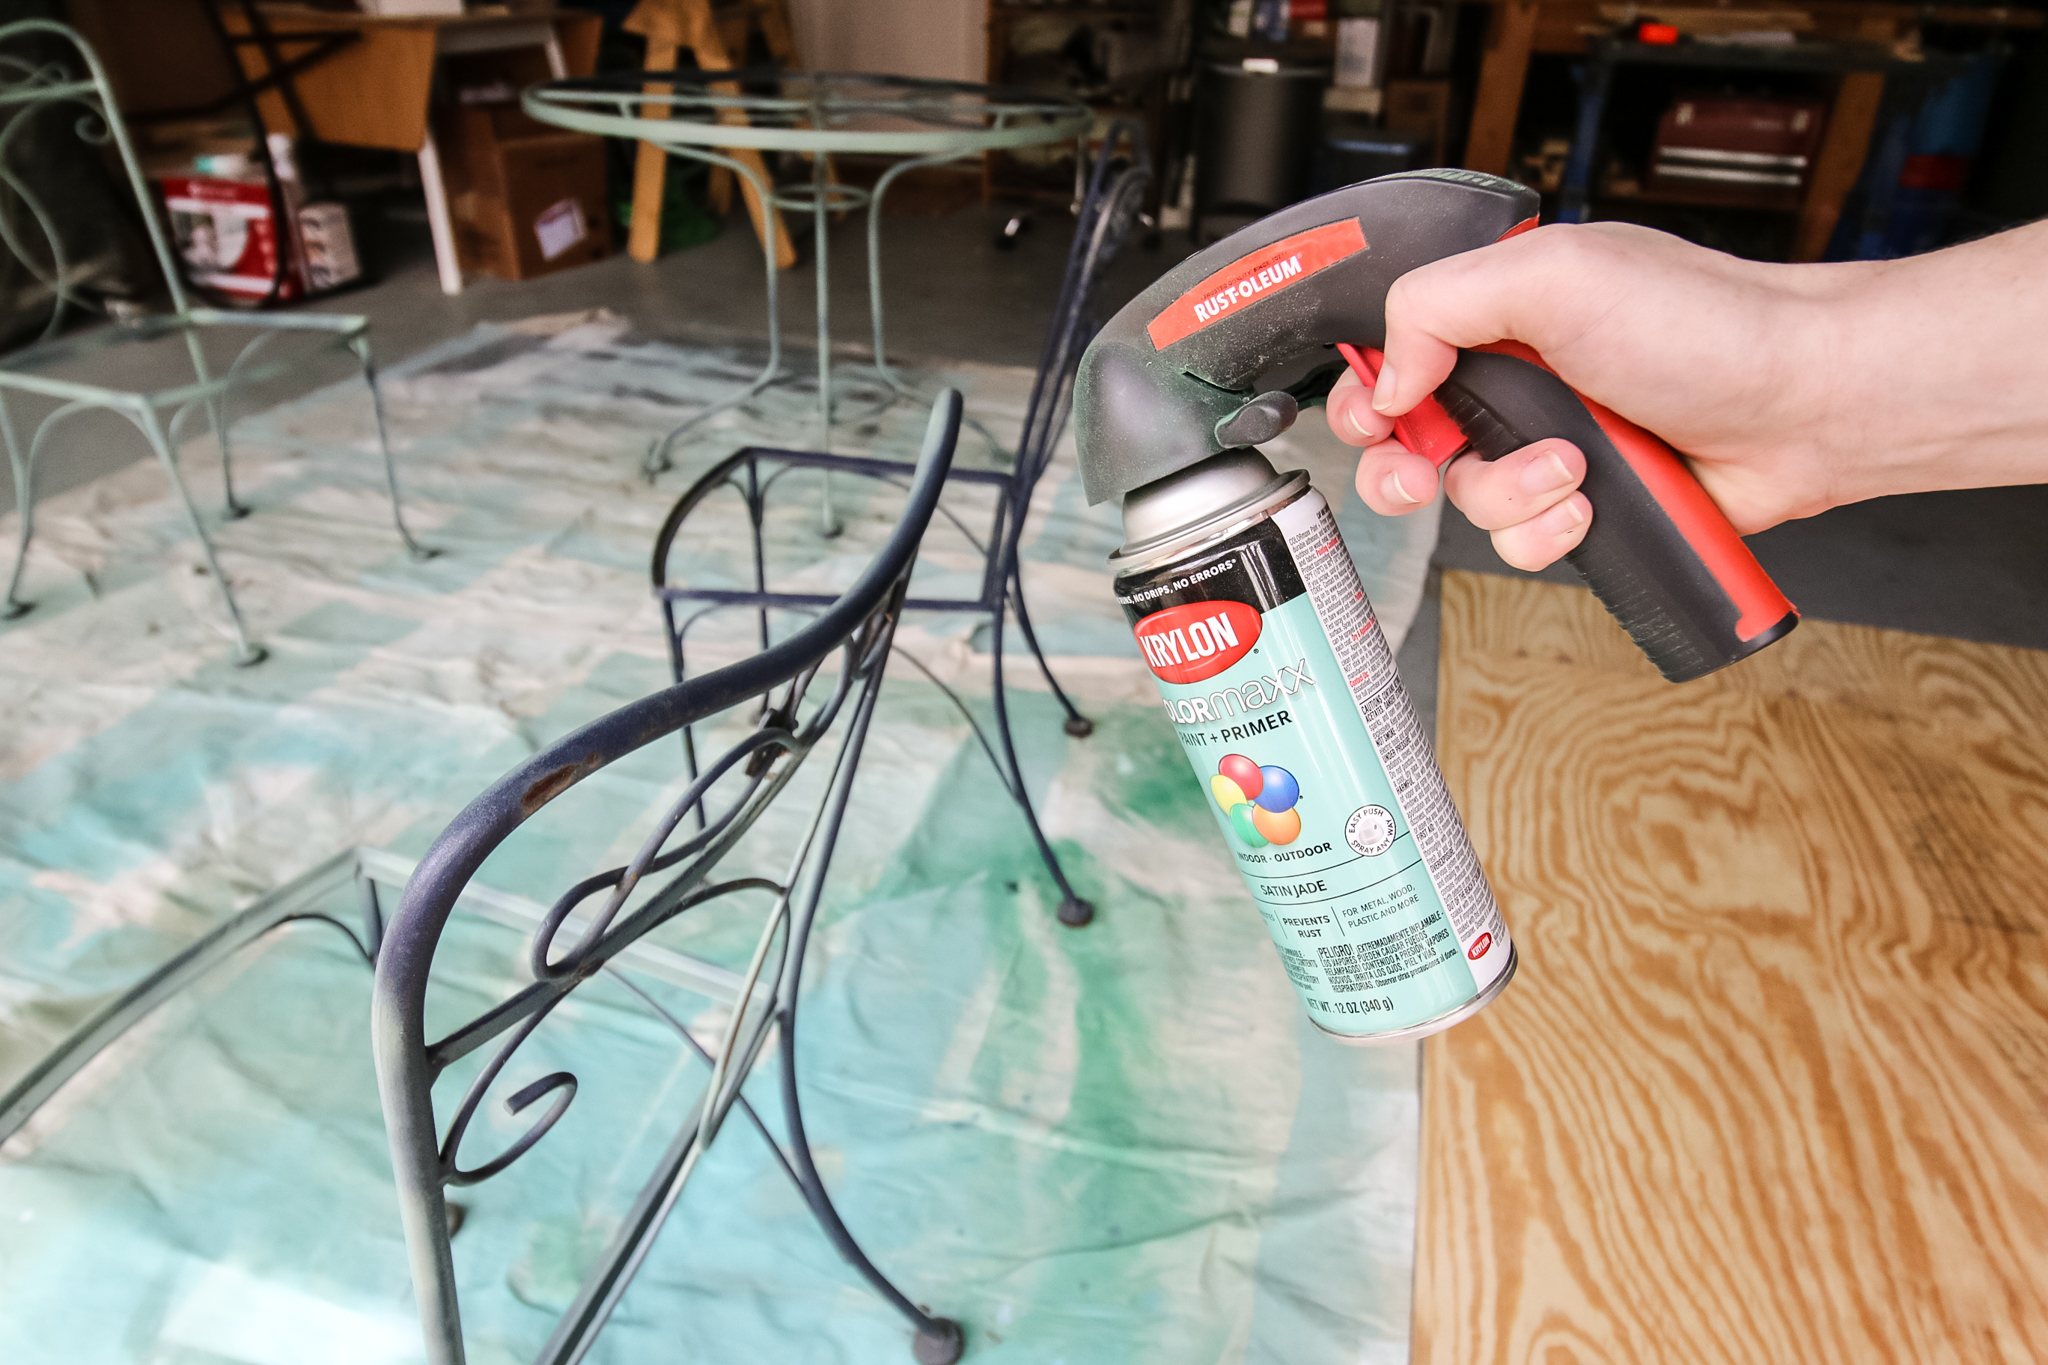
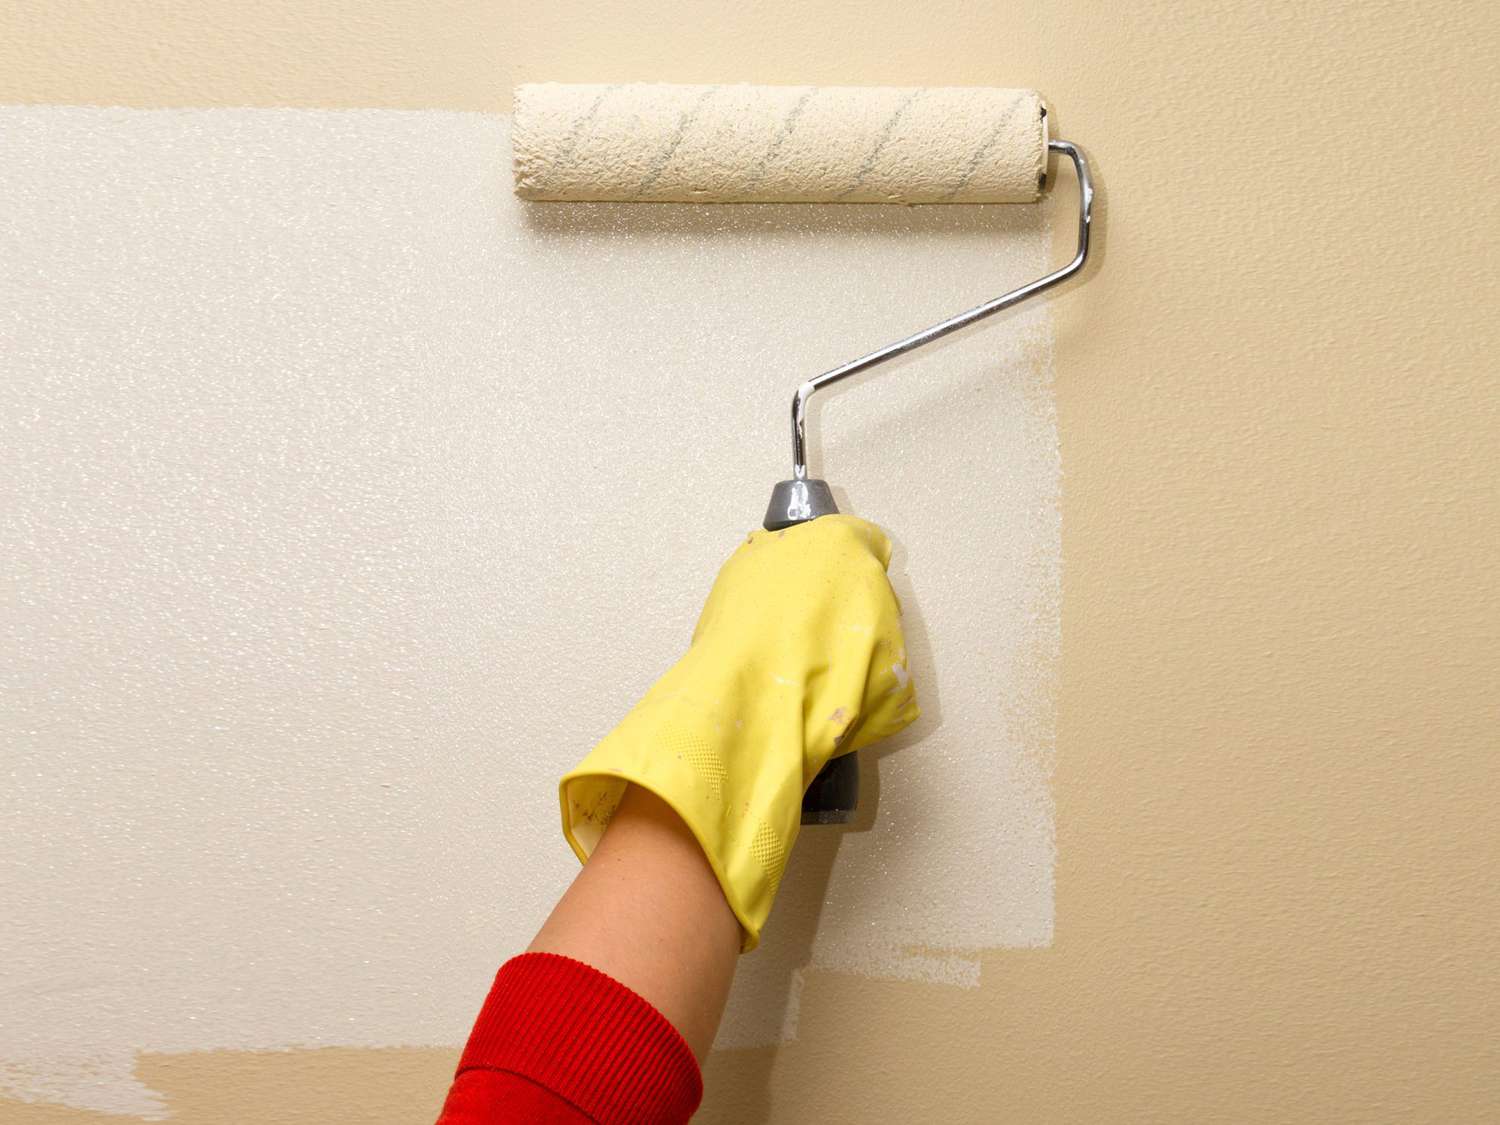
Step 6: Applying the Paint
Now comes the exciting part – applying the paint to your porch! Follow these steps to ensure a smooth and professional-looking paint job:
- Choose the right paint: Select a high-quality exterior paint that is suitable for the material of your porch. Consider factors such as durability, weather resistance, and color options.
- Mix the paint: If your paint requires mixing, follow the manufacturer’s instructions to ensure proper blending. Use a paint stirrer or a mixing tool to achieve a consistent color and texture.
- Protect the surrounding areas: Use painter’s tape and drop cloths to protect any areas you don’t want to paint, such as trim, railings, or windows. Make sure the tape is applied securely and evenly.
- Start with the edges: Use a paintbrush to cut in and paint around the edges of the porch, such as the corners and the trim. This will allow for more precise and detailed painting.
- Use a roller: For larger areas, use a roller to apply the paint. Start from one corner and work your way across the porch in smooth, overlapping strokes. Use an extension pole for hard-to-reach areas, such as ceilings or higher sections of the porch.
- Apply multiple coats: Depending on the color and the desired finish, you may need to apply multiple coats of paint. Follow the recommended drying time specified on the paint can between each coat. Make sure to allow proper ventilation during drying.
- Paint in favorable conditions: Choose a day with mild weather conditions for painting. Avoid painting during extremely hot or humid weather, as it can affect the paint’s drying time and finish.
- Inspect and touch up: After applying the initial coats of paint, carefully inspect the porch surface for any missed spots or unevenness. Touch up any areas that need additional coverage or smoothing.
Applying the paint requires some patience and attention to detail, but the end result will be a beautifully painted porch that enhances the overall exterior of your home. Take your time and enjoy the process as you see your porch transform with each brushstroke.
Step 7: Finishing Touches
As you near the completion of your porch repainting project, it’s time to add the finishing touches to ensure a polished and professional look. Here are some steps to consider for those final details:
- Remove painter’s tape: Carefully remove the painter’s tape from the areas you protected, such as trim, railings, and windows. Take your time to ensure a clean removal without causing any damage or pulling off the fresh paint.
- Inspect for touch-ups: Once the tape is removed, closely inspect the porch surface for any areas that may need touch-ups. Look for any missed spots, drips, or uneven patches. Use a small brush or a sponge applicator to address these areas and ensure a seamless finish.
- Clean up: Clean your brushes, rollers, and any other painting tools promptly using the appropriate cleaning materials. Store them properly for future use or dispose of them responsibly.
- Dispose of waste: Dispose of any leftover paint, empty cans, and other painting-related waste responsibly, following the guidelines provided by your local waste management regulations.
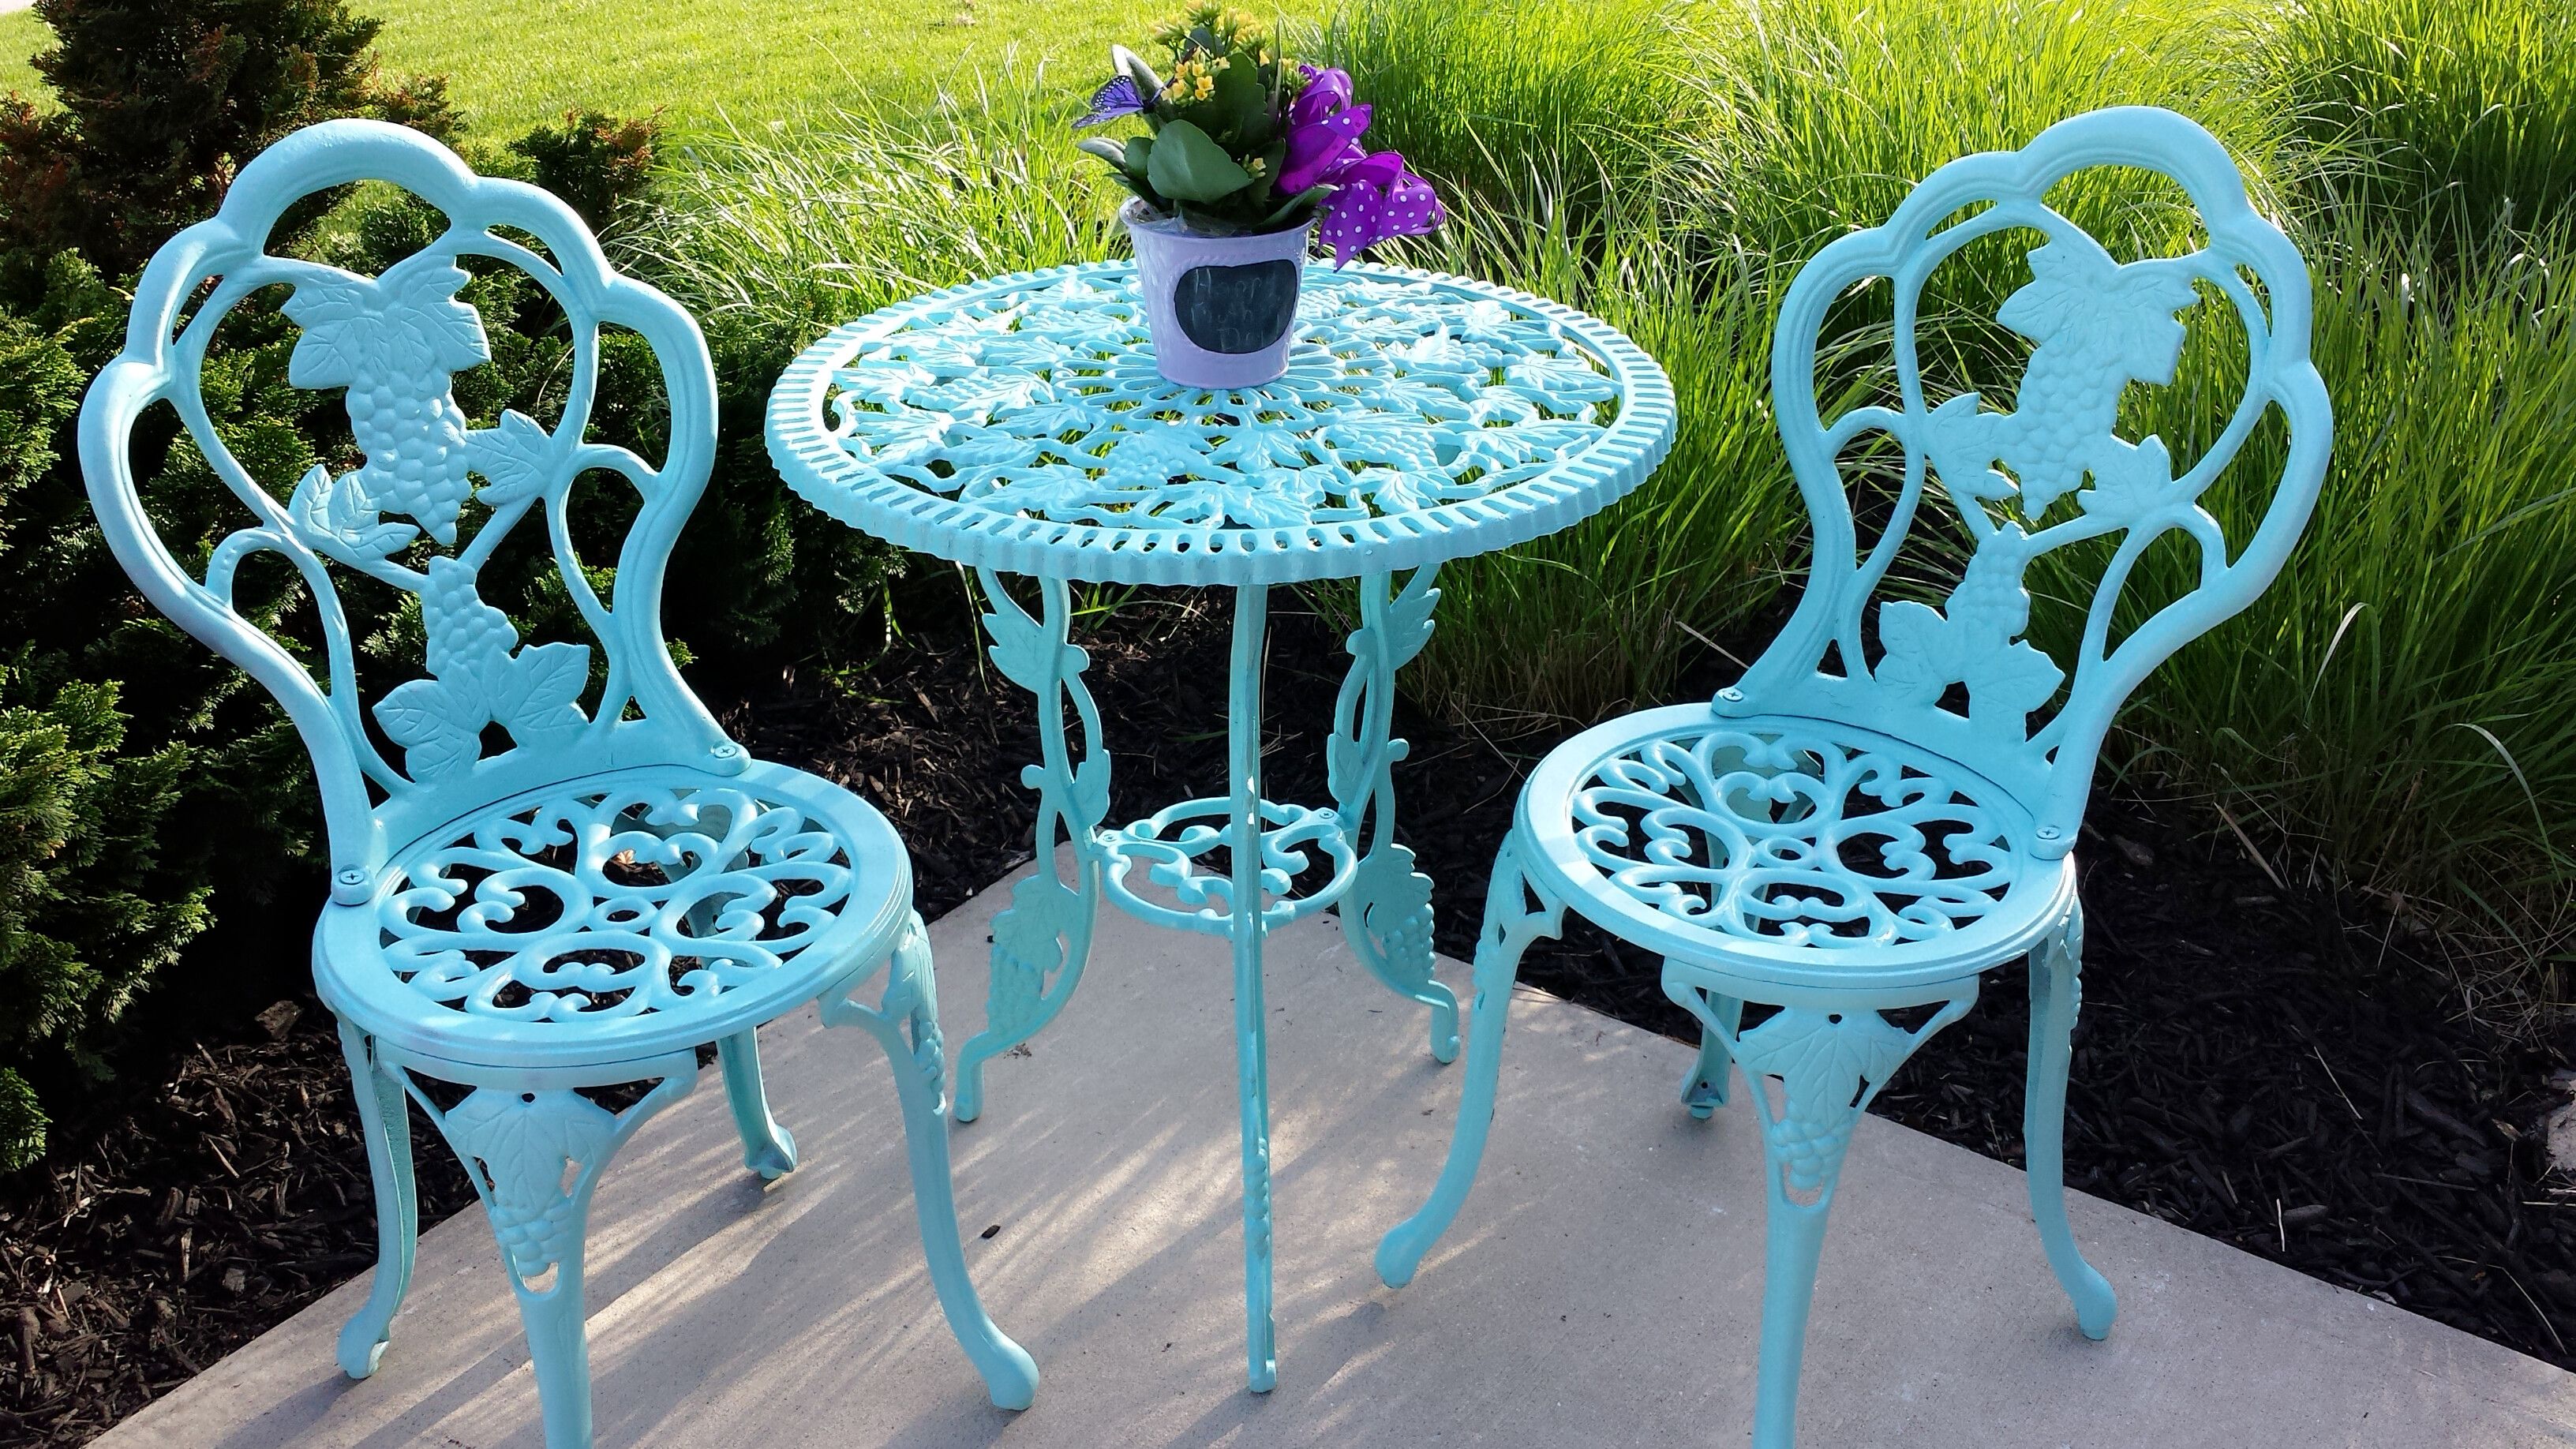
- Enjoy your newly painted porch: Once the finishing touches are complete and the paint has fully cured, take a step back and admire your newly painted porch. Not only will it enhance the overall appearance of your home, but it will also provide protection against the elements for years to come.
- Maintain your porch: To keep your porch looking its best, regular maintenance is important. Keep an eye out for any signs of damage, such as peeling or chipping paint, and address them promptly. Additionally, consider cleaning the porch periodically to remove dirt and debris that could accumulate over time.
By paying attention to the finishing touches and maintaining your porch, you can ensure that your efforts in repainting the porch last for years, providing an inviting space that you can enjoy and be proud of.
Read more: How To Repaint Dining Chairs
Conclusion
Congratulations on successfully repainting your porch! By following the step-by-step guide provided in this article, you’ve transformed the look and feel of your home’s exterior while also protecting the porch from the elements. The process may have been time-consuming and required attention to detail, but the end result is well worth it.
Remember, proper preparation is key when repainting your porch. Taking the time to clean the surface, remove old paint, repair any damage, and apply primer sets the stage for a smooth and long-lasting paint job. Applying the paint itself requires patience, precision, and the right tools, but the moment you see the vibrant new color on your porch, it will all be worth it.
Don’t forget to give attention to the finishing touches, such as removing painter’s tape, inspecting for any touch-ups, and properly cleaning up your materials. These final steps ensure a professional outcome and help maintain the beauty of your newly painted porch.
With your freshly painted porch, you can now enjoy a welcoming and attractive entrance to your home. Plus, the added protection provided by the new paint will help keep your porch looking great for years to come.
Remember, regular maintenance is essential to preserve the condition of your repainted porch. Periodically check for any signs of damage or wear, and promptly address any issues that arise. By doing so, you can extend the life of your porch’s new paint and keep it looking its best.
Thank you for joining us in this comprehensive guide on how to repaint your porch. We hope that the information provided has been helpful and that you feel confident in tackling this DIY project. Enjoy your beautifully repainted porch and the renewed curb appeal it brings to your home!
Frequently Asked Questions about How To Repaint The Porch
Was this page helpful?
At Storables.com, we guarantee accurate and reliable information. Our content, validated by Expert Board Contributors, is crafted following stringent Editorial Policies. We're committed to providing you with well-researched, expert-backed insights for all your informational needs.


0 thoughts on “How To Repaint The Porch”