Articles
How To Use Zoku Ice Cream Maker
Modified: December 7, 2023
Learn how to use the Zoku ice cream maker with our informative articles. Discover tips and tricks for creating delicious homemade ice cream in minutes.
(Many of the links in this article redirect to a specific reviewed product. Your purchase of these products through affiliate links helps to generate commission for Storables.com, at no extra cost. Learn more)
Introduction
Welcome to the world of homemade ice cream! If you’re a fan of this frozen treat, then you’re in for a treat yourself. Say goodbye to long waits at the ice cream parlor or settling for store-bought options. With the Zoku Ice Cream Maker, you can whip up delicious, creamy ice cream in the comfort of your own kitchen. Whether you’re a novice or a seasoned dessert enthusiast, this handy tool is sure to become your new favorite kitchen companion.
The Zoku Ice Cream Maker is a compact and innovative device that allows you to make individual servings of ice cream in just minutes. Gone are the days of waiting hours for your homemade ice cream to freeze. With this nifty gadget, you can create personalized frozen desserts in a flash.
But what sets the Zoku Ice Cream Maker apart from traditional ice cream makers? First and foremost, it’s incredibly easy to use. You don’t need to be a culinary expert to achieve professional-quality ice cream. The Zoku Ice Cream Maker takes care of the hard work for you, allowing you to focus on experimenting with flavors and enjoying the results.
Another advantage of the Zoku Ice Cream Maker is its compact size. Traditional ice cream makers can take up a lot of space in your kitchen, but the Zoku version is small and portable. It won’t clutter your counter or take up valuable storage space. Plus, its sleek design makes it an attractive addition to any kitchen decor.
One of the best features of the Zoku Ice Cream Maker is its versatility. While it excels at making classic ice cream flavors, you can also use it to create frozen yogurt, sorbet, gelato, and even dairy-free alternatives. The possibilities are endless, allowing you to unleash your creativity and indulge in a wide variety of frozen treats.
So, whether you’re hosting a dinner party, satisfying a late-night craving, or simply treating yourself to a sweet indulgence, the Zoku Ice Cream Maker is the perfect tool to have on hand. In the following sections, we’ll guide you through the simple steps of using this wonderful device, from preparing it for use to enjoying your homemade ice cream creations. Get ready to embark on a delightful ice cream adventure!
Key Takeaways:
- Enjoy homemade ice cream in minutes with the Zoku Ice Cream Maker, a compact and versatile device that simplifies the process. Experiment with flavors, mix-ins, and dairy-free options for endless frozen treat possibilities.
- Say goodbye to store-bought ice cream and hello to personalized frozen delights. The Zoku Ice Cream Maker allows for individual servings, easy cleanup, and endless flavor experimentation, making it a must-have kitchen gadget for dessert enthusiasts.
Read more: How To Use The Kitchenaid Ice Cream Maker
What is Zoku Ice Cream Maker?
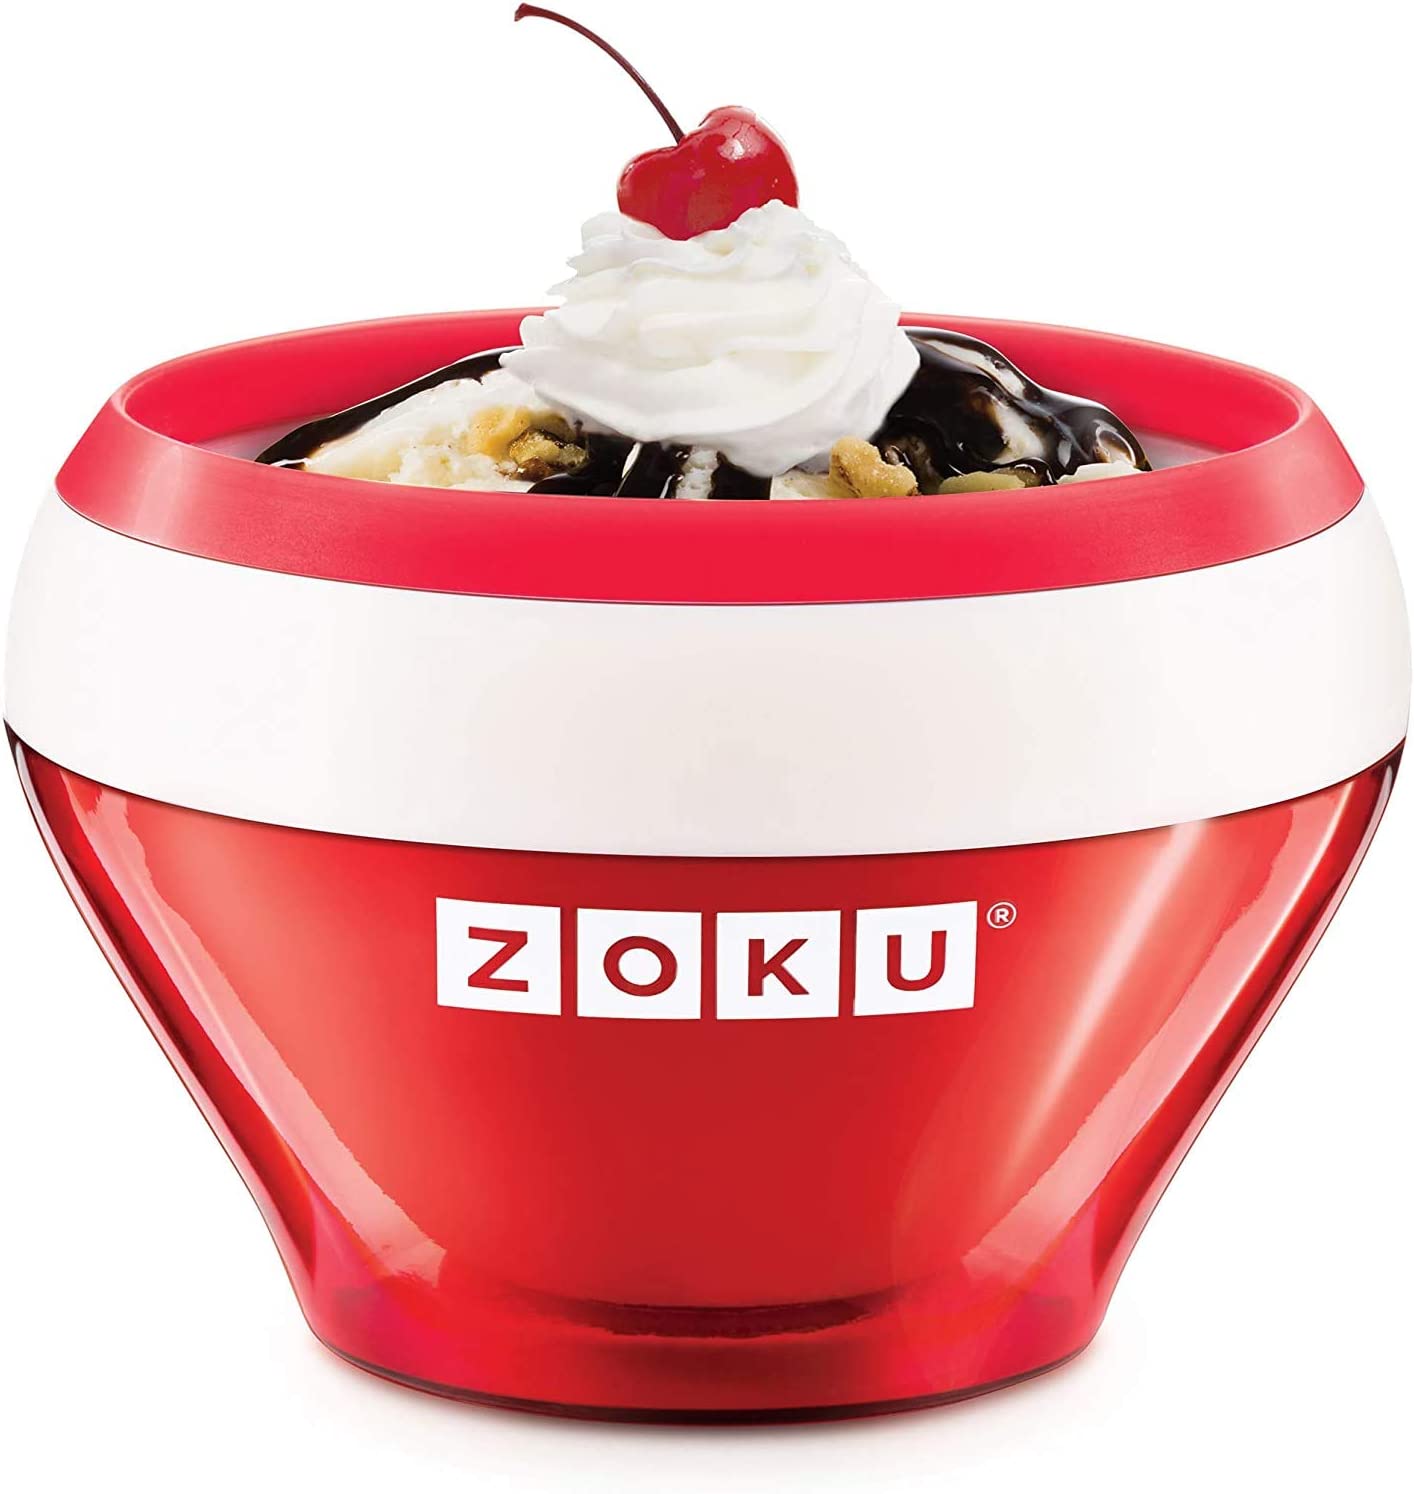
The Zoku Ice Cream Maker is a revolutionary kitchen appliance that allows you to make personalized ice cream creations in a matter of minutes. It is designed to simplify the process of making ice cream at home, making it accessible to everyone, regardless of their culinary expertise.
This innovative device consists of a stainless steel inner bowl, an outer protective sleeve, and a mixing spoon. The stainless steel bowl is pre-frozen, which eliminates the need for bulky, noisy, and time-consuming traditional ice cream makers that require pre-freezing the bowl for several hours.
With the Zoku Ice Cream Maker, you can skip the lengthy freezing step and enjoy your homemade frozen treats almost instantly. The inner bowl is filled with a special liquid that freezes rapidly when the mixture is poured in, resulting in creamy and delicious ice cream in just 10 to 15 minutes.
One of the key features that sets the Zoku Ice Cream Maker apart from other ice cream makers is its single-serve capability. It allows you to create individual portions of ice cream, which is perfect for those who prefer portion control or enjoy customizing their desserts with different flavors and toppings.
The Zoku Ice Cream Maker offers endless possibilities when it comes to flavors and ingredients. If you have dietary restrictions or preferences, you can easily make dairy-free or vegan ice creams using alternative milk or cream substitutes. You can also experiment with a variety of mix-ins, such as chocolate chips, fruit, nuts, or cookie crumbs, to add extra texture and flavor to your creations.
In addition to its user-friendly design and versatility, the Zoku Ice Cream Maker is also incredibly easy to clean. The inner bowl, outer sleeve, and mixing spoon are all dishwasher-safe, making cleanup a breeze.
Whether you’re an ice cream aficionado or just a dessert lover looking to add some fun and flavor to your culinary repertoire, the Zoku Ice Cream Maker is a must-have kitchen gadget. It allows you to unleash your creativity and indulge in delicious homemade ice cream whenever the craving strikes. So, let’s dive into the step-by-step process of using the Zoku Ice Cream Maker to create your own frozen delights!
Step 1: Preparing the Zoku Ice Cream Maker
Before you can start making your delicious ice cream creations, it’s important to properly prepare your Zoku Ice Cream Maker. Follow these steps to ensure the best results:
- Start by placing the stainless steel inner bowl in the freezer. Make sure it is placed upright in a flat position. Leave it in the freezer for at least 12 hours or until the liquid inside is completely frozen. It’s a good idea to always keep the inner bowl in the freezer so that it’s ready whenever you have the urge for homemade ice cream.
- Once the inner bowl is frozen, remove it from the freezer and insert it into the outer protective sleeve. The sleeve helps to insulate the ice cream mixture and keep it at the optimal temperature for freezing.
- Take the mixing spoon that came with your Zoku Ice Cream Maker and place it in the freezer as well. This will ensure that the spoon is cold and will help keep the ice cream mixture properly mixed during the freezing process.
- Make sure you have all your ingredients and mix-ins ready. This includes your base mixture, such as cream, milk, sugar, and any desired flavorings. You can also prepare any mix-ins you want to add, such as chocolate chips or crushed cookies.
Preparing the Zoku Ice Cream Maker in advance ensures that you have a properly chilled foundation for freezing your ice cream mixture. This step is crucial for achieving the perfect texture and consistency. Now that your Zoku Ice Cream Maker is ready to go, let’s move on to the next step: mixing the ingredients.
Step 2: Mixing the Ingredients
Now that your Zoku Ice Cream Maker is prepared, it’s time to mix together the ingredients for your homemade ice cream. This is where you can get creative and customize your flavors to suit your taste preferences. Here’s how you can do it:
- Start by preparing your base mixture. This usually consists of a combination of cream, milk, sugar, and any flavorings you desire. You can use a basic vanilla base or get adventurous with flavors like chocolate, strawberry, or even mint chocolate chip!
- In a mixing bowl, whisk together the cream, milk, and sugar until the sugar is completely dissolved. If you’re using any flavor extracts, such as vanilla or mint, add them to the mixture and incorporate well.
- If you want to add mix-ins to your ice cream, such as chocolate chips, chopped fruits, or nuts, prepare them in advance. You can fold them into the base mixture or add them later during the freezing process.
- Once your base mixture is ready, take out the frozen inner bowl from the Zoku Ice Cream Maker and place it onto a stable surface. Pour the base mixture into the bowl, leaving some space at the top to allow for expansion during freezing.
- Using the cold mixing spoon from the freezer, stir the mixture gently and evenly. Make sure to scrape the sides of the bowl to incorporate any frozen bits that may have formed.
It’s important to note that the consistency of the base mixture will affect the freezing time and end result of your ice cream. A mixture with a higher fat content, such as one with more cream, will result in a creamier and softer ice cream. Experiment with different ratios to find your preferred texture.
Now that your ingredients are mixed together, the next step is to freeze the mixture in the Zoku Ice Cream Maker. This is where the magic happens! Head over to Step 3 to learn how to turn your mixture into delicious ice cream.
To use a Zoku ice cream maker, make sure the inner bowl is completely frozen before pouring in your ice cream mixture. Then, stir and scrape the sides as it freezes to create a smooth texture. Enjoy your homemade ice cream in about 10 minutes!
Step 3: Freezing the Ice Cream
Now that you have your ice cream mixture prepared, it’s time to freeze it using the Zoku Ice Cream Maker. Follow these step-by-step instructions to achieve perfectly frozen and creamy ice cream:
- Take the frozen inner bowl, which is now filled with your ice cream mixture, and carefully insert it back into the outer protective sleeve of the Zoku Ice Cream Maker.
- Attach the mixing spoon to the lid of the Zoku Ice Cream Maker. This ensures that the mixture is continuously stirred while it freezes, resulting in a smoother texture.
- Place the assembled Zoku Ice Cream Maker on a flat, stable surface. Make sure the lid is securely closed and the mixing spoon is properly attached.
- Allow the ice cream mixture to freeze for about 10 to 15 minutes. During this time, the cold inner bowl will quickly freeze the mixture, creating a creamy consistency.
- While the ice cream is freezing, you might notice the outer sleeve becoming frosty. This is normal and indicates that the freezing process is taking place.
- As the ice cream freezes, you may also notice that the mixture starts to solidify around the edges. Use the mixing spoon to scrape down the sides and incorporate any frozen bits back into the mixture.
- Continue stirring and scraping the mixture every few minutes to prevent any large ice crystals from forming. This will result in a smoother and creamier texture.
- After 10 to 15 minutes, the ice cream should be frozen and ready to enjoy. The exact freezing time may vary depending on the temperature of your ingredients and the consistency you desire.
Remember, the beauty of the Zoku Ice Cream Maker is that you can create individual servings, allowing you to customize each portion with different flavors and mix-ins. So, feel free to experiment and have fun with your ice cream creations!
Now that your ice cream is frozen, it’s time for the final step: serving and savoring the deliciousness. Keep reading to find out how.
Read more: How To Use Ninja Ice Cream Maker
Step 4: Serving and Enjoying the Ice Cream
Congratulations! You’ve successfully frozen your homemade ice cream using the Zoku Ice Cream Maker. Now it’s time to indulge in the sweet rewards. Follow these steps to serve and enjoy your delectable creation:
- Remove the lid of the Zoku Ice Cream Maker and detach the mixing spoon. Set them aside.
- Using a silicone spatula or a spoon, carefully remove the frozen ice cream from the inner bowl of the Zoku Ice Cream Maker. Place it in a bowl or a cone of your choice. If you prefer, you can also eat it right out of the inner bowl.
- At this point, you can add any additional toppings or mix-ins to enhance the flavor and texture of your ice cream. Sprinkle some chocolate chips, drizzle some caramel sauce, or add a dollop of whipped cream.
- Feel free to get creative with your presentation. You can garnish your ice cream with fresh fruits, crushed nuts, or even colorful sprinkles to make it visually enticing.
- Now, grab a spoon and dig in! Relish the creamy, homemade goodness of your ice cream creation. Pay close attention to the flavors, the textures, and the overall satisfaction of your taste buds.
- Don’t forget to share the joy! Invite your family, friends, or loved ones to join in the ice cream extravaganza. Whether it’s a small gathering or a cozy family night, homemade ice cream is always a delightful treat to be shared.
Remember, the Zoku Ice Cream Maker allows you to enjoy single servings of ice cream, which means you can experiment with different flavors and combinations for each person. It’s like having your own mini ice cream parlor right at home!
After savoring your homemade ice cream, it’s time to clean up. The Zoku Ice Cream Maker is designed for easy cleaning. Simply remove the inner bowl, outer sleeve, and mixing spoon and wash them with warm, soapy water or place them in the dishwasher for convenience.
Now that you’ve mastered the art of making ice cream with the Zoku Ice Cream Maker, you can continue exploring new flavors, experimenting with mix-ins, and delighting in the joy of homemade frozen desserts. Enjoy the creativity and satisfaction that comes with creating your own frozen delights!
Tips and Tricks for Using Zoku Ice Cream Maker
Using the Zoku Ice Cream Maker is a fun and simple process, but here are some tips and tricks to help you make the most out of your homemade ice cream experience:
- Pre-chill your ingredients: For faster freezing and optimal results, make sure your cream, milk, and any other liquid ingredients are chilled before mixing them together.
- Experiment with flavors: Don’t be afraid to get creative with your ice cream flavors. Explore different combinations like salted caramel, cookies and cream, or even matcha green tea. The Zoku Ice Cream Maker allows you to try new flavors with ease.
- Embrace mix-ins: Adding mix-ins like chocolate chips, fruit chunks, or cookie crumbs can take your ice cream to the next level. Fold them into the base mixture or sprinkle them on top before freezing.
- For a lighter option: If you prefer a lighter ice cream, you can use a combination of milk and Greek yogurt instead of heavy cream. This will result in a slightly tangy and refreshing treat.
- Layering flavors and mix-ins: To create swirls or layers of flavors, freeze one layer of ice cream at a time. Once it’s frozen, add in a different flavored mixture on top and repeat the freezing process.
- Speed up the freezing process: If you’re short on time and want your ice cream to freeze even faster, place the inner bowl in the freezer for a few minutes before pouring in the mixture.
- Make it in advance: If you plan on serving the ice cream later, you can prepare the mixture in advance and keep it refrigerated. When you’re ready to serve, simply pour it into the Zoku Ice Cream Maker and follow the freezing instructions.
- Try dairy-free alternatives: If you or someone in your household has dietary restrictions, you can use alternative milk options like almond milk, coconut milk, or soy milk to create delicious dairy-free ice creams.
- Clean the Zoku Ice Cream Maker immediately: The inner bowl and mixing spoon should be washed immediately after using to prevent any residue from freezing onto them. This will make cleaning a breeze and ensure optimal performance for your next ice cream adventure.
- Be patient: While the Zoku Ice Cream Maker freezes ice cream quickly, it’s important to be patient and follow the recommended freezing time. Rushing the process may result in a softer or less creamy texture.
Remember, the joy of using the Zoku Ice Cream Maker is all about experimentation and creating unique frozen treats. Don’t be afraid to try new flavors, mix-ins, and techniques to customize your ice cream just the way you like it.
Now armed with these tips and tricks, go forth and embark on your ice cream-making journey with the Zoku Ice Cream Maker. Have fun, enjoy the process, and savor your delightful creations!
Conclusion
Using the Zoku Ice Cream Maker opens up a world of delicious possibilities right in your own kitchen. This compact and user-friendly device allows you to create personalized ice cream creations in just minutes, without the need for bulky and time-consuming traditional ice cream makers.
We’ve explored the step-by-step process of using the Zoku Ice Cream Maker, from preparing the device to serving and enjoying your frozen treats. By pre-freezing the inner bowl, mixing your ingredients, and freezing the mixture in the Zoku Ice Cream Maker, you can create creamy and flavorful ice cream in a matter of minutes.
Throughout the process, we’ve provided tips and tricks to help you elevate your ice cream-making game. Whether it’s experimenting with flavors, adding mix-ins, or exploring dairy-free alternatives, the Zoku Ice Cream Maker allows you to customize your ice cream creations to suit your tastes and preferences.
With the Zoku Ice Cream Maker, you can let your imagination run wild and create endless variations of frozen delights. From classic flavors to exotic combinations, the choice is yours. Plus, the single-serve feature of this device allows you to customize each portion, making it perfect for family desserts or entertaining guests.
So, say goodbye to store-bought ice cream and hello to the joy of crafting your own frozen treats. With the Zoku Ice Cream Maker, you have the power to create delectable ice cream flavors, experiment with unique mix-ins, and delight in the satisfaction of homemade desserts.
Get ready to embark on a delightful ice cream adventure and let your creativity shine. Whether you’re a novice in the kitchen or a seasoned dessert enthusiast, the Zoku Ice Cream Maker is an essential tool for creating memorable and delicious frozen treats. So, gather your ingredients, unleash your imagination, and get ready to experience the joy of homemade ice cream like never before!
Frequently Asked Questions about How To Use Zoku Ice Cream Maker
Was this page helpful?
At Storables.com, we guarantee accurate and reliable information. Our content, validated by Expert Board Contributors, is crafted following stringent Editorial Policies. We're committed to providing you with well-researched, expert-backed insights for all your informational needs.


0 thoughts on “How To Use Zoku Ice Cream Maker”