Home>Construction & Tools>Building Materials>How To Remove Stucco Walls
Building Materials
How To Remove Stucco Walls
Modified: February 18, 2024
Learn how to remove stucco walls using the right building materials and techniques. Discover step-by-step instructions for a smooth stucco removal process.
(Many of the links in this article redirect to a specific reviewed product. Your purchase of these products through affiliate links helps to generate commission for Storables.com, at no extra cost. Learn more)
Introduction
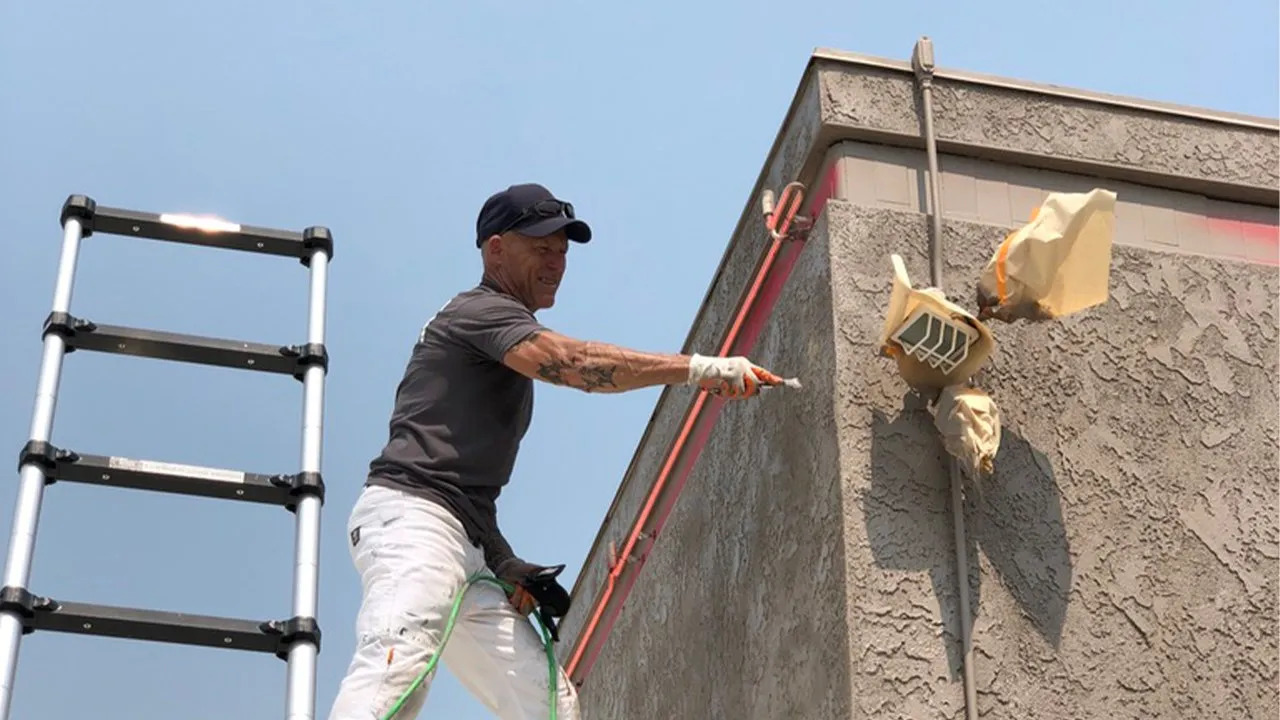
So, you've decided it's time to bid farewell to those outdated stucco walls and give your space a fresh new look. Whether you're aiming for a modern, sleek finish or simply want to revamp the aesthetic of your home, removing stucco walls can be a game-changer. While the task may seem daunting at first, with the right tools, materials, and know-how, you can tackle this project like a pro.
In this comprehensive guide, we'll walk you through the step-by-step process of removing stucco walls, from the essential tools and materials needed to the nitty-gritty of repairing the wall post-stucco removal. By the end of this journey, you'll be equipped with the knowledge and confidence to transform your space and unleash its true potential.
Let's roll up our sleeves and dive into the world of stucco removal, where creativity and craftsmanship converge to breathe new life into your living space.
Key Takeaways:
- Removing stucco walls requires safety gear, tools like a hammer and chisel, and careful steps like scoring and cleaning the wall. It’s a transformative process that sets the stage for a fresh new look.
- After removing stucco, repairing the wall involves addressing structural concerns, applying bonding agents, and preparing for a new finish. This phase breathes new life into the space and unleashes creativity.
Read more: How To Remove Stucco From Interior Walls
Tools and Materials Needed
Before embarking on your stucco removal project, it’s essential to gather the necessary tools and materials to ensure a smooth and efficient process. Here’s a comprehensive list to get you started:
Tools:
- Protective eyewear and gloves: Safety first! Shield your eyes and hands from debris and dust during the removal process.
- Work gloves: Sturdy gloves will provide protection and improve your grip while handling tools and materials.
- Hammer and chisel: These tools are essential for breaking through the stucco surface and loosening it from the wall.
- Reciprocating saw: A reciprocating saw equipped with a masonry blade can expedite the removal process, especially for larger areas.
- Pry bar: A pry bar will come in handy for prying off the stucco and lath from the wall.
- Utility knife: Use a utility knife to score the stucco surface and create clean lines for removal.
- Power drill with mixing paddle: If you're planning to apply new stucco or an alternative wall finish, a power drill with a mixing paddle is essential for preparing the new material.
- Wheelbarrow or mixing trough: For mixing and containing the new stucco or wall finish material.
- Wire brush: A wire brush can help clean and prepare the wall surface for repairs.
- Trowels: Various sizes of trowels will be needed for applying new stucco or repair materials.
- Level: Ensure a straight and even application of new stucco or wall finish with a reliable level.
- Measuring tape: Precise measurements are crucial for accurate material estimation and application.
- Broom and dustpan: Keep your work area clean and tidy throughout the project.
Materials:
- Plastic sheeting: Use plastic sheeting to protect surrounding areas from debris and dust.
- Stucco or wall finish material: Depending on your desired outcome, acquire the appropriate stucco or wall finish material for the reapplication phase.
- Lath: If the existing lath is damaged during stucco removal, you may need to replace it before applying new stucco or an alternative wall finish.
- Construction adhesive: Secure the new lath to the wall with construction adhesive for added stability.
- Staples or nails: Use staples or nails to attach the lath to the wall, ensuring a secure foundation for the new stucco or wall finish.
- Stucco mesh: If applying new stucco, stucco mesh will enhance adhesion and durability.
- Stucco bonding agent: Prepare the wall surface for new stucco application by applying a suitable bonding agent.
- Stucco repair compound: In the event of minor wall imperfections, a stucco repair compound will come in handy for seamless repairs.
- Primer and paint: If opting for an alternative wall finish, ensure you have the necessary primer and paint for the desired aesthetic.
By assembling these tools and materials, you’ll be well-prepared to tackle the stucco removal and subsequent wall restoration with confidence and precision.
Preparation
Before diving into the stucco removal process, thorough preparation is key to a successful and efficient project. Follow these essential steps to set the stage for seamless stucco removal:
Read more: How To Remove Stucco From Block Walls
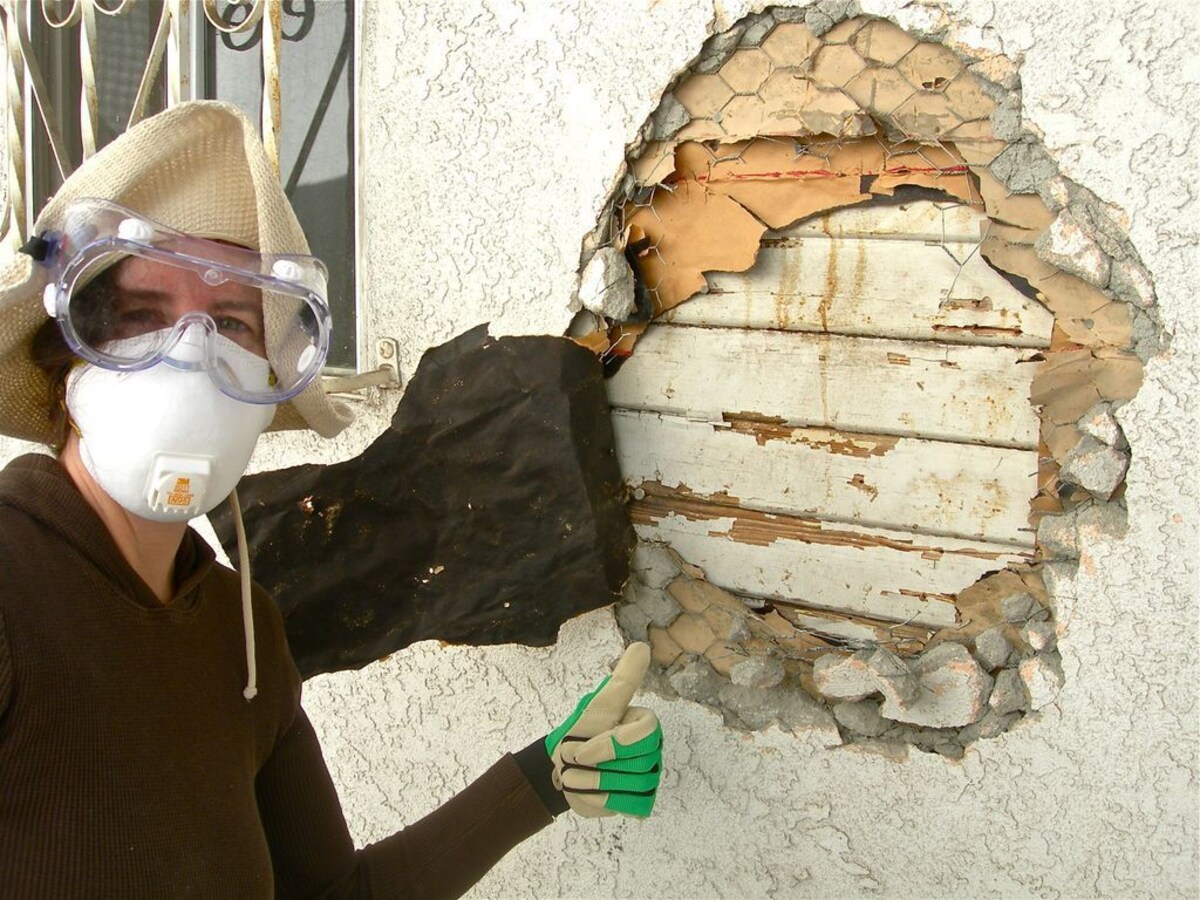
1. Safety First
Prioritize safety by equipping yourself with protective eyewear, gloves, and durable work attire. Ensure a clear and hazard-free work area, and consider using a dust mask to minimize inhalation of debris and dust during the removal process.
2. Clear the Surrounding Area
Remove any furniture, decorations, or obstacles near the stucco walls to create ample working space. Cover the remaining items with plastic sheeting to shield them from debris and dust.
3. Secure the Work Zone
Communicate the project to household members or occupants to ensure their safety and awareness of the ongoing work. If necessary, cordon off the work area to prevent unauthorized access and minimize disruptions.
4. Assess the Wall Condition
Inspect the stucco walls for any signs of damage, such as cracks, moisture penetration, or structural issues. Addressing these concerns before and during the removal process will contribute to a smoother transition to the wall restoration phase.
5. Gather Essential Tools and Materials
Verify that all the required tools and materials are readily accessible and in good working condition. This includes ensuring the availability of protective gear, demolition tools, and the necessary wall restoration materials.
6. Plan for Waste Disposal
Arrange for proper disposal of the removed stucco, lath, and any other construction waste. Consider renting a dumpster or coordinating with a waste management service to facilitate the removal of debris and maintain a tidy work environment.
7. Weather Considerations
Be mindful of weather conditions, particularly if you plan to work outdoors. Avoid undertaking the stucco removal during rainy or excessively windy periods, as these factors can impede progress and compromise safety.
By meticulously preparing the workspace, ensuring safety measures are in place, and evaluating the condition of the stucco walls, you’re laying a solid foundation for a successful stucco removal endeavor. With these preliminary steps completed, you’re primed to embark on the transformative journey of revamping your living space.
Removing the Stucco
Now that the stage is set and the necessary tools and materials are at your disposal, it’s time to delve into the process of removing the stucco from your walls. This phase requires patience, precision, and a methodical approach to ensure the stucco is effectively separated from the underlying surface. Here’s a step-by-step guide to navigate the stucco removal process:
Read more: What Is A Stucco Wall
1. Score the Stucco
Using a utility knife, carefully score the stucco surface in a uniform pattern. This scoring will facilitate the subsequent removal process by creating defined sections for extraction.
2. Loosen the Stucco
With a hammer and chisel, begin loosening the scored stucco sections, working from top to bottom. Exercise caution and apply consistent, controlled force to avoid damaging the underlying wall.
3. Utilize a Reciprocating Saw
For larger stucco areas or stubborn sections, a reciprocating saw equipped with a masonry blade can expedite the removal process. Use this tool judiciously, ensuring a steady hand and adherence to safety protocols.
4. Remove the Lath
After the stucco is detached, carefully pry off the lath from the wall. Inspect the condition of the lath, and if necessary, replace any damaged sections to establish a solid foundation for the subsequent wall treatment.
Read more: How To Remove Exterior Stucco
5. Clean the Wall Surface
Once the stucco and lath are removed, use a wire brush to clean the wall surface, eliminating residual debris and preparing it for the repair and restoration phase.
6. Dispose of Debris
Dispose of the removed stucco and lath in accordance with local waste disposal regulations. Maintain a tidy work area by promptly clearing the debris and waste generated during the removal process.
7. Inspect the Wall
Thoroughly inspect the exposed wall for any underlying issues, such as structural damage, moisture infiltration, or other concerns that may necessitate attention before proceeding with the wall restoration phase.
By methodically following these steps, you’ll effectively remove the stucco from your walls, setting the stage for the subsequent phase of repairing and rejuvenating the wall surface. With the stucco successfully removed, you’re one step closer to transforming your space and bringing your vision to fruition.
Repairing the Wall
With the stucco successfully removed, the focus now shifts to repairing and restoring the wall surface to its former glory or preparing it for a new finish. This pivotal phase involves addressing any underlying issues, fortifying the wall structure, and priming it for the application of fresh stucco or an alternative wall treatment. Let’s delve into the essential steps for repairing the wall post-stucco removal:
Read more: How To Remove Stucco Ceiling
1. Address Structural Concerns
If the wall exhibits structural issues, such as cracks, instability, or moisture damage, it’s imperative to address these issues before proceeding. Consult a qualified contractor or structural engineer to assess and remedy any underlying structural concerns for a sound and secure wall foundation.
2. Replace Damaged Lath
If the lath sustained damage during the stucco removal process, replace the affected sections to ensure a stable and uniform substrate for the subsequent wall treatment. Secure the new lath with construction adhesive and fasteners for enhanced stability.
3. Apply Bonding Agent
Prepare the wall surface for the new stucco or alternative finish by applying a suitable bonding agent. This crucial step enhances adhesion and ensures a durable bond between the wall and the applied material.
4. Repair Imperfections
If the wall exhibits minor imperfections or irregularities, utilize a stucco repair compound to seamlessly address these issues. Smooth out the repaired areas to achieve a uniform surface, ready for the application of new stucco or an alternative wall finish.
Read more: How To Stucco A Brick Wall
5. Apply Stucco Mesh (If Applicable)
If opting for a new stucco application, consider applying stucco mesh to the prepared wall surface. The mesh enhances the adhesion and strength of the new stucco, contributing to a resilient and long-lasting finish.
6. Prepare for New Finish
For those opting for an alternative wall finish, ensure the wall surface is primed and ready for the application of the chosen finish. This may involve applying a suitable primer to promote adhesion and optimize the aesthetic outcome of the new wall treatment.
7. Proceed with Wall Treatment
Following the completion of the repair and preparation phase, proceed with the application of new stucco or the chosen alternative wall finish. Adhere to the manufacturer’s guidelines and best practices to achieve a professional and visually appealing result.
By meticulously addressing structural concerns, fortifying the wall surface, and preparing it for the new finish, you’re poised to breathe new life into your space. Whether opting for a revitalized stucco finish or an alternative wall treatment, the repair phase sets the stage for a stunning transformation, bringing your vision to fruition.
Conclusion
Congratulations on successfully navigating the transformative journey of removing stucco walls and preparing the canvas for a fresh new aesthetic. As you reflect on the culmination of this endeavor, it’s essential to appreciate the dedication, craftsmanship, and creativity that have converged to redefine your living space. Whether you’ve uncovered the timeless charm of the underlying wall or set the stage for a contemporary wall finish, this journey has been a testament to your vision and determination.
By embracing the process of stucco removal and wall restoration, you’ve not only revitalized your space but also unlocked the potential for new beginnings and boundless creativity. As you stand before the rejuvenated walls, envisioning the possibilities that lie ahead, take pride in the artistry and attention to detail that have shaped this transformation.
Furthermore, the skills and knowledge acquired throughout this endeavor serve as invaluable assets, empowering you to embark on future projects with confidence and proficiency. Whether it’s revamping other areas of your home or exploring new ventures in the realm of craftsmanship and design, the experiences gained from this undertaking will continue to inspire and guide your creative pursuits.
As you revel in the renewed ambiance of your space, adorned with freshly restored walls that embody your unique style and vision, remember that every stroke of craftsmanship and every meticulous repair has contributed to this remarkable outcome. Your dedication to elevating your living environment has yielded a tangible testament to your ingenuity and determination.
In closing, may this journey of stucco removal and wall restoration stand as a testament to your unwavering commitment to creating spaces that resonate with beauty, functionality, and individuality. As you embark on future projects and endeavors, may the spirit of creativity and craftsmanship continue to illuminate your path, enriching your surroundings and inspiring those who encounter your remarkable transformations.
Frequently Asked Questions about How To Remove Stucco Walls
Was this page helpful?
At Storables.com, we guarantee accurate and reliable information. Our content, validated by Expert Board Contributors, is crafted following stringent Editorial Policies. We're committed to providing you with well-researched, expert-backed insights for all your informational needs.


0 thoughts on “How To Remove Stucco Walls”