Home>Construction & Tools>Building Materials>How To Remove Stucco From Block Walls
Building Materials
How To Remove Stucco From Block Walls
Modified: May 6, 2024
Learn effective methods for removing stucco from block walls using common building materials. Discover step-by-step instructions for a successful stucco removal process.
(Many of the links in this article redirect to a specific reviewed product. Your purchase of these products through affiliate links helps to generate commission for Storables.com, at no extra cost. Learn more)
Introduction
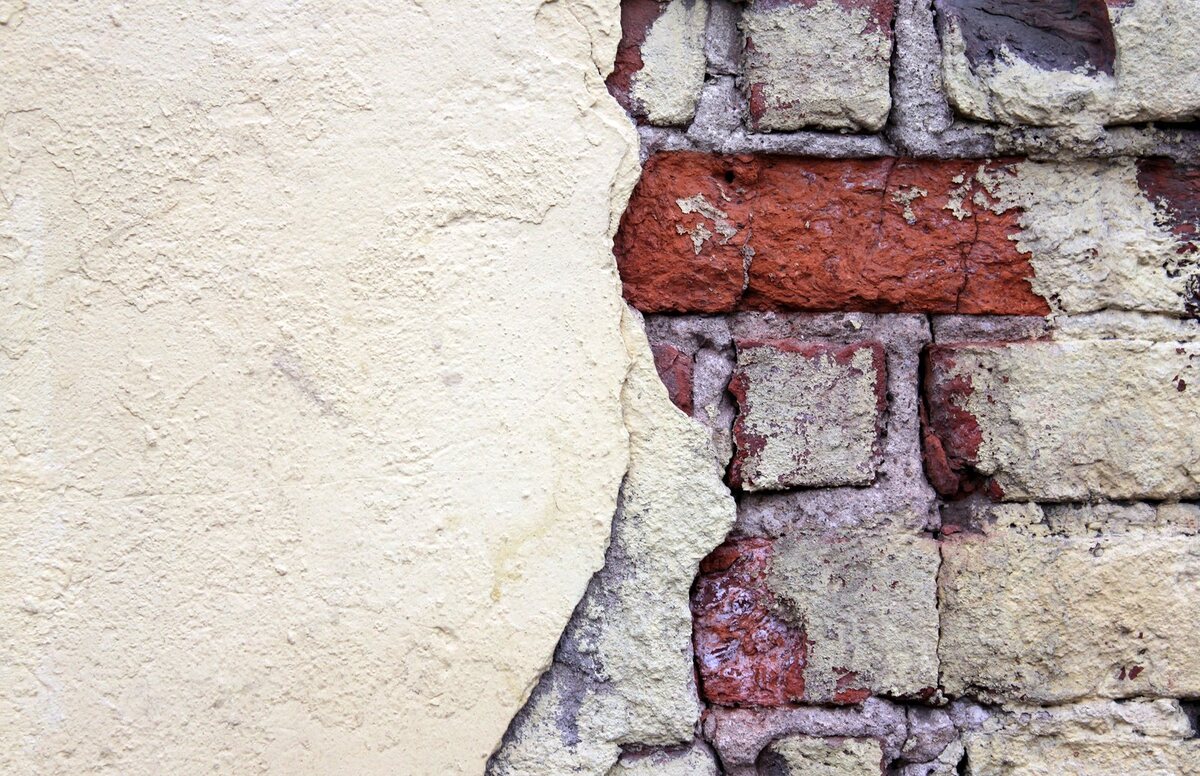
When it comes to renovating your home or giving it a fresh new look, removing old stucco from block walls can be a challenging yet rewarding endeavor. Stucco, a durable and weather-resistant material, is commonly used to coat exterior block walls, providing both protection and aesthetic appeal. However, over time, stucco can deteriorate, crack, or simply become outdated, prompting homeowners to seek methods for its removal. Whether you're preparing the surface for a new finish or aiming to restore the original beauty of the block walls, knowing how to effectively remove stucco is essential.
In this comprehensive guide, we'll walk you through the step-by-step process of removing stucco from block walls, providing valuable insights, expert tips, and a list of essential tools and materials. By following these instructions, you'll be well-equipped to tackle this project with confidence and achieve remarkable results. So, roll up your sleeves, gather your supplies, and let's embark on this transformative journey to reveal the natural beauty of your block walls beneath the stucco facade.
Key Takeaways:
- Prepare the work area, gather tools, and approach the stucco removal methodically for a successful and efficient project. Attention to detail ensures exceptional results and a renewed exterior for your home.
- Removing stucco from block walls unveils the natural beauty of the surface, offering a blank canvas for your creative vision. With meticulous cleaning and preparation, you’re ready to infuse your personal style into the exterior of your home.
Read more: How To Apply Stucco To Cinder Block Wall
Tools and Materials Needed
Before you begin the stucco removal process, it’s crucial to gather the necessary tools and materials to ensure a smooth and efficient operation. Here’s a comprehensive list of items you’ll need:
Tools:
- Hammer
- Chisel
- Pry bar
- Power drill with mixing attachment
- Wire brush
- Pressure washer
- Masonry saw
- Safety goggles
- Work gloves
- Dust mask
- Protective clothing
Materials:
- Muriatic acid or stucco remover
- Plastic sheeting
- Tarp or drop cloth
- Plastic buckets
- Water
- Stiff bristle brush
- Stucco patching compound
- Primer
- Exterior paint
Having these tools and materials at your disposal will streamline the stucco removal process and ensure that you’re adequately prepared for any challenges that may arise. Safety should always be a top priority, so be sure to use protective gear, such as safety goggles, work gloves, and a dust mask, to shield yourself from potential hazards.
Preparing the Work Area
Before diving into the stucco removal process, it’s essential to prepare the work area to minimize mess and maximize safety. Here are the key steps to ensure your work area is ready for the task at hand:
Read more: How To Remove Stains From Stucco
Clear the Surrounding Area:
Remove any furniture, decorations, or obstacles near the block walls to create a clear and unobstructed workspace. This will prevent potential damage to items and allow for unrestricted movement during the stucco removal process.
Protective Coverings:
Cover the ground adjacent to the block walls with plastic sheeting, tarps, or a drop cloth to safeguard the surrounding area from debris, dust, and potential chemical splashes. This protective covering will also facilitate an easier cleanup process once the stucco removal is complete.
Ventilation:
Ensure proper ventilation in the work area by opening windows and doors. If possible, use fans to improve air circulation and prevent the accumulation of dust and fumes. Additionally, wearing a dust mask is highly recommended to protect your respiratory system from airborne particles.
Water Source:
Have access to a water source, as you’ll likely need water for various stages of the stucco removal process. Whether it’s for mixing stucco remover, rinsing the block walls, or cleaning tools, a nearby water supply will prove to be indispensable.
By taking these preparatory measures, you’ll create a safe, well-equipped, and organized work environment, setting the stage for a successful stucco removal project. With the work area ready, you can confidently proceed to tackle the next steps in the stucco removal process.
Read more: How To Remove Rust From Stucco
Removing the Stucco
Now that the work area is prepared and you have the necessary tools and materials at hand, it’s time to embark on the stucco removal process. Follow these steps to effectively remove stucco from block walls:
Assessment:
Begin by assessing the condition of the stucco. Identify any areas where the stucco is loose, cracked, or already peeling away from the block walls. These areas will likely require less effort to remove, serving as a starting point for the overall removal process.
Manual Removal:
Utilize a hammer and chisel to carefully chip away the stucco from the block walls. Work systematically, starting from the identified areas of weakness and gradually progressing to the more firmly adhered sections. Exercise caution to avoid damaging the underlying block walls during this process.
Power Tools:
For stubborn or extensive stucco coverage, consider using a power drill with a mixing attachment or a masonry saw to aid in the removal process. These tools can expedite the removal of thicker layers of stucco and facilitate a more efficient overall operation.
Read more: How To Remove Vines From Stucco
Chemical Assistance:
In cases where manual and power tools may not suffice, consider using a stucco remover or muriatic acid to help dissolve and loosen the stucco from the block walls. Follow the manufacturer’s instructions and safety guidelines when using chemical agents, and be sure to thoroughly rinse the walls after application.
Thorough Cleaning:
Once the majority of the stucco has been removed, use a pressure washer to clean the block walls and remove any remaining debris, dust, or residue. This step will reveal the true condition of the block walls and prepare them for any necessary repairs or refinishing.
By diligently following these steps, you’ll effectively remove the stucco from the block walls, uncovering a clean and pristine surface that’s ready for the next phase of the renovation process. With the stucco removed, you’re one step closer to revitalizing the appearance of your home and achieving your desired aesthetic goals.
Cleaning the Block Walls
With the stucco successfully removed, the next crucial step is to thoroughly clean the block walls to ensure a pristine and well-prepared surface for any subsequent treatments or finishes. Follow these essential guidelines to effectively clean the block walls:
Debris Removal:
Begin by manually removing any loose debris, dust, or remnants of stucco from the block walls. A wire brush can be particularly useful for this task, allowing you to sweep away any remaining particles and achieve a smoother surface.
Read more: How To Remove Dirt Dauber Nest From Stucco
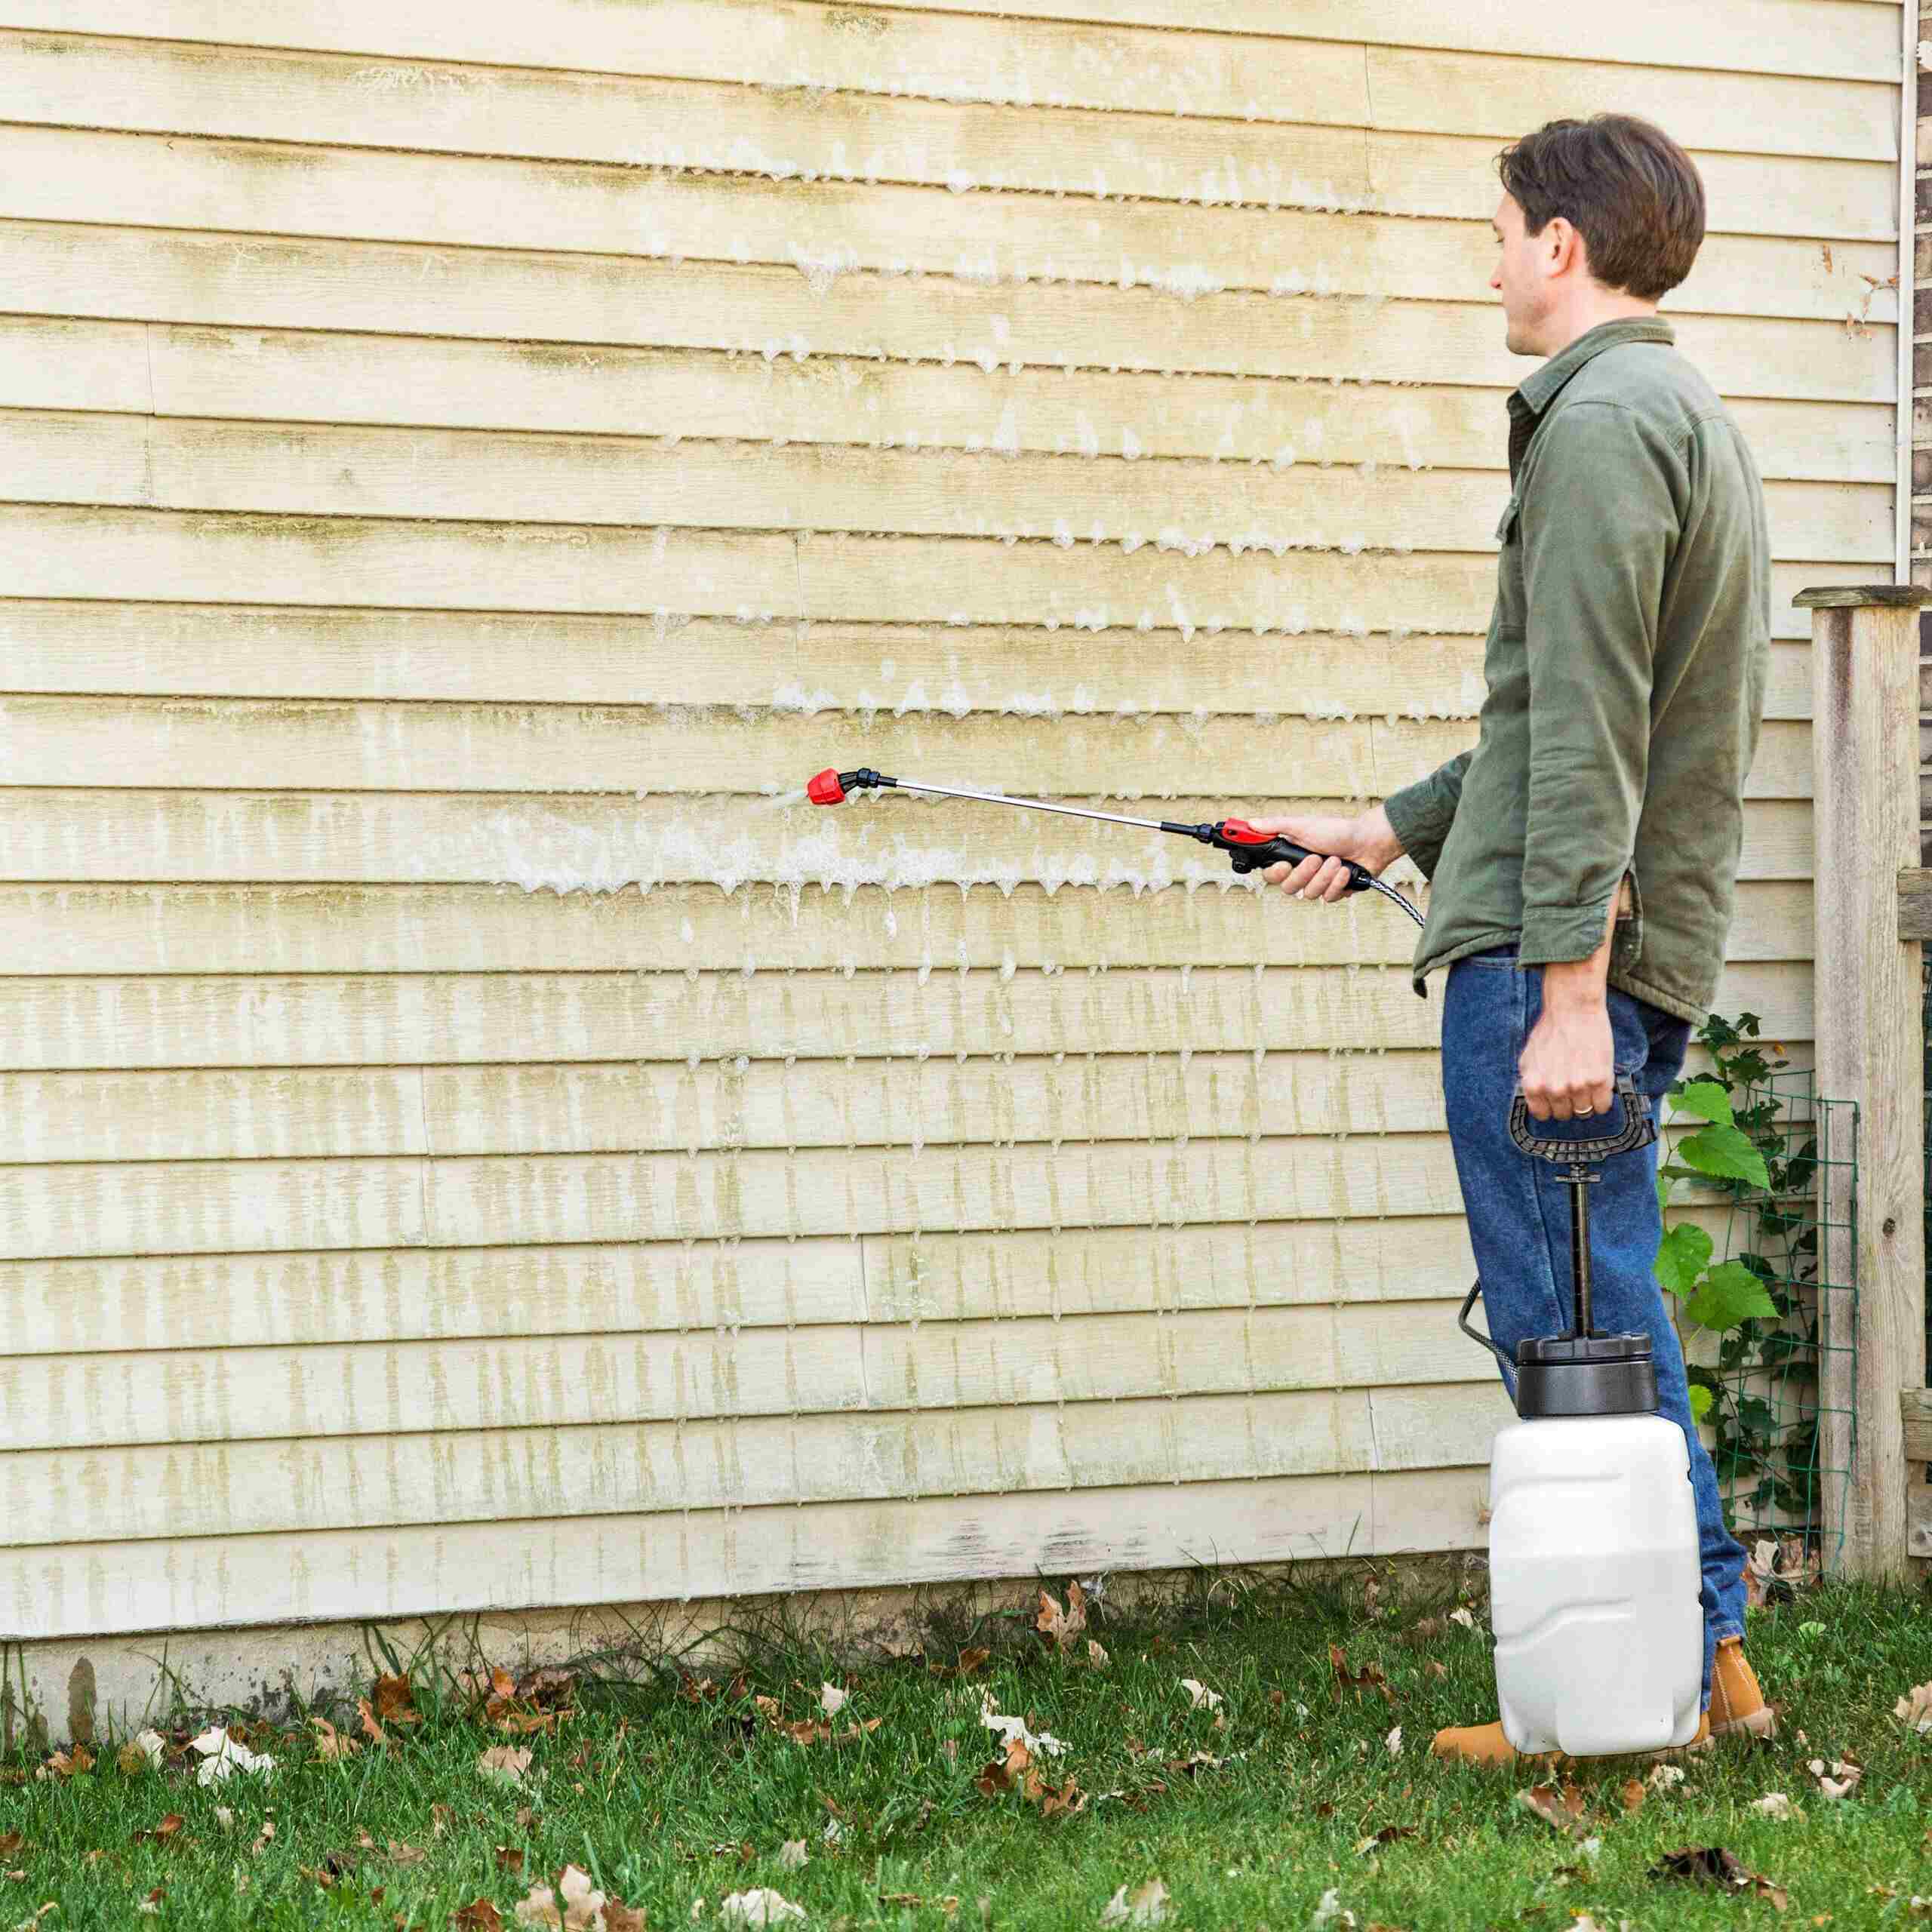
Pressure Washing:
Utilize a pressure washer to thoroughly clean the block walls, effectively removing stubborn dirt, grime, and any residual stucco fragments. Adjust the pressure settings as needed to avoid causing damage to the block walls while ensuring a comprehensive cleaning process.
Chemical Cleaning:
In cases where significant stains or discoloration persist, consider using a mild detergent or a specialized masonry cleaner in conjunction with the pressure washer. This combination can help eliminate embedded dirt and blemishes, restoring the block walls to their original appearance.
Repairs and Patching:
Inspect the block walls for any cracks, chips, or imperfections that may require attention. Use a stucco patching compound to fill in any irregularities, ensuring a uniform and smooth surface that’s ready for refinishing or painting.
Priming the Surface:
Once the block walls are clean and any necessary repairs have been addressed, apply a suitable primer to prepare the surface for the application of a new finish. The primer will enhance adhesion and ensure optimal results when applying paint or any other desired coating.
By diligently cleaning the block walls and addressing any minor repairs, you’ll set the stage for the final phase of the renovation process, whether it involves applying a fresh coat of paint, a new stucco finish, or leaving the block walls exposed for a distinctive and industrial look. With the block walls now clean and primed, you’re poised to bring your vision to life and transform the appearance of your home’s exterior.
Read more: What Is A Stucco Wall
Conclusion
Embarking on the journey to remove stucco from block walls is a significant undertaking that yields transformative results. By following the comprehensive steps outlined in this guide, you’ve gained the knowledge and insights needed to tackle this project with confidence and precision. As you reflect on the process and look ahead to the possibilities that lie before you, consider the following key takeaways:
Preparation is Key:
Taking the time to prepare the work area, gather essential tools and materials, and ensure proper ventilation and safety measures sets the stage for a successful stucco removal endeavor. By approaching the project with thorough preparation, you’ve laid a solid foundation for a seamless and efficient operation.
Methodical Approach:
Whether it’s manual removal, the use of power tools, or the application of chemical agents, a methodical and systematic approach is essential for effectively removing stucco from block walls. By carefully assessing the condition of the stucco and employing the appropriate techniques, you’ve navigated the removal process with skill and precision.
Attention to Detail:
From cleaning the block walls to addressing any necessary repairs and priming the surface, your attention to detail ensures that the final result will be nothing short of exceptional. By meticulously cleaning and preparing the block walls, you’ve set the stage for the next phase of the renovation, whether it involves refinishing, painting, or leaving the block walls exposed for a distinct aesthetic.
Read more: How To Do A Stucco Wall
Rewarding Results:
As you stand back and admire the clean, unadorned block walls, you’re met with a sense of accomplishment and the promise of a renewed exterior for your home. The removal of stucco has unveiled the inherent beauty of the block walls, offering a blank canvas for your creative vision and the opportunity to redefine the look and feel of your living space.
With the stucco removed and the block walls now primed and ready for the next phase, you’re poised to infuse your personal style and preferences into the exterior of your home. Whether you choose to apply a fresh coat of paint, explore alternative finishes, or embrace the raw and industrial charm of exposed block walls, the possibilities are as limitless as your imagination.
As you embark on this transformative journey, may the newfound allure of your block walls serve as a testament to your dedication, creativity, and the enduring potential for reinvention that resides within your home.
Ready to take your home's appeal up a notch? After mastering stucco removal, why not dive into our guide on selecting the best hardwood floors? Whether renovating or simply refreshing your space, understanding your options can significantly impact the overall look and feel. Our comprehensive article breaks down top choices for durability and style, making your decision process smoother and more informed.
Frequently Asked Questions about How To Remove Stucco From Block Walls
Was this page helpful?
At Storables.com, we guarantee accurate and reliable information. Our content, validated by Expert Board Contributors, is crafted following stringent Editorial Policies. We're committed to providing you with well-researched, expert-backed insights for all your informational needs.


0 thoughts on “How To Remove Stucco From Block Walls”