Home>diy>Architecture & Design>How To Create A Floor Plan In SketchUp

Architecture & Design
How To Create A Floor Plan In SketchUp
Modified: January 4, 2024
Learn how to create detailed floor plans in SketchUp with this step-by-step guide. Perfect for architects and designers looking to master architecture design.
(Many of the links in this article redirect to a specific reviewed product. Your purchase of these products through affiliate links helps to generate commission for Storables.com, at no extra cost. Learn more)
Introduction
Creating a floor plan is an essential step in the design and construction of a building. It serves as a visual representation of the space, showcasing the layout and dimensions of each room. A well-designed floor plan ensures that the building or space is functional, efficient, and aesthetically pleasing.
One popular tool used by architects, designers, and homeowners to create accurate and detailed floor plans is SketchUp. SketchUp is a powerful 3D modeling software that allows users to create virtual representations of spaces, including buildings, interiors, and landscapes.
In this article, we will guide you through the process of creating a floor plan in SketchUp. From setting up the workspace to adding furniture and textures, we will cover all the necessary steps to help you bring your floor plan to life.
Whether you are a professional designer or a DIY enthusiast looking to redesign your home, this comprehensive guide will equip you with the skills and knowledge needed to create an impressive floor plan that meets your requirements.
Before we dive into the technical aspects of creating a floor plan in SketchUp, let’s take a moment to understand the importance of a well-designed floor plan.
A well-designed floor plan serves multiple purposes:
- Functional layout: A properly designed floor plan ensures that each room or space is laid out in a way that maximizes functionality and flow. It considers factors like traffic patterns, accessibility, and the arrangement of furniture or fixtures.
- Efficient use of space: A well-designed floor plan optimizes the use of available space, ensuring that there is no wastage or overcrowding. It balances the allocation of space between different rooms and areas to create a harmonious and functional environment.
- Aesthetics: A visually appealing floor plan takes into account the overall design style and theme of the building. It considers factors like natural light, views, and the relationship between indoor and outdoor spaces to create a visually stimulating environment.
- Communication: A detailed and accurate floor plan serves as a communication tool between designers, architects, contractors, and clients. It allows everyone involved in the project to understand the layout, dimensions, and specifications of the space, ensuring that everyone is on the same page.
Now that we have established the importance of a well-designed floor plan, let’s continue with the step-by-step process of creating one in SketchUp.
Note: The instructions provided in this article are based on SketchUp Pro, but most of the steps and techniques can also be applied to SketchUp Free or SketchUp Make.
Key Takeaways:
- SketchUp empowers designers and DIY enthusiasts to create visually appealing and functional floor plans by providing a comprehensive set of tools and features, from setting up the workspace to adding textures and materials.
- A well-designed floor plan in SketchUp considers not only aesthetics but also functionality, efficiency, and communication, allowing for the creation of impressive and realistic representations of spaces.
Read more: How To Create A Floor Plan
Step 1: Setting up the workspace
Before you start creating your floor plan in SketchUp, it’s essential to set up the workspace to ensure a smooth and efficient design process. Here are the steps to follow:
- Create a new project: Open SketchUp and start a new project by selecting “File” from the menu bar and choosing “New”. This will open a blank canvas for you to work on.
- Set the units: SketchUp allows you to work in different units of measurement, such as feet, meters, or inches. To set the units, navigate to the “Window” menu, select “Model Info”, and then choose the “Units” tab. Choose the appropriate unit system and precision for your project.
- Enable guides and grid: Guides and the grid help you accurately place and align objects in your floor plan. To enable them, go to the “View” menu and check the boxes next to “Guides” and “Grid”. You can adjust the spacing and appearance of the grid by going to the “Model Info” menu and selecting “Grid”.
- Customize the toolbar: SketchUp offers a wide range of tools and commands. To make your workflow more efficient, customize the toolbar by adding commonly used tools. Go to the “View” menu, select “Tool Palettes”, and choose “Large Tool Set”. This will display a toolbar where you can drag and drop frequently used tools.
- Save your workspace: Once you have set up your workspace to your liking, it’s a good idea to save it as a custom template. This way, you can easily load your customized workspace every time you start a new project. To save your workspace, go to the “Window” menu, select “Preferences”, and choose the “Workspace” tab. Click on the “Save As Template” button and give your template a name.
By following these steps, you will create an optimized workspace in SketchUp that suits your specific needs and preferences. Setting up the workspace at the beginning will save you time and effort throughout the floor plan creation process.
Now that you have set up the workspace, you are ready to move on to the next step: importing reference materials.
Step 2: Importing reference materials
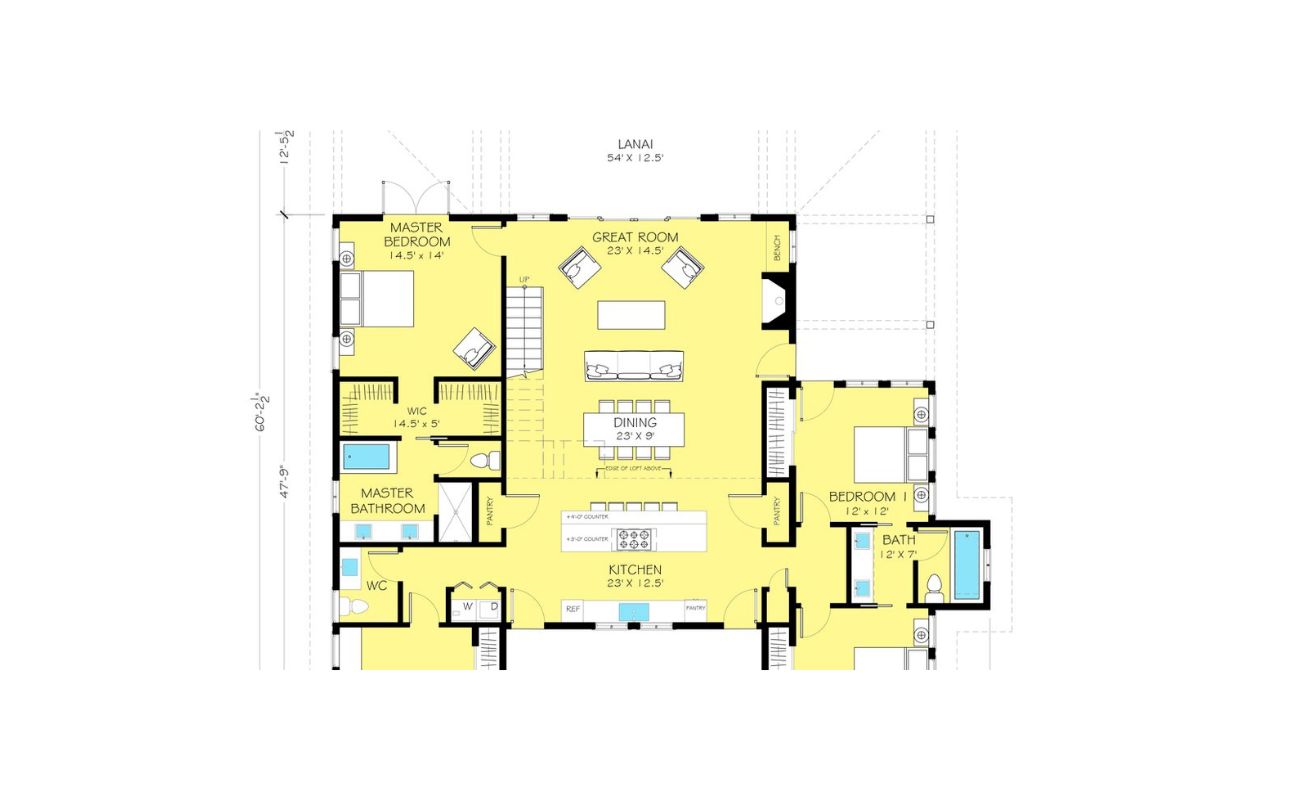
Importing accurate reference materials into your SketchUp project is crucial for creating a precise floor plan. Reference materials can include architectural drawings, site plans, or even hand-drawn sketches. Here’s how you can import and use reference materials in SketchUp:
- Collect your reference materials: Gather all the relevant reference materials that you will be using for your floor plan. This can include floor plans, elevations, or any other drawings that provide important details about the space.
- Import the reference materials: In SketchUp, go to the “File” menu and select “Import”. Choose the file format of your reference material, such as PDF, DWG, or JPEG. Browse for the file on your computer, select it, and click “Import”.
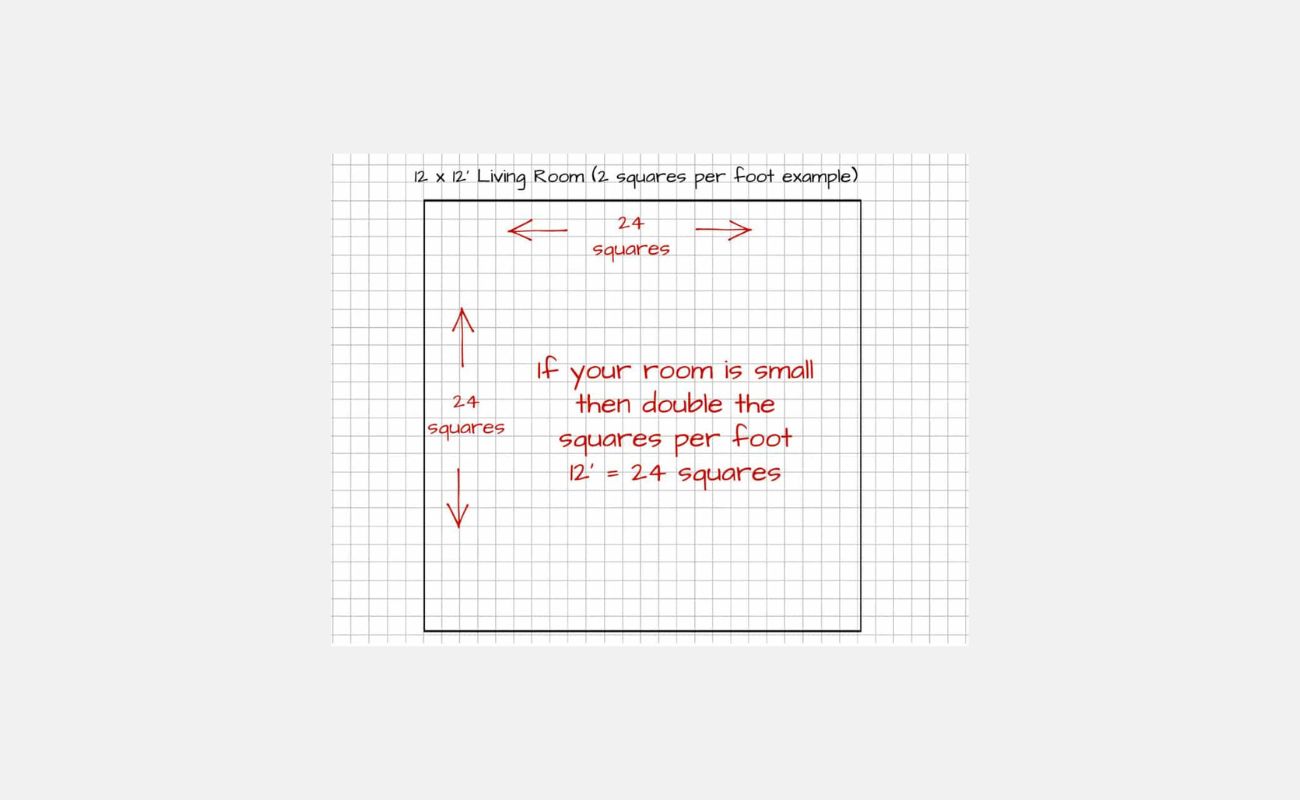
- Scale the reference material: Once the reference material is imported, it may not be properly scaled to match the dimensions of your SketchUp project. To scale the reference material, select the “Scale” tool from the toolbar. Click on a known point or dimension in the reference material, enter the correct dimension in real-world units, and press “Enter”. SketchUp will scale the reference material accordingly.
- Lock the reference material: After scaling, it is essential to lock the reference material to prevent accidental movement. Right-click on the reference material, select “Lock”, and then choose “Lock All”. This ensures that the reference material remains fixed in place while you work on your floor plan.
- Use the reference material as a guide: With the reference material locked, you can now start tracing over it to create the walls, partitions, and other elements of your floor plan. Use the line, rectangle, or polygon tools to draw the outlines of the rooms, corridors, and other areas based on the reference material.
Importing and utilizing reference materials in SketchUp allows you to work with accurate information and ensures that your floor plan aligns with the original design. It serves as a helpful guide throughout the creation process, especially when it comes to capturing specific details and dimensions.
Now that you have imported your reference materials and used them as a guide, you are ready to move on to the next step: drawing walls and partitions.
Step 3: Drawing walls and partitions
Now that you have your reference materials in place, it’s time to start drawing the walls and partitions of your floor plan. SketchUp provides several tools and techniques to help you create accurate and detailed walls. Follow these steps to draw walls and partitions in SketchUp:
- Select the Line tool: From the toolbar, select the “Line” tool or press the “L” key on your keyboard. This tool allows you to draw straight lines in SketchUp.
- Start drawing a wall: Click on a starting point on your floor plan and move the cursor to the desired length of the wall. Click again to create the first line of the wall. Continue clicking to add more lines and create the shape of the wall. SketchUp will automatically connect the lines to create a closed polygon.
- Create partitions: To create partitions within a room, use the “Line” tool to draw dividing lines from one wall to another. These lines represent the partitions or walls within the larger room.
- Adjust wall thickness: By default, the lines you draw in SketchUp have no thickness. To give your walls thickness, select the “Push/Pull” tool from the toolbar or press the “P” key on your keyboard. Click on the surface representing the wall and move the cursor to push or pull the wall inwards or outwards. Enter the desired thickness in real-world units and press “Enter”.
- Add door and window openings: To incorporate doors and windows into your walls, use the “Rectangle” tool to draw rectangles on the walls where you want them to be placed. Adjust the size and position of these rectangles to match the dimensions of the doors and windows in your design.
By following these steps, you can accurately draw walls and partitions in SketchUp, creating a clear representation of the layout of your floor plan. Remember to refer to your reference materials and take accurate measurements to ensure that your walls are properly scaled and aligned.
Now that you have drawn the walls and partitions, you can move on to the next step: adding doors and windows to your floor plan.
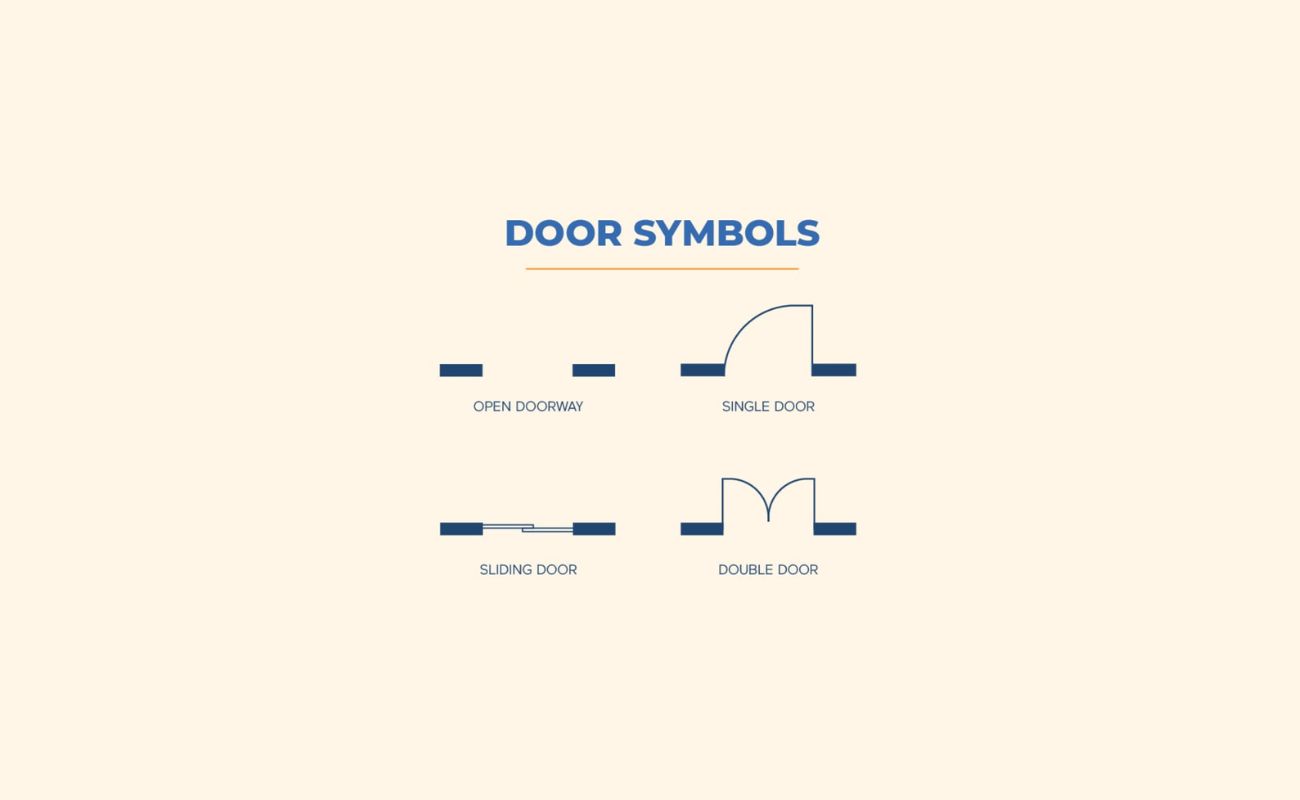
Step 4: Adding doors and windows
Adding doors and windows to your floor plan in SketchUp is an important step in creating a realistic and functional representation of the space. Doors and windows play a significant role in the overall layout and flow of a building. Here’s how you can add doors and windows to your SketchUp floor plan:
- Select the Rectangle tool: From the toolbar, choose the “Rectangle” tool or press the “R” key on your keyboard. This tool allows you to draw rectangular shapes.
- Draw the door or window opening: Click on the wall where you want to place the door or window. Drag the cursor to draw a rectangle representing the opening. Adjust the size and position of the rectangle to match the dimensions of the actual door or window.
- Push/Pull the opening: Once you have drawn the opening, select the “Push/Pull” tool from the toolbar or press the “P” key on your keyboard. Click on the surface of the opening and move the cursor to push or pull the opening to the desired depth. Enter the thickness of the wall in real-world units and press “Enter”.
- Add detail to the door or window: To add more detail to the door or window, such as panels or glass, select the “Push/Pull” tool again and click on the surface of the opening. Use the tool to push or pull specific areas to create the desired details.
- Save components: If you are using standard door or window designs that you will be reusing in your floor plan, it is a good idea to save them as components. To save a door or window as a component, select the entire object, right-click, and choose “Make Component”. Give the component a name and select “Create” to save it.
By following these steps, you can add doors and windows to your floor plan in SketchUp, enhancing the functionality and realism of your design. Remember to accurately measure and position the openings based on your reference materials to ensure accuracy.
Now that you have added doors and windows to your floor plan, you can move on to the next step: creating interior elements such as walls, furniture, and fixtures.
Read more: How To Create A Floor Plan For Free
Step 5: Creating interior elements
Now that you have defined the basic structure of your floor plan by adding walls, partitions, doors, and windows, it’s time to bring the space to life by adding interior elements. This step involves adding essential features such as walls, furniture, fixtures, and other decorative elements. Here’s how you can create interior elements in SketchUp:
- Use the Rectangle or Line tool: Depending on the shape of the element you want to create, select either the “Rectangle” or “Line” tool from the toolbar. The Rectangle tool allows you to draw rectangular shapes, while the Line tool allows you to draw straight lines.
- Draw walls and partitions: Use the Rectangle tool to draw additional walls or partitions within rooms to create separate areas or define specific spaces.
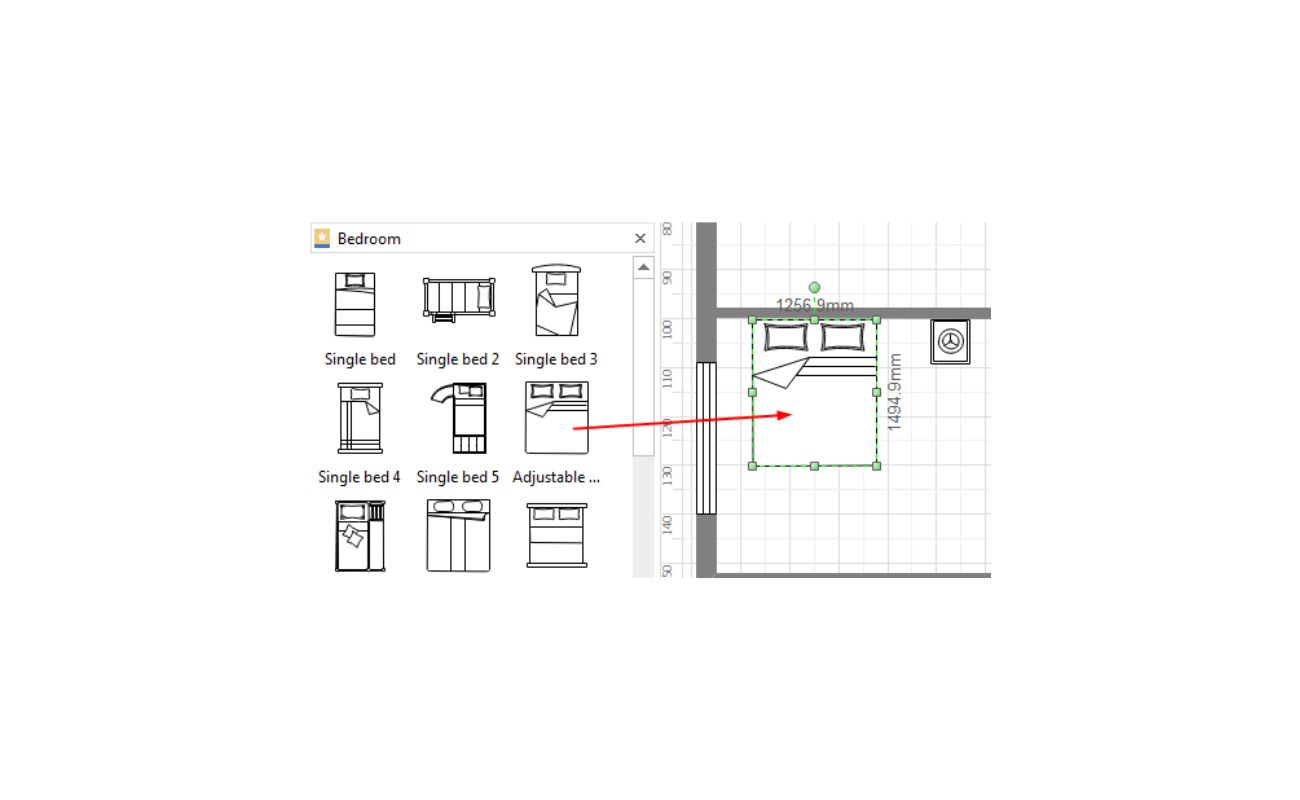
- Add furniture and fixtures: To add furniture or fixtures, use the Rectangle or Line tool to draw the outlines of the items. You can create beds, chairs, tables, cabinets, and other furniture pieces by drawing their basic shapes and adjusting them to the appropriate dimensions.
- Use pre-made models: SketchUp offers a vast library of pre-made 3D models that you can import and use in your floor plan. If you don’t want to create furniture or fixtures from scratch, you can search for pre-made models that match your design and import them into your project.
- Adjust and position elements: Once you have created or imported the interior elements, use the Move tool to adjust their position and orientation. Place furniture against walls, arrange fixtures in appropriate locations, and ensure that everything aligns with the overall design and layout.
Remember to refer to your reference materials and take accurate measurements when creating or placing interior elements. Pay attention to spatial relationships, functionality, and aesthetics to create a well-balanced and visually pleasing interior space.
Now that you have added interior elements to your floor plan, you can move on to the next step: adding textures and materials to enhance the visual appeal of your design.
When creating a floor plan in SketchUp, start by drawing the outer walls first to establish the overall shape of the building. This will help you to accurately place interior walls and furniture later on.
Step 6: Adding furniture and fixtures
Adding furniture and fixtures is a crucial step in creating a realistic and functional floor plan in SketchUp. Furniture and fixtures not only enhance the visual appeal of the space but also provide a sense of scale and functionality. Here’s how you can add furniture and fixtures to your SketchUp floor plan:
- Search for furniture models: SketchUp has a vast library of 3D models available online, including furniture and fixtures. Start by browsing the Warehouse by going to the “Window” menu and selecting “Components”. Use the search bar to find the specific furniture or fixtures you need for your floor plan.
- Import furniture models: Once you find the desired furniture or fixtures, select the model and click the “Download” button. SketchUp will import the model into your project. Alternatively, you can also import furniture models downloaded from other sources by going to the “File” menu and selecting “Import”.
- Position and scale the furniture: After importing the furniture or fixture models, use the Move tool to position them in the desired location within your floor plan. You can also use the Scale tool to adjust the size of the furniture to match the proportions of your space.
- Group or create components: To keep your floor plan organized and manageable, it is recommended to group or create components for the furniture and fixtures. Right-click on the furniture or fixture model, select “Make Group” or “Make Component”, and give it a descriptive name. This will allow you to easily select, move, or modify the furniture as a single entity.
- Add details and textures: To make the furniture and fixtures more visually appealing, you can add textures and details. Use the Paint Bucket tool to apply different materials and textures to specific components or groups. Experiment with different finishes, colors, and patterns to achieve the desired look.
By following these steps, you can add furniture and fixtures to your SketchUp floor plan, bringing your design to life and creating a more realistic representation of the space. Pay attention to scale, functionality, and style to ensure that the furniture and fixtures complement the overall design concept.
Now that you have added furniture and fixtures to your floor plan, you can move on to the next step: adding textures and materials to enhance the visual appeal of your design.
Step 7: Adding textures and materials
Adding textures and materials to your floor plan in SketchUp is a crucial step in enhancing the visual appeal and realism of your design. Textures and materials help bring surfaces to life by adding depth, color, and texture to various elements within your floor plan. Here’s how you can add textures and materials in SketchUp:
- Select the Paint Bucket tool: From the toolbar, choose the “Paint Bucket” tool or press the “B” key on your keyboard. This tool allows you to apply different textures and materials to surfaces.
- Choose a material: SketchUp provides a library of pre-made materials that you can choose from. To access the library, click on the “Materials” icon in the toolbar. Browse through the available materials or use the search bar to find a specific type of material.
- Apply materials to surfaces: With the Paint Bucket tool selected, click on the surface or group that you want to apply the material to. The selected material will be applied to the surface, instantly transforming its appearance. Repeat this step for other surfaces or groups within your floor plan.
- Create custom materials: If you can’t find the exact material you’re looking for in the SketchUp library, you can create custom materials. To create a custom material, click on the “Edit” tab within the Materials window, select “Create Material”, and adjust the properties like color, texture, and reflectivity.
- Adjust material placement and scale: After applying a material, you can adjust its placement and scale on the surface. Select the surface or group, right-click, and choose “Texture” from the context menu. Use the on-screen controls to move, rotate, or scale the texture until you are satisfied with its placement.
By following these steps, you can add textures and materials to your floor plan, transforming plain surfaces into realistic and visually appealing elements. Experiment with different materials to achieve the desired look and feel of each surface, whether it’s wood, stone, tile, or any other desired material.
Now that you have added textures and materials to your floor plan, you can move on to the next step: adding lighting and shadows to enhance the overall ambiance of your design.
Step 8: Adding lighting and shadows
Adding lighting and shadows is a crucial step in creating a realistic and immersive floor plan in SketchUp. Lighting enhances the ambiance, mood, and functionality of a space, while shadows add depth and dimension. Here’s how you can add lighting and shadows to your SketchUp floor plan:
- Activate the Shadows toolbar: Go to the “View” menu and select “Toolbars”. Check the box next to “Shadows” to activate the Shadows toolbar.
- Adjust the time and date: Use the slider on the Shadows toolbar to adjust the time and date settings. This will determine the position of the sun and the lighting conditions in your floor plan.
- Set the shadow settings: On the Shadows toolbar, you can adjust the shadow settings such as the darkness and softness of the shadows. Experiment with these settings to achieve the desired effect.
- Add artificial lighting: To simulate artificial lighting within your floor plan, you can use the various lighting fixtures available in SketchUp’s 3D Warehouse. Search for specific light fixtures such as lamps, chandeliers, or recessed lights, and import them into your project. Place the light fixtures where desired and adjust their parameters or properties, such as light intensity or color temperature.
- Utilize natural lighting: In addition to artificial lighting, consider the natural lighting conditions in your floor plan. Make use of windows, skylights, or glass doors to allow natural light to enter the space. Adjust the transparency and material properties of the glass surfaces to control the amount of light that enters the room.
By following these steps, you can add lighting and shadows to your SketchUp floor plan, enhancing the realism and overall ambiance of the space. Experiment with different lighting scenarios and consider the impact of shadows on the design. Proper lighting and shadow play can greatly influence the atmosphere and mood of your floor plan.
Now that you have added lighting and shadows, you can move on to the next step: creating annotations and dimensions to provide additional information and clarity in your floor plan.
Read more: How To Make A 2D Floor Plan In Sketchup
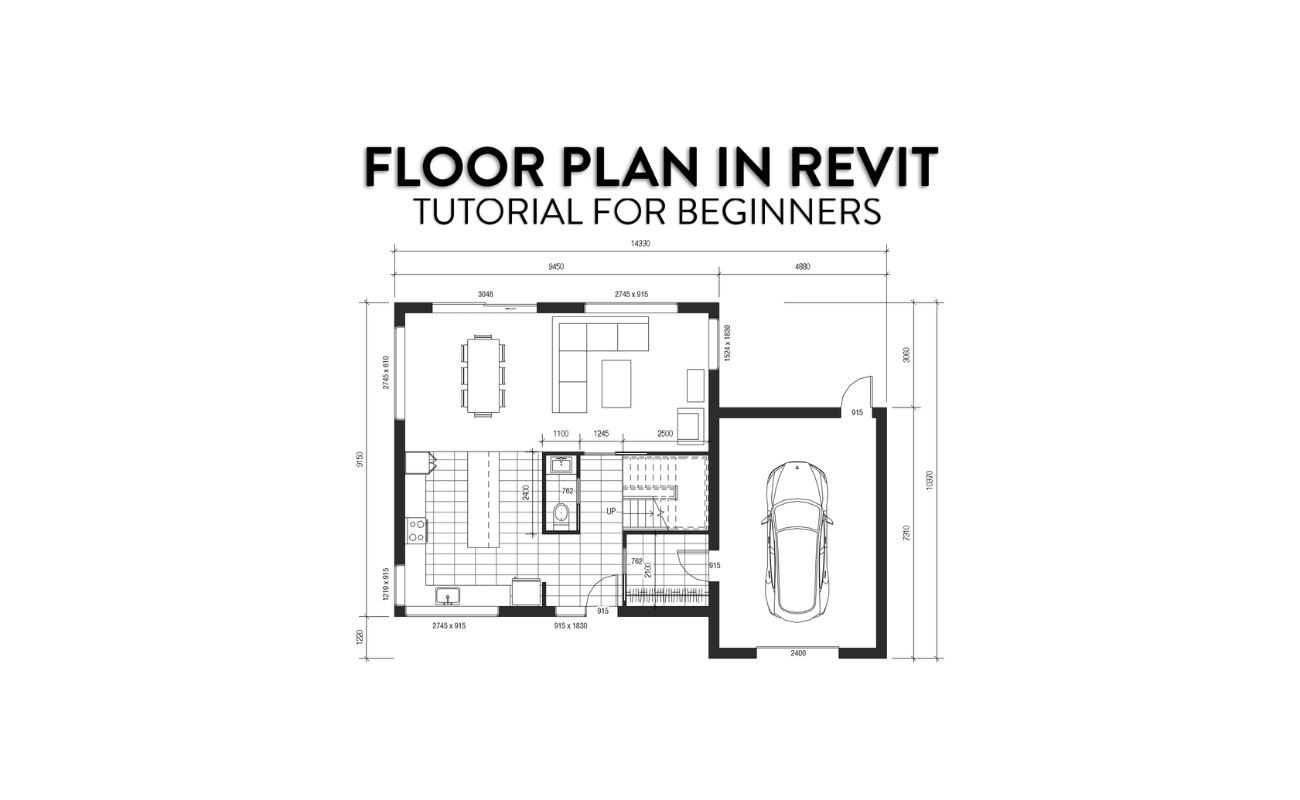
Step 9: Creating annotations and dimensions
Annotations and dimensions play a crucial role in conveying important information and providing clarity in your floor plan. They help viewers understand the layout, measurements, and details of the space. Adding annotations and dimensions in SketchUp is an essential step in creating a comprehensive and informative floor plan. Follow these steps to create annotations and dimensions:
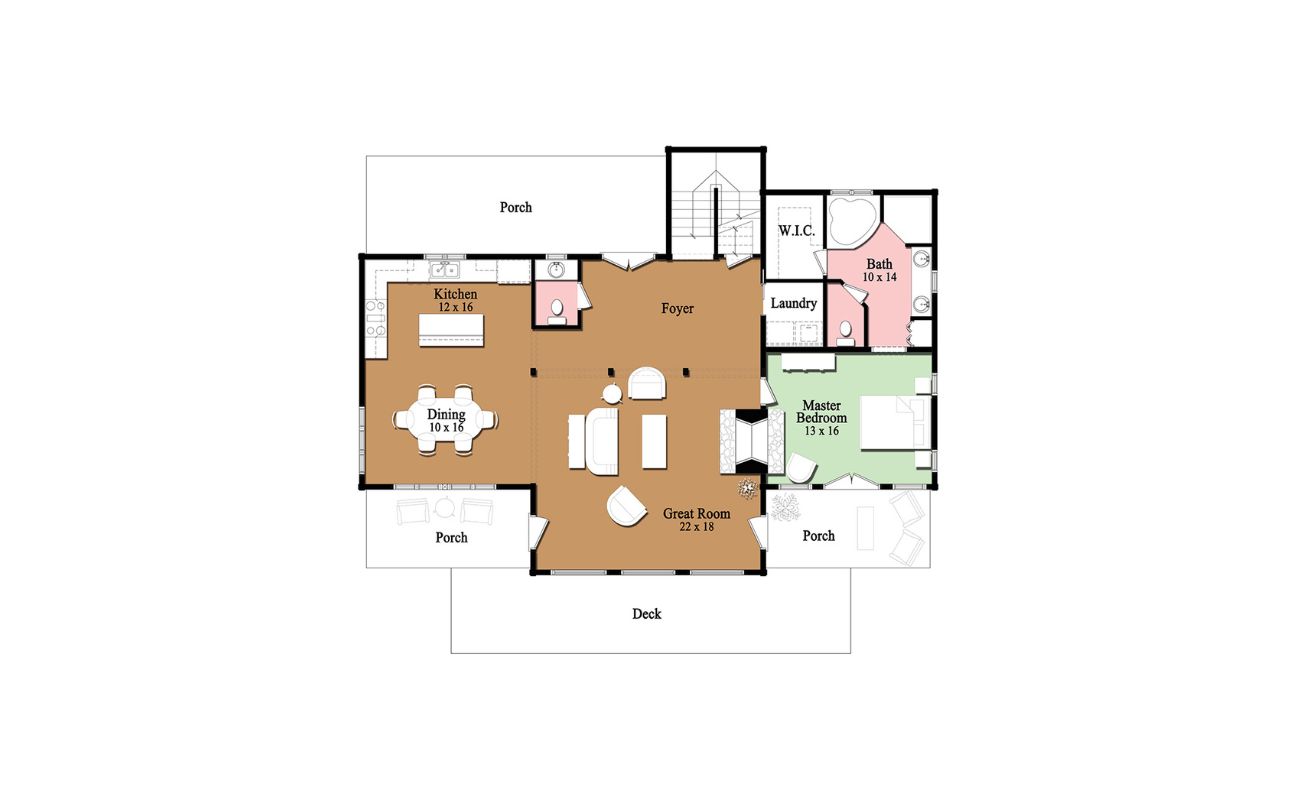
- Select the Text tool: From the toolbar, choose the “Text” tool or press the “T” key on your keyboard. This tool allows you to add text annotations to your floor plan.
- Create text annotations: Click on the surface or location within your floor plan where you want to add the text annotation. Enter the desired text, such as room names, labels, or notes. Adjust the font size, style, and alignment to ensure readability.
- Add dimensions: To add dimensions to your floor plan, select the “Dimension” tool from the toolbar or press the “D” key on your keyboard. Click on a starting point and then click on an end point to create a linear dimension. Repeat this process to add dimensions to other areas or objects within your floor plan.
- Adjust dimension style: After adding dimensions, you can adjust the style and formatting of the dimensions. Right-click on a dimension, select “Text Styles”, and choose the desired dimension style from the list. You can customize the appearance of the dimensions, such as the text size, arrow styles, and units of measurement.
- Organize annotations and dimensions: To maintain an organized and clutter-free floor plan, group annotations and dimensions into separate layers or groups. This will allow you to hide or show specific annotations or dimensions as needed and keep your floor plan clean and easy to understand.
By following these steps, you can add annotations and dimensions to your SketchUp floor plan, providing additional information and clarity. Labels, notes, and dimensions help viewers understand the layout, measurements, and details of the space, making your floor plan more informative and valuable.
Now that you have added annotations and dimensions, you are ready for the final step: exporting and sharing your floor plan.
Step 10: Exporting and sharing the floor plan
After putting in all the effort to create your floor plan in SketchUp, it’s time to export and share your design with others. Exporting your floor plan allows you to create files in various formats that can be easily shared with clients, collaborators, or contractors. Here’s how you can export and share your SketchUp floor plan:
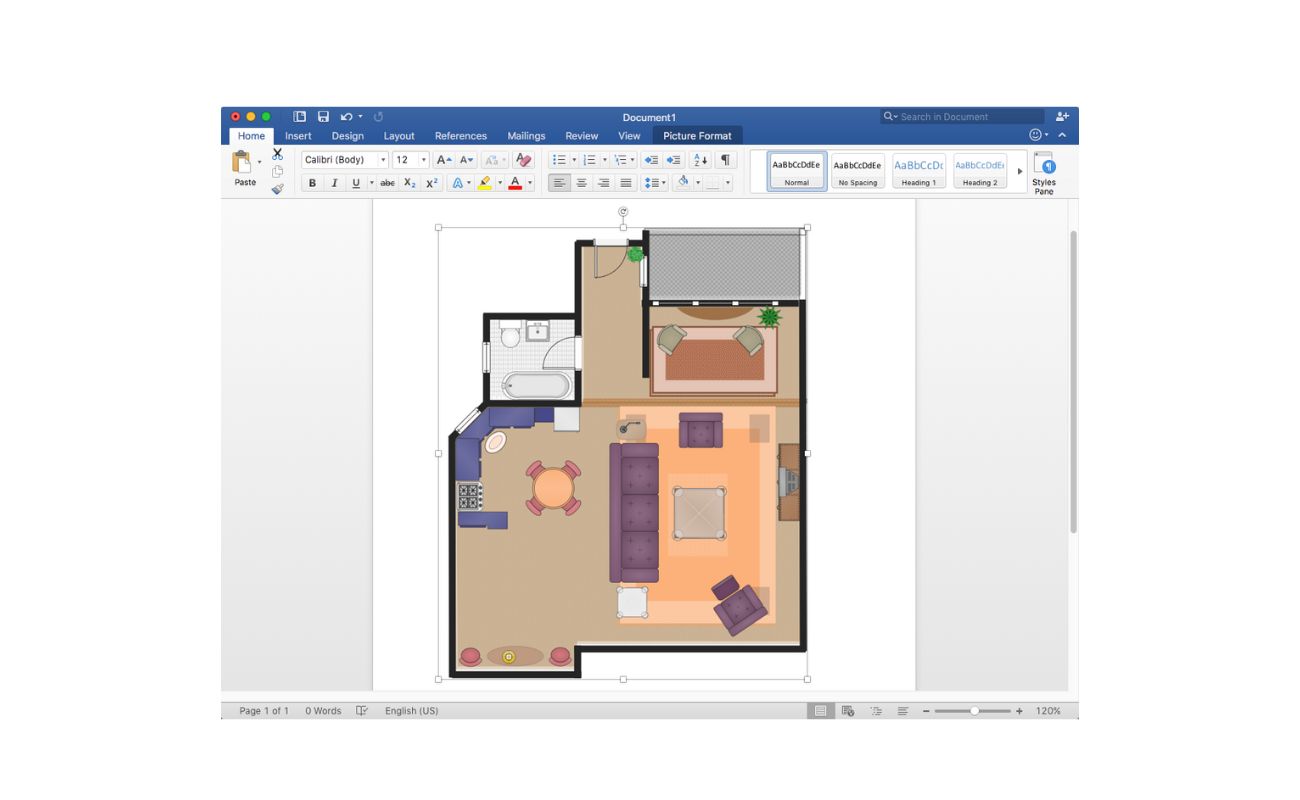
- Select the desired file format: Go to the “File” menu and choose “Export”. Select the file format that best suits your needs, such as PDF, JPEG, PNG, or DWG. Consider the requirements of the recipient, whether they need a 2D image or a 3D file.
- Set export options: Depending on the file format you choose, you may have additional export options to adjust. For example, when exporting to PDF, you can customize the paper size, resolution, and scale.
- Choose the destination folder: Browse your computer to select the folder where you want to save the exported file. Give the file a descriptive name to easily identify it later.
- Click “Export”: Once you have set the export options and chosen the destination folder, click the “Export” button to begin the export process. SketchUp will generate the file based on your settings.
- Share your floor plan: Once the export is complete, you can share the floor plan file via email, file-sharing platforms, or by printing physical copies. Consider the best method for sharing based on the preferences and requirements of your intended audience.
By following these steps, you can export and share your SketchUp floor plan, making it accessible to others involved in the project. Whether it’s presenting to clients, collaborating with colleagues, or communicating with contractors, a clear and shareable floor plan is essential for effective communication and project development.
Congratulations! You have now completed all ten steps of creating a floor plan in SketchUp. Your efforts in setting up the workspace, importing reference materials, drawing walls and partitions, adding doors and windows, creating interior elements, adding textures and materials, incorporating lighting and shadows, adding annotations and dimensions, and exporting your floor plan have resulted in a detailed and visually appealing design.
Remember to constantly review and refine your floor plan as the project progresses, making necessary adjustments and improvements. With SketchUp’s comprehensive tools and your creative input, you have the potential to create remarkable floor plans that transform spaces into functional and captivating environments.
Conclusion
Creating a floor plan in SketchUp is an exciting and rewarding process that allows you to bring your design visions to life. By following the ten steps outlined in this guide, you have learned how to set up the workspace, import reference materials, draw walls and partitions, add doors and windows, create interior elements, add textures and materials, incorporate lighting and shadows, add annotations and dimensions, and export and share your floor plan.
Throughout the process, it is crucial to stay organized, pay attention to detail, and continuously refer to your reference materials for accuracy. SketchUp’s powerful tools and features enable you to create detailed and realistic floor plans that can effectively communicate your design ideas to clients, stakeholders, and construction professionals.
Remember that a well-designed floor plan not only considers aesthetics but also functionality and efficiency. It is vital to prioritize ergonomics, traffic flow, and space optimization when placing walls, doors, furniture, and fixtures. Additionally, utilizing textures, materials, lighting, and shadows helps create a realistic representation of the space and enhances the overall ambiance and mood.
As you continue your journey in using SketchUp for floor plan design, don’t be afraid to experiment, explore new features, and push the boundaries of your creativity. With practice, you will become more proficient in utilizing SketchUp’s tools and techniques, enabling you to create incredible floor plans that showcase your design skills.
Whether you’re an architect, interior designer, or homeowner embarking on a remodeling project, SketchUp empowers you to transform ideas into tangible floor plans. With the knowledge gained from this guide, you have the ability to create floor plans that are both visually stunning and functionally efficient.
So, grab your ideas, fire up SketchUp, and dive into the world of floor plan design. Let your imagination soar as you craft stunning spaces that inspire and captivate.
Frequently Asked Questions about How To Create A Floor Plan In SketchUp
Was this page helpful?
At Storables.com, we guarantee accurate and reliable information. Our content, validated by Expert Board Contributors, is crafted following stringent Editorial Policies. We're committed to providing you with well-researched, expert-backed insights for all your informational needs.


0 thoughts on “How To Create A Floor Plan In SketchUp”