Home>diy>Architecture & Design>How To Design A House Frame
Architecture & Design
How To Design A House Frame
Modified: October 22, 2024
Learn how to design a house frame with our comprehensive guide on architecture design. Discover key techniques and concepts to create a structurally sound and aesthetically pleasing frame for your dream home.
(Many of the links in this article redirect to a specific reviewed product. Your purchase of these products through affiliate links helps to generate commission for Storables.com, at no extra cost. Learn more)
Introduction
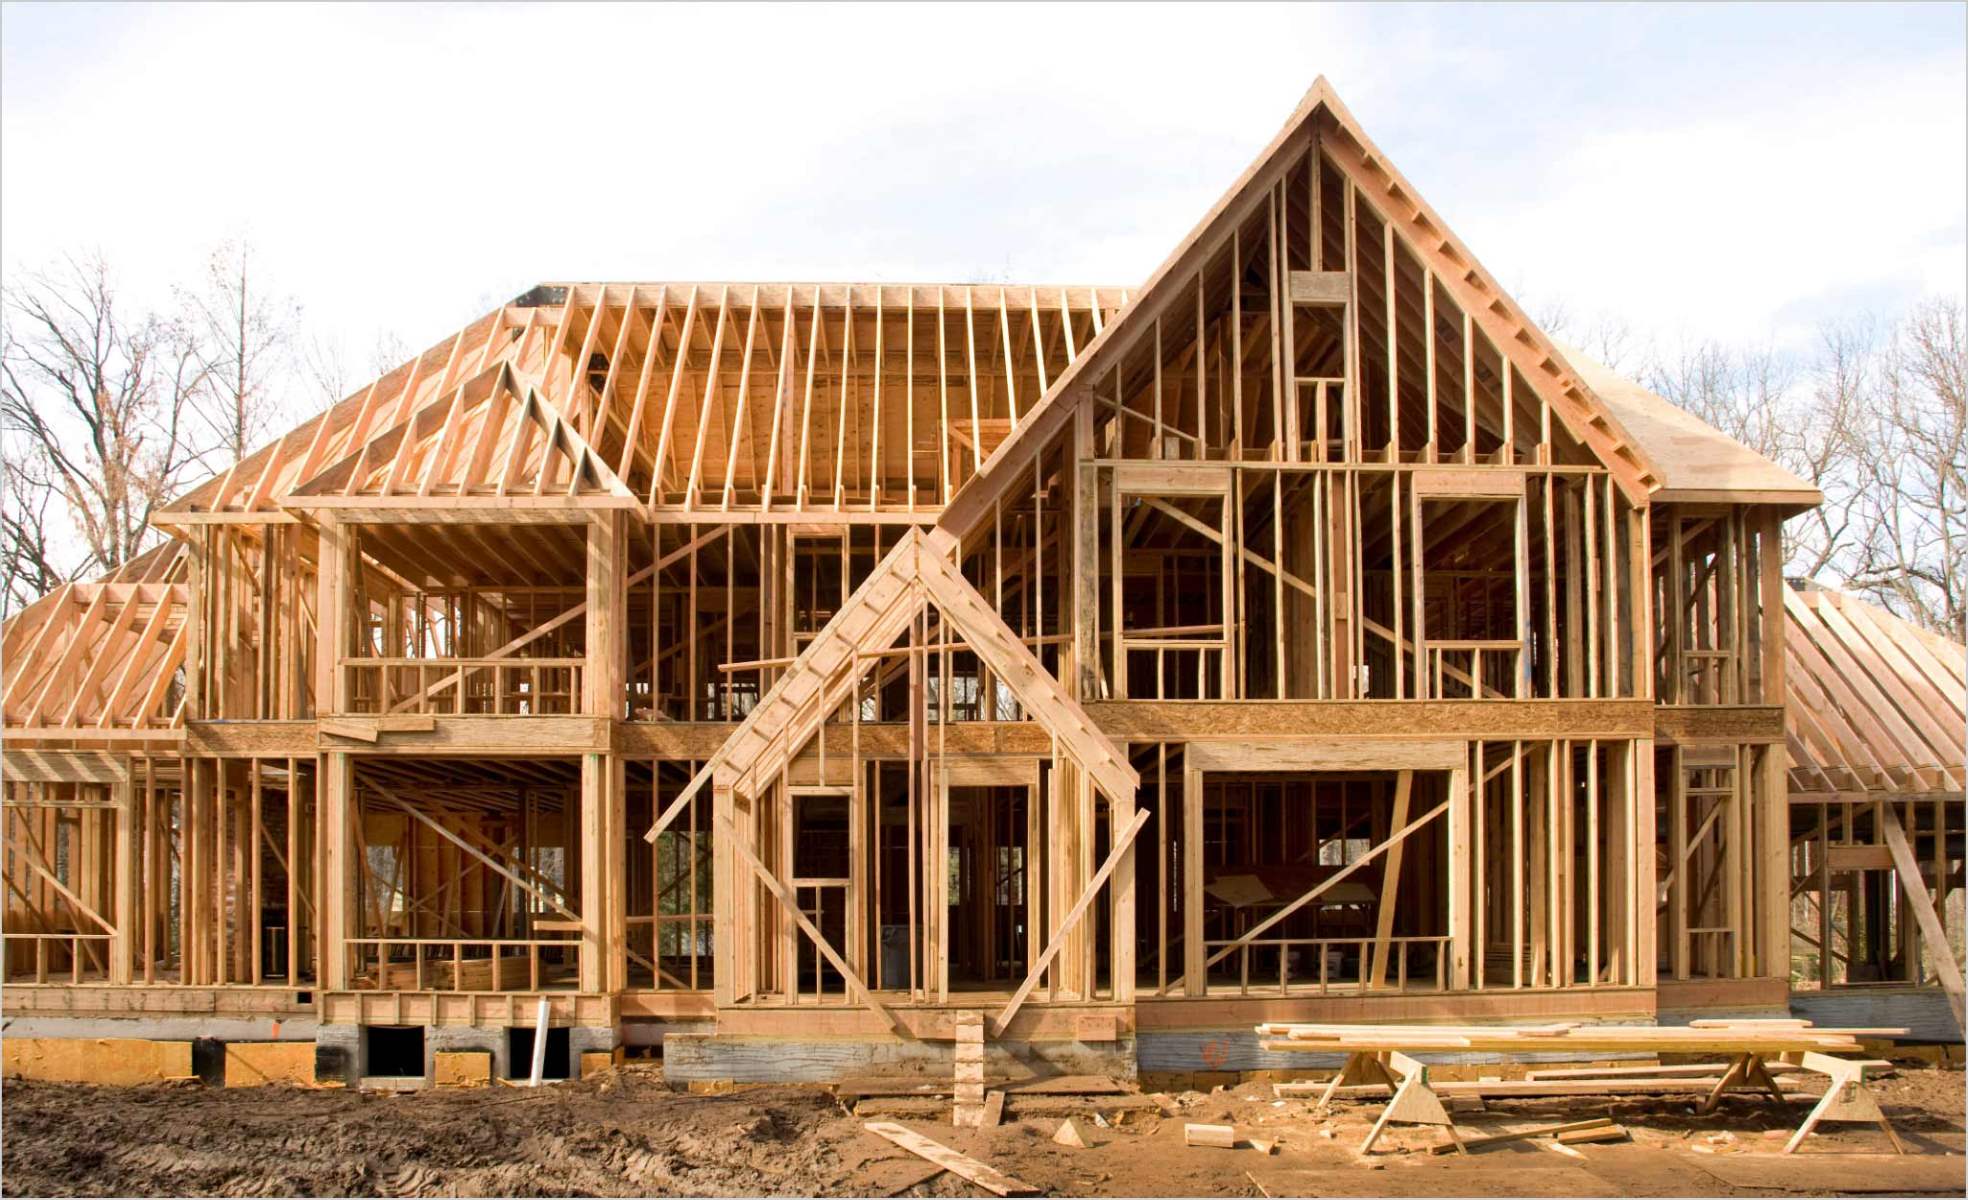
Designing a house frame is a crucial step in the construction process. It serves as the skeleton of the house, providing support and structure. A well-designed frame ensures the stability and durability of the entire building. Whether you are building a new home or renovating an existing one, understanding the fundamentals of house frame design is essential.
This article will guide you through the step-by-step process of designing a house frame. From determining the frame design to completing the construction, we will cover all the essential aspects to help you create a strong and reliable structure. So, let’s dive in and explore the key steps involved in designing a house frame.
Key Takeaways:
- Designing a house frame involves careful planning, material selection, and adherence to building codes. Attention to detail and quality craftsmanship are essential for creating a strong and reliable structure.
- The construction of a house frame requires thorough inspections, proper insulation, and compliance with regulations. Each step, from foundation to completion, contributes to the overall stability and functionality of the home.
Read more: What Is An A-Frame House?
Step 1: Determine the House Frame Design
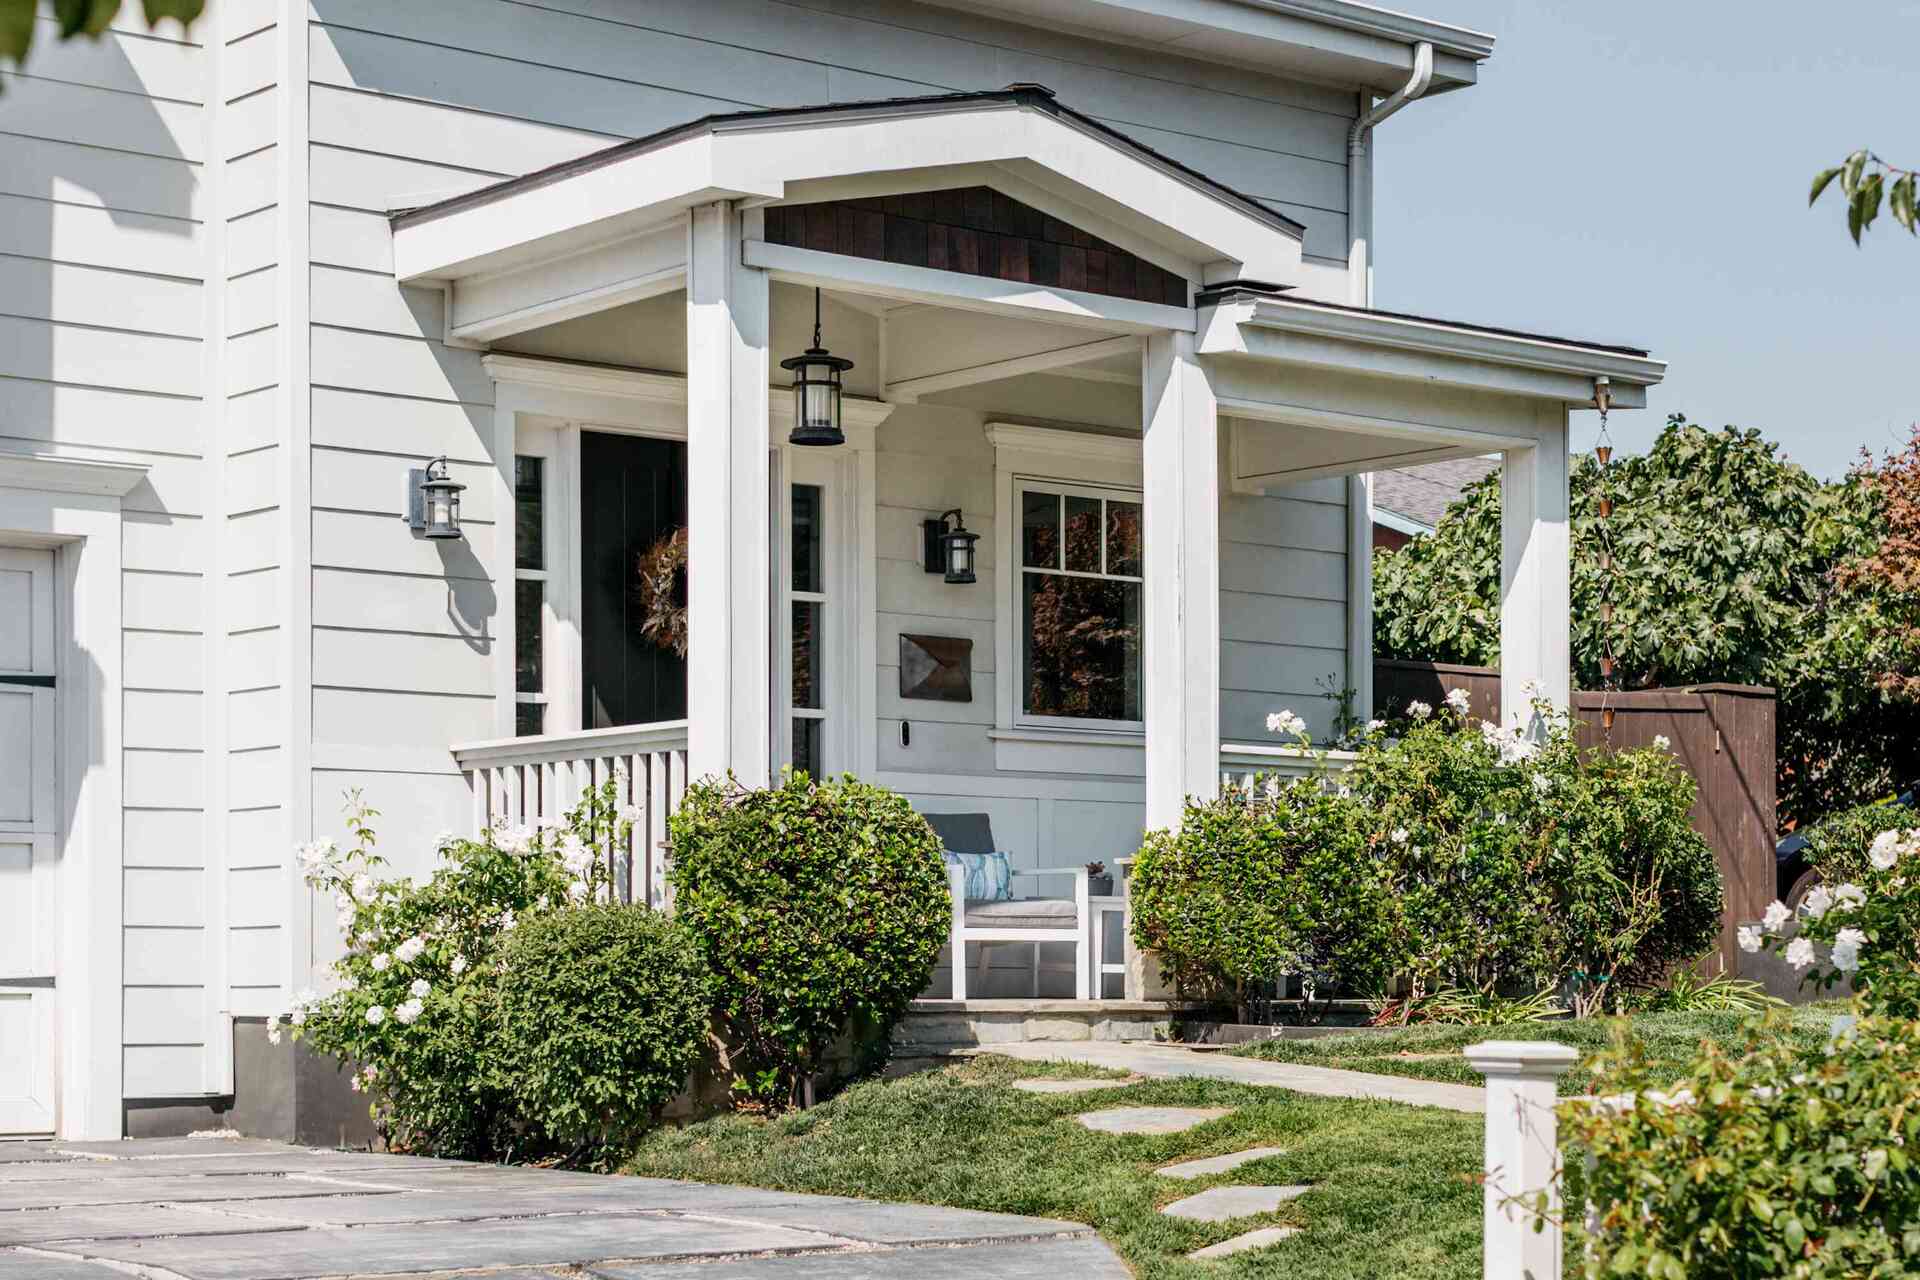
The first step in designing a house frame is determining the overall design and layout of the frame. This includes deciding on the architectural style, the number of floors, and the general floor plan of the house.
Consider factors such as the size of the lot, the desired square footage, and the intended use of the space. Are you designing a small cottage or a large family home? Will the house have an open concept or separate rooms? These considerations will help you determine the appropriate size and shape of the frame.
Additionally, think about any specific design features or requirements you have in mind. Do you want high ceilings, large windows, or unique architectural details? Incorporating these elements into the frame design will give your house a distinctive look and feel.
Consulting with an architect or a home designer can be beneficial during this stage. They can help you visualize and refine your ideas, ensuring that your house frame design aligns with your vision and meets local building codes and regulations.
Remember that the house frame design should not only be aesthetically pleasing but also practical and functional. It should support the weight of the entire structure and accommodate necessary utilities such as electrical wiring and plumbing.
By taking the time to carefully determine the house frame design, you will set a solid foundation for the rest of the construction process.
Step 2: Choose the Type of Building Material
Once you have finalized the design of your house frame, the next step is to choose the type of building material that will be used. There are several options available, each with its own advantages and considerations.
One common material used for house framing is wood, particularly dimensional lumber. Wood is a popular choice due to its availability, affordability, and ease of construction. It is versatile, allowing for various frame designs, and provides good insulation properties. However, it is important to ensure that the wood is treated to protect against rot and pest infestation.
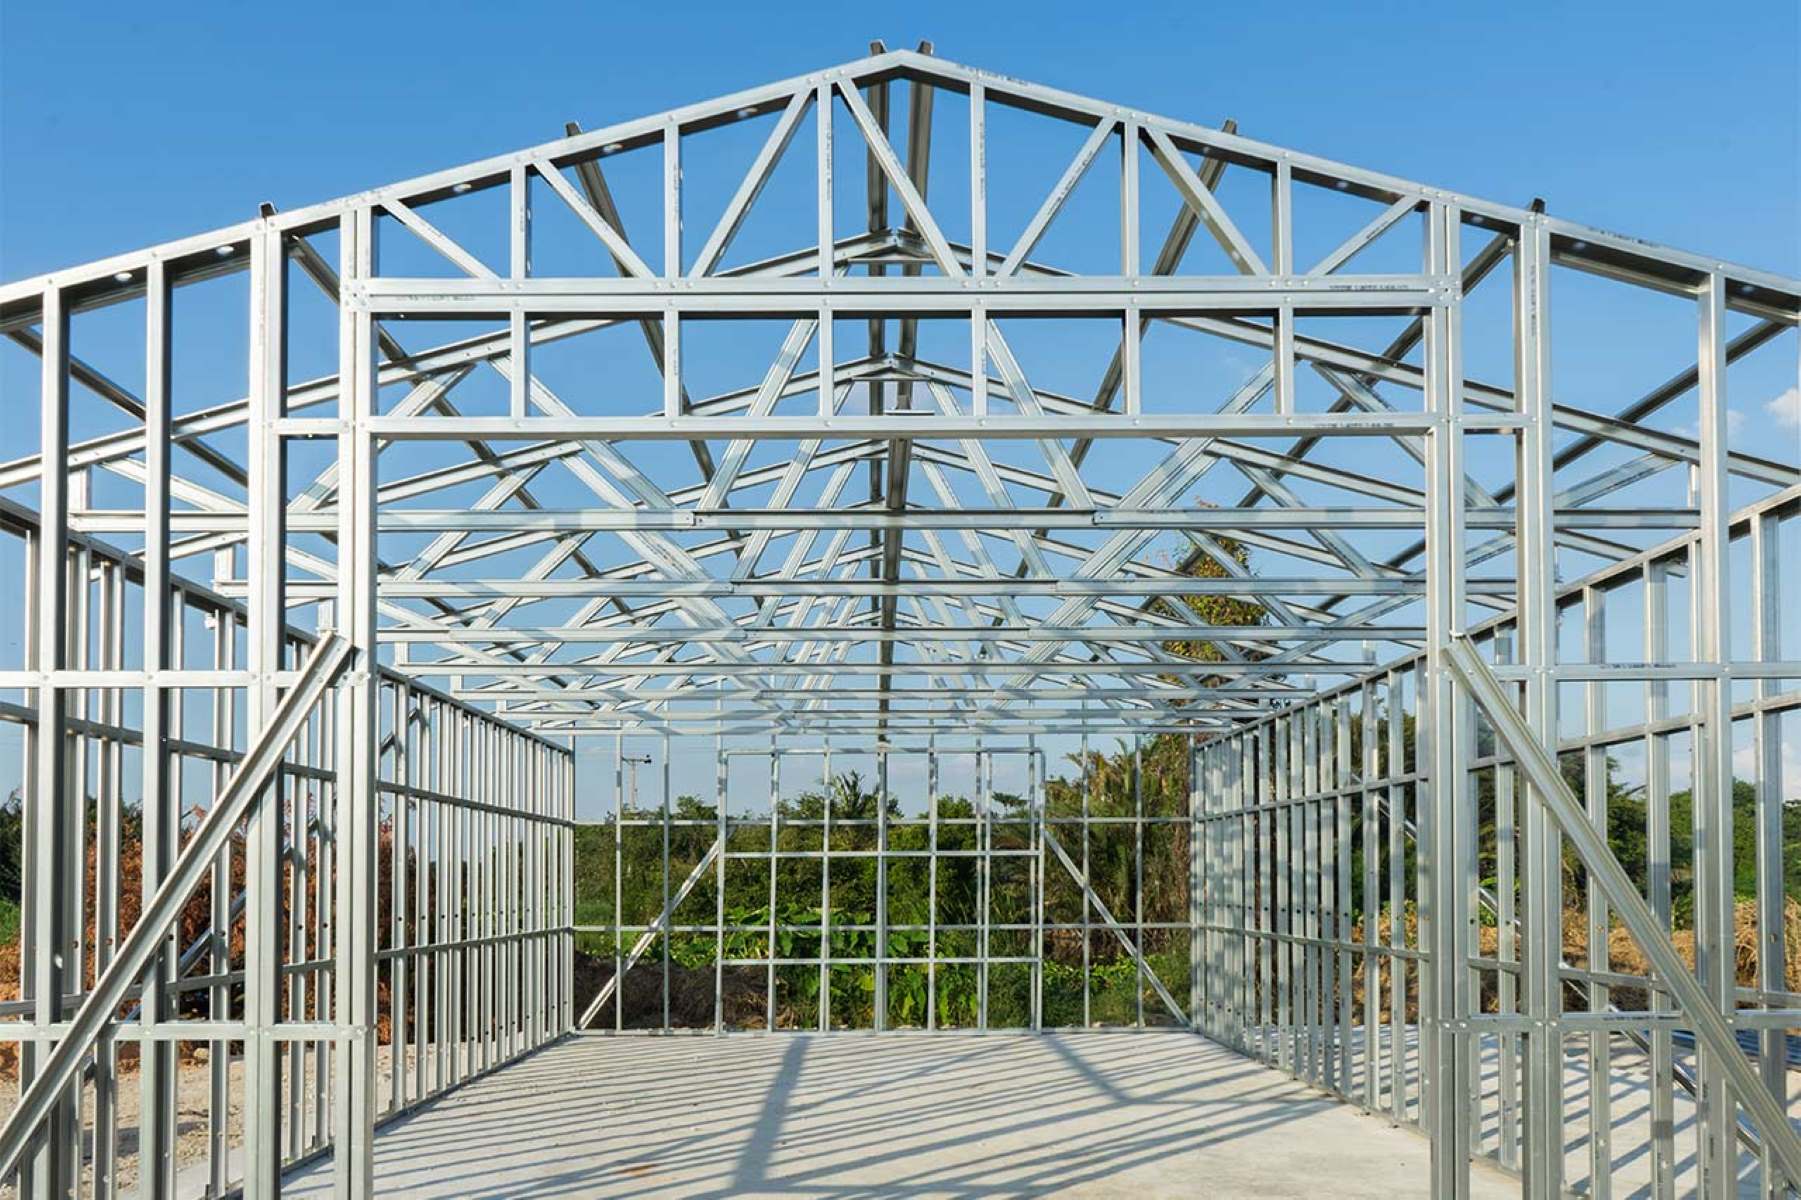
Another option is steel, which offers strength and durability. Steel frames can withstand extreme weather conditions and are resistant to fire, mold, and insects. They are also lightweight and can be easily assembled on-site. However, steel framing may require specialized expertise and can be more expensive than wood.
Concrete block or masonry is another material choice for house frames. It provides excellent durability, stability, and resistance to fire and natural disasters. Concrete block frames are energy-efficient and offer good sound insulation. However, masonry construction can be labor-intensive and may require professional assistance.
Other materials, such as structural insulated panels (SIPs) or insulated concrete forms (ICFs), offer energy efficiency and quick installation. These prefabricated systems provide excellent insulation and can help reduce energy costs in the long run. However, they may have higher upfront costs and require specialized training for installation.
When selecting the building material for your house frame, consider factors such as budget, climate conditions, construction time, and long-term maintenance. It is also important to comply with local building codes and regulations regarding the choice of materials.
By carefully weighing the pros and cons of each option, you can choose the building material that best suits your needs and ensures a strong and structurally sound house frame.
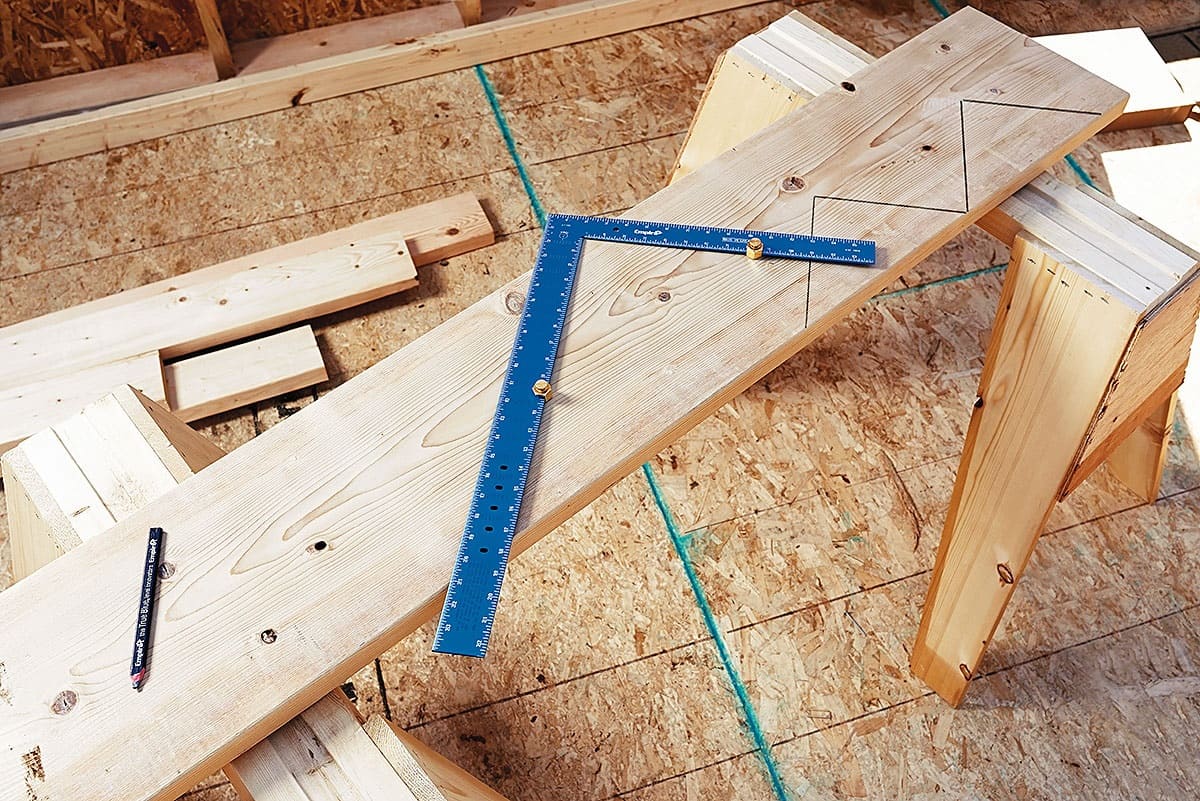
Step 3: Calculate the Dimensions for the Frame
Once you have determined the house frame design and chosen the building material, the next step is to calculate the dimensions for the frame. This involves careful measurement and consideration of various factors.
Start by calculating the total square footage of the house. Measure the length and width of each floor, including any additional spaces such as garages or porches. Multiply the length by the width to get the area of each floor, and sum up the areas to determine the total square footage.
Next, consider the height of the ceilings. Standard ceiling heights are usually 8 to 9 feet, but you can opt for higher ceilings if desired. The height of the walls will depend on the specific design of the house.
Take into account any architectural features that may affect the dimensions. These could include bay windows, dormers, or intricately designed roof structures. These features may require additional support and affect the overall dimensions of the frame.
It is also important to consider the load-bearing capacity of the frame. This involves calculating the weight that the frame will need to support, including the weight of the roof, flooring, and any additional fixtures such as chandeliers or ceiling fans. Consult with a structural engineer to ensure that the frame can adequately support the anticipated load.
Additionally, think about the placement of doors, windows, and interior walls. These elements will affect the placement and dimensions of the frame. Consider any specific requirements for these features, such as accessibility or natural light, and adjust the dimensions accordingly.
Throughout the calculation process, it is crucial to adhere to local building codes and regulations. These guidelines may specify minimum dimensions for rooms, ceiling heights, or clearances around utilities.
Properly calculating the dimensions for the frame will ensure that the resulting structure is sturdy, well-proportioned, and compliant with all necessary standards. Take your time during this step to ensure accurate measurements and thorough consideration of all design elements.
Step 4: Create a Blueprint for the House Frame
Once you have determined the dimensions for the house frame, the next step is to create a detailed blueprint. A blueprint serves as a visual representation of the frame design and provides crucial information for the construction process.
Start by hiring an architect or a draftsperson to draft the blueprint. They will translate your design ideas and measurements into a professional and accurate representation. The blueprint will include detailed floor plans, elevations, and cross-sectional views of the frame.
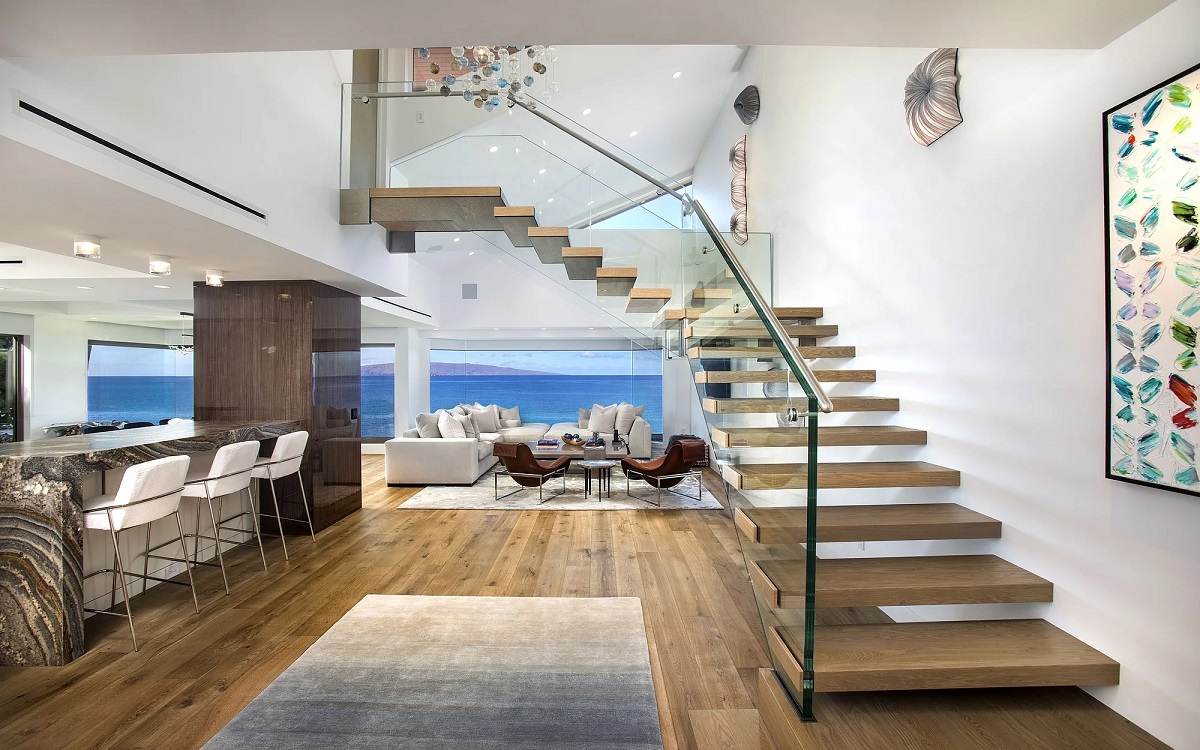
The floor plans depict the layout and dimensions of each floor, including the placement of walls, doors, and windows. They also indicate any additional features like staircases or fireplaces. The floor plans provide a comprehensive understanding of the overall design and flow of the house.
Elevations show the exterior view of the house from different angles. This includes the front, side, and rear views, allowing you to visualize the overall appearance of the house frame. Elevations indicate the height of the walls, the placement of windows and doors, and any architectural details or features.
Cross-sectional views provide a cut-through perspective of the house frame, showing the internal structure and dimensional details. This helps in understanding the placement of beams, joists, and other framing components. Cross-sections also highlight the relationship between different floors and the overall structural integrity of the frame.
In addition to the visual representations, the blueprint will also include written specifications, such as the type of building material to be used, the thickness of walls, and other construction details. These specifications provide important information for contractors, engineers, and inspectors during the construction process.
Creating a detailed blueprint ensures that everyone involved in the construction process has a clear understanding of the design and construction requirements. It serves as a roadmap for the construction team and helps to prevent errors or misunderstandings during the build.
Consult with the architect or draftsperson throughout the blueprint creation process to ensure that all design elements are accurately represented and meet your expectations. Once the blueprint is complete, review it carefully and make any necessary revisions before moving on to the next step.
Read more: How To Frame A Screen Porch
Step 5: Obtain Necessary Permits and Clearances
Before you can begin construction on your house frame, it is essential to obtain the necessary permits and clearances from the relevant authorities. This step ensures that your project complies with local building codes and regulations.
Start by researching the building regulations in your area. Contact the local building department or planning commission to understand the specific requirements for constructing a house frame. They will provide you with information on the permits needed and the documentation required.
Typically, you will need to submit the blueprint of your house frame along with other supporting documents, such as proof of property ownership, site plans, and engineering calculations. These documents will undergo review by the building department or planning commission to ensure compliance with building codes and zoning regulations.
The review process may take some time, depending on the workload of the authorities. It is important to be patient and allow sufficient time for the necessary approvals.
Once your documents are reviewed and approved, you will be issued the required permits. These permits serve as authorization for you to begin construction on the house frame. They also indicate that your project has met the necessary safety and regulatory standards.
In addition to the building permits, you may also need to obtain other clearances or approvals. For example, an environmental clearance may be required if your construction site is in a protected area or if certain environmental regulations apply. Consult with local authorities to determine if any additional clearances are needed.
During the construction process, it is important to display the permits prominently at the construction site. This allows inspectors to verify compliance and ensures that construction proceeds as permitted.
Obtaining the necessary permits and clearances is a critical step in the construction process. It ensures that your house frame is built in accordance with local laws and regulations, promoting safety and adherence to standards.
Work closely with the building department and other relevant authorities to ensure a smooth and compliant process. By doing so, you can proceed with confidence, knowing that you have met all the necessary legal requirements.
Step 6: Prepare the Construction Site
Before starting the construction of your house frame, it is important to prepare the construction site properly. This step ensures a safe and efficient work environment and sets the stage for the successful execution of the project.
Start by clearing the construction site of any existing structures, debris, or vegetation. This includes removing trees, shrubs, or rocks that may obstruct the construction process or pose safety hazards. Clearing the site allows for a clean and spacious area to begin the construction of the house frame.
Next, ensure that the site is properly leveled. The ground should be even and free from any uneven areas or slopes that may affect the stability of the house frame. If necessary, hire professionals to grade the site and ensure proper leveling.
Establish proper access to the construction site. This includes creating driveways or temporary pathways for construction vehicles and equipment. Adequate access ensures smooth transportation of materials and easy movement of workers on the site.
Set up necessary utilities and infrastructure. Ensure that there is access to electricity, water supply, and sanitary facilities during the construction process. Temporary connections may be required at this stage.
Install safety measures on the site. This includes erecting fencing around the perimeter to prevent unauthorized access and ensuring proper signage indicating the construction zone. Implement safety protocols and provide protective gear to all workers to minimize accidents and maintain a safe work environment.
Arrange for the delivery of construction materials, such as lumber, steel, or concrete, based on your house frame design and blueprint. Coordinate with suppliers to ensure timely delivery and proper storage of materials on site.
It is also important to consider environmental factors during the site preparation process. Implement erosion control measures to prevent soil erosion and sedimentation during construction. Take steps to minimize the impact on nearby ecosystems or water bodies, if applicable.
Finally, communicate with the construction team and make sure everyone is aware of the site’s preparedness and safety measures. Conduct regular safety briefings and emphasize the importance of adhering to safety protocols at all times.
By properly preparing the construction site, you create the foundation for a smooth and efficient construction process. It ensures a safe work environment and sets the stage for the successful execution of your house frame project.
When designing a house frame, consider using engineered wood products like laminated veneer lumber (LVL) or I-joists for increased strength and stability. These materials are often more consistent and reliable than traditional lumber.
Step 7: Construct the Foundation
With the construction site prepared, it’s time to move on to the next crucial step: constructing the foundation of your house frame. The foundation provides stability, support, and a solid base for the entire structure.
Start by excavating the area where the foundation will be laid. This involves digging trenches to the appropriate depth and dimensions, as specified in your house frame blueprint. The depth of the trenches will depend on the local building codes and the soil conditions of your site.
Once the trenches are excavated, it’s time to prepare the foundation forms. These forms are typically made of wood or metal and are used to create the shape and contours of the foundation. Ensure that the forms are properly aligned and leveled to achieve a uniform foundation.
After the forms are in place, it’s time to pour the concrete. Concrete is the most commonly used material for foundation construction, as it provides strength and durability. The concrete is mixed according to the specifications and then poured into the forms. Use reinforcing bars or mesh within the concrete to enhance its strength and prevent cracking.
As the concrete is poured, workers will use tools such as shovels, rakes, and vibrating equipment to ensure proper consolidation and remove air bubbles. This helps to achieve a smooth and solid foundation.
After the concrete is poured, it needs time to cure and gain strength. The curing process typically takes several days, during which the concrete should be protected from extreme temperatures, direct sunlight, and excessive moisture. Follow the recommended curing guidelines provided by the concrete supplier or consult with a professional for best practices.
Once the concrete has fully cured, the foundation forms can be removed. This exposes the solid foundation that will support the house frame. Inspect the foundation for any signs of cracks or defects and address them accordingly to ensure its structural integrity.
It is essential to adhere to local building codes and regulations throughout the foundation construction process. This includes obtaining any necessary inspections to ensure compliance and to guarantee the foundation meets the required standards.
The foundation is a critical component of your house frame, providing the stability and strength for the entire structure. By paying careful attention to detail during the construction of the foundation, you set the groundwork for a secure and durable house frame.
Step 8: Build the Exterior Walls
Once the foundation is in place, it’s time to move on to building the exterior walls of your house frame. The exterior walls provide structural support, insulation, and protection from the elements.
Start by measuring and marking the layout of the walls on the foundation. Use a chalk line or string to ensure accurate placement of the walls. Pay attention to corners, doorways, and window openings, as they will require additional framing.
Next, determine the type of framing you will use for the exterior walls. This can include traditional wood studs, steel framing, or other alternative materials. Ensure that the chosen materials comply with local building codes and meet your design and structural requirements.
Begin the wall construction by assembling the bottom plates. These plates are placed directly on the foundation and serve as the base for the wall framing. Make sure they are securely anchored to the foundation using appropriate fasteners.
Once the bottom plates are in place, start erecting the wall frames. Cut and assemble the studs, ensuring they are plumb and properly spaced according to the blueprint. Use a level and framing square to ensure accurate positioning and alignment.
Throughout the wall construction process, it is important to install appropriate insulation materials. Insulation helps to regulate the temperature inside the house and improve energy efficiency. Consider the climate conditions in your area when selecting insulation types and thickness.
As you construct the walls, remember to install appropriate openings for doors and windows. These openings should be framed and reinforced to support the weight of the doors and windows. Consult the manufacturer’s guidelines for installation requirements.
As each wall section is completed, it’s important to secure them to the foundation and to each other. Use appropriate fasteners, such as nails or screws, to ensure stability and structural integrity. Reinforce the corners and junctions for added strength.
Throughout the wall construction process, maintain a focus on quality and attention to detail. Check for any gaps, uneven surfaces, or structural irregularities and address them promptly. This will help prevent issues in the later stages of construction and ensure a solid and well-built exterior wall system.
By building the exterior walls diligently and following best construction practices, you lay the foundation for a sturdy and secure house frame. These walls will form the structural envelope of your home and serve as the framework for the remaining construction steps.
Read more: How To Frame A Porch Deck
Step 9: Install the Roof Structure
With the exterior walls in place, it’s time to move on to installing the roof structure of your house frame. The roof structure provides protection from the elements and supports the roof covering.
Start by determining the type of roof design you want for your house. This can include gable roofs, hip roofs, flat roofs, or other architectural styles. Consider factors such as the climate, aesthetic preferences, and local building codes when selecting the roof design.
Next, calculate the necessary roof dimensions based on the size and layout of your house. This includes determining the pitch or slope of the roof, as well as the length and width of the roof structure.
Once the dimensions are determined, begin the installation of the roof structure. This typically involves placing and securing the roof trusses or rafters. These are the main supporting elements that form the framework of the roof.
Make sure to follow the manufacturer’s guidelines for the installation of roof trusses or rafters. Ensure they are properly spaced, aligned, and securely fastened. Use appropriate hardware and connectors to provide stability and structural integrity.
During the roof structure installation, it’s important to consider proper bracing and support systems. These help maintain the structural stability of the roof during and after construction. Consult the design specifications and local building codes for the required bracing and support systems.
As you install the roof structure, take into account any additional features or components, such as skylights, dormers, or chimneys. Properly frame and integrate these elements into the roof structure to ensure a secure and watertight installation.
Once the roof structure is in place, it’s time to install the roof sheathing. This is typically made of plywood or oriented strand board (OSB) and provides a solid base for the roof coverings. Secure the sheathing to the roof structure using appropriate fasteners, ensuring a tight fit between the panels.
Remember to consider proper ventilation for the roof. Adequate ventilation helps to regulate temperature, reduce moisture buildup, and prolong the life of the roof. Install ridge vents, soffit vents, or other ventilation systems as per the requirements.
Throughout the roof structure installation, prioritize safety and quality craftsmanship. Ensure that all components are installed properly and meet the necessary structural and safety standards. Regularly inspect the work to check for any defects or issues and address them promptly.
By installing the roof structure with precision and attention to detail, you are one step closer to completing the house frame. The roof structure not only provides protection from the elements but also contributes to the overall aesthetics and functionality of your home.
Step 10: Frame the Interior Walls
With the exterior walls and roof structure in place, it’s time to move on to framing the interior walls of your house frame. The interior walls define the layout and structure of the rooms within your home.
Start by marking out the locations of the interior walls on the floor and ceiling according to your house design and blueprint. This will serve as a guide for positioning the wall studs and framing components.
Next, determine the type of wall framing you will use, such as wood studs or steel framing. Ensure that you meet local building codes and follow the recommendations provided by the manufacturer for the framing material you choose.
Begin framing the interior walls by installing the bottom plates. These plates will be fixed to the floor, serving as the base for the wall framing. Use appropriate fasteners to secure the plates.
Once the plates are in place, measure and cut the wall studs to the required height. Ensure they are spaced according to the building code, keeping in mind any additional structural elements or openings such as doors and windows.
As you assemble the wall framing, make sure the studs are plumb, level, and securely fastened to the bottom and top plates. Use a carpenter’s level and plumb line to ensure accuracy and precision.
During the framing process, consider insulation materials for interior walls. While insulation is commonly used for exterior walls, it can also be beneficial for interior walls to enhance soundproofing and energy efficiency.
If your house design includes any special features or structural elements, such as arches, niches, or built-in shelving units, integrate them into the framing of the interior walls. Follow the design specifications and measurements to ensure proper installation.
As you frame each interior wall, inspect the work for any gaps, uneven surfaces, or structural irregularities. Address any issues promptly to maintain the integrity and quality of the wall framing.
Throughout the framing process, keep safety in mind. Ensure a safe work environment, follow proper safety protocols, and provide appropriate protective gear for all workers involved in the construction.
By framing the interior walls meticulously, you are creating the physical boundaries that define the functional spaces within your home. These walls will serve as the framework for the remaining construction steps, ensuring a solid and well-designed interior.
Step 11: Install Doors and Windows
With the interior walls framed, it’s time to move on to installing the doors and windows in your house frame. Doors and windows not only provide access and natural light to your home but also contribute to its aesthetic appeal.
Start by determining the locations and sizes of the doors and windows based on your house design and blueprint. Consider factors such as room layout, functionality, and architectural style when making these decisions.
Next, measure the openings for the doors and windows and prepare them for installation. This may involve removing any temporary coverings and ensuring the openings are clean and level.
Begin by installing the doors. Start with the entry doors, as they are typically larger and more complex to install. Follow the manufacturer’s instructions for proper door installation, ensuring that they are level, plumb, and properly aligned. Use appropriate hardware and fasteners to secure the doors in place.
For windows, start by installing the window frames into the rough openings. Ensure they fit securely and are properly leveled. Follow the manufacturer’s guidelines for proper installation, which may involve inserting shims to align the frames and anchoring them with screws or nails.
Once the frames are in place, install the window sashes and any additional components, such as screens or blinds, according to the manufacturer’s instructions. Make sure that the windows open and close smoothly and are properly sealed to prevent drafts and water infiltration.
Ensure that all doors and windows are properly insulated. Use weatherstripping and appropriate insulation materials to minimize air leakage and improve energy efficiency.
Throughout the installation process, pay attention to details and quality craftsmanship. Check for any gaps, uneven surfaces, or improper alignment and address them promptly. Properly installed doors and windows contribute to the overall functionality, aesthetics, and energy efficiency of your home.
After the doors and windows are installed, check for proper operation and functionality. Test door locks, handles, and window mechanisms to ensure they are working smoothly.
Remember to follow any safety guidelines and local building codes during the door and window installation process. If needed, consult with professionals or experts to ensure compliant and secure installations.
By installing doors and windows with precision and attention to detail, you are nearing the completion of your house frame. These elements not only enhance the functionality and comfort of your home but also add the finishing touches to the overall design.
Step 12: Complete the House Frame
Congratulations! You are now in the final step of completing the house frame. This step involves a final check and any necessary adjustments to ensure the frame is solid, secure, and ready for the next stages of construction.
Start by conducting a thorough inspection of the entire house frame. Look for any structural issues, such as gaps, cracks, or uneven surfaces. Address any concerns promptly to maintain the integrity of the frame.
During the inspection, pay close attention to all connections and joints. Ensure that they are properly secured and reinforced. Check the stability of the frame by applying pressure to key areas and verifying that there is no excessive movement or shifting.
If required, reinforce any areas of the frame that may need extra support. This could involve adding additional beams, braces, or other structural components.
Ensure that all necessary openings, such as ventilation ducts and electrical wirings, have been properly accommodated in the frame. This ensures the smooth installation of utilities and avoids any future need for alterations or modifications.
Make sure that the frame meets all the building codes and regulations specific to your area. Consult with a professional if needed to ensure compliance.
Check for proper insulation throughout the house frame. This includes insulation in exterior walls, interior walls, and the roof structure. Insulation helps regulate temperature, improve energy efficiency, and enhance comfort inside the house.
Once the frame has been thoroughly inspected and all necessary adjustments have been made, you can proceed to the next stages of construction, such as electrical and plumbing installations, drywalling, and finishing work.
It’s important to maintain a safe work environment throughout the completion of the house frame. Ensure that proper safety measures are in place and that all workers are equipped with the necessary protective gear.
Remember that completing the house frame is an important milestone in the construction process, but it is just one step in creating your dream home. Take pride in the work done so far and stay focused on the remaining tasks to bring your vision to life.
By completing the house frame with attention to detail and quality, you have set a strong foundation for the rest of the construction. Your efforts in this step will ensure a solid, secure, and well-crafted house frame that will form the backbone of your dream home.
Read more: How To Frame Porch Roof
Conclusion
Designing and constructing a house frame is a complex process that requires careful planning, attention to detail, and adherence to building codes and regulations. By following the step-by-step guide outlined in this article, you can create a strong and reliable structure that will serve as the foundation of your dream home.
From determining the house frame design to completing the construction, each step plays a crucial role in ensuring a successful and well-built house frame. By considering factors like materials, dimensions, permits, and clearances, you can create a frame that meets both your aesthetic preferences and functional requirements.
Throughout the construction process, it’s important to maintain a focus on quality craftsmanship, safety, and compliance with local building codes. Regular inspections, proper alignment, and attention to detail will help you address any issues and ensure that your frame meets the necessary standards.
Remember that the house frame is the skeleton of your home, providing the support and structure for the entire building. It’s the result of your architectural vision and will serve as the framework for the final touches that transform the house into a cozy and comfortable space.
Whether you’re building a new home or renovating an existing one, the process of designing and constructing a house frame can be both exciting and challenging. But with the right knowledge, planning, and expertise, you can create a durable and aesthetically pleasing frame that will stand the test of time.
So, roll up your sleeves, gather your team of professionals, and embark on this fulfilling journey of bringing your dream home to life. With careful attention to each step, your house frame will serve as a solid and impressive structure, ready to welcome you and your loved ones for years to come.
Frequently Asked Questions about How To Design A House Frame
Was this page helpful?
At Storables.com, we guarantee accurate and reliable information. Our content, validated by Expert Board Contributors, is crafted following stringent Editorial Policies. We're committed to providing you with well-researched, expert-backed insights for all your informational needs.


0 thoughts on “How To Design A House Frame”