Home>diy>Architecture & Design>How To Make A 3D Design Of A House
Architecture & Design
How To Make A 3D Design Of A House
Modified: December 7, 2023
Learn how to create stunning 3D designs of houses with our step-by-step guide. Enhance your architecture design skills and bring your ideas to life!
(Many of the links in this article redirect to a specific reviewed product. Your purchase of these products through affiliate links helps to generate commission for Storables.com, at no extra cost. Learn more)
Introduction
Welcome to the world of 3D design and architecture! If you’ve ever dreamed of creating your own stunning house design, then this article is for you. In today’s digital age, 3D design has become an essential tool for architects, interior designers, and homeowners alike. With the advancements in technology, it is now easier than ever to bring your vision to life and create a realistic 3D model of your dream house.
Designing a house in three dimensions not only allows you to visualize your ideas more clearly but also gives you the opportunity to explore different design options and make informed decisions about the layout, materials, and aesthetics of your home. Whether you’re an aspiring architect, a home renovation enthusiast, or someone who simply loves to dabble in creative projects, learning how to make a 3D design of a house can be both fun and rewarding.
In this article, we will guide you through the step-by-step process of creating a 3D design of a house. From gathering the necessary tools and materials to fine-tuning and exporting the final design, we’ve got you covered. By the end of this article, you’ll have a comprehensive understanding of the process and be ready to embark on your own 3D design journey.
But before we begin, it’s important to note that while 3D design software can be a powerful tool, it requires some learning and practice to master. Don’t get discouraged if you encounter challenges along the way. Rome wasn’t built in a day, and neither will your 3D design skills. So, let’s dive in and unleash your creativity!
Key Takeaways:
- Embrace the world of 3D design and architecture by following a step-by-step process to create a stunning virtual house. From gathering tools to fine-tuning the design, unleash your creativity and bring your vision to life.
- Patience, attention to detail, and an open mind are essential in the journey of making a 3D design of a house. Explore different techniques, engage with the design community, and infuse your unique style to create breathtaking virtual homes.
Step 1: Gathering the Necessary Tools and Materials
Before diving into the world of 3D design, it’s important to make sure you have all the necessary tools and materials at your disposal. Here are some essential things you’ll need:
- Computer or Laptop: A reliable computer or laptop is essential for running 3D design software smoothly. Make sure it meets the minimum requirements for the software you’ll be using.
- 3D Design Software: There are numerous 3D design software options available, ranging from beginner-friendly to professional-grade. Do some research and choose one that suits your needs and budget. Some popular options include SketchUp, AutoCAD, and Blender.
- Mouse or Drawing Tablet: While a regular mouse can get the job done, using a drawing tablet can provide a more precise and intuitive drawing experience. Choose the option that feels most comfortable for you.
- Reference Materials: Collect any reference materials you may have, such as architectural magazines, books, or photographs of houses that inspire you. These references will help you during the design process.
- Notebook and Pens: Keeping a notebook and pens handy will allow you to jot down ideas, sketch rough layouts, and make notes as you go along. This will keep your thoughts organized and serve as a valuable reference.
- Internet Connection: Having a stable internet connection is important for downloading software updates, accessing online tutorials and resources, and even collaborating with others on your design.
Once you have gathered all the necessary tools and materials, you’re ready to move on to the next step: creating a blueprint of the house. This is an essential foundation for your 3D design, as it will serve as a guide throughout the entire process.
Now, let’s get creative as we lay the groundwork for your virtual dream house!
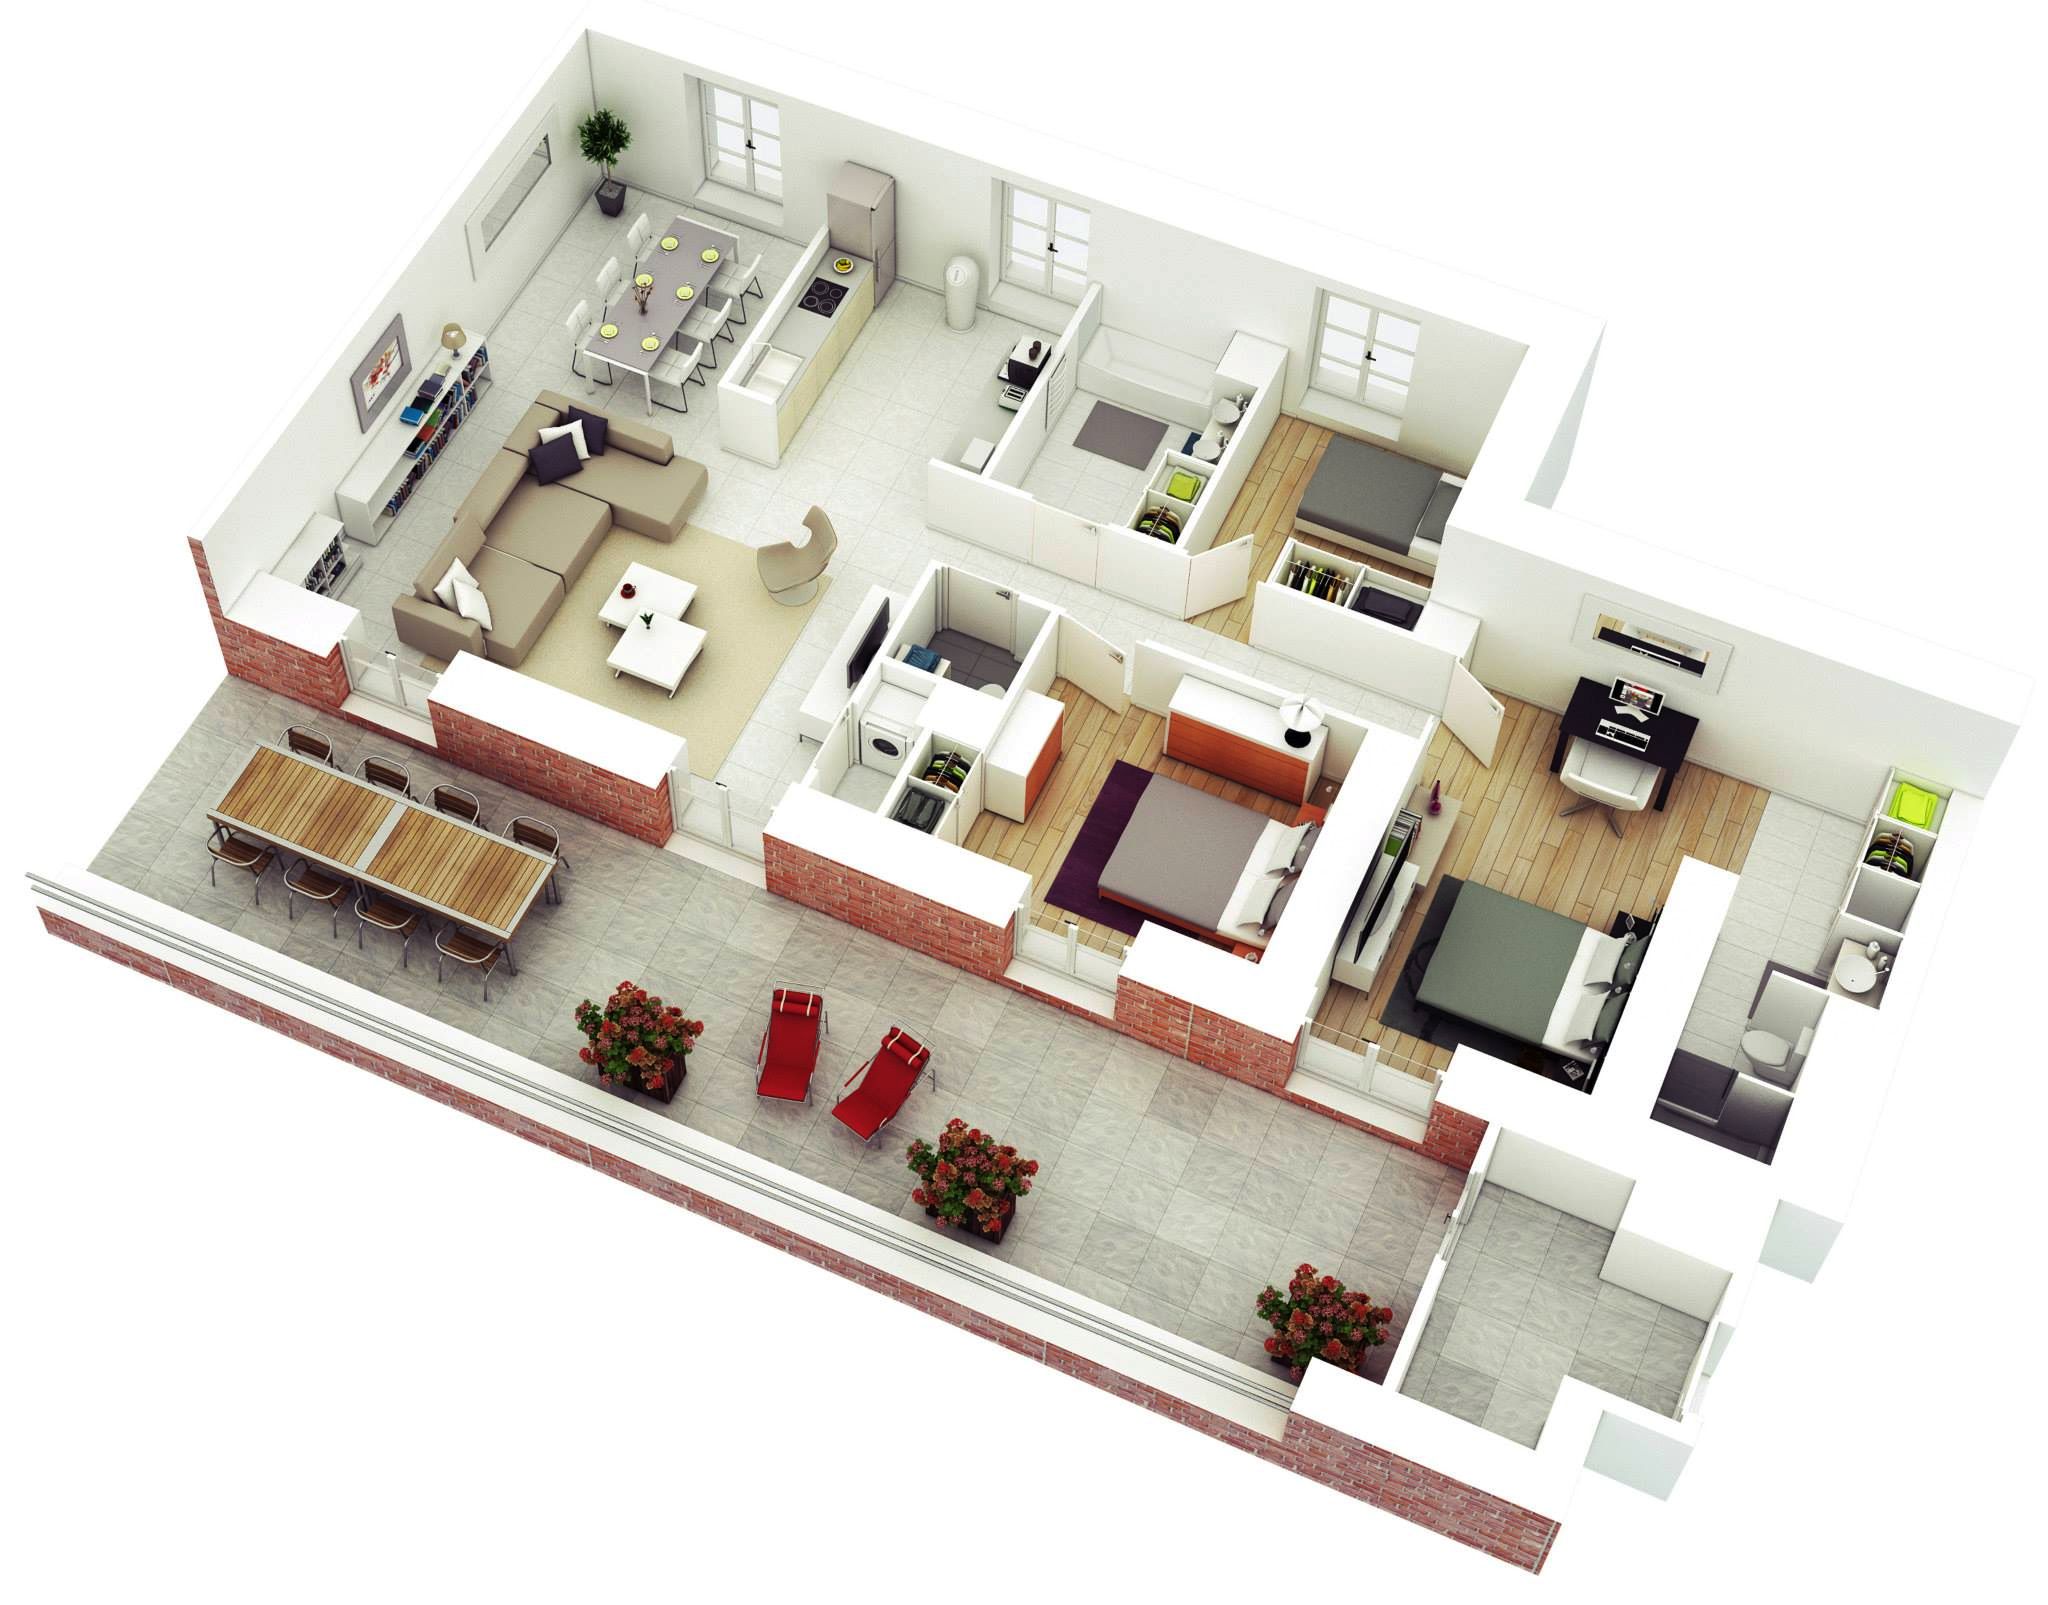
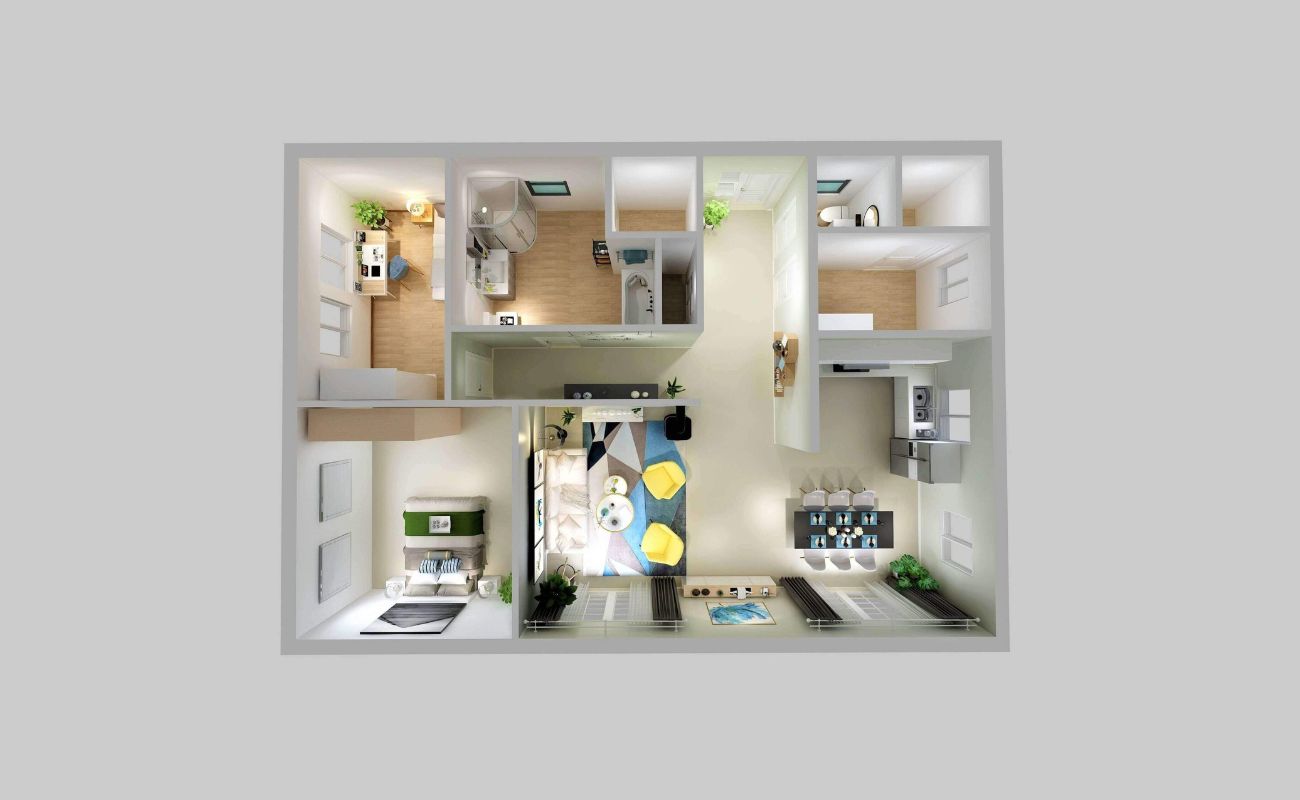
Step 2: Creating a Blueprint of the House
Creating a blueprint is a crucial step in the 3D design process as it serves as the foundation for your virtual house. A blueprint is a scaled drawing that outlines the layout, dimensions, and overall structure of the house. Here’s how you can create a blueprint:
- Measure and Sketch: Start by measuring the dimensions of the rooms, walls, and other elements of your house. Use a tape measure to accurately record the lengths, widths, and heights. Then, sketch a rough floor plan of each level of your house. Include walls, doors, windows, and any other architectural features.
- Use Online Tools: If you’re not confident in your sketching abilities, there are many online tools and software available that can help you create a digital floor plan. These tools often have pre-built templates and a drag-and-drop interface, making it easy to visualize and adjust your layout.
- Include Measurements: Make sure to include measurements on your blueprint. This will help you accurately replicate the dimensions in your 3D design software.
- Consider Structural Elements: Take into account important structural elements such as load-bearing walls, beams, and stairs. These details are important for creating an accurate and realistic 3D model.
- Add Exterior Features: Don’t forget to include exterior features such as gardens, patios, and driveways in your blueprint. These elements will contribute to the overall design and ambiance of your virtual house.
Remember, the more detailed and accurate your blueprint is, the easier it will be to translate it into a 3D design. Take the time to carefully plan and refine your blueprint before moving on to the next step.
Now that you have a solid blueprint in hand, it’s time to explore the exciting world of 3D design software. In the next step, we will guide you through the process of choosing the right software for your needs.
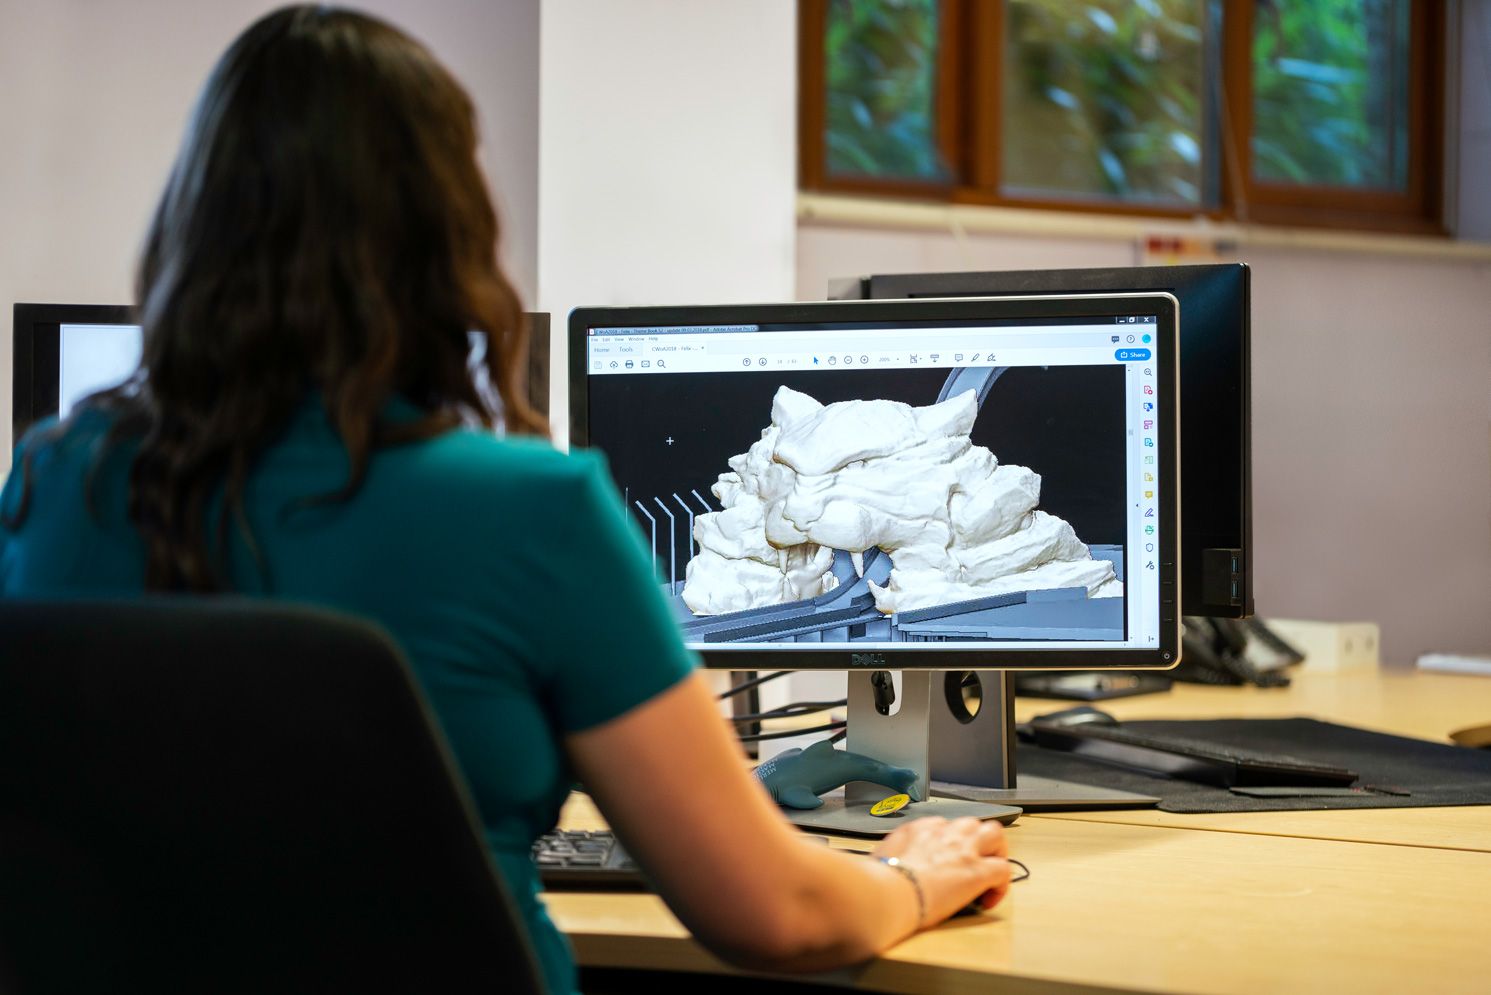
Step 3: Choosing a 3D Design Software
Choosing the right 3D design software is essential to bring your vision to life. With so many options available, it’s important to consider your skill level, budget, and specific needs when making a decision. Here are some factors to consider when choosing a 3D design software:
- User-Friendliness: If you’re new to 3D design, it’s preferable to choose software with a user-friendly interface and intuitive controls. Look for software that offers a shallow learning curve and provides ample documentation and tutorials.
- Feature Set: Consider the features that are important to you. Do you need advanced rendering capabilities, realistic lighting effects, or the ability to create intricate architectural details? Evaluate the software’s feature set and see if it aligns with your design goals.
- Compatibility: Ensure that the software you choose is compatible with your computer’s operating system. Some software may only be available for Windows, while others are compatible with both Windows and macOS.
- Community and Support: Check if the software has an active user community and good support channels. Having access to online forums, tutorials, and technical support can greatly aid your learning process and troubleshooting.
- Price: Consider your budget when selecting a 3D design software. Some software may have a one-time purchase fee, while others require a monthly or annual subscription. Research the pricing options and choose one that fits your budget.
Some popular 3D design software options include SketchUp, AutoCAD, Revit, and Blender. Each software has its own strengths and weaknesses, so take the time to explore and experiment with different programs before committing to one.
Remember, choosing the right software is crucial for a smooth and enjoyable 3D design experience. Once you’ve selected the software that meets your requirements, the next step is to import your blueprint and start creating the basic structure of your house.
Step 4: Importing the Blueprint into the Software
Now that you have chosen your 3D design software, it’s time to bring your blueprint to life by importing it into the software. This step will serve as the starting point for creating the 3D model of your house. Here’s how you can import the blueprint:
- Open the Software: Launch the 3D design software that you’ve chosen and ensure that your computer meets the minimum system requirements.
- Create a New Project: Start a new project within the software and give it a meaningful name. This will help you stay organized throughout the design process.
- Import the Blueprint: Look for an option to import or import from file within the software. Locate the blueprint file on your computer and open it. The software will then import the blueprint, allowing you to use it as a reference for your 3D design.
- Scale and Orient the Blueprint: Once the blueprint is imported, ensure that it is properly scaled and oriented within the software. Compare the dimensions of the walls, doors, and windows in the software to the ones in the blueprint. Adjust the scaling if necessary to maintain accuracy.
- Place the Blueprint in the Workspace: Position the imported blueprint in the workspace of the software. This will serve as your guide for creating the basic structure of the house.
Importing the blueprint into the software provides a solid foundation for your 3D design. It allows you to accurately translate the dimensions and layout of the house into the virtual environment. With the blueprint as a reference, you can now start building the basic structure of your house in the next step.
Now that your blueprint is successfully imported, it’s time to get creative and start shaping your dream house in the virtual world. In the next step, we will guide you through the process of creating the basic structure of the house.
Read more: How To Make 3D Grass
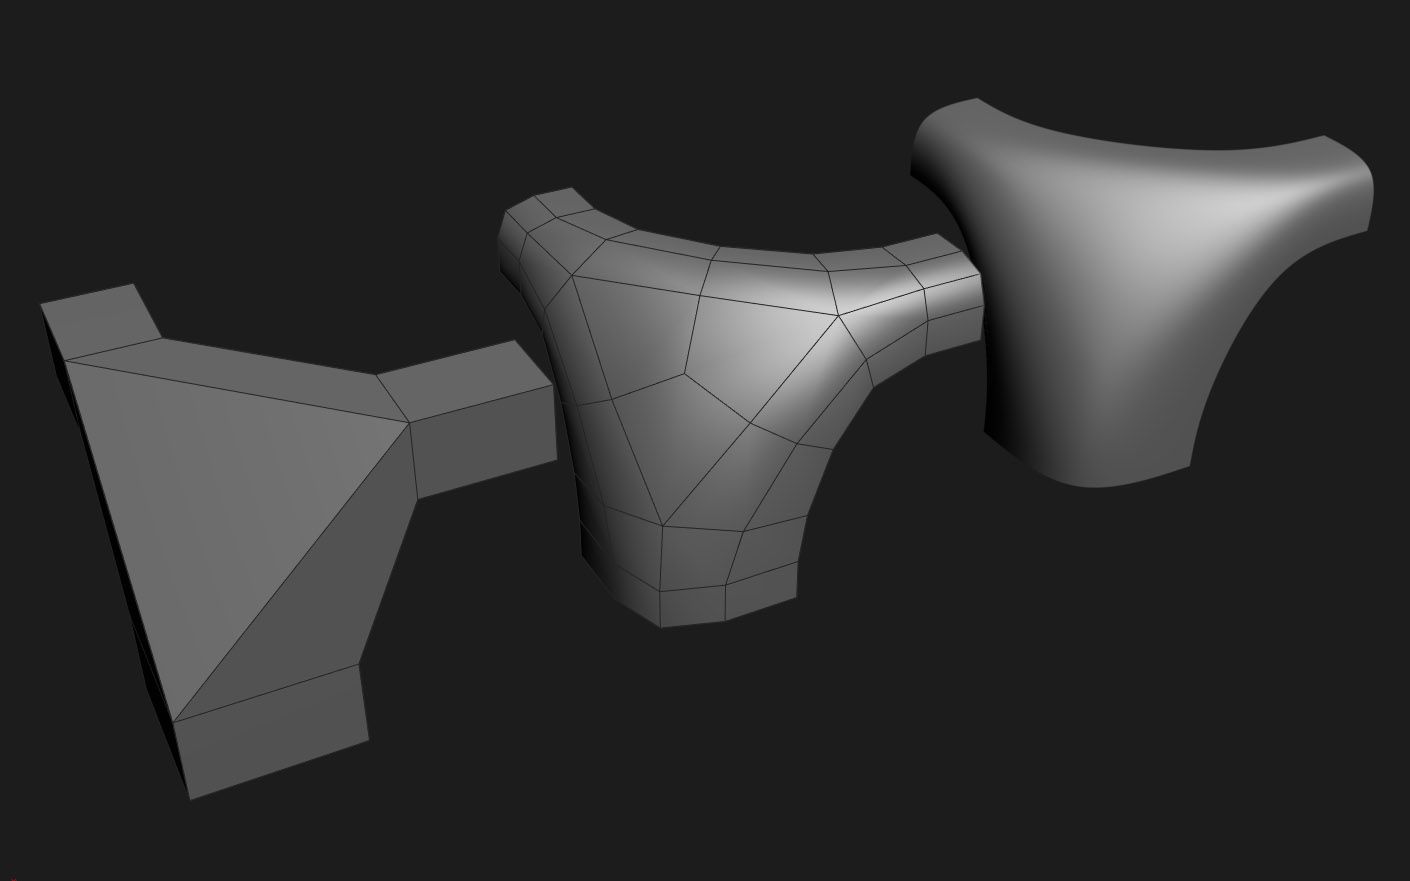
Step 5: Creating the Basic Structure of the House
With the blueprint imported into the 3D design software, it’s time to bring your dream house to life by creating its basic structure. This step involves building the foundation, walls, and floors of your house in the virtual environment. Follow these steps to create the basic structure:
- Foundation: Start by creating the foundation of your house. Use the blueprint as a guide to accurately position and size the foundation in the 3D design software. Ensure that it matches the dimensions and shape of the actual foundation.
- Walls: Proceed to create the walls of your house. Use the drawing tools in the software to draw walls according to the blueprint. Adjust the height and thickness of each wall as necessary. Pay attention to interior and exterior walls, as well as any partitions or dividers.
- Floors: After creating the walls, add the floors to your design. Use the software’s tools to create accurate and level floors for each level of your house. Take into account any variations in floor heights, such as different levels for different rooms.
- Aligning and Snapping: Utilize the alignment and snapping tools available in the software to ensure that the walls and floors are properly aligned and connected to each other. This will help you maintain accuracy and consistency throughout the design.
- Exterior Openings: Once the basic structure is in place, add openings for windows and doors. Use the blueprint as a reference to accurately position and size the openings. Pay attention to the height, width, and placement of each opening to reflect your desired design.
Creating the basic structure of the house lays the groundwork for further customization and detailing. Remember to continuously refer to the blueprint and make adjustments as necessary to match your vision. With the basic structure in place, you can now move on to the next step of the design process, where you’ll add walls, windows, and doors to refine the look of your virtual home.
Let your imagination soar as you continue to shape your dream house in the virtual realm. In the next step, we will guide you through the exciting process of adding walls, windows, and doors to your 3D design.
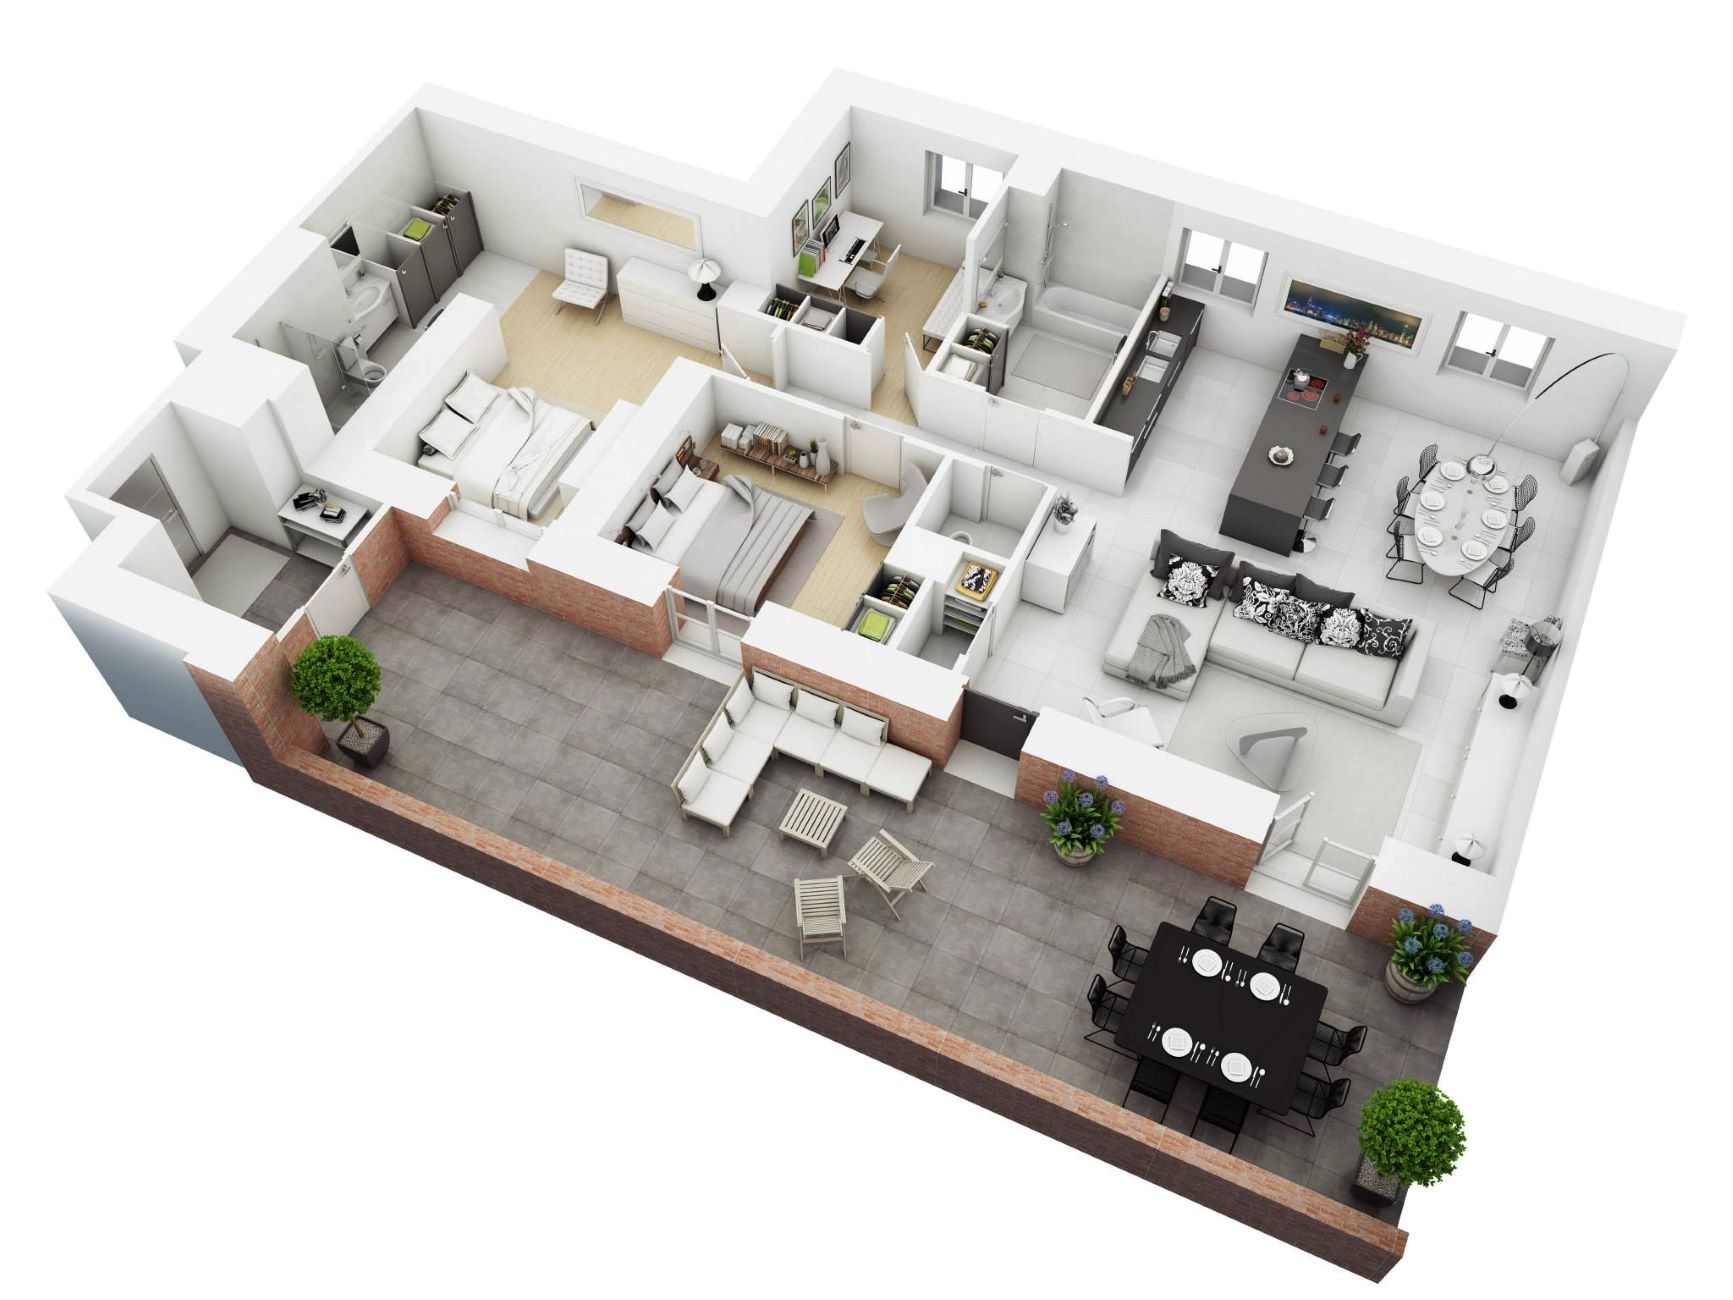
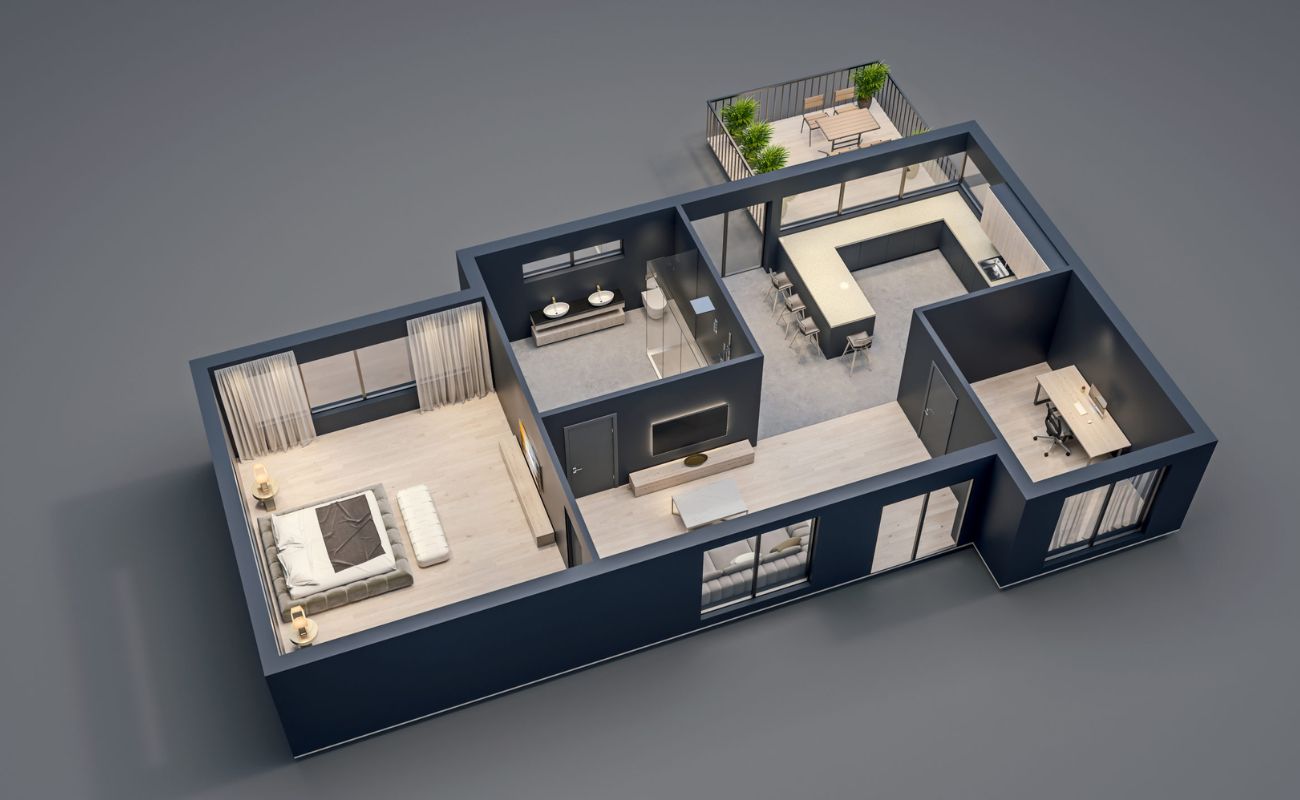
When making a 3D design of a house, start by creating a detailed floor plan with accurate measurements. This will serve as the foundation for your 3D model and ensure that the design is realistic and functional.
Step 6: Adding Walls, Windows, and Doors
With the basic structure of your house in place, it’s time to add walls, windows, and doors to refine the look and functionality of your virtual home. This step allows you to customize the layout, flow, and aesthetics of your design. Follow these steps to add walls, windows, and doors:
- Walls: Start by adding interior walls to create rooms within your house. Use the drawing tools in the 3D design software to create walls according to your desired layout. Pay attention to the measurements and positions specified in the blueprint.
- Windows: Once the walls are in place, it’s time to add windows. Select the appropriate window style and size from the software’s library. Place the windows within the walls, ensuring that they align with the blueprint and reflect your desired design aesthetic.
- Doors: Next, add doors to the walls to create entrances and passages between rooms. Choose doors with the desired style and dimensions, and position them accordingly. Consider the functionality and flow between spaces when deciding where to place doors.
- Adjustments and Customizations: After adding walls, windows, and doors, make any necessary adjustments and customizations. This may include resizing windows or doors, changing their positions, or adding additional features such as arches or skylights.
Adding walls, windows, and doors is an important step in the 3D design process, as it allows you to visualize the spatial relationships within your house and create a more realistic representation. Continuously refer to the blueprint for guidance and ensure that your design aligns with your vision.
Now that the walls, windows, and doors are in place, it’s time to turn our attention to the interior design of your virtual home. In the next step, we will explore the process of customizing the interior design to bring your personal style and preferences to life.
Step 7: Customizing the Interior Design
With the walls, windows, and doors in place, it’s time to unleash your creativity and customize the interior design of your virtual home. This step allows you to add furniture, decorations, and other elements that reflect your personal style and preferences. Follow these steps to customize the interior design:
- Choose a Design Style: Decide on the overall design style you want to achieve within each room. Whether it’s modern, traditional, minimalist, or eclectic, selecting a consistent design style will create a cohesive and harmonious interior.
- Select and Place Furniture: Use the furniture library or create your own furniture models within the 3D design software. Place the furniture in each room, taking into account functionality and aesthetics. Arrange them in a way that creates a comfortable and visually pleasing environment.
- Add Decorative Elements: Enhance the ambiance of each room by adding decorative elements such as artwork, lighting fixtures, rugs, curtains, and plants. These details will add depth and personality to your virtual home.
- Consider Lighting: Experiment with different lighting options to create the desired mood and atmosphere within each room. Adjust the intensity and direction of the lights to highlight focal points and create a visually appealing space.
- Pay Attention to Details: Don’t forget to add small details like wall textures, molding, trim, and baseboards. These details can elevate the overall look of your design and make it feel more realistic.
Remember to continuously refer to the blueprint and maintain consistency with your design choices. It’s okay to experiment and make changes as you go along. The goal is to create a space that reflects your personality and meets your functional needs.
Now that you have customized the interior design of your virtual home, it’s time to shift our focus to the exterior features. In the next step, we will guide you through the process of adding exterior elements to enhance the overall look and curb appeal of your 3D design.
Step 8: Adding Exterior Features
With the interior design customized, it’s time to shift our focus to the exterior of your virtual home. Adding exterior features will enhance the overall look and curb appeal of your 3D design. Follow these steps to add exterior elements:
- Roof: Start by designing the roof of your house. Use the 3D design software’s tools to create a roof that matches your blueprint. Consider the style of your house and choose a roof design that complements it.
- Siding and Materials: Select the appropriate siding material for the exterior walls of your virtual home. This could include options like brick, wood, stucco, or stone. Choose materials that align with your desired aesthetics.
- Exterior Colors: Experiment with different color combinations for the exterior of your house. Play around with the software’s color options to find a palette that suits your vision and enhances the overall look of your design.
- Landscaping: Add landscaping elements such as gardens, trees, shrubs, and pathways to create an inviting outdoor space. Consider the layout and style of your house when deciding where to place these elements.
- Exterior Features: Customize the details of your exterior features, such as windows, doors, and trim. Pay attention to architectural details and add any additional features like balconies or porches to enhance the visual appeal.
Adding exterior features not only improves the visual appeal of your design but also helps to create an overall cohesive and realistic look. Continuously refer to your blueprint for guidance and make any adjustments as needed.
Now that you have customized both the interior and exterior of your virtual home, it’s time to fine-tune and edit the design. In the next step, we’ll guide you through the process of refining your 3D design before saving and exporting the final result.
Read more: How To Make 3D Printer Faster
Step 9: Fine-tuning and Editing the Design
With the foundation of your 3D design complete, it’s time to fine-tune and edit the details to create a polished and realistic representation. This step allows you to make necessary adjustments, refine the design, and ensure that everything is visually appealing. Follow these steps to fine-tune and edit your design:
- Review and Refine: Take a step back and review your 3D design as a whole. Pay attention to the overall composition, proportions, and balance of the elements. Make any necessary adjustments to achieve aesthetic harmony.
- Detailing and Texturing: Add additional details and textures to various elements of your design, such as walls, floors, and furniture. This can include applying realistic textures, adding patterns, or adjusting material properties.
- Lighting and Shadows: Experiment with different lighting techniques to create realistic shadows and highlights within your design. This will enhance the depth and dimensionality of the space.
- Camera Angle and Perspective: Explore different camera angles and perspectives to showcase the best views and features of your virtual home. Find the angles that capture the essence and architectural highlights of your design.
- Color Correction: Adjust the color balance, saturation, and contrast of your design to achieve the desired mood and overall aesthetic. This can help create a cohesive visual experience for viewers.
- Visualization and Walkthrough: Utilize the visualization tools available in the software to create walkthroughs or fly-through animations of your virtual home. This will allow you to experience your design from different perspectives and identify any areas that need further refinement.
Take your time during this step to ensure that every detail is meticulously fine-tuned. Continuously refer to your blueprint and refer back to your initial vision to ensure your design aligns with your goals.
Now that your design is refined and visually appealing, it’s time to save and export your 3D design. In the final step, we’ll guide you through the process of saving and exporting the final result.
Step 10: Saving and Exporting the 3D Design
Congratulations! You’ve reached the final step of the 3D design process – saving and exporting your masterpiece. By saving and exporting your design, you’ll be able to share it with others, showcase your creativity, or even use it as a reference for future projects. Follow these steps to save and export your 3D design:
- Save Your Project: Before exporting, make sure to save your project within the 3D design software. This will allow you to easily make future edits or revisions if needed.
- Choose the File Format: Select an appropriate file format for exporting your 3D design. Common file formats include OBJ, FBX, and STL, depending on the software you’re using and the intended purpose of the design.
- Adjust Export Settings: Configure the export settings based on your requirements. This may include options for texture resolution, file compression, and coordinate system alignment.
- Export and Save: Click the export or save button within the software to generate the final file of your 3D design. Choose a location on your computer to save the file.
Once the export process is complete, you’ll have a digital file of your 3D design that can be shared, viewed, and even printed if desired. Remember to keep a backup of the file in a secure location for future reference or modifications.
Now that you’ve successfully saved and exported your 3D design, take a moment to admire your hard work and creativity. You’ve completed the entire process of creating a 3D design of a house from start to finish!
Whether you’re an aspiring architect, interior designer, or someone with a passion for creative projects, learning how to make a 3D design of a house opens up a world of possibilities. It allows you to visualize your ideas, experiment with different design elements, and bring your vision to life in a virtual space.
Remember, the more you practice and experiment with different techniques and software, the better you’ll become at creating stunning 3D designs. So keep exploring, learning, and embracing your creativity as you continue your journey into the world of 3D design and architecture.
Thank you for joining us on this exciting adventure. Happy designing!
Conclusion
Designing a 3D model of a house is a captivating and fulfilling process that allows you to bring your dream home to life in a virtual space. Throughout this journey, we’ve explored the step-by-step process of creating a 3D design, from gathering the necessary tools and materials to saving and exporting the final result. By following these steps and infusing your creativity, you can create a stunning and realistic representation of your vision.
Starting with a detailed blueprint, you imported it into a 3D design software, where you built the basic structure of your house, added walls, windows, and doors, and customized the interior and exterior design. Fine-tuning and editing your design brought it closer to perfection, and in the final step, you saved and exported your 3D design to share and showcase your masterpiece.
As you continue to refine your skills in 3D design, consider exploring different techniques, software, and styles to broaden your horizons. Engage with the vibrant community of designers, participate in online forums, and seek inspiration from architectural trends and innovations. By continuously learning and practicing, you will improve your ability to create breathtaking 3D designs that capture the essence of architectural beauty.
Remember, the process of making a 3D design of a house requires patience, attention to detail, and an open mind. Don’t be afraid to experiment, make adjustments, and challenge yourself to think outside the box. Let your imagination soar, and don’t shy away from incorporating your unique style and personality into your designs.
Whether you are an aspiring architect, interior designer, or simply someone with a passion for home design, the ability to create a 3D design of a house offers endless possibilities. So, unleash your creativity, embrace the power of technology, and embark on your journey to design stunning virtual homes.
Thank you for joining us on this exciting and educational adventure. We hope this guide has provided you with the knowledge and inspiration to start creating your own 3D designs. Happy designing!
Frequently Asked Questions about How To Make A 3D Design Of A House
Was this page helpful?
At Storables.com, we guarantee accurate and reliable information. Our content, validated by Expert Board Contributors, is crafted following stringent Editorial Policies. We're committed to providing you with well-researched, expert-backed insights for all your informational needs.


0 thoughts on “How To Make A 3D Design Of A House”