Home>diy>Architecture & Design>How To Make A Floor Plan In Illustrator
Architecture & Design
How To Make A Floor Plan In Illustrator
Modified: December 7, 2023
Learn how to create professional floor plans using Illustrator. Perfect for architects and designers, this step-by-step guide will teach you the essential techniques for architecture design.
(Many of the links in this article redirect to a specific reviewed product. Your purchase of these products through affiliate links helps to generate commission for Storables.com, at no extra cost. Learn more)
Introduction
Creating a floor plan is a crucial step in the design and architecture process. Whether you are planning to build a new home, renovate an existing space, or simply want to visualize your ideas, having a well-designed floor plan can provide you with a clear understanding of the layout and flow of your space.
Traditionally, floor plans were hand-drawn by architects and designers. However, with the advancement of technology, we now have access to powerful design software that simplifies the process and allows for more precise and detailed floor plans. One such software is Adobe Illustrator, a versatile graphic design tool that can be used for creating stunning and professional floor plans.
In this article, we will guide you through the process of creating a floor plan in Illustrator. Whether you are a seasoned designer or a beginner, this step-by-step tutorial will help you navigate through the software and create a customized floor plan that meets your specific needs.
Before we dive into the details, let’s take a moment to understand the benefits of using Adobe Illustrator for floor plan design. Firstly, Illustrator offers a wide range of tools and features that allow for precise measurements and accurate scaling. This ensures that your floor plan is not only visually appealing but also practical and functional.
Secondly, Illustrator provides a versatile platform for incorporating various design elements into your floor plan. Whether you want to add furniture, fixtures, or decorative elements, Illustrator’s extensive library of symbols and shapes makes it easy to create a realistic representation of your space.
Finally, Illustrator allows for seamless integration with other design software and tools. This means that you can easily import and export your floor plan to collaborate with other professionals or incorporate it into presentations and marketing materials.
With these advantages in mind, let’s get started with our step-by-step guide on how to make a floor plan in Illustrator. By following these instructions, you will be able to create a professional and visually appealing floor plan that brings your design ideas to life.
Key Takeaways:
- Create professional floor plans in Adobe Illustrator with precision, incorporating walls, doors, windows, furniture, and labels. Customize the design with colors, shadows, and textures for visually striking results.
- Utilize Adobe Illustrator’s versatile tools to bring architectural visions to life, ensuring clear communication and functionality in floor plan designs. Embrace creativity and continue refining skills for stunning results.
Read more: How To Make A Restaurant Floor Plan
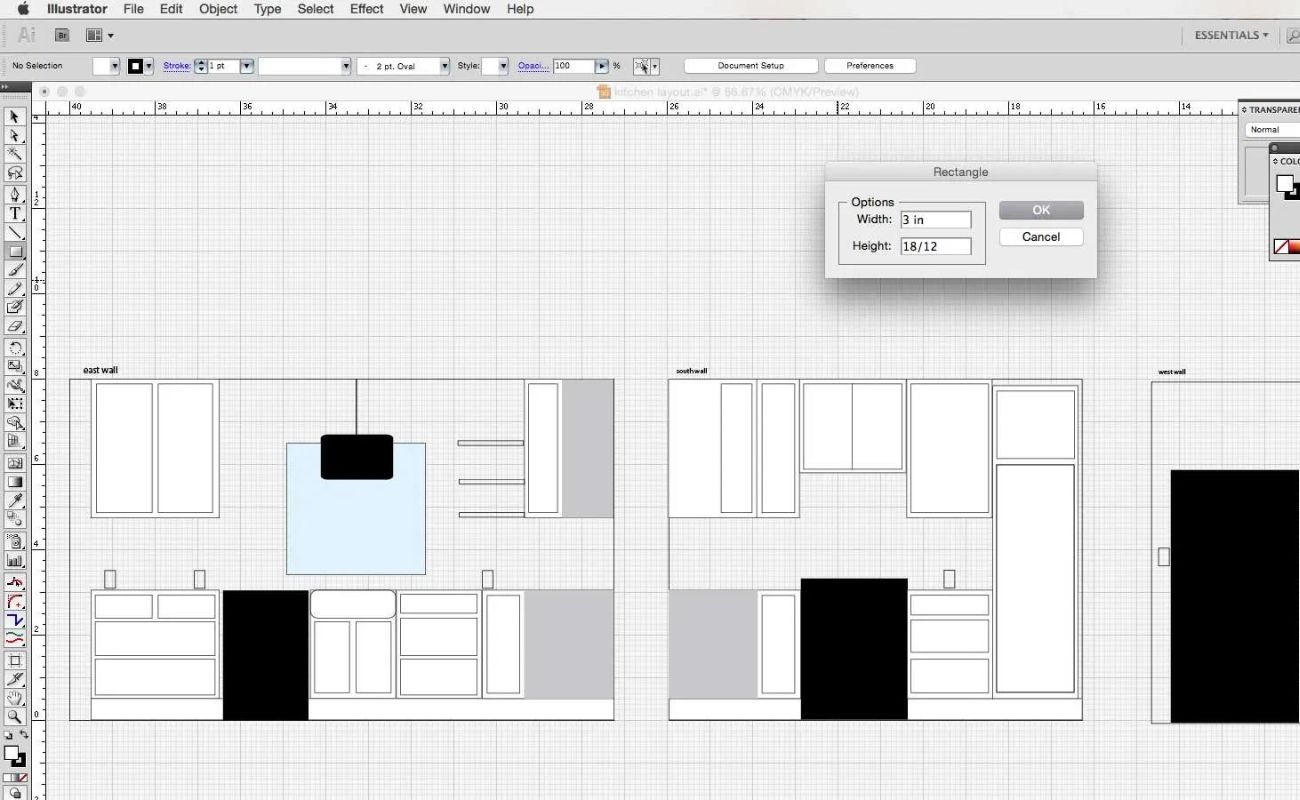
Step 1: Setting up the workspace
Before we begin creating our floor plan, it’s essential to set up our workspace in Adobe Illustrator for optimal design efficiency. Follow these steps to ensure you have everything you need:
- Create a New Document: Open Adobe Illustrator and create a new document by selecting “File” and then “New.” Set the dimensions and units according to your project requirements. For a floor plan, it’s best to use a standard architectural scale, such as 1/4″ = 1′-0″.
- Set Up Layers: Organize your floor plan by creating layers. This will help keep your design organized and make it easier to work with different elements. Create separate layers for walls, doors, windows, furniture, labels, etc.
- Configure Guides and Grids: Utilize Illustrator’s guide and grid systems to ensure accurate alignment and spacing. Go to “View” and select “Rulers” to display rulers along the top and left sides of your workspace. You can also enable the grid by going to “View” and selecting “Show Grid.”
- Set Preferences: Customize Illustrator’s preferences to suit your workflow. Go to “Edit” and select “Preferences.” Adjust settings such as grid size, snapping options, and measurement units to enhance your design process.
- Save Your Workspace: Once you have set up your workspace according to your preferences, save it as a custom workspace. This will allow you to easily access the same settings in the future and streamline your floor plan design process.
With your workspace properly configured, you are now ready to start creating your floor plan in Adobe Illustrator. The next steps will guide you through the process of importing the floor plan image and tracing the walls to form the foundation of your design.
Step 2: Importing the floor plan image
To begin creating your floor plan in Adobe Illustrator, you will need to import the floor plan image that you will be working with. Follow these steps to import your floor plan image:
- Locate your floor plan image: Make sure you have a digital copy of your floor plan image saved on your computer. This can be a scanned image, a photograph, or a digital file from an architectural software.
- Open Adobe Illustrator: Launch Adobe Illustrator and open the document you created in Step 1, where you set up your workspace.
- Select “File” > “Place”: In the top menu bar, click on “File” and then choose “Place” from the drop-down menu. This will open a file explorer window.
- Navigate to your floor plan image: Use the file explorer to locate and select your floor plan image. Click “Place” to import the image into your Illustrator document. The image will appear as a separate layer.
- Adjust the image: Resize and position the imported floor plan image to fit within your Illustrator document. Use the bounding box handles to scale the image proportionally, and the Move tool to position it in the desired location.
- Lock the image layer: To prevent accidentally moving or editing the image, lock the layer that contains the floor plan image. This can be done by clicking on the small lock icon next to the layer in the Layers panel.
By following these steps, you have successfully imported your floor plan image into Adobe Illustrator. The next step will guide you through tracing the walls to create the foundation of your floor plan design.
Step 3: Tracing the walls
Now that we have imported the floor plan image, it’s time to trace the walls to create the basic structure of the floor plan. Follow these steps to trace the walls in Adobe Illustrator:
- Create a new layer: In the Layers panel, create a new layer dedicated to the walls of your floor plan. This will help keep your design organized and allow for easy editing in the future.
- Select the Pen tool: Activate the Pen tool from the Tools panel. The Pen tool allows you to draw precise and custom shapes.
- Start tracing: Begin tracing the walls of your floor plan by clicking on one corner or endpoint of a wall. Continue clicking at different corners and endpoints to create a series of straight line segments. If the walls are curved or angled, use the Pen tool to create Bezier curves or adjust the anchor points accordingly.
- Close the shape: Once you have traced around a room or an area, close the shape by clicking on the first endpoint you created. This will create a closed path, representing the walls of that particular area.
- Adjust anchor points: After creating the walls, you can refine the shape by adjusting the placement of anchor points. Use the Direct Selection tool (white arrow) to select and move anchor points, or the Convert Anchor Point tool (pen with a minus sign) to convert smooth anchor points into corner anchor points and vice versa.
- Assign stroke and fill: Customize the appearance of your walls by assigning stroke and fill properties to the shapes. Select the walls and use the Stroke and Fill options in the Control panel or the Appearance panel to adjust the color, weight, and style of the lines.
- Continue tracing: Repeat the process of tracing and shaping the walls for each room or area in your floor plan. Use different colors or line styles to differentiate different rooms or sections.
By following these steps, you have successfully traced the walls of your floor plan in Adobe Illustrator. The next step will guide you through adding doors and windows to your floor plan design to complete the architectural layout.
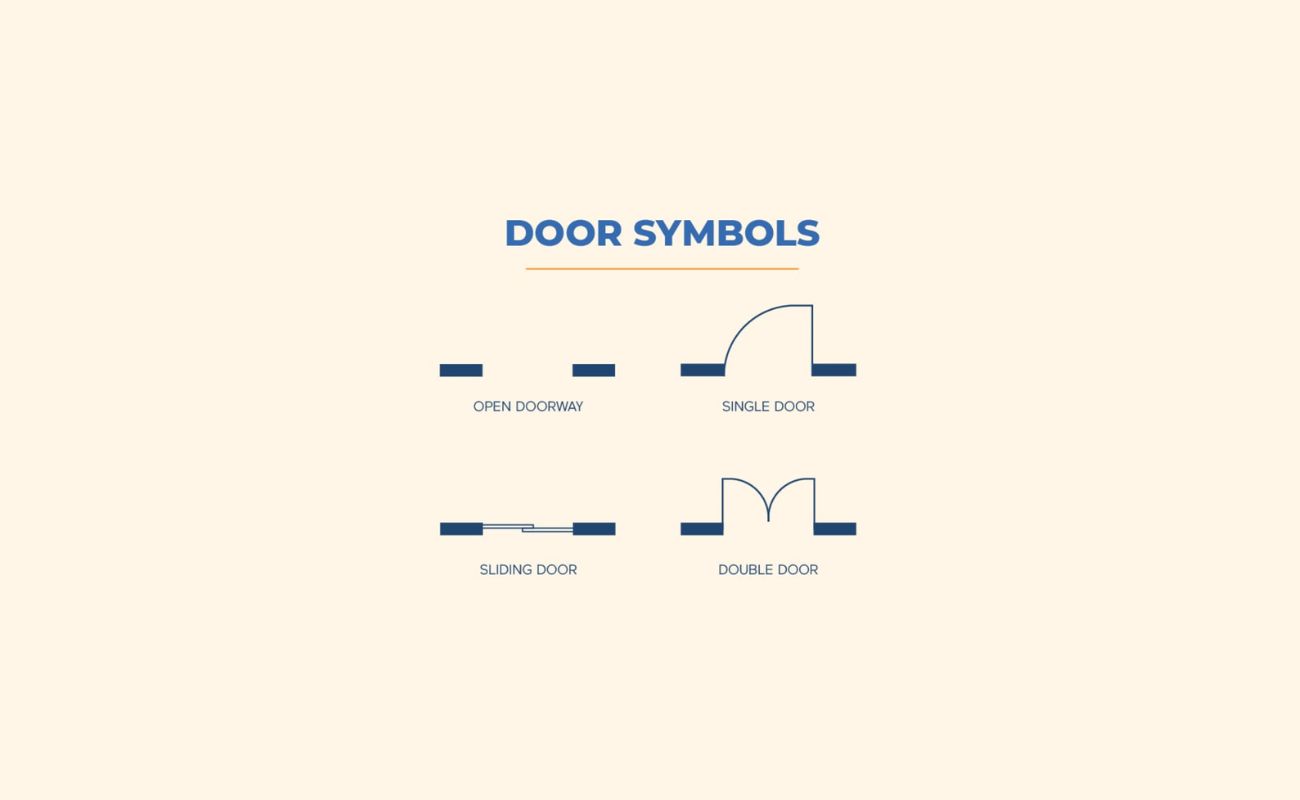
Step 4: Adding doors and windows
After tracing the walls of your floor plan, the next step is to add doors and windows to your design. Doors and windows are crucial elements in any floor plan, as they determine the flow and accessibility of the space. Here’s how you can add doors and windows in Adobe Illustrator:
- Create a new layer: In the Layers panel, create a new layer dedicated to the doors and windows. This will help separate them from the walls and make editing easier.
- Select the Rectangle or Ellipse tool: Depending on the shape of your doors and windows, choose the appropriate shape tool from the Tools panel.
- Draw the shape: Use the chosen shape tool to draw rectangles or ellipses to represent the doors and windows. Align them with the walls and position them accordingly.
- Customize the appearance: Use the Stroke and Fill options in the Control panel or the Appearance panel to customize the appearance of the doors and windows. You can assign different colors, line weights, and styles to distinguish them from the walls.
- Add details: To add more detail, you can use the Pen tool or other shape tools to draw additional lines or panels on the doors or windows. This will help depict the style or type of door/window, such as glass panels or raised panels.
- Label the doors and windows: To provide further clarity, add labels or tags to indicate the type of door or window (e.g., bedroom door, kitchen window). Use the Text tool to create labels and place them next to the corresponding doors or windows.
By following these steps, you have successfully added doors and windows to your floor plan design in Adobe Illustrator. The next step will guide you through adding furniture and fixtures to bring your floor plan to life.
When creating a floor plan in Illustrator, use the grid and snap to grid features to ensure accurate and consistent placement of walls, doors, and furniture. This will help maintain a clean and professional look to your floor plan.
Read more: How To Make A 2D Floor Plan In Sketchup
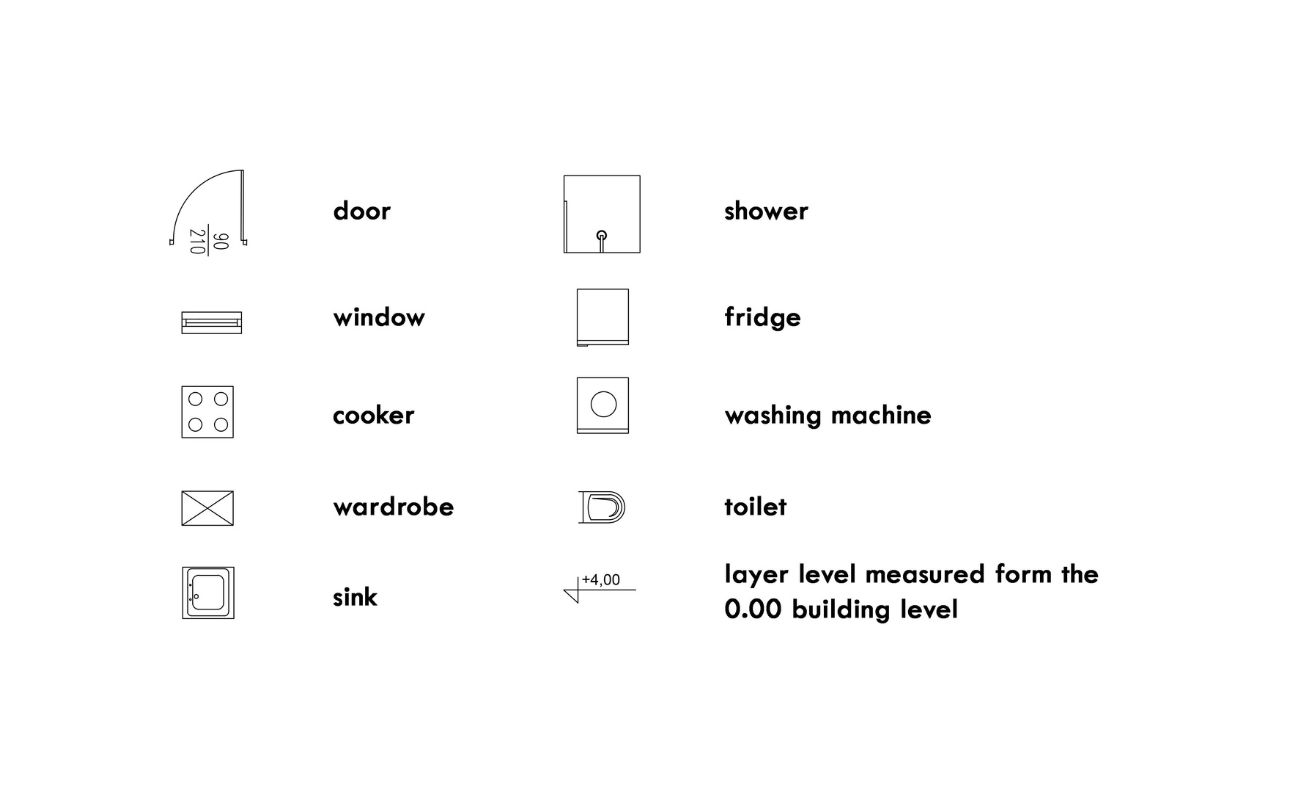
Step 5: Adding furniture and fixtures
Now that you have the basic architectural elements of your floor plan, it’s time to add furniture and fixtures to create a more realistic representation of your space. Adding furniture and fixtures not only enhances the visual appeal of your floor plan but also helps in determining the functionality and layout of your design. Follow these steps to add furniture and fixtures in Adobe Illustrator:
- Create a new layer: In the Layers panel, create a new layer dedicated to furniture and fixtures. This will help separate them from the walls and doors/windows.
- Find furniture and fixture symbols: Look for furniture and fixture symbols in Illustrator’s Symbol library or search online for pre-made symbol sets. These symbols can include furniture pieces, kitchen appliances, bathroom fixtures, and other decorative items.
- Import symbols: Select and import the desired symbols into your Illustrator document. Place them on your floor plan in appropriate locations, such as beds in bedrooms, sofas in living rooms, or sinks in bathrooms.
- Customize symbols: Once the symbols are placed, customize their appearance using the Stroke and Fill options in the Control panel or the Appearance panel. Adapt the colors, sizes, and styles to match your design aesthetic.
- Position and scale: Adjust the position and scale of the furniture and fixtures to fit within the rooms and spaces. Ensure they are proportionate to the walls and doors/windows.
- Add additional details: Depending on the complexity of your design, you may want to add additional details to the furniture and fixtures, such as patterns, textures, or labels. Use the appropriate tools in Illustrator to achieve the desired effects.
By following these steps, you have successfully added furniture and fixtures to your floor plan in Adobe Illustrator. The next step will guide you through adding labels and dimensions to provide important information about your design.
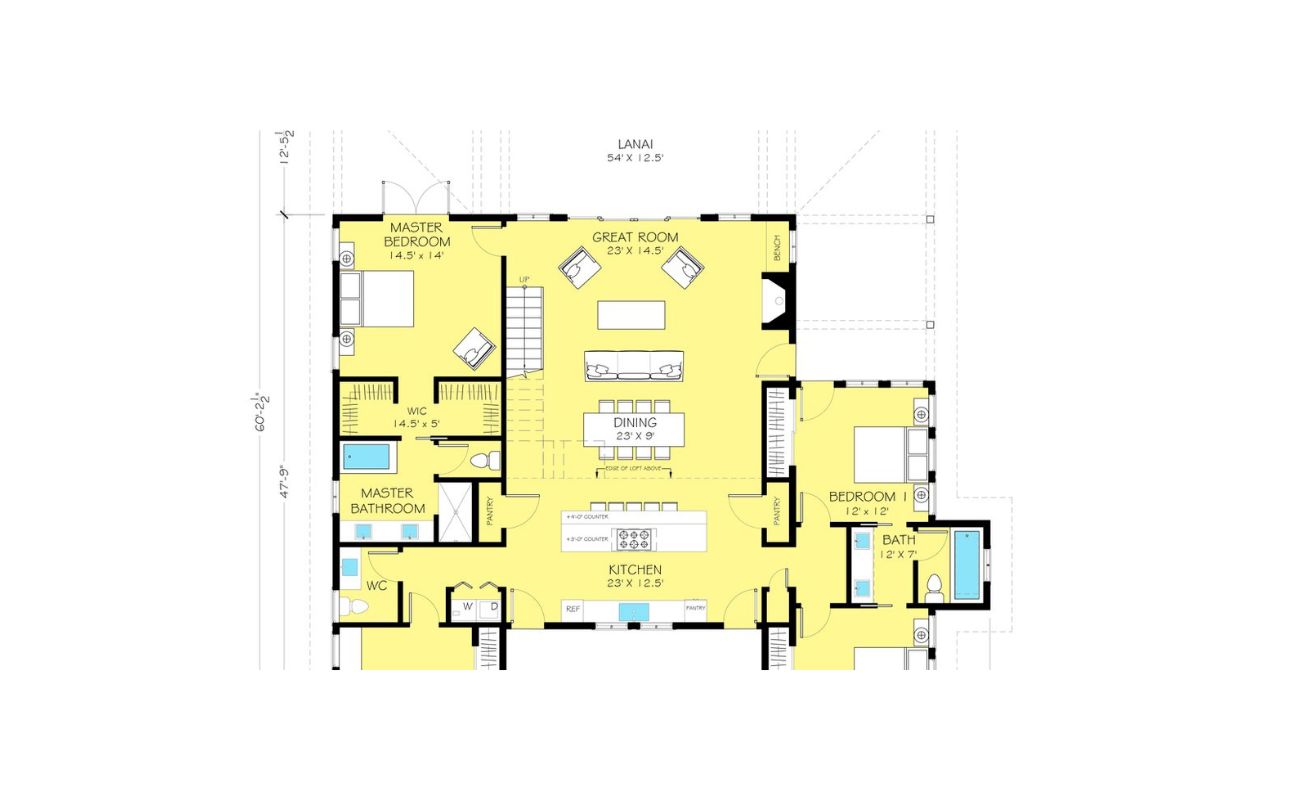
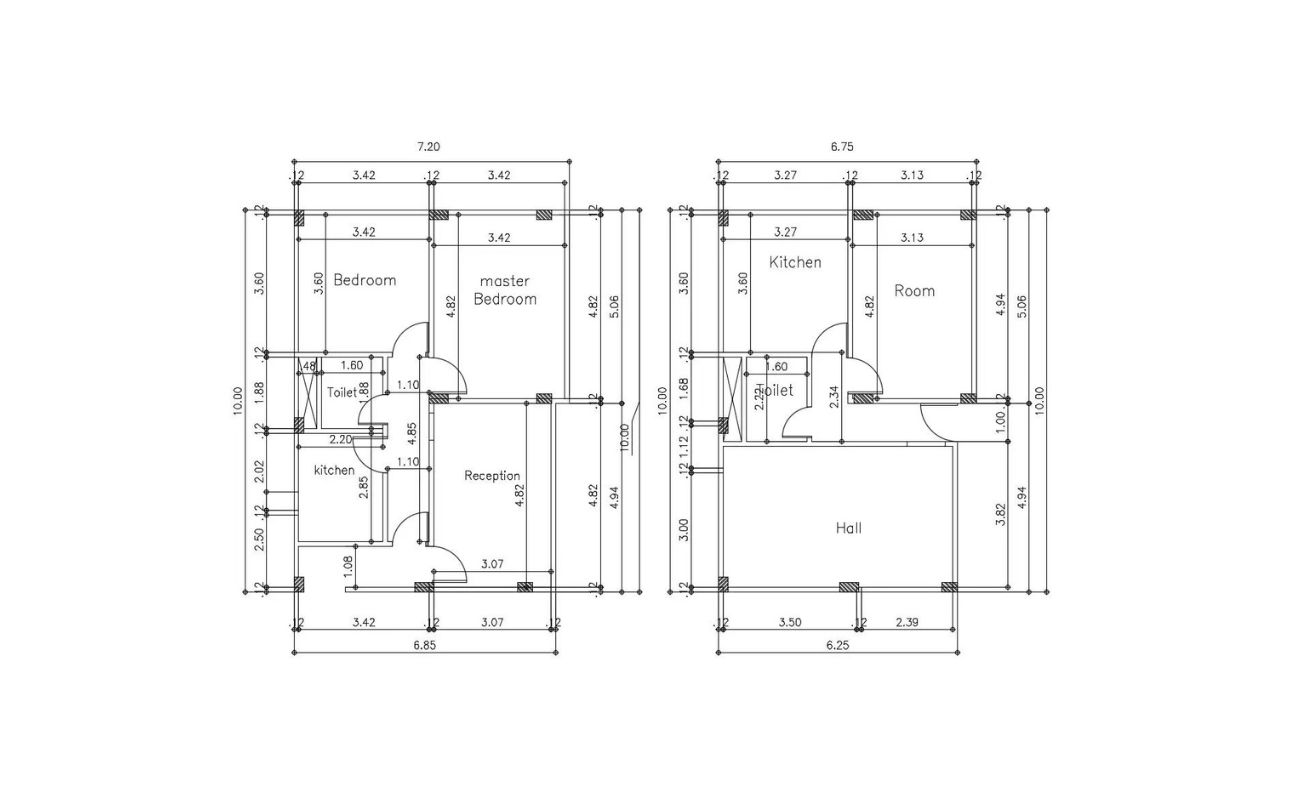
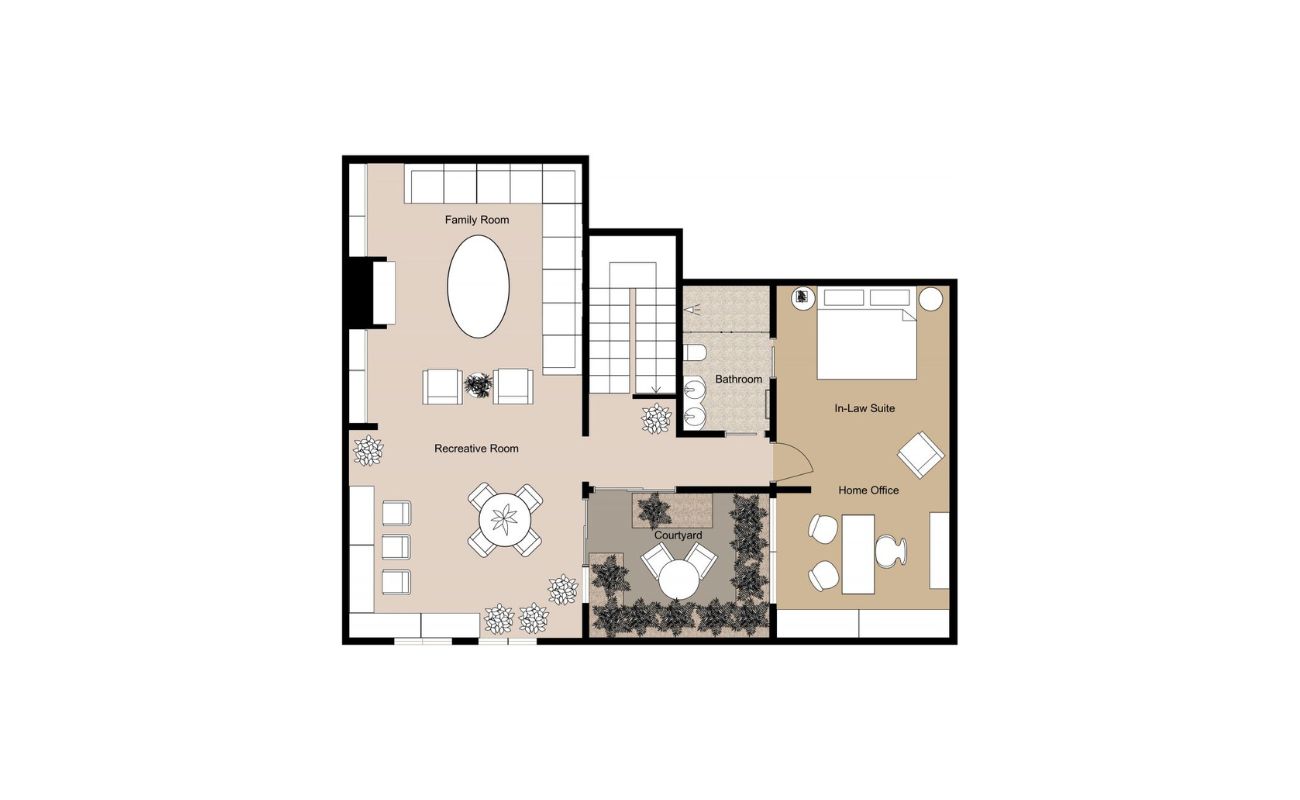
Step 6: Adding labels and dimensions
Adding labels and dimensions to your floor plan is essential for providing important information and ensuring clarity and accuracy. Labels help identify different rooms and areas, while dimensions provide measurements for walls, doors, windows, and furniture placement. Here’s how you can add labels and dimensions in Adobe Illustrator:
- Create a new layer: In the Layers panel, create a new layer dedicated to labels and dimensions. This will help separate them from the other elements of the floor plan.
- Use the Text tool: Activate the Text tool from the Tools panel. Click on the desired location in your floor plan to create a text box.
- Add room labels: Enter labels for each room or area of your floor plan. This can include room names, functions, or any other relevant information. Adjust the font style, size, and color as needed.
- Add dimensions: To add dimensions, start by selecting the Line tool from the Tools panel. Draw lines that represent the measurements of walls, doors, windows, or furniture placements.
- Add text for dimensions: Using the Text tool, click near the ends of the lines to add text boxes with the dimensions of the corresponding elements. Adjust the text style and size to ensure legibility.
- Position and align labels and dimensions: Arrange the labels and dimensions in a way that is clear, organized, and visually appealing. Align them with the appropriate elements of the floor plan to provide accurate information.
- Group and lock labels and dimensions: Select all the labels and dimensions, group them together using the Group command, and lock the layer to prevent accidental modifications.
By following these steps, you have successfully added labels and dimensions to your floor plan in Adobe Illustrator. The next step will guide you through tweaking the design by adjusting colors, adding shadows, or applying any other finishing touches.
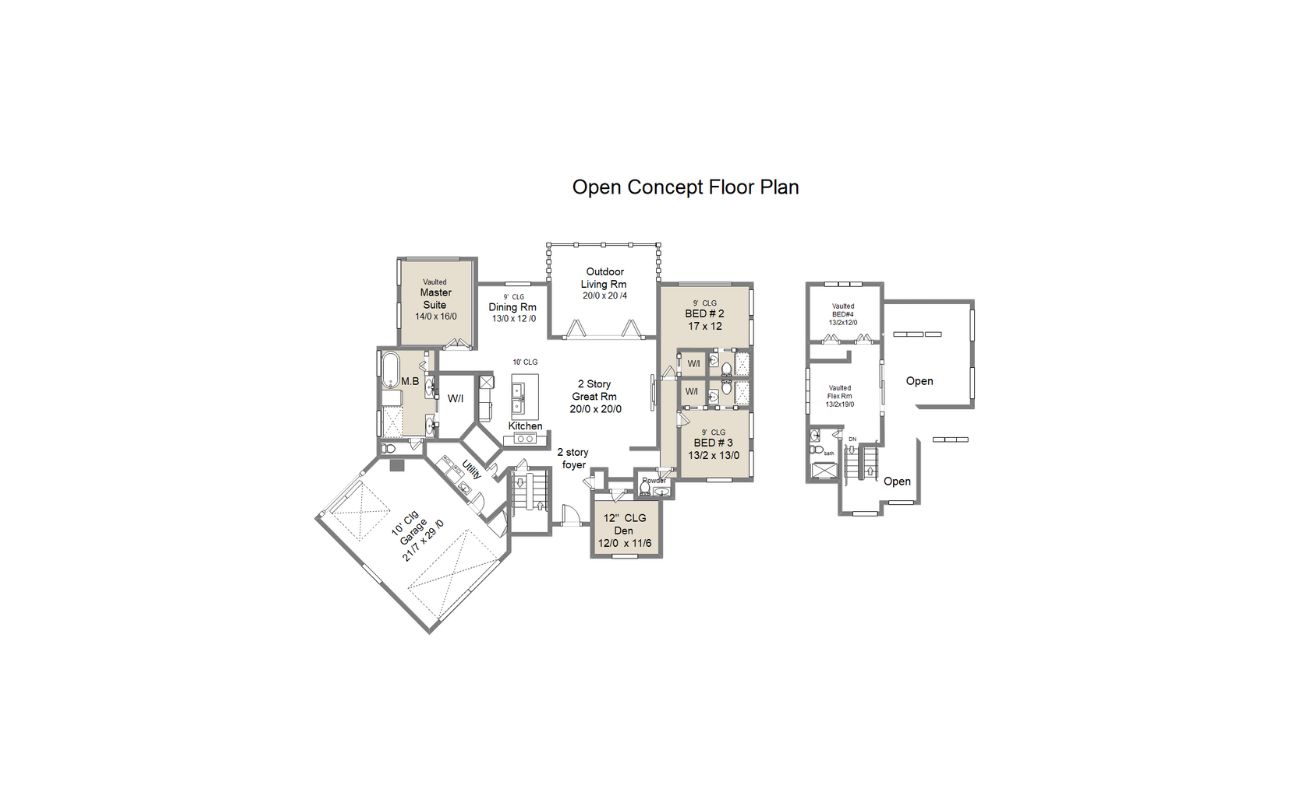
Step 7: Tweaking the design
Now that you have completed the major elements of your floor plan in Adobe Illustrator, it’s time to fine-tune the design and add any finishing touches that will elevate the visual appeal and clarity of your floor plan. This step allows you to make adjustments and enhancements to ensure your floor plan accurately reflects your design intent. Follow these steps to tweak your floor plan design:
- Review your floor plan: Take a moment to review your floor plan as a whole. Check for any inconsistencies, missing elements, or areas that may need improvement. This will give you an overview of what modifications or additions are required.
- Adjust line weights and colors: To enhance legibility and visual hierarchy, you can modify the line weights and colors of the elements in your floor plan. Thicker lines can be used for structural walls, while lighter lines can be used for furniture or decorative elements. Use colors strategically to denote different zones or areas.
- Add shadows and textures: Consider adding shadows, gradients, or textures to your floor plan to create depth and visual interest. This can be done by using the Gradient tool or applying textured fills to specific elements, such as walls, furniture, or floor surfaces.
- Include key elements or landmarks: If there are any unique features or landmarks in your design, such as a fireplace, staircase, or panoramic window, ensure they are accurately represented in your floor plan. Use custom symbols or shapes to highlight these elements.
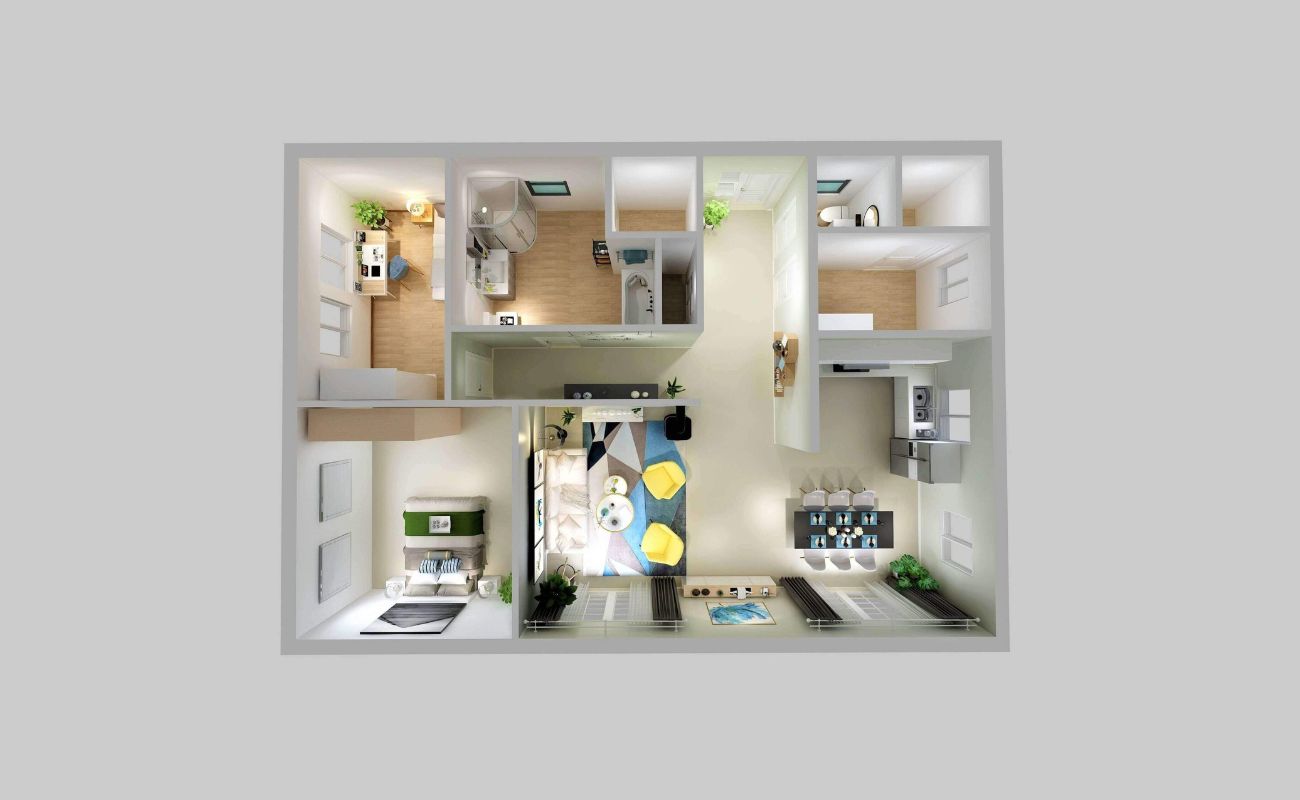
- Consider a 3D projection: If you want to showcase your floor plan in a more realistic and immersive way, you can explore creating a 3D projection of your design. Adobe Illustrator supports 3D rendering and allows you to visualize your floor plan from different angles.
- Seek feedback and make revisions: Share your floor plan with colleagues, clients, or other professionals to gather feedback. Consider their input and make any necessary revisions to improve the clarity and effectiveness of your design.
By following these steps and taking the time to tweak your floor plan design, you can create a visually striking and informative representation of your architectural vision. Remember to save your work regularly and keep a backup of your files to avoid any potential loss of data.
With your completed floor plan, you can now present your design to clients, contractors, or other stakeholders with confidence and provide them with a clear understanding of your architectural concept.
Congratulations! You have successfully gone through the process of creating a floor plan in Adobe Illustrator. With your newfound skills, you can continue exploring more advanced techniques and create even more intricate and stunning floor plans.
Happy designing!
Conclusion
Creating a floor plan in Adobe Illustrator is a rewarding and valuable skill for architects, designers, and anyone involved in the field of architecture and interior design. Through the step-by-step process outlined in this article, you have learned how to set up your workspace, import the floor plan image, trace walls, add doors and windows, incorporate furniture and fixtures, label and dimension elements, and tweak the design for a polished final result.
Adobe Illustrator’s powerful tools and features have allowed you to bring your floor plan to life, resulting in a visually appealing and informative representation of your architectural design. By using layers, guides, and grids, you have maintained organization and precision throughout the process. Additionally, the ability to customize stroke and fill properties, incorporate symbols, and apply gradients and shadows has added depth and realism to your floor plan.
Remember, a well-designed floor plan not only showcases your creativity and expertise but also serves as a vital communication tool for clients, contractors, and other stakeholders. It provides clarity regarding the layout, flow, and functionality of a space, helping to bring your design vision to fruition.
As you continue to refine your skills in Adobe Illustrator, continue exploring advanced techniques, such as 3D projections, textured fills, and custom symbols, to further enhance your floor plan designs. Seek inspiration from other professionals and stay updated with the latest design trends to continually improve your abilities.
Creating floor plans in Adobe Illustrator can be a dynamic and enjoyable process, allowing you to fuse your technical knowledge with your artistic flair. Embrace the possibilities, experiment with different elements and styles, and let your imagination shine through.
Now that you have completed this step-by-step guide, you are armed with the knowledge and skills needed to confidently create floor plans in Adobe Illustrator. So, go ahead and embark on your next architectural design project, knowing that you have the tools and expertise to create stunning and professional floor plans.
Best of luck, and happy designing!
Frequently Asked Questions about How To Make A Floor Plan In Illustrator
Was this page helpful?
At Storables.com, we guarantee accurate and reliable information. Our content, validated by Expert Board Contributors, is crafted following stringent Editorial Policies. We're committed to providing you with well-researched, expert-backed insights for all your informational needs.


0 thoughts on “How To Make A Floor Plan In Illustrator”