Home>diy>Architecture & Design>How To Make A Restaurant Floor Plan
Architecture & Design
How To Make A Restaurant Floor Plan
Modified: October 20, 2024
Learn how to create an ideal restaurant floor plan with expert guidance in architecture design. Maximize space and efficiency for a successful dining establishment.
(Many of the links in this article redirect to a specific reviewed product. Your purchase of these products through affiliate links helps to generate commission for Storables.com, at no extra cost. Learn more)
Introduction
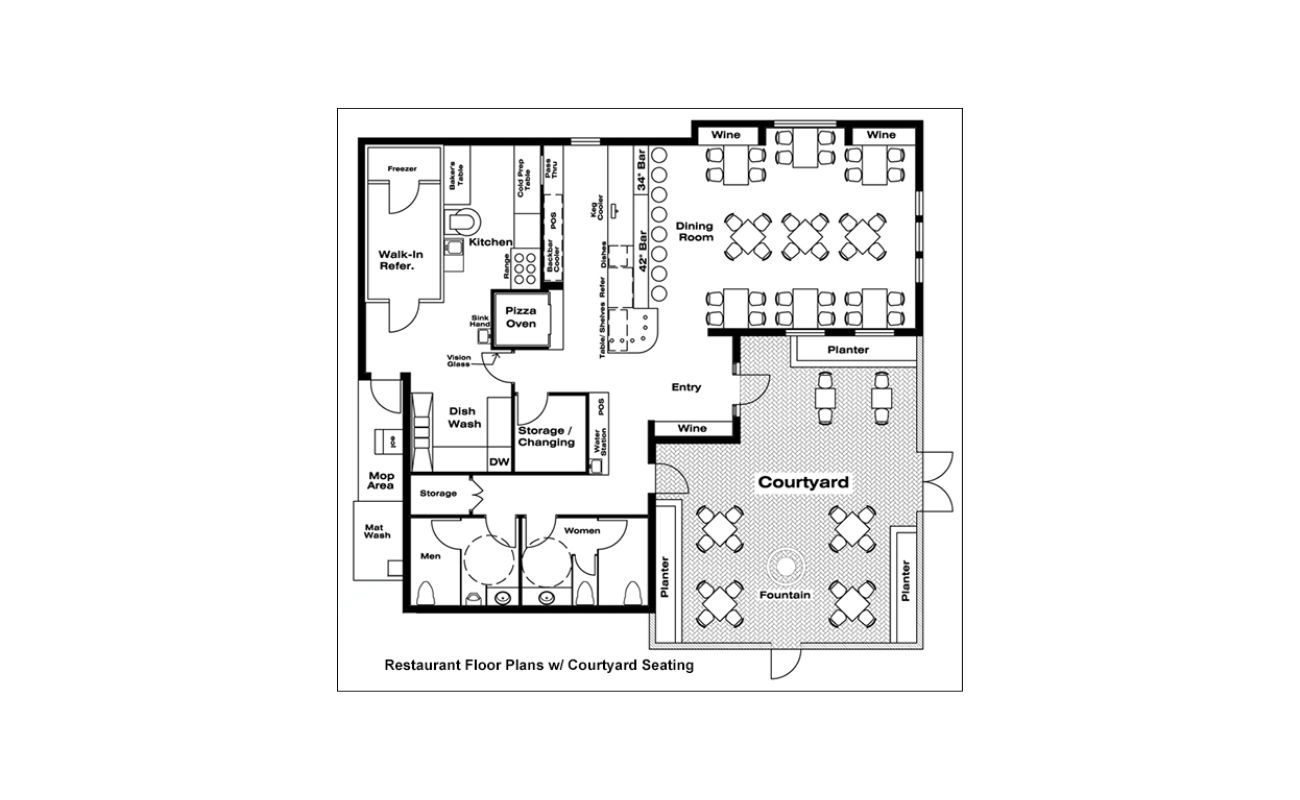
Welcome to the world of restaurant design, where every detail matters and the layout of your establishment can have a significant impact on the overall dining experience. One crucial aspect of creating a successful restaurant is designing an efficient and well-thought-out floor plan. A well-designed restaurant floor plan not only maximizes the use of space but also ensures a smooth flow of customers and staff.
In this article, we will guide you through the process of creating a restaurant floor plan that combines functionality, aesthetics, and customer satisfaction. Whether you are opening a new restaurant or renovating an existing one, following these steps will help you optimize your space and create a memorable dining experience.
Let’s dive into the first step of the process: assessing the space.
Key Takeaways:
- Designing a restaurant floor plan involves assessing space, identifying key areas, and prioritizing customer comfort and safety. Collaboration with professionals and continuous improvement are essential for creating a memorable dining experience.
- The floor plan serves as the foundation for a successful restaurant, balancing functionality and aesthetics. It’s crucial to consider flow, accessibility, safety measures, and the right choice of furniture and fixtures to create a welcoming and efficient space.
Read more: How To Make A Floor Plan In Illustrator
Step 1: Assessing the Space
The first step in designing a restaurant floor plan is to assess the available space. Begin by taking accurate measurements of the entire area where the restaurant will be located. This includes not only the dining area but also any additional spaces such as a bar area, waiting area, or outdoor seating.
Once you have the measurements, consider the shape and layout of the space. Is it a square, rectangle, or an irregular shape? Are there any architectural features such as columns, windows, or doors that you need to work around?
Next, think about the overall theme and style of your restaurant. Are you going for a cozy and intimate atmosphere, or a more open and airy design? This will help you determine the best layout for your space.
Take note of any existing infrastructure, such as HVAC systems, electrical outlets, or plumbing. Consider how these elements will impact your design choices and whether any modifications will be necessary.
Lastly, consider the local building codes and regulations that you need to comply with. This may include fire safety regulations, accessibility requirements, or zoning restrictions. Make sure to familiarize yourself with these regulations to ensure your floor plan meets all the necessary standards.
By assessing the space and taking into account its unique features and constraints, you will be able to move on to the next step with a clear understanding of the design possibilities and limitations.
Step 2: Identifying the Key Areas
Once you have assessed the space, the next step in designing a restaurant floor plan is to identify the key areas that need to be incorporated into your layout. These areas will depend on the type of restaurant you are designing and the services you plan to offer.
The most essential areas to consider are:
- Dining Area: This is where customers will be seated and enjoy their meals. Determine the number of tables and chairs you can accommodate based on the available space and the desired seating capacity.
- Bar Area: If your restaurant includes a bar, designate an area for it. Consider the size of the bar counter, the seating arrangement, and any required equipment such as refrigeration units or sinks.
- Waiting Area: If you expect a lot of foot traffic or have a high volume of reservations, it is essential to create a waiting area. This can be a separate space or a designated section within the dining area.
- Kitchen Area: The kitchen is the heart of any restaurant. Allocate sufficient space for food preparation, cooking stations, storage, and cleaning areas. Consider the workflow and ensure easy access to all necessary equipment and supplies.
- Serving Area: Designate space for servers to pick up orders and deliver them to customers. This can include a service station or a pass-through window from the kitchen to the dining area.
- Restrooms: Don’t forget to allocate space for restrooms, making sure they are easily accessible to customers and comply with ADA guidelines.
- Storage Areas: Determine the need for storage space for dry goods, refrigerated items, and cleaning supplies. Adequate storage areas are crucial for maintaining a well-organized and efficient operation.
- Office Space: Depending on the size and complexity of your restaurant, you may need to designate space for an office where administrative tasks can be handled.
By identifying these key areas, you can start visualizing how they will interact with one another and begin to formulate a floor plan that optimizes space utilization and creates a seamless flow for both customers and staff. Moving forward, we will delve into the specifics of designing the actual layout of your restaurant in Step 3.
Step 3: Determining the Seating Capacity
When designing a restaurant floor plan, determining the seating capacity is a crucial step. The seating capacity will depend on various factors, including the size of your dining area, the type of cuisine you offer, and the overall ambiance you want to create.
To determine the seating capacity, consider the following:
- Available Space: Take into account the size and shape of your dining area. Measure the dimensions accurately and consider the layout of tables and chairs. Account for walkways and spacing between tables to ensure comfort and ease of movement for both diners and staff.
- Restaurant Style: The style and theme of your restaurant will influence the seating capacity. For example, if you are creating a fine dining experience, you may want to provide more spacious seating arrangements. On the other hand, a fast-casual restaurant may prioritize maximizing the number of seats available.
- Regulatory Guidelines: Check local building codes and regulations to determine any legal requirements regarding occupancy limits. These regulations will dictate the maximum number of people you can accommodate in your space.
- Amenities and Accessibility: Consider any additional amenities you plan to offer, such as a bar or outdoor seating. These elements should be factored into the seating capacity calculation. Also, ensure that your seating plan is accessible to all customers, including those with disabilities.
Once you have considered these factors, you can begin to create a seating layout that maximizes the number of seats without sacrificing comfort. Experiment with different table configurations, such as booths, round tables, or communal dining tables, to find the most efficient arrangement for your space.
Remember to strike a balance between maximizing seating capacity and providing a comfortable dining experience for your customers. Overcrowding the dining area can lead to a chaotic atmosphere and negatively impact customer satisfaction. On the other hand, having too much empty space can make the restaurant feel sparse and uninviting.
By determining the seating capacity early in the design process, you can ensure that your restaurant floor plan is optimized for both functionality and customer comfort. With the seating capacity established, we can now move on to designing the layout of your restaurant in Step 4.
Step 4: Designing the Layout
Now that you have assessed the space, identified key areas, and determined the seating capacity, it’s time to design the layout of your restaurant. The layout will determine the overall flow and organization of your establishment, ensuring a seamless experience for both customers and staff.
Consider the following aspects when designing the layout:
- Zoning: Divide the space into different zones to create distinct areas for different purposes. For example, you may have a dining zone, a bar zone, and a waiting area zone. This zoning helps create a sense of organization and allows for efficient operation.
- Seating Arrangements: Experiment with different seating arrangements to make the best use of the available space. Consider using a mix of table sizes to accommodate different party sizes, and ensure adequate distance between tables for privacy and comfort.
- Pathways: Design clear pathways for both customers and staff to navigate through the restaurant. Avoid creating tight or cluttered areas that may impede movement. It’s essential to maintain a smooth flow of traffic to optimize efficiency.
- Visibility and Ambiance: Consider the visibility of various areas from different vantage points. Showcase the main attractions of your restaurant, such as a bar or a beautifully designed dining area, to create an inviting ambiance. Utilize lighting, colors, and décor to enhance the overall atmosphere.
- Customer Interaction: Design your layout to encourage positive customer interaction. For example, you may want to create a communal table for a more social dining experience or position certain tables to take advantage of a scenic view.
- Flexibility: Plan for flexibility and adjustability in your layout. This will allow for changes in the future, such as accommodating larger groups or rearranging seating arrangements for private events.
During the layout design process, it can be helpful to use software tools or work with an architect or interior designer who specializes in restaurant design. They can provide valuable insights and help bring your vision to life.
Remember, the layout should not only be visually appealing but also functional and conducive to excellent customer experiences. By carefully designing the layout, you will create a restaurant space that is both aesthetically pleasing and efficiently organized.
With the layout design completed, we can now move on to Step 5: considering the flow and accessibility of your restaurant.
Read more: How To Make A 2D Floor Plan In Sketchup
Step 5: Considering the Flow and Accessibility
When designing a restaurant floor plan, it’s essential to consider the flow and accessibility of the space. A well-designed flow ensures that customers and staff can move around the restaurant easily, while accessibility ensures that everyone, including those with disabilities, can navigate the space comfortably.
Here are some factors to consider when evaluating the flow and accessibility:
- Entrance and Exits: Designate clear and welcoming entrance and exit points for customers. Ensure that the pathways leading to the entrance are unobstructed and clearly marked.
- Waiting Area: If you have a waiting area, make sure it is easily accessible from the entrance and provides enough space for customers to wait comfortably. Consider adding seating, signage, and a host/hostess station to manage waiting guests efficiently.
- Pathways: Create wide and uncluttered pathways throughout the dining area to allow for easy navigation. Avoid placing furniture or decor items that impede the flow of traffic. You may also consider incorporating one-way traffic flows to prevent congestion.
- Bathrooms: Ensure that the restrooms are conveniently located and easily accessible to all customers. Follow ADA guidelines for accessible restrooms, including proper door widths, grab bars, and wheelchair maneuvering space.
- Service Areas: Arrange service areas such as the kitchen, bar, and serving station in locations that facilitate efficient operations. Consider proximity to the dining area to minimize travel time for staff and avoid any bottlenecks in food and beverage service.
- Emergency Exits: Place clearly marked emergency exits in strategic locations throughout the restaurant. Ensure that they are easily accessible and unobstructed at all times to comply with safety regulations.
- Signage: Implement clear and visible signage throughout the restaurant to guide customers to different areas, including restrooms, exits, and the bar. This will improve overall flow and prevent confusion.
- Lighting and Acoustics: Use lighting and acoustics to create a comfortable and inviting atmosphere in your restaurant. Proper lighting levels and sound control contribute to a more relaxed dining experience.
- Outdoor Spaces: If you have an outdoor seating area, ensure that it is easily accessible from both the inside and outside of the restaurant. Consider the placement of doors, pathways, and any necessary ramps or steps for accessibility.
By carefully considering the flow and accessibility of your restaurant, you can create a space that is easy to navigate, comfortable for customers, and efficient for staff. This attention to detail will contribute to a seamless dining experience and leave a positive impression on your guests.
Now that you’ve considered the flow and accessibility, let’s move on to Step 6: allocating space for kitchen and storage areas.
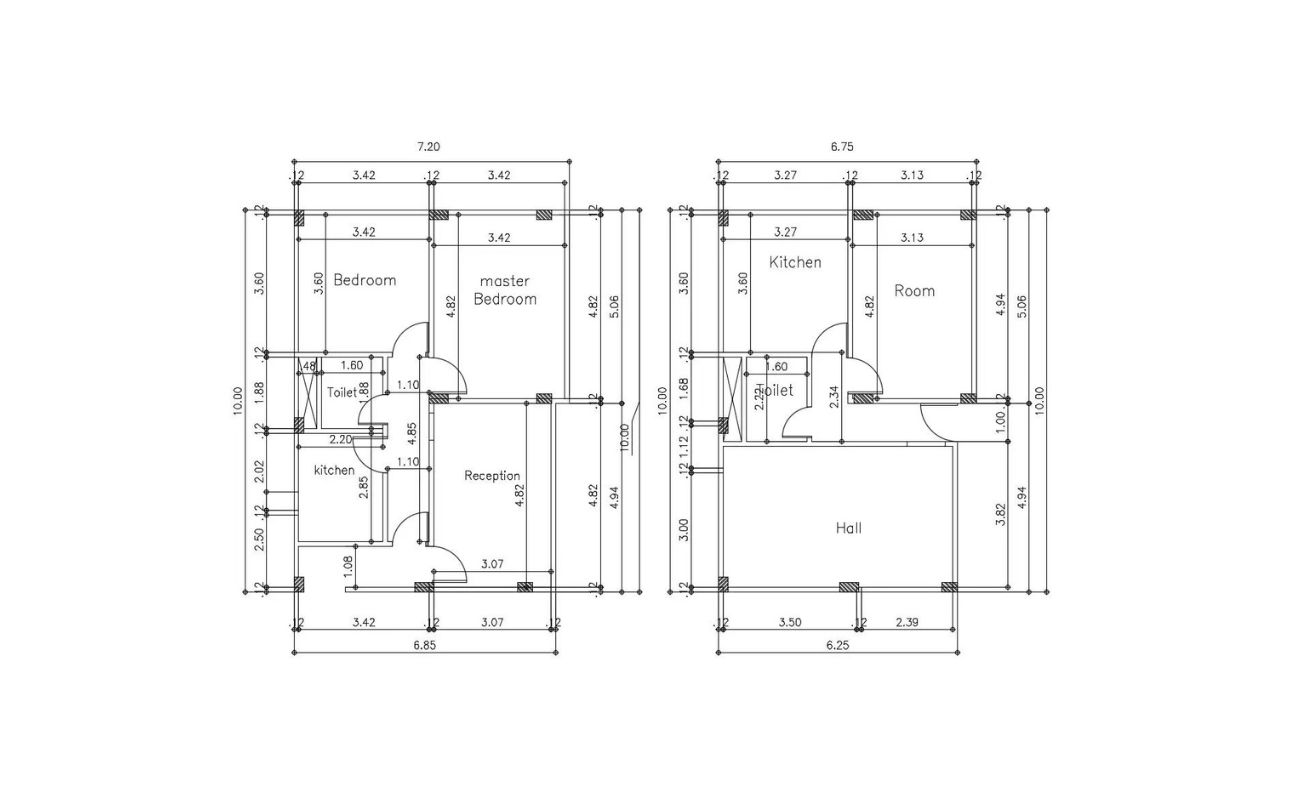
When making a restaurant floor plan, consider the flow of traffic, the placement of kitchen and service areas, and the overall ambiance you want to create for your guests.
Step 6: Allocating Space for Kitchen and Storage Areas
Allocating the proper amount of space for the kitchen and storage areas is crucial in creating an efficient restaurant floor plan. A well-designed kitchen layout and adequate storage space are essential for smooth operations and maintaining inventory.
Consider the following factors when allocating space for the kitchen and storage areas:
- Kitchen Workflow: Determine the workflow and layout of the kitchen based on the type of cuisine you will be offering. Arrange the cooking stations, prep areas, and cleaning stations in a logical and efficient order, ensuring that staff can move seamlessly between tasks.
- Food Preparation Area: Allocate enough space for food preparation, including cutting, chopping, and mixing ingredients. Consider the number of staff members who will be working in the kitchen simultaneously and provide ample counter space for their tasks.
- Cooking Equipment: Take into account the necessary cooking equipment, such as stoves, ovens, grills, and fryers. Make sure there is enough space between each piece of equipment for staff to work safely and efficiently.
- Storage Space: Determine the storage needs for dry goods, refrigerated items, and cleaning supplies. Allocate separate areas for each, ensuring proper shelving and organization. Consider the amount of inventory you will be handling and plan for sufficient storage capacity.
- Receiving Area: Designate a specific area for receiving deliveries and inspecting incoming goods. This area should be easily accessible for delivery personnel and staff members responsible for inventory management.
- Staff Facilities: Allocate space for staff members to take breaks, store personal belongings, and have quick access to restrooms. Creating a comfortable and convenient space for your employees can improve their overall satisfaction and productivity.
- Efficient Workflow: Consider the workflow between the kitchen and dining area. Position the service areas and serving stations strategically to minimize travel distance and ensure a smooth transition from food preparation to delivery.
Collaborate with chefs, kitchen staff, and restaurant consultants to ensure that the kitchen and storage areas are designed to meet the specific needs of your restaurant. Their expertise can provide valuable insights into optimizing the functionality and efficiency of these spaces.
Remember that safety and compliance with health regulations are of utmost importance in the kitchen and storage areas. Plan for proper ventilation, appropriate sinks, and adequate plumbing to meet health code requirements.
By allocating the right amount of space for the kitchen and storage areas, you can create a well-organized and efficient back-of-house operation, ultimately contributing to the success of your restaurant.
Now that you’ve allocated space for the kitchen and storage areas, we can move on to Step 7: planning for restrooms.
Step 7: Planning for Restrooms
When designing a restaurant floor plan, planning for restrooms is a critical step. Providing clean, accessible, and well-maintained restrooms is essential for customer satisfaction and compliance with building codes and regulations.
Consider the following factors when planning for restrooms:
- Accessibility: Ensure that your restrooms are accessible to all customers, including those with disabilities. Follow ADA guidelines for door widths, grab bars, sink height, toilet height, and adequate maneuvering space.
- Location: Strategically position the restrooms in a convenient and discreet area. They should be easily accessible from the dining area, waiting area, or outdoor seating if applicable. Avoid placing them too close to dining tables to maintain privacy and minimize any unpleasant odors.
- Gender-Neutral Restrooms: Consider providing gender-neutral restrooms in addition to gender-specific options. This promotes inclusivity and accommodates diverse customer needs.
- Space Requirements: Allocate sufficient space for each restroom stall to ensure privacy and comfort. Consider the number of seats in your dining area and the estimated peak time traffic to determine the number of stalls needed to avoid long wait times.
- Handwashing Stations: Ensure that each restroom includes an adequate number of sinks with hot and cold water, soap dispensers, and hand dryers or paper towel dispensers. These are essential for proper hand hygiene and should be easily accessible upon exiting the restroom.
- Design and Décor: Choose appropriate fixtures, lighting, and décor that align with the overall aesthetics and theme of your restaurant. Create a clean and visually appealing ambiance in the restrooms to enhance the overall customer experience.
- Maintenance: Plan for easy access to the restrooms for maintenance and cleaning purposes. Designate a storage area for janitorial supplies and ensure there is proper ventilation to minimize odors.
Consult with architects and contractors to ensure that your restroom design meets local building codes and regulations. They can provide guidance on specific requirements relevant to your location.
Remember, well-maintained and functional restrooms are crucial for guest satisfaction and can significantly impact the overall perception of your restaurant. By carefully planning the layout and design of your restrooms, you will create a comfortable and sanitary environment for your customers.
Now that you have planned for restrooms, we can move on to Step 8: incorporating safety measures.
Step 8: Incorporating Safety Measures
When designing a restaurant floor plan, it is essential to incorporate safety measures to ensure the well-being of both customers and staff. By implementing proper safety protocols and features, you can create a secure and comfortable environment for everyone in your establishment.
Consider the following safety measures to incorporate in your restaurant floor plan:
- Emergency Exits: Designate clearly marked emergency exits and ensure they are easily accessible from all areas of the restaurant. Follow local fire safety regulations and ensure that there are no obstructions blocking the path to exits.
- Fire Suppression Systems: Install a reliable fire suppression system, such as sprinklers or fire extinguishers, in the necessary areas of the restaurant. Place them strategically and ensure they are easily accessible for quick response in case of a fire emergency.
- Safe Walkways and Flooring: Ensure that the flooring in all areas of the restaurant is slip-resistant to prevent accidents. Keep walkways clear of any debris or obstacles that could pose a tripping hazard. Install proper lighting to illuminate pathways, reducing the risk of falls.
- Electrical Safety: Comply with electrical safety standards and codes in your region. Install and maintain electrical systems, outlets, and appliances properly to minimize the risk of electrical hazards.
- First Aid Kits and Safety Equipment: Place easily accessible first aid kits in designated areas of the restaurant. Train staff members on basic first aid procedures and ensure they know the location of the kits. Additionally, have safety equipment, such as AED devices, readily available if required.
- Safety Signage: Install safety signage throughout the restaurant, including instructions for emergency exits, locations of fire extinguishers and first aid kits, and reminders for staff to follow safety protocols. This promotes awareness and helps guide both customers and staff during emergencies.
- Security Measures: Incorporate security measures such as CCTV cameras, alarm systems, and secure entrances to deter potential theft or unauthorized access. Secure storage areas for valuable items and sensitive information.
- Training and Staff Education: Implement thorough training programs for your staff regarding safety protocols, emergency procedures, and proper handling of safety equipment. Regularly review and update these protocols to ensure everyone is prepared for any situation.
Consult with local authorities and experts in safety regulations to ensure compliance with all applicable laws and codes. They can provide valuable insights and guidance specific to your region.
By incorporating these safety measures into your restaurant floor plan, you can create a secure environment for both customers and staff, promoting a culture of safety throughout your establishment.
With safety measures in place, we can now move on to Step 9: choosing the right furniture and fixtures for your restaurant.
Read more: How To Make A 3D Floor Plan In Photoshop
Step 9: Choosing the Right Furniture and Fixtures
Choosing the right furniture and fixtures for your restaurant is a crucial step in creating a comfortable and visually appealing space. The furniture you select will not only define the style and ambiance of your establishment but also contribute to the overall dining experience.
Consider the following factors when choosing furniture and fixtures:
- Style and Theme: Align the furniture and fixtures with the overall style and theme of your restaurant. Whether you’re going for a classic, modern, rustic, or eclectic look, ensure that the furniture complements and enhances the desired atmosphere.
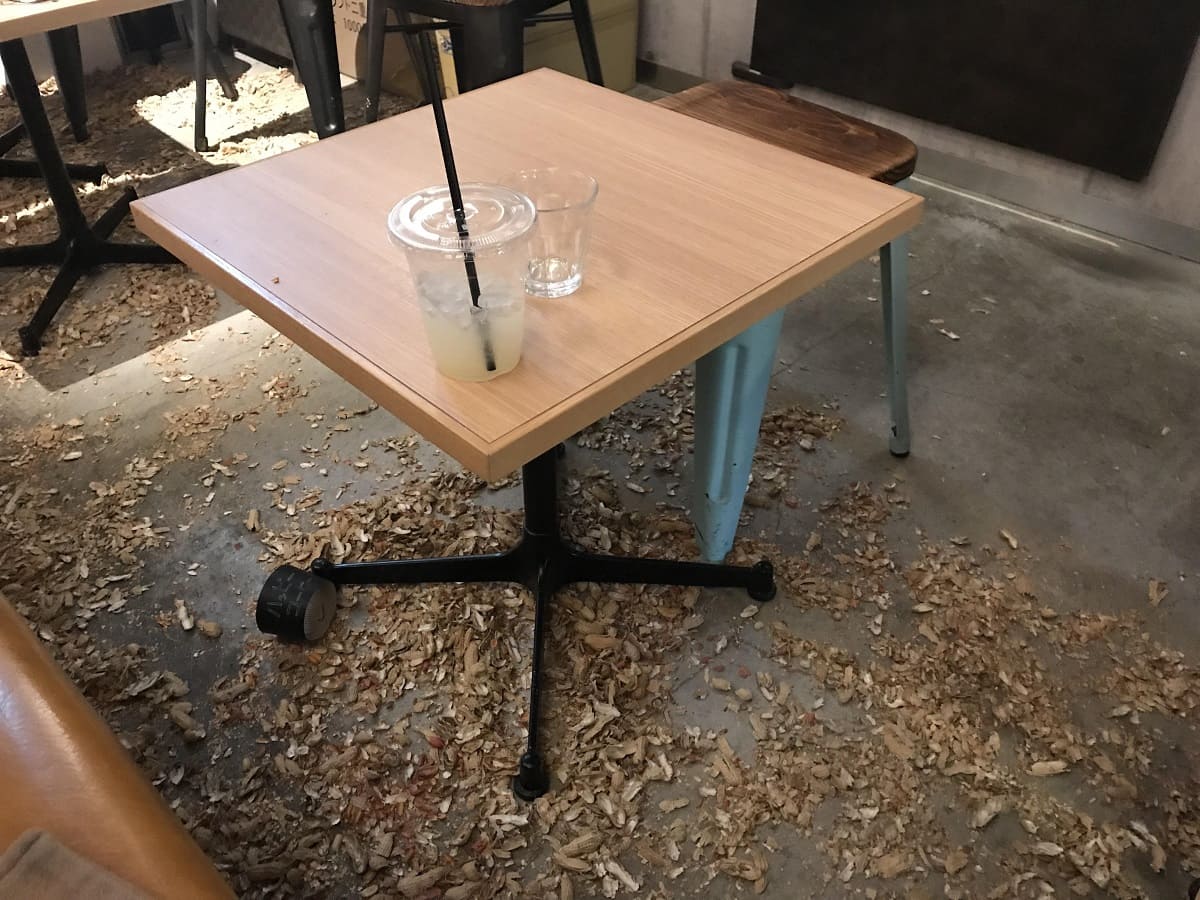
- Comfort: Prioritize the comfort of your customers. Select chairs and seating options that provide adequate support and cushioning, allowing guests to enjoy their meals without any discomfort. Consider booth seating for a more intimate and cozy dining experience.
- Durability: Choose furniture and fixtures that are built to withstand the demands of a restaurant environment. Opt for materials that are both durable and easy to clean, such as high-quality wood, metal, or upholstered furniture with stain-resistant fabric.
- Space Optimization: Keep in mind the size and layout of your restaurant when selecting furniture. Maximize the use of space by choosing appropriately sized tables and chairs that allow for comfortable seating while still accommodating the desired number of guests.
- Flexibility: Consider the versatility of the furniture and fixtures. Opt for modular or movable furniture pieces that can be easily rearranged to accommodate different group sizes and adapt to changing needs. This flexibility is especially useful for private events or busy periods.
- Accessibility: Ensure that your furniture arrangement allows for easy access for all customers, including those with disabilities. Leave ample space between tables to accommodate wheelchair accessibility and provide seating options that are accessible to individuals with mobility challenges.
- Lighting: Select lighting fixtures that complement your overall design while providing sufficient illumination. Consider a mix of ambient, task, and accent lighting to create the desired mood and highlight specific areas of interest.
- Brand Identity: Use furniture and fixtures to reinforce your brand identity. Consider incorporating your logo or unique design elements into the furniture, such as custom upholstery or branded tabletops. This helps create a cohesive and memorable brand experience.
Take the time to research different suppliers and consider their reputation for quality and reliability. Test out the furniture and assess its comfort and durability before making a final decision. Remember, investing in high-quality furniture and fixtures will pay off in the long run, as they will endure heavy use and maintain their appearance.
By carefully selecting the right furniture and fixtures, you can create a visually appealing and comfortable space that enhances the overall dining experience for your customers.
With the furniture and fixtures chosen, we can now move on to the final step: finalizing the floor plan.
Step 10: Finalizing the Floor Plan
After going through the process of assessing the space, identifying key areas, determining the seating capacity, designing the layout, considering flow and accessibility, allocating space for the kitchen and storage areas, planning for restrooms, incorporating safety measures, and choosing the right furniture and fixtures, it’s time to finalize your restaurant floor plan.
During this step, it’s crucial to review the entire floor plan and make any necessary adjustments. Consider the following points:
- Evaluation: Take a step back and evaluate the overall design. Ensure that your floor plan reflects your initial goals and objectives for your restaurant. Does it align with the ambiance, style, and theme you had envisioned?
- Customer Experience: Put yourself in the shoes of your customers and walk through the floor plan. Are there any areas that feel crowded or not adequately designed for comfort and ease of movement? Make adjustments to create a seamless and enjoyable experience for your guests.
- Efficiency: Evaluate the functionality and efficiency of the floor plan. Consider feedback from staff members and make adjustments to optimize the workflow in the kitchen, service areas, and overall operation of the restaurant.
- Safety and Accessibility: Ensure that all safety measures and accessibility requirements are met in the final floor plan. Double-check the placement of emergency exits, restrooms, and any necessary safety equipment to ensure compliance with regulations.
- Spacial Optimization: Make sure you have maximized the available space to accommodate the desired number of seats while maintaining comfort and a visually appealing atmosphere. Take into account the location of furniture, fixtures, and equipment to create a balanced and well-organized space.
- Review Building Codes: Review the final floor plan against local building codes and regulations. Ensure compliance with requirements regarding occupancy limits, zoning restrictions, ventilation, electrical systems, and any other relevant guidelines.
- Get Input: Consult with architects, interior designers, or restaurant consultants to get their input and professional opinions on your floor plan. They can provide valuable insights and suggestions based on their expertise and experience in restaurant design.
- Continuous Improvement: Remember that finalizing the floor plan doesn’t mean it’s set in stone. Your restaurant will evolve over time, and you may need to make adjustments in the future. Keep gathering feedback from customers and staff to identify areas that can be improved and be open to making necessary changes.
Once you have reviewed and finalized your floor plan, it’s time to bring it to life. Collaborate with your construction team or contractors to ensure the proper execution of the floor plan and the realization of your vision. Regularly visit the construction site to monitor the progress and ensure that everything is being implemented according to plan.
Remember, the success of your restaurant goes beyond just the floor plan. It relies on factors such as the quality of food, service, and overall dining experience. The floor plan serves as the foundation for creating a space that enhances these aspects and provides an inviting and comfortable environment for guests.
Congratulations on completing the process of designing your restaurant floor plan. You’re now one step closer to opening your doors to an amazing dining experience for your customers.
Best of luck with your restaurant venture!
Conclusion
Designing a restaurant floor plan is a complex and critical task that requires careful consideration of various factors. The layout of your restaurant plays a significant role in shaping the dining experience for your customers and optimizing the efficiency of your operation.
Throughout this article, we have outlined the ten steps involved in creating a well-designed restaurant floor plan. From assessing the space and identifying key areas to finalizing the layout and considering safety measures, each step is crucial in ensuring a seamless and enjoyable experience for both customers and staff.
By following these steps, you can create a floor plan that maximizes the use of space, provides comfort and accessibility, and reflects the unique style and ambiance of your restaurant. A well-designed floor plan contributes to efficient operations, enhances the overall dining experience, and leaves a lasting impression on your guests.
Remember that the floor plan is not a static document; it should be continuously evaluated and adapted based on feedback from customers and staff. As your restaurant evolves, be open to making necessary adjustments to improve efficiency and meet changing needs.
Collaborating with professionals in the field, such as architects, interior designers, or restaurant consultants, can provide invaluable guidance and expertise throughout the design process. Their insights can help streamline the decision-making process and ensure compliance with local regulations.
It’s important to strike a balance between functionality and aesthetics when designing your restaurant floor plan. Consider the flow of customers and staff, allocate space for essential areas such as the kitchen and storage, and create a welcoming ambiance through the right choice of furniture and fixtures.
At the heart of it all, your goal is to create a memorable dining experience for your customers. Pay attention to the details and prioritize customer satisfaction, safety, and accessibility in your floor plan. By doing so, you will set the stage for a successful and thriving restaurant.
Good luck in your restaurant journey and may your floor plan serve as the foundation for a delightful culinary adventure!
Now that you've tackled designing a restaurant floor plan, why not perfect another crucial area of your establishment? Dive into our guide on optimizing kitchen space, where you'll find practical advice for efficient storage. With insights from top designers, this read ensures no square inch goes unused, making every culinary operation smoother and more functional. Don't miss out on these invaluable kitchen design tweaks that could transform your cooking area into a model of efficiency and style.
Frequently Asked Questions about How To Make A Restaurant Floor Plan
Was this page helpful?
At Storables.com, we guarantee accurate and reliable information. Our content, validated by Expert Board Contributors, is crafted following stringent Editorial Policies. We're committed to providing you with well-researched, expert-backed insights for all your informational needs.


0 thoughts on “How To Make A Restaurant Floor Plan”