Home>diy>Architecture & Design>How To Draw Out A Floor Plan

Architecture & Design
How To Draw Out A Floor Plan
Modified: January 6, 2024
Learn how to draw out a floor plan with our architecture design tutorial. Gain valuable insights and tips to create professional layouts in no time.
(Many of the links in this article redirect to a specific reviewed product. Your purchase of these products through affiliate links helps to generate commission for Storables.com, at no extra cost. Learn more)
Introduction
Welcome to the world of architectural design! Drawing out a floor plan is an essential step in creating a well-designed and functional space. Whether you are designing your dream home, renovating an existing space, or planning an office layout, having a clear floor plan will help you visualize the layout and make informed decisions.
In this article, we will guide you through the process of drawing out a floor plan. We will discuss the tools and materials you will need, the steps to follow, and the important elements to consider. By the end of this article, you will have the knowledge and confidence to create your own floor plan and bring your design ideas to life.
Let’s dive in and get started!
Key Takeaways:
- Master the art of drawing out a floor plan with precision and creativity using essential tools, accurate measurements, and attention to detail. Create functional and visually appealing spaces with confidence and skill.
- Elevate your architectural design skills by incorporating windows, doors, structural elements, furniture, and finishing touches into your floor plan. Communicate your vision effectively and bring your design ideas to life with clarity and style.
Read more: How To Draw An Evacuation Floor Plan
Tools and Materials Needed
Before you begin drawing out a floor plan, it is important to gather the necessary tools and materials. Here are some essential items you will need:
- Paper: Start with a large sheet of paper or a sketchbook. Having enough space to draw out your floor plan is crucial.
- Pencil: You will need a pencil for sketching and making revisions. It is recommended to use a mechanical pencil with a variety of lead thicknesses for more precise drawings.
- Ruler: A straightedge ruler is essential for drawing straight lines and measuring distances accurately.
- Architect’s Scale: An architect’s scale is a specialized ruler that allows you to draw to scale. It is used to convert real-life measurements to a smaller, more manageable size.
- Tape Measure: A tape measure is used to measure the dimensions of the space you are designing. Obtain accurate measurements of the length, width, and height of the room.
- Eraser: Mistakes and revisions are inevitable during the drawing process. A good quality eraser will help you make corrections without damaging the paper.
- Colored Markers or Pens: Once your floor plan is complete, using different colors for walls, furniture, and fixtures can help differentiate elements and add visual appeal.
- Symbols and Templates: Consider using pre-made symbols and templates for furniture, appliances, and fixtures. They can save time and ensure consistency in your floor plan.
Having these tools and materials on hand will make the process of drawing out your floor plan much smoother and more enjoyable. It is always best to gather everything you need before getting started to avoid interruptions and maintain a steady workflow.
Step 1: Measure the Space
Before you can start drawing out a floor plan, you need to measure the dimensions of the space you are designing. It is crucial to obtain accurate measurements to ensure the floor plan reflects the actual dimensions of the room. Here are some steps to follow:
- Clear the Space: Remove any furniture or obstacles that may hinder your ability to measure accurately. The space should be empty and ready for measurements.
- Use a Tape Measure: Using a tape measure, measure the length, width, and height of the room. Measure from wall to wall for accurate dimensions. Take note of any recesses, alcoves, or protrusions that need to be considered in your floor plan.
- Document Measurements: Record your measurements in a notebook or on a sketchpad. Keep them organized and labeled for easy reference.
- Measure Doors and Windows: Measure the dimensions of any doors and windows, including their heights from the floor. Note their locations and distances from the walls.
- Measure Wall Thickness: Measure the thickness of the walls. This can be important when considering electrical outlets, plumbing fixtures, and built-in features.
- Note Structural Elements: If there are any structural elements such as columns, beams, or support walls, measure their dimensions and document their locations.
Remember to double-check your measurements to ensure accuracy. It is also helpful to take photos of the space for reference while drawing out the floor plan.
Once you have gathered all the necessary measurements, you are ready to move on to the next step: deciding on a scale.
Step 2: Decide on a Scale
Choosing a scale is an important step in drawing out a floor plan as it determines the size in which you will represent real-life measurements. The scale allows you to reduce the size of the room and its elements while maintaining accurate proportions. Here’s how to decide on a scale:
- Consider the Size of the Space: Assess the size of the room you are designing. If it is relatively small, you may choose to use a larger scale to capture more detail. For larger spaces, a smaller scale can provide a comprehensive overview.
- Set a Realistic Scale: Determine how much you can reduce the dimensions of the room while still accurately representing the space. Common scales for floor plans include 1/4 inch = 1 foot, 1/8 inch = 1 foot, or 1/2 inch = 1 foot.
- Consider the Paper Size: Take the size of your paper into account when choosing a scale. Ensure that the dimensions of your floor plan can comfortably fit within the confines of the paper.
- Maintain Clarity: It is essential to select a scale that allows for clear and readable drawings. Avoid using scales that are too small and result in cramped or illegible designs.
Once you have chosen a scale, write it down for reference during the drawing process. Remember that the scale will determine the accuracy and level of detail in your floor plan, so choose wisely based on your goals and the size of the space.
Now that you have your measurements and scale in hand, you are ready to start drawing out the walls of your floor plan!
Step 3: Start with the Walls
Now that you have your measurements and scale determined, it’s time to start drawing the walls of your floor plan. The walls will serve as the foundation and framework of your design. Follow these steps to accurately depict the walls:
- Begin with a Base Line: Using a ruler and pencil, draw a horizontal line to represent the base of your floor plan. This line will be the reference point for the rest of your walls and elements.
- Draw Exterior Walls: Starting from the base line, use your ruler and scale to draw the exterior walls of the space. Measure the lengths accurately and draw straight lines to represent the walls.
- Include Interior Walls: If your space has interior walls, measure and draw them using the same technique. Ensure that the walls are properly spaced and aligned with the exterior walls.
- Indicate Wall Thickness: Using different line weights or shading, indicate the thickness of the walls. This will give a clearer representation of the architectural layout.
- Add Doors and Windows: Mark the locations of doors and windows on the walls. Use your scale to ensure accurate placement and dimensions. You can use symbols or drawings to represent these openings.
As you draw the walls, remember to refer back to your measurements and scale to maintain accuracy. Pay attention to corners, angles, and any architectural features such as alcoves or recesses. It’s important to take your time during this step to ensure that the walls are proportionate and aligned properly.
With the walls in place, your floor plan is starting to take shape. The next step is to add windows and doors to further refine the design.
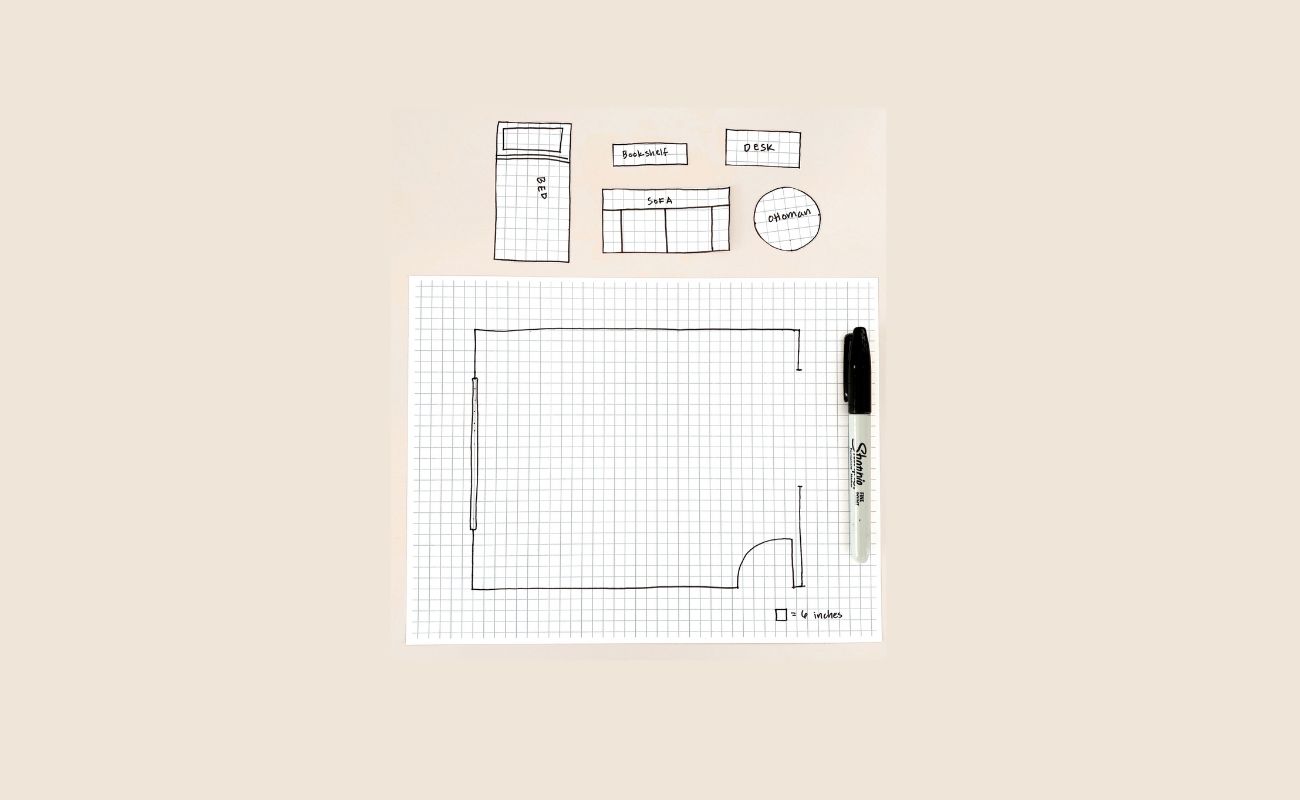
When drawing out a floor plan, start by measuring the dimensions of the space accurately and use graph paper to scale down the measurements for a more precise representation.
Read more: How To Draw Chairs On A Floor Plan
Step 4: Add Windows and Doors
Adding windows and doors to your floor plan is an essential step that will bring your design to life. These elements not only provide access and natural light but also contribute to the overall aesthetics of the space. Here’s how you can incorporate windows and doors into your floor plan:
- Refer to Your Measurements: Use your measurements to accurately depict the size and positioning of windows and doors within the walls. Ensure that they are in scale with the rest of the floor plan.
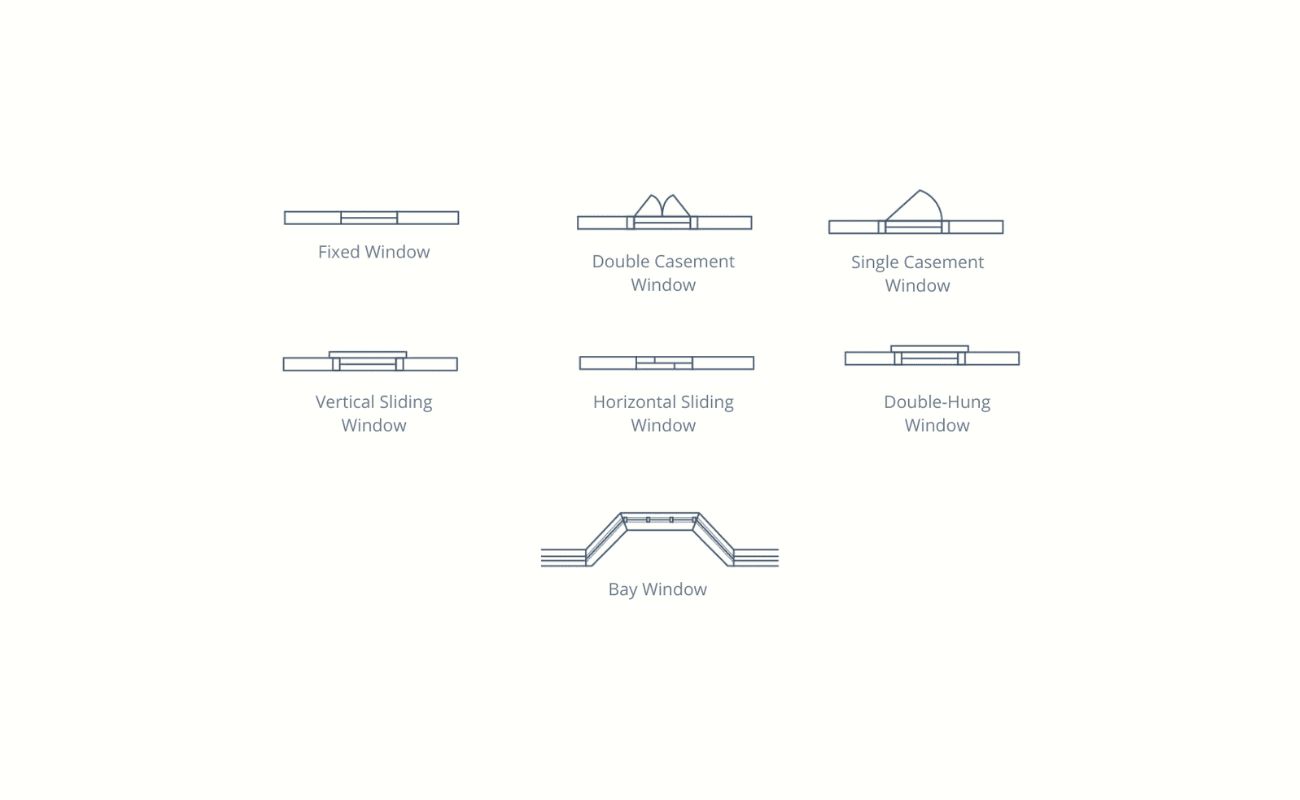
- Windows: Draw rectangles to represent windows, considering their height and width. Use your scale to determine the appropriate size and placement. You can also indicate the type of window, such as casement or double-hung, to provide more detail.
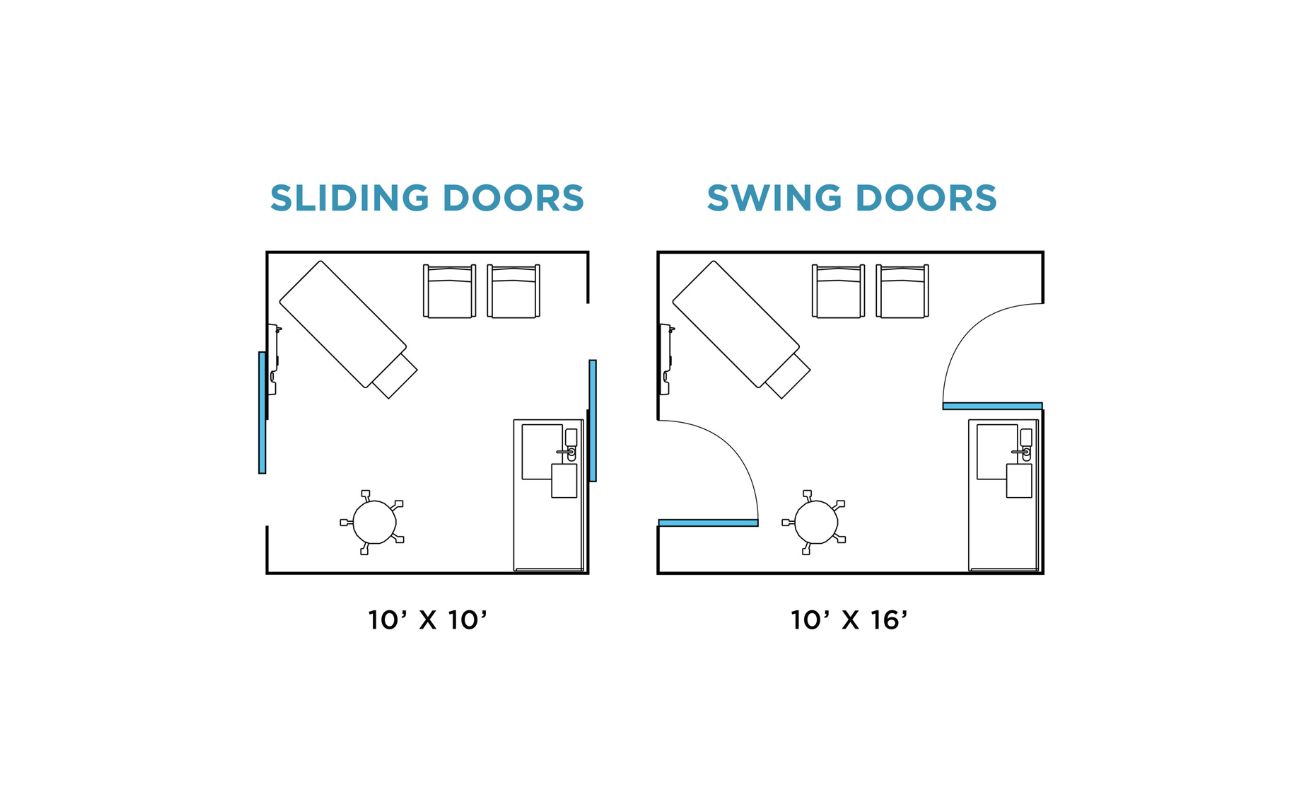
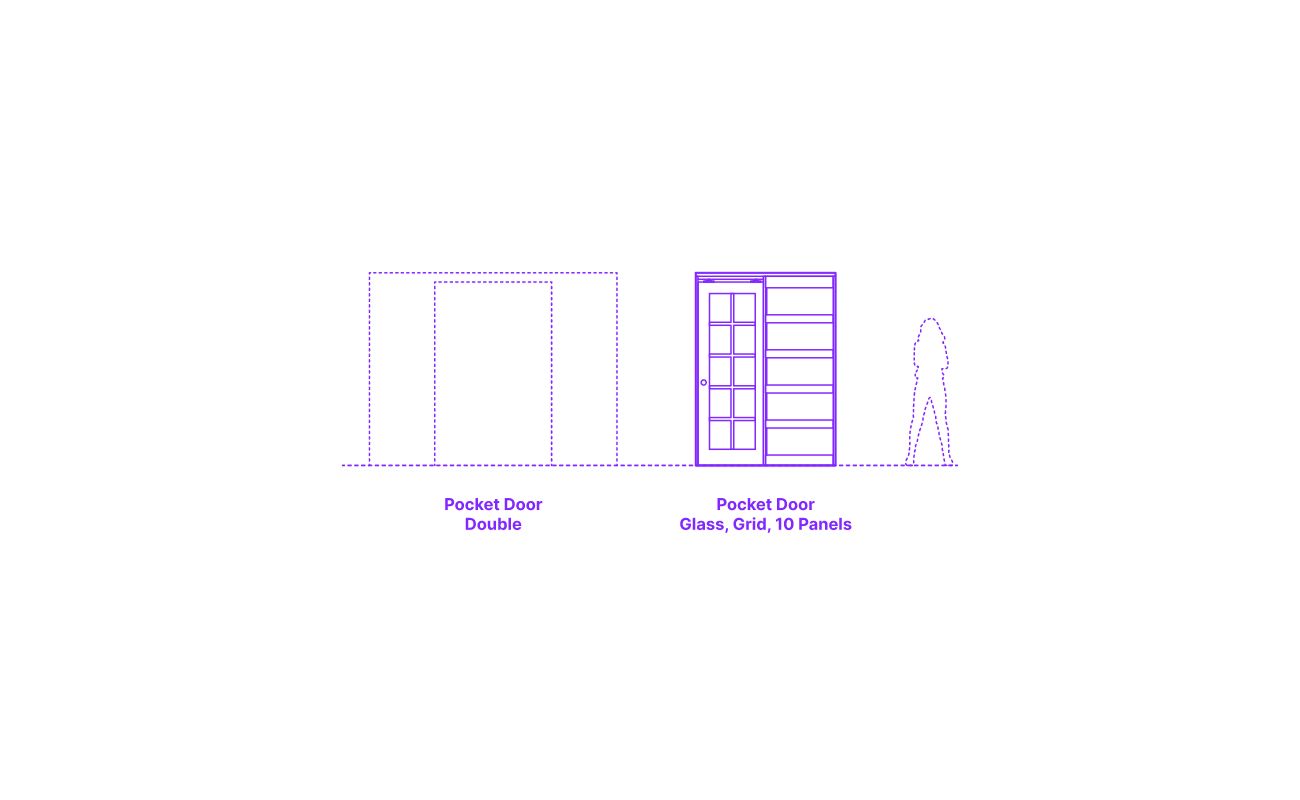
- Doors: Draw rectangles to signify doors in the walls. Pay attention to their height and width. Differentiate between interior and exterior doors as necessary. You can also add symbols or labels to indicate the swing direction of the door.
- Consider Adjacent Elements: Take into account any architectural features or obstacles around the windows and doors, such as trim, moldings, or built-in shelving. Incorporate these details into your floor plan to accurately represent the space.
- Label and Annotate: As you add windows and doors, label them accordingly. Use a key or legend to indicate specific details or features. This will help others understand the floor plan with ease.
Remember to refer back to your measurements and scale to ensure accuracy when adding windows and doors. Pay attention to their placement and their relationship to the walls and the overall flow of the space.
With windows and doors in place, your floor plan is now taking shape with defined spaces. The next step is to include structural elements such as columns, beams, or support walls.
Step 5: Include Structural Elements
Incorporating structural elements in your floor plan is essential to capture the architectural integrity of the space. These elements, such as columns, beams, and support walls, play a crucial role in the overall structural stability of the building. Here’s how you can include them in your floor plan:
- Refer to Your Measurements: Use your measurements to accurately portray the dimensions and positions of the structural elements. Ensure that they are in scale with the rest of the floor plan.
- Columns: If there are any columns in the space, draw rectangles or circles to represent them. Pay attention to their dimensions and locations, as they can impact furniture placement and overall flow.
- Beams: Draw straight lines to indicate the presence of beams. Consider their height, width, and position in relation to the walls and other elements in the space.
- Support Walls: If there are support walls in the room, indicate them using solid lines. Note their thickness and their connection to the floor and ceiling.
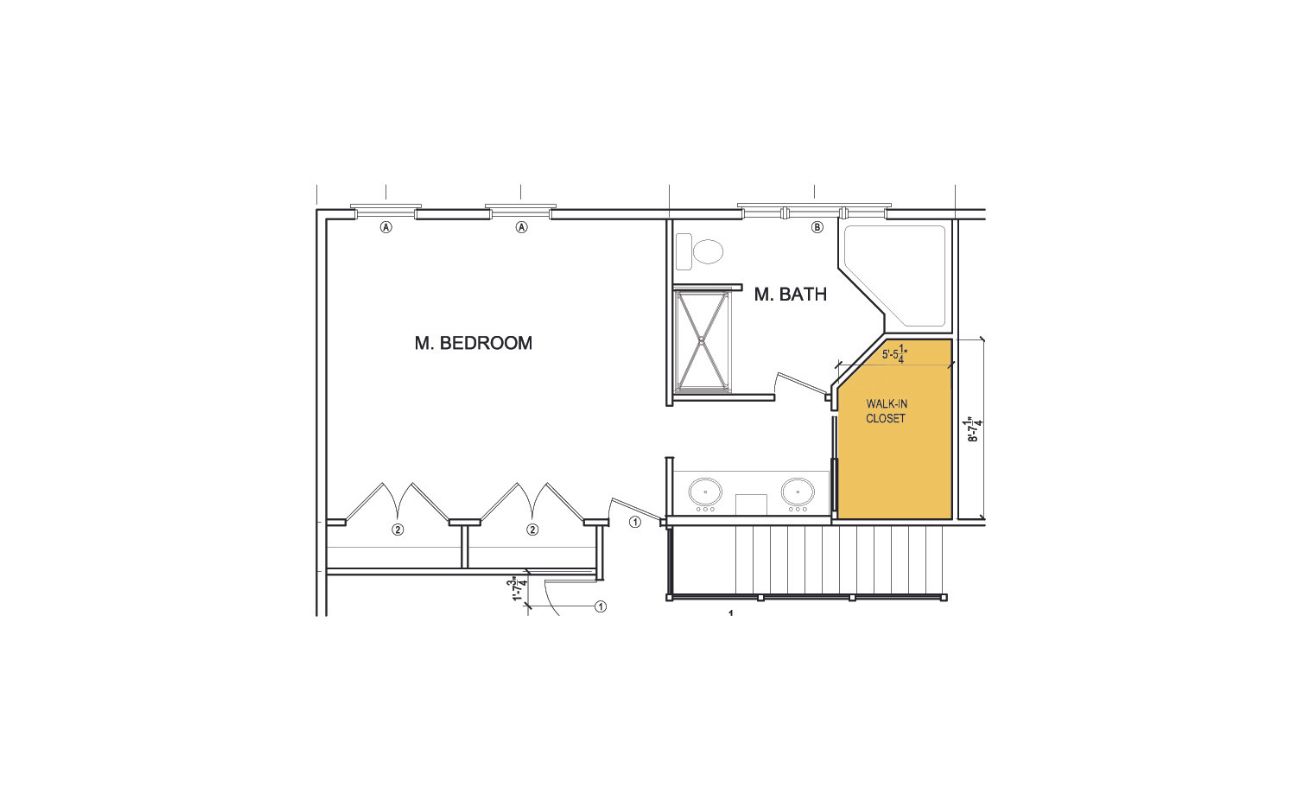
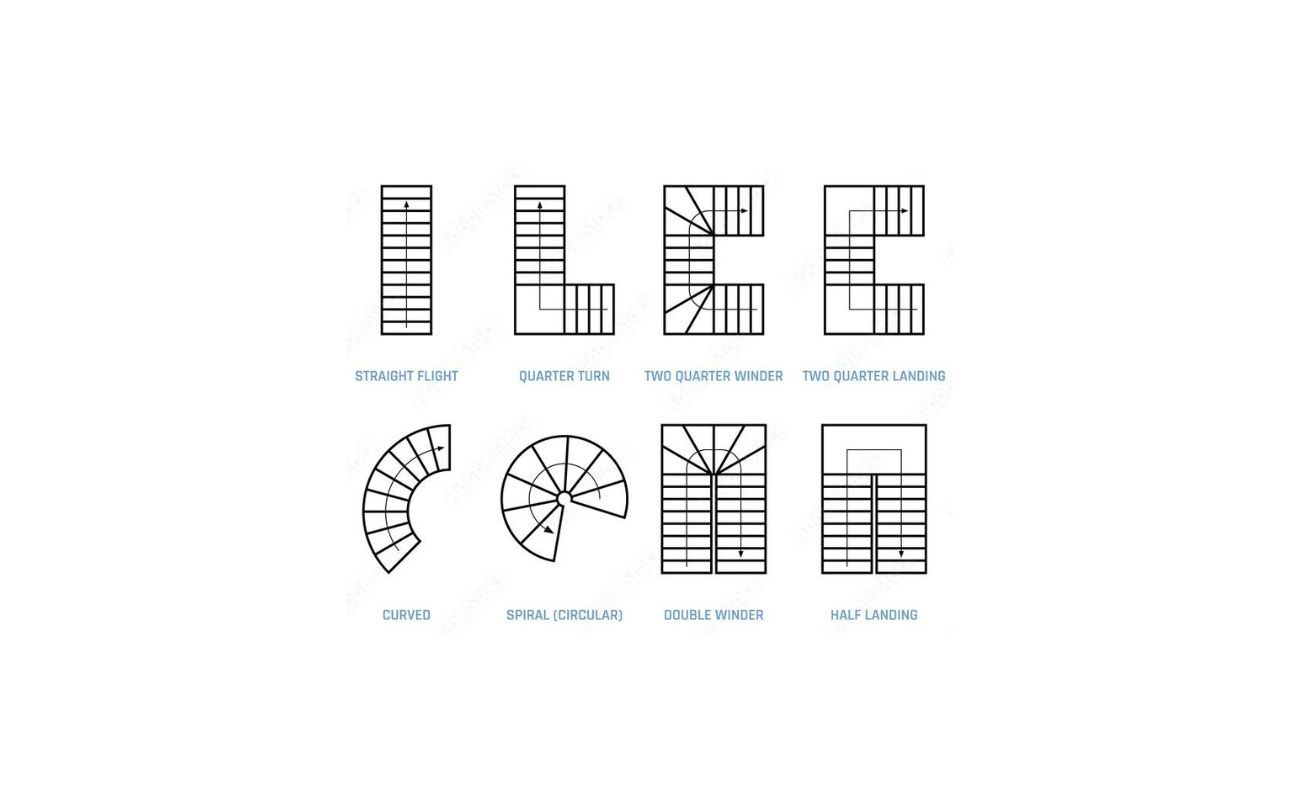
- Stairs: If your floor plan includes stairs, draw them with accurate dimensions and positioning. Consider the width of the stairs and any landing areas.
- Labels and Annotations: As you include structural elements, label and annotate them for clarity. Use symbols or a legend to indicate specific details or features.
It is crucial to accurately represent the structural elements in your floor plan as they impact the overall design and functionality of the space. Take your time and refer back to your measurements to ensure accuracy.
With the structural elements included, you are now ready to move on to the next step: placing furniture and fixtures in your floor plan.
Step 6: Place Furniture and Fixtures
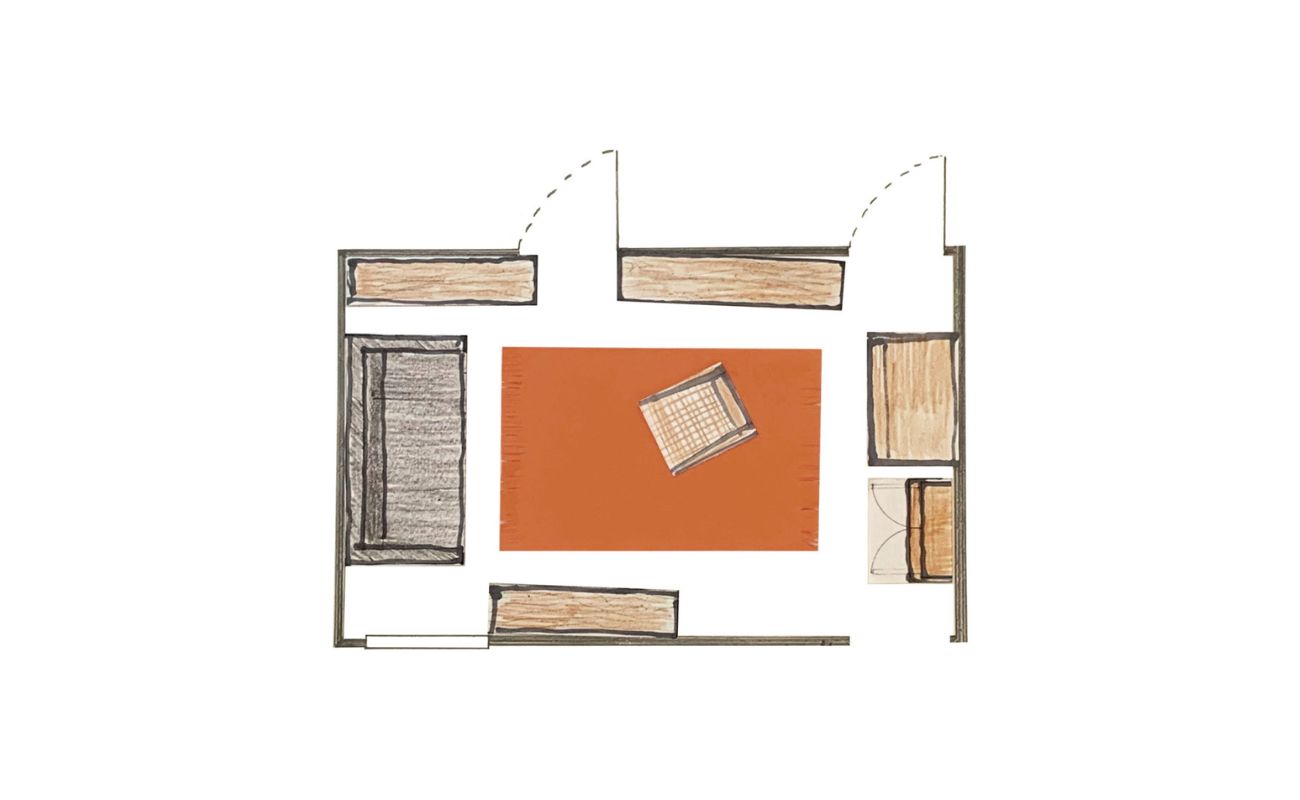
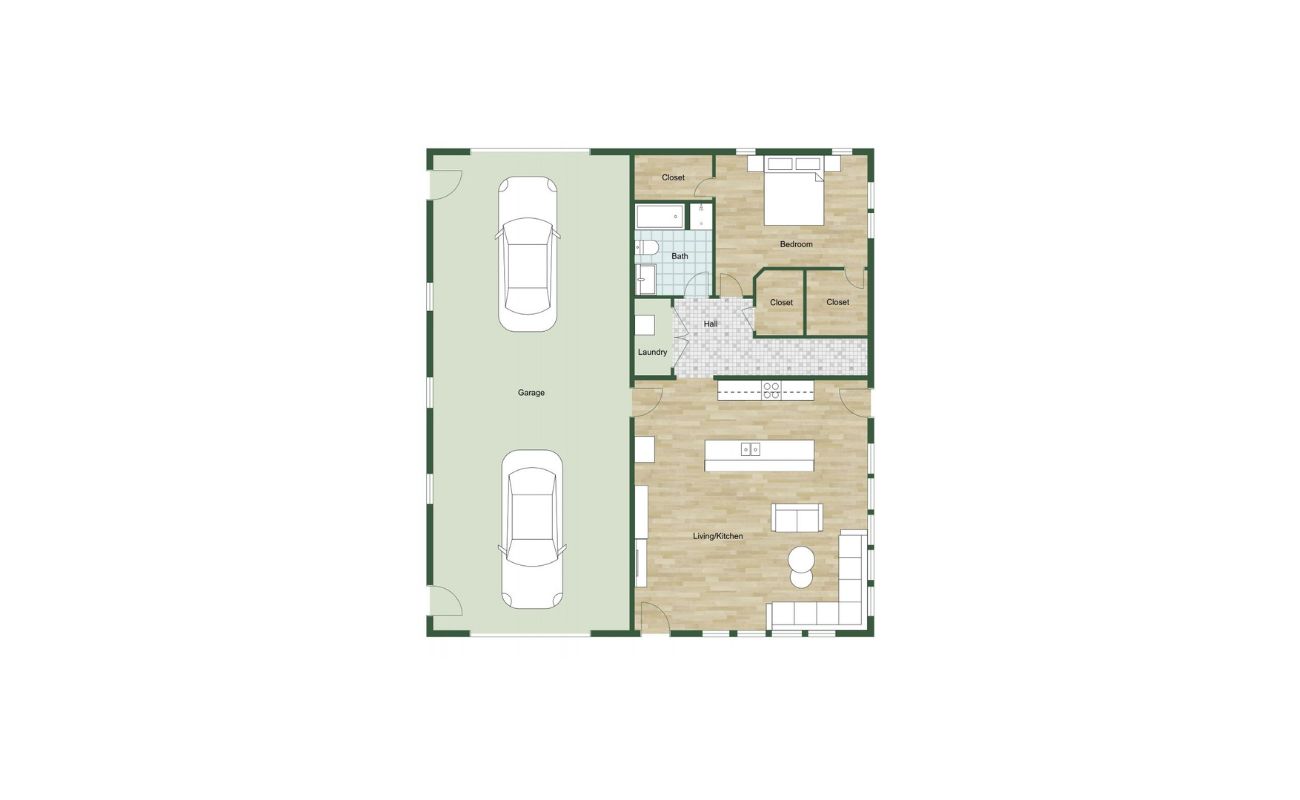
Now that you have created the framework of your floor plan with the walls, windows, doors, and structural elements, it’s time to bring in the furniture and fixtures. Placing them strategically will help you create a functional and well-designed space. Follow these steps to place furniture and fixtures in your floor plan:
- Consider Functionality: Think about how you intend to use the space. Are you designing a living room, bedroom, or office? Determine the main activities that will take place in the room and plan accordingly.
- Measure Furniture: Measure the dimensions of the furniture pieces you want to include in the floor plan. This will help you determine if they can fit properly without overcrowding the space.
- Use Scale and Proportion: Take your scale into account when placing furniture. Ensure that the size of the furniture on the floor plan accurately reflects its size in real life. Also, consider the proportions of the furniture in relation to the room’s dimensions.
- Arrange for Traffic Flow: Keep in mind the natural flow of movement within the space. Allow for clear pathways and ensure that furniture placement does not obstruct doorways or windows.
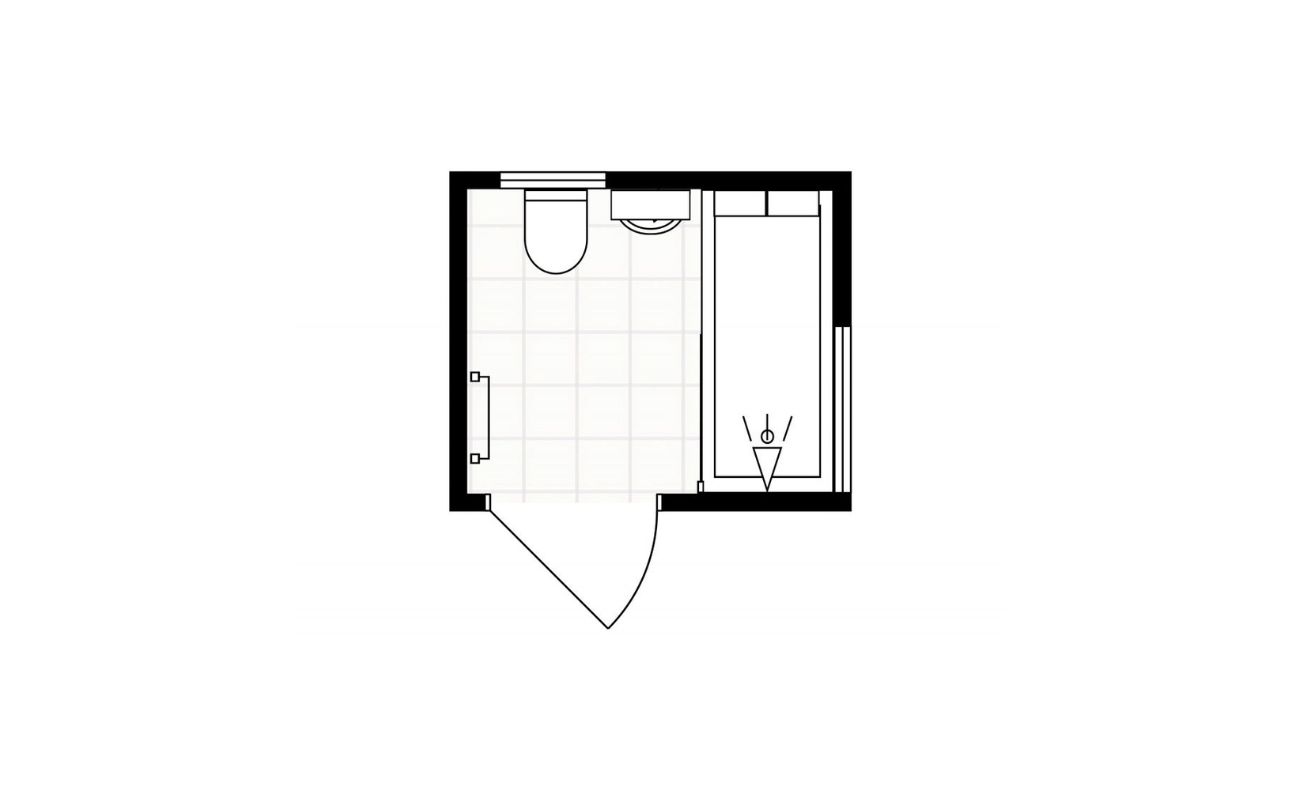
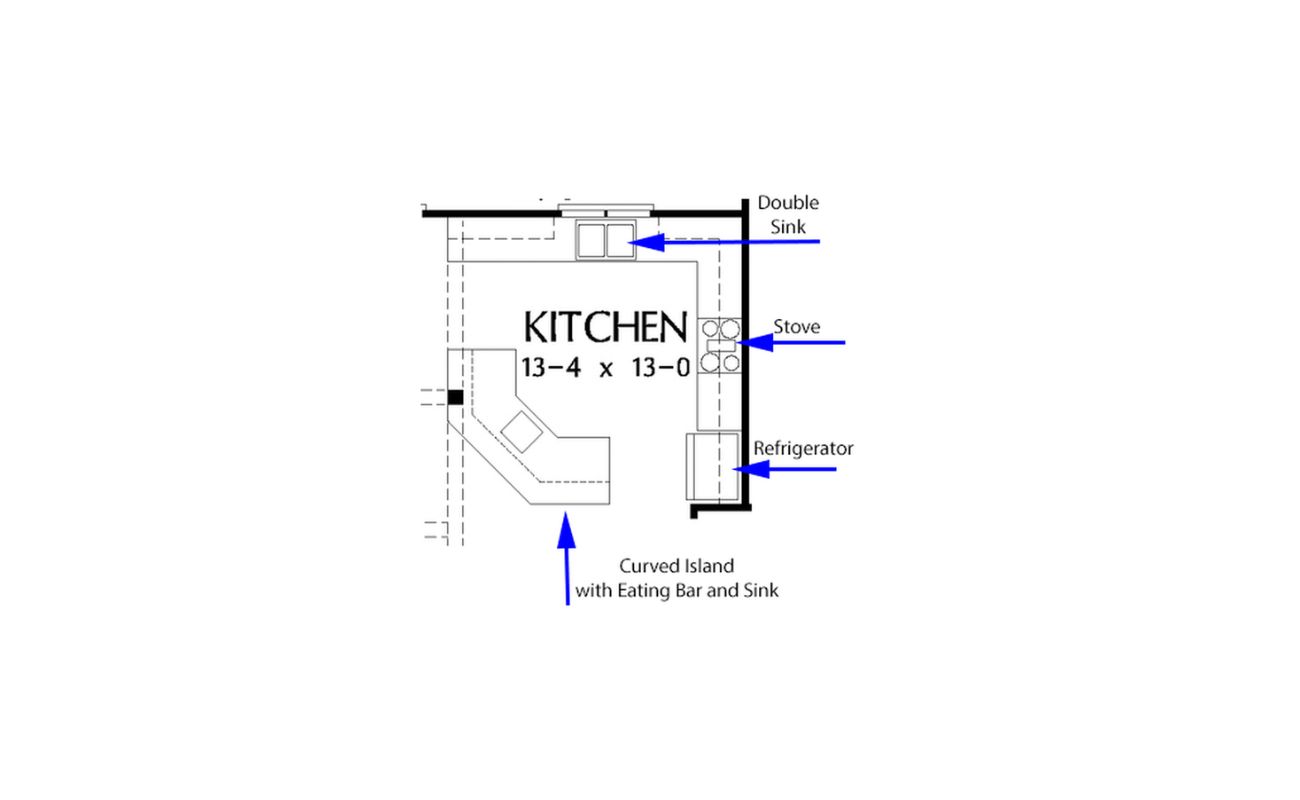
- Add Fixtures and Appliances: If applicable, include fixtures such as sinks, toilets, showers, or kitchen appliances in the floor plan. Use symbols or drawings to represent them accurately.
- Label and Annotate: As you place furniture and fixtures, label them accordingly. This will help others understand the floor plan and visualize the final layout easily.
Take some time to experiment with different furniture arrangements until you find the most suitable layout for your needs. Don’t be afraid to make adjustments and try new configurations to optimize the functionality and aesthetics of the space.
With furniture and fixtures in place, you are now ready to add the finishing touches to your floor plan.
Step 7: Add Finishing Touches
Adding the finishing touches to your floor plan will help enhance its visual appeal and provide additional details about the space. These final touches will bring your design to life and make it more visually engaging. Here are some steps to follow:
- Color and Texture: Consider adding color or textures to your floor plan to differentiate between different materials or areas. Use colored markers or pens to represent walls, flooring, and other elements.
- Shadows and Shading: Incorporate shadows and shading to create depth and dimension in your floor plan. This can be done by adding gradient or hatching techniques to indicate areas of light and shadow.
- Notation and Symbols: Include notations and symbols to indicate specific features or important details. This can include electrical outlets, plumbing fixtures, built-in storage, or other specific elements unique to the space.
- Key or Legend: Create a key or legend that explains the symbols and notations used in your floor plan. This will make it easier for others to understand the different elements represented.
- Title and Scale: Add a title to your floor plan, indicating the purpose of the space or the room being designed. Also, include the scale you used, so viewers are aware of the proportions.
- Review and Revise: Take some time to review your floor plan and check for any errors or inconsistencies. Make necessary revisions to ensure the accuracy and clarity of the final design.
Adding these finishing touches will enhance the overall presentation of your floor plan. It will also make it easier for others, such as contractors or interior designers, to interpret and work with your design.
Congratulations! You have successfully completed the process of drawing out a floor plan. Your comprehensive and well-designed floor plan will serve as a valuable tool in executing your architectural project with accuracy and efficiency.
Remember, practice makes perfect, so continue to refine your floor plan drawing skills and explore different design possibilities.
Read more: How To Draw A Door In A Floor Plan
Conclusion
Congratulations on completing your floor plan! Drawing out a floor plan is an exciting process that allows you to bring your design ideas to life and create functional spaces. By following the steps outlined in this article and using the necessary tools and materials, you have learned how to accurately represent the dimensions, walls, windows, doors, structural elements, furniture, and finishing touches of your design.
A well-executed floor plan is essential for effective communication with contractors, architects, and interior designers. It provides them with a clear understanding of your vision, facilitating a smoother construction or renovation process. Moreover, a properly measured and detailed floor plan maximizes space utilization, improves flow, and ensures that your design aligns with your needs and preferences.
Remember that a floor plan is not a static document. It is meant to be revised and refined as your design evolves. Don’t hesitate to make adjustments or experiment with different furniture arrangements to create the perfect layout for your space.
Whether you are designing your dream home, remodeling an existing space, or planning an office layout, the ability to draw out a floor plan adds an invaluable skill to your repertoire. With practice, you will become more proficient in capturing the essence of a space and conveying your design intentions effectively.
So, grab your tools, gather your measurements, and let your creativity flow as you embark on creating stunning and functional floor plans. Enjoy the process and have fun designing spaces that inspire and captivate!
Frequently Asked Questions about How To Draw Out A Floor Plan
Was this page helpful?
At Storables.com, we guarantee accurate and reliable information. Our content, validated by Expert Board Contributors, is crafted following stringent Editorial Policies. We're committed to providing you with well-researched, expert-backed insights for all your informational needs.


0 thoughts on “How To Draw Out A Floor Plan”