Home>Furniture & Design>Bathroom Accessories>How To Remove Toothbrush Holder From Wall
Bathroom Accessories
How To Remove Toothbrush Holder From Wall
Modified: April 22, 2024
Learn how to safely remove a toothbrush holder from the wall in your bathroom. Discover the best techniques for taking down bathroom accessories without causing damage.
(Many of the links in this article redirect to a specific reviewed product. Your purchase of these products through affiliate links helps to generate commission for Storables.com, at no extra cost. Learn more)
Introduction
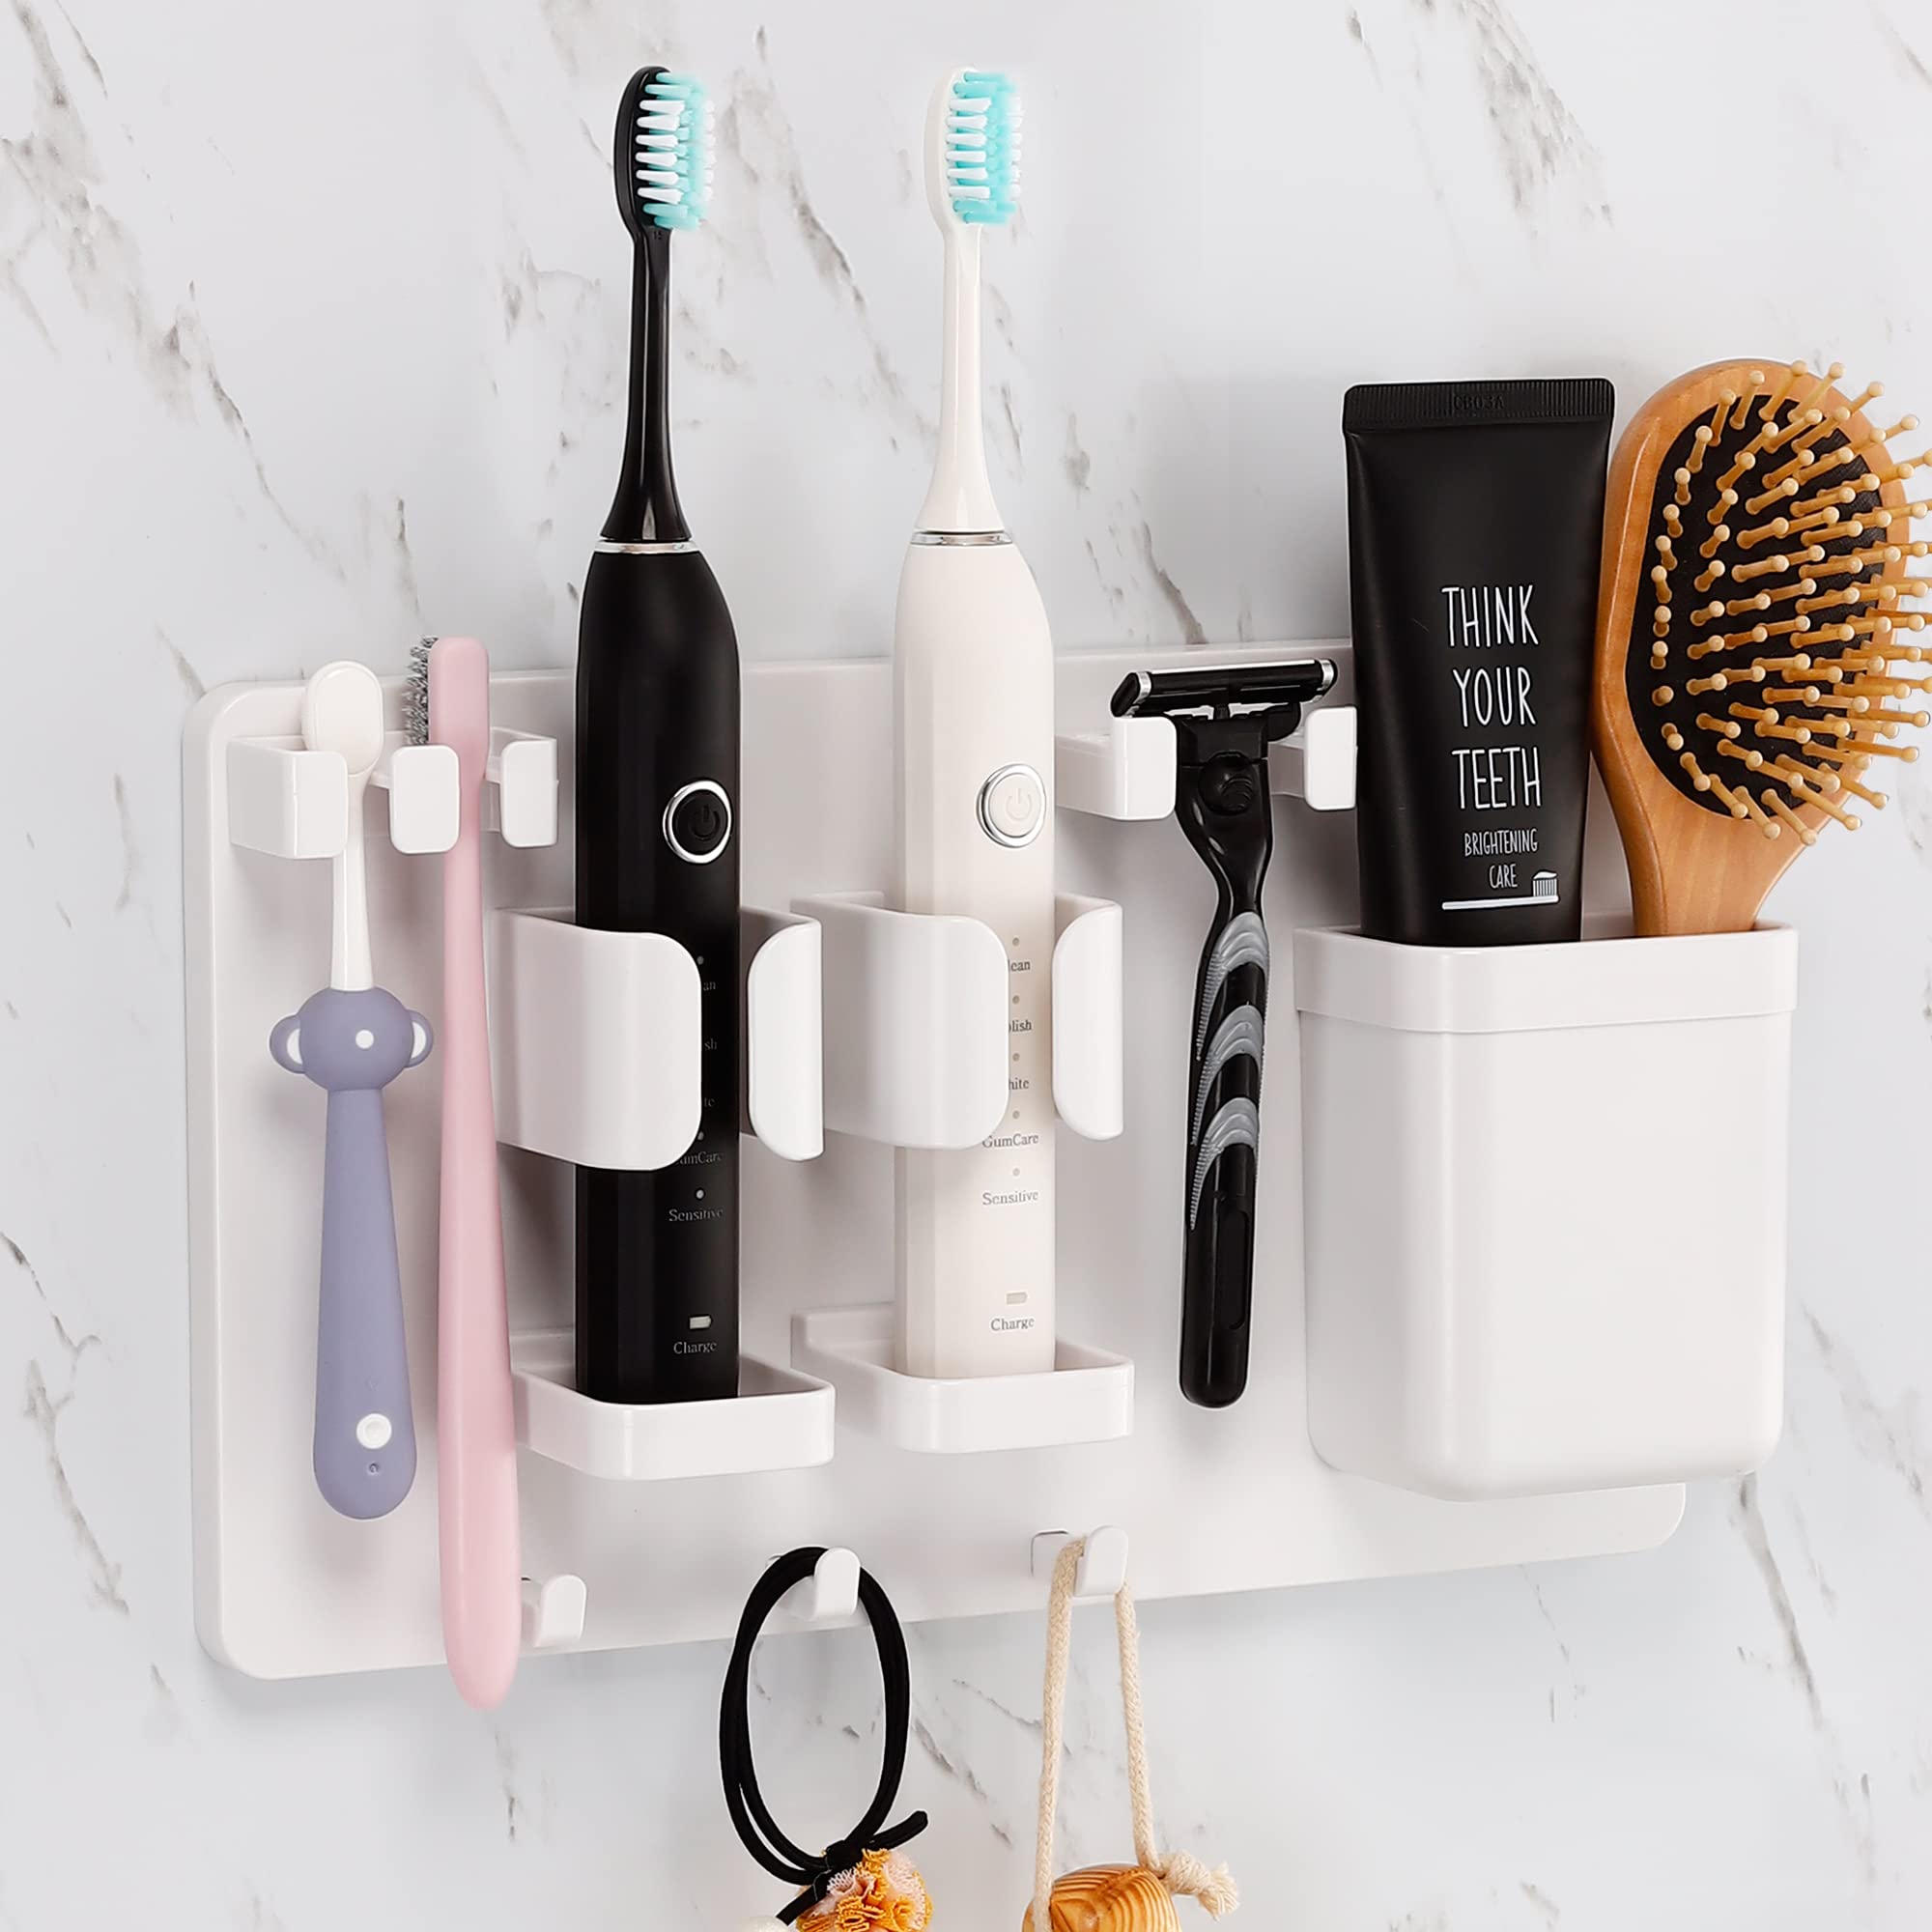
Removing a toothbrush holder from the wall may seem like a straightforward task, but it's essential to approach it with care to avoid damaging the wall or the holder itself. Whether you're looking to replace the existing holder with a new one or simply want to reposition it, understanding the proper steps for removal is crucial. This guide will walk you through the process, providing clear instructions and tips to ensure a smooth and hassle-free experience.
By following the steps outlined in this article, you'll be equipped with the knowledge and confidence to tackle this task effectively. From gathering the necessary tools to safely detaching the holder from the wall and cleaning the surface afterward, each step is designed to help you navigate the process with ease. Whether you're a seasoned DIY enthusiast or a novice looking to take on a small home improvement project, this guide is tailored to assist you every step of the way.
As you embark on this endeavor, it's important to approach it with patience and attention to detail. By doing so, you can minimize the risk of causing any damage to the wall or the toothbrush holder, ensuring that the entire process is executed smoothly and without any unexpected setbacks. With the right approach and a clear understanding of the necessary steps, you'll be well-prepared to tackle the task of removing a toothbrush holder from the wall, leaving you with a clean and refreshed space to work with.
Now, let's dive into the step-by-step process, starting with gathering the necessary tools to facilitate the removal of the toothbrush holder from the wall.
Key Takeaways:
- Removing a toothbrush holder from the wall requires the right tools, patience, and caution. Whether it’s screws or adhesive, follow the steps to avoid damaging the wall or the holder itself.
- After removing the toothbrush holder, clean the wall surface thoroughly. Consider reinstalling, replacing, or responsibly disposing of the holder to refresh and personalize your bathroom space.
Step 1: Gather necessary tools
Before embarking on the task of removing a toothbrush holder from the wall, it's essential to gather the necessary tools to facilitate a smooth and efficient process. Having the right tools at your disposal will not only streamline the removal but also ensure that you can address any unexpected challenges that may arise along the way.
Here are the essential tools you'll need:
-
Screwdriver: Depending on the type of installation, you may require a flathead or Phillips screwdriver to loosen the screws securing the toothbrush holder to the wall. Ensure that the screwdriver matches the type of screws used in the installation to avoid damaging them during removal.
-
Putty Knife or Spatula: If the toothbrush holder is attached to the wall with adhesive, a putty knife or spatula will be invaluable for gently prying it away from the surface. This tool helps to loosen the adhesive without causing damage to the wall.
-
Cleaning Supplies: It's advisable to have cleaning supplies on hand to address any residue left behind after removing the holder. This may include a mild cleaning solution, a sponge or cloth, and possibly a wall-safe adhesive remover if the holder was attached with strong adhesive.
-
Safety Gloves: While not always necessary, wearing safety gloves can provide added protection for your hands, especially when dealing with sharp edges or potentially abrasive surfaces during the removal process.
-
Safety Glasses: If the toothbrush holder is secured with screws, wearing safety glasses can help protect your eyes from any debris that may be dislodged during the removal.
By ensuring that you have these tools readily available, you'll be well-prepared to tackle the task of removing the toothbrush holder from the wall. With the right tools at your disposal, you can approach the removal process with confidence, knowing that you have everything you need to navigate each step effectively.
With the necessary tools in hand, you're now ready to proceed to the next step: loosening the screws or adhesive to facilitate the removal of the toothbrush holder from the wall.
Step 2: Loosen the screws or adhesive
When it comes to removing a toothbrush holder from the wall, the method of attachment will determine the approach for detachment. Whether the holder is secured with screws or adhesive, it's essential to proceed with caution to avoid causing damage to the wall or the holder itself.
Removing a Screwed Holder
If the toothbrush holder is attached to the wall with screws, the first step is to locate and identify the screws holding it in place. Using the appropriate screwdriver—either flathead or Phillips, depending on the screw type—carefully begin loosening the screws. It's important to maintain a firm grip on the holder while loosening the screws to prevent it from falling and causing any damage. Once the screws are sufficiently loosened, gently lift the holder away from the wall, ensuring that all screws are completely removed before proceeding.
Detaching an Adhesive-mounted Holder
For toothbrush holders that are affixed to the wall with adhesive, a different approach is required. Begin by assessing the edges of the holder to determine the extent of the adhesive bond. Using a putty knife or spatula, carefully insert the tool between the holder and the wall, applying gentle pressure to gradually loosen the adhesive. It's crucial to exercise patience during this process to avoid damaging the wall surface. Slowly work the putty knife or spatula around the entire perimeter of the holder until it begins to detach from the wall. Once the adhesive bond is sufficiently loosened, carefully lift the holder away from the wall, ensuring that any remaining adhesive is not excessively pulled or stretched.
Precautions and Safety Measures
Regardless of the method of attachment, it's important to take certain precautions during the removal process. When dealing with screws, wearing safety gloves and protective eyewear can provide added protection. This is especially important to prevent any accidental injuries or exposure to debris that may be dislodged during the loosening of screws. When working with adhesive, exercising patience and using gentle, consistent pressure with the putty knife or spatula will help prevent damage to the wall surface.
By following these steps and taking necessary precautions, you can effectively loosen the screws or adhesive securing the toothbrush holder to the wall. With the holder successfully detached, you can proceed to the next step of removing it from the wall surface, ensuring a smooth and damage-free process.
Step 3: Remove the toothbrush holder from the wall
With the screws or adhesive successfully loosened, the next crucial step is to carefully remove the toothbrush holder from the wall. This process requires a delicate touch to ensure that neither the holder nor the wall sustains any damage during the removal.
For holders secured with screws, gently lift the holder away from the wall, ensuring that all screws are completely detached. It's important to maintain a steady grip on the holder to prevent it from slipping or falling, which could potentially cause damage to the wall surface. Once the holder is free from the wall, set it aside in a safe location, away from the work area, to prevent any accidental damage or interference during the subsequent cleaning process.
In the case of adhesive-mounted holders, continue to apply gentle, consistent pressure with the putty knife or spatula to carefully detach the holder from the wall. As the adhesive bond loosens, slowly lift the holder away from the wall, ensuring that any remaining adhesive does not excessively stretch or pull. It's crucial to exercise patience during this process to avoid causing damage to the wall surface, as excessive force could lead to unsightly marks or blemishes.
As you remove the holder from the wall, take note of any residual adhesive or debris that may be left behind. These remnants can be addressed during the subsequent cleaning phase to ensure that the wall surface is left smooth and free from any traces of the previous installation.
By following these careful steps, you can effectively remove the toothbrush holder from the wall, setting the stage for the final phase of the process: cleaning the wall surface to prepare it for potential reinstallation or a fresh, updated look. With the holder successfully removed, you're now ready to proceed to the next step, ensuring that the wall is left in pristine condition for the next phase of your home improvement project.
Step 4: Clean the wall surface
After successfully removing the toothbrush holder from the wall, the next crucial step is to thoroughly clean the wall surface to ensure that it is free from any residual adhesive, debris, or marks left behind. This cleaning process is essential, whether you plan to reinstall a new toothbrush holder, apply a fresh coat of paint, or simply leave the wall bare for a clean, refreshed look.
Removing Residual Adhesive and Debris
Begin by inspecting the wall surface where the toothbrush holder was previously installed. Look for any remnants of adhesive, such as sticky residue or small particles that may have accumulated during the removal process. Using a mild cleaning solution and a soft sponge or cloth, gently dab the affected areas to loosen and remove any remaining adhesive. It's important to avoid using abrasive materials or harsh chemicals that could damage the wall surface, especially if it is painted or has a delicate finish.
Read more: How To Remove Toothbrush Bristle From Throat
Addressing Stubborn Residue
In some cases, adhesive remnants may prove to be more stubborn and resistant to standard cleaning methods. If gentle dabbing with a cleaning solution does not fully remove the residue, consider using a wall-safe adhesive remover specifically designed to dissolve and lift stubborn adhesive remnants. Follow the product instructions carefully, applying the adhesive remover to the affected areas and allowing it to work its magic before gently wiping away the residue with a clean cloth.
Smoothing the Wall Surface
Once any adhesive remnants and debris have been effectively removed, take a moment to assess the overall condition of the wall surface. If there are any minor imperfections or blemishes resulting from the previous installation, consider using a gentle wall cleaner or mild soap solution to further clean and smooth the affected areas. This step can help ensure that the wall surface is left in optimal condition, free from any visible marks or irregularities.
Drying and Inspecting
After cleaning the wall surface, allow it to air dry completely before proceeding with any further steps, such as reinstallation or applying a fresh coat of paint. Take this opportunity to inspect the cleaned area thoroughly, ensuring that it is smooth, free from residue, and ready for the next phase of your home improvement project.
By meticulously cleaning the wall surface, you can prepare it for potential reinstallation of a toothbrush holder or any other decorative elements, or simply leave it with a clean, refreshed appearance. With the wall surface now clean and pristine, you're ready to proceed to the final step of the process: reinstallation or disposal of the toothbrush holder, depending on your specific preferences and home improvement goals.
Step 5: Reinstall or dispose of the toothbrush holder
After successfully removing the toothbrush holder from the wall and ensuring that the wall surface is clean and pristine, you are now faced with the decision of whether to reinstall the existing holder, replace it with a new one, or dispose of it altogether. This step allows you to consider your preferences and home improvement goals, providing the opportunity to refresh the space with a new holder or explore alternative decorative options.
Read more: How To Make A Toothbrush Holder
Reinstallation of the Toothbrush Holder
If you intend to reinstall the same toothbrush holder or a similar one in the same location, carefully assess the condition of the holder and its compatibility with the wall surface. Inspect the holder for any signs of damage or wear that may affect its functionality or aesthetic appeal. Additionally, ensure that the attachment method—whether screws or adhesive—is suitable for the wall surface and aligns with your preferences for installation.
When reinstalling the toothbrush holder, follow the manufacturer's guidelines for proper installation, ensuring that it is securely attached to the wall without causing any damage. If using screws, verify that they are in good condition and suitable for reinstallation. For adhesive-mounted holders, consider using fresh, high-quality adhesive to ensure a strong and durable bond with the wall.
Replacement with a New Toothbrush Holder
Should you opt for a fresh look or upgraded functionality, replacing the existing toothbrush holder with a new one presents an opportunity to enhance the space. Explore a wide range of toothbrush holder designs, materials, and installation methods to find the perfect fit for your bathroom. Consider factors such as style, size, and compatibility with the wall surface to ensure a seamless and visually appealing installation.
Before installing the new toothbrush holder, take measurements to determine the ideal placement and ensure that it aligns with your desired aesthetic and functional requirements. Whether secured with screws or adhesive, follow the manufacturer's instructions for proper installation to achieve a secure and stable attachment to the wall.
Disposal of the Toothbrush Holder
In the event that the existing toothbrush holder is no longer suitable for reinstallation or replacement, consider responsibly disposing of it. Depending on the materials used in the holder, explore recycling options to minimize environmental impact. If the holder is made of plastic, metal, or other recyclable materials, inquire about local recycling facilities or programs that accept such items for proper disposal.
For holders that are not recyclable, ensure that they are disposed of in accordance with local waste management guidelines. Consider donating usable holders to local charities or organizations that may benefit from such items. By responsibly disposing of the toothbrush holder, you can contribute to sustainable waste management practices and potentially support community initiatives.
By carefully considering the options to reinstall, replace, or dispose of the toothbrush holder, you can make an informed decision that aligns with your home improvement goals and contributes to a refreshed and visually appealing bathroom space. Whether opting for familiarity, innovation, or sustainability, this step allows you to personalize and enhance your bathroom environment according to your preferences and needs.
Frequently Asked Questions about How To Remove Toothbrush Holder From Wall
Was this page helpful?
At Storables.com, we guarantee accurate and reliable information. Our content, validated by Expert Board Contributors, is crafted following stringent Editorial Policies. We're committed to providing you with well-researched, expert-backed insights for all your informational needs.

0 thoughts on “How To Remove Toothbrush Holder From Wall”