Home>Furniture>Bedroom Furniture>How To Build A Full Size Bed Frame

Bedroom Furniture
How To Build A Full Size Bed Frame
Modified: March 1, 2024
Learn how to build your own full size bed frame with our step-by-step guide. Create a stylish and functional addition to your bedroom furniture.
(Many of the links in this article redirect to a specific reviewed product. Your purchase of these products through affiliate links helps to generate commission for Storables.com, at no extra cost. Learn more)
Introduction
When it comes to creating the perfect bedroom, a key element that often takes center stage is the bed frame. A well-built and stylish bed frame not only provides support for your mattress but also adds aesthetic appeal to your sleeping space. If you’re looking to customize your bedroom furniture and have the satisfaction of creating something with your own hands, building a full-size bed frame can be a rewarding project.
In this comprehensive guide, we’ll take you through the step-by-step process of building a full-size bed frame from scratch. Whether you’re a seasoned DIY enthusiast or a beginner looking to embark on your first woodworking project, this guide will provide you with all the information and tips you need to successfully complete your bed frame.
We’ll cover everything from gathering the necessary materials, measuring and cutting the lumber, constructing the headboard and footboard, building the side rails, attaching all the components together, and all the way through to sanding and finishing the bed frame. So, grab your tools, put on your safety goggles, and let’s dive in!
But before we get started, let’s take a quick look at the materials you’ll need to gather for this project.
Key Takeaways:
- Create a custom full-size bed frame with high-quality lumber, wood glue, and screws. Follow the step-by-step guide to measure, cut, assemble, and reinforce for a sturdy and stylish DIY project.
- Achieve a polished and personalized full-size bed frame by sanding, finishing, and assembling with attention to detail. Embrace creativity and craftsmanship to enjoy a unique and elegant bedroom centerpiece.
Read also: 13 Superior Full Size Bed Frame for 2024
Materials Needed
Before you start building your full-size bed frame, it’s essential to gather all the necessary materials. Here’s a comprehensive list of what you’ll need:
- Wood: Choose high-quality lumber for the frame, headboard, and footboard. You may opt for hardwood like oak, pine, or walnut, depending on your personal preference and budget.
- Screws: Select screws that are suitable for woodworking purposes. Use wood screws in various lengths to secure the different components together.
- Wood Glue: Invest in a reliable wood adhesive to reinforce the joints and improve the overall stability of the bed frame.
- L Brackets: These metal brackets will be used to attach the side rails to the headboard and footboard, providing additional support.
- Sandpaper: To achieve a smooth and polished finish, have different grits of sandpaper on hand. This will allow you to progressively smoothen the surfaces.
- Finishing Materials: Depending on your desired look, choose a suitable finishing material. This could be wood stain or paint to add your preferred color and protect the wood.
- Measuring Tape: An essential tool for accurate measurements, ensuring proper alignment of the components.
- Saw: A power saw or handsaw will be needed to cut the lumber according to the required dimensions.
- Drill: To drill pilot holes and secure the screws, you’ll need a reliable drill.
- Safety Equipment: Don’t forget to prioritize safety! Have safety goggles, gloves, and a dust mask to protect yourself when handling tools and materials.
Once you have all these materials ready, you’re well-prepared to embark on your DIY bed frame project. Now, let’s move on to the first step: measuring and cutting the lumber.
Step 1: Measure and Cut the Lumber
Before you begin constructing your full-size bed frame, you’ll need to accurately measure and cut the lumber according to the dimensions of your mattress. This step is crucial to ensure that all the pieces fit together correctly and the final frame is sturdy and secure.
Start by measuring the length and width of your full-size mattress. Add a few inches to each dimension to allow for clearance and bedding. This will give you the overall dimensions for the bed frame.
Now, using a measuring tape, mark and measure the lumber pieces accordingly. You’ll need four pieces for the headboard and footboard, two longer pieces for the side rails, and additional support pieces if desired.
Once you have your measurements, it’s time to cut the lumber. Use a power saw or handsaw to carefully cut the pieces to their required lengths. Take extra care to ensure that all the edges are straight and clean.
Remember to measure twice and cut once to avoid any mistakes. It’s always better to double-check your measurements before making any cuts to ensure accuracy.
After cutting the lumber, use sandpaper to smooth out any rough edges or splinters. This will provide a finished and polished look to your bed frame and prevent any potential injuries when assembling or using the frame.
With the lumber measured and cut to size, you’re now ready to move on to the next step: creating the headboard and footboard for your full-size bed frame.
Step 2: Create the Headboard and Footboard
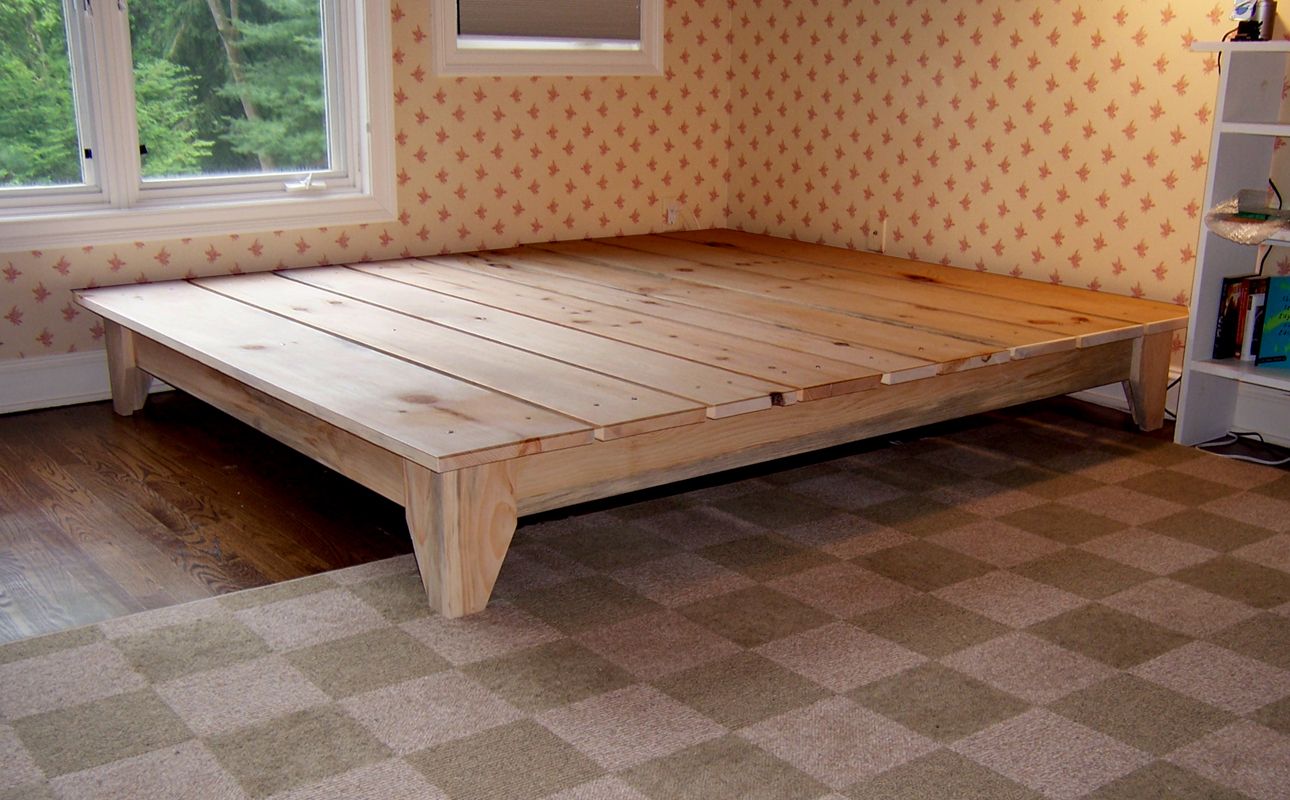
In this step, we’ll focus on constructing the headboard and footboard for your full-size bed frame. The headboard and footboard not only add visual appeal to your bed frame but also provide support and stability when attached to the side rails.
Start by laying out the cut lumber pieces for the headboard and footboard. Arrange them in the desired pattern, ensuring that they fit together seamlessly. You can choose a simple design with straight vertical slats or get creative with intricate patterns or curved designs.
Once you’re satisfied with the layout, it’s time to secure the pieces together. Apply wood glue to the joints and use screws to connect them firmly. Make sure to drill pilot holes before inserting the screws to prevent the wood from splitting.
Continue assembling the headboard and footboard, ensuring that the pieces are aligned correctly and are flush with one another. Use clamps to hold the pieces in place while the glue dries, providing extra stability during the construction process.
After the glue has dried and the headboard and footboard are securely assembled, it’s recommended to reinforce the joints by attaching L brackets on the backside. This will add extra strength and durability to the structure of your bed frame.
Once all the components are securely fastened, use sandpaper to smooth out any rough edges or surfaces. This will create a polished and finished look for your headboard and footboard.
With the headboard and footboard constructed, it’s time to move on to the next step: building the side rails for your full-size bed frame.
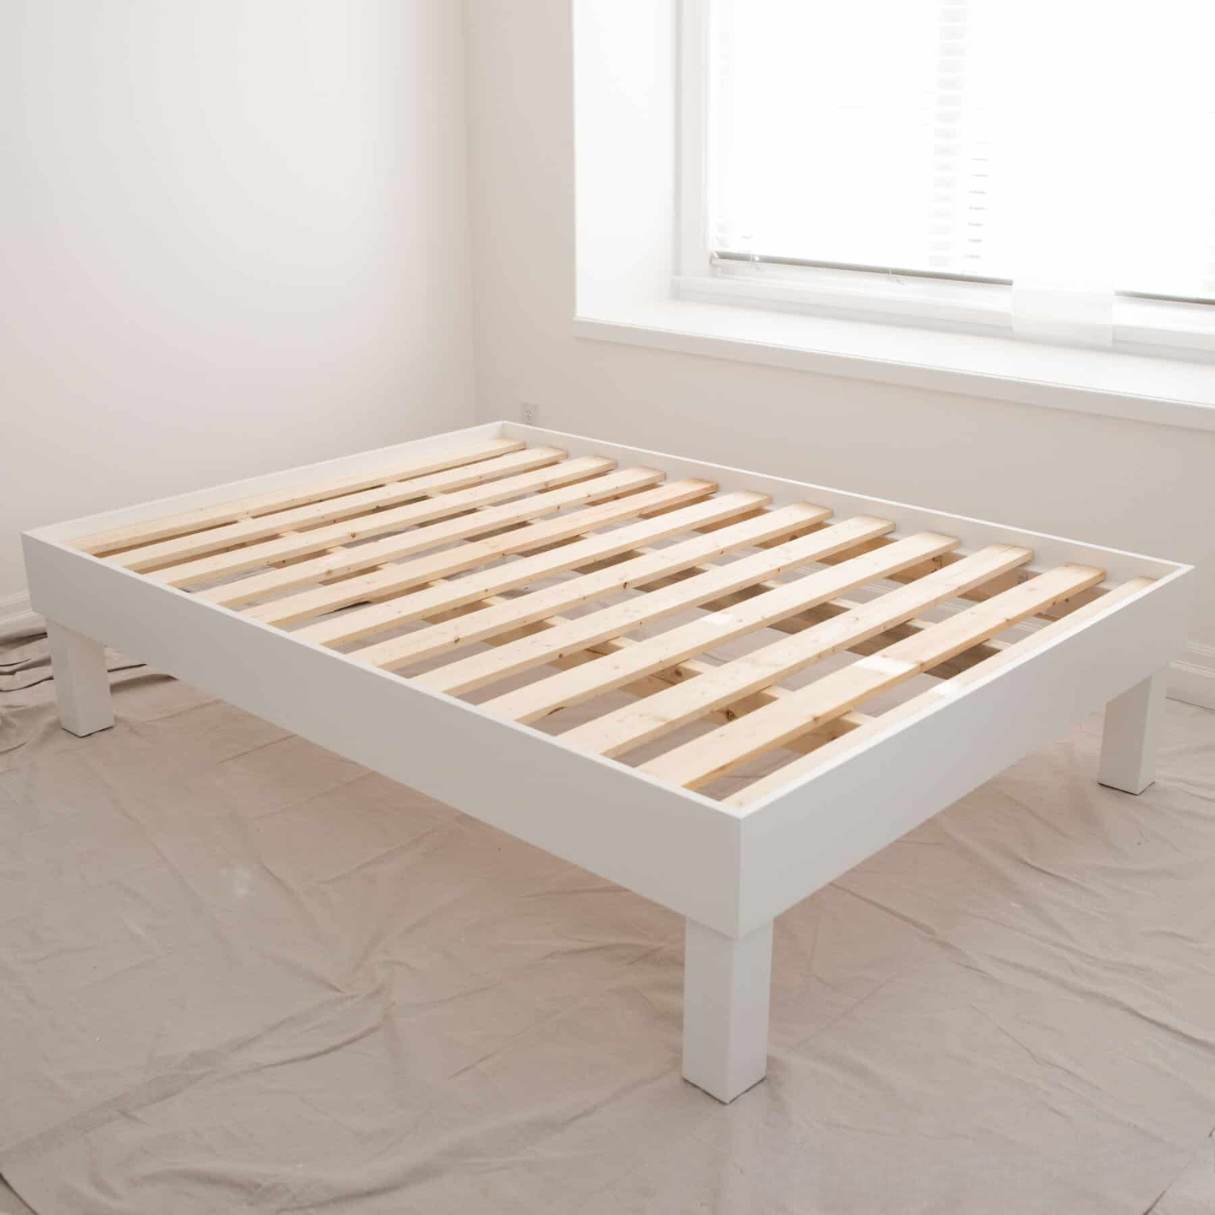
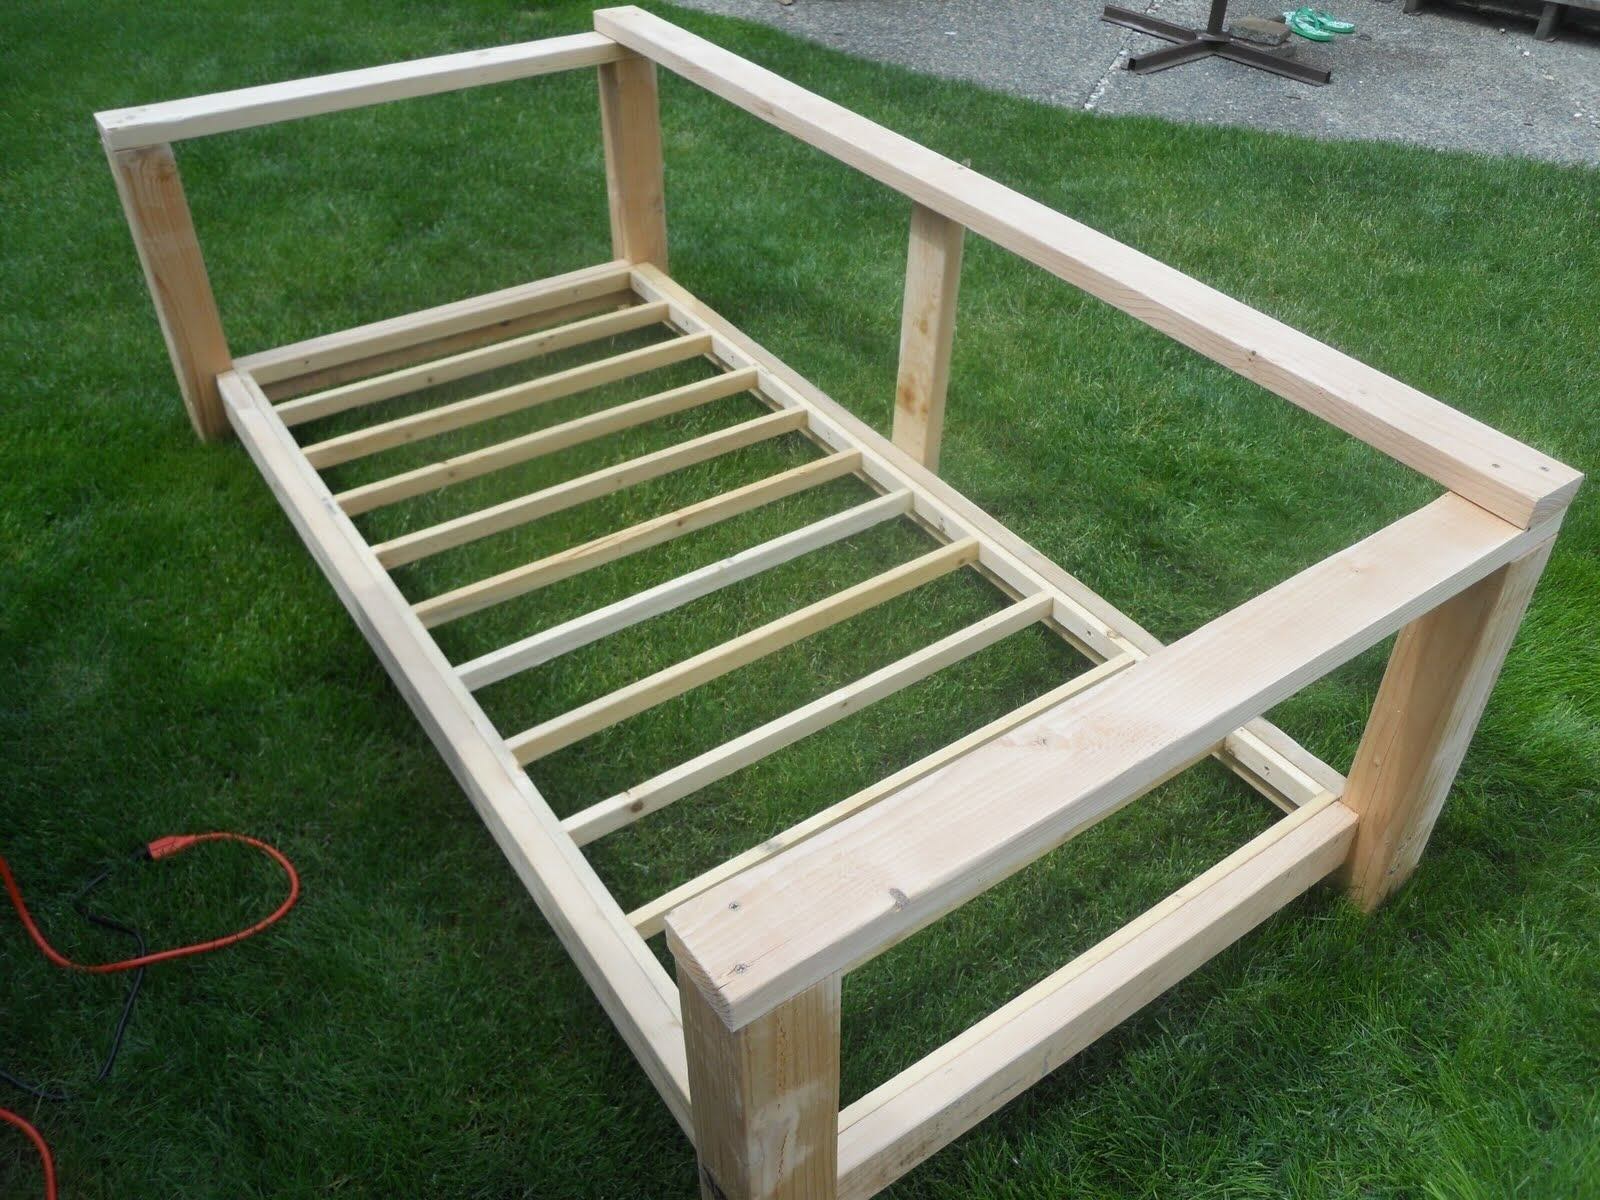
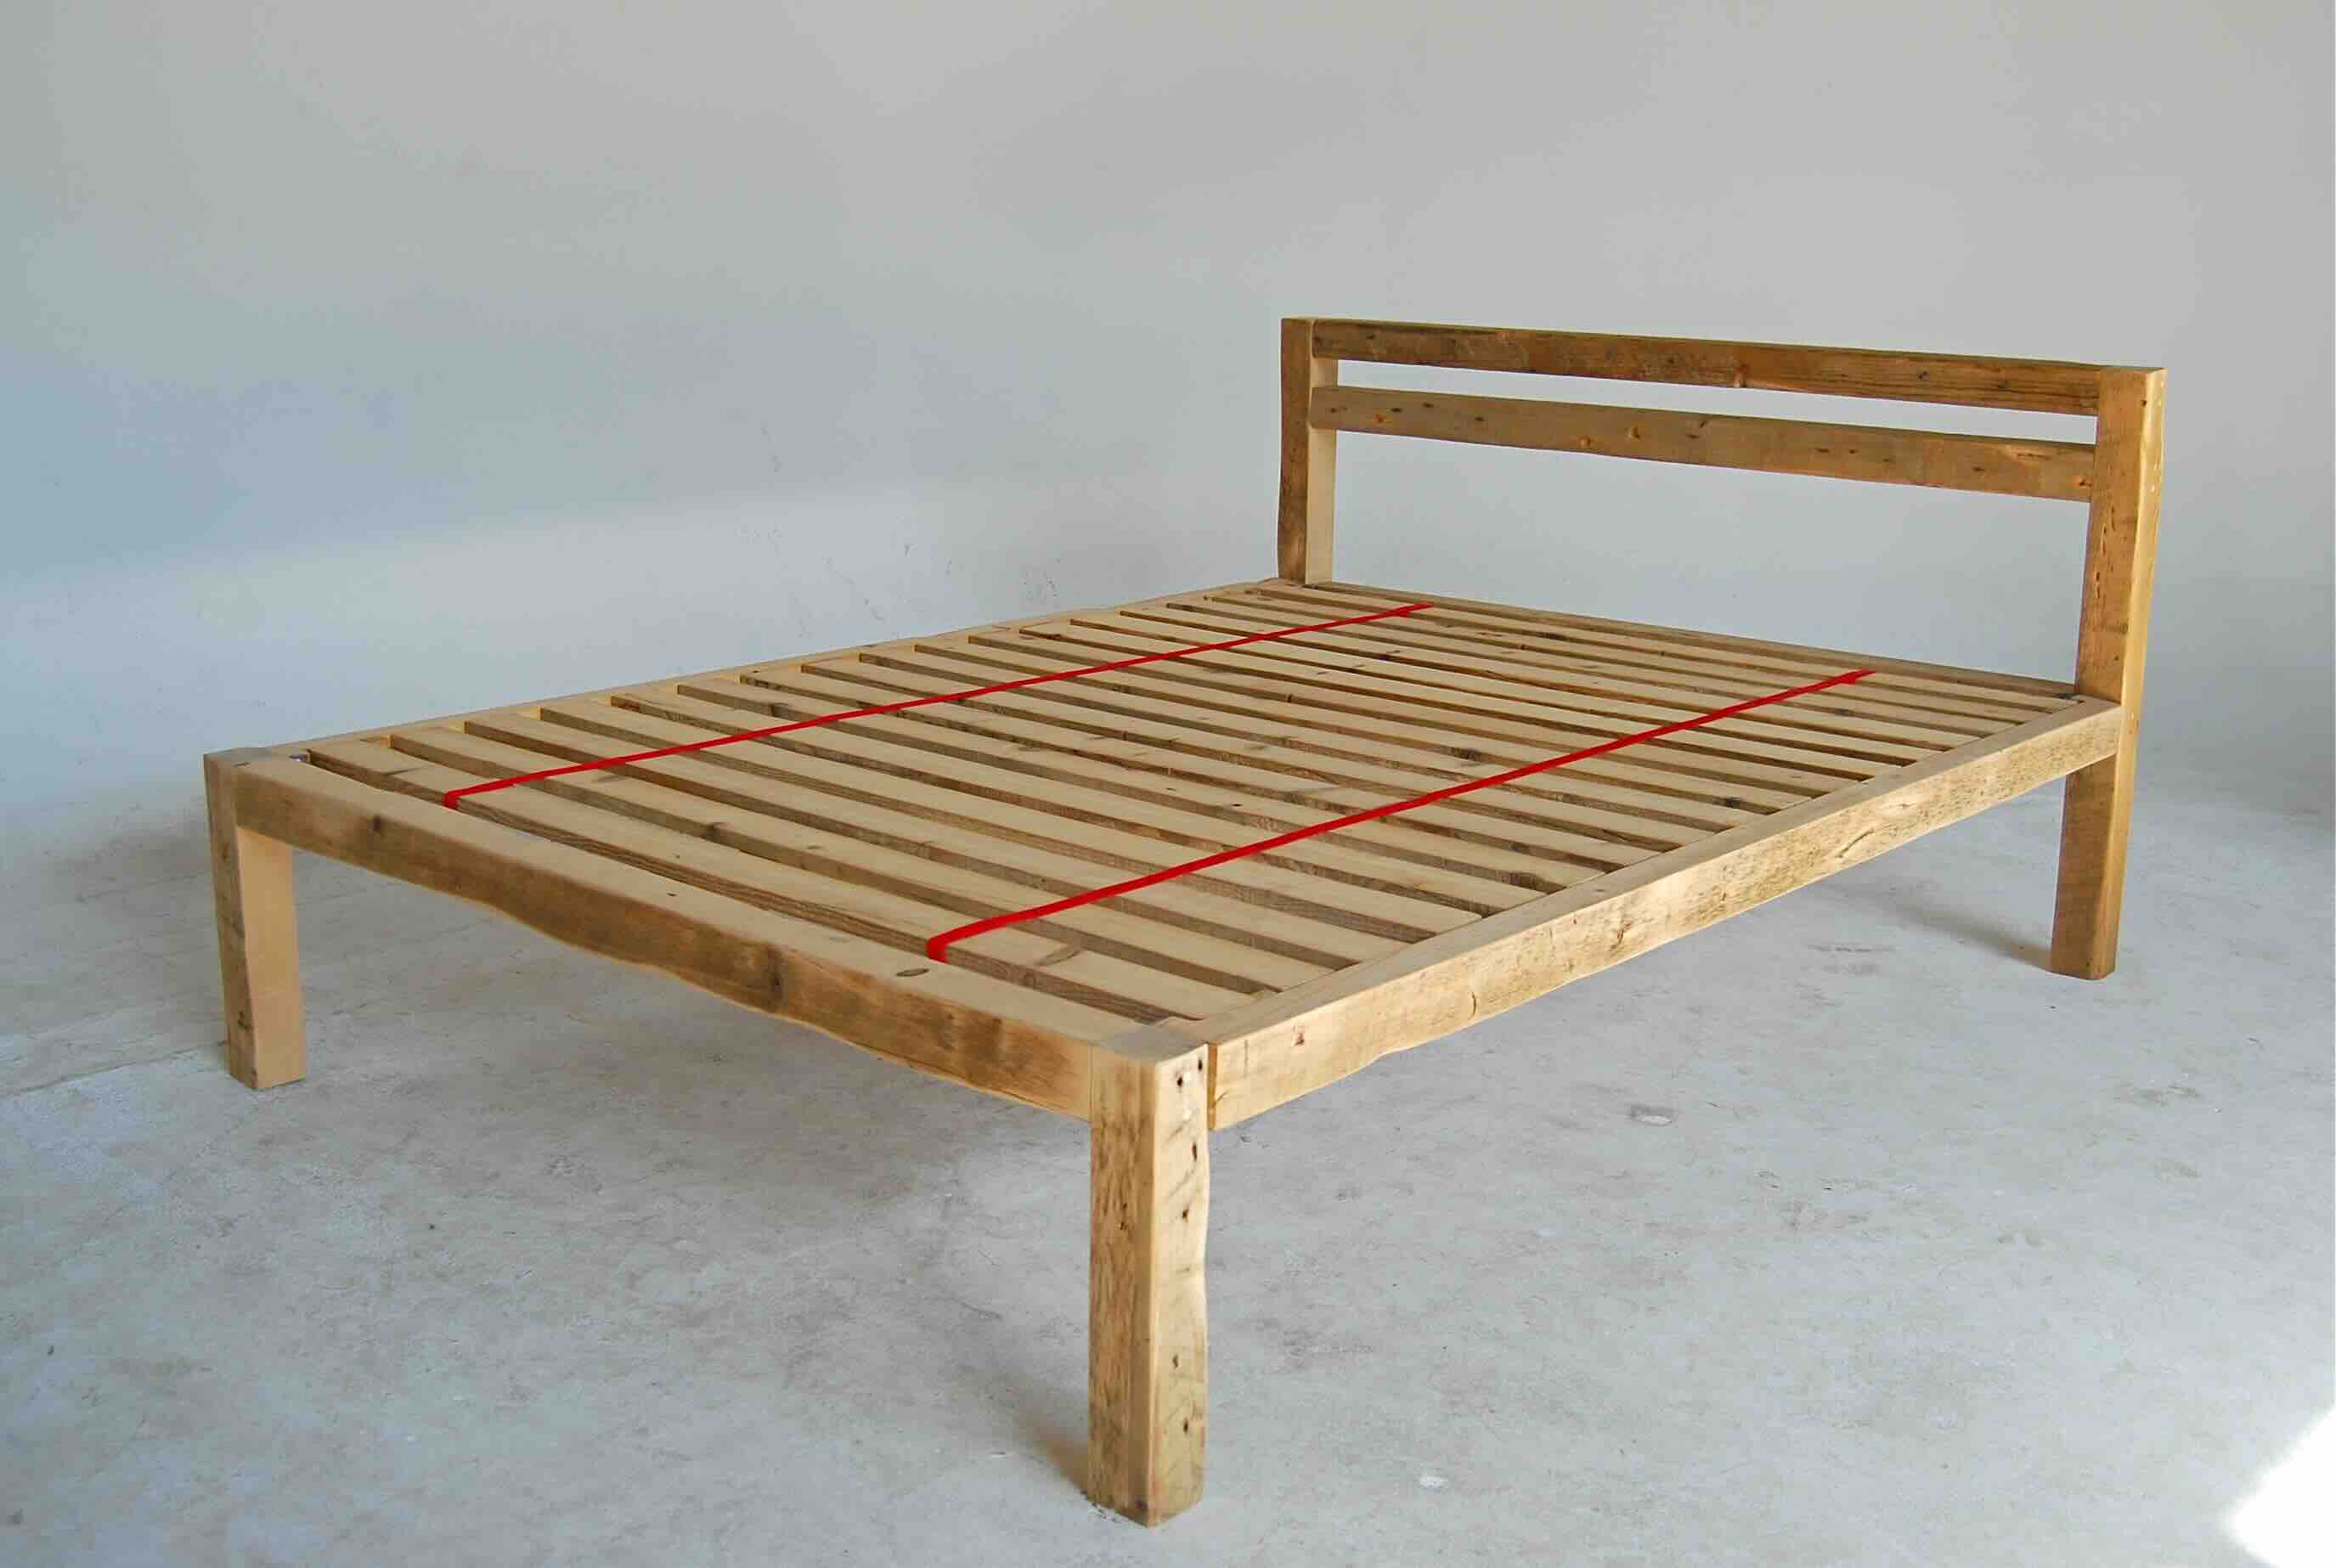
Step 3: Build the Side Rails
In this step, we’ll focus on constructing the side rails for your full-size bed frame. The side rails play a crucial role in connecting the headboard and footboard, providing stability and support for the mattress.
Start by determining the length of the side rails. Measure the distance between the headboard and footboard, accounting for any additional clearance or desired overhang.
Once you have the measurements, cut two pieces of lumber to the required length for the side rails. Make sure the cuts are clean and precise to ensure a proper fit.
Now, it’s time to attach the side rails to the headboard and footboard. Align the rails with the inside edges of the headboard and footboard and mark the spots where they need to be attached.
Using screws and wood glue, secure the side rails to the headboard and footboard. Drill pilot holes to prevent the wood from splitting and ensure a strong connection. Apply wood glue to the joints before inserting the screws for added stability.
Once the side rails are securely attached, double-check the alignment and ensure that everything is level and flush. Use a level tool to make any necessary adjustments.
To enhance the strength and stability of the side rails, it’s recommended to reinforce them by installing additional support beams in the center. This will prevent any sagging or bending of the mattress over time.
With the side rails constructed and securely attached, we’re now ready to move on to the next step: attaching the side rails to the headboard and footboard.
When building a full-size bed frame, make sure to measure and cut all the pieces accurately to ensure a sturdy and well-fitting frame. Use quality materials and consider adding extra support in the center for added stability.
Step 4: Attach the Side Rails to the Headboard and Footboard
In this step, we’ll focus on attaching the side rails to the headboard and footboard, connecting all the components of your full-size bed frame. This step is crucial for ensuring stability and structural integrity.
Start by positioning the side rails alongside the headboard and footboard, ensuring that they are aligned correctly. The ends of the side rails should fit snugly into the slots or brackets on the headboard and footboard.
Once the side rails are in position, use screws and L brackets to secure them to the headboard and footboard. Drill pilot holes to prevent the wood from splitting, and then insert the screws firmly. Apply wood glue to provide extra strength and stability.
Make sure to check the alignment and levelness as you attach the side rails. The frame should be square and balanced to ensure proper support for the mattress.
Continue fastening the side rails to the headboard and footboard, making sure to distribute the attachment points evenly along the length of the rails. This will ensure a secure and uniform connection.
Once all the screws and brackets are in place, double-check the stability of the entire bed frame. Give it a gentle shake to test for any movement or wobbling. If necessary, make any adjustments or tighten the connections for a solid and steady frame.
With the side rails securely attached to the headboard and footboard, it’s time to move on to the next step: reinforcing the frame for added strength and durability.
Step 5: Reinforce the Frame
In this step, we’ll focus on reinforcing the frame of your full-size bed to ensure maximum strength and durability. By adding extra support and reinforcement, you can prolong the lifespan of your bed frame and prevent any potential issues in the future.
Start by assessing the overall stability of the bed frame. Check for any areas that may feel weak or wobbly, and take note of them. These are the areas where reinforcement will be necessary.
One common method of reinforcing the bed frame is by adding support beams across the center. These beams provide additional support to prevent any sagging or bending of the mattress over time.
Measure the distance between the existing side rails and cut a piece of lumber to the required length. This piece will act as the support beam that runs horizontally across the center of the bed frame.
Using screws or bolts, attach the support beam to the inside of the side rails, ensuring that it is centered and secure. Pre-drill pilot holes to prevent any splitting of the wood, and then secure the beam in place.
In addition to the center support beam, you may also consider adding corner braces for extra reinforcement. These can be installed at the corners of the bed frame where the headboard, footboard, and side rails meet.
Corner braces help to stabilize the corners, preventing any wobbling or loosening of the connections. Attach them securely using screws and ensure they are flush with the surface of the wood.
Once all the reinforcement measures are in place, test the stability of the bed frame again by giving it a gentle shake. If everything feels solid and secure, you’re ready to move on to the next step: sanding and finishing the bed frame.
Step 6: Sand and Finish the Bed Frame
In this step, we’ll focus on sanding and finishing the bed frame to create a smooth and polished surface. Sanding will help remove any rough edges, imperfections, or splinters, while finishing will protect the wood and enhance its appearance.
Start by using sandpaper with a coarse grit to sand the entire surface of the bed frame. This will help smooth out any rough spots or uneven surfaces. As you progress, switch to finer grit sandpaper for a smoother finish.
Pay extra attention to the edges and corners of the bed frame, as they often have sharper edges that may need more sanding. Sand in a consistent motion, following the grain of the wood, for the best results.
After sanding, wipe down the bed frame with a clean, damp cloth to remove any dust or debris. This will ensure that the finish adheres properly to the wood.
Next, choose the type of finish you want for your bed frame. This can be a wood stain to enhance the natural beauty of the wood, or paint if you prefer a different color or style. Apply the finish following the manufacturer’s instructions, using a brush or a cloth, and allow it to dry completely.
If you opt for a wood stain, consider applying a coat of clear polyurethane or varnish as a protective layer. This will help protect the wood from scratches, moisture, and wear over time.
Once the finish is dry, take a step back and admire the beautiful result of your hard work. The bed frame should now have a smooth and polished surface, ready to be assembled and cherished.
With the bed frame sanded and finished, we’re now ready to move on to the final step: assembling the bed frame.
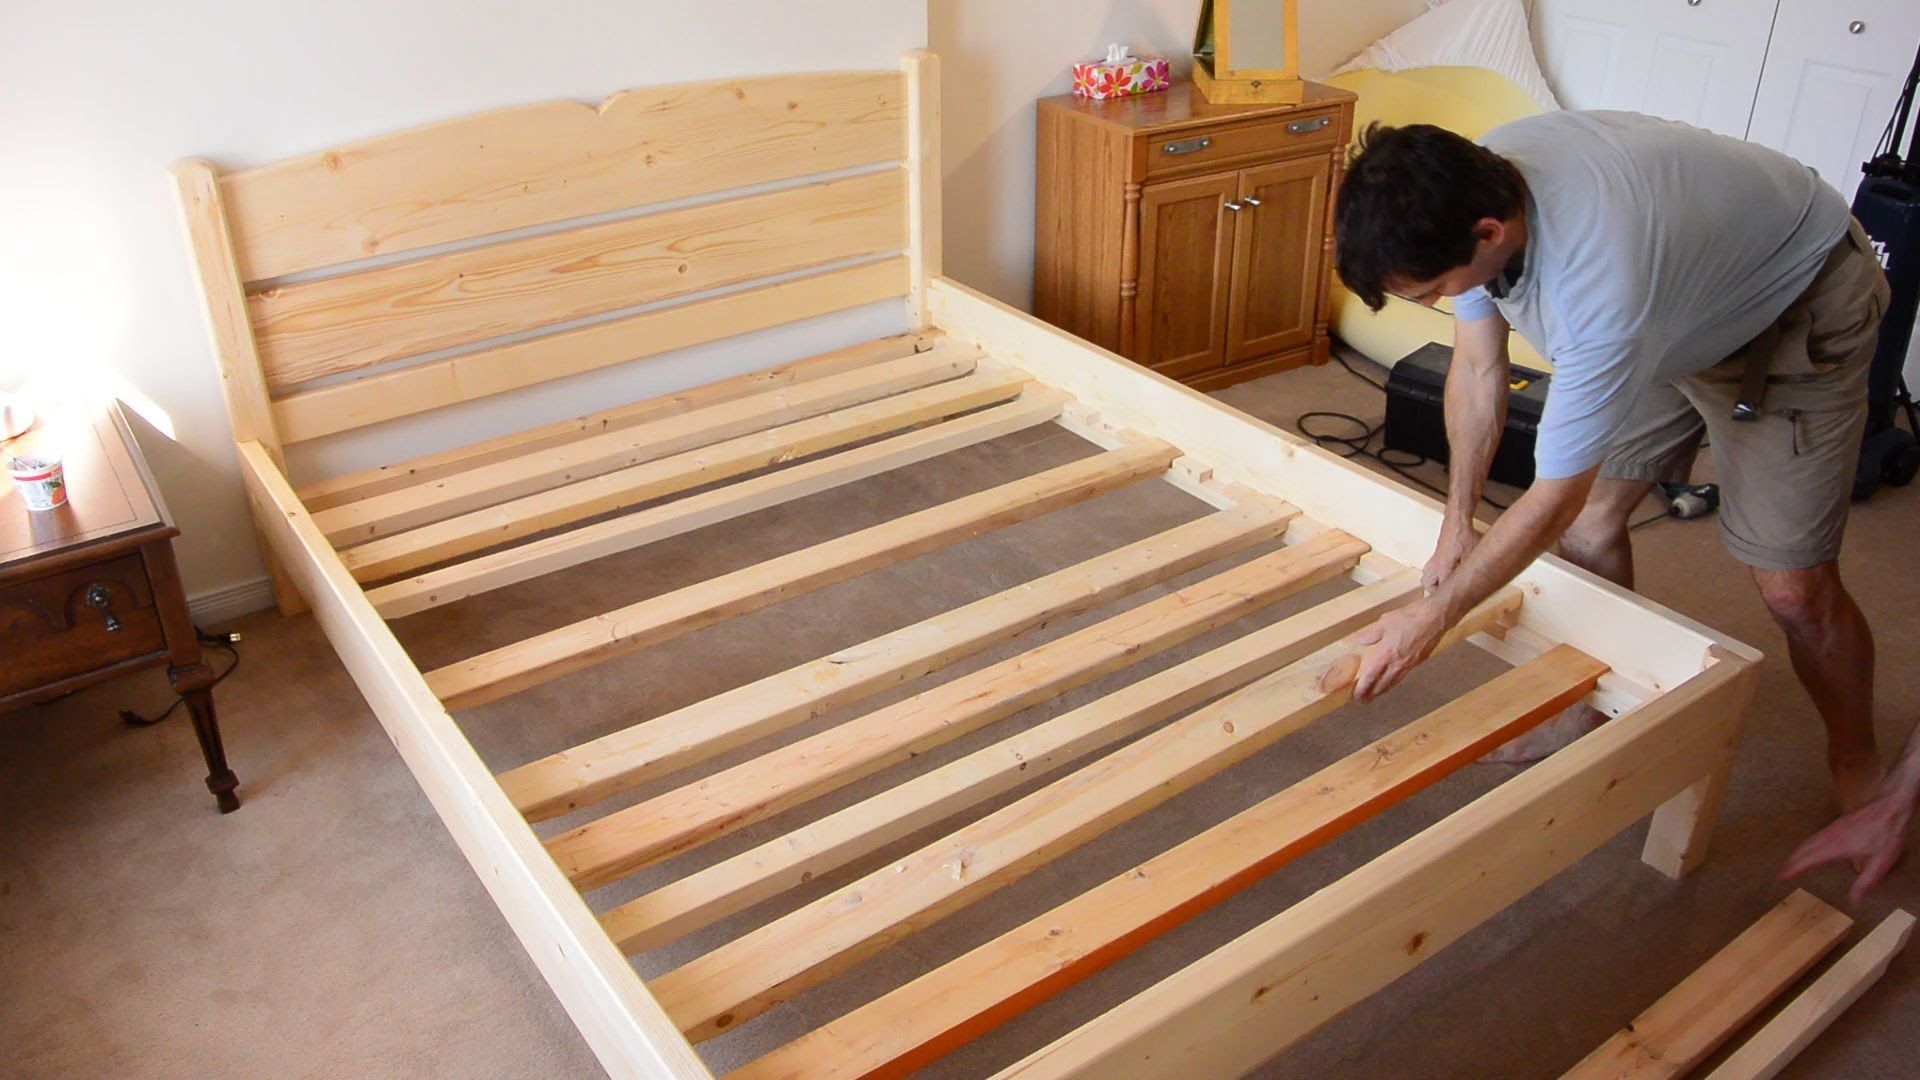
Step 7: Assemble the Bed Frame
In this final step, we’ll focus on assembling the different components of your full-size bed frame to complete the construction process. By following these steps, you’ll have a sturdy and beautifully crafted bed frame ready for a restful night’s sleep.
Start by gathering all the components, including the headboard, footboard, side rails, and any necessary hardware.
Place the headboard and footboard in the desired location, ensuring that they are aligned and facing the right way. Double-check that the slots or brackets on the headboard and footboard are in position to receive the side rails.
With the side rails in hand, carefully insert each end into the designated slots or brackets on the headboard and footboard. Make sure they fit securely and align with the existing connections.
Once the side rails are attached, use screws or bolts to secure them tightly to the headboard and footboard. This will ensure a solid and stable connection.
After all the connections have been tightened, give the bed frame a gentle shake to test for any movement or instability. If everything feels sturdy, you’re good to go.
Now, place your full-size mattress on top of the bed frame, ensuring it fits snugly within the dimensions of the frame.
Depending on your preference, you can add additional elements such as a box spring, a mattress cover, or decorative elements like throw pillows or a bed skirt.
Finally, step back and admire your newly constructed full-size bed frame! With its sturdy construction, polished finish, and personalized design, your bed frame will not only provide a comfortable place to sleep but also add a touch of elegance to your bedroom space.
Now it’s time to relax and enjoy a good night’s sleep in your beautiful handcrafted bed frame!
With the bed frame fully assembled, our journey comes to an end. We hope this comprehensive guide has empowered you to build your own full-size bed frame. Remember to exercise caution when handling tools and materials, and always prioritize safety throughout the construction process.
We wish you the best of luck in your DIY adventure, and may your new bed frame provide you with years of comfort and satisfaction!
Conclusion
Building your own full-size bed frame can be a rewarding and fulfilling project that allows you to create a custom piece of furniture for your bedroom. By following the step-by-step process outlined in this guide, you can achieve a sturdy, stylish, and personalized bed frame that enhances the aesthetic appeal of your sleeping space.
Throughout the journey, we explored the materials needed, measured and cut the lumber, created the headboard and footboard, built the side rails, attached them to the headboard and footboard, reinforced the frame, sanded, finished, and assembled the bed frame. Each step was crucial in ensuring the strength, stability, and durability of the final product.
Remember to exercise caution when working with tools and materials, and prioritize safety at every stage of the project. Properly measuring and cutting the lumber, carefully assembling the components, and reinforcing the frame are essential for not only achieving a beautiful bed frame but also ensuring its functionality and longevity.
By sanding and finishing the bed frame, you create a polished and smooth surface that not only enhances the overall appearance but also protects the wood from wear and tear. Finally, assembling the bed frame by securely attaching the side rails and placing the mattress will give you a complete and functional piece of furniture that you can be proud of.
Now, it’s time to relax and enjoy the fruits of your labor. Curl up in bed, knowing that you created a one-of-a-kind masterpiece that caters to your comfort and style. Your DIY full-size bed frame will not only provide you with a comfortable place to sleep but also become a centerpiece of your bedroom, reflecting your creativity and craftsmanship.
We hope this comprehensive guide has empowered and inspired you to embark on your journey to build a full-size bed frame. Enjoy the process, embrace your creativity, and revel in the satisfaction of creating something truly special for your bedroom. Happy building!
Frequently Asked Questions about How To Build A Full Size Bed Frame
Was this page helpful?
At Storables.com, we guarantee accurate and reliable information. Our content, validated by Expert Board Contributors, is crafted following stringent Editorial Policies. We're committed to providing you with well-researched, expert-backed insights for all your informational needs.


0 thoughts on “How To Build A Full Size Bed Frame”