Furniture
How To Refurbish An Old Dresser
Modified: August 17, 2024
Learn how to refurbish an old dresser and breathe new life into your furniture. Discover tips, techniques, and step-by-step instructions for a stunning transformation.
(Many of the links in this article redirect to a specific reviewed product. Your purchase of these products through affiliate links helps to generate commission for Storables.com, at no extra cost. Learn more)
Introduction
Welcome to the exciting world of furniture refurbishment! If you have an old dresser that has seen better days, don’t rush to throw it away. With a little bit of time, effort, and creativity, you can transform that worn-out piece of furniture into a stunning focal point for any room.
Refurbishing an old dresser not only breathes new life into it but also allows you to unleash your creative side. Whether you’re a seasoned DIY enthusiast or new to the world of furniture restoration, this step-by-step guide will help you bring out the best in your old dresser.
Before we dive into the process, it’s important to note that refurbishing furniture requires patience and attention to detail. Each piece is unique, and the amount of work needed will depend on its condition. With that said, let’s get started on this exciting journey of transforming your old dresser into a piece you’ll be proud to showcase in your home.
Key Takeaways:
- Refurbishing an old dresser is a creative and rewarding project that breathes new life into tired furniture. With patience and attention to detail, you can transform it into a stunning focal point for any room.
- By following the step-by-step guide, you can unleash your creativity and personalize your dresser to reflect your unique style. Refurbishing not only saves money but also reduces waste, making it a sustainable and eco-friendly way to refresh your space.
Read more: How To Clean An Old Dresser
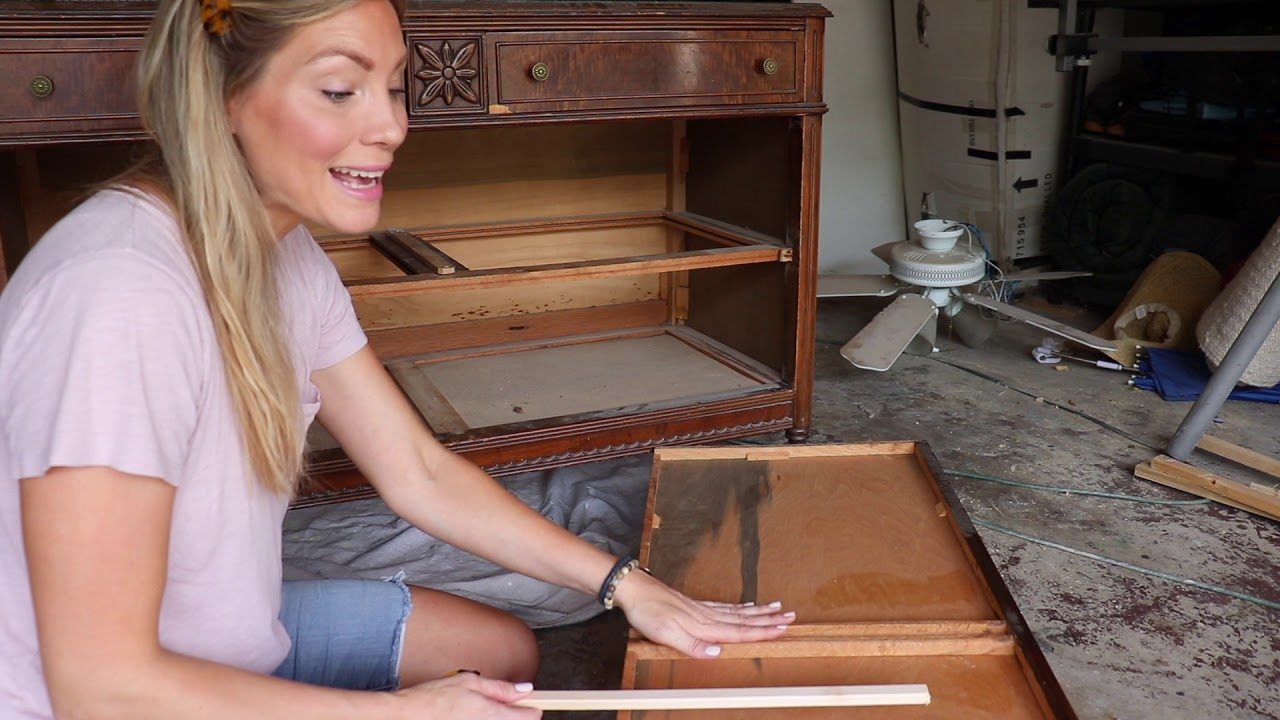
Step 1: Assess the Condition of the Dresser
The first step in refurbishing an old dresser is to thoroughly assess its condition. This will help you determine the extent of the work needed and plan accordingly.
Start by examining the dresser for any structural damage. Check for loose or broken joints, missing pieces, or warped panels. Take note of any areas that need repair or replacement.
Next, inspect the surface of the dresser. Look for scratches, gouges, stains, or peeling paint. Take note of these imperfections as they will need to be addressed during the refurbishing process.
It’s also important to consider the style and design of the dresser. Does it fit your aesthetic preferences? If not, think about how you can modify its appearance to align with your desired look.
Take measurements of the dresser to determine if it fits the space you have in mind. This will help you determine if any modifications need to be made, such as adding or removing drawers or changing the height of the dresser.
Once you have thoroughly assessed the condition of the dresser, you can move on to the next step: removing the hardware and cleaning the dresser.
Step 2: Remove Hardware and Clean the Dresser
Now that you have assessed the condition of the dresser, it’s time to start preparing it for refurbishment. The second step involves removing the hardware and giving the dresser a thorough cleaning.
Begin by removing any knobs, handles, hinges, or other hardware attached to the dresser. This will make the refurbishing process much easier and help ensure a smooth and even finish on the surface.
Once the hardware is removed, it’s time to clean the dresser. Start by dusting the entire surface using a soft cloth or a brush. Pay close attention to corners, crevices, and any intricate details of the dresser.
Next, prepare a mild cleaning solution by mixing a few drops of dish soap with warm water. Dampen a clean cloth or sponge in the solution and gently scrub the surface of the dresser. Be careful not to oversaturate the wood as this can cause damage.
If you come across any stubborn stains or grime, you can use a slightly stronger cleaning solution or a gentle wood cleaner. However, always perform a patch test in an inconspicuous area to ensure that the cleaner does not strip the finish or cause any discoloration.
After cleaning the dresser, rinse it thoroughly with a clean, damp cloth to remove any soap residue. Then, allow the dresser to dry completely before moving on to the next step.
Removing hardware and cleaning the dresser might seem like a simple step, but it plays a crucial role in the overall refurbishing process. By starting with a clean and well-prepared surface, you create a solid foundation for the upcoming repairs and refinishing.
Step 3: Repair any Damaged Areas
After assessing the condition of the dresser and giving it a thorough cleaning, it’s time to move on to step three: repairing any damaged areas. This step is crucial to ensuring the structural integrity and aesthetic appeal of the piece.
Begin by addressing any loose or broken joints. Apply wood glue to the affected areas and use clamps to hold them together until the glue dries. If there are any missing or irreparable pieces, consider replacing them with similar materials or searching for vintage hardware that matches the dresser’s style.
If you notice any scratches, gouges, or dents on the surface of the dresser, it’s important to fix them before moving on to the refinishing process. Start by filling in the damaged areas with wood filler or putty, using a putty knife to ensure a smooth and even application. After the filler has dried, sand the surface using fine-grit sandpaper until it is flush with the rest of the dresser.
For deeper scratches or gouges, you may need to use a wood stain marker or crayon that matches the color of the dresser. Apply the stain to the damaged area, following the manufacturer’s instructions, and blend it in with the surrounding wood.
If the dresser has water damage or a dull finish, you can use a wood stripper or sandpaper to remove the old finish and reveal the bare wood. Be sure to follow the safety instructions on the wood stripper and wear protective gear, such as gloves and goggles.
Once you have repaired any damaged areas, take a moment to inspect the dresser again to ensure that everything is secure and in good condition. Making these necessary repairs will not only improve the overall look of the dresser but also help it withstand the test of time.
With step three complete, you’re now ready to proceed to the next step: sanding the surface of the dresser.
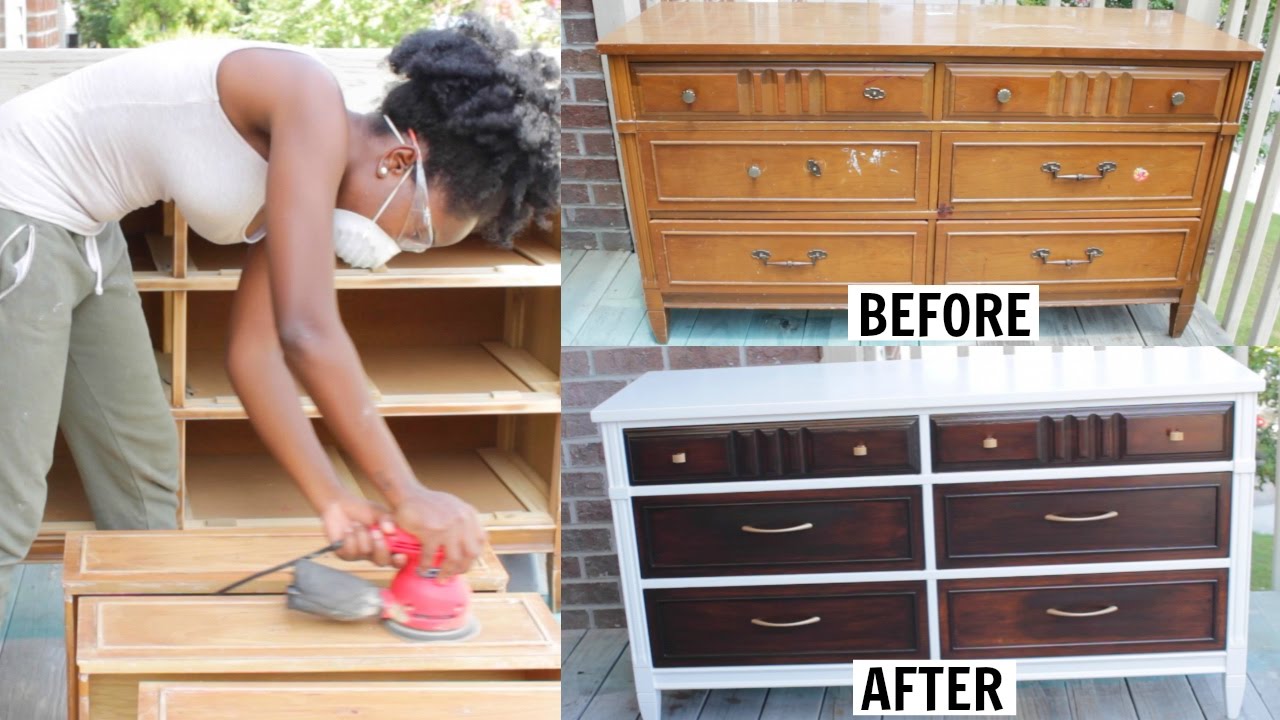
Step 4: Sand the Surface
Now that you’ve assessed and repaired any damaged areas on the dresser, it’s time to move on to step four: sanding the surface. Sanding is a crucial step in the refurbishing process as it helps smooth out imperfections, remove old finish or paint, and create a clean and even surface for the upcoming refinishing.
Start by selecting the appropriate grit sandpaper for the job. For initial sanding or to remove old finish, use a coarse grit sandpaper (around 80 to 120 grit). As you progress, move to finer grit sandpapers (around 180 to 220 grit) for a smoother finish.
Begin by sanding the entire surface of the dresser, moving in the direction of the wood grain. This helps to prevent any visible scratches or swirl marks. Use long, even strokes and apply moderate pressure, being careful not to press too hard and damage the wood.
Pay extra attention to areas with remaining finish or paint, making sure to sand them until the surface is bare. Take your time and be thorough, as the quality of the sanding will directly impact the final result of the refurbishing process.
While sanding, periodically check the surface for smoothness and ensure all imperfections have been addressed. You should aim for a surface that is even, with no visible scratches, gouges, or rough patches.
Once the initial sanding is complete, switch to a finer grit sandpaper and repeat the process. This will further smooth out the surface and prepare it for the refinishing stage.
After you have finished sanding, make sure to remove any dust or debris from the dresser. Vacuum the surface or use a tack cloth to wipe away the particles, ensuring a clean and dust-free surface before moving on to the next step.
Sanding the surface of the dresser is a crucial step that sets the foundation for a successful refurbishing project. By creating a smooth and even surface, you’ll be ready to move on to the next step: applying primer.
Read more: How To Tell How Old A Dresser Is
Step 5: Apply Primer
After sanding the surface of the dresser, it’s time to move on to step five: applying primer. Primer is an essential step in the refinishing process as it helps create a smooth and durable base for the paint or finish to adhere to.
Begin by choosing a high-quality primer suitable for the type of dresser you’re refurbishing. There are various types of primers available, such as oil-based or water-based options. Consider factors like the type of wood, the desired finish, and the paint or stain you’ll be using to guide your selection.
Before applying the primer, make sure the surface of the dresser is clean and free from any dust or debris. Use a tack cloth or a damp cloth to wipe away any particles that might have settled on the sanded surface.
Start by applying a thin, even coat of primer using a brush, roller, or sprayer. Work in small sections and follow the direction of the wood grain. This helps achieve a professional-looking finish and minimizes visible brush strokes or roller marks.
Allow the primer to dry completely according to the manufacturer’s instructions. This usually takes a few hours, but it’s essential to give it enough time to properly cure before moving on to the next step.
Once the first coat of primer is dry, lightly sand the surface with a fine-grit sandpaper. This helps to smooth out any imperfections and creates a better surface for the subsequent coats of primer or paint. Remember to wipe away any sanding dust before proceeding.
Repeat the process of applying a second coat of primer, ensuring smooth and even coverage. This additional coat helps to further enhance the durability and coverage of the paint or finish that will be applied later.
After the final coat of primer is dry, inspect the surface for any irregularities or missed spots. Touch up as needed, and sand lightly if necessary. Your dresser is now ready for the exciting next step: painting!
Applying primer is a crucial step that ensures the longevity and overall quality of the refurbishing project. By taking the time to properly prime the surface, you’ll create a solid foundation for the paint or finish, resulting in a beautiful and professional-looking outcome.
Before starting to refurbish an old dresser, make sure to thoroughly clean and sand the surface to remove any existing finish or imperfections. This will ensure a smooth and even base for painting or staining.
Step 6: Paint the Dresser
After applying the primer and allowing it to dry, it’s time to move on to the next exciting step: painting the dresser. Painting is where you can truly unleash your creativity and give the piece a fresh new look.
Start by choosing a paint color that complements your desired aesthetic and matches the style of the room. Consider factors such as the overall color scheme, the dresser’s intended use, and your personal preferences. Opt for high-quality paint that is specifically formulated for furniture to ensure a smooth and long-lasting finish.
Before you begin painting, prepare the surface by lightly sanding it with a fine-grit sandpaper. This helps to smooth out any imperfections that may have occurred during the priming process and create a better surface for the paint to adhere to. Wipe away any sanding dust with a tack cloth or a clean cloth.
Once the surface is prepped, you can start applying the paint. Use a brush, roller, or sprayer to achieve the desired finish. Begin with even strokes, working in the direction of the wood grain. Apply thin, even coats to ensure a smooth and professional-looking finish.
Allow each coat of paint to dry completely before applying the next. This usually takes a few hours, but it’s important to follow the drying time recommended by the paint manufacturer. Be patient during this step to avoid smudging or damaging the freshly painted surface.
If you prefer a distressed or vintage look, consider using a technique such as sanding or layering different colors of paint. This can add depth and character to the dresser, giving it a unique and aged appearance.
Once you have achieved the desired level of coverage and finish, allow the final coat of paint to dry fully. Take the time to inspect the dresser for any touch-ups or missed spots, and make any necessary corrections.
When the paint is completely dry and cured, your dresser is ready to move on to the next step: applying a protective finish to enhance its durability and give it a polished look.
Painting the dresser is the stage where you can truly personalize and transform its appearance. With a little creativity and attention to detail, you can give your old dresser a fresh new look that enhances the style and ambiance of your space.
Step 7: Apply a Protective Finish
After painting the dresser and allowing the paint to dry completely, it’s time to move on to step seven: applying a protective finish. Adding this final layer of protection not only enhances the overall durability of the refurbishment but also gives the dresser a polished and professional look.
There are various types of protective finishes available, such as polyurethane, varnish, or wax. The choice of finish depends on the desired level of shine, durability, and ease of application. Consider factors such as the dresser’s intended use, the desired aesthetic, and personal preferences when selecting a protective finish.
Before applying the protective finish, ensure that the painted surface is clean, smooth, and free from any dust or debris. Use a tack cloth or a clean cloth to wipe away any particles that may have settled on the surface.
Apply the protective finish using a high-quality brush, foam brush, or a sprayer, following the manufacturer’s instructions. Start with even strokes, working in the direction of the wood grain to achieve a consistent and smooth application.
Allow the first coat of protective finish to dry completely. This may take a few hours, so be patient and avoid touching or disturbing the surface during this time.
Once the first coat is dry, lightly sand the surface with fine-grit sandpaper to create a smooth and even surface. Wipe away any sanding dust before applying additional coats of the protective finish.
Apply multiple thin coats of the protective finish, allowing each coat to dry fully before applying the next. This builds up the durability and protection of the dresser’s surface. Follow the drying time recommended by the manufacturer to ensure optimal results.
After applying the final coat of protective finish and allowing it to cure, take a moment to inspect the dresser for any imperfections or missed spots. Touch up as needed, and make sure every part is coated evenly.
Once the protective finish is dry and fully cured, your dresser is ready to be admired and enjoyed. The protective finish not only adds longevity to the refurbishment but also provides a smooth and polished surface that will withstand daily use.
With step seven complete, you’re now ready to move on to the final stages of the refurbishing process: reattaching the hardware and adding those finishing touches.
Step 8: Reattach Hardware
With your freshly refurbished dresser looking beautiful and protected with a finish, it’s time to move on to step eight: reattaching the hardware. This step brings the dresser back together and adds the final touches that complement its newly revitalized appearance.
Start by gathering all the original hardware or the new hardware you have chosen for the dresser. Lay them out in an organized manner, making sure all necessary screws, knobs, handles, hinges, or other hardware components are accounted for.
Take a moment to clean and polish the hardware if needed. Use a mild cleaning solution and a soft cloth to remove any dust, dirt, or residue that may have accumulated.
Align each piece of hardware with its corresponding mounting hole on the dresser, and insert the screws provided. Use a screwdriver or a drill with a suitable screwdriver tip to secure the hardware in place. Take care not to overtighten the screws, as this may cause damage to the dresser or compromise the stability of the hardware.
As you reattach the hardware, ensure that each piece is straight, properly aligned, and securely fastened. This will ensure that the drawers open and close smoothly and that the overall appearance is consistent and cohesive.
If you are using vintage or antique hardware that requires additional care, be mindful of its unique characteristics. Take extra precautions to protect the hardware during the reattachment process and handle them with care to avoid damaging their intricate details.
Once all the hardware is properly reattached, take a step back and admire your handiwork. The careful selection and placement of hardware can greatly enhance the overall aesthetic of the refurbished dresser.
With step eight complete, you’re almost at the finish line! Now it’s time to add those final touches and style the dresser to make it truly shine.
Read more: How To Fix An Old Dresser Drawers
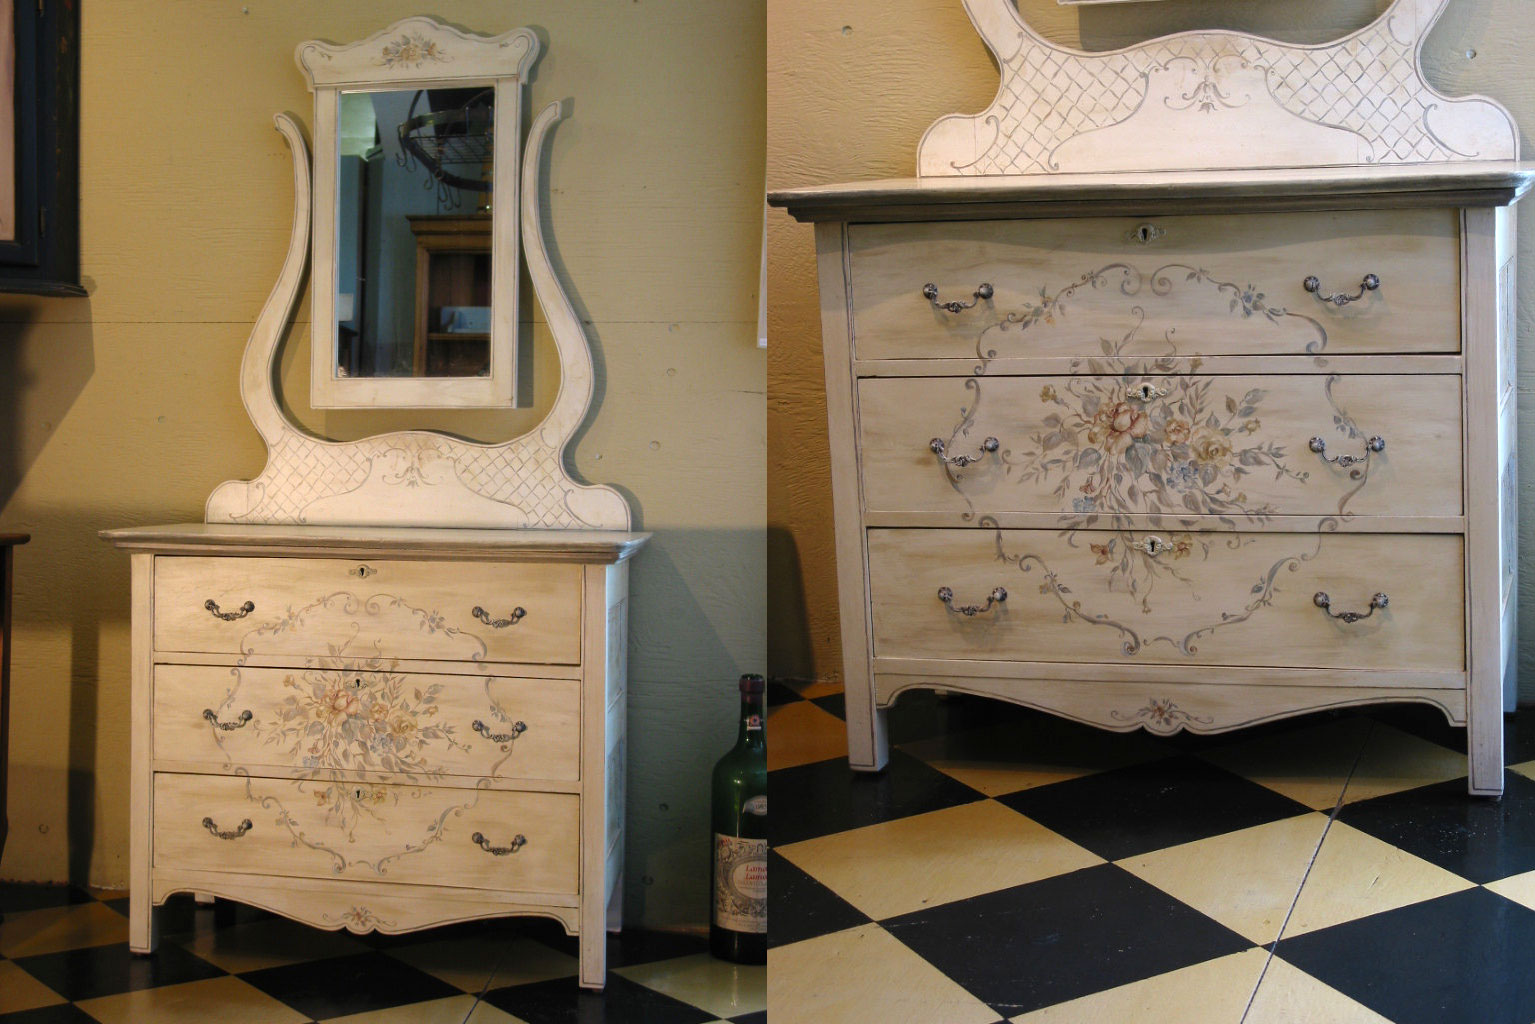
Step 9: Final Touches and Styling
Congratulations! You’ve successfully refurbished your old dresser and reattached the hardware. Now, it’s time for the final step: adding those special touches and styling the dresser to make it truly shine.
First, take a moment to step back and evaluate the overall look and feel of the dresser. Consider the style and aesthetic you want to achieve, whether it’s a classic, rustic, modern, or eclectic look.
Now, let’s dive into the final touches:
- Accessorize: Add decorative elements such as picture frames, vases, or candles to complement the dresser’s new look. Consider the colors, textures, and heights of the accessories to create a visually appealing arrangement.
- Personalize: Display sentimental items or cherished collectibles on the dresser. This adds a personal touch and makes it a reflection of your unique style and memories.
- Lighting: Consider adding a table lamp or sconces to illuminate the dresser and create an inviting atmosphere. The right lighting can enhance the overall ambiance of the room.
- Greenery: Incorporate plants or flowers on top of the dresser to bring a touch of nature and freshness to the space. Choose plants that thrive indoors and require minimal maintenance.
- Organize: Use decorative baskets, trays, or bins to keep items organized within the drawers or on top of the dresser. This not only adds functionality but also adds a neat and tidy look.
- Mirror: Consider adding a mirror above the dresser to create visual interest and make the space feel larger. Choose a mirror that complements the style of the dresser and the room.
Remember, the final touches and styling will depend on your personal taste and the overall design of the room. Experiment with different arrangements and accessories until you achieve a look that reflects your style and vision.
Lastly, take a moment to step back and admire your refurbished dresser. You’ve put in the time and effort to transform it into a beautiful and functional piece of furniture that adds character to your space.
By following these steps, you’ve unlocked the magic of furniture refurbishment and created a unique and stunning dresser that you can be proud of!
Thank you for joining us on this refurbishing journey. We hope you enjoy your newly transformed dresser for years to come.
Conclusion
Refurbishing an old dresser is a rewarding and creative project that allows you to breathe new life into a tired piece of furniture. Through careful assessment, repair, and attention to detail, you can transform an ordinary dresser into a stunning focal point for any room.
By following the step-by-step guide outlined in this article, you have learned how to assess the condition of the dresser, remove hardware, clean, repair damaged areas, sand the surface, apply primer, paint, and finish, reattach the hardware, and add those final touches and styling to complete the refurbishing process.
Throughout this journey, it’s important to let your creativity shine and choose colors, finishes, and accessories that reflect your personal style and enhance the overall ambiance of your space. Whether you prefer a contemporary, rustic, or vintage look, refurbishing an old dresser allows you to unleash your imagination and create a unique and personalized piece of furniture.
Remember that patience is key during this process. Take your time to properly assess, repair, and prepare the dresser, and pay attention to the details. This will ensure a successful refurbishment and a finished product that you can truly be proud of.
Not only does refurbishing a dresser save money compared to buying new furniture, but it also reduces waste by giving new life to an existing piece. It is a sustainable and eco-friendly way to refresh your space and express your creativity.
We hope this comprehensive guide has provided you with valuable insights and inspiration to embark on your own dresser refurbishing project. Enjoy the process, embrace the creativity, and transform your old dresser into a stunning piece that will bring joy and character to your home for years to come!
Frequently Asked Questions about How To Refurbish An Old Dresser
Was this page helpful?
At Storables.com, we guarantee accurate and reliable information. Our content, validated by Expert Board Contributors, is crafted following stringent Editorial Policies. We're committed to providing you with well-researched, expert-backed insights for all your informational needs.


0 thoughts on “How To Refurbish An Old Dresser”