Furniture
How To Turn A Dresser Into A Bookshelf
Modified: October 20, 2024
Transform your old dresser into a stylish bookshelf with this easy furniture DIY project. Make the most of your space and give new life to your furniture!
(Many of the links in this article redirect to a specific reviewed product. Your purchase of these products through affiliate links helps to generate commission for Storables.com, at no extra cost. Learn more)
Introduction
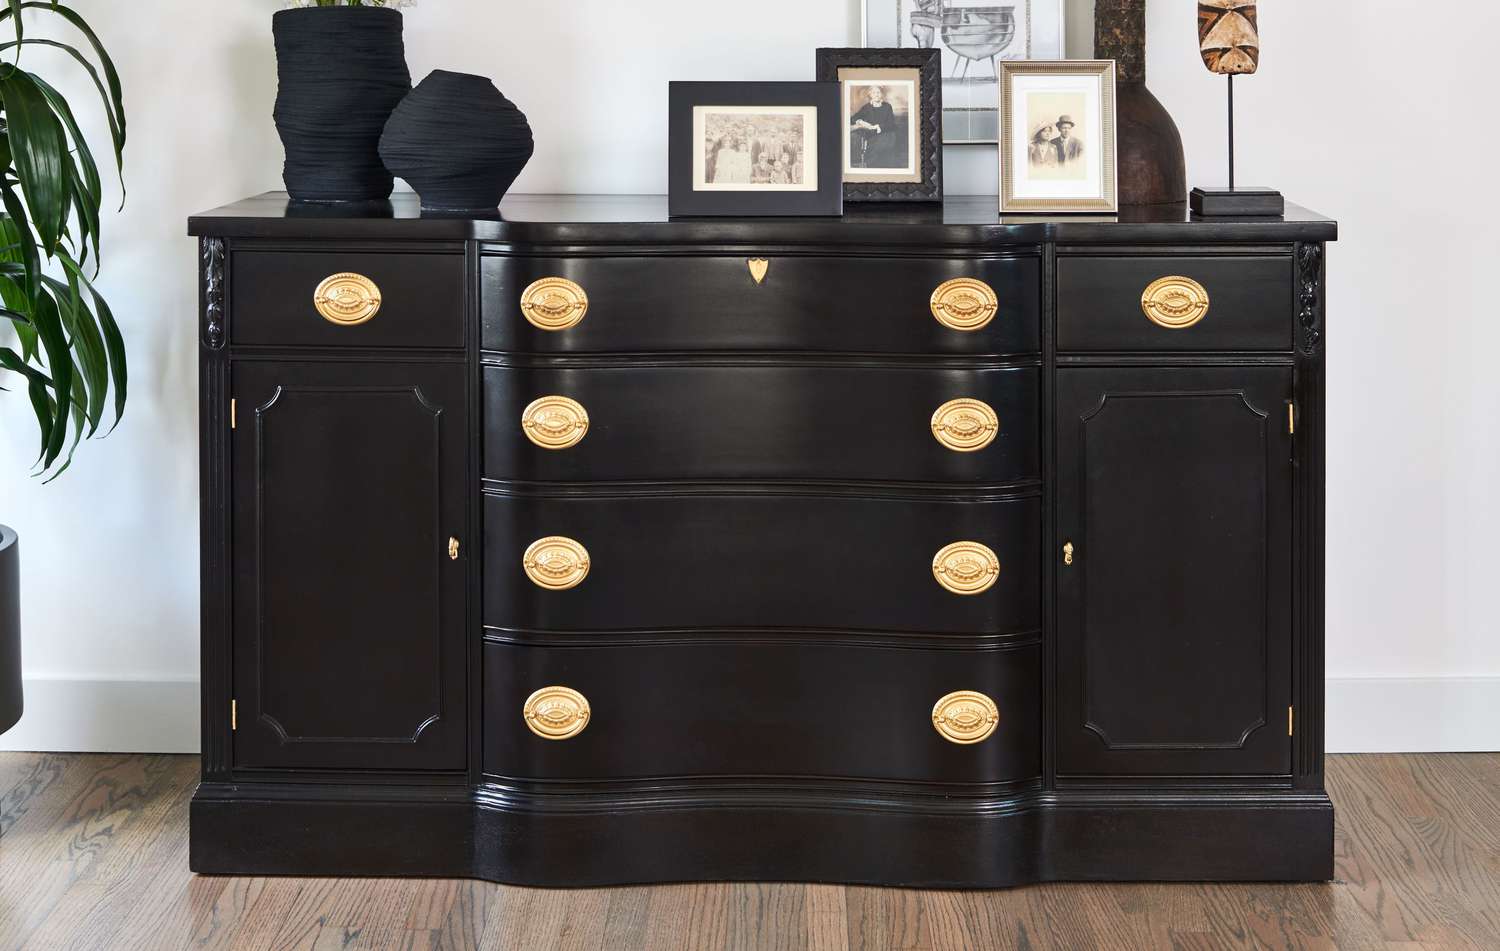
Welcome to the world of furniture transformations! If you have an old dresser collecting dust in your home, why not give it a new lease on life by transforming it into a functional and stylish bookshelf? Not only will this save you money and resources, but it will also add a unique and personalized touch to your home decor.
Converting a dresser into a bookshelf is a fun and creative DIY project that can be completed with just a few simple steps. Whether you’re a seasoned DIY enthusiast or a beginner looking for a weekend project, this guide will walk you through the process to create a stunning bookshelf that suits your style and meets your storage needs.
Before we dive into the steps, it’s important to gather the necessary materials. You’ll need:
- An old dresser
- Screwdriver or drill
- Sandpaper
- Paint or stain
- Paintbrush or roller
- Back panel or backing material
- Shelving brackets
- Shelves
- Level
Now that you have all your materials ready, let’s get started on your dresser-to-bookshelf transformation!
Key Takeaways:
- Repurpose your old dresser into a stylish bookshelf with just a few simple steps, saving money and adding a personalized touch to your home decor.
- Transforming furniture not only reduces waste but also allows you to unleash your creativity and create a functional and sustainable statement piece for your home.
Read more: How To Turn A Dresser Into A Cabinet
Step 1: Gather the necessary materials
Before you begin the transformation process, it’s important to gather all the materials and tools you’ll need. Here’s a list of what you’ll typically require:
- An old dresser: Look for a sturdy dresser that is no longer needed or can be repurposed. Consider its size and dimensions to ensure it will fit your desired bookshelf design.
- Screwdriver or drill: You’ll need this to remove the drawers and hardware from the dresser.
- Sandpaper: Choose a grit that is appropriate for the surface of your dresser. Sandpaper will help you smooth out any rough edges or imperfections before painting or staining.
- Paint or stain: Decide if you want to paint the dresser to match your decor or stain it to enhance the natural wood grain. Choose a color or finish that complements your home’s aesthetic.
- Paintbrush or roller: Use a paintbrush or roller to apply the paint or stain evenly to the dresser surface. Consider the size and type of brush or roller based on the dresser’s texture and your preferred finish.
- Back panel or backing material: This will provide stability and support to the bookshelf. You can use plywood, fiberboard, or even repurpose an old wooden door as the backing material.
- Shelving brackets: Choose sturdy and durable brackets that can support the weight of your books and other items. Consider the size and style of the brackets to match the overall aesthetic of your bookshelf.
- Shelves: Determine how many shelves you want and their dimensions. You can purchase pre-made shelves or cut your own from plywood or other suitable materials.
- Level: A level will ensure that your bookshelf is straight and properly aligned. It’s an essential tool for achieving a professional and polished look.
Once you have gathered all the materials, you’re ready to move on to the next step: removing the drawers and hardware from the dresser.
Step 2: Remove the drawers and hardware
Now that you have all the necessary materials assembled, it’s time to start transforming your dresser into a bookshelf. The first step is to remove the drawers and hardware from the dresser.
Begin by emptying the drawers and setting them aside. Inspect the dresser to identify any screws or hardware that need to be removed. Use a screwdriver or drill to carefully unscrew and remove any knobs, handles, or hinges. Place the hardware in a safe location for later use or consider replacing them if you want to give your bookshelf a new look.
Next, remove the drawers from the dresser. This can usually be done by pulling them out gently or tilting them up and sliding them out. Set the drawers aside as you won’t be needing them for this project. If you plan on repurposing them in another way, keep them in a safe spot.
Once all the drawers and hardware have been removed, take a moment to assess the dresser’s condition. Look for any dents, scratches, or other imperfections that may need to be addressed before proceeding. Sand down any rough spots or patch up areas as necessary. This will ensure that the finished bookshelf looks clean and polished.
With the drawers and hardware out of the way, you’re ready to move on to the next step: preparing the dresser for its transformation into a bookshelf.
Step 3: Prepare the dresser for transformation
With the drawers and hardware removed, it’s time to prepare the dresser for its transformation into a bookshelf. This step involves cleaning the surface, repairing any damage, and considering any modifications that may be needed.
Start by cleaning the dresser thoroughly to remove any dust, dirt, or residue. Use a damp cloth or gentle cleaner to wipe down the surfaces, ensuring that they are clean and ready for the next steps. This will help the paint or stain adhere properly and provide a smooth finish.
Next, assess the dresser for any structural or cosmetic damage. Look for cracks, loose joints, or other issues that need to be addressed before continuing. If you spot any damages, take the time to repair and reinforce the dresser as needed. This will ensure the longevity and strength of your finished bookshelf.
Consider any modifications or changes you want to make to the dresser. Do you want to remove or add additional trim or molding? Would you like to change the size or shape of the dresser in any way? Now is the time to make these decisions and plan accordingly.
If you’re planning to paint the dresser, it’s a good idea to prime the surface first. Primer helps to create a smooth and even base for the paint and improves its adhesion. Apply the primer according to the manufacturer’s instructions and allow it to dry completely before moving on to the next step.
Once you have cleaned, repaired, and primed the dresser (if necessary), you’re ready to move on to the exciting part: making adjustments for shelving.
Step 4: Make adjustments for shelving
Now that the dresser is prepared, it’s time to make adjustments to accommodate the shelves for your future bookshelf. This step involves measuring, marking, and potentially making cuts to the dresser to create space for the shelves.
Start by considering the desired height and spacing of your shelves. Measure and mark these dimensions on the side panels of the dresser. Make sure to take into account the thickness of the shelves themselves when determining the spacing.
Once the measurements are marked, you’ll need to create slots or notches in the side panels to hold the shelves securely. There are a few different methods you can use to accomplish this:
- Sawing slots: If you have the tools and skills, you can use a saw to carefully cut evenly spaced vertical slots in the side panels of the dresser. These slots should match the thickness and width of the shelves.
- Using shelf brackets: Another option is to use shelf brackets to support the shelves. With this method, you’ll need to attach the brackets to the side panels at the desired height, then place the shelves on top of the brackets.
- Creating adjustable shelving: If you want the flexibility to change the shelving configuration in the future, consider using adjustable shelving hardware. This allows you to move the shelves up or down as needed.
Choose the method that best suits your skills, tools, and design preferences. Remember to work carefully and accurately to ensure the shelves fit securely and provide the necessary support for your books and other items.
Once you have made the necessary adjustments for shelving, it’s time to move on to the next step: sanding and painting the dresser.
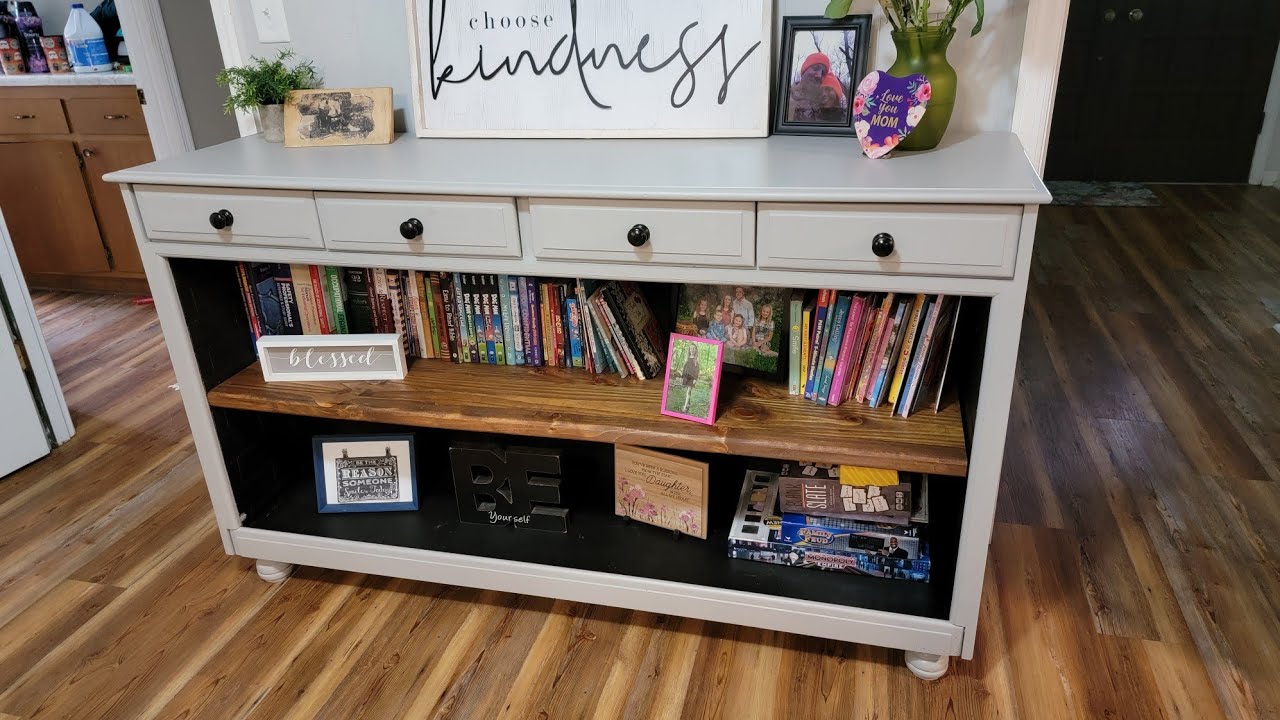
Before repurposing a dresser into a bookshelf, make sure to remove any drawers and hardware. Sand and paint the dresser to match your decor, and consider adding additional shelves for more storage space.
Read more: How To Turn A Dresser Into A Bench
Step 5: Sand and paint the dresser
With the necessary adjustments made for shelving, it’s time to transform the dresser with a fresh coat of paint or stain. This step involves sanding the surface to create a smooth finish and applying the desired paint or stain to achieve your desired look.
Begin by using sandpaper to lightly sand the surfaces of the dresser. This will help remove any rough areas and create an even surface for the paint or stain to adhere to. Sand in the direction of the wood grain, using a medium-grit sandpaper initially and finishing with a fine-grit sandpaper for a smoother finish.
Once the sanding is complete, wipe away any dust or debris from the surface using a clean cloth. This will ensure that the paint or stain goes on smoothly and evenly.
If you’ve decided to paint the dresser, choose a color that fits your home decor and personal style. Consider using a primer before applying the paint to improve adhesion and coverage. Use a paintbrush or roller to apply the paint evenly, following the natural grain of the wood. Apply multiple coats if necessary, allowing each coat to dry completely before applying the next.
If you prefer the natural beauty of the wood, you can opt for staining instead of painting. Choose a stain color that enhances the grain and complements your overall aesthetic. Apply the stain using a cloth or brush, working in the direction of the wood grain, and allow it to penetrate the surface. Wipe away any excess stain to achieve your desired level of color intensity.
Whether you choose to paint or stain the dresser, allow it to dry completely before moving on to the next step. This will ensure that the finish is fully cured and durable.
With the dresser sanded and painted to your liking, you’re one step closer to completing your bookshelf transformation. The next step is to attach a back panel or backing material to provide stability and support to the bookshelf.
Step 6: Attach back panel or backing material
Now that the dresser is painted and looking refreshed, it’s time to add a back panel or backing material to provide stability and support to the bookshelf. This step will also give your bookshelf a finished look from all angles.
There are a few options for the back panel or backing material:
- Plywood: Cut a piece of plywood to the size of the back of the dresser. This provides a solid and durable backing for the bookshelf.
- Fiberboard: Similar to plywood, fiberboard can be cut to fit the back of the dresser. It’s a lightweight option that still offers stability.
- Reclaimed wood: If you’re looking for a more rustic or unique touch, consider using reclaimed wood as the back panel. This can add character and charm to your bookshelf.
- Fabric or wallpaper: For a creative and decorative touch, you can cover a back panel with fabric or wallpaper. This option allows you to customize the design and overall look of the bookshelf.
Choose the option that best suits your style and desired aesthetic. Ensure that the back panel or backing material is cut to the correct dimensions to fit securely on the back of the dresser.
To attach the back panel or backing material, use nails, screws, or adhesive, depending on the material and your preference. Align the panel or material with the edges of the dresser and secure it in place, ensuring it is straight and flush.
Take the time to double-check for any gaps or unevenness and make any necessary adjustments. This step is important not only for the visual appeal of the bookshelf but also for its stability and structural integrity.
Once the back panel or backing material is securely attached, you’re almost ready to complete your bookshelf transformation. The final step is to install the shelves and make any final adjustments to finalize your new bookshelf.
Step 7: Install shelves and finalize the bookshelf
Congratulations, you’re in the final step of your dresser-to-bookshelf transformation! It’s time to install the shelves and make any final adjustments to complete your new functional and stylish bookshelf.
Start by placing the shelves onto the previously created slots or brackets. Make sure they fit snugly and are level. Use a level to ensure that the shelves are straight and even. If needed, you can adjust the height of the shelves or the brackets to achieve the desired spacing.
Once the shelves are in place, step back and assess the overall look and functionality of your bookshelf. Take note of any areas that may need a touch-up of paint or stain. Use touch-up paint or stain to carefully cover up any imperfections and create a seamless finish.
If you want to add a decorative element, you can consider adding trim or molding to the edges of the shelves or around the entire bookshelf. This can give it a more polished and finished look.
Take this opportunity to also ensure that the bookshelf is stable and secure. Check that all screws, nails, or brackets are tightly fastened and that the bookshelf is sturdy. Make any necessary adjustments or reinforce weak areas to ensure longevity and safety.
Finally, it’s time to arrange your books, decor items, and other belongings on your newly transformed bookshelf. Get creative with your organization and display options. You can categorize books by genre or author, incorporate decorative accents, or add personal touches to make it truly your own.
Stand back and admire your hard work and creativity. Your dresser has now been transformed into a beautiful and functional bookshelf that adds character and style to your living space.
Remember to regularly clean and maintain your bookshelf to keep it looking fresh and inviting. Dust the shelves, wipe down the surfaces, and rearrange or update the display as desired.
With the completion of this final step, you can now enjoy your unique and repurposed bookshelf, knowing that you’ve not only saved money but also added a touch of personalization to your home decor.
Thank you for joining us on this DIY journey, and happy reading in your newly transformed bookshelf!
Conclusion
Transforming an old dresser into a functional and stylish bookshelf is a rewarding DIY project that allows you to repurpose furniture and add a unique touch to your home decor. By following the steps outlined in this guide, you can easily turn your dresser into a beautiful bookshelf that fits your style and storage needs.
Starting with gathering the necessary materials and removing the drawers and hardware, you’ll prepare the dresser for its transformation. Making adjustments for shelving and sanding and painting the dresser will give it a fresh and polished look. Attaching a back panel or backing material will add stability and provide a finished appearance.
Finally, installing the shelves and making any final adjustments will complete your bookshelf transformation. Take pride in your work and enjoy arranging your books and personal belongings on your newly repurposed piece of furniture.
Throughout the process, remember to be creative and have fun. You can personalize your bookshelf with paint colors, decorative trim, or unique backing materials to make it truly your own. Don’t hesitate to let your imagination run wild and experiment with different designs and configurations.
By repurposing old furniture, not only are you reducing waste, but you’re also adding a touch of character and sustainability to your home. Your transformed bookshelf will not only serve as a functional storage solution but also become a statement piece that sparks conversation and admiration from guests.
Remember to maintain and care for your bookshelf regularly, keeping it clean and addressing any repairs promptly. With proper care, your repurposed dresser bookshelf can serve as a central element of your home decor for years to come.
So, unleash your creativity, gather your tools, and embark on the journey of transforming your dresser into a beautiful bookshelf – all while enjoying the satisfaction of DIY accomplishment.
Frequently Asked Questions about How To Turn A Dresser Into A Bookshelf
Was this page helpful?
At Storables.com, we guarantee accurate and reliable information. Our content, validated by Expert Board Contributors, is crafted following stringent Editorial Policies. We're committed to providing you with well-researched, expert-backed insights for all your informational needs.


0 thoughts on “How To Turn A Dresser Into A Bookshelf”