Home>Garden Essentials>How To Germinate Camellia Sinensis
Garden Essentials
How To Germinate Camellia Sinensis
Modified: March 16, 2024
Learn how to successfully germinate Camellia Sinensis in your garden with our expert gardening tips and techniques. Start growing your own tea plants today!
(Many of the links in this article redirect to a specific reviewed product. Your purchase of these products through affiliate links helps to generate commission for Storables.com, at no extra cost. Learn more)
Introduction
Gardening is a wonderful hobby that allows us to connect with nature and create beautiful outdoor spaces. If you have a passion for plants and a love for tea, then why not combine the two and grow your own Camellia Sinensis, the plant from which tea is made? In this article, we will guide you through the process of germinating Camellia Sinensis seeds or cuttings and help you create your very own tea garden.
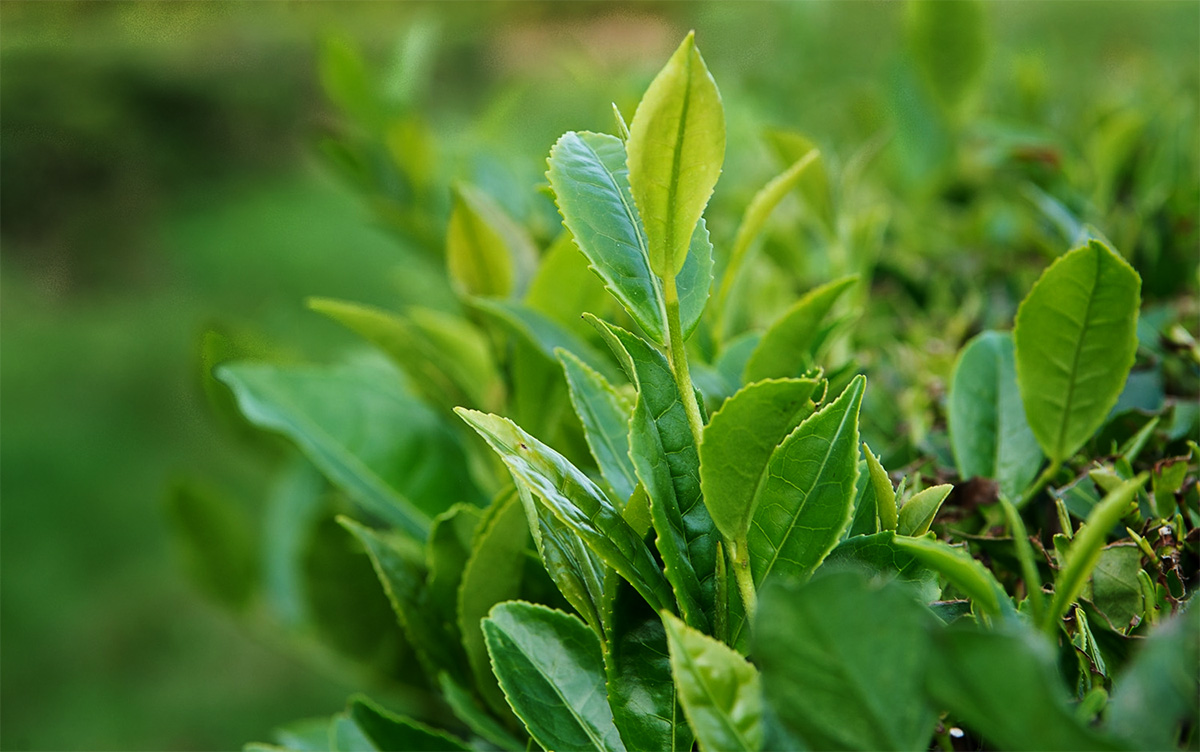
Camellia Sinensis, commonly known as the tea plant, is a species of evergreen shrub native to East Asia. It is prized for its leaves, which are used to produce different types of tea, including green tea, black tea, oolong tea, and white tea. While it may seem daunting to grow your own tea plant, with a little knowledge and effort, you can successfully germinate Camellia Sinensis and enjoy a fresh and flavorful cup of tea straight from your garden.
Before we dive into the steps of germination, let’s first discuss the importance of choosing the right seeds or cuttings. To ensure the best chance of success, it is crucial to start with high-quality seeds or healthy cuttings from a reputable source. Look for Camellia Sinensis varieties that are well-suited to your climate and growing conditions.
Now that we have covered the basics, let’s move on to the first step of the germination process: choosing the right seeds or cuttings.
Key Takeaways:
- Choose high-quality Camellia Sinensis seeds or cuttings suited to your climate. Prepare a well-draining germination medium and provide optimal growing conditions to set the stage for a successful tea garden.
- Monitor and care for your germinated Camellia Sinensis plants with patience and attention. Transplant them carefully, provide ongoing care, and look forward to enjoying the delightful flavors of your homegrown tea.
Read more: How To Grow Camellia From Seed
Step 1: Choosing the Right Seeds or Cuttings
When it comes to germinating Camellia Sinensis, selecting the right seeds or cuttings is crucial for a successful outcome. Here’s what you need to consider:
- Variety: Camellia Sinensis comes in different varieties, each with its own unique characteristics and tea flavors. The two main varieties are Camellia Sinensis var. Sinensis, which is known for its tolerance to cooler climates, and Camellia Sinensis var. Assamica, which thrives in warmer regions. Choose the variety that is best suited to your climate and growing conditions.
- Source: Purchase seeds or cuttings from a reputable source to ensure their quality and viability. Look for nurseries or online sellers known for their expertise in tea plants. It’s also advisable to choose organic seeds or cuttings to avoid potential chemical contamination.
- Age and Health: If you opt for seeds, fresher is better. Choose seeds that are no more than six months old to maximize their germination potential. For cuttings, select healthy branches with no signs of disease or pest damage.
- Propagation Method: Decide whether you want to propagate the plants from seeds or cuttings. While starting from seeds is more common, using cuttings can provide quicker results. If you choose to use cuttings, look for well-developed shoots with at least three sets of leaves.
Take your time when choosing the right seeds or cuttings for germination. Doing so will set a solid foundation for a successful and thriving Camellia Sinensis plant in your tea garden.
Step 2: Preparing the Germination Medium
Creating the right germination medium is essential for providing the ideal conditions for Camellia Sinensis seeds or cuttings to sprout and develop. Here’s how you can prepare the germination medium:
- Choose the Right Container: Select a container that allows for proper drainage and has enough space for the seeds or cuttings to grow. A seed tray or small pots with drainage holes are good options. Make sure to clean the container with mild soap and rinse thoroughly to remove any potential pathogens.
- Use Well-Draining Soil: Camellia Sinensis prefers well-draining soil that is rich in organic matter. You can create a germination mix by combining equal parts of peat moss, perlite, and compost. This mixture provides a balance of moisture retention and drainage, allowing the seeds or cuttings to establish themselves without becoming waterlogged.
- Sterilize the Soil: To reduce the risk of diseases and pests, sterilize the germination medium before planting. This can be done by baking the soil mix in the oven at 180°F (82°C) for 30 minutes or using a microwave on high for 2-3 minutes. Allow the soil to cool down before proceeding.
- Moisten the Germination Medium: Before planting, dampen the soil mix by adding water gradually until it reaches a moist but not saturated consistency. Ensure the soil is evenly moist throughout the container.
By preparing the germination medium carefully, you provide an optimal environment for the seeds or cuttings to take root and begin their journey towards becoming healthy Camellia Sinensis plants.
Step 3: Stratification (Optional)
Stratification is an optional step in the germination process that can improve the success rate of Camellia Sinensis seeds. Stratification mimics the natural winter conditions that the seeds would experience in their native habitat, breaking dormancy and stimulating germination. Here’s how you can stratify the seeds:
- Collect Seeds: If you have harvested seeds from mature Camellia Sinensis plants, collect them and remove any pulp or debris.
- Cold Treatment: Place the cleaned seeds in a sealed plastic bag with a moistened paper towel or sphagnum moss. Ensure the seeds are evenly spread and not overcrowded. Label the bag with the date and variety of seeds.
- Refrigeration Period: Put the sealed bag in the refrigerator at a temperature between 35°F (1.7°C) and 40°F (4.4°C) for a period of 4 to 12 weeks. This cold stratification period breaks the seed’s dormancy and prepares it for germination.
- Check Moisture Levels: Throughout the stratification period, check the seeds regularly to ensure they remain moist but not overly wet. If needed, spritz the paper towel or moss with water to maintain proper moisture levels.
- Remove from Refrigerator: After the recommended stratification period, remove the seeds from the refrigerator and allow them to come to room temperature before proceeding to the next step of sowing or planting.
Note that stratification is not required for all Camellia Sinensis seeds as some varieties may naturally overcome dormancy without this process. However, if you want to maximize the chances of successful germination, consider stratifying the seeds before planting.
Step 4: Sowing the Seeds or Planting the Cuttings
Now that you have prepared the germination medium and, if desired, completed the stratification process, it’s time to sow the Camellia Sinensis seeds or plant the cuttings. Here are the steps to follow:
- Sowing Seeds: If you are using seeds, create shallow furrows in the prepared germination medium, approximately 1/4 inch (0.6 cm) deep. Space the furrows about 2 inches (5 cm) apart to allow room for growth. Gently place the seeds in the furrows, spacing them evenly apart. Cover the seeds lightly with a thin layer of the germination medium and gently press it down.
- Planting Cuttings: If you are using cuttings, make a small hole in the germination medium using a pencil or a dibber. Insert the cutting into the hole, ensuring that at least two sets of leaves are above the surface. Gently firm the soil around the cutting to secure it in place.
- Labeling: To keep track of the different varieties or planting dates, label each row or pot with the variety name and the date of sowing or planting.
- Watering: After sowing or planting, water the germination medium thoroughly to settle the soil and ensure good contact with the seeds or cuttings. Use a gentle spray or watering can to avoid disturbing the seeds or dislodging the cuttings.
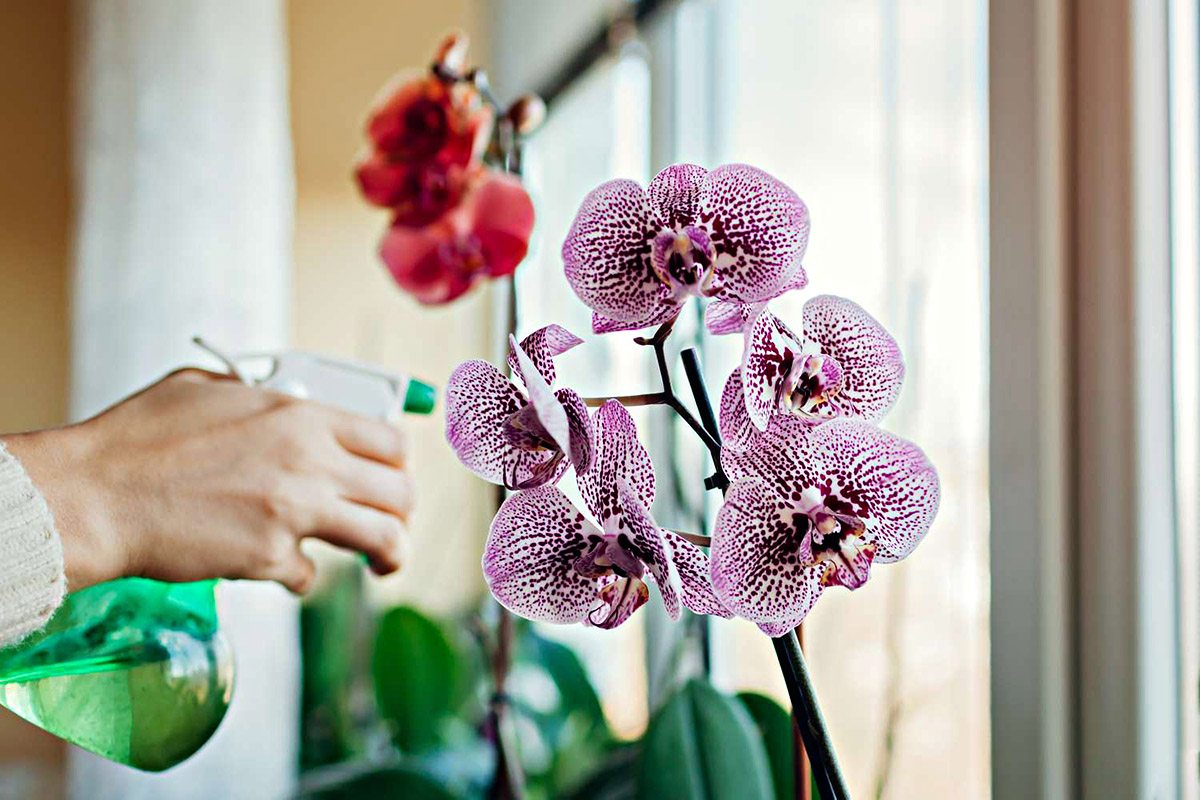
Place the containers in a warm and well-lit area, but avoid direct sunlight, as it can be too intense for the delicate germinating plants. Maintain consistent moisture by misting the soil or using a spray bottle to prevent drying out.
Now that the seeds or cuttings are nestled in their germination medium, it’s time to move on to the next step: providing optimal growing conditions.
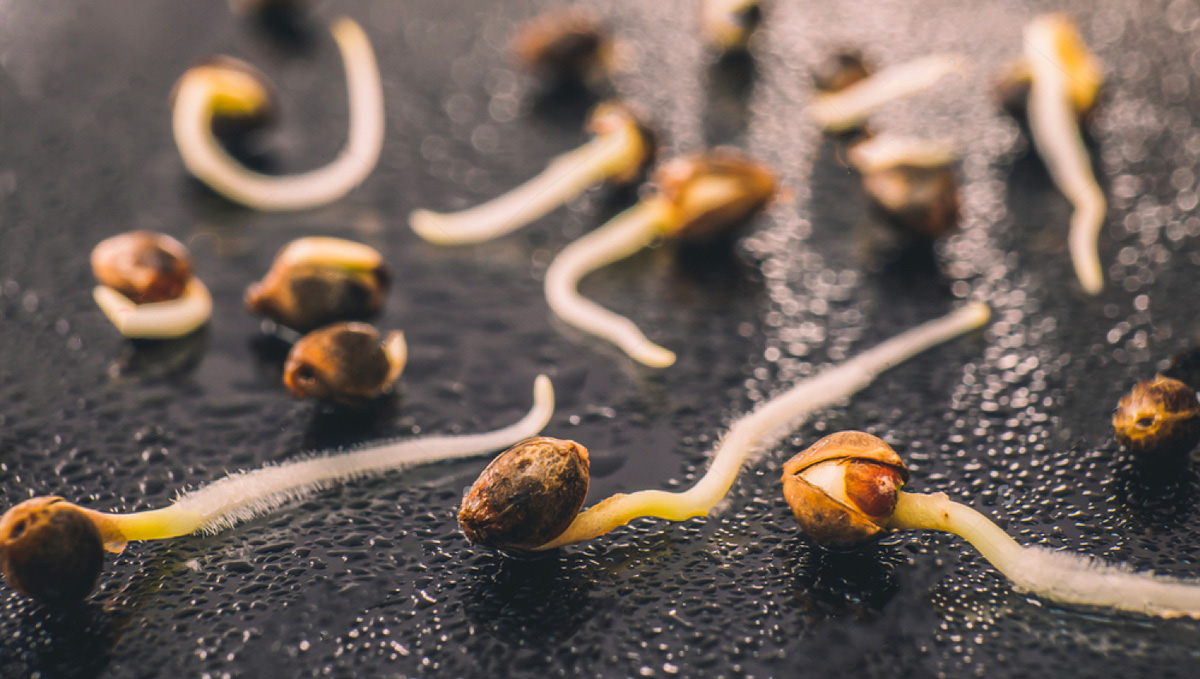
To germinate Camellia Sinensis seeds, soak them in warm water for 24 hours, then plant them in well-draining soil. Keep the soil consistently moist and place the pot in a warm, bright location. Germination can take 1-3 months.
Read more: How To Use Camellia Oil On Hand Tools
Step 5: Providing Optimal Growing Conditions
To ensure the successful growth and development of your germinated Camellia Sinensis plants, it’s important to provide them with optimal growing conditions. Here’s how you can create a favorable environment for their progress:
- Temperature: Camellia Sinensis prefers a moderate climate with temperatures ranging between 65°F (18°C) and 85°F (29°C). Maintain a consistent temperature in the germination area, avoiding extreme fluctuations that may harm the plants.
- Light: Place the containers in a bright location with indirect sunlight. A location near a window that receives morning or filtered sunlight is ideal. Adequate light is necessary for the plants to photosynthesize and establish strong growth.
- Humidity: Camellia Sinensis thrives in moderate humidity levels of 50% to 60%. If the air in your growing area is dry, consider increasing humidity by using a humidifier or placing a tray of water nearby to provide ambient moisture.
- Air Circulation: Good air circulation is essential for preventing fungal diseases and promoting healthy growth. Avoid overcrowding the plants and provide ample space between the containers for air to circulate freely.
- Watering: Keep the germination medium consistently moist but not saturated. Water the plants whenever the top inch of soil feels dry, using a watering can or spray bottle to avoid overwatering. Ensure proper drainage to prevent waterlogging, which can lead to root rot.
- Fertilization: Start fertilizing the plants once they have established a few sets of true leaves. Use a balanced fertilizer, such as a slow-release granular fertilizer or a diluted liquid fertilizer, following the manufacturer’s instructions. Avoid over-fertilizing, as it can cause nutrient burn and harm the plants.
By providing these optimal growing conditions, you create a nurturing environment for your Camellia Sinensis plants, promoting healthy development and setting the stage for a bountiful tea harvest in the future.
Now that your germinated Camellia Sinensis plants are in good hands, let’s move on to the next step: monitoring and care during germination.
Step 6: Monitoring and Care during Germination
During the germination process, it’s important to monitor the progress of your Camellia Sinensis plants and provide them with the care they need to thrive. Here are some key points to keep in mind:
- Germination Time: Depending on the variety and conditions, Camellia Sinensis seeds may take anywhere from two weeks to several months to germinate. Be patient and monitor the progress regularly.
- Watering: Check the moisture level of the germination medium regularly. Water the plants gently whenever the top inch of soil feels dry. Avoid overwatering, as it can lead to root rot, but also ensure that the plants do not dry out completely.
- Weeding: Monitor the containers for any unwanted weeds or other plants that may compete with the Camellia Sinensis seedlings for nutrients and space. Carefully remove any weeds as soon as they appear to prevent them from causing harm.
- Protection from Pests: Keep an eye out for common garden pests such as aphids, mites, or snails. Inspect the plants regularly and take appropriate measures, such as using organic pest control methods or removing the pests manually.
- Thinning: If multiple seedlings emerge in close proximity, thin them out by snipping off the weaker seedlings at the soil level. This will allow the remaining seedlings to have sufficient space and resources for healthy growth.
- Providing Support: As the Camellia Sinensis plants grow, they may require support to prevent them from leaning or toppling over. Gently tie the plants to stakes or use plant supports to provide necessary stability.
- Observe Leaf Color and Growth: Pay attention to the color and growth of the leaves. Healthy leaves should be vibrant green and steadily increase in size. Discolored or stunted leaves may indicate nutrient deficiencies or other issues that require attention.
- Patience and Care: Be patient and provide consistent care to your germinated Camellia Sinensis plants. Continue to maintain optimal growing conditions, monitor their progress, and address any issues promptly to ensure their healthy development.
By closely monitoring and providing attentive care during the germination phase, you set the stage for strong and resilient Camellia Sinensis plants that will eventually yield flavorful and aromatic tea leaves.
With the germination stage complete, it’s time to move on to the next step: transplanting the germinated Camellia Sinensis.
Step 7: Transplanting the Germinated Camellia Sinensis
Once your Camellia Sinensis seedlings have grown and developed a strong root system, it’s time to transplant them into their permanent locations. Here’s how you can successfully transplant your germinated Camellia Sinensis:
- Choose the Right Location: Select a suitable spot in your garden that provides partial shade or filtered sunlight. Camellia Sinensis prefers well-draining soil, so ensure the planting area has good drainage.
- Prepare the Planting Hole: Dig a hole that is slightly larger and deeper than the seedling’s root ball. Loosen the soil around the hole to promote healthy root growth.
- Carefully Remove the Seedlings: Gently loosen the soil around the base of the seedlings, being careful not to disturb the delicate roots. Lift the seedlings out of their containers or seed tray, taking care to keep the soil intact around the roots.
- Planting: Place the seedling into the prepared hole, ensuring that the top of the root ball is level with the surrounding soil. Backfill the hole with soil, gently firming it around the seedling to provide stability.
- Watering: After transplanting, water the seedlings thoroughly to settle the soil and remove any air pockets. Ensure the soil is evenly moist, but avoid overwatering, which can lead to root rot. Provide regular irrigation during the establishment period.
- Mulching: Apply a layer of organic mulch around the base of the plant to help conserve soil moisture, suppress weed growth, and regulate soil temperature. Leave a gap around the stem to prevent excess moisture accumulation.
- Stake if Necessary: If the seedlings appear weak or struggle to stay upright, use stakes or plant supports to provide additional support until they develop stronger stems.
- Ongoing Care: Monitor the transplanted seedlings for any signs of stress or pests. Continue to provide optimal growing conditions, including regular watering, protection from extreme weather conditions, and fertilization according to the plant’s specific needs.
Transplanting your germinated Camellia Sinensis seedlings is an important step in their journey towards becoming mature tea plants. By following these guidelines and providing attentive care, you will give them the best chance of thriving and producing high-quality tea leaves in the future.
Congratulations! You have successfully completed all the steps necessary for germinating and transplanting Camellia Sinensis. With proper care and patience, you can enjoy the satisfaction of growing your own tea plants and indulging in delicious, homegrown tea.
Enjoy the journey and the wonderful flavors that await you from your very own tea garden!
Conclusion
Congratulations on completing the journey of germinating and transplanting your very own Camellia Sinensis, the tea plant! By following the steps outlined in this guide, you have set the foundation for a thriving and bountiful tea garden. Growing your own tea plants not only allows you to connect with nature but also opens up a world of flavors and possibilities.
Through careful selection of high-quality seeds or cuttings, preparing the germination medium, and providing optimal growing conditions, you have given your Camellia Sinensis plants the best chance to flourish. Monitoring their progress, providing attentive care, and addressing any issues that arise will further enhance their growth and development.
As your tea plants continue to mature, you can look forward to harvesting the leaves and creating your very own homemade teas. From delicate green teas to robust black teas, the flavors will be a testament to your dedication and expertise as a tea gardener.
Remember, growing Camellia Sinensis is a journey that requires patience and ongoing care. Stay vigilant for signs of pests, diseases, and nutrient deficiencies, and address them promptly to ensure the health and vitality of your tea plants.
So, sit back, relax, and enjoy the aromatic and flavorful cup of tea that you have grown with your own hands. Let each sip be a reminder of the journey you embarked upon and the satisfaction of nurturing nature’s bounty.
Cheers to your successful tea garden and the countless delightful cups of tea that await you!
Frequently Asked Questions about How To Germinate Camellia Sinensis
Was this page helpful?
At Storables.com, we guarantee accurate and reliable information. Our content, validated by Expert Board Contributors, is crafted following stringent Editorial Policies. We're committed to providing you with well-researched, expert-backed insights for all your informational needs.


0 thoughts on “How To Germinate Camellia Sinensis”